
When you connect a client’s accounting file to Debits, you can control exactly which accounts Debits will use when it pulls in and categorizes transactions. This step is crucial because it determines where “unresolved” or “to-be-reviewed” items will land in the ledger.
Here’s what that point means in more detail and how to do it:
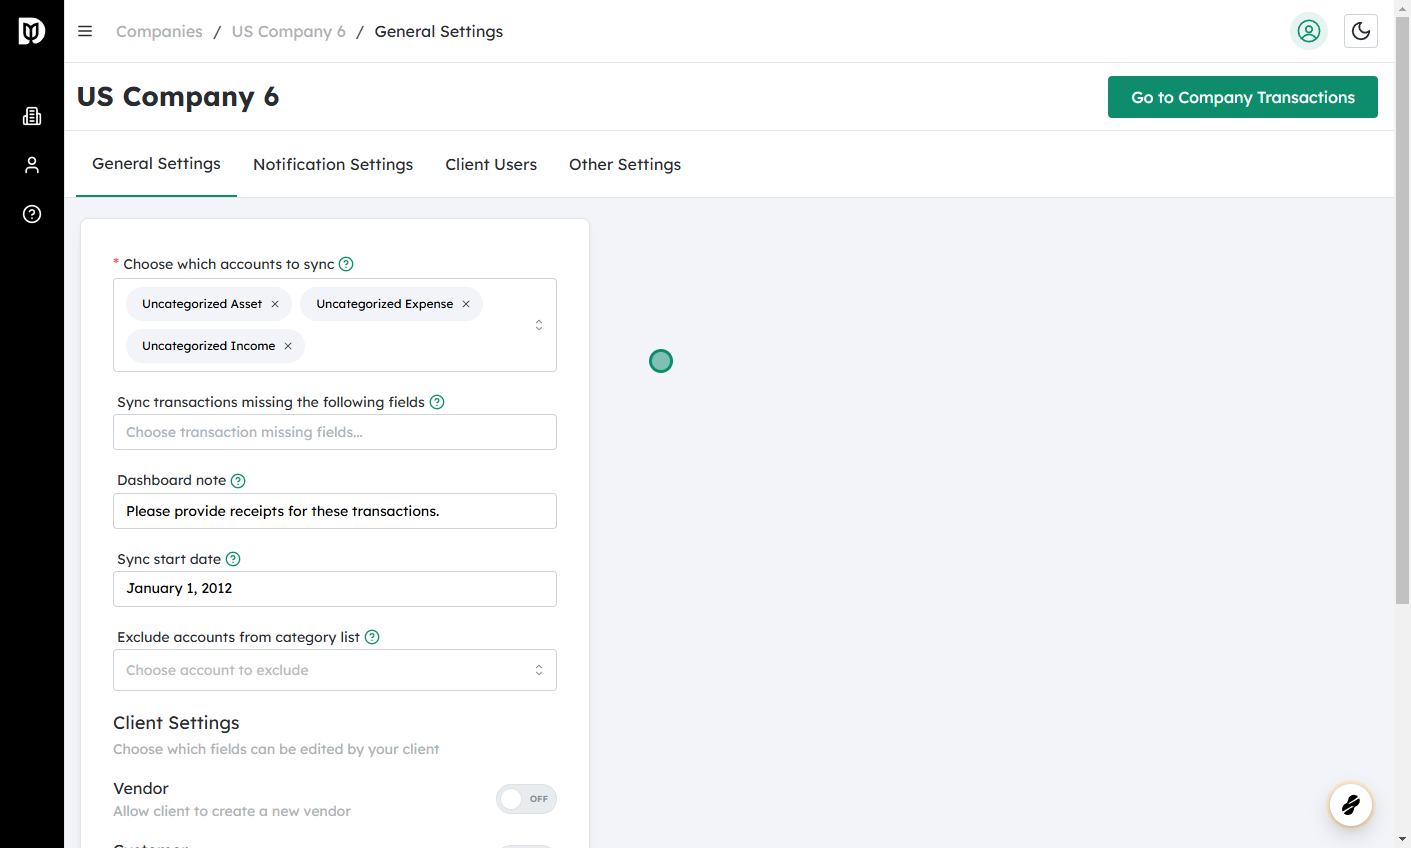
What “Choose which accounts you want to sync” actually means #
For each client/company, you tell Debits:
- Which chart-of-accounts categories Debits should be allowed to use
- Where to park transactions that are not clearly categorized yet
Common examples include:
- Uncategorized Expense – For expenses you haven’t assigned to a specific expense account yet.
- Uncategorized Income – For income that hasn’t been matched to the right revenue account.
- Uncategorized Asset – For balance sheet items that need clarification (e.g., asset purchases or transfers).
- Ask My Accountant / Ask Client – For transactions that need input or confirmation from the accountant or the client before being finalized.
- Suspense – A temporary holding account for amounts you know belong somewhere but aren’t sure where yet.
By choosing which of these accounts Debits can post to, you’re defining the “staging areas” for new or unclear transactions. Once these are set, new transactions from the client’s bank/credit cards will automatically sync into Debits and post to those selected accounts as appropriate, so you don’t have to manually import or assign them every time.
Why this matters #
- Cleaner books: Instead of random or inconsistent posting, all unresolved items go into consistent, known accounts (e.g., all questions go to “Ask Client”).
- Faster review: You and your team can quickly filter and clear out each of these accounts during month-end:
- Review “Ask Client” for open questions
- Reclassify items in “Uncategorized Expense/Income” to their proper accounts
- Clear any “Suspense” items
- Fewer posting mistakes: Limiting which accounts sync reduces the risk of Debits pushing entries into the wrong account type.
How to select and sync these accounts in Debits #
Log in to Debits and go to Companies
- After logging in, open the Companies (or Clients) section.
- You’ll see a list of all the companies/clients connected to your Debits account.
Click on the Settings icon for the company you want to change
- Find the specific client/company.
- Click the Settings (gear) icon next to that company to open its configuration.
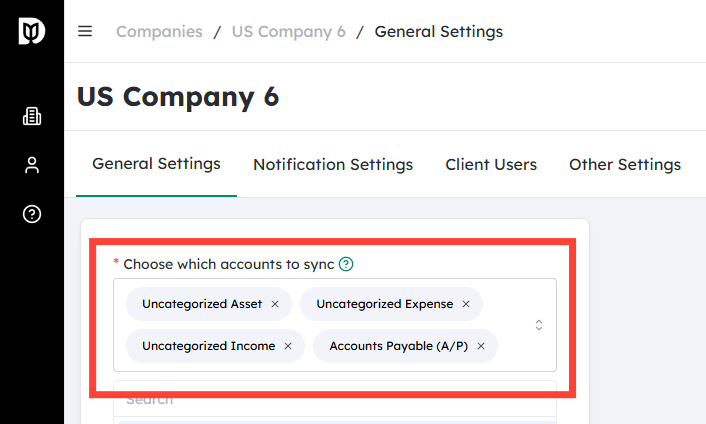
Select the accounts you want Debits to use/sync
- In the settings, look for the area related to Accounts, Chart of Accounts, or Sync Settings.
- You’ll typically see dropdowns or checkboxes where you can map or choose:
- Default account for uncategorized expenses
- Default account for uncategorized income
- Default account for uncategorized assets
- An “Ask My Accountant” or “Ask Client” type account for items requiring review
- A Suspense account for temporary, unclear items
- For each category, select the corresponding account from your client’s chart of accounts.
Tips:
- If your client doesn’t yet have these accounts, you may want to create them in their accounting system first (e.g., “Ask Client – Debits,” “Suspense – Debits”) to keep Debits-driven activity easy to identify.
- Use consistent naming across all clients so your team knows exactly what each account is for.
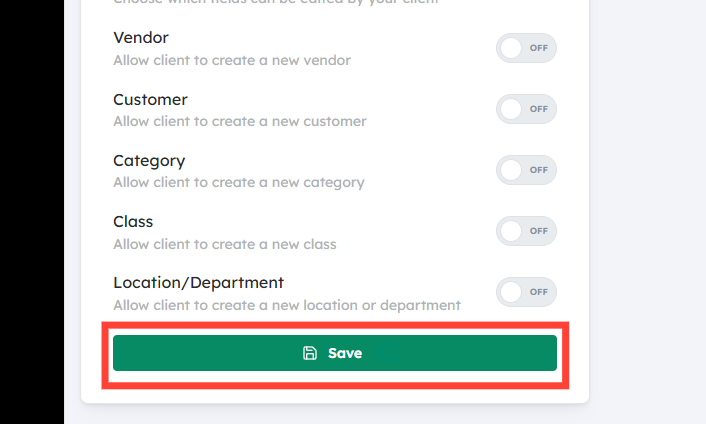
Click Save to apply the changes
- Once you’ve selected all desired accounts, click Save.
- From this point on, new transactions will sync automatically into Debits and post to these chosen accounts, following your configuration.
In short: you are telling Debits, “When you pull new transactions for this client, these are the accounts you’re allowed to use—especially for anything uncategorized or needing review.” After you save these settings, Debits will use them automatically going forward, which streamlines your workflow and keeps the client’s books organized.


