
Who this is for: Accountants who need to upload tax return documents for client review and signature.
What you’ll learn: How to upload documents, assign document types, and manage your uploaded files.
Before you begin #
- You must have a tax return open on the detail page.
- Prepare your documents in PDF, Word, Excel, or image format (up to 50 MB each).
Step-by-step instructions #
Step 1: Open the Documents tab #
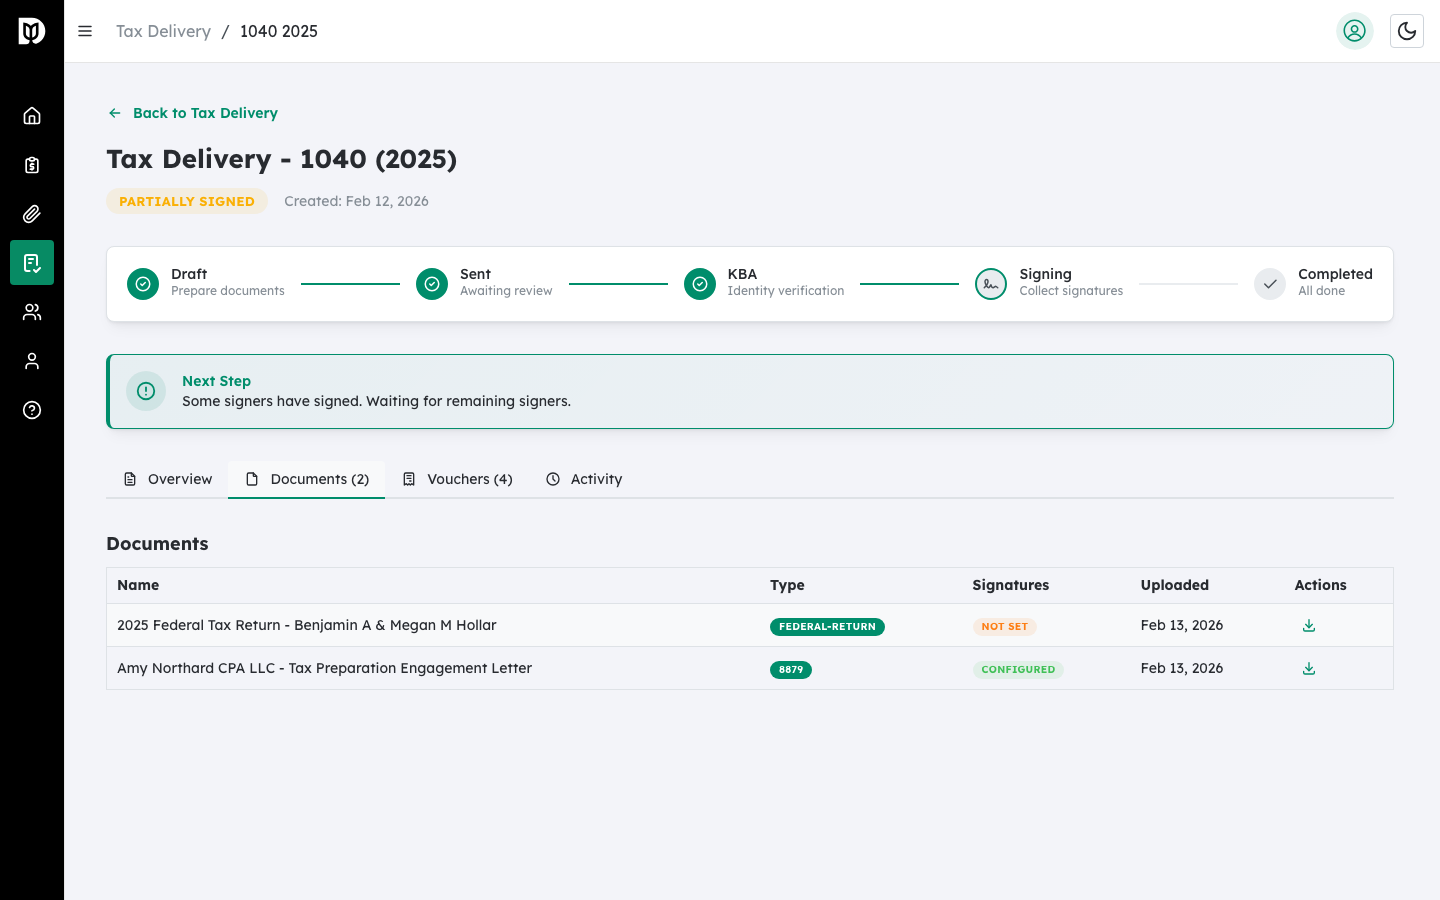
On the tax return detail page, click the Documents tab.
Step 2: Click Upload Document #
Click the Upload Document button to open the upload modal.
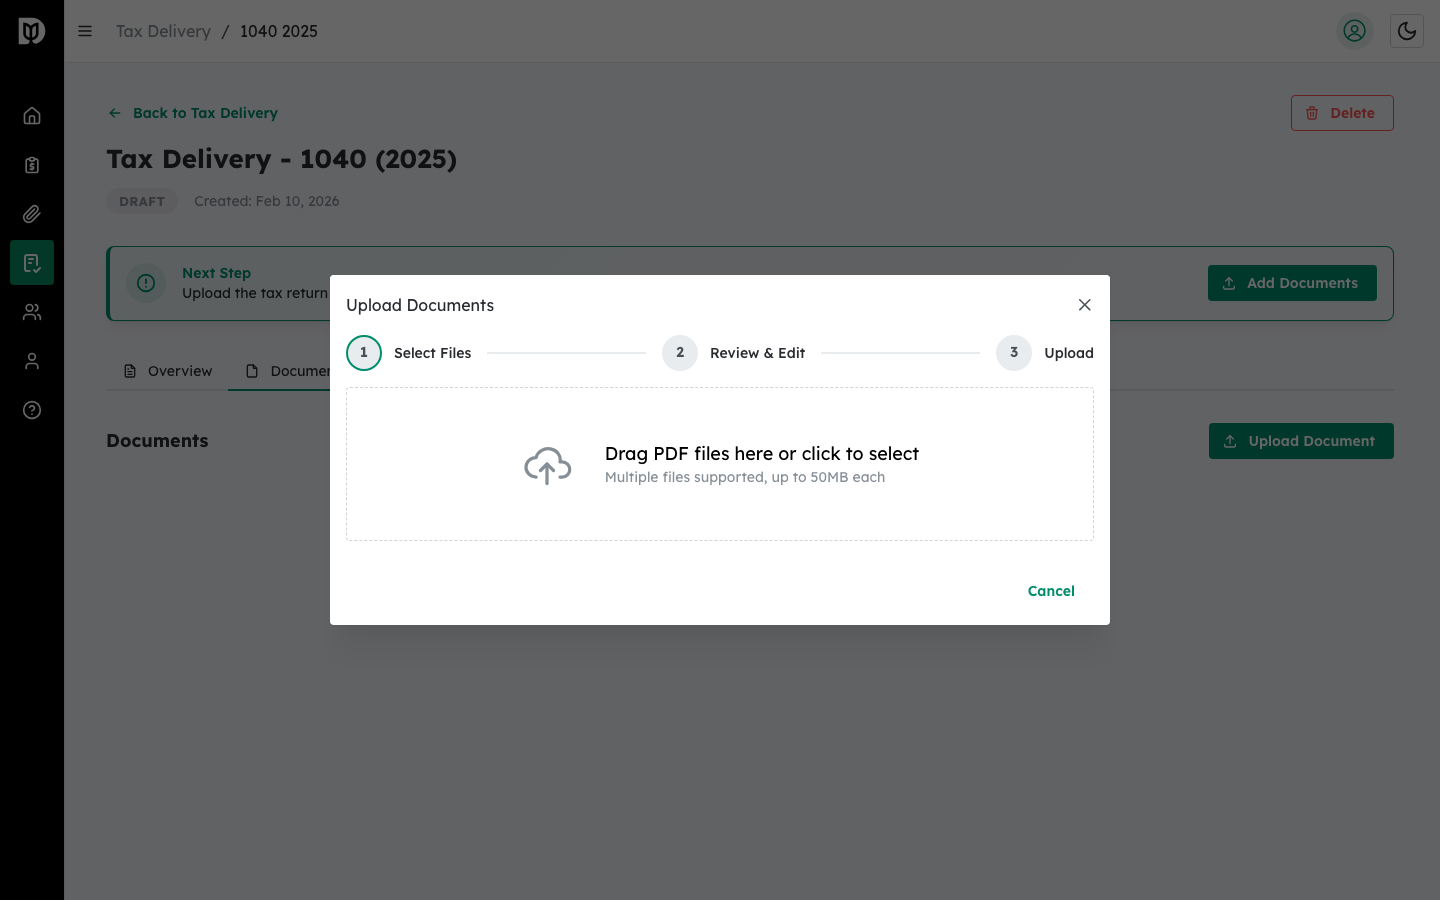
Step 3: Select or drag a file #
Drag a file into the drop zone, or click the drop zone to open the file picker. Supported formats include PDF, Word (.doc, .docx), Excel (.xls, .xlsx), PNG, and JPEG.
Step 4: Name the document and assign a type #
After selecting a file:
- Enter a Document Name (defaults to the file name).
- Select a Document Type from the dropdown:
- Form 8879 (E-File Authorization) — The IRS e-filing authorization form.
- Federal Return — The federal tax return.
- State Return — A state tax return.
- Schedule K-1 — For partnership or S-Corp returns.
- Payment Voucher — Estimated tax payment vouchers.
- Engagement Letter — Client engagement agreements.
- Other — Any other supporting document.
Step 5: Upload the document #
Click the Upload button. A progress bar shows the upload status.
Step 6: Download or remove uploaded documents #
From the Documents tab, you can:
- Click the download icon to download any document.
- Click the trash icon to remove a document.
What happens next #
After uploading PDF documents, you must configure signature fields on them before you can send the return for signature.
Troubleshooting #
- “File Rejected” notification: The file type is not supported or exceeds the 50 MB limit. Convert to a supported format and try again.
- Upload fails: Check your internet connection and try again. If the problem persists, try a smaller file.


