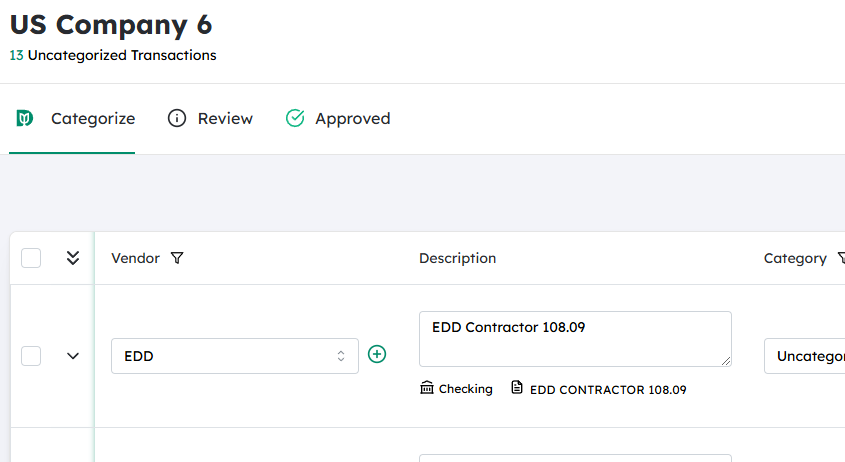
Navigate to the desired Company #
- From the main menu or company list, locate the company you want to work with.
- Click on the company name to open its details or transactions screen.
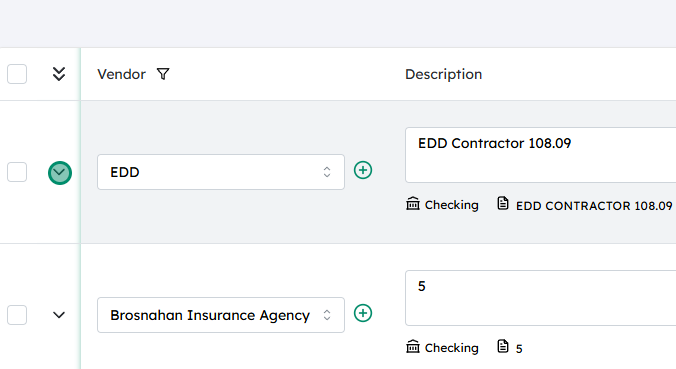
Expand the desired transaction #
- In the company’s transaction list (e.g., invoices, bills, journal entries), find the specific transaction where you want to add a Location/Department.
- Click on the transaction line or on the arrow/expand icon to open the full transaction details.
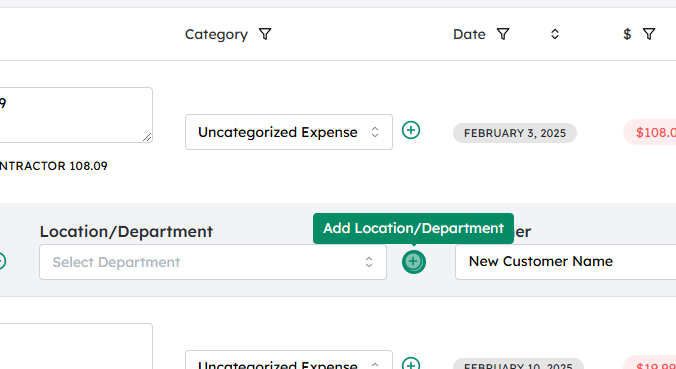
Click on the plus (+) next to Location/Department #
- Within the transaction details, locate the Location or Department field.
- Next to this field, you should see a “+” or “Add” icon.
- Click this icon to start creating a new Location/Department.

Enter the new Location/Department name and click on Create #
- A small pop-up window or side panel will appear prompting you to enter details for the new Location/Department.
- Type in the name (and any other required information, if prompted).
- Click Create (or Save) to add the new Location/Department and automatically assign it to the current transaction.
Updated on December 2, 2025