

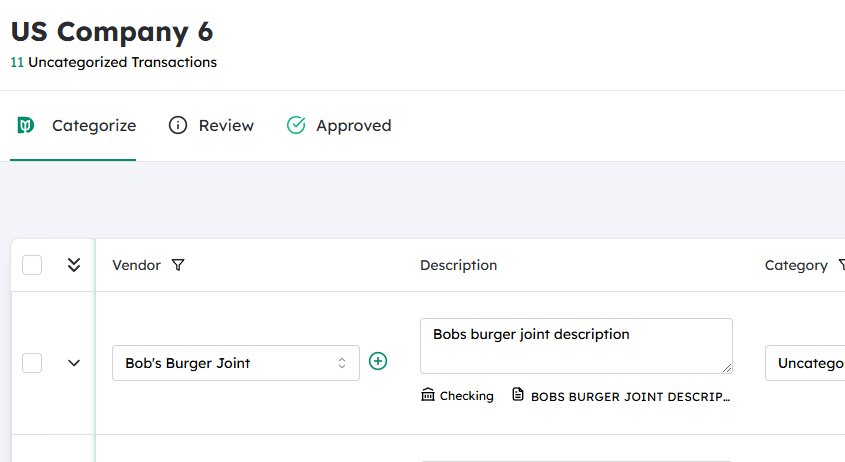
Navigate to the desired Company #
First, make sure you’re working in the correct company file.
- From the main dashboard or company list, locate and open the Company in which the transaction exists.
- Confirm you see the correct company name at the top of the screen before proceeding.
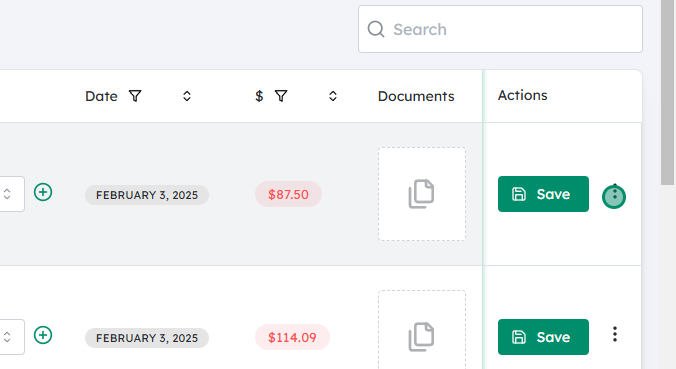
Click on the icon next to Save #
Once you’re viewing the transaction you want to split:
- Look for the Save button (often at the bottom or top-right of the transaction window).
- Next to Save, there should be a small icon (e.g., a dropdown arrow, three dots, or gear icon) that opens additional options.
- Click that icon to reveal the extended menu.
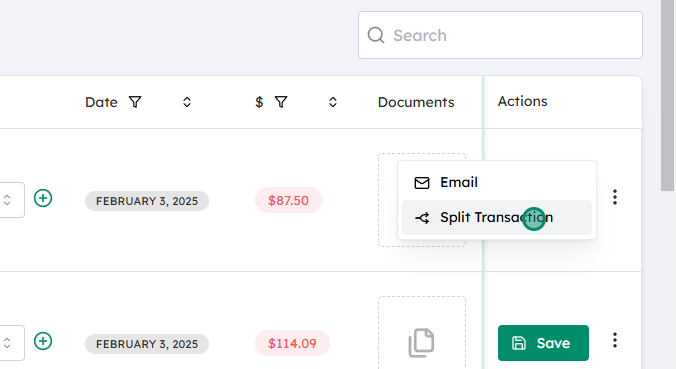
Click on Split Transaction #
From the options that appear:
- Select Split Transaction.
- This will open a split-entry panel or a new window that lets you divide a single transaction into multiple lines (for different accounts, categories, or cost centers).
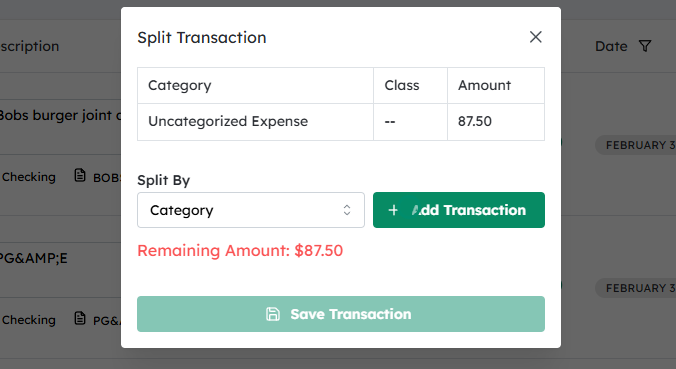
Click on Add Transaction #
Inside the split window:
- You’ll see at least one line already present for the transaction.
- Click Add Transaction (or Add Line, Add Split, etc.) to insert additional lines.
- Each new line represents another portion of the total amount you’re splitting.
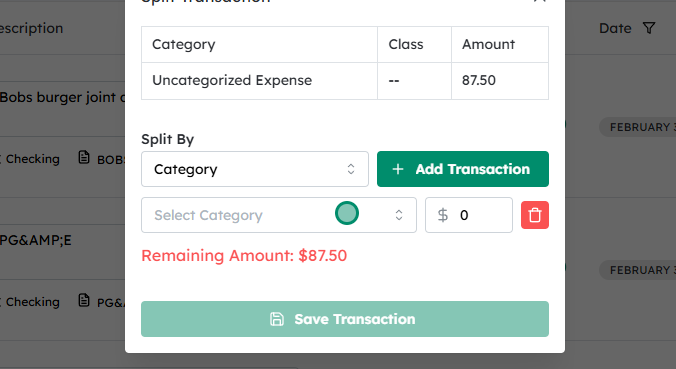
Click on Select Category #
For each line of the split:
- Click on Select Category (or the category/account field) to choose where that part of the amount should be allocated.
- This could be an expense category, income category, account, department, or project, depending on how your system is set up.
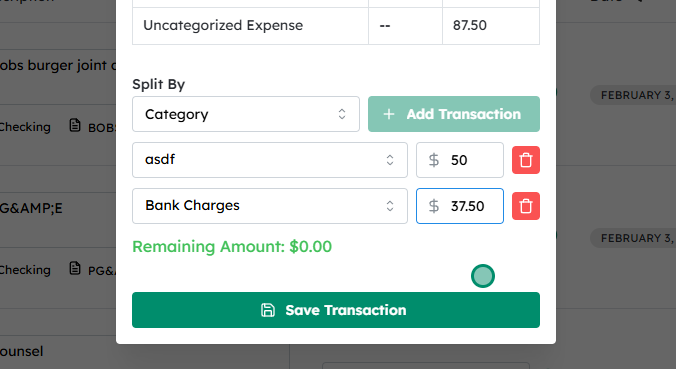
Select the desired split and ensure the remaining amount is $0.00 #
Now define how the total amount is divided:
- For each split line:
- Choose the correct Category.
- Enter the Amount (or a percentage, if your system allows it).
- As you fill in amounts, watch the Remaining Amount or Unassigned Amount field (often displayed at the bottom or top of the split window).
- Adjust the individual line amounts until the remaining/unassigned amount shows $0.00, meaning:
- The entire original transaction amount has been allocated across your split lines.
- There are no leftover or unassigned funds.
This step is critical: if the remaining amount is not $0.00, the system may not let you save, or the transaction may be out of balance.
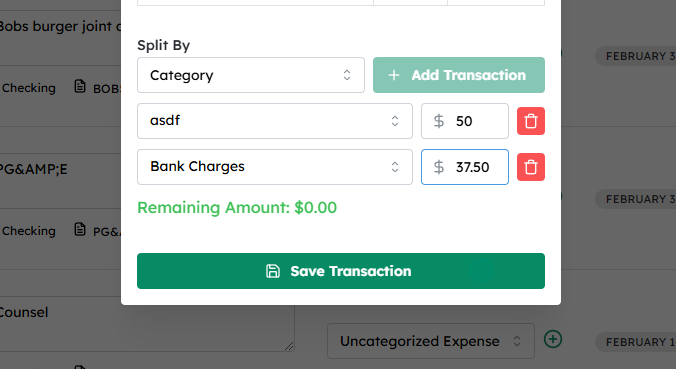
Click on Save Transaction #
Once all split lines are set up correctly:
- Review each line for:
- Correct category
- Correct amount
- Any additional required fields (e.g., memo, class, project, tax code)
- Confirm that the Remaining Amount is $0.00.
- Click Save Transaction (or Save / Save & Close) to finalize the split.
The transaction will now be recorded as a single entry in total, but internally allocated across multiple categories/lines as you specified.


