
Who this is for: Accountants who manage bookkeeping for client companies in Debits.
What you’ll learn: How to create a new monthly financial report for a company connected to QuickBooks Online.
Before you begin #
- You must be signed in as an Accountant with an active account.
- Bookkeeping and Financial Reports must be enabled for your account.
- The company must be connected to QuickBooks Online.
Step-by-step instructions #
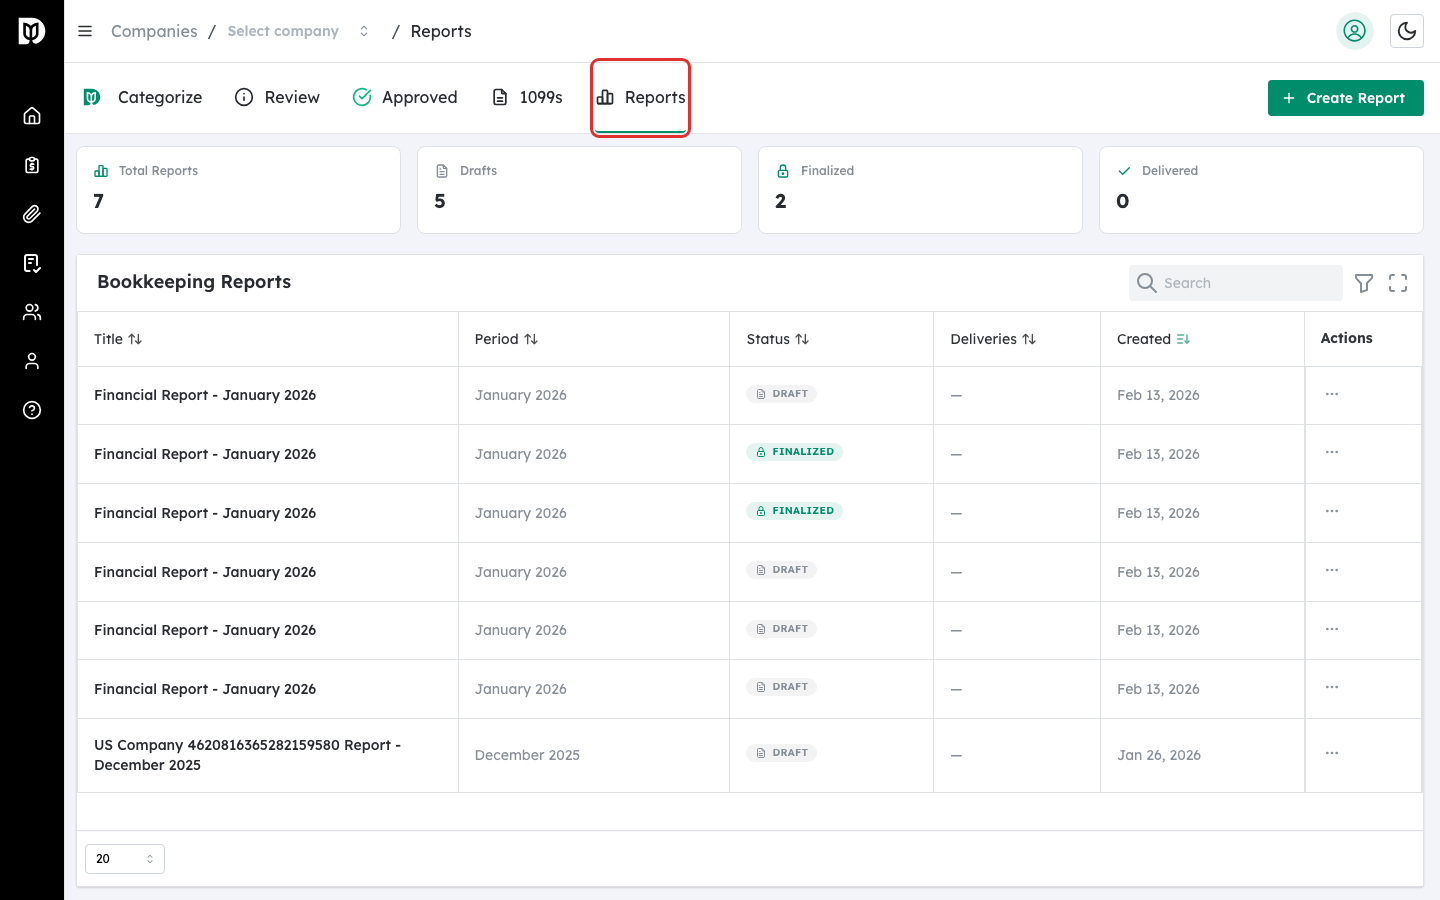
Step 1: Navigate to the Reports tab #
From the sidebar, click Bookkeeping to open the Companies list. Select a company, then click the Reports tab at the top of the page. If you do not see the Reports tab, confirm that Financial Reports are enabled in your account settings.
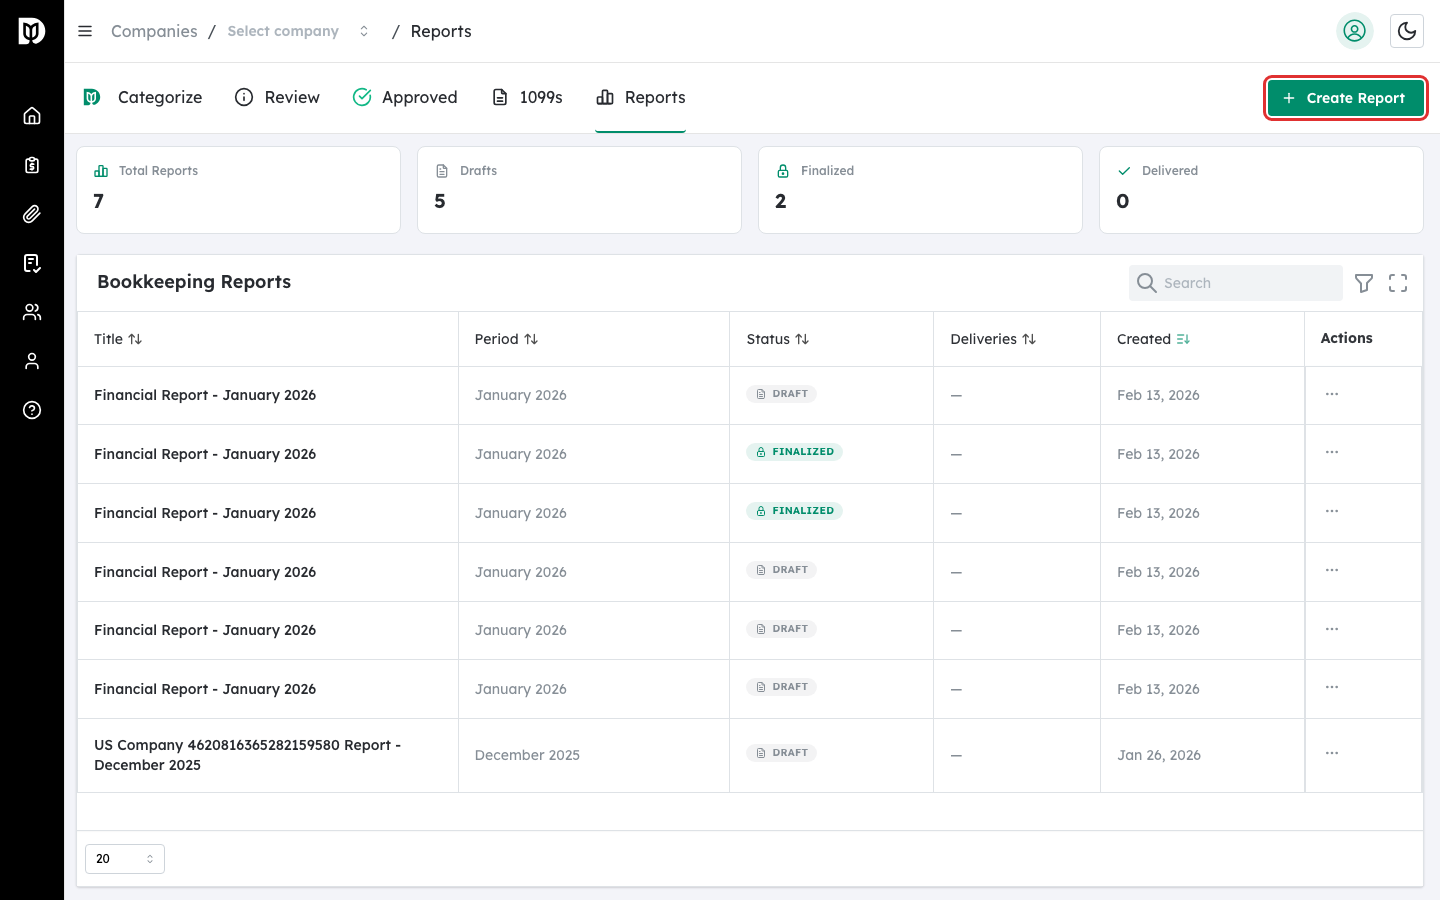
Step 2: Click Create Report #
On the Reports tab, click the Create Report button in the top-right corner of the page. If this is your first report, you can also click the Create Report button in the center of the empty state card.
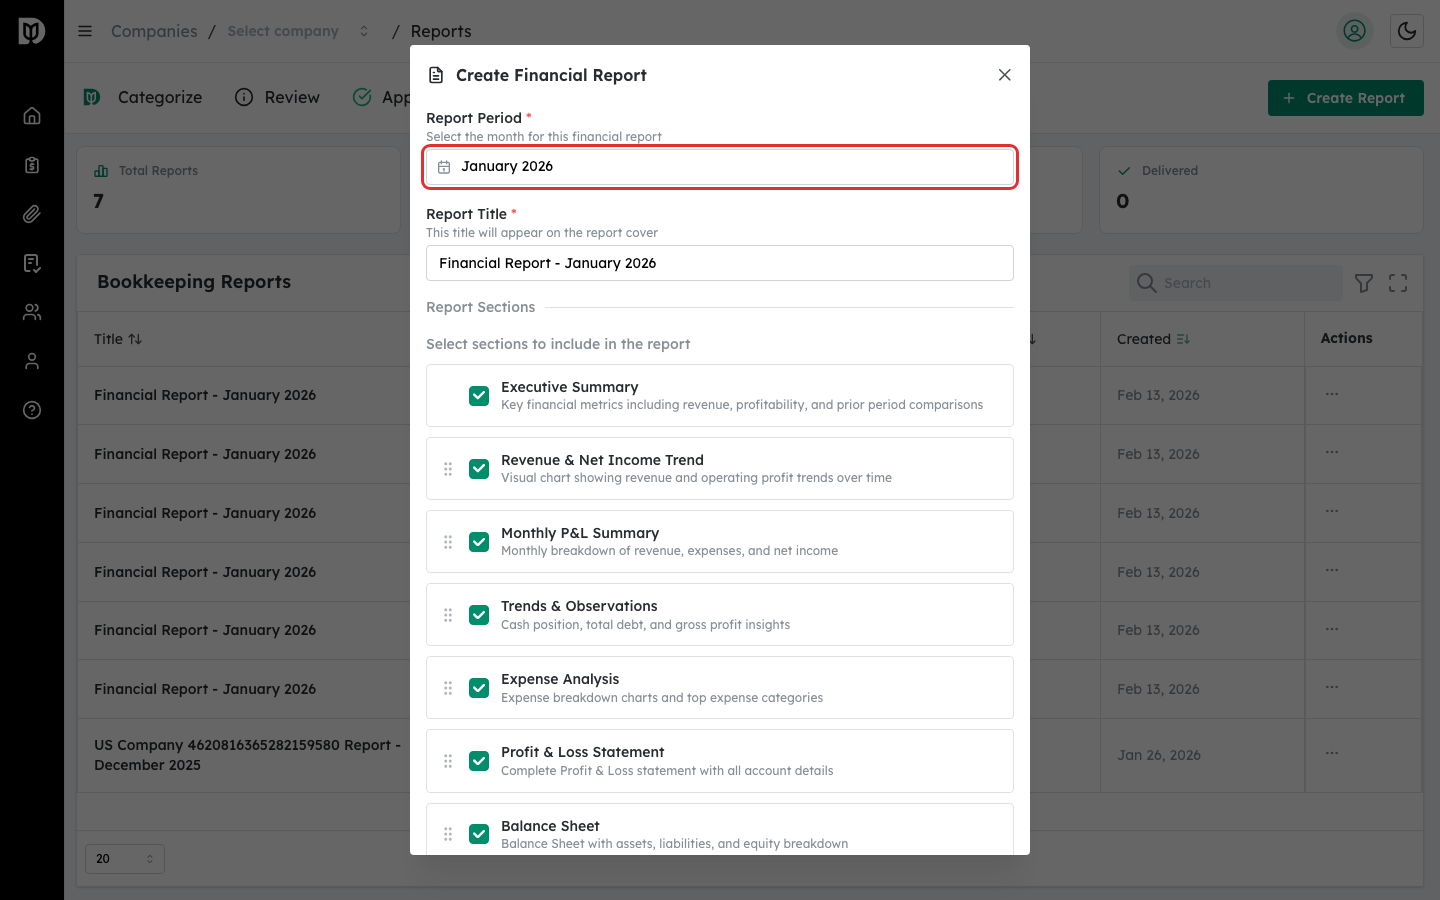
Step 3: Select the report period #
In the Create Financial Report modal, use the Report Period month picker to choose the month you are reporting on. By default, the previous month is selected. The report title updates automatically to match the selected period.
Step 4: Review the report title #
The Report Title field is auto-populated with the company name and selected month (for example, “Acme Corp Report – January 2026”). You can edit this title if needed. The title must be at least 3 characters.
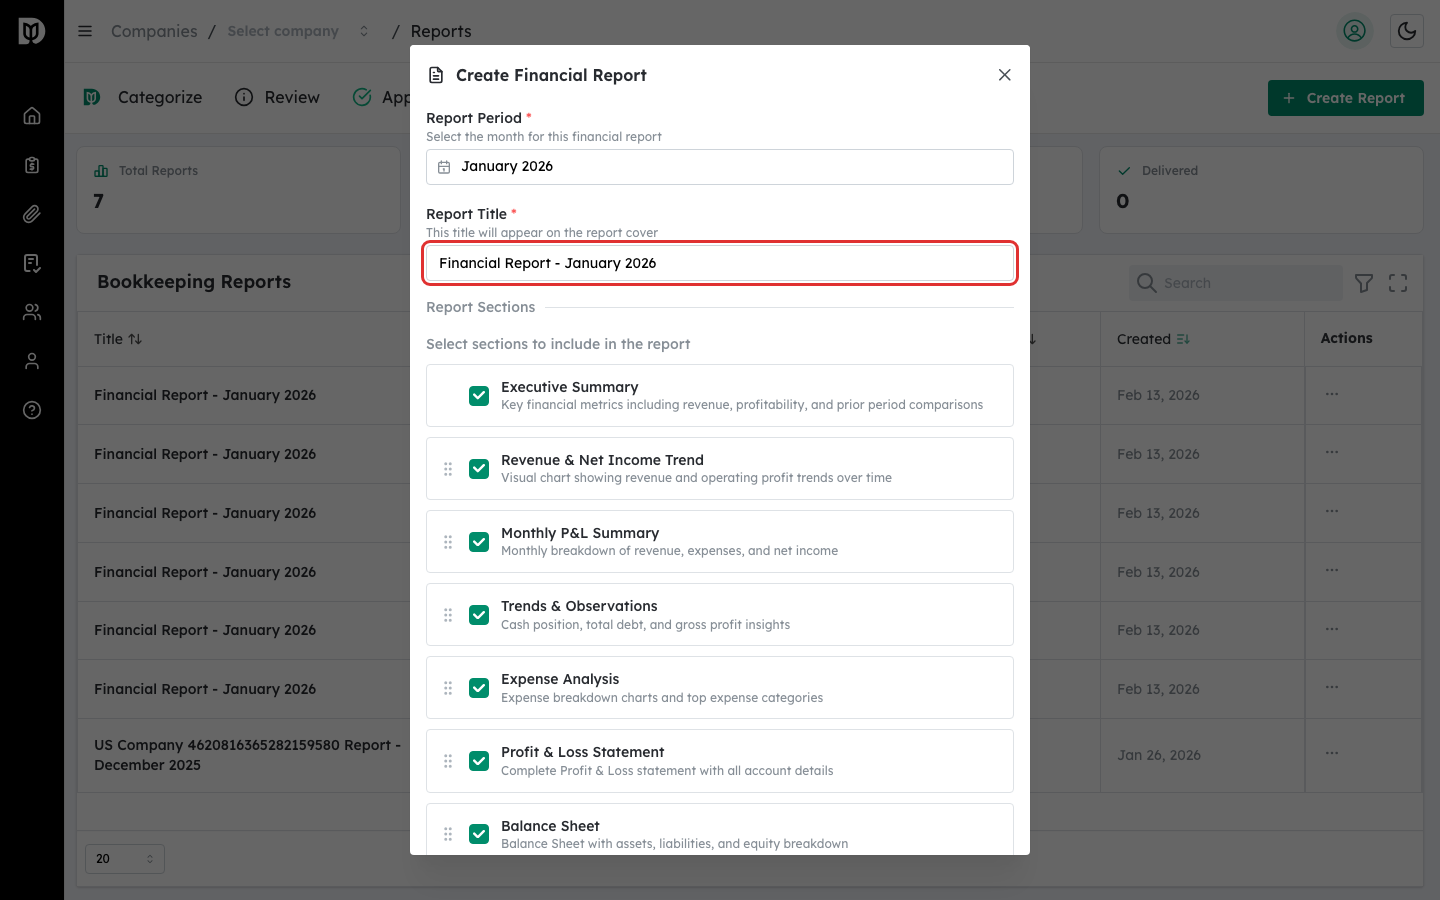
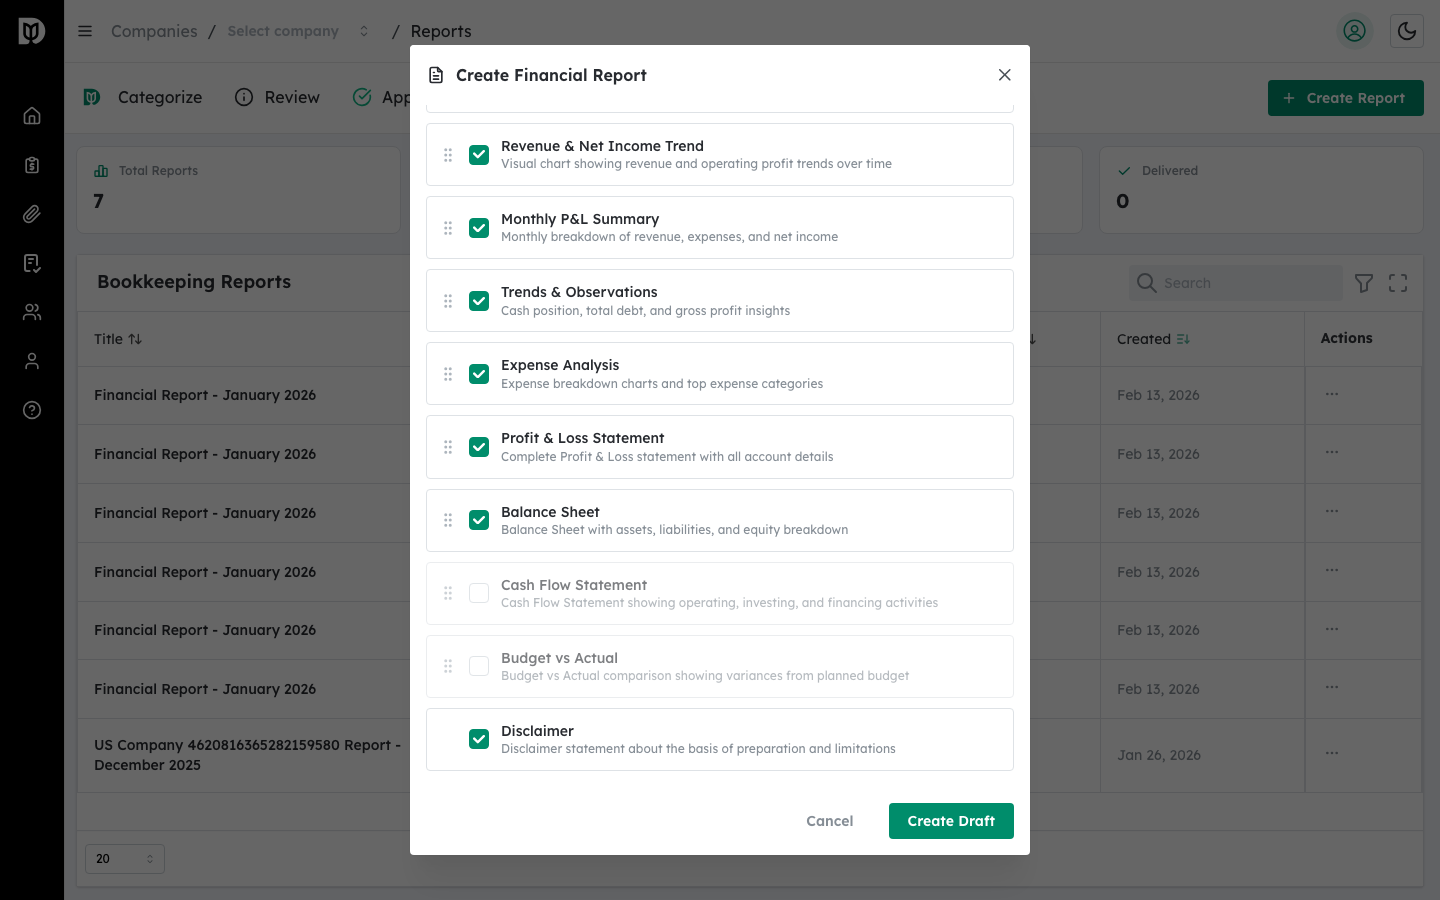
Step 5: Choose report sections #
Under Report Sections, you will see a list of available sections. Each section has a checkbox to enable or disable it. Enabled sections will appear in the report. You can drag sections using the grip handle to reorder them. Executive Summary is pinned to the top and Disclaimer is pinned to the bottom.
Step 6: Click Create Draft #
Once you are satisfied with the period, title, and sections, click the Create Draft button at the bottom of the modal. The system will create your report and navigate you to the report detail page where you can preview live data from QuickBooks.

What happens next #
After creating the draft, you are taken to the report detail page. The report pulls live data from QuickBooks Online for the selected period. From here you can customize sections, add commentary, preview the PDF, and finalize the report when ready.
Troubleshooting #
- I do not see the Reports tab: Confirm that Financial Reports are enabled for your account. Contact your account administrator if the feature is not available.
- The Create Draft button is disabled: Make sure at least one report section is enabled. The button is disabled when no sections are selected.
- Title validation error: The report title must be at least 3 characters long. Update the title and try again.
- “Failed to create report” error: Check your internet connection and try again. If the error persists, verify that the company is still connected to QuickBooks.


