Every organizer generates a document checklist from the client’s answers — the W-2s, 1098s and other forms their return needs. The Organizer tasks page is where you and the client collect those documents and check them off.
Before you begin
- Organizer tasks is greyed out while the organizer is in Awaiting delivery or Sent. The checklist appears once the client starts answering questions.
- The list’s Tasks column shows each organizer’s progress at a glance, for example “0/3 submitted”.
Step-by-step instructions
Step 1: Open the row’s actions menu
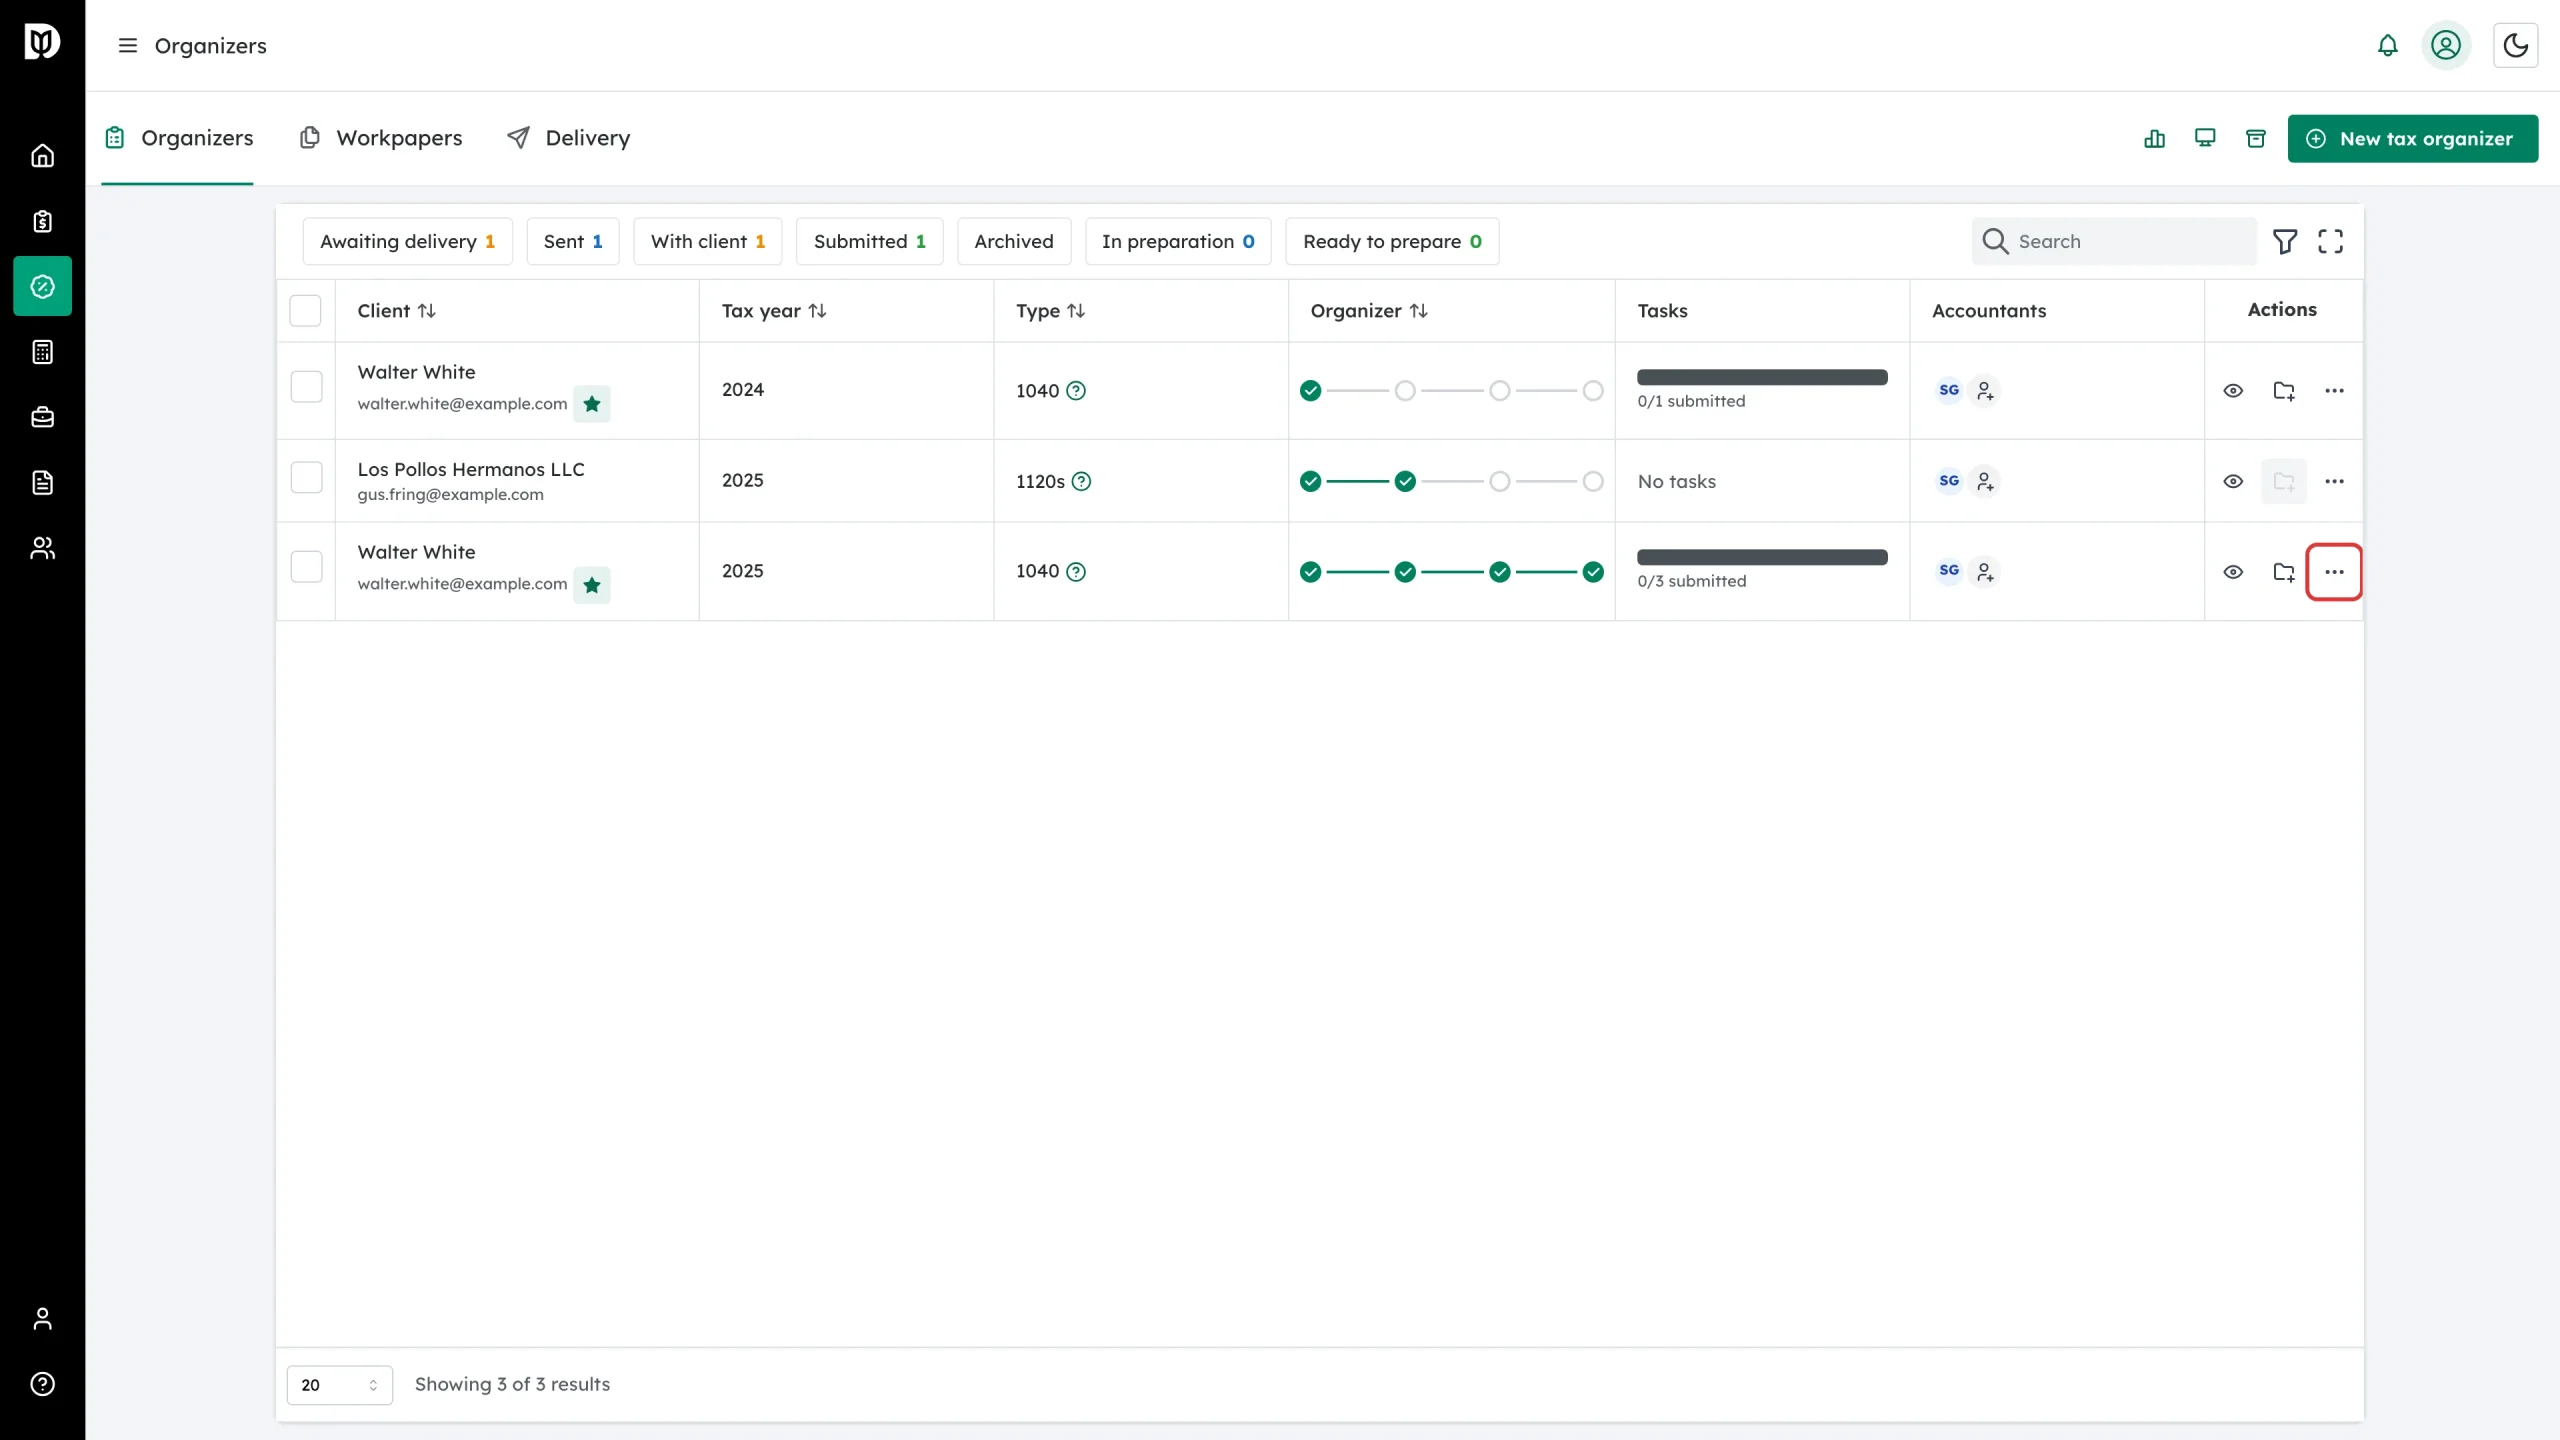
In the left sidebar, click Tax, then open the Organizers tab. Find the organizer, then click the three-dot More actions icon at the end of its row.
Step 2: Click Organizer tasks
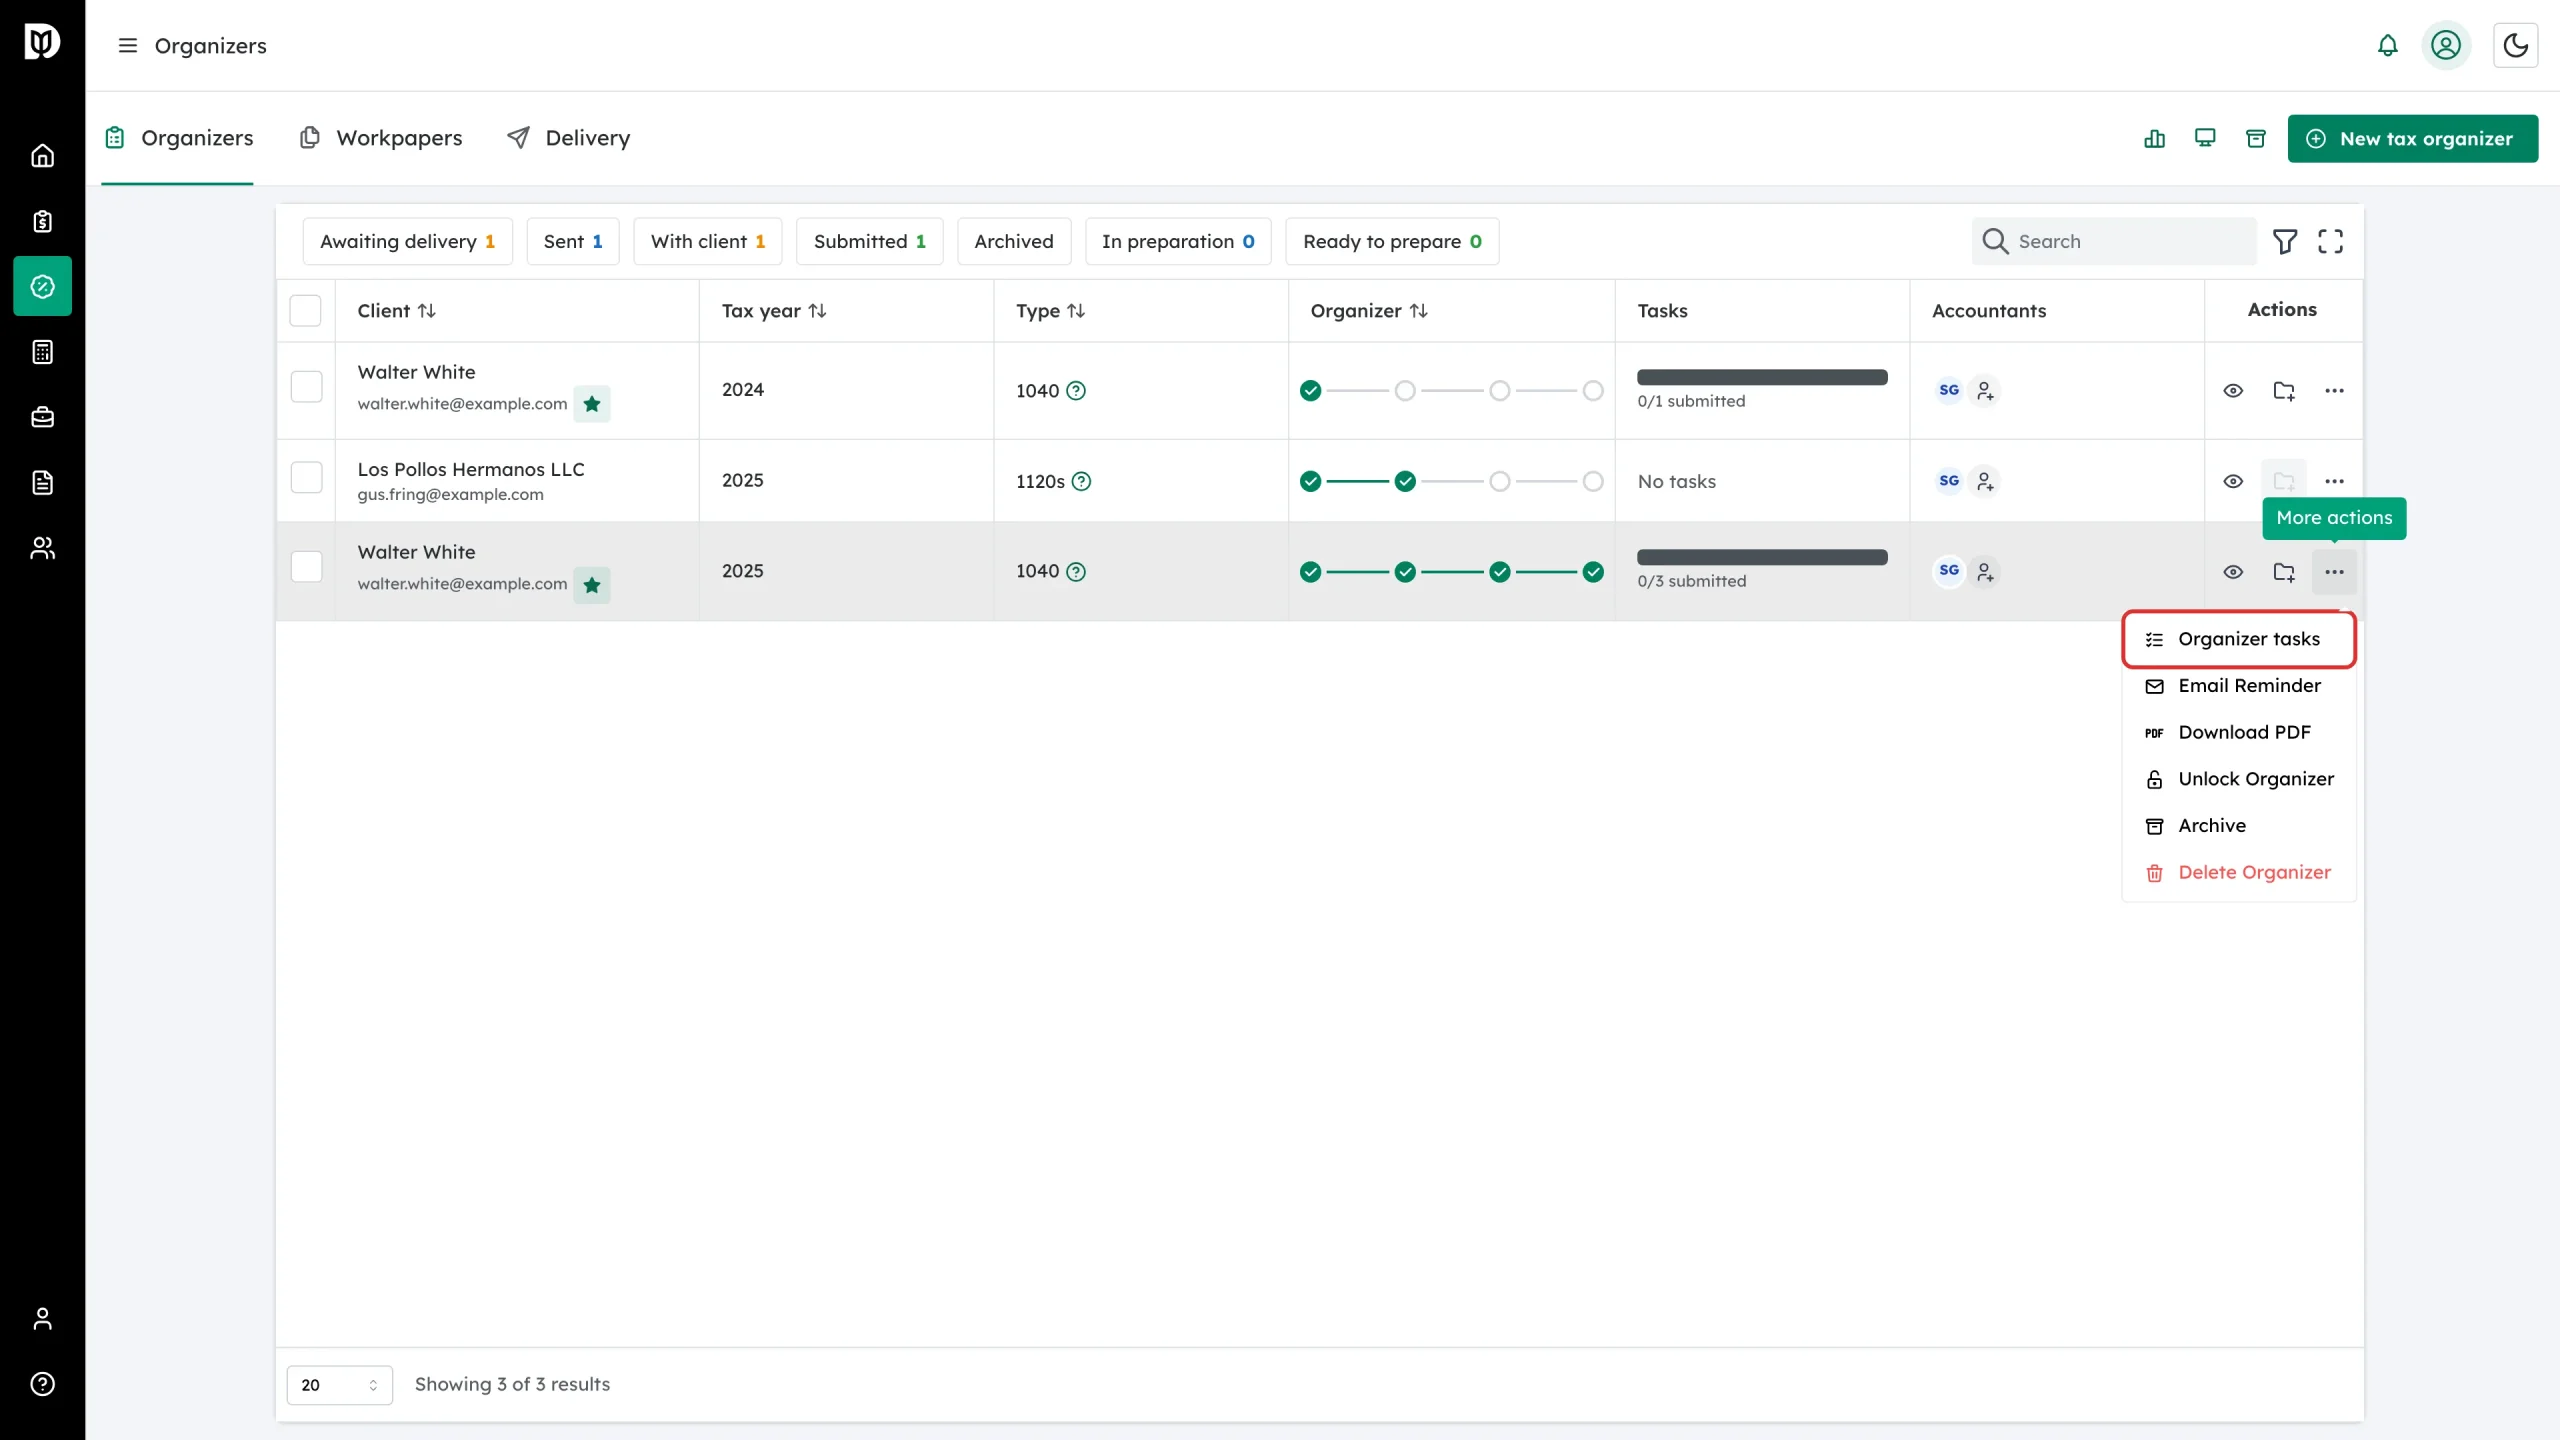
In the menu, click Organizer tasks.
Step 3: Work the uploads page
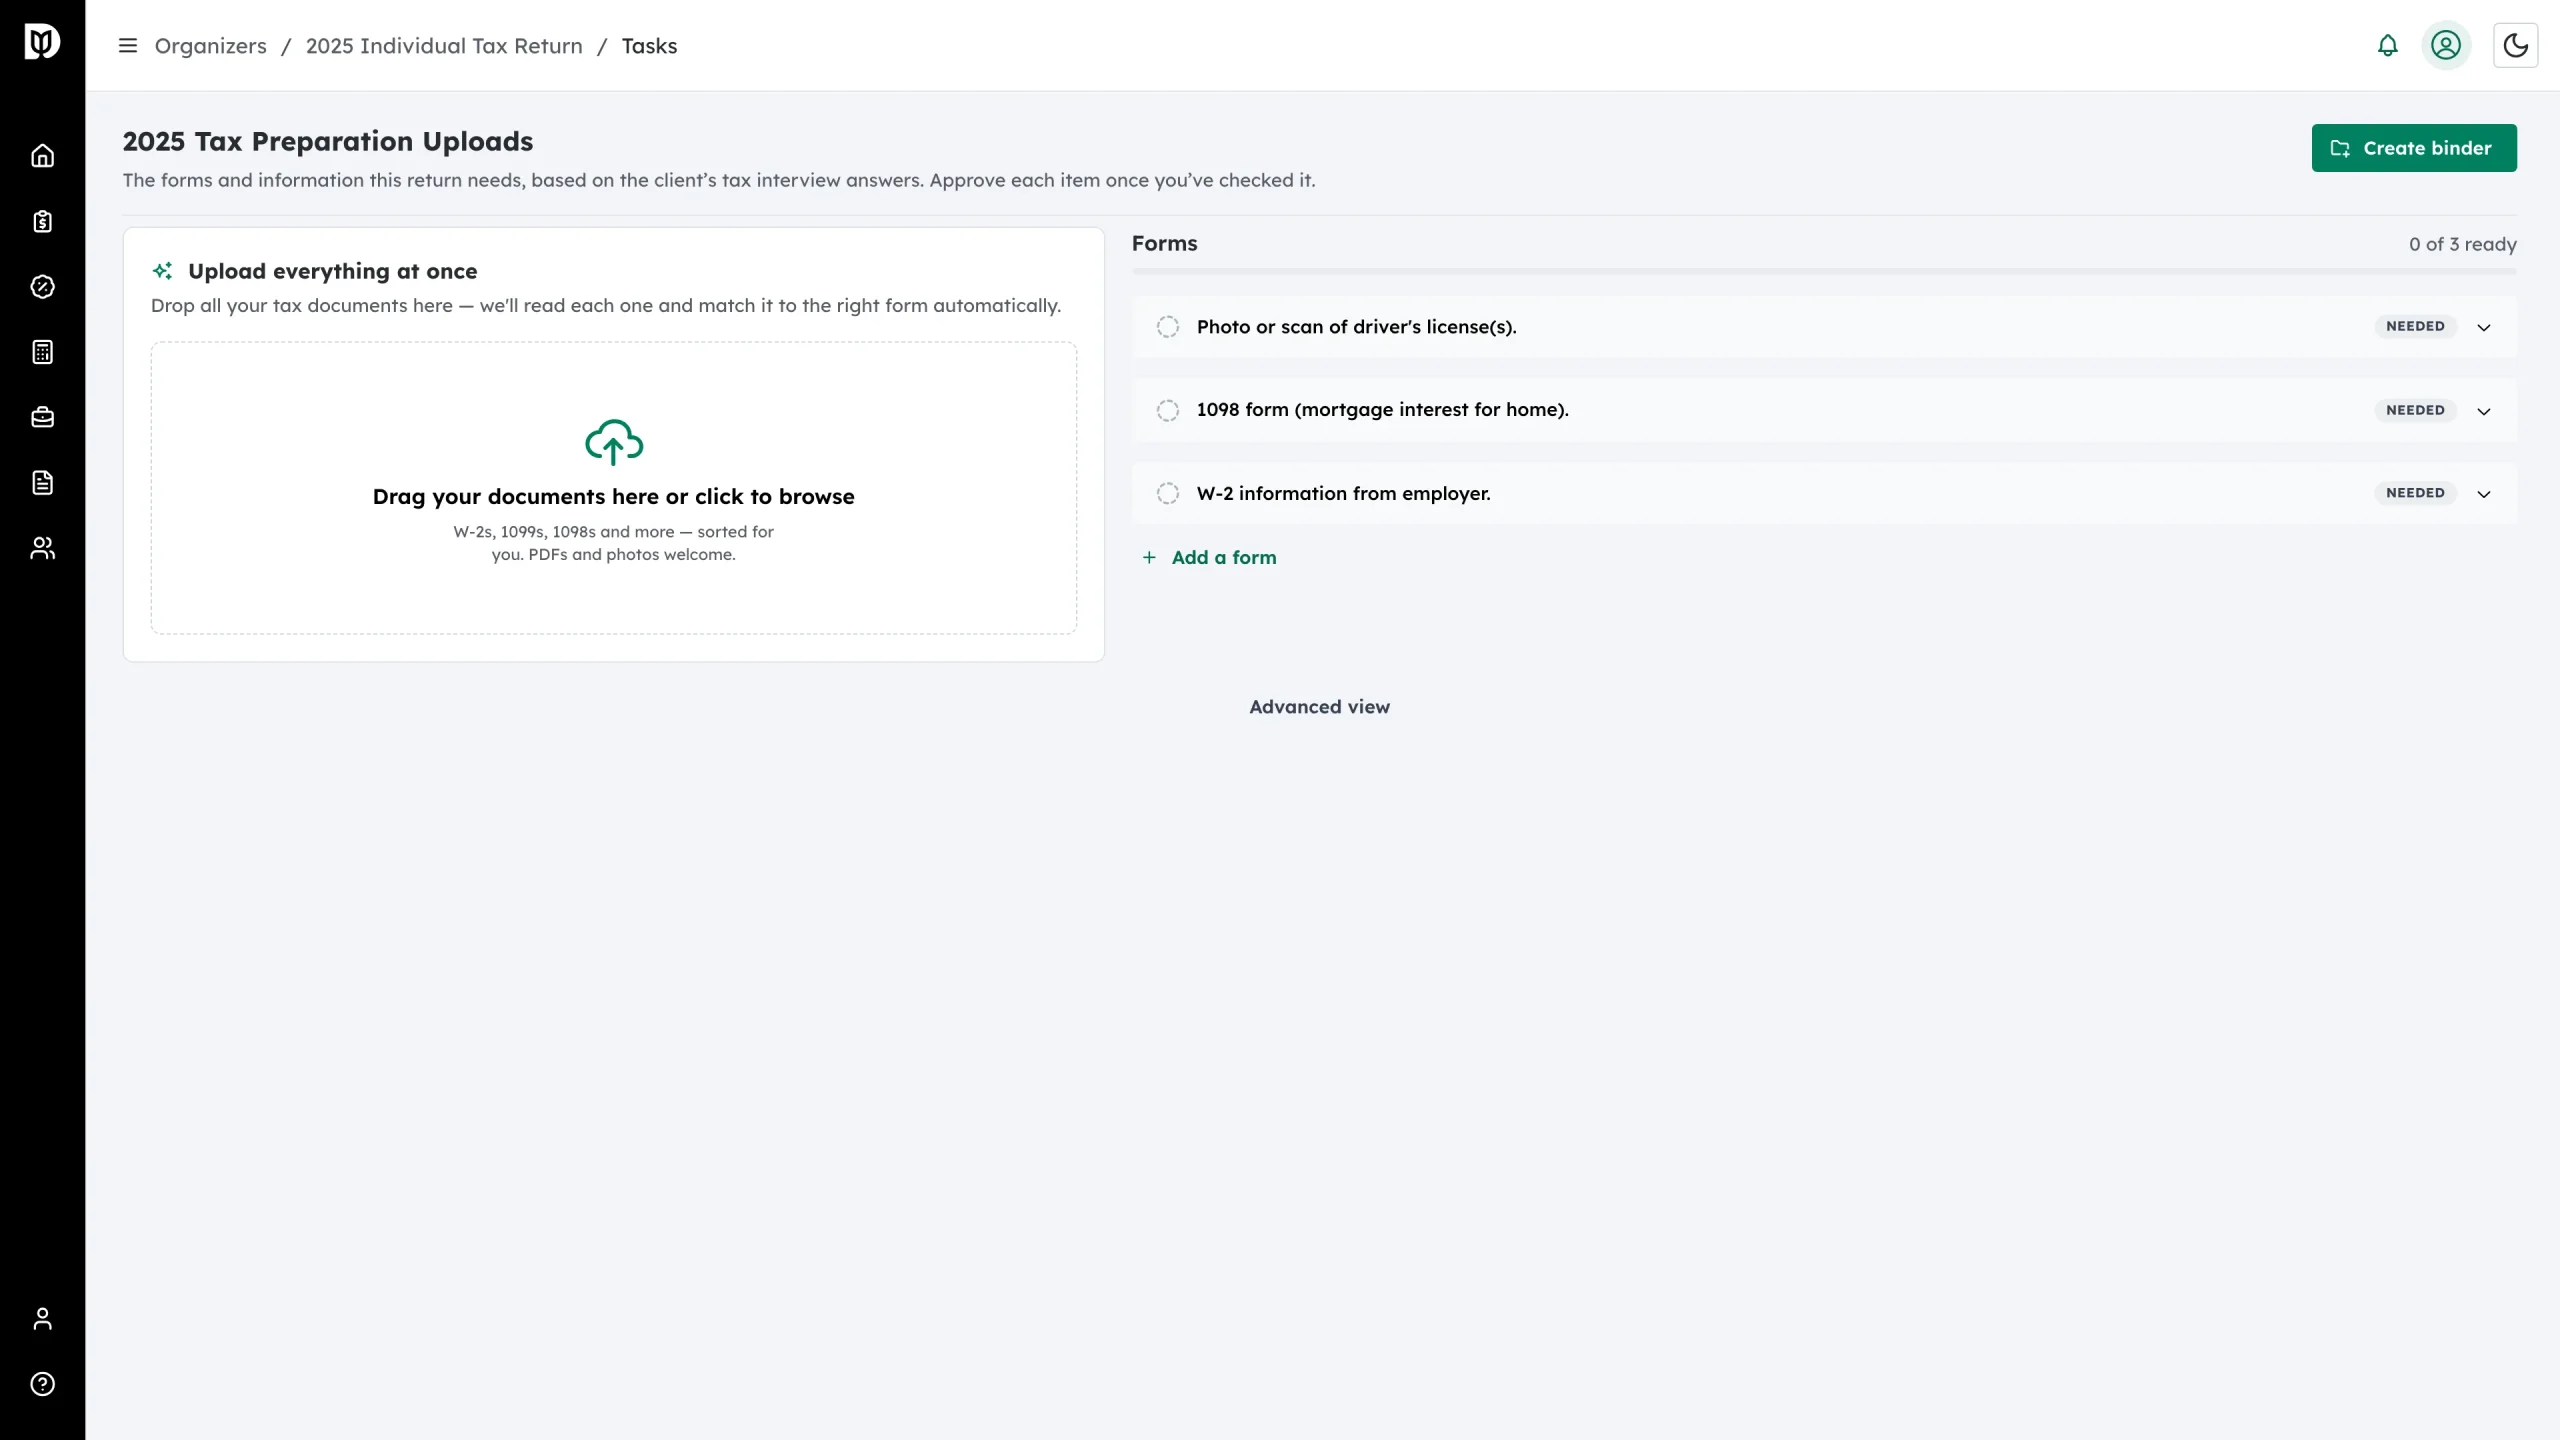
The Tax Preparation Uploads page opens for that tax year. From here you can:
- Upload everything at once — drag documents into the drop zone (or click to browse). Each file is read and matched to the right form automatically.
- Review the Forms list — every needed item (for example “W-2 information from employer” or “1098 form (mortgage interest for home)”) shows a status badge: Needed, In Review once something is uploaded, and Completed once you approve it. The counter at the top right shows how many are ready.
- Add a form — request an extra document the checklist didn’t generate.
- Advanced view — mark items as Uploaded to File Management System, Provided Elsewhere (e.g. Email), Will upload later or Not Applicable.
- Create binder — send the organizer and its documents to workpapers to start preparation.
What happens next
The client sees the same checklist in their portal and can upload documents there. Approve each item once you’ve checked it — when everything the client owes is in review, the organizer row shows a green Start tax preparation button that creates the workpaper binder for you.
Troubleshooting
- Organizer tasks is greyed out: the organizer hasn’t been started yet. Send the invite (or an Email reminder) and wait for the client to begin.
- The checklist is missing a document you need: click Add a form to request it. Checklist items come from the client’s answers, so an unanswered question means no item.
- The client says they sent a document by email: use Advanced view to mark the item “Provided Elsewhere” so the checklist stays truthful.