A tax organizer is the online questionnaire your client fills out before you prepare their return. This guide shows you how to create one, invite the client, and what happens next.
Before you begin
- You need the Create returns and organizers, and invite clients tax permission. Owners, admins and managers can invite one by one, use Bulk Upload or Import from Drake. Staff can invite one by one only, one client at a time.
- Know the tax year and the return type your client files: 1040 (individual), 1120 (C corporation), 1120s (S corporation), or 1065 (partnership).
- To invite many clients at once from a spreadsheet, choose Bulk Upload instead of One by one. To reuse data from Drake Tax Software, choose Import from Drake.
Step-by-step instructions
Step 1: Open the Tax hub
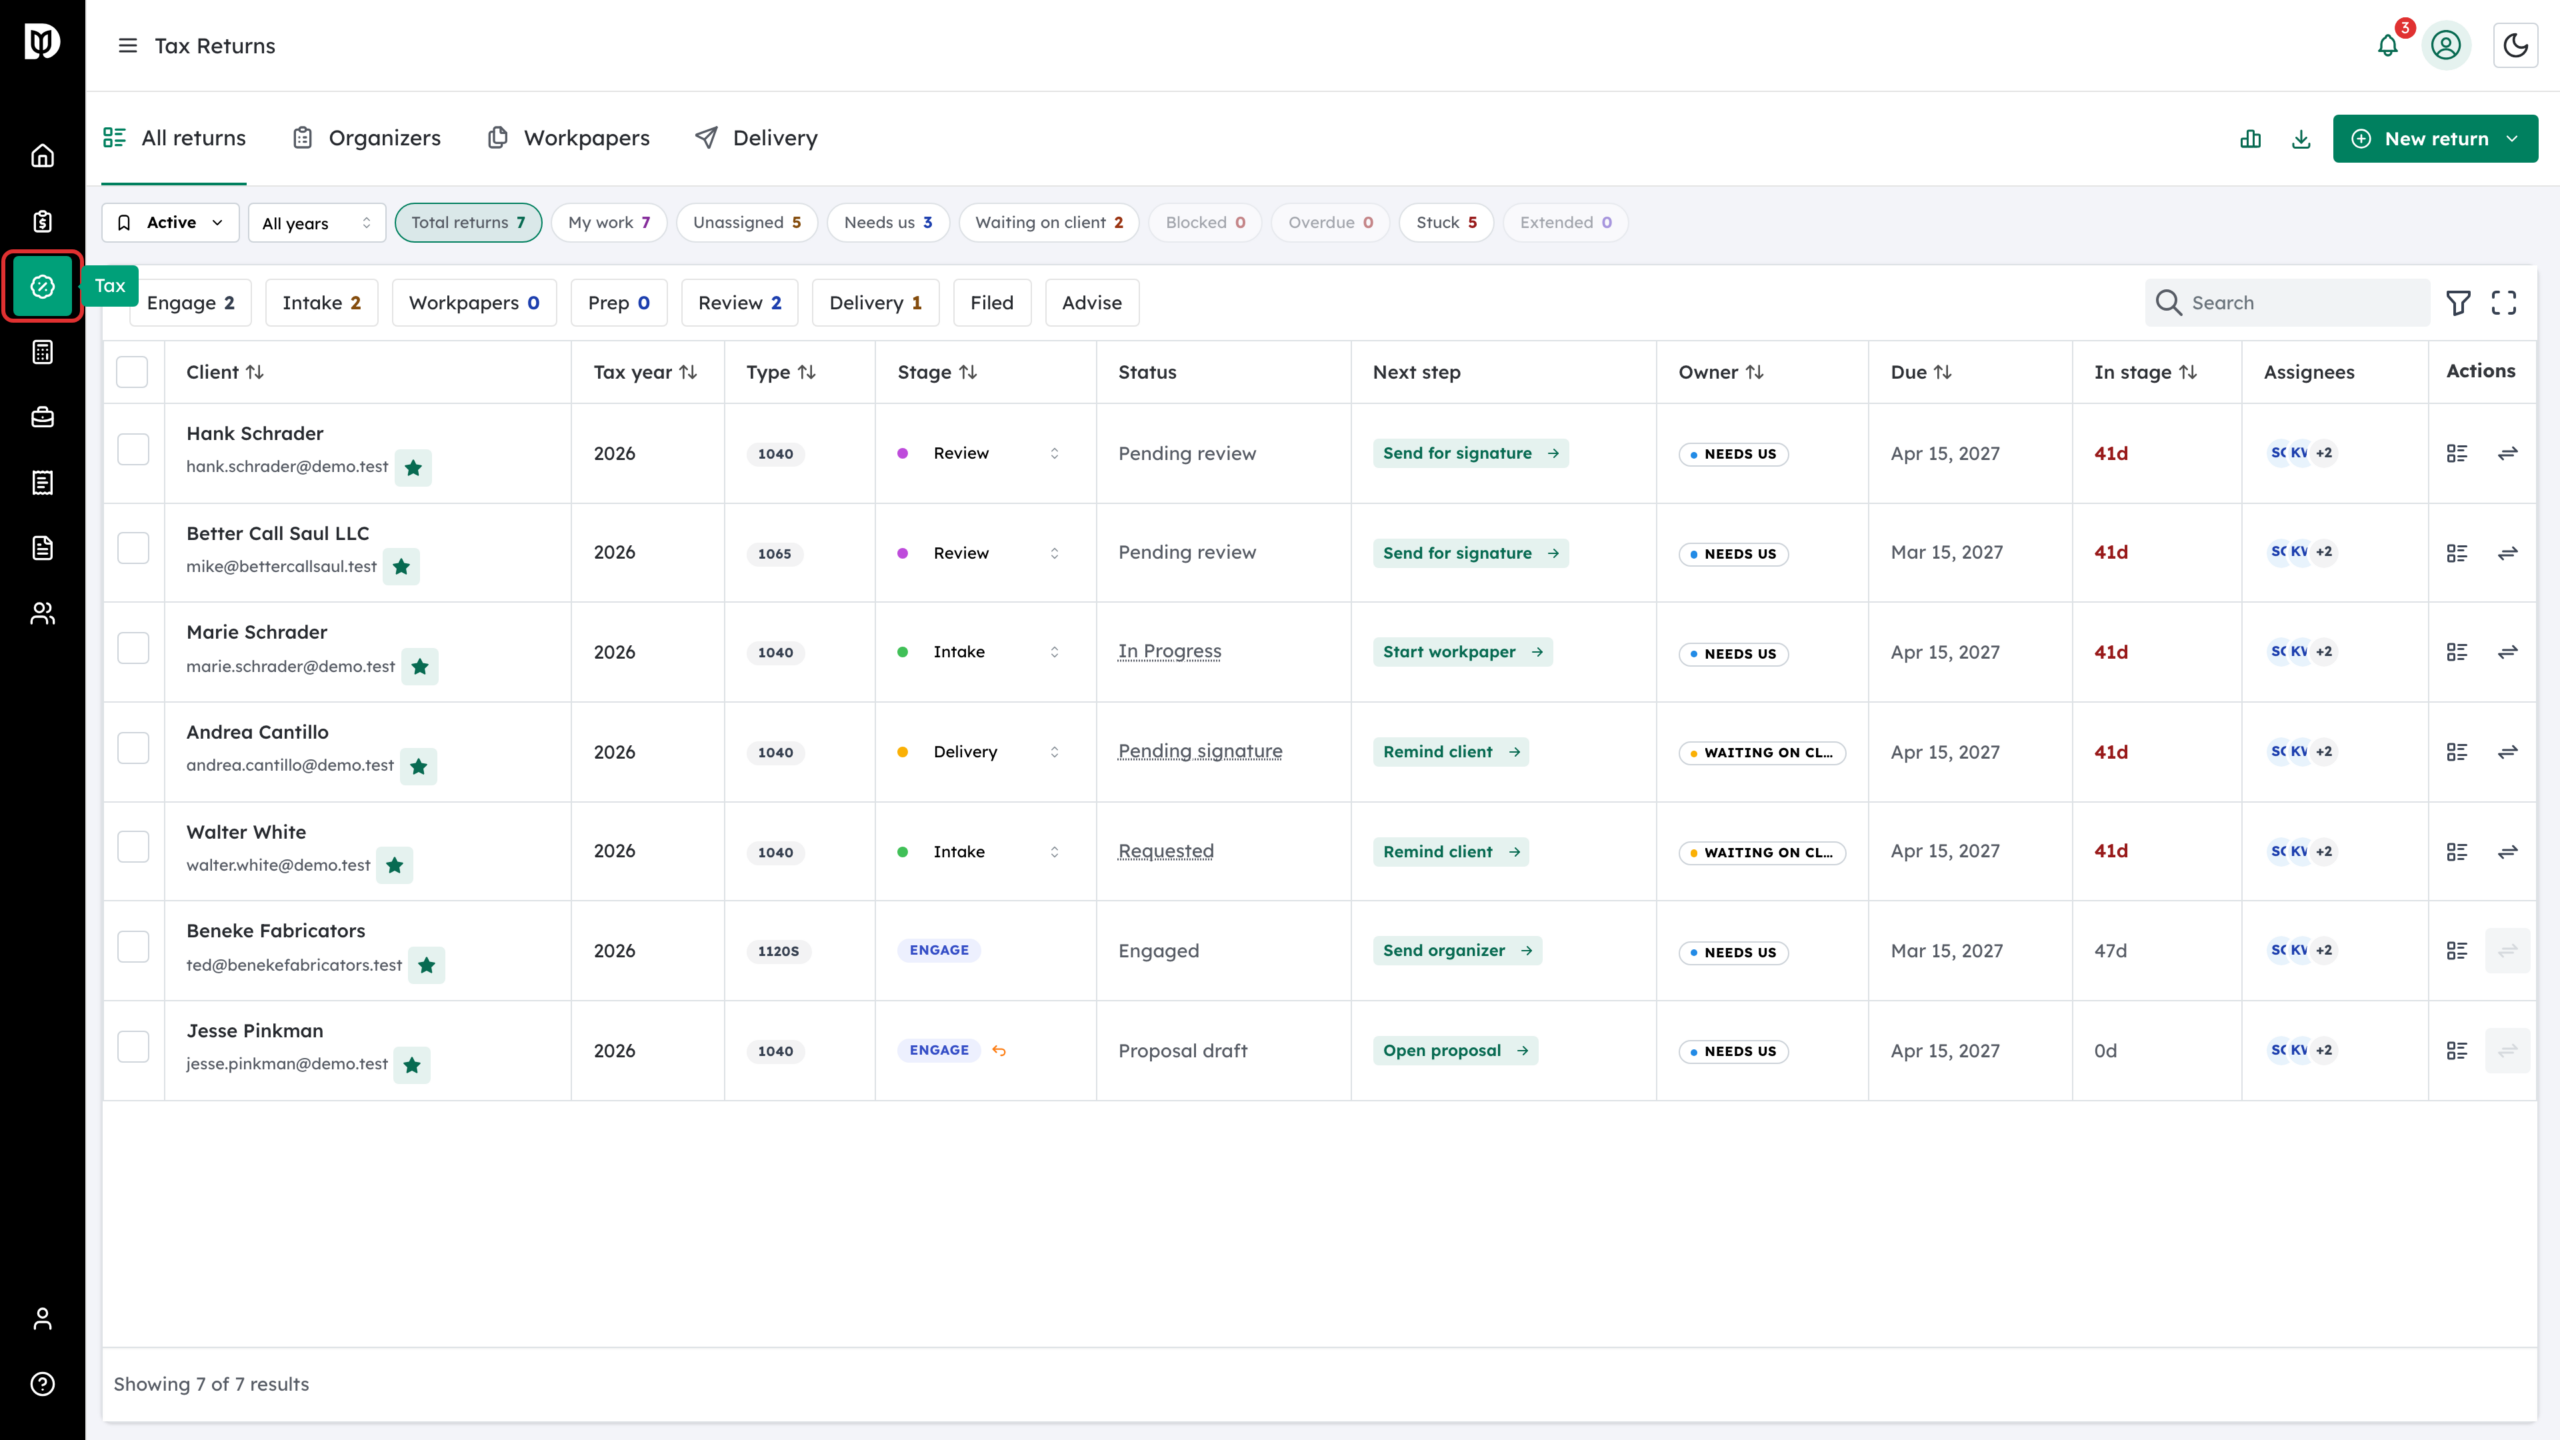
In the left sidebar, click Tax. The Tax hub opens on All returns. Click the Organizers tab, next to Workpapers and Delivery.
Step 2: Click New tax organizer
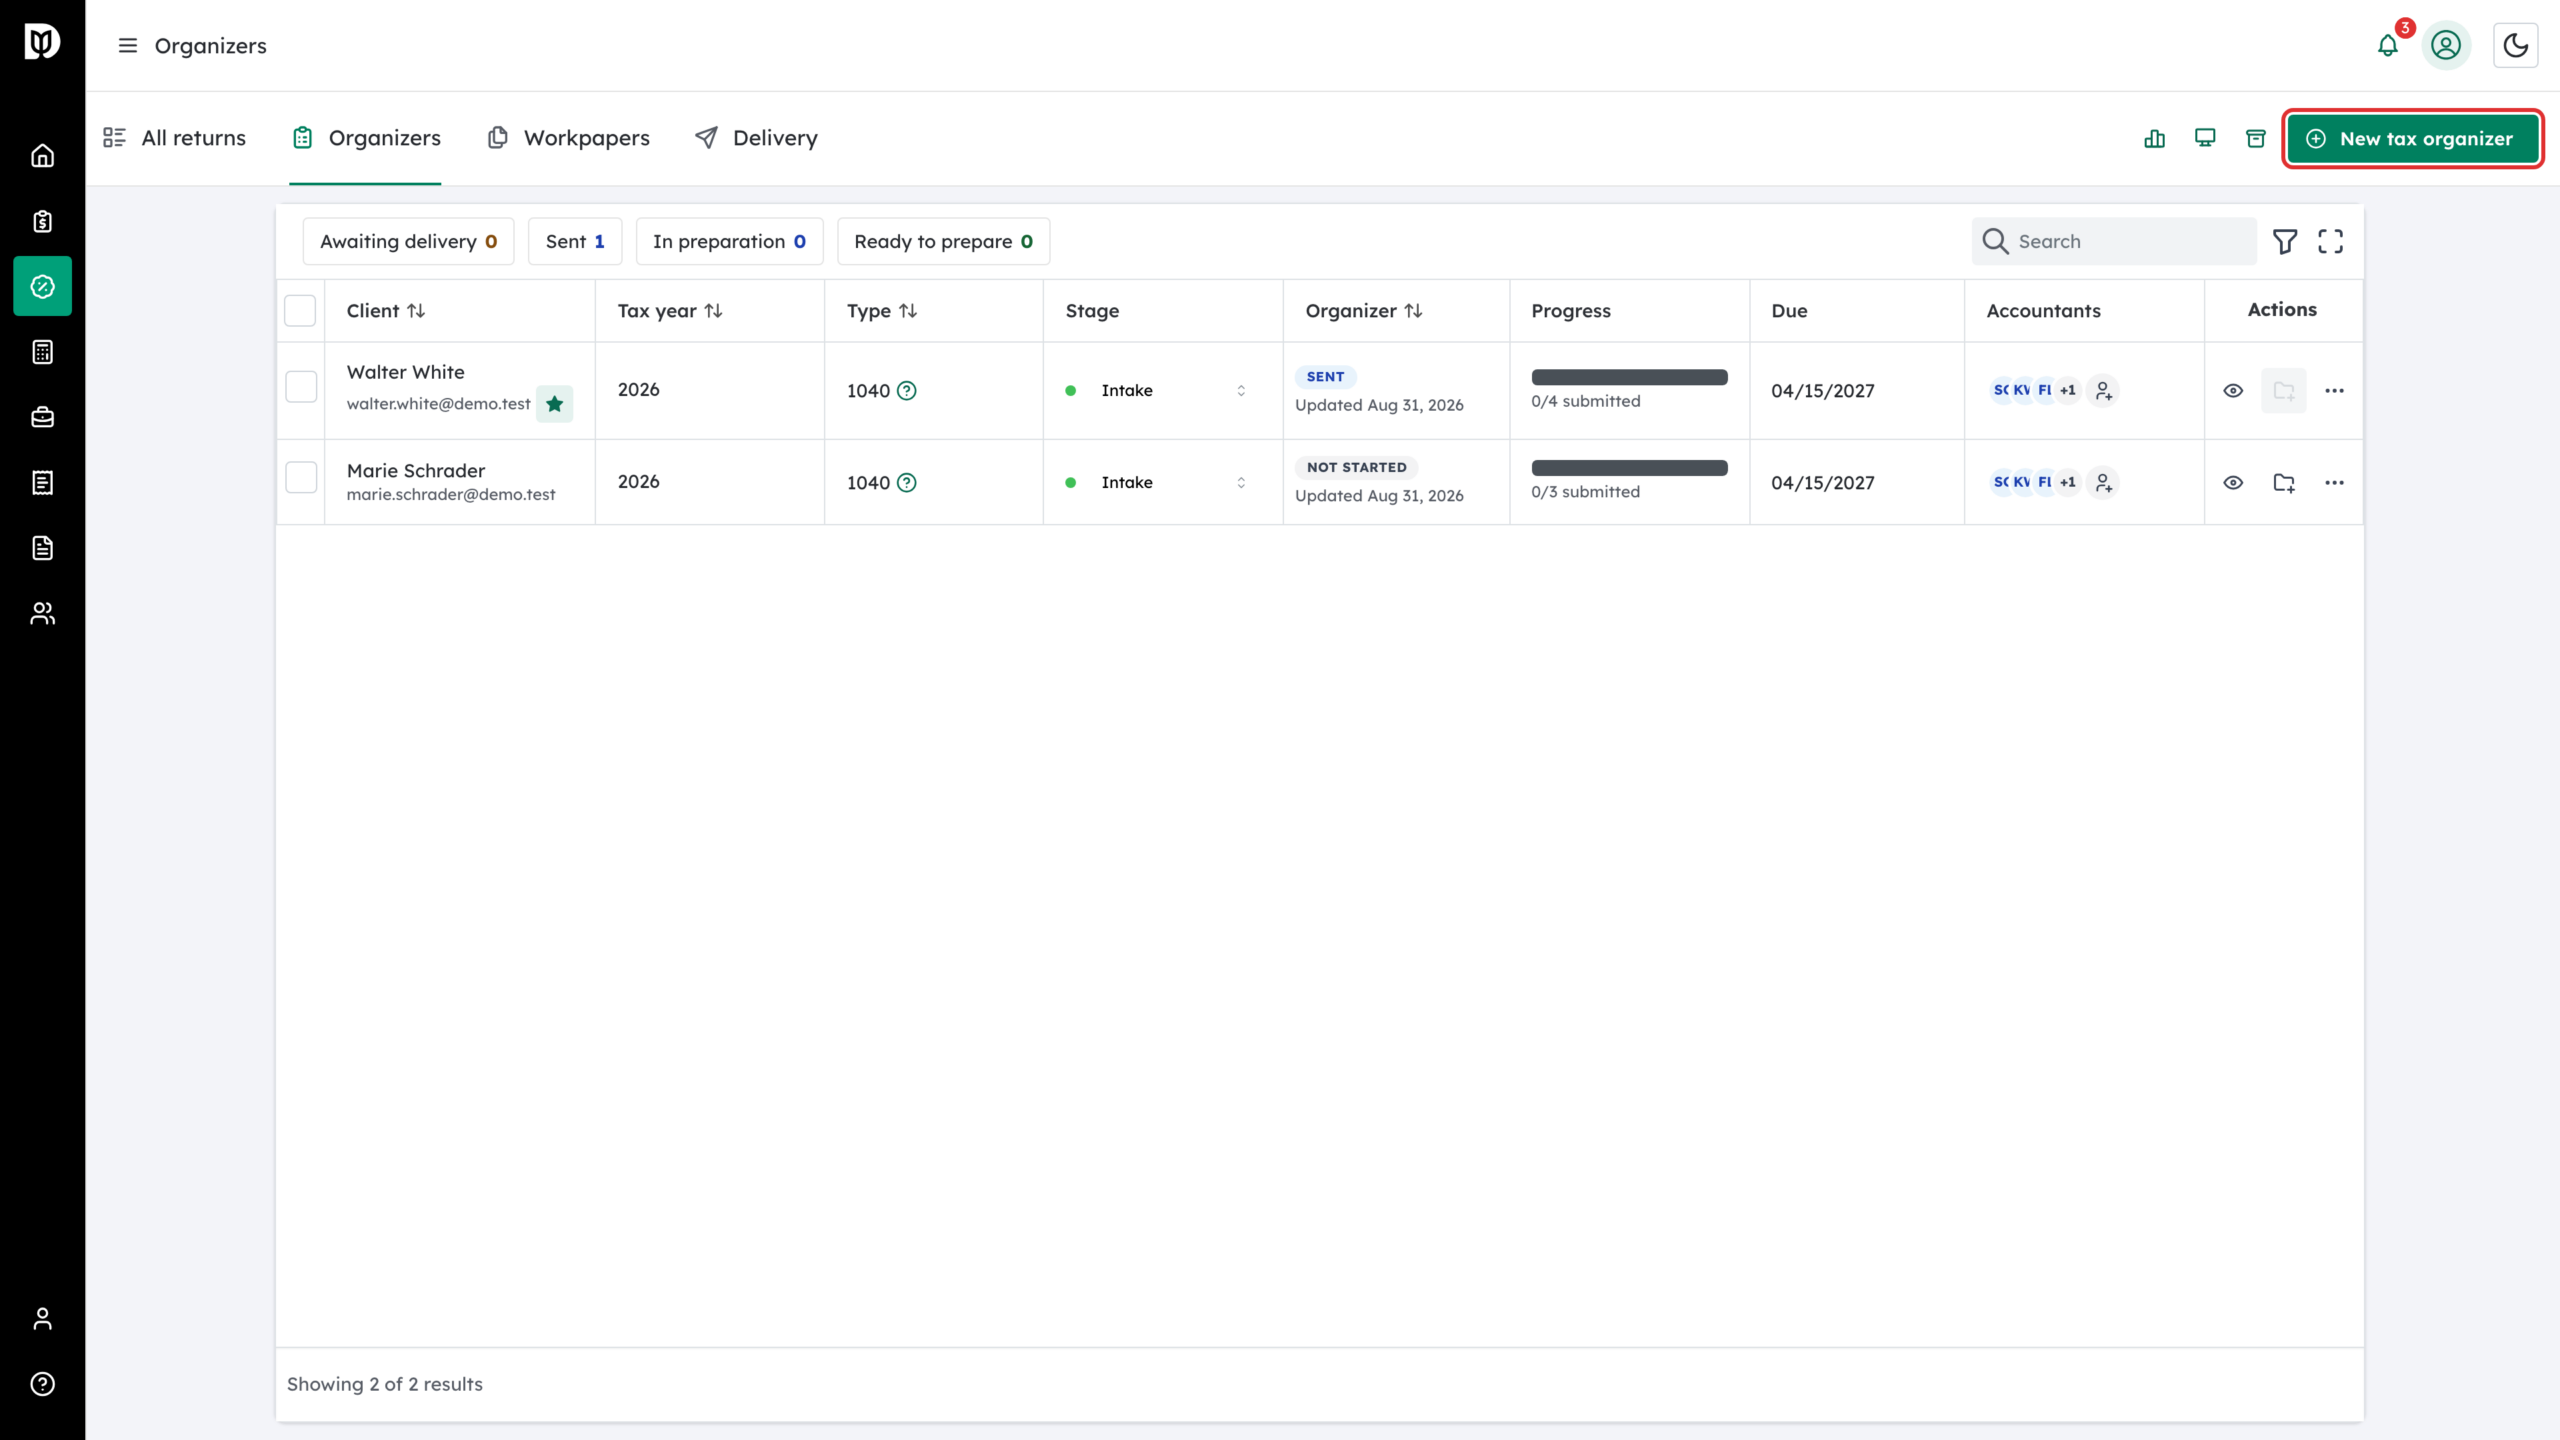
Click the green New tax organizer button at the top right of the Organizers tab.
Step 3: Choose One by one
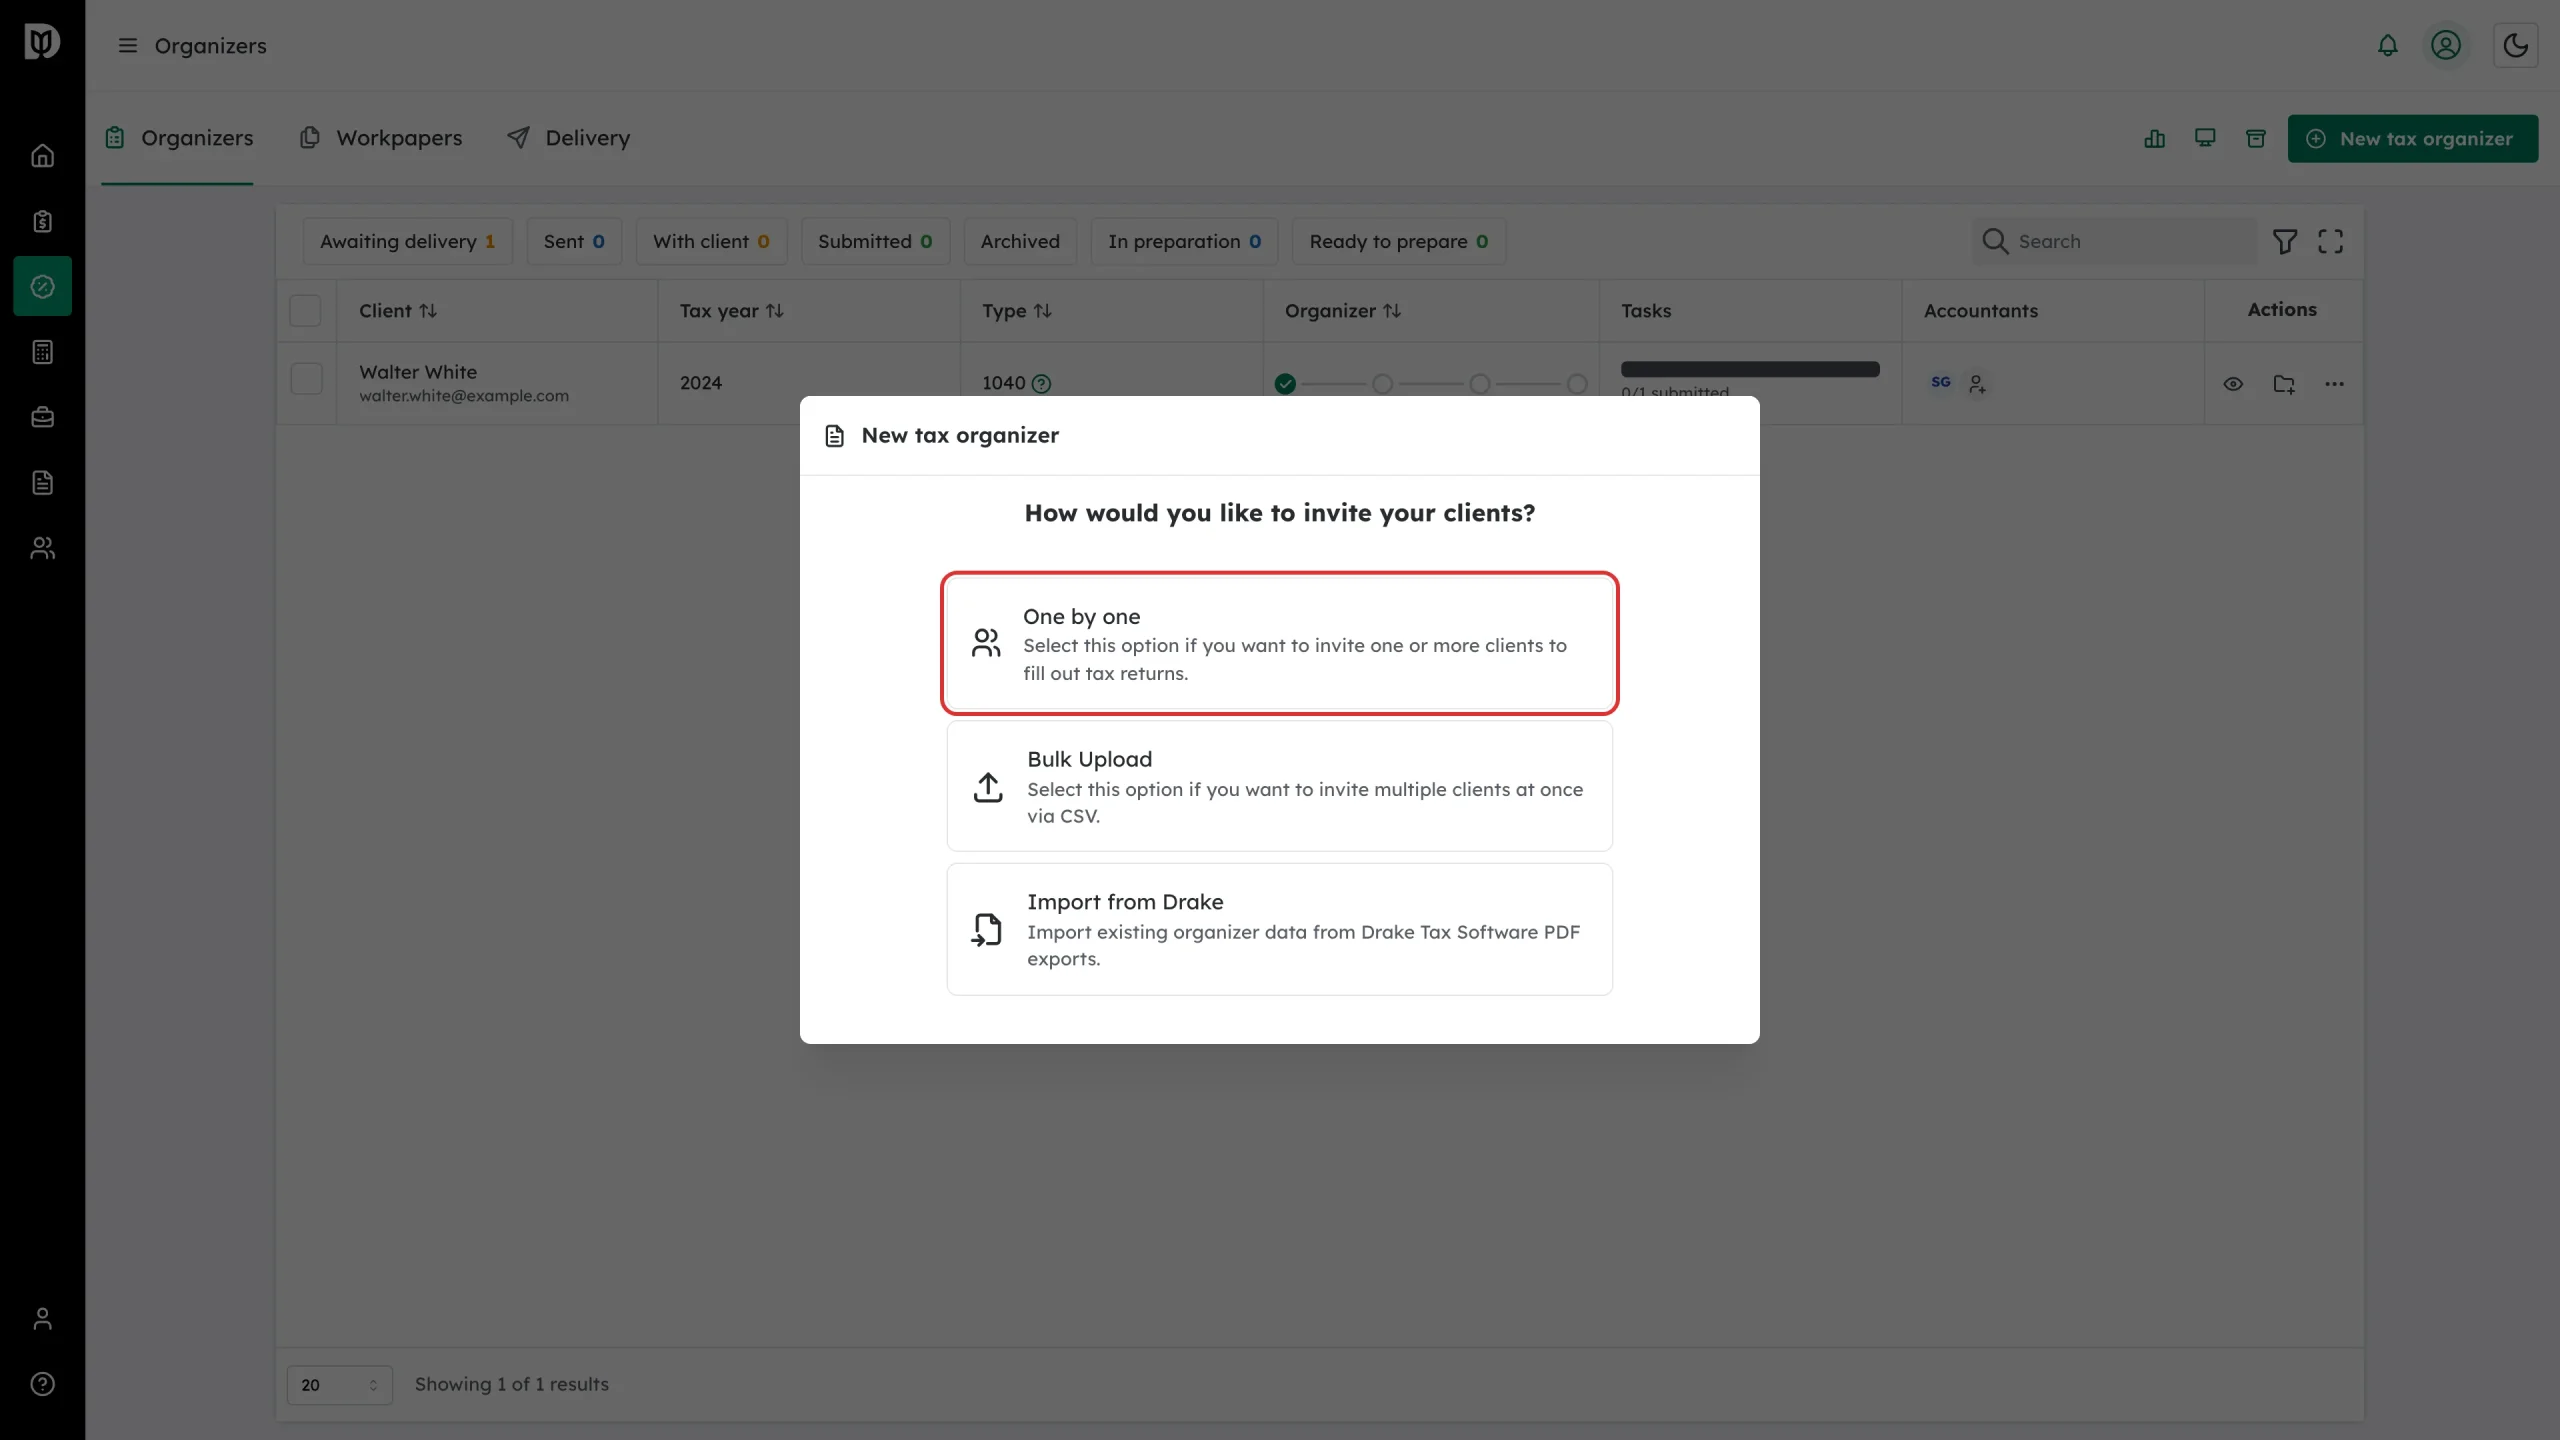
The modal asks how you would like to invite your clients. Pick One by one to set up an organizer for a single client. Bulk Upload invites many clients from a CSV, and Import from Drake reads Drake Tax Software PDF exports.
Step 4: Select the tax year
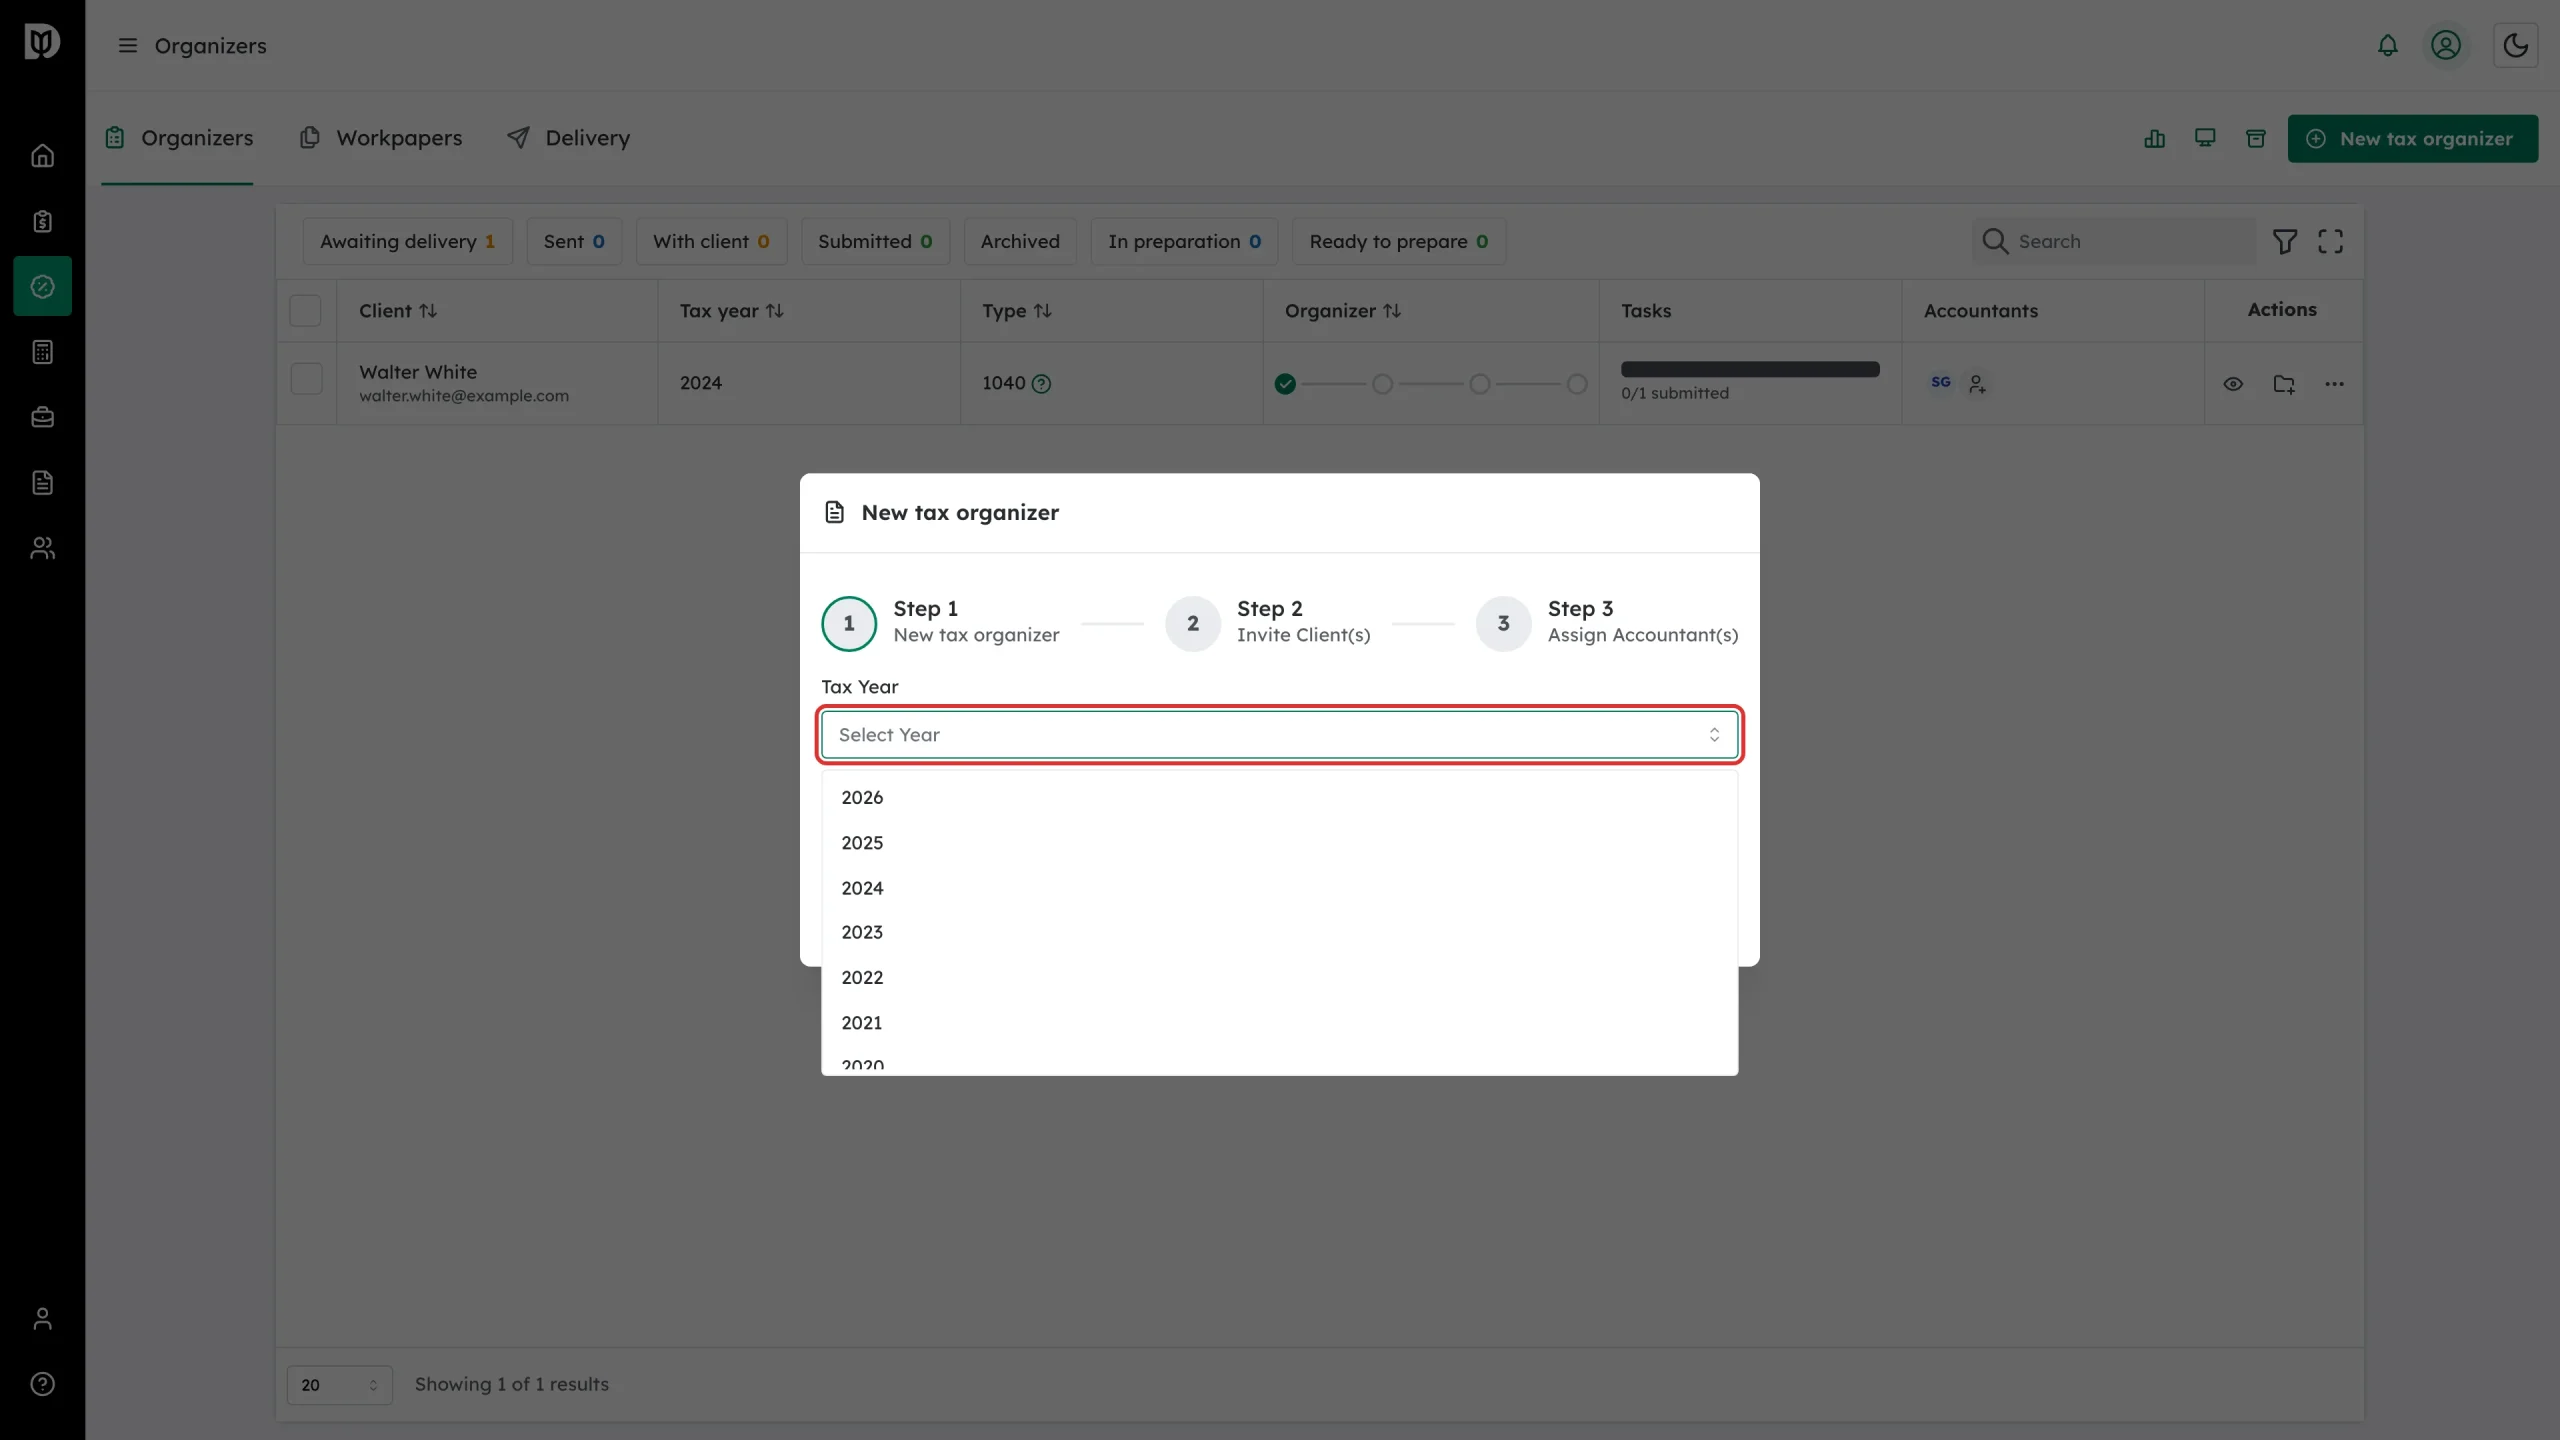
In Step 1 of the wizard, open the Tax year dropdown and pick the year you are preparing, for example 2025.
Step 5: Select the return type
Open the Return type dropdown and pick the IRS form your client files: 1040 for individuals, 1120 for C corporations, 1120s for S corporations, or 1065 for partnerships. Then click Next.

Step 6: Add the client
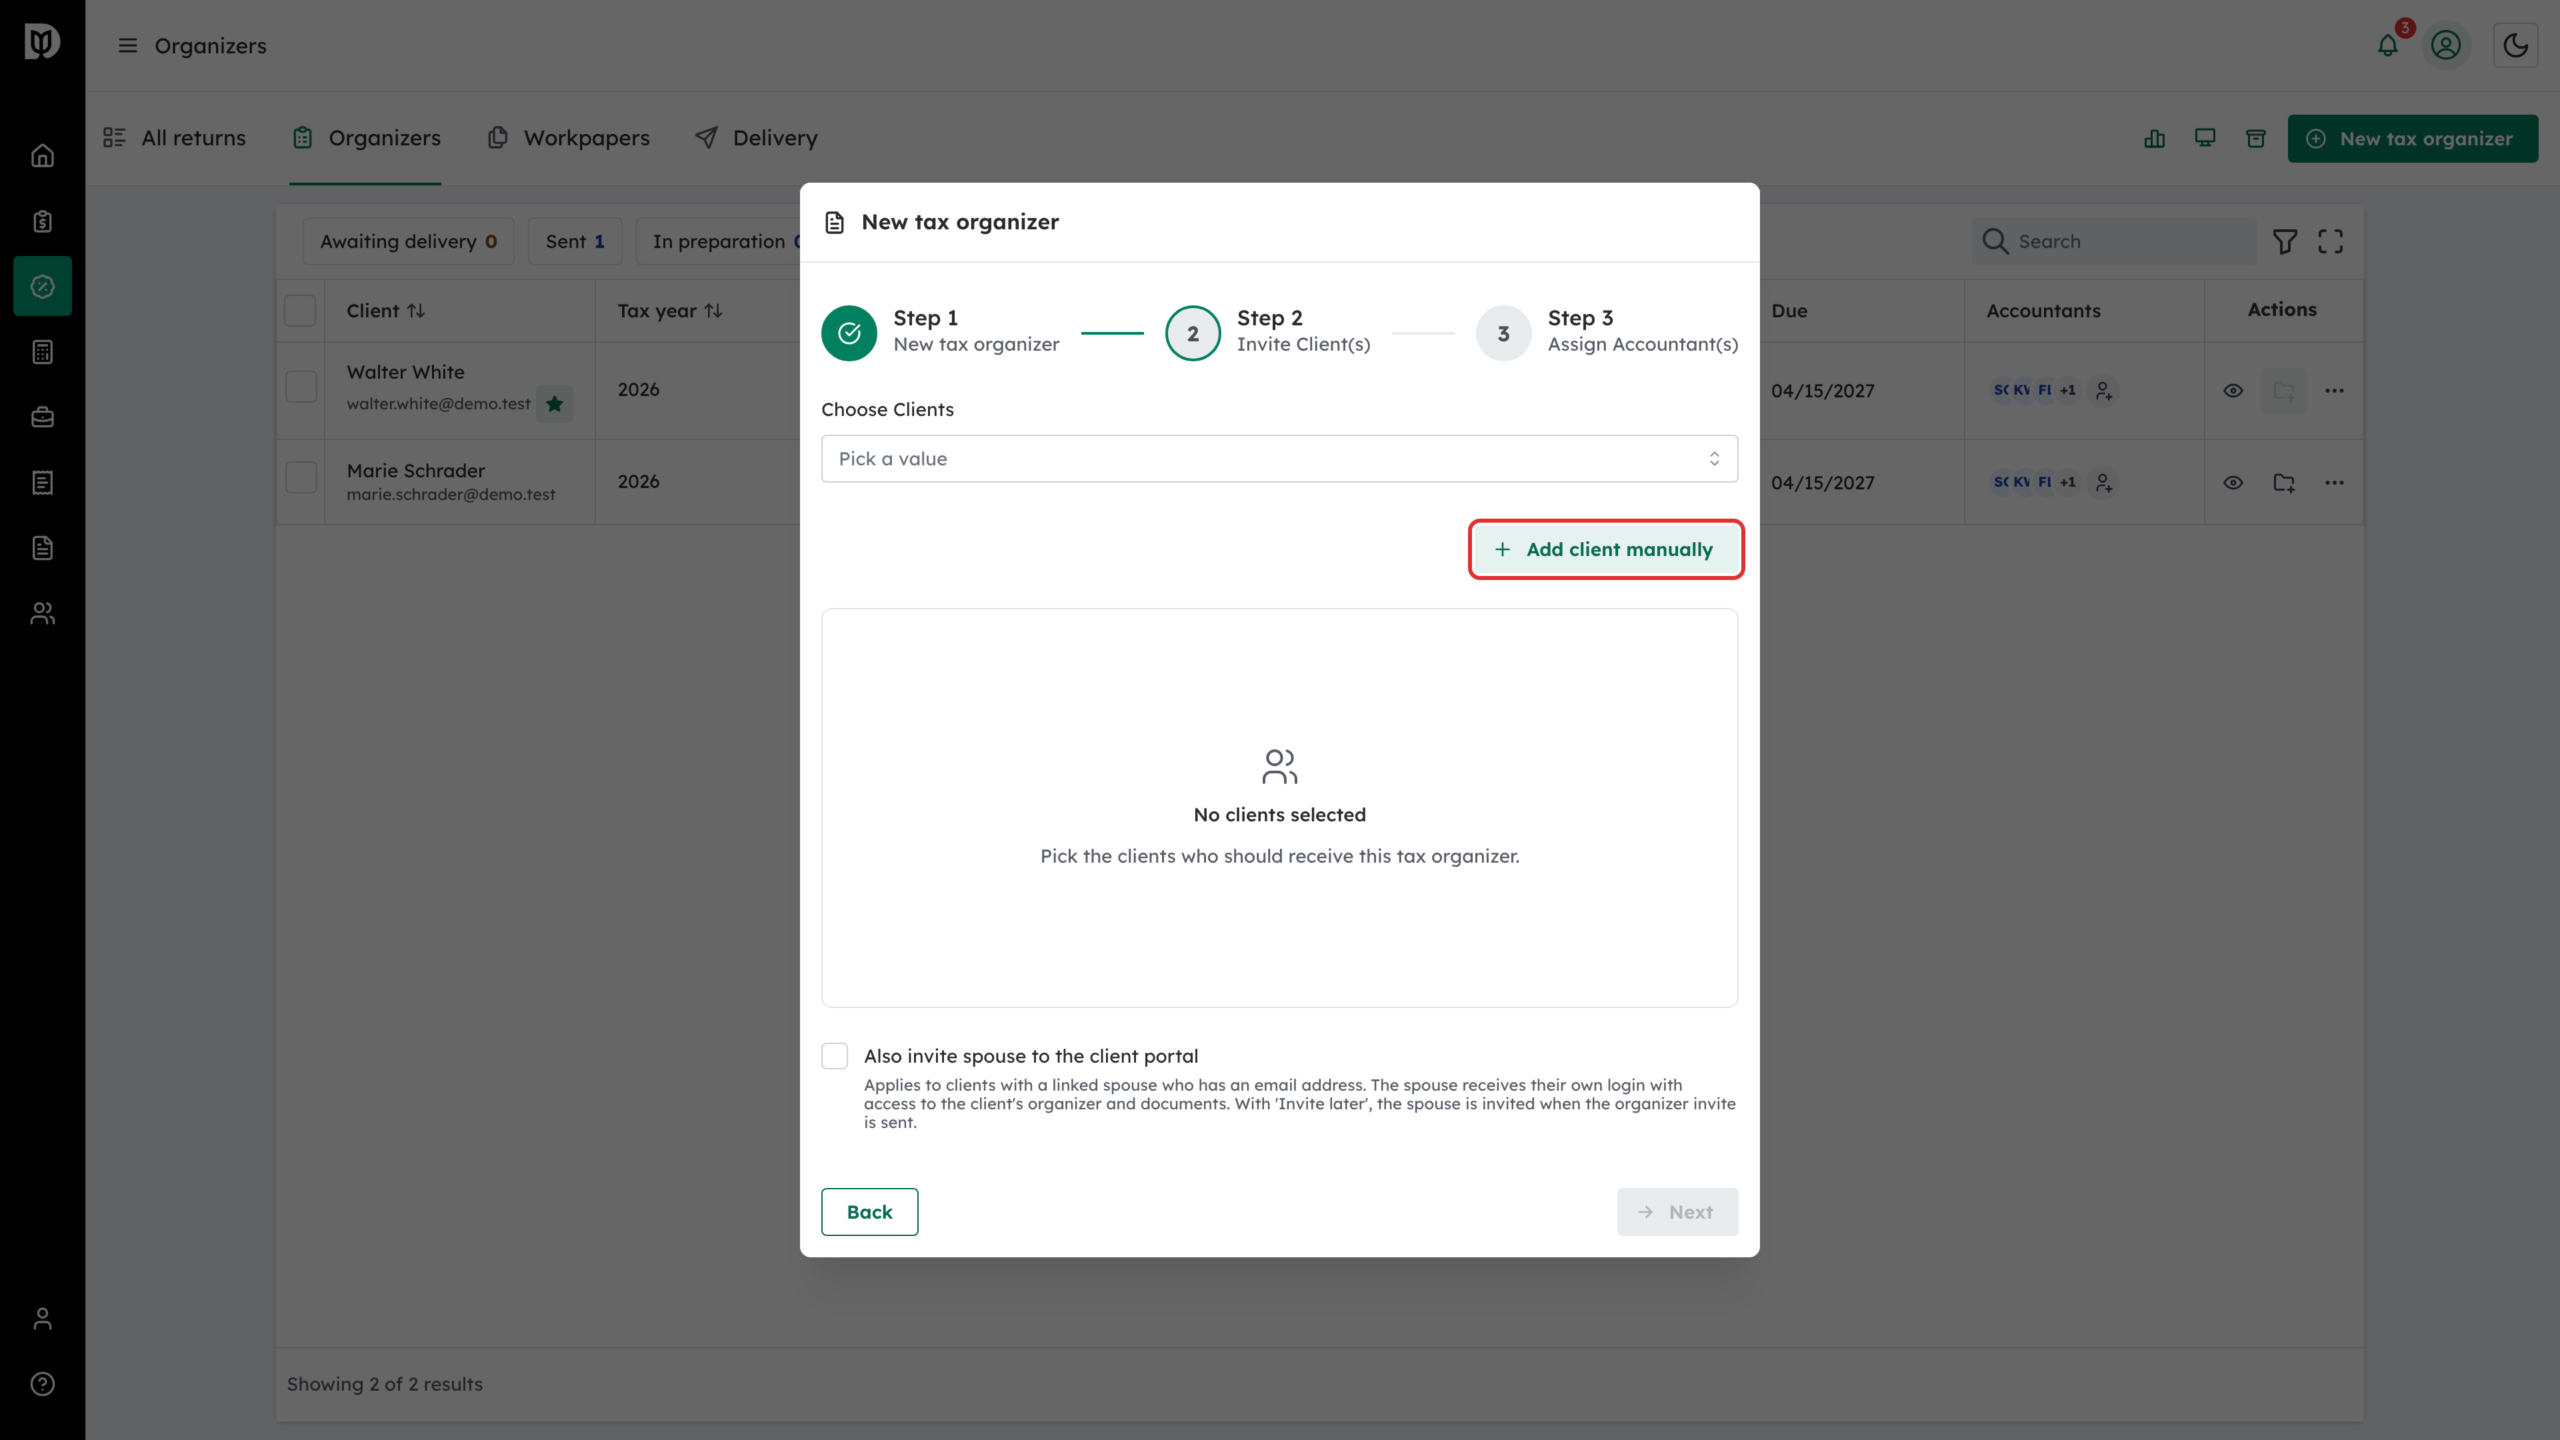
In Step 2 (Invite Client(s)), pick an existing client from the Choose Clients dropdown, or click Add client manually to create a new one.
Step 7: Enter the client’s details
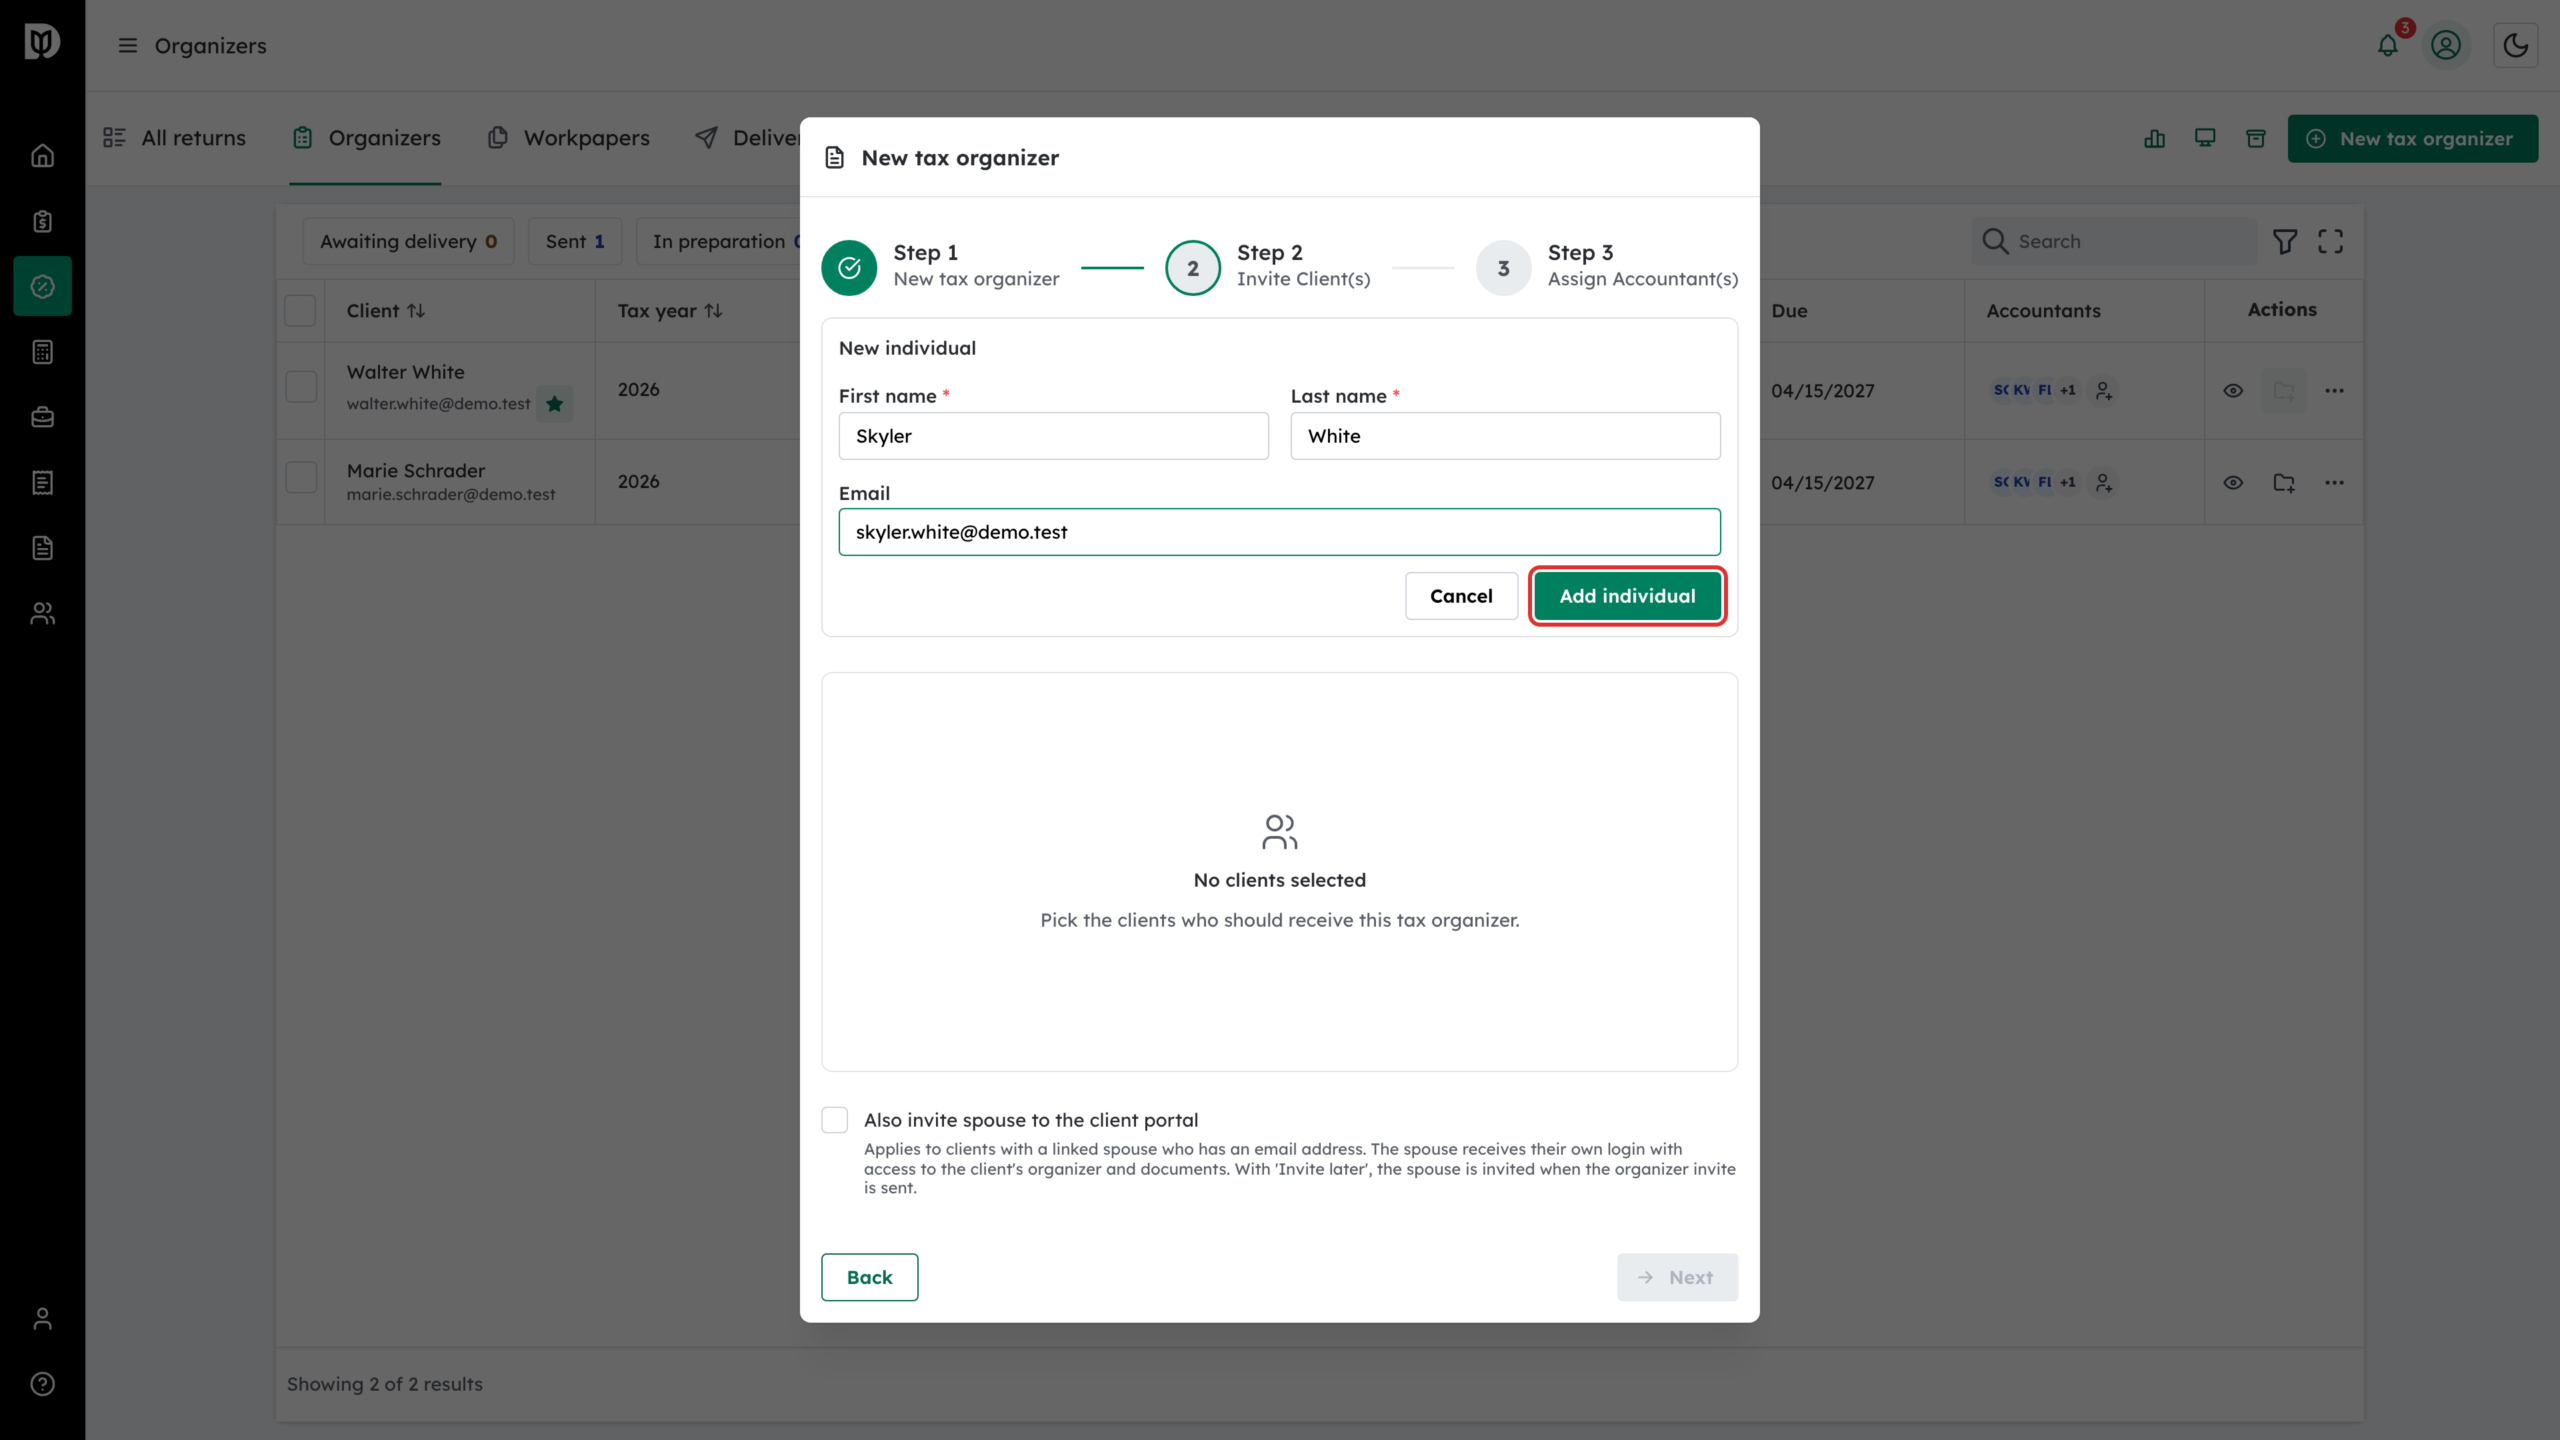
For an individual return, the New individual form asks for First name, Last name and Email. Click Add individual. Double-check the email — the invitation goes there, and a client with no email cannot be sent an organizer. Owners, admins and managers can add more than one client to send the same organizer to several people.
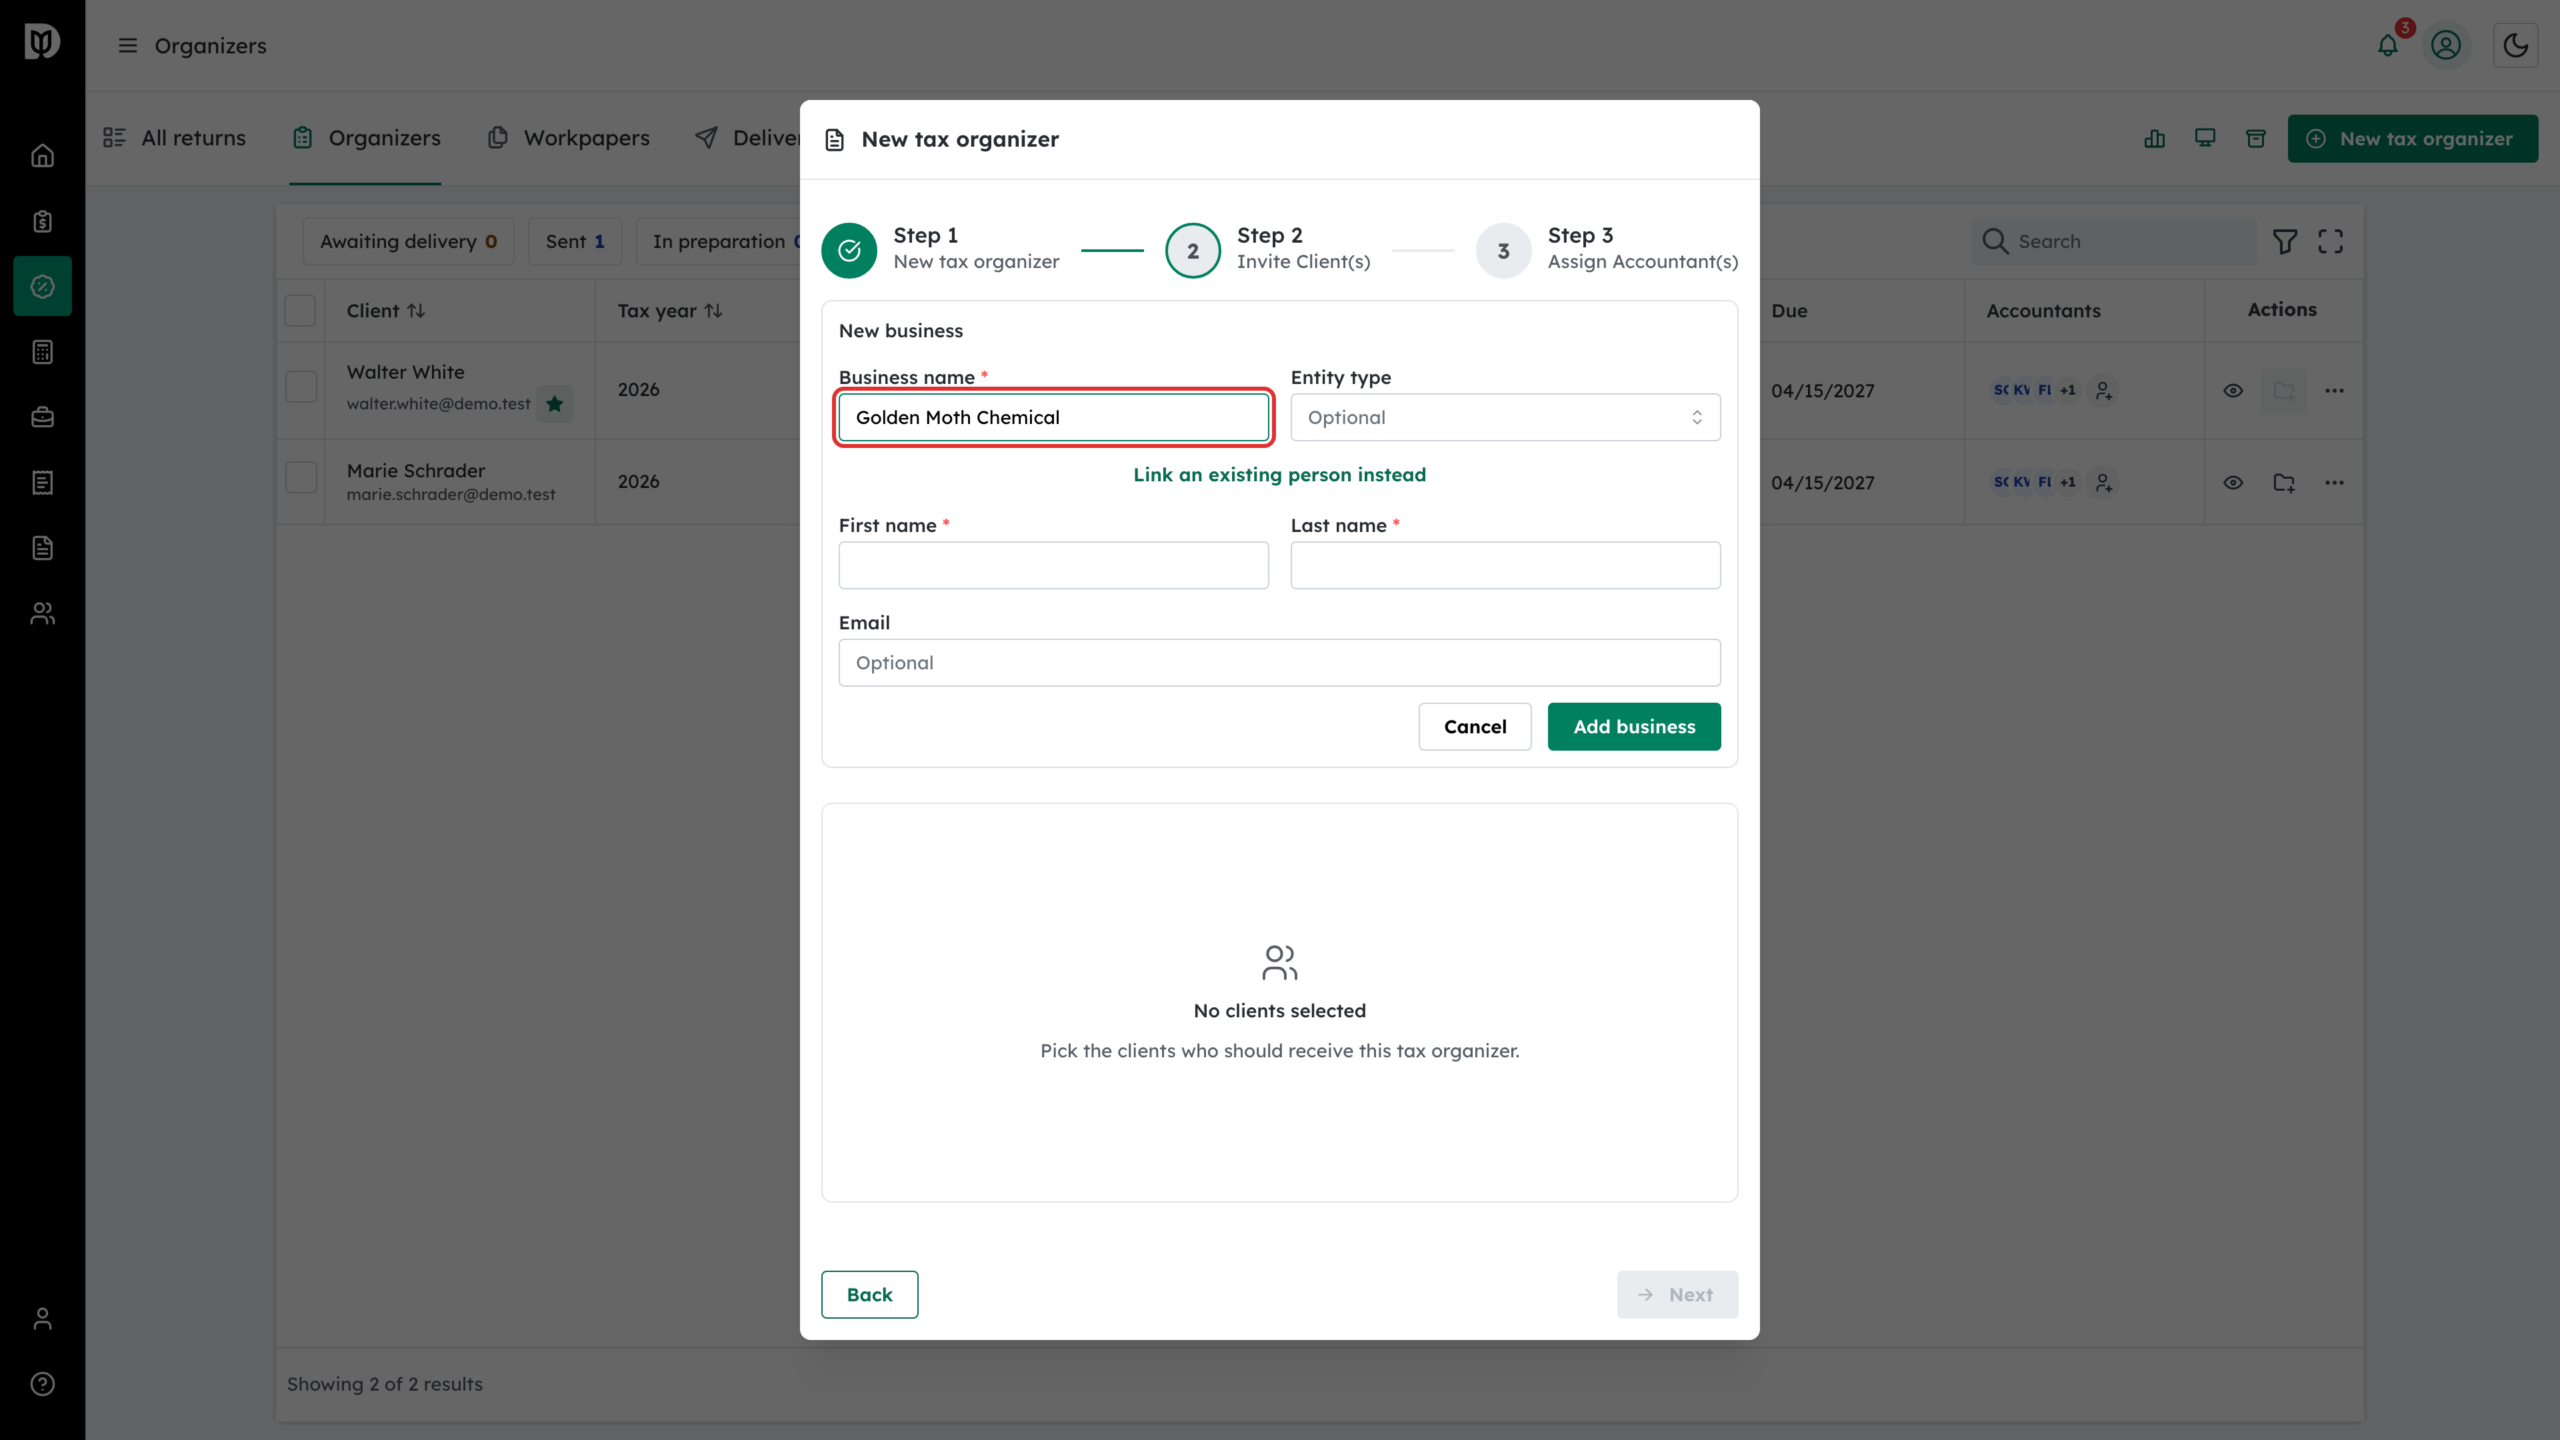
For an 1120, 1120s or 1065 return, the New business form asks for the Business name and an optional Entity type, then the business’s contact person: enter their first name, last name and email, or click Link an existing person instead to pick an individual contact you already have. Click Add business. The invitation goes to the contact person’s email.
Step 8: Assign accountants (optional)
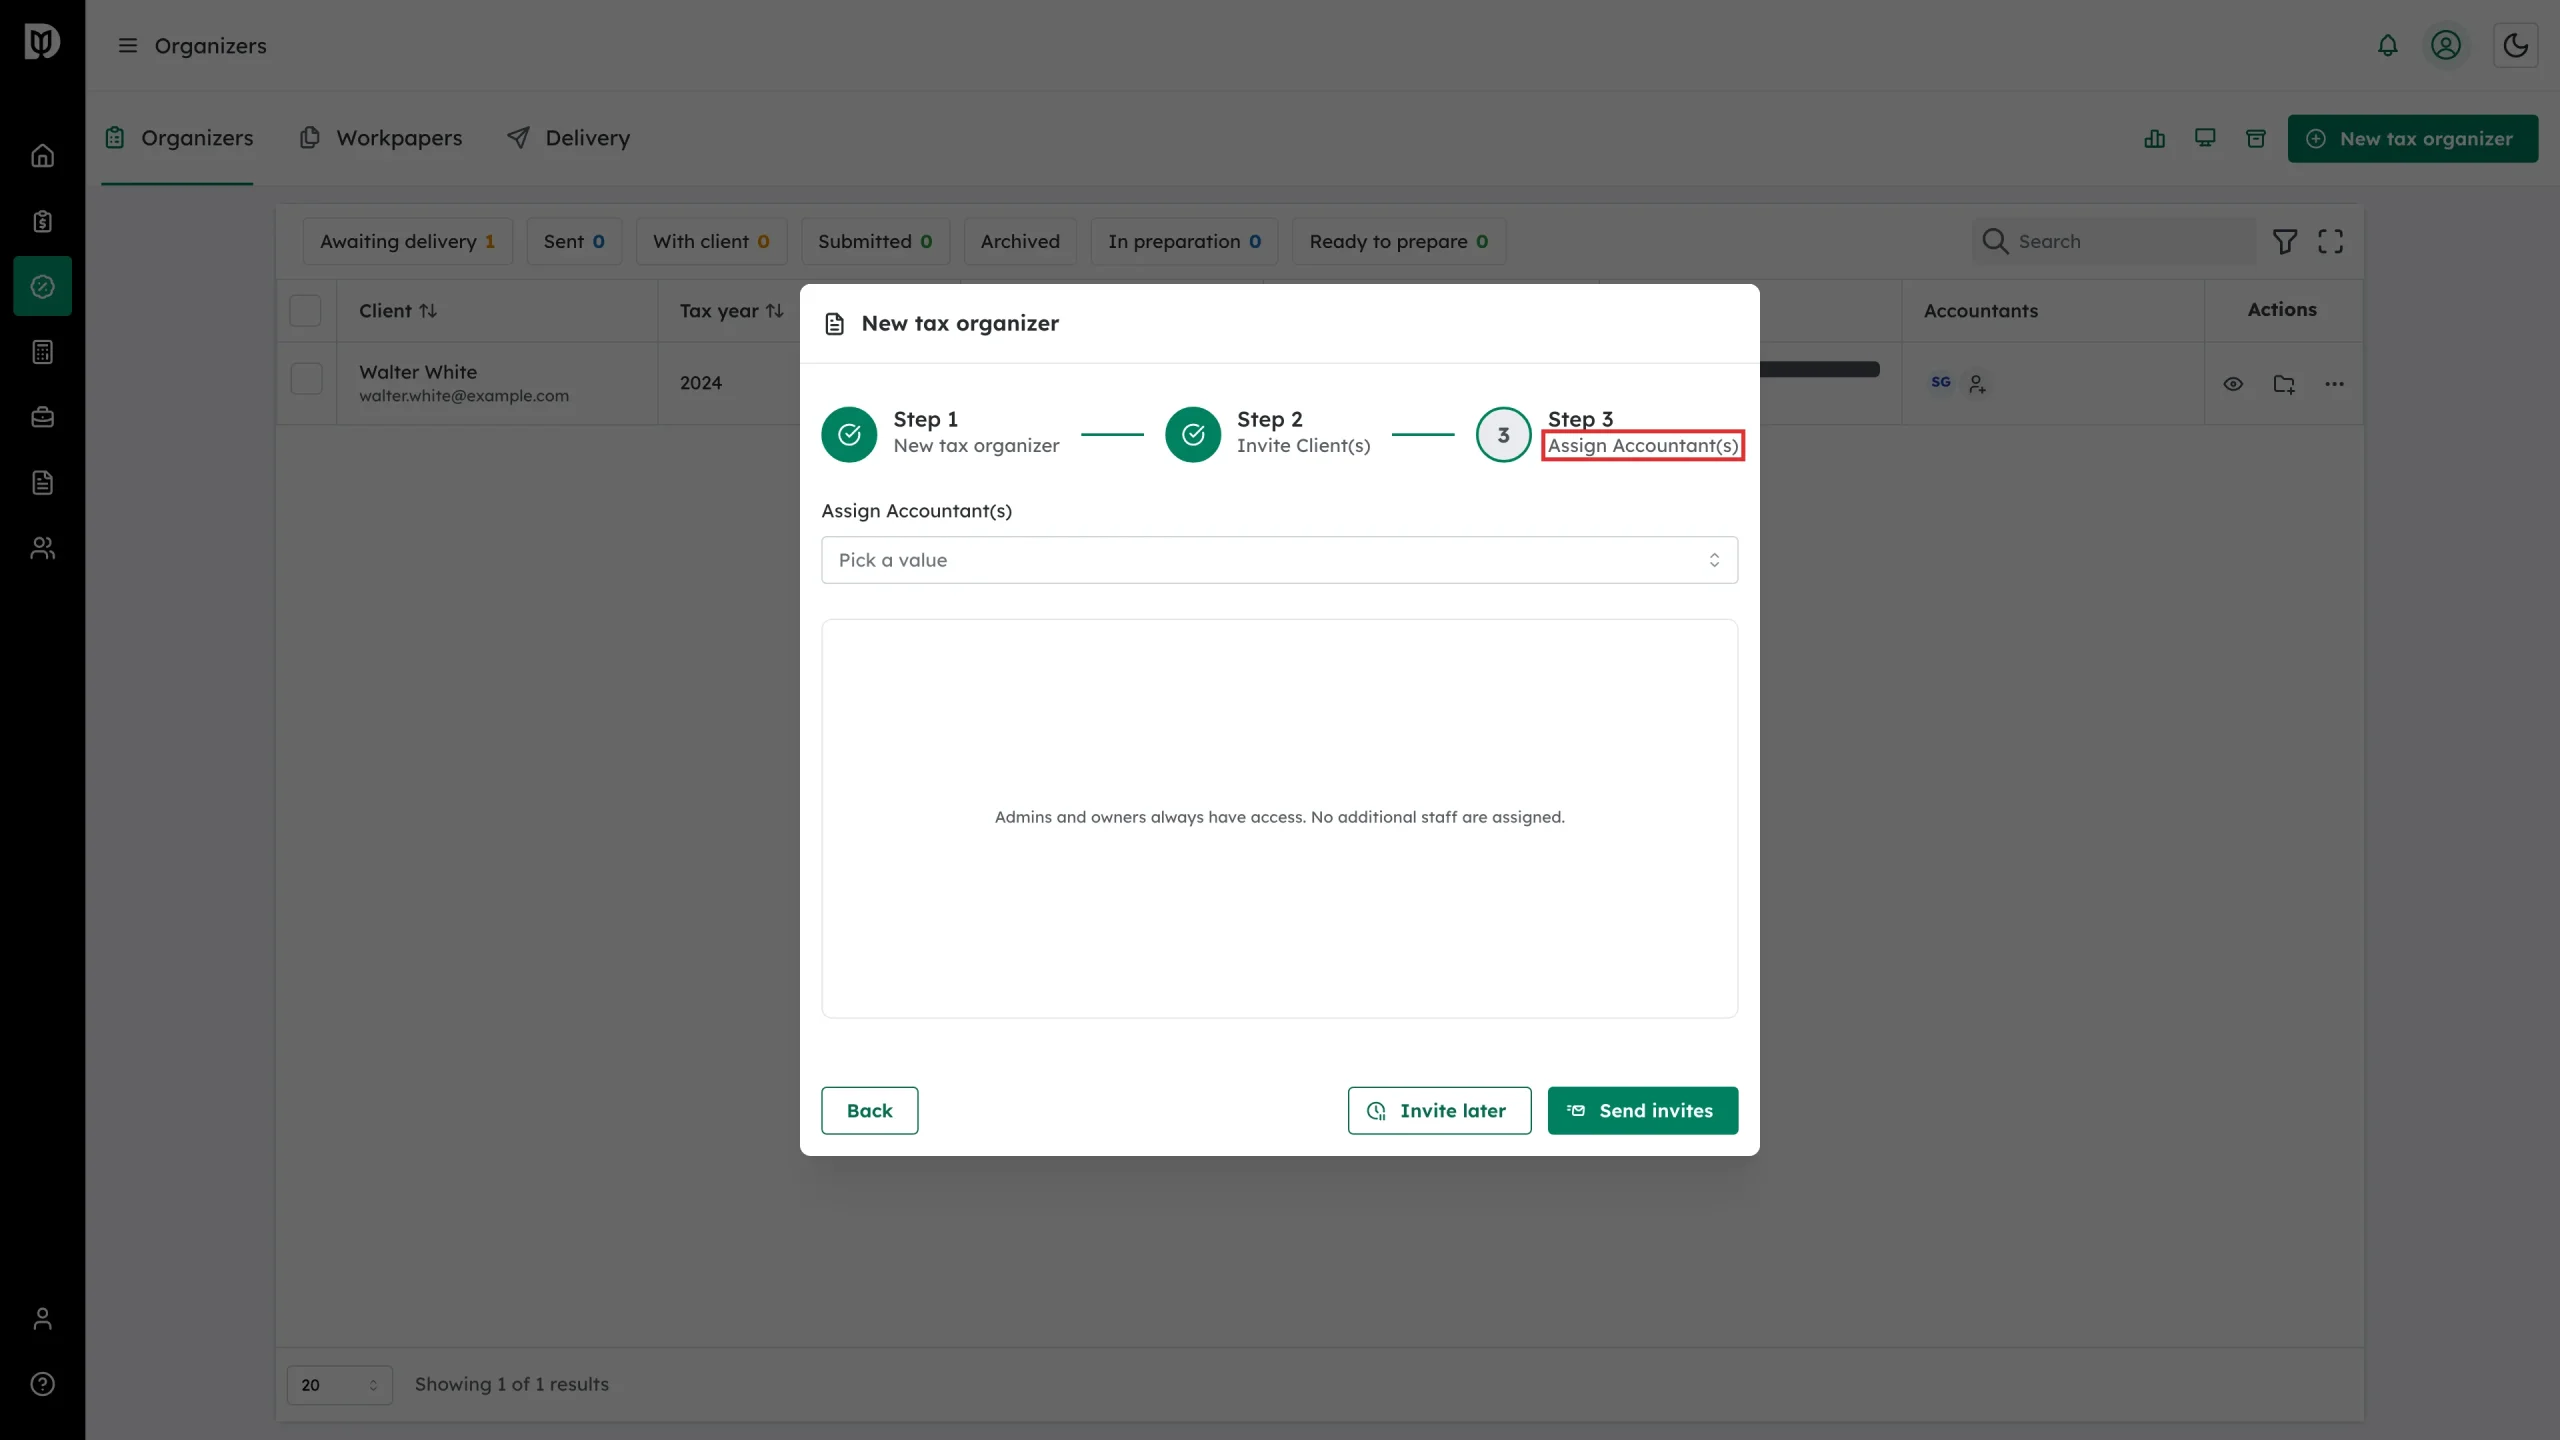
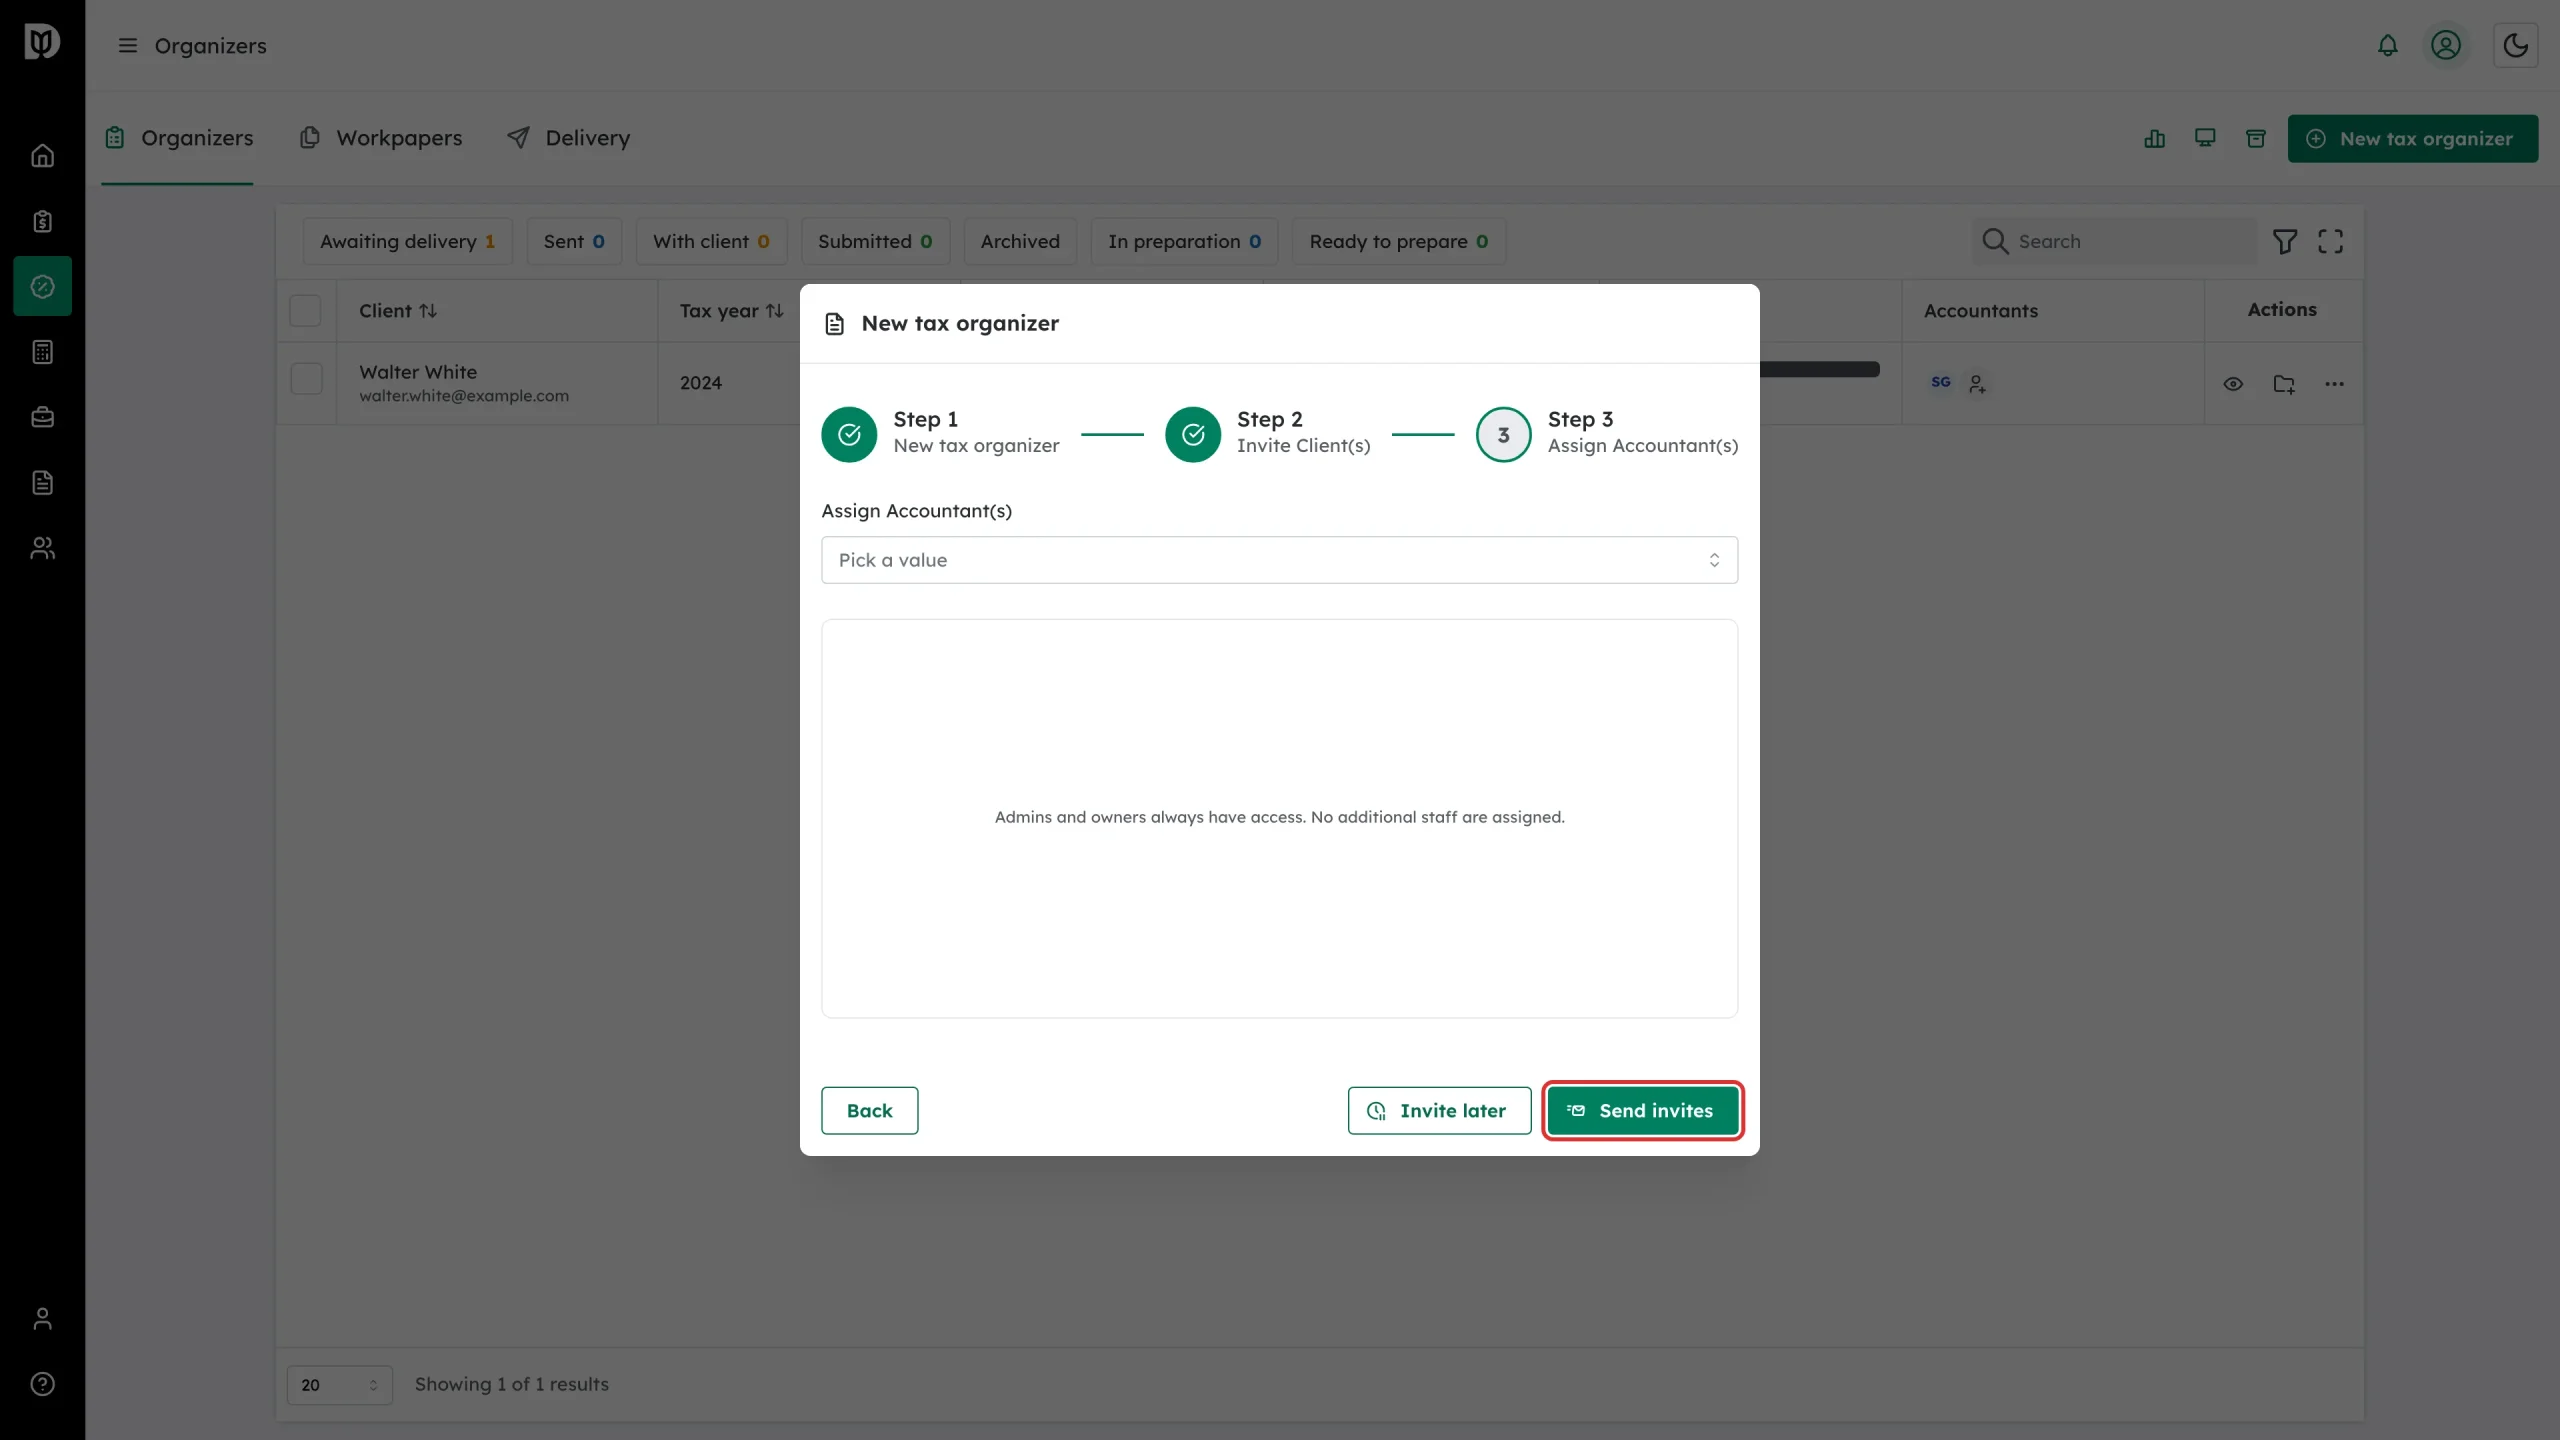
Click Next. In Step 3 (Assign Accountant(s)), you can pick team members who should manage this organizer. You can skip this — admins and owners always have access.
Step 9: Send the invitation
Click Send invites to email the client now, or Invite later to create the organizer without emailing anyone yet. Organizers created with Invite later sit in Awaiting delivery until you send the invite from the row’s actions menu.
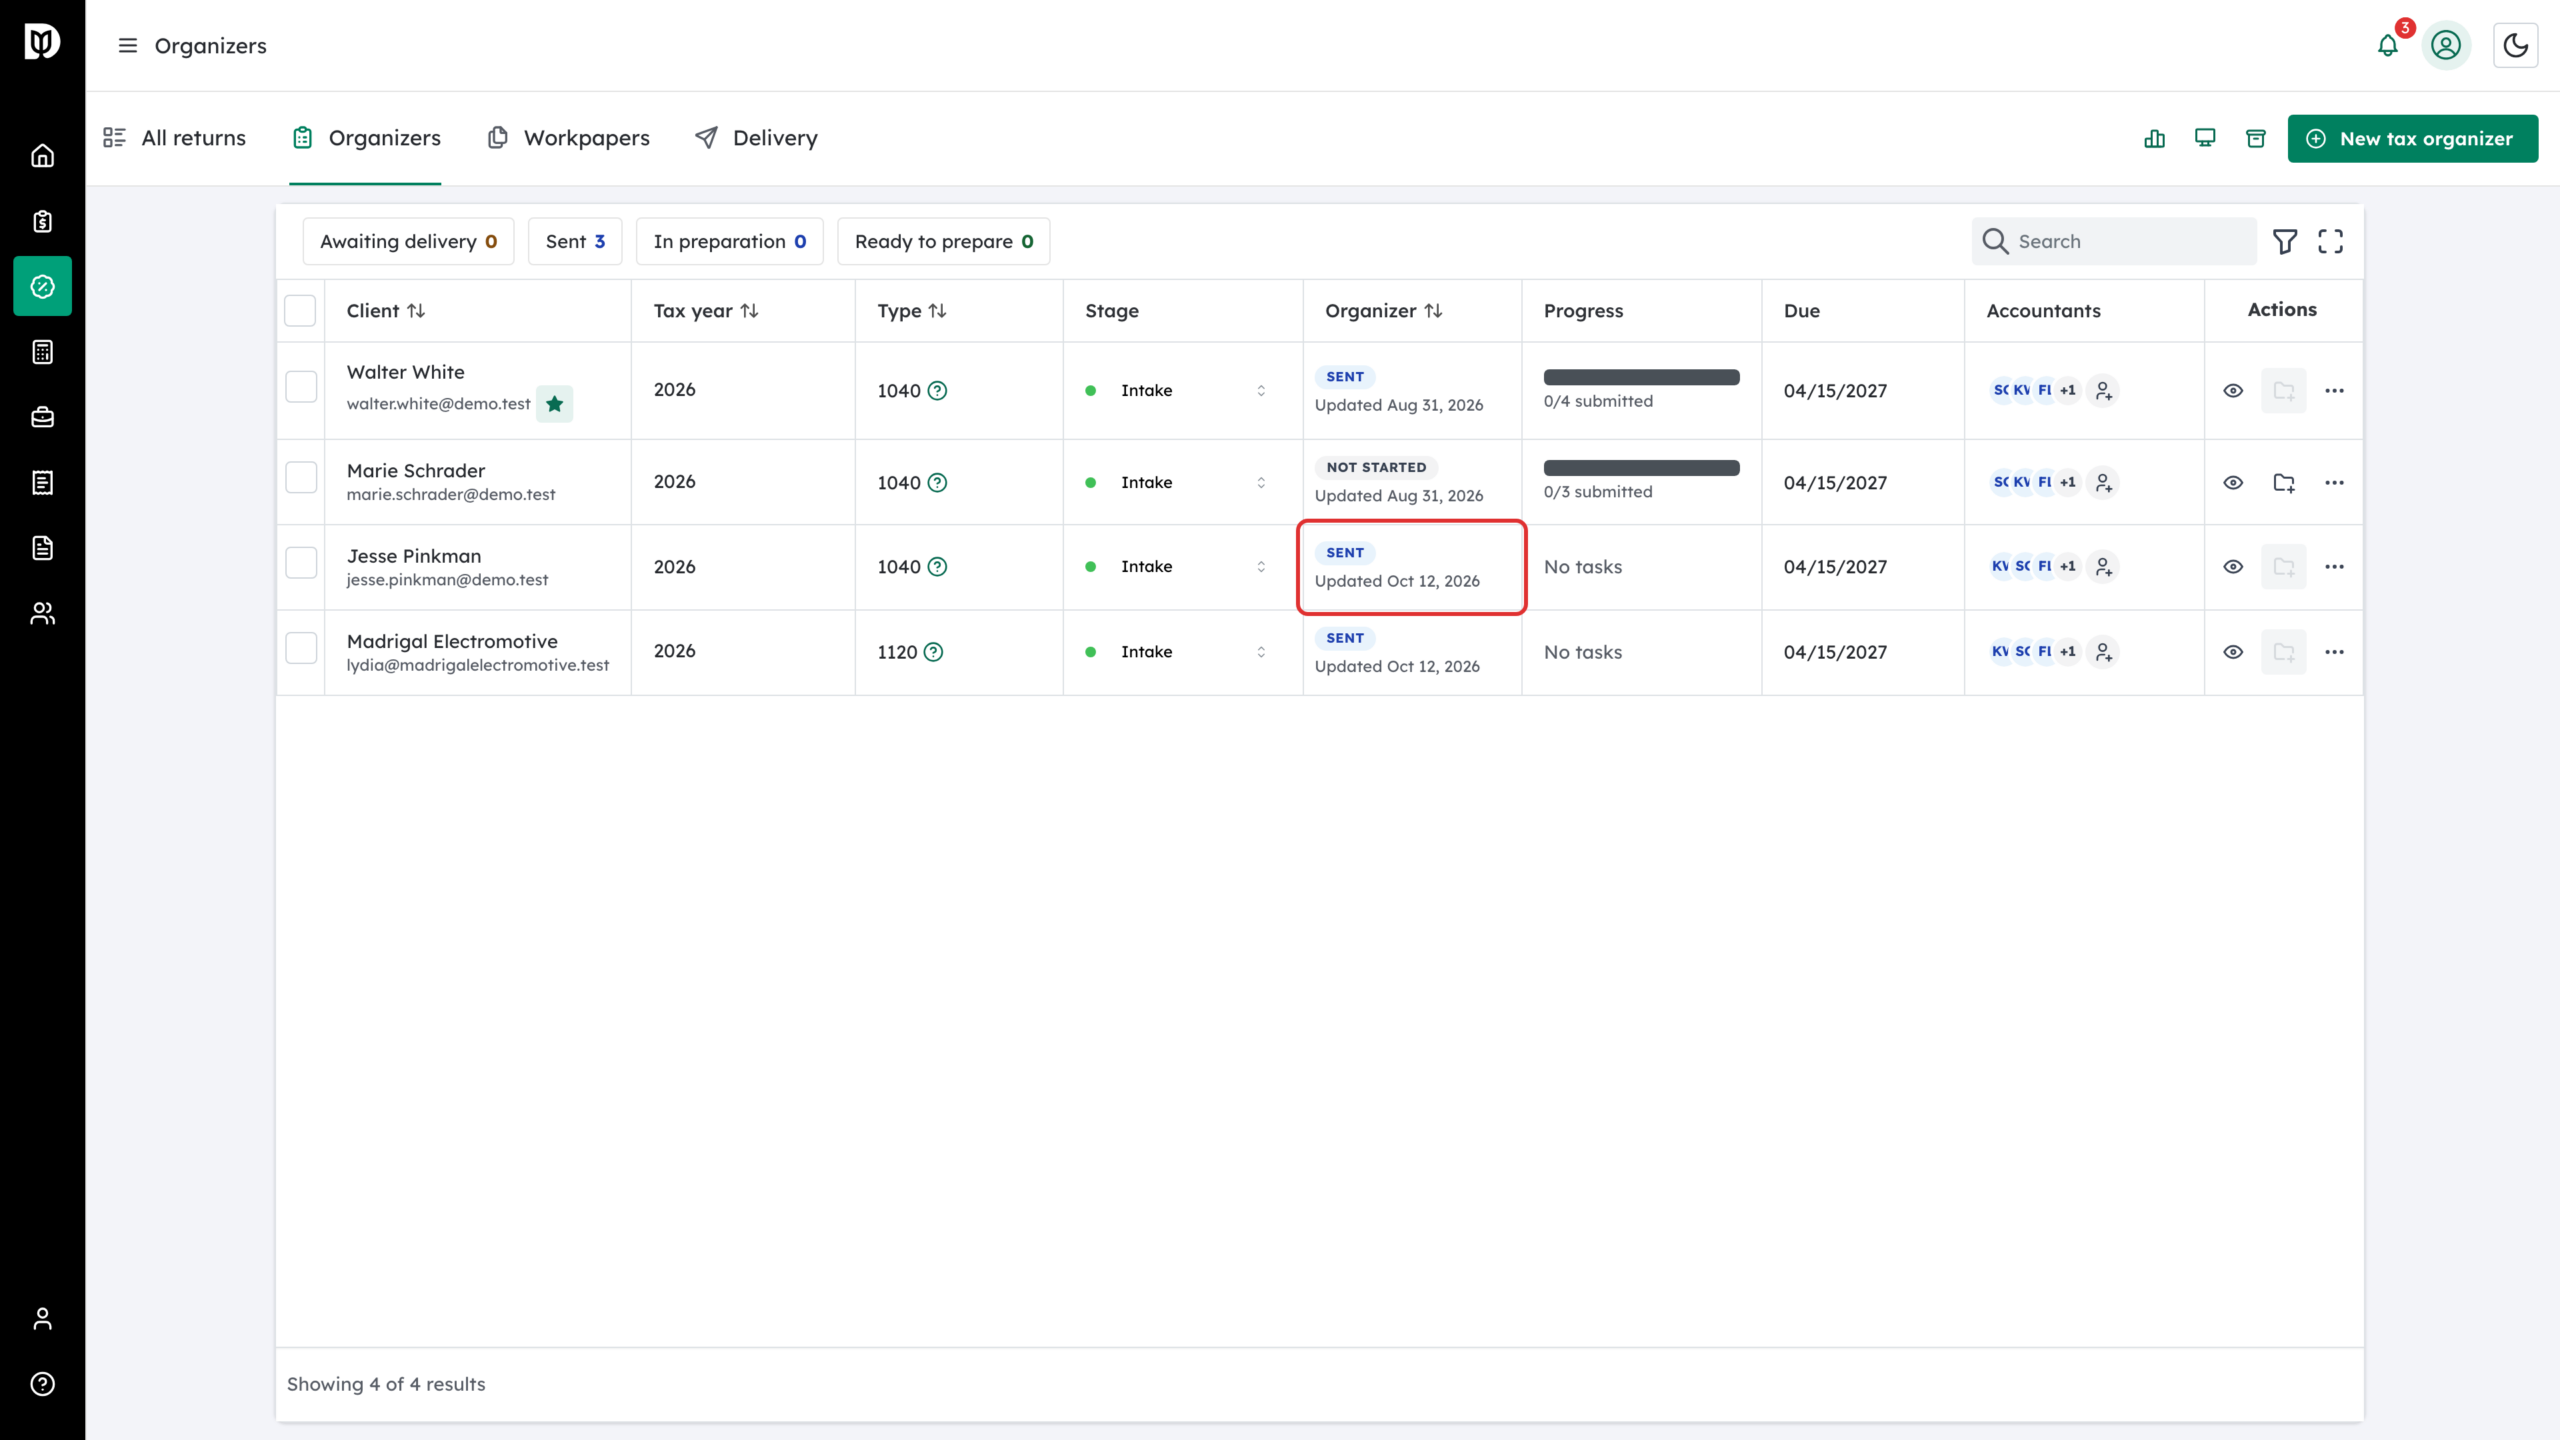
Step 10: Check the new row
The organizer appears in the list. The Organizer column shows its status: Awaiting delivery, Sent, With client or Submitted.
Returning clients: answers carry forward
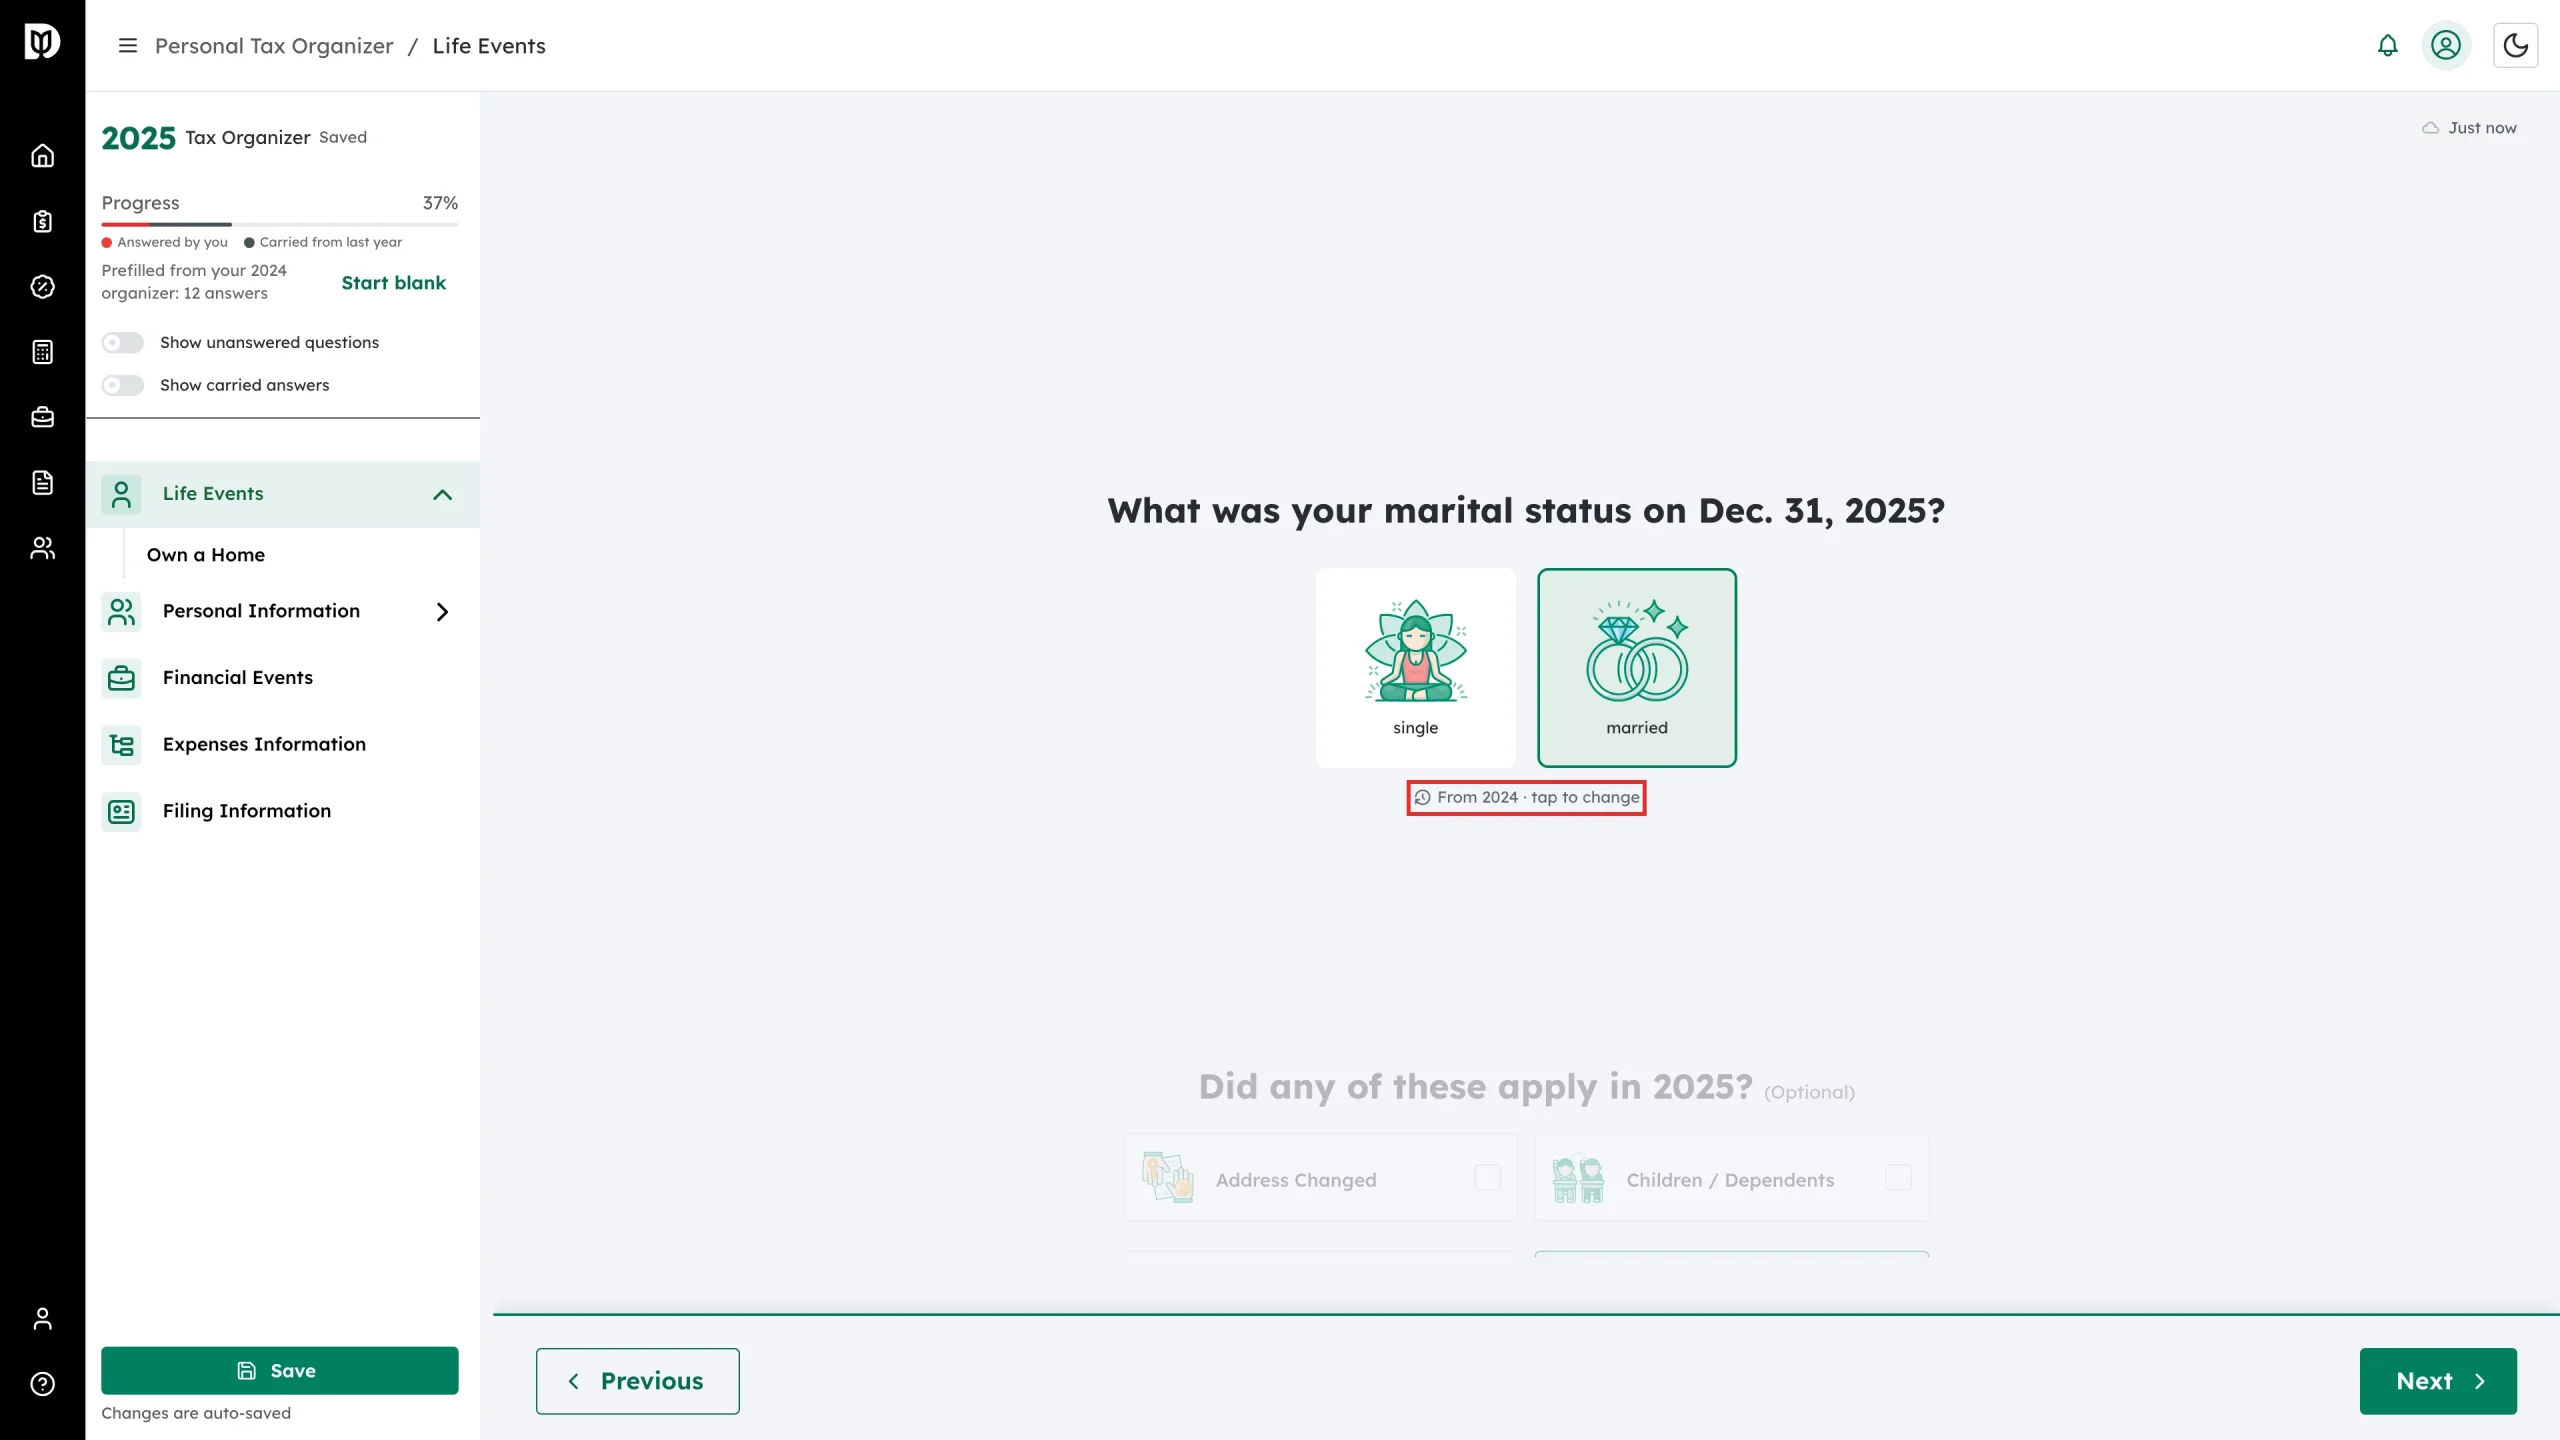
If the same client had an organizer for the previous year, the new one starts pre-filled. Stable answers (marital status, occupation, contact details, and similar) are copied in and marked with a From 2024 · tap to change badge. Per-year amounts are never copied — instead a hint like “No last year” shows what the client answered before. The sidebar shows how many answers were pre-filled, a Show carried answers toggle, and a Start blank link that clears everything carried over.
What happens next
The client receives an Organizer Invitation email with a link to create their portal account and open the organizer. Their answers auto-save as they go, and the row’s status moves to With client and then Submitted. Once they submit, their answers generate a document checklist you can review under Organizer tasks, and you can send everything to workpapers to start preparation.
Troubleshooting
- The client never got the email: open the row’s actions menu (⋯) and click Email reminder to resend the invitation, or use the magic-link button next to the client’s email to copy a sign-in link.
- A business contact with that email already exists: pick the business from the Choose Clients dropdown instead of adding it manually a second time.
- You picked the wrong year or type: delete the organizer from the actions menu and create a new one — the year and return type cannot be changed afterwards.