Who this is for: Anyone who tracks client work on a board.
What you’ll learn: How to add a job card for a client, set its due date, priority and assignees, and move it along the board.
Before you begin
- Pick the board you want the job to live on first — a card belongs to one board.
- The client must already exist as a contact, and that contact needs an email address. Contacts with no email cannot be used on a card.
- Only staff who have access to that board can be assigned to its cards.
Step-by-step instructions
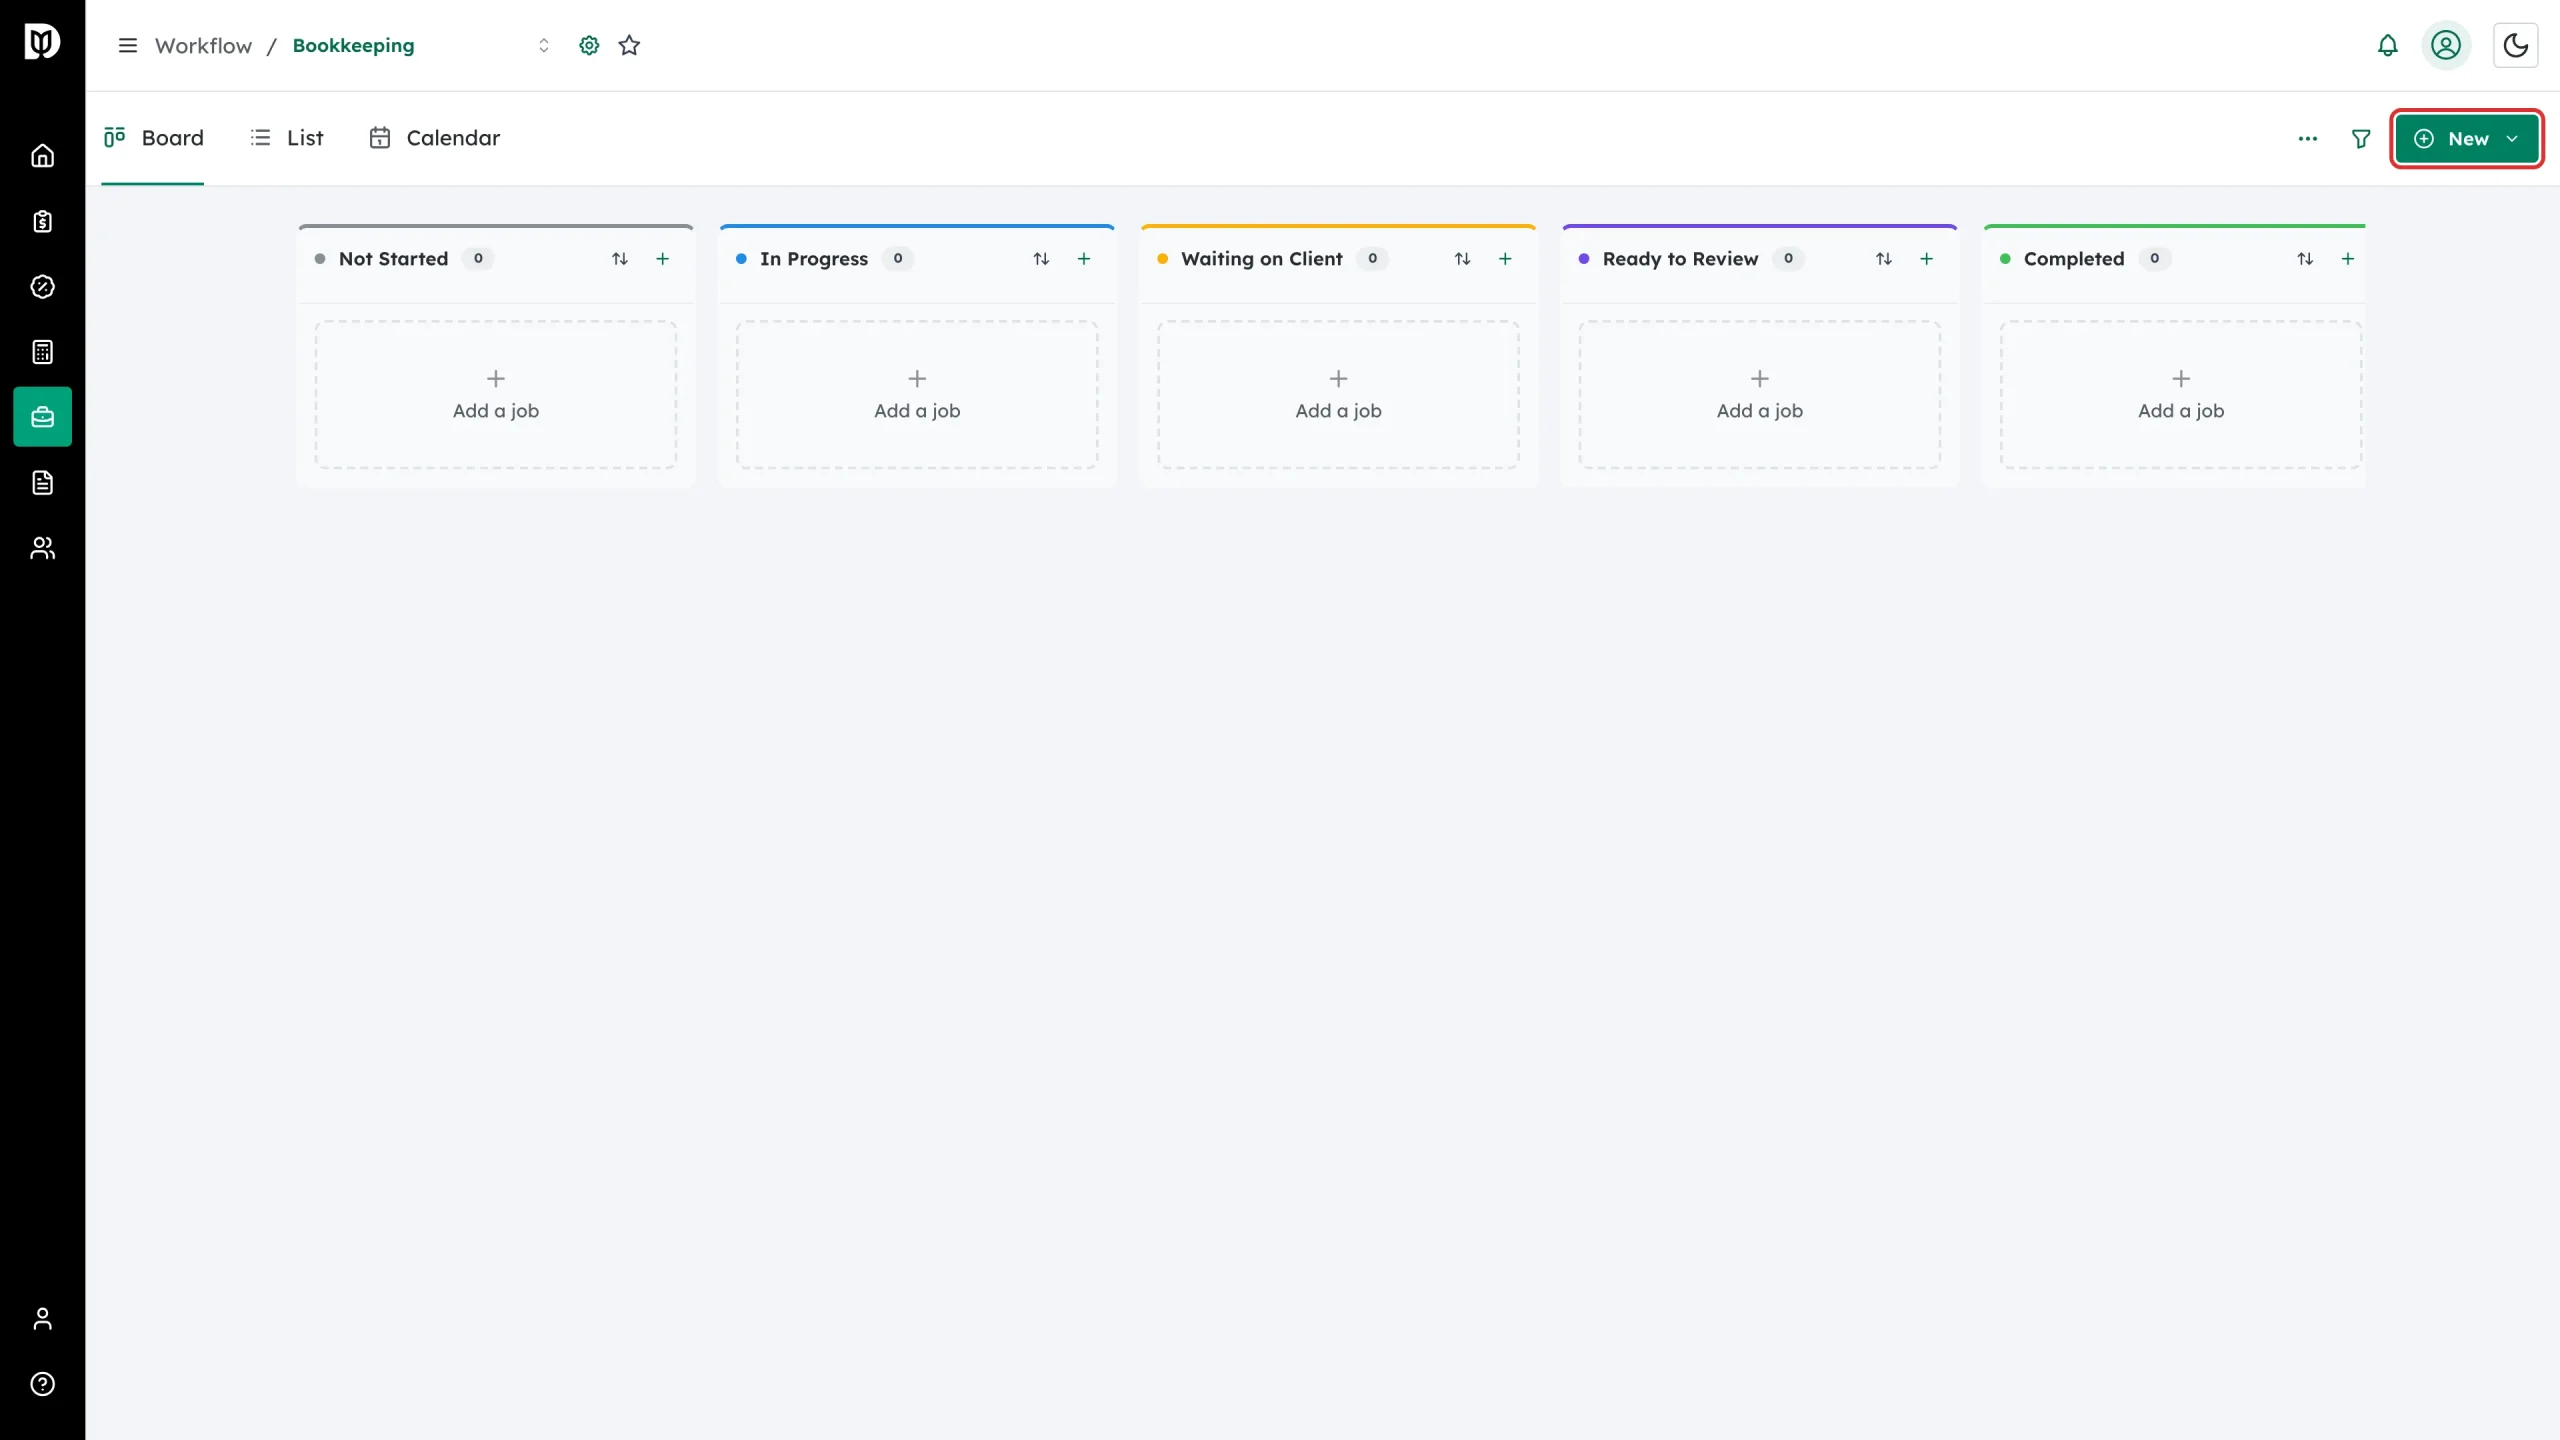
Step 1: Select New
With the right board open, select New in the top-right corner.
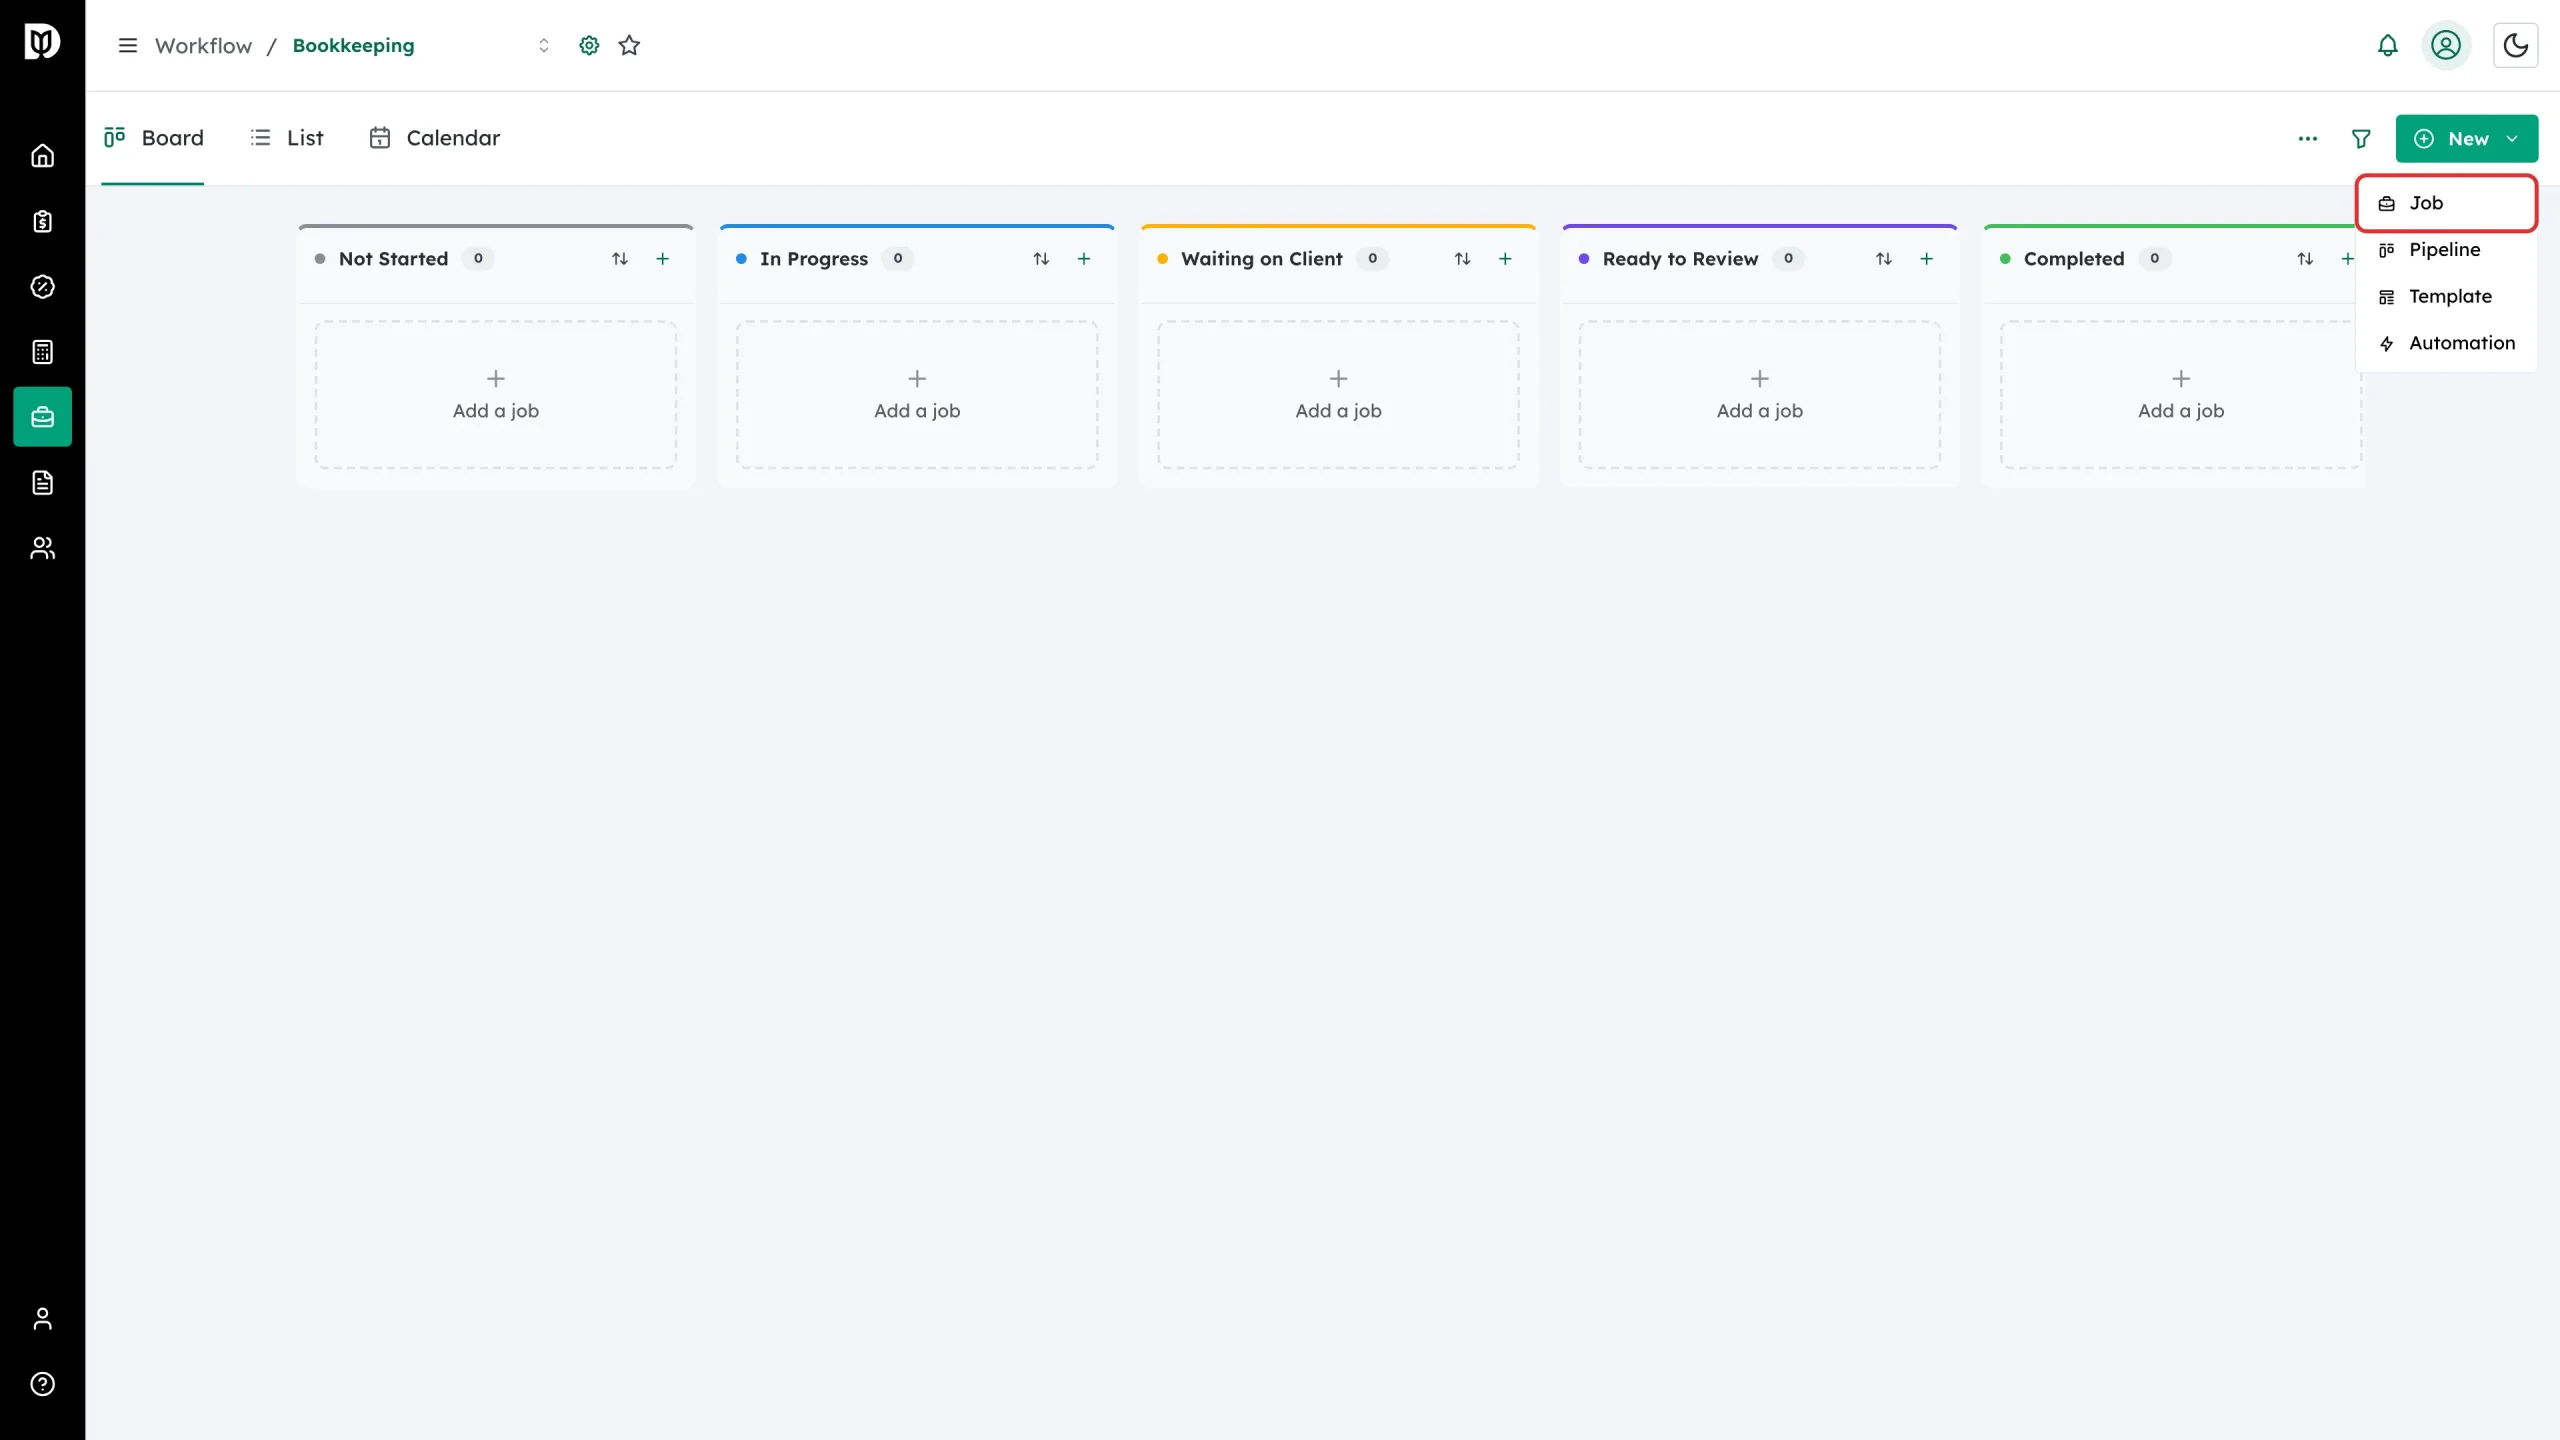
Step 2: Choose Job
Select Job. (You can also select the plus at the top of any column, or Add job at the bottom of a column, to start the card in that stage.)
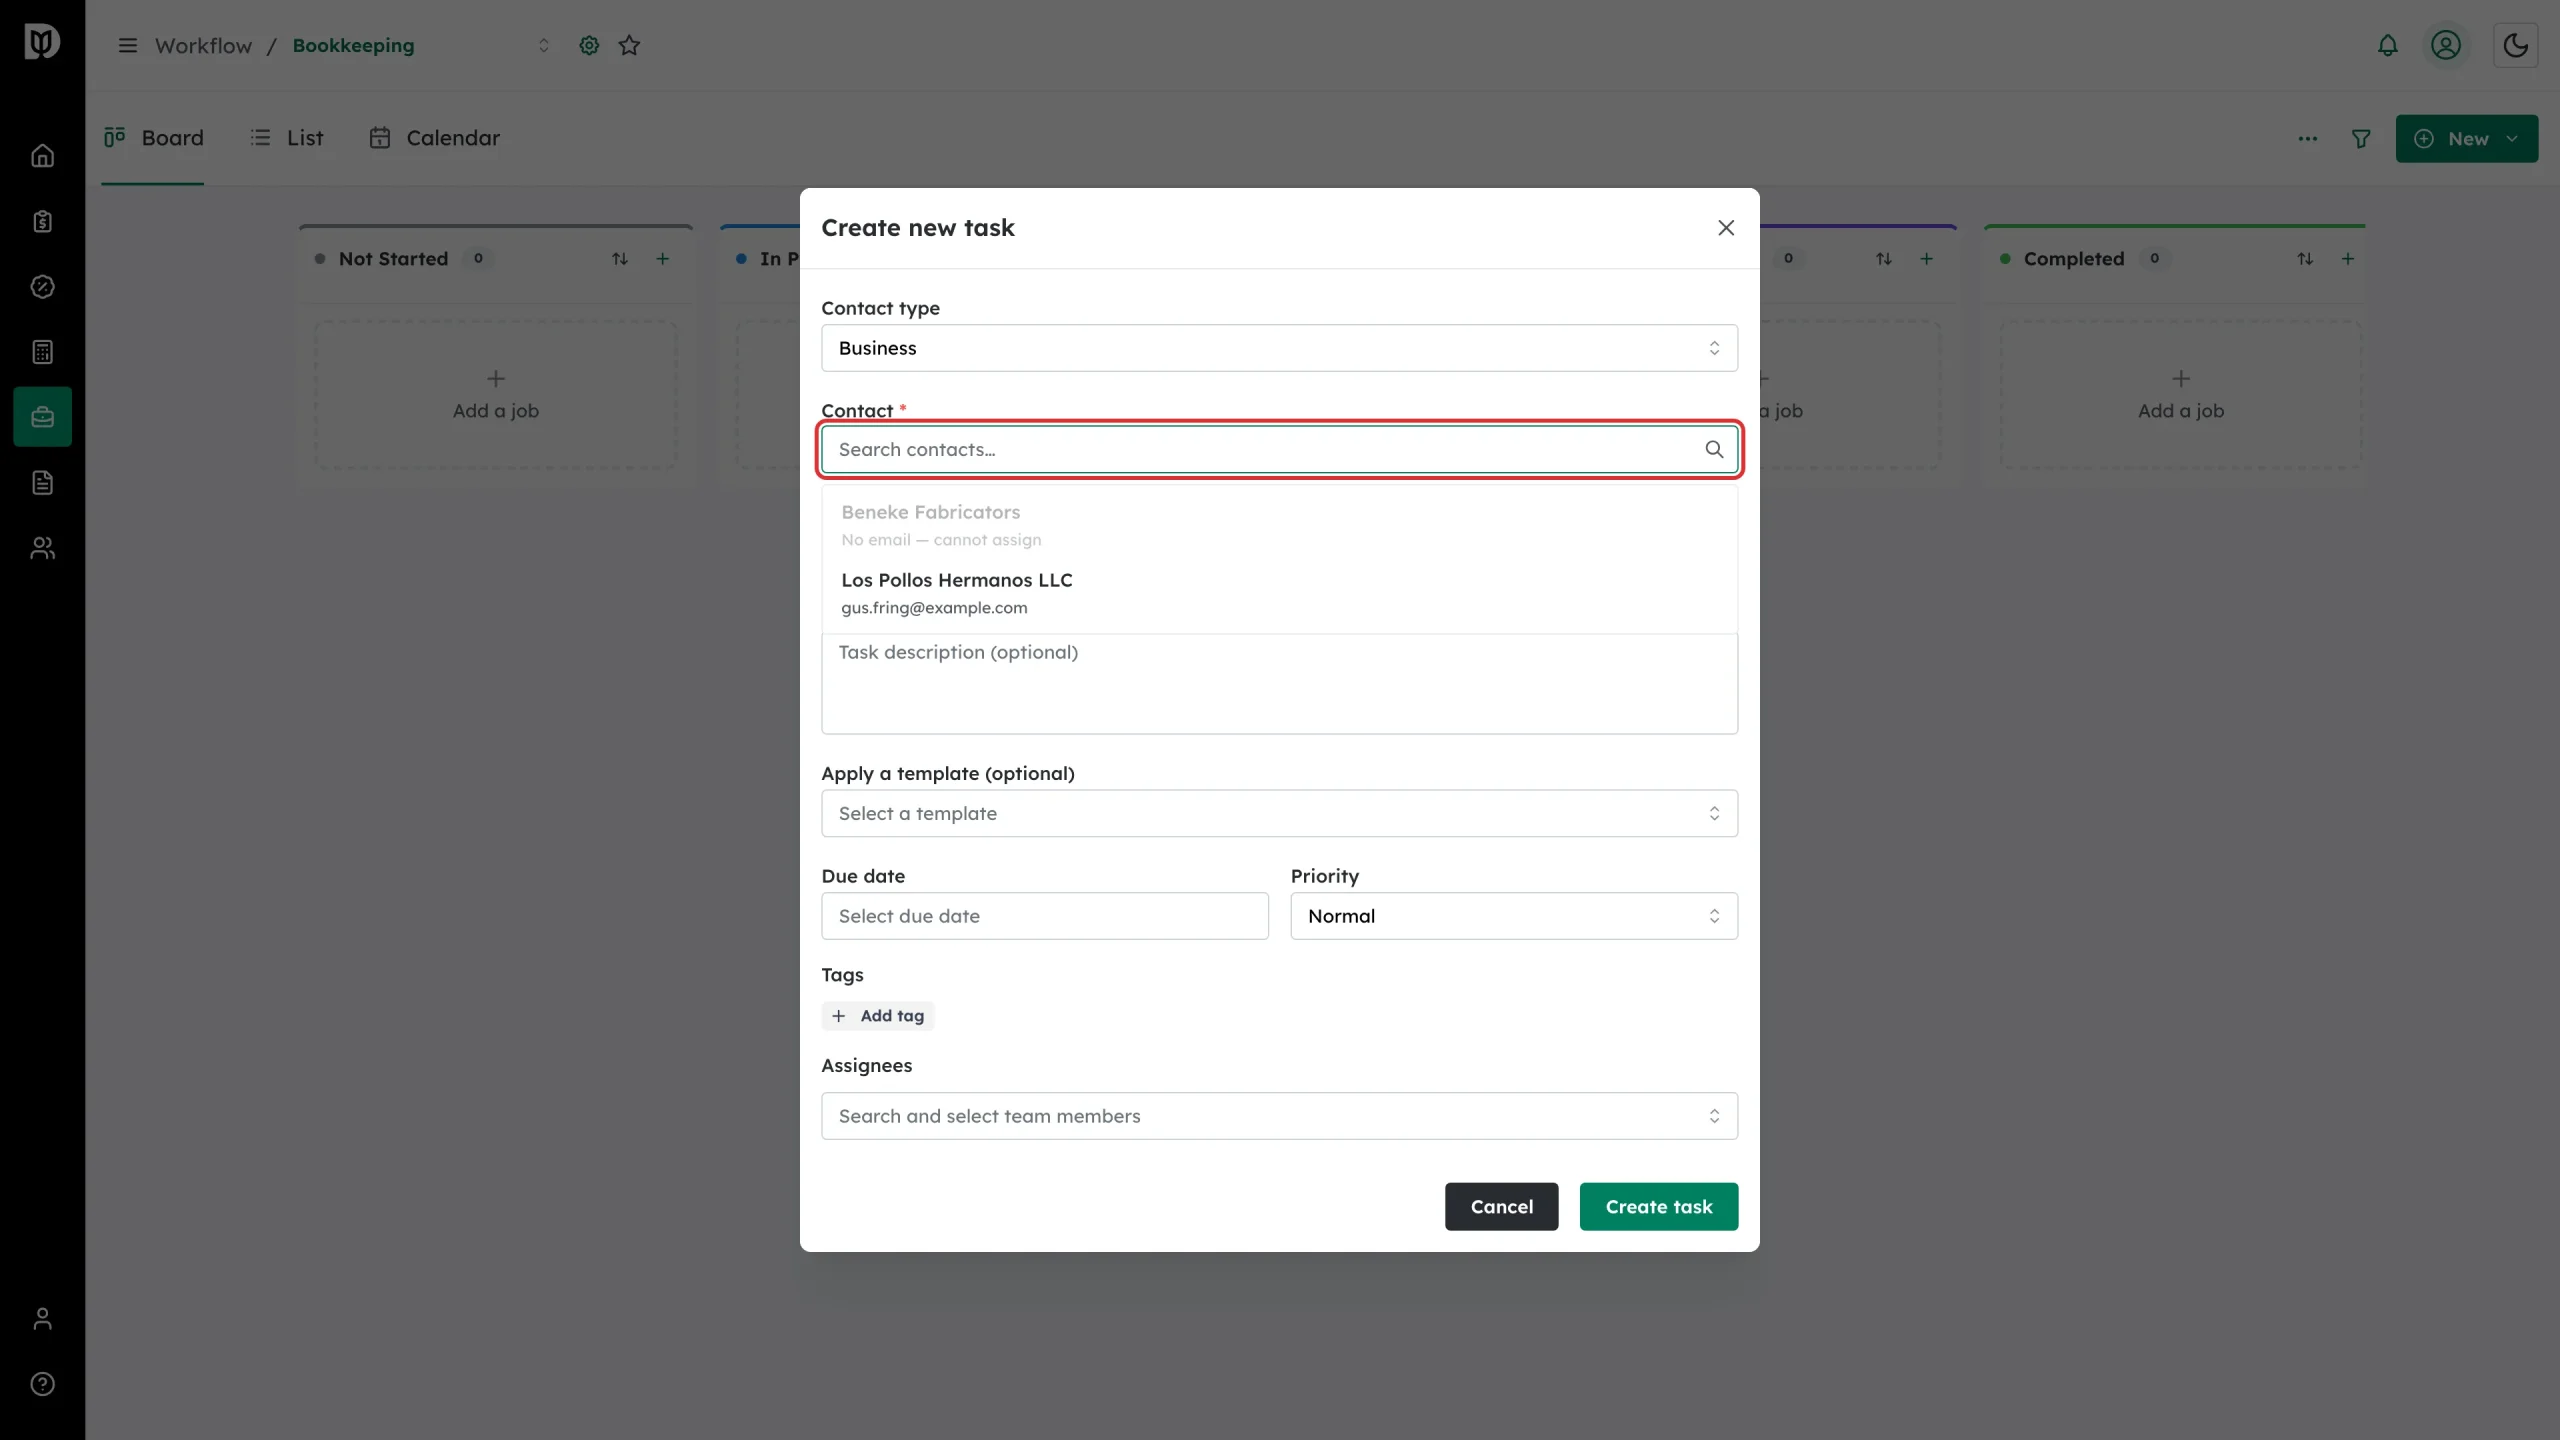
Step 3: Pick the client
Set Contact type to Individual or Business, then start typing in Contact. Select the client from the list.
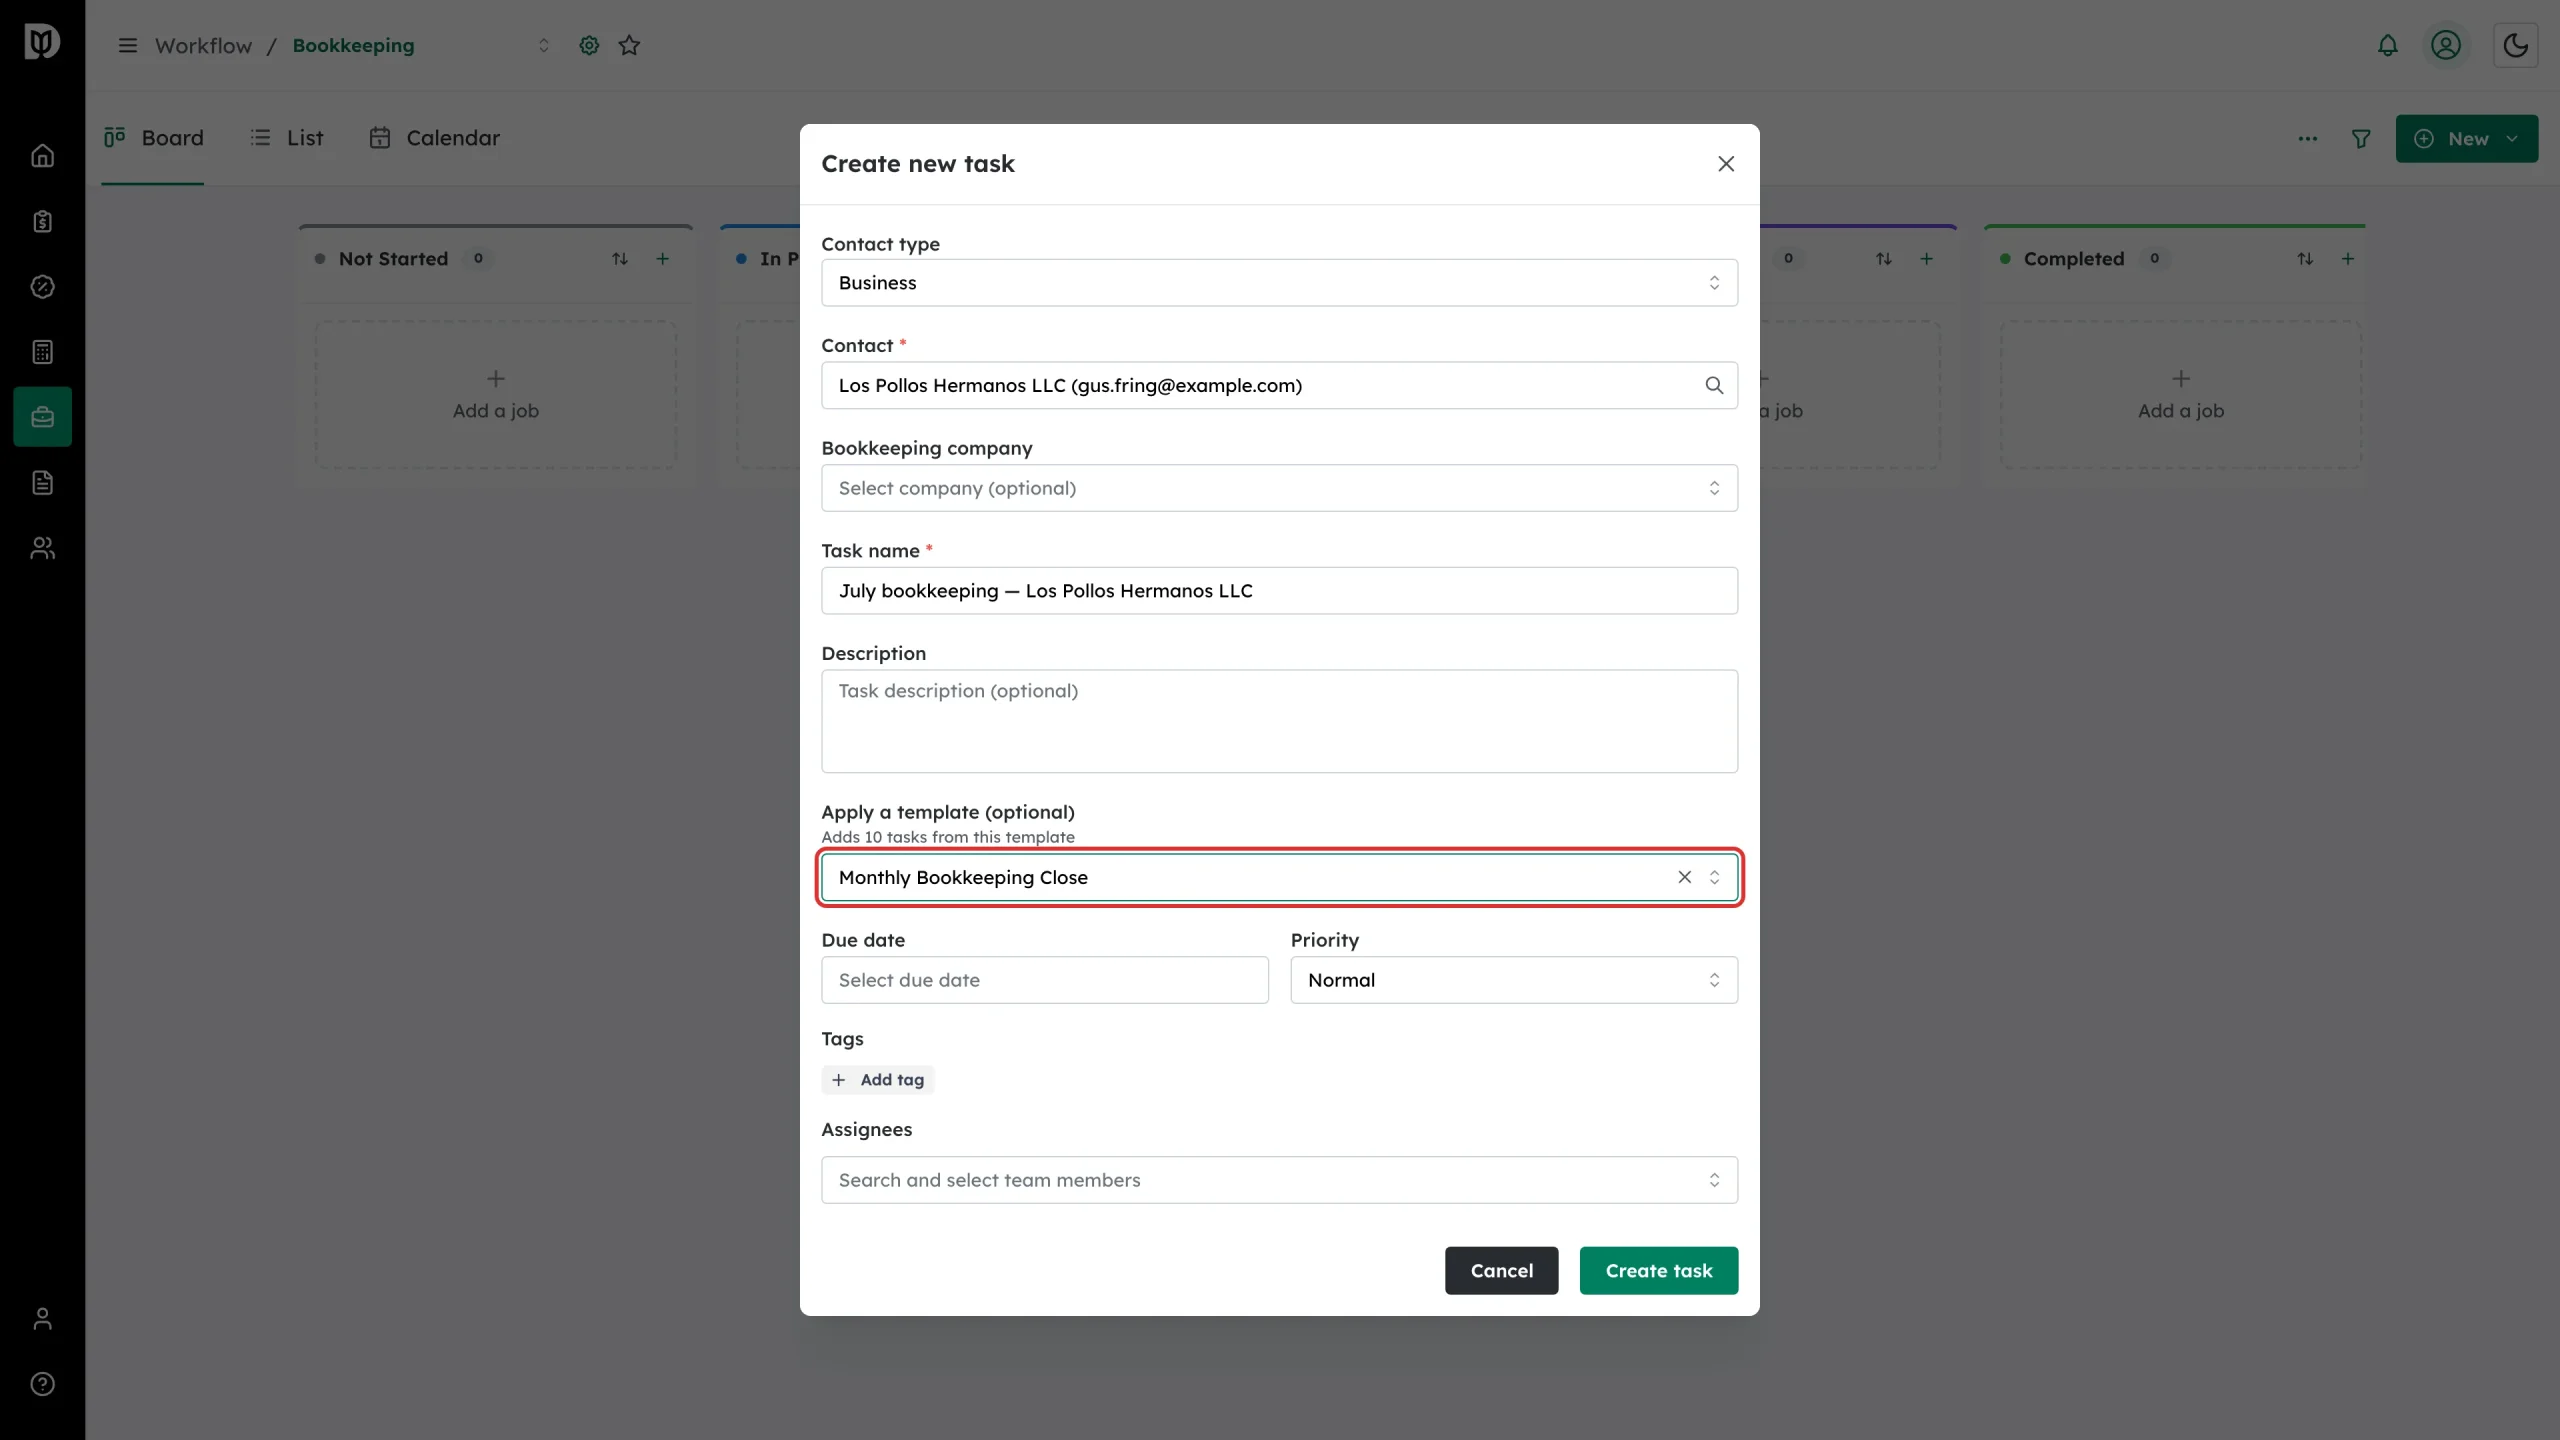
Step 4: Name the job and apply a template
Debits fills Task name with the client’s name — change it to something you will recognise on the board. Under Apply a template (optional) pick a checklist template to start the job with a ready-made task list; the field tells you how many tasks it will add.
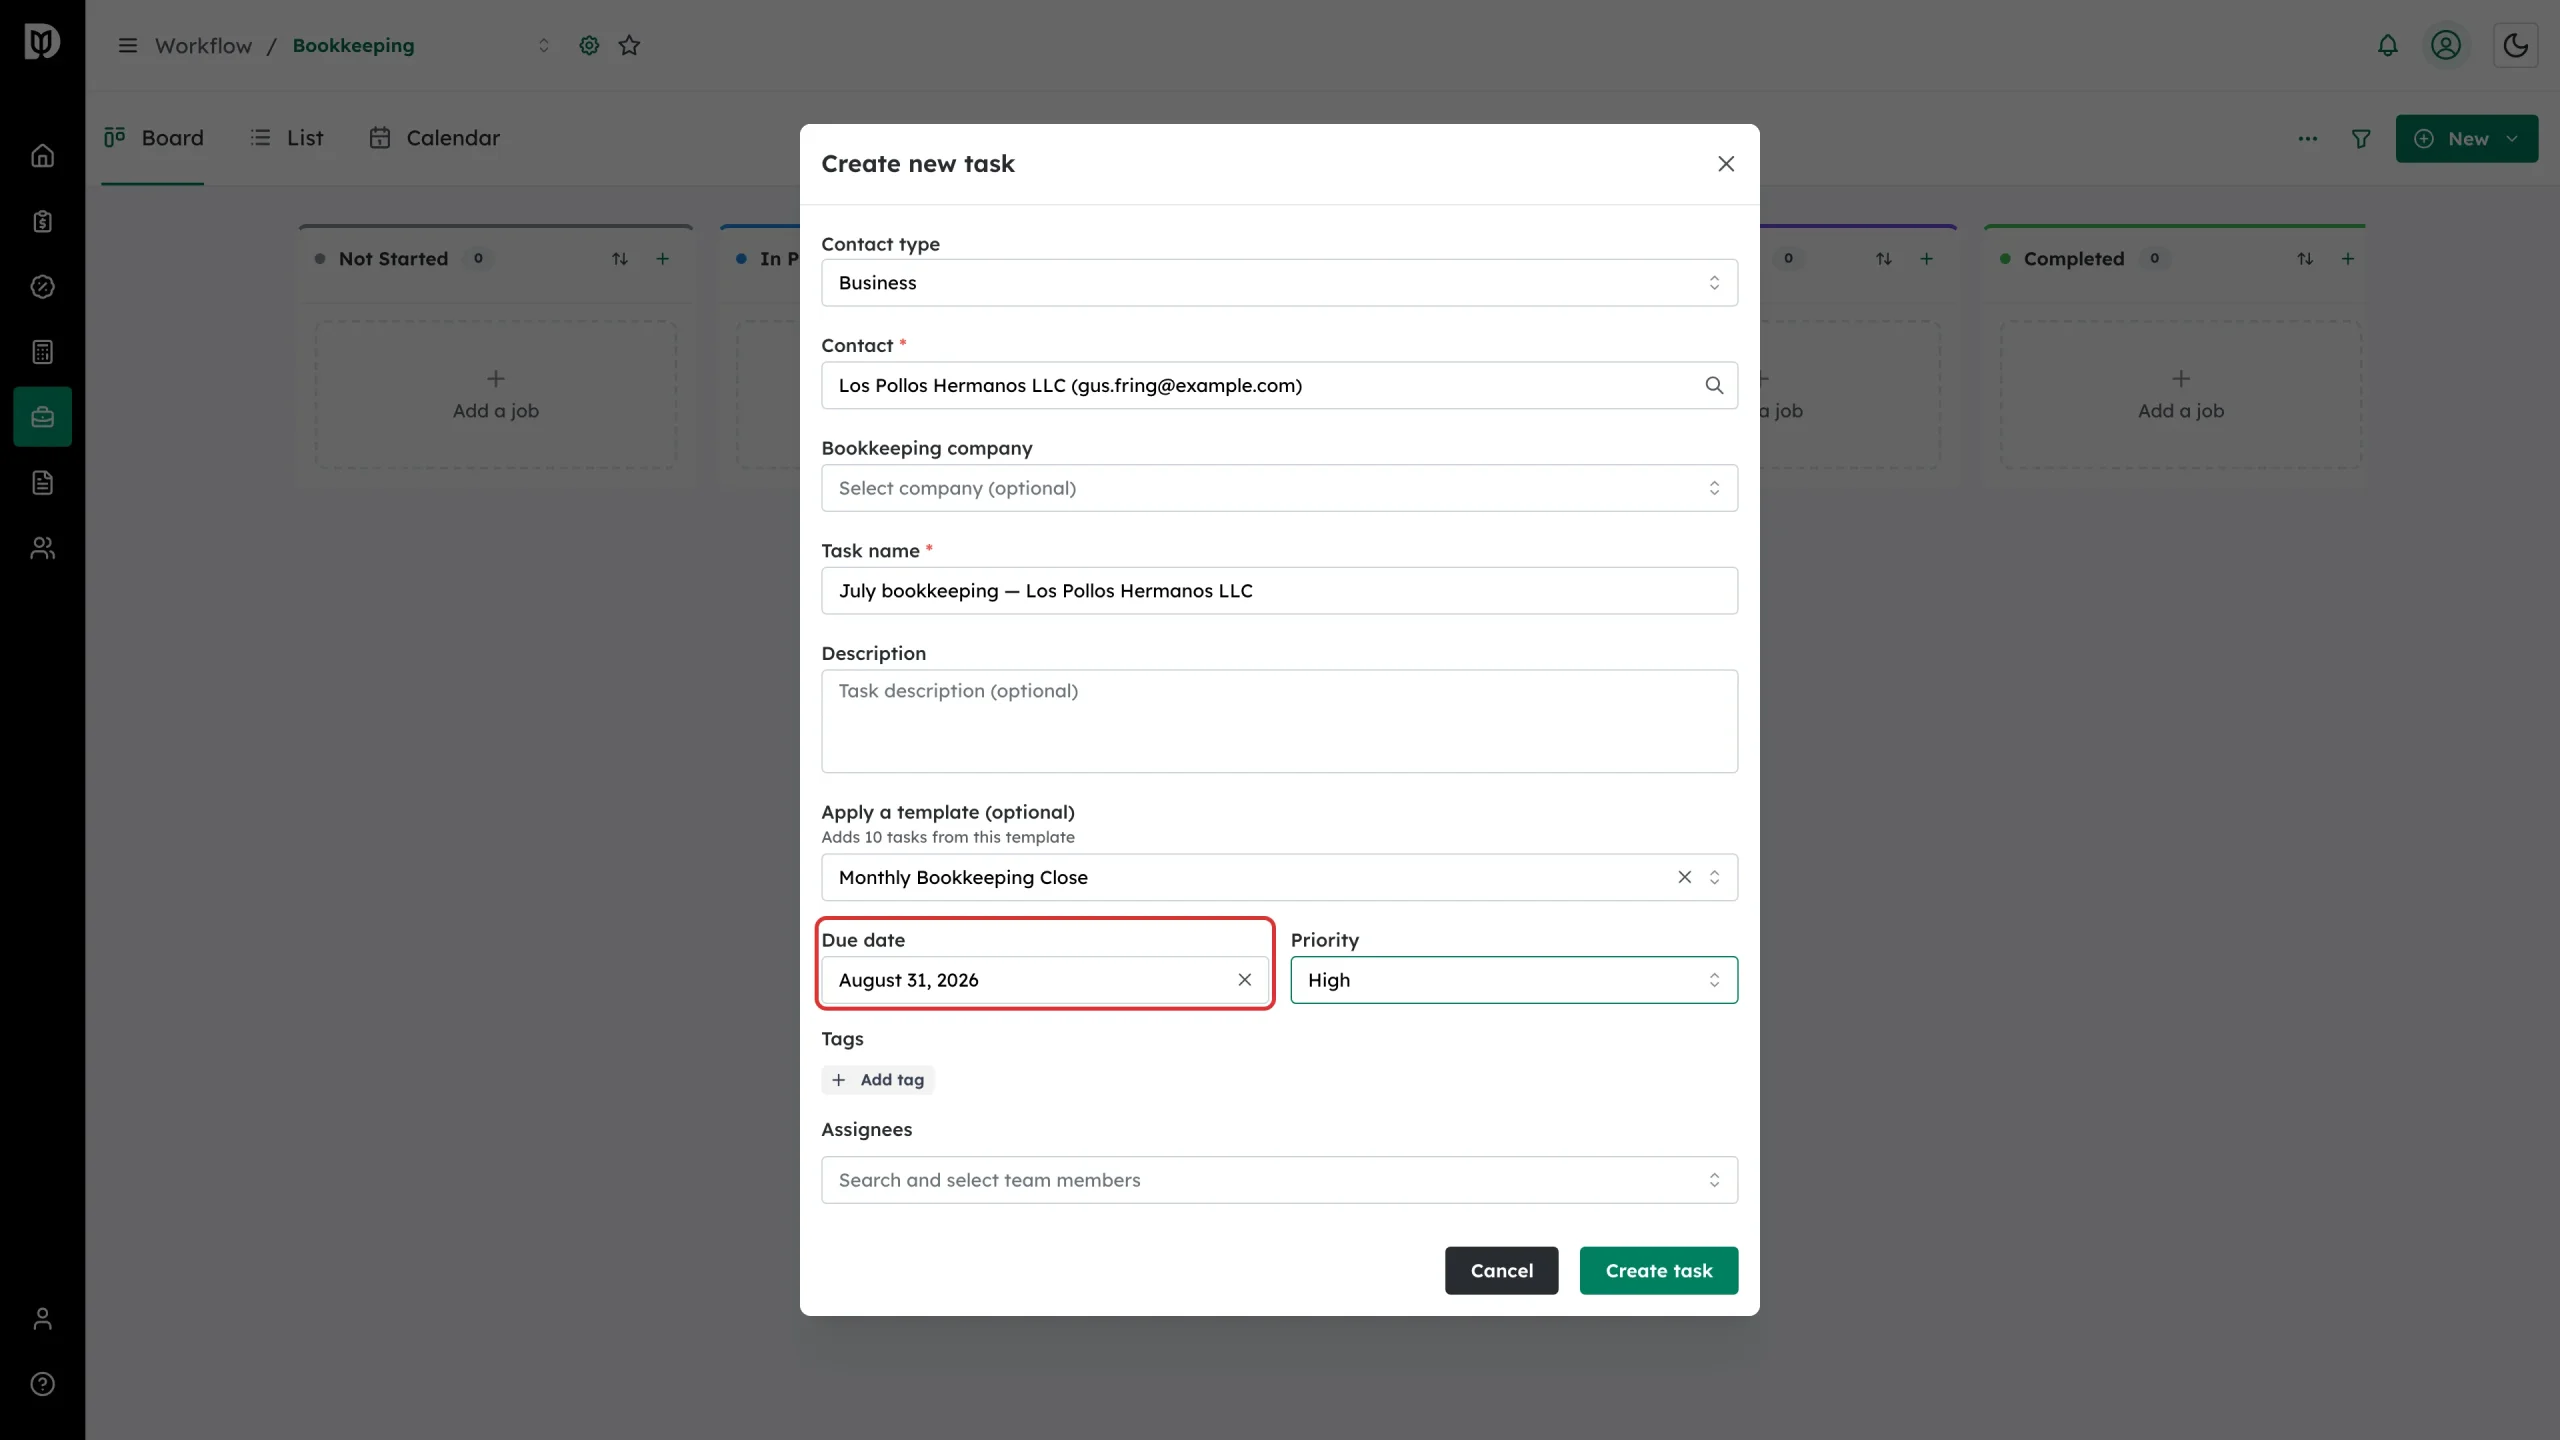
Step 5: Set the due date and priority
Choose a Due date and a Priority (Low, Normal, High or Urgent). The due date drives the overdue badge on the card, the Calendar view and the due-date filters.
Step 6: Assign the work
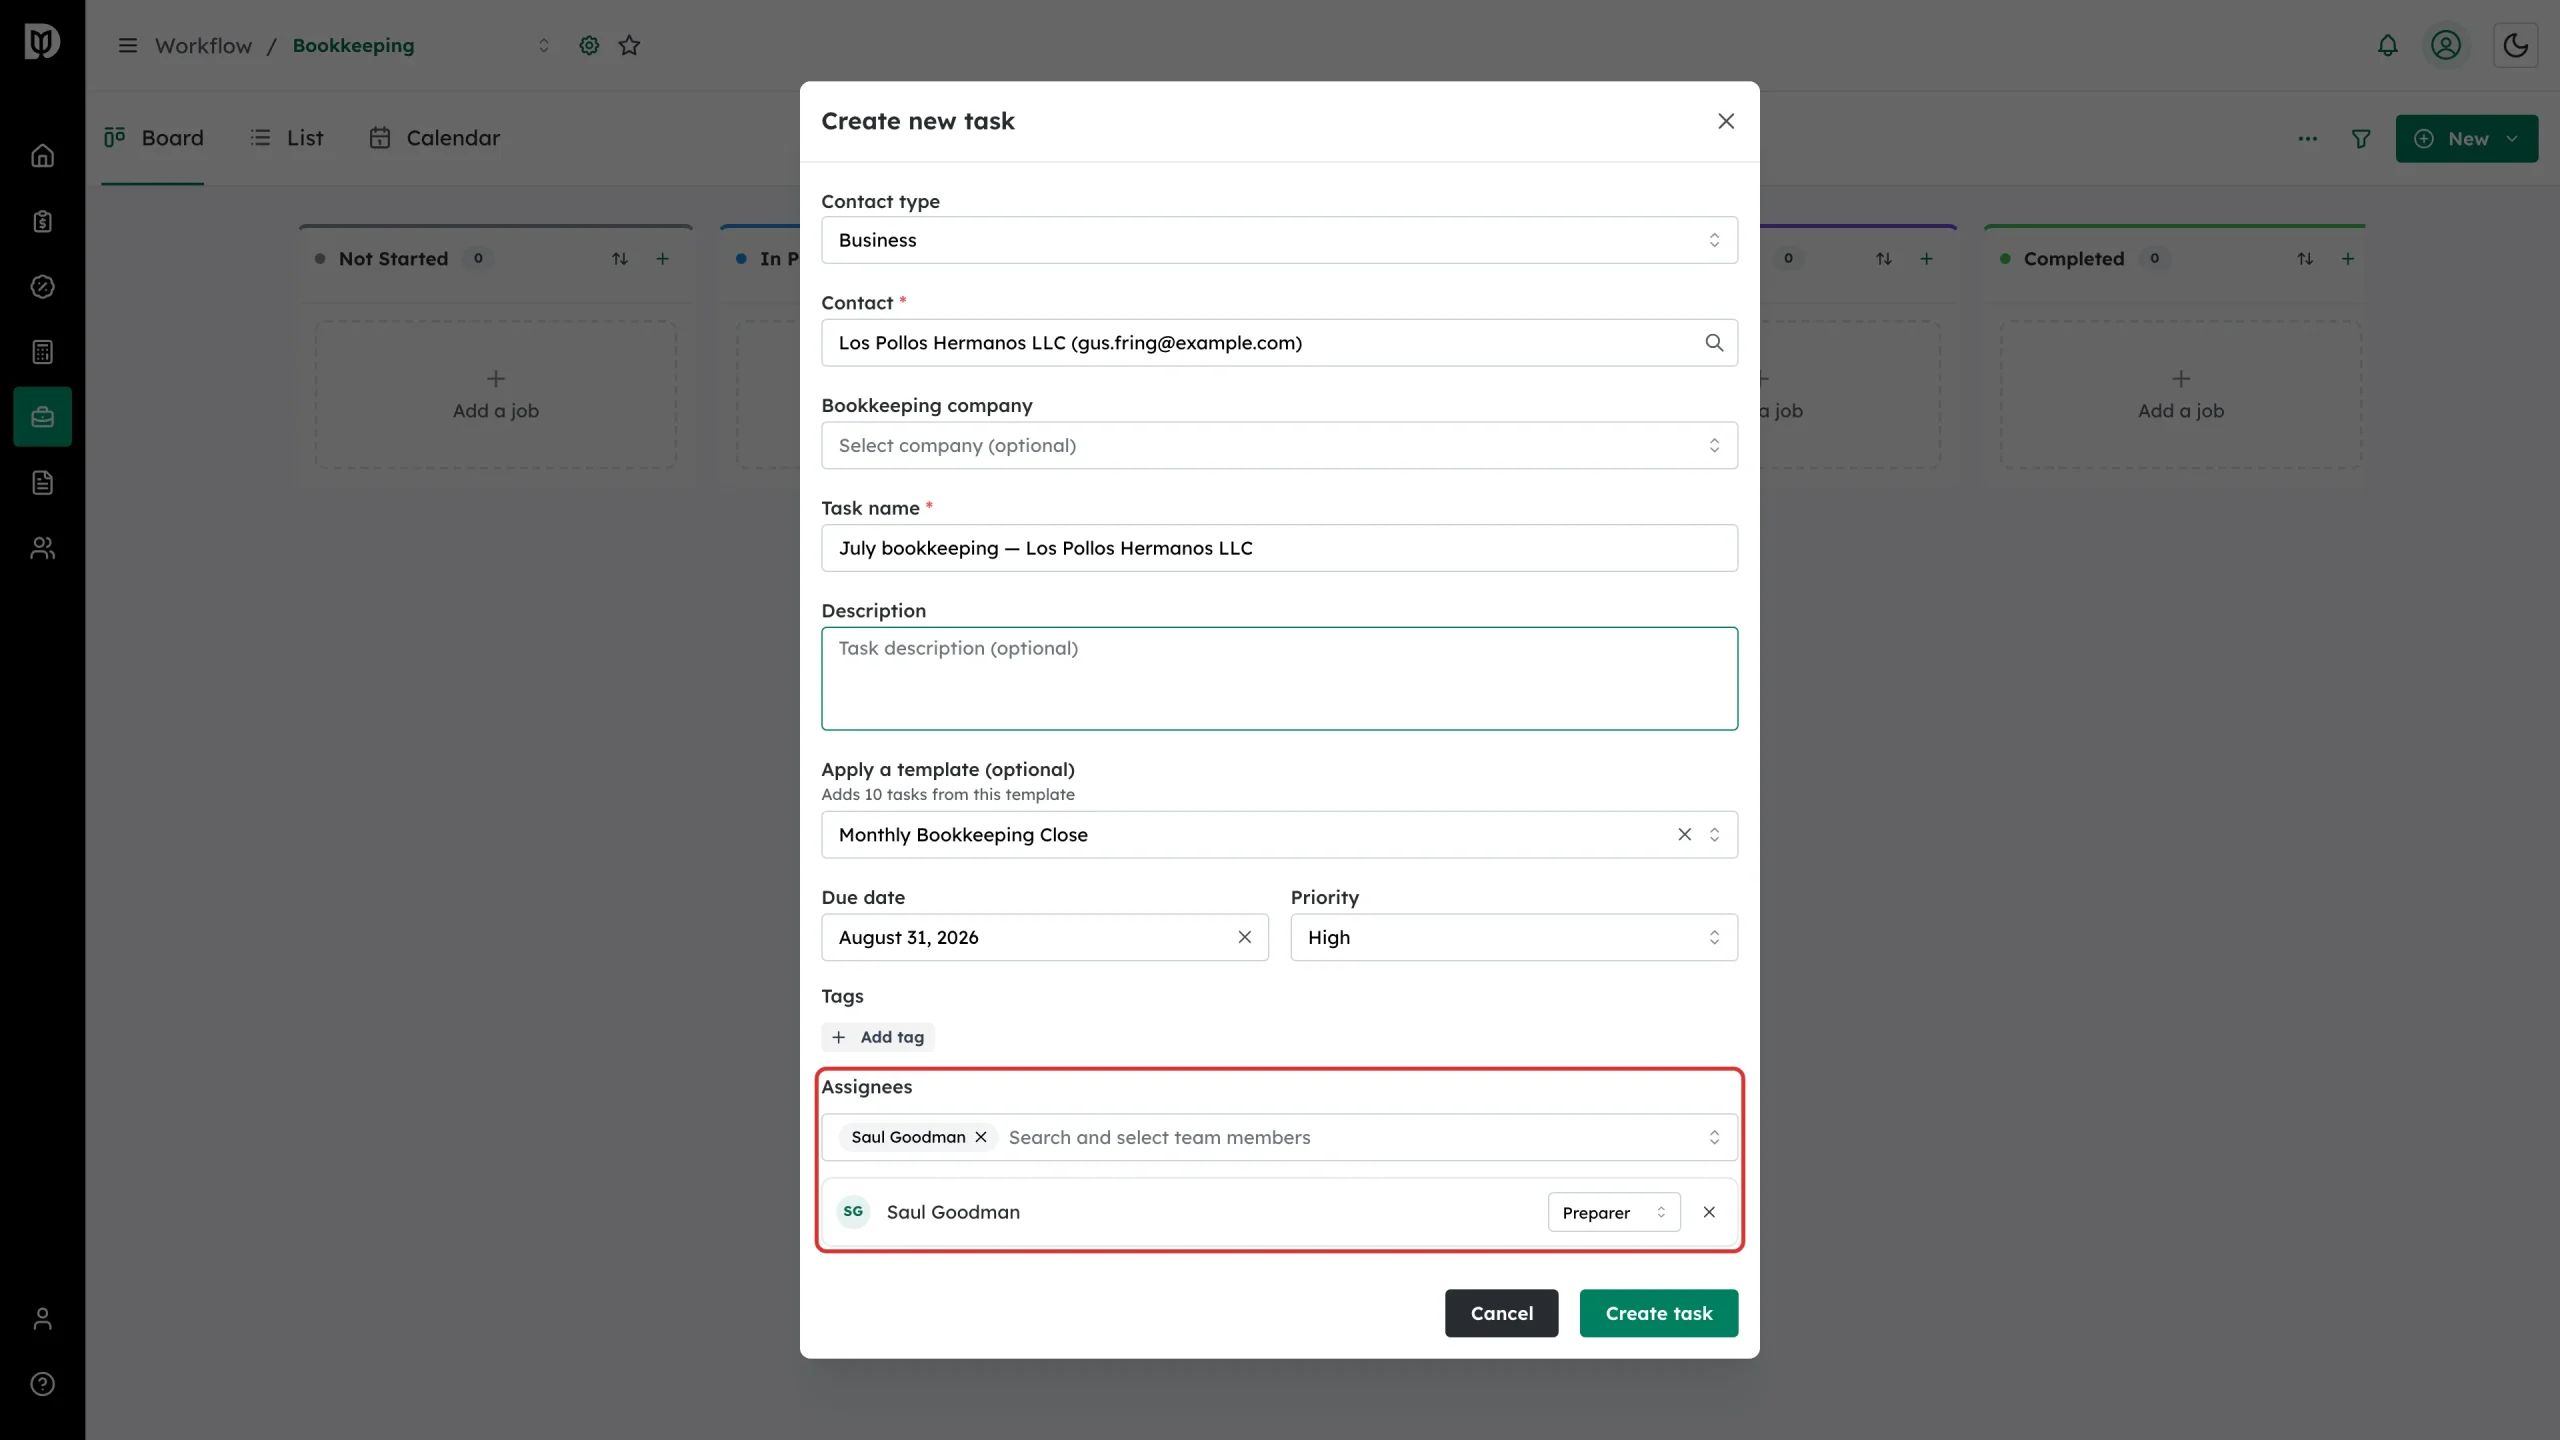
Search for team members under Assignees. Each person you add gets a role — Preparer, Reviewer, Manager or Partner — that you can change on their row.
To make the work come back on a schedule, turn on Repeat this task and fill in the schedule fields that appear. You need permission to edit jobs to use it.
Select Create task to add the card.
Step 7: Move the card to the next stage
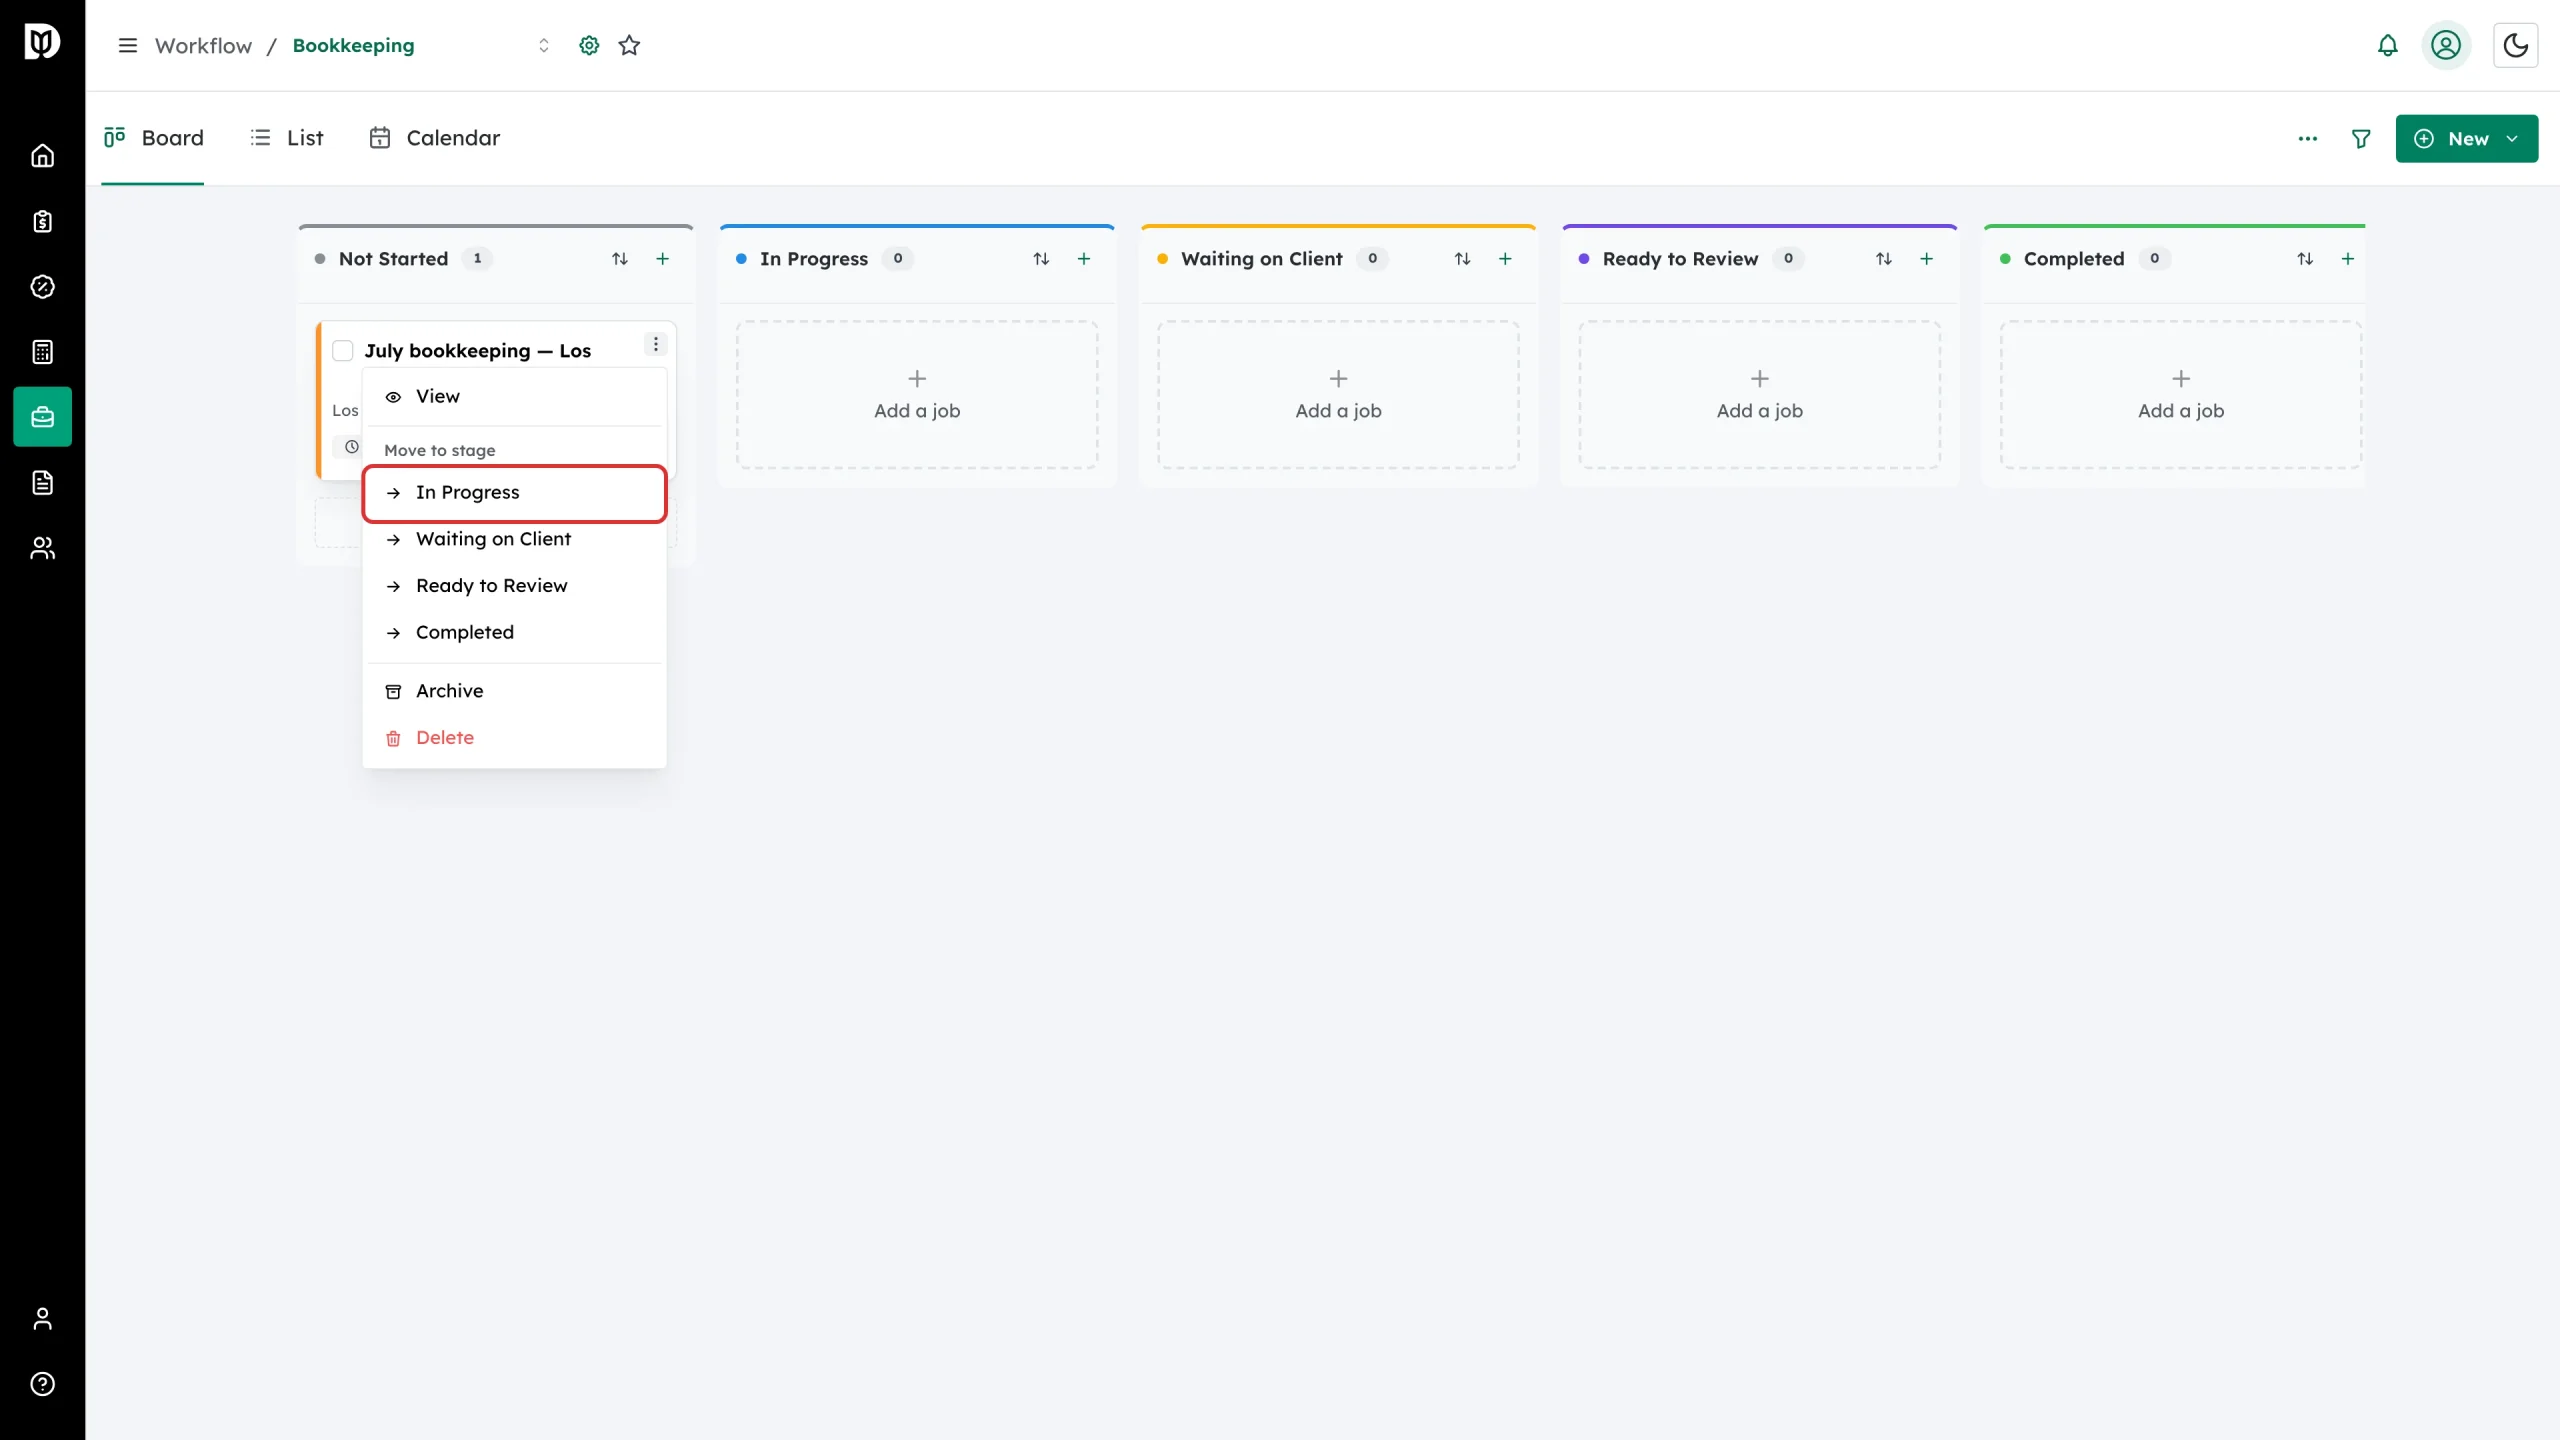
Drag a card into another column, or open the card’s three-dot menu and pick a stage under Move to stage. The same menu also has View, Archive and Delete.
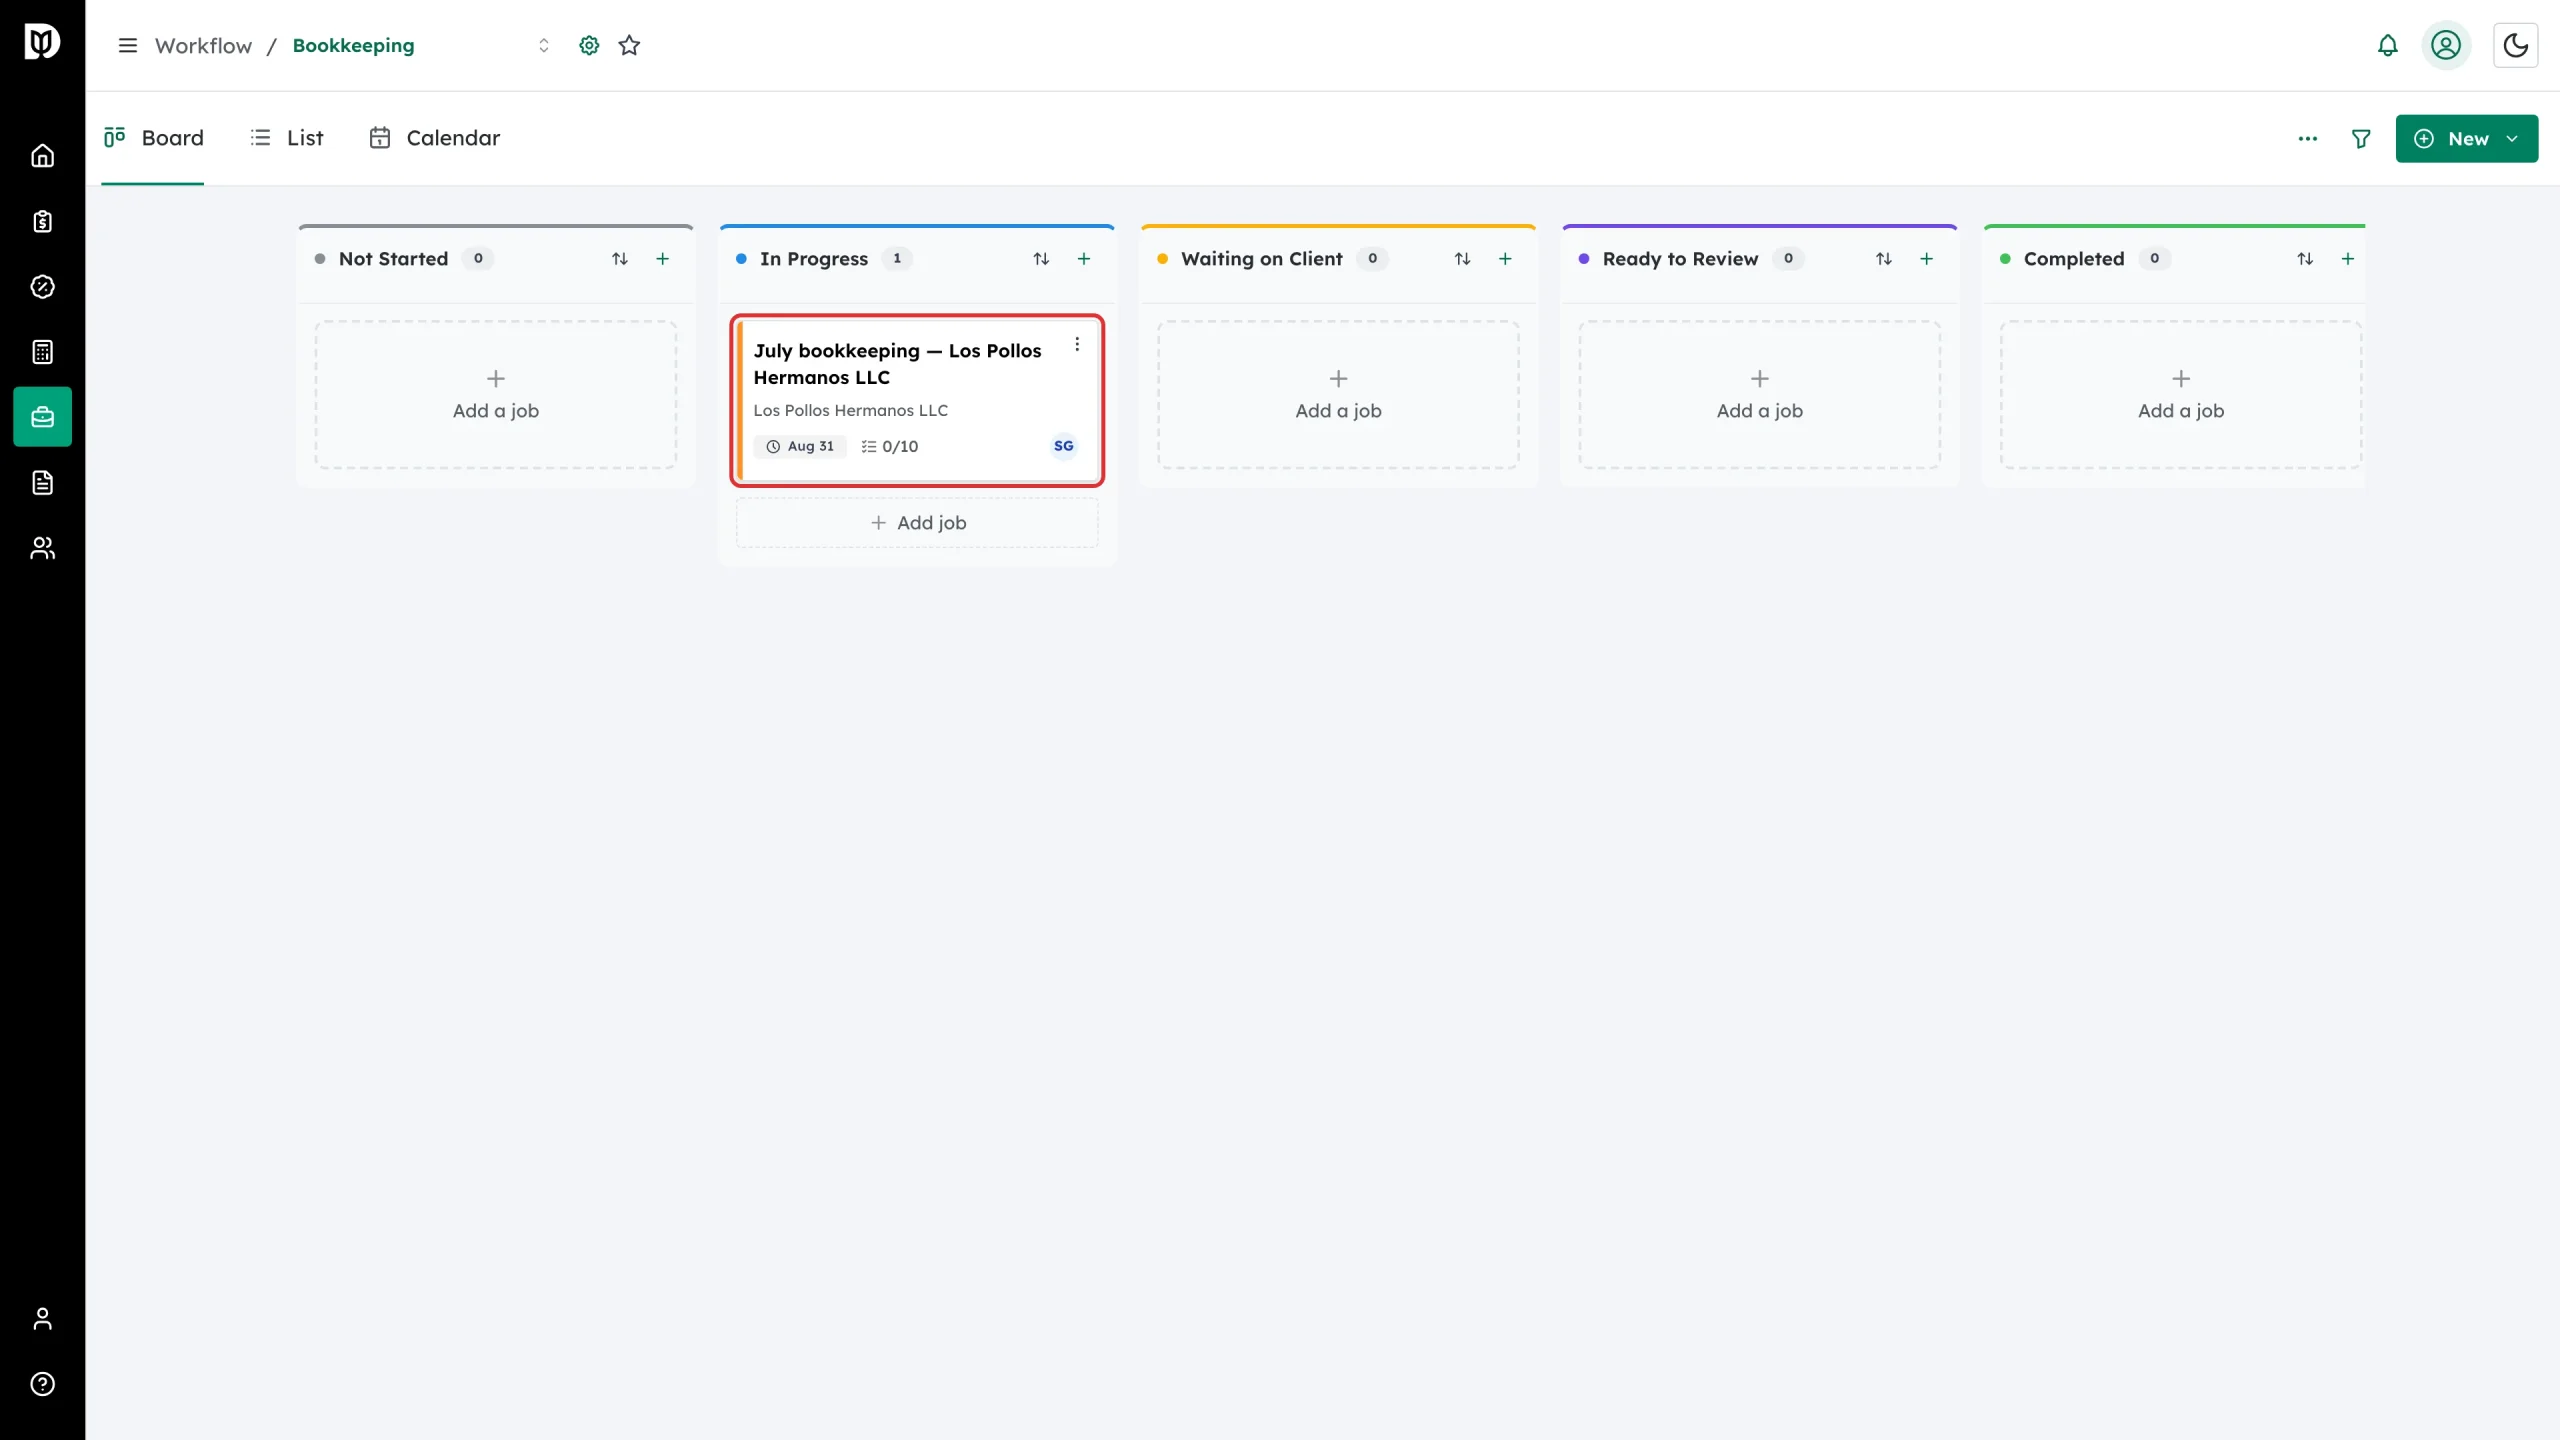
Step 8: Check the card landed
The card moves to the new column and that column’s count goes up.
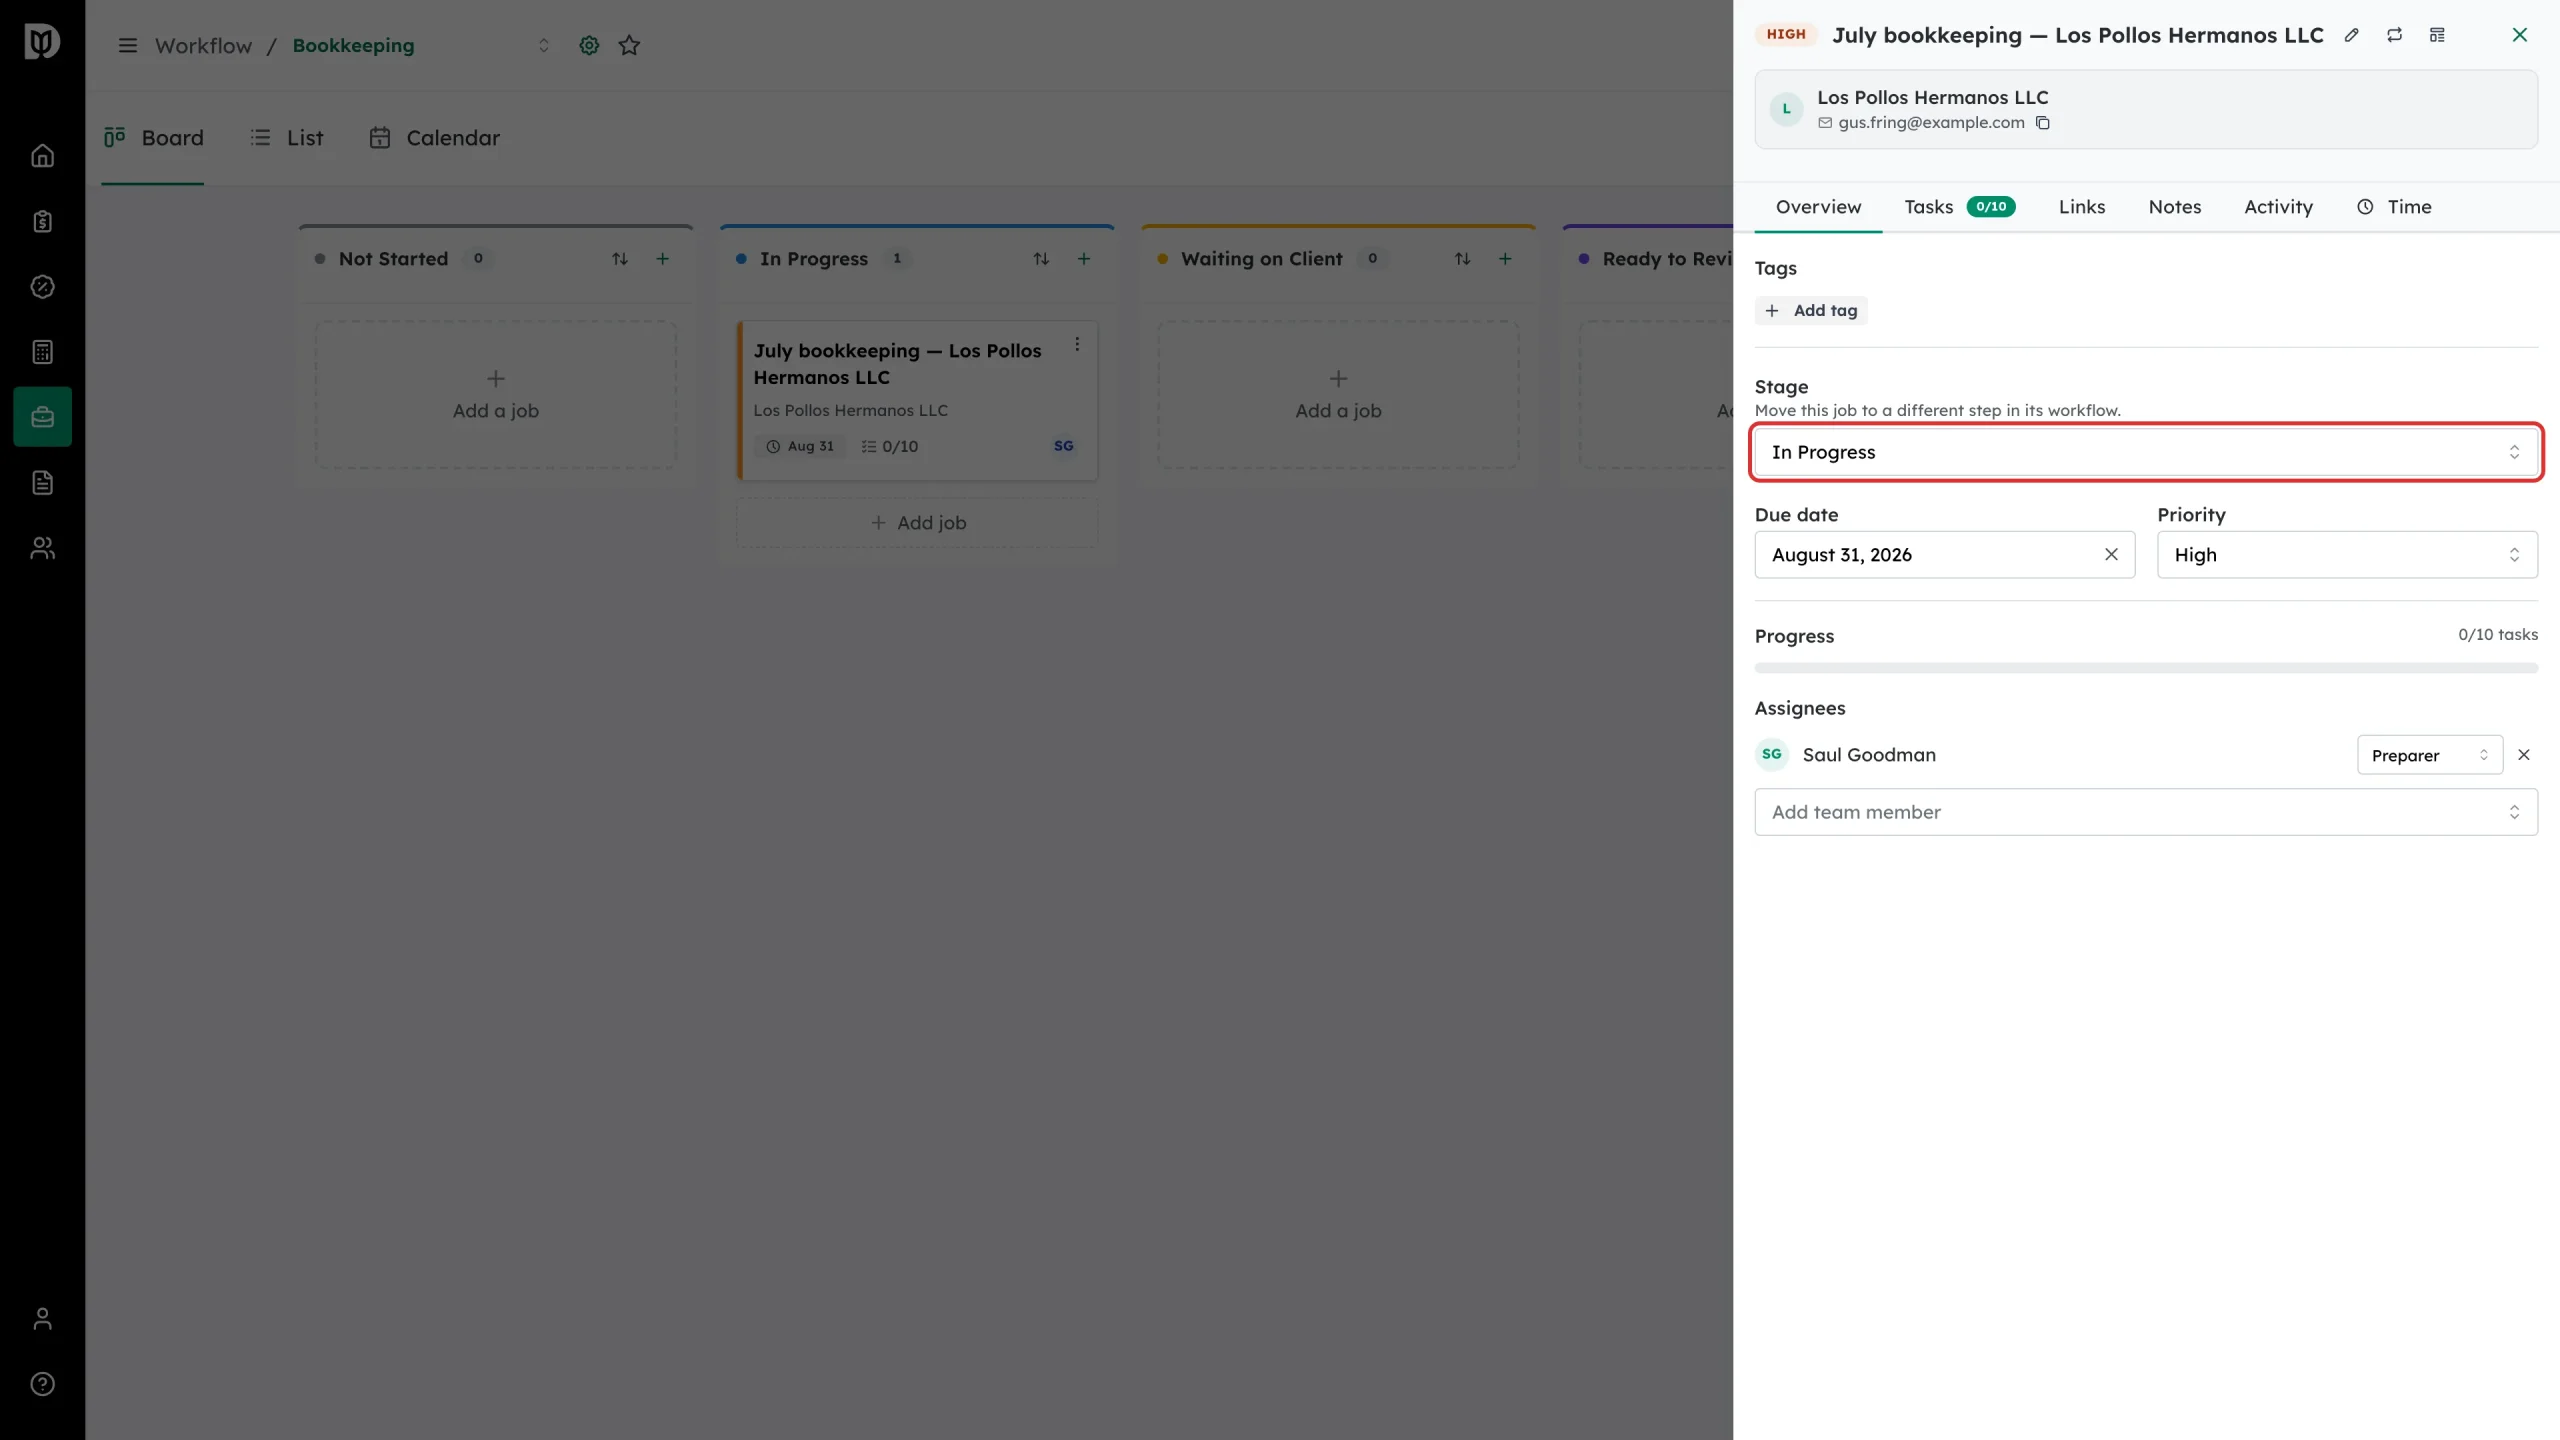
Step 9: Move a card from inside the job
Selecting a card opens the job panel. The Stage field on the Overview tab moves the job without going back to the board, and the due date, priority, tags and assignees can all be changed here too.
What happens next
On a tax board, moving a return card also moves the return itself. Moving back asks you to confirm before it undoes work (for example, recalling a return sent for signature). If a forward move needs something Debits cannot do on its own, such as recording a step completed outside Debits, a Move to stage window opens with the steps it will run; click Move return to go ahead.
The card sits in its new stage until someone moves it again. Every move is recorded on the job’s Activity tab, and any automation you have set up for that stage runs on the move.
Troubleshooting
- The contact is greyed out in the picker. That contact has no email address. Add one on the contact first.
- A teammate is missing from Assignees. Only staff with access to that board can be assigned. Share the board with them first.
- The move is refused. A stage can limit how many jobs it holds, restrict which roles may move work into it, or require a different person from the one who moved the job in. The message on screen says which rule stopped you.
- The card was created but the checklist is empty. If the template could not be applied you get a separate “Template not applied” message — the job is still created, and you can apply the template afterwards from Templates.