Who this is for: Firm owners and admins who want the board to keep itself tidy.
What you’ll learn: How to switch on a ready-made rule, build your own, and control which other parts of Debits feed the board.
Before you begin
- You need the “manage automations” permission. Firm owners and admins have it.
- Debits ships a set of rules already written for you. They all start switched off — read one before you turn it on.
- A rule only runs while it is enabled, and only on the boards you scope it to.
Step-by-step instructions
Step 1: Open Automations
On the board, open the three-dot More menu and select Automations.
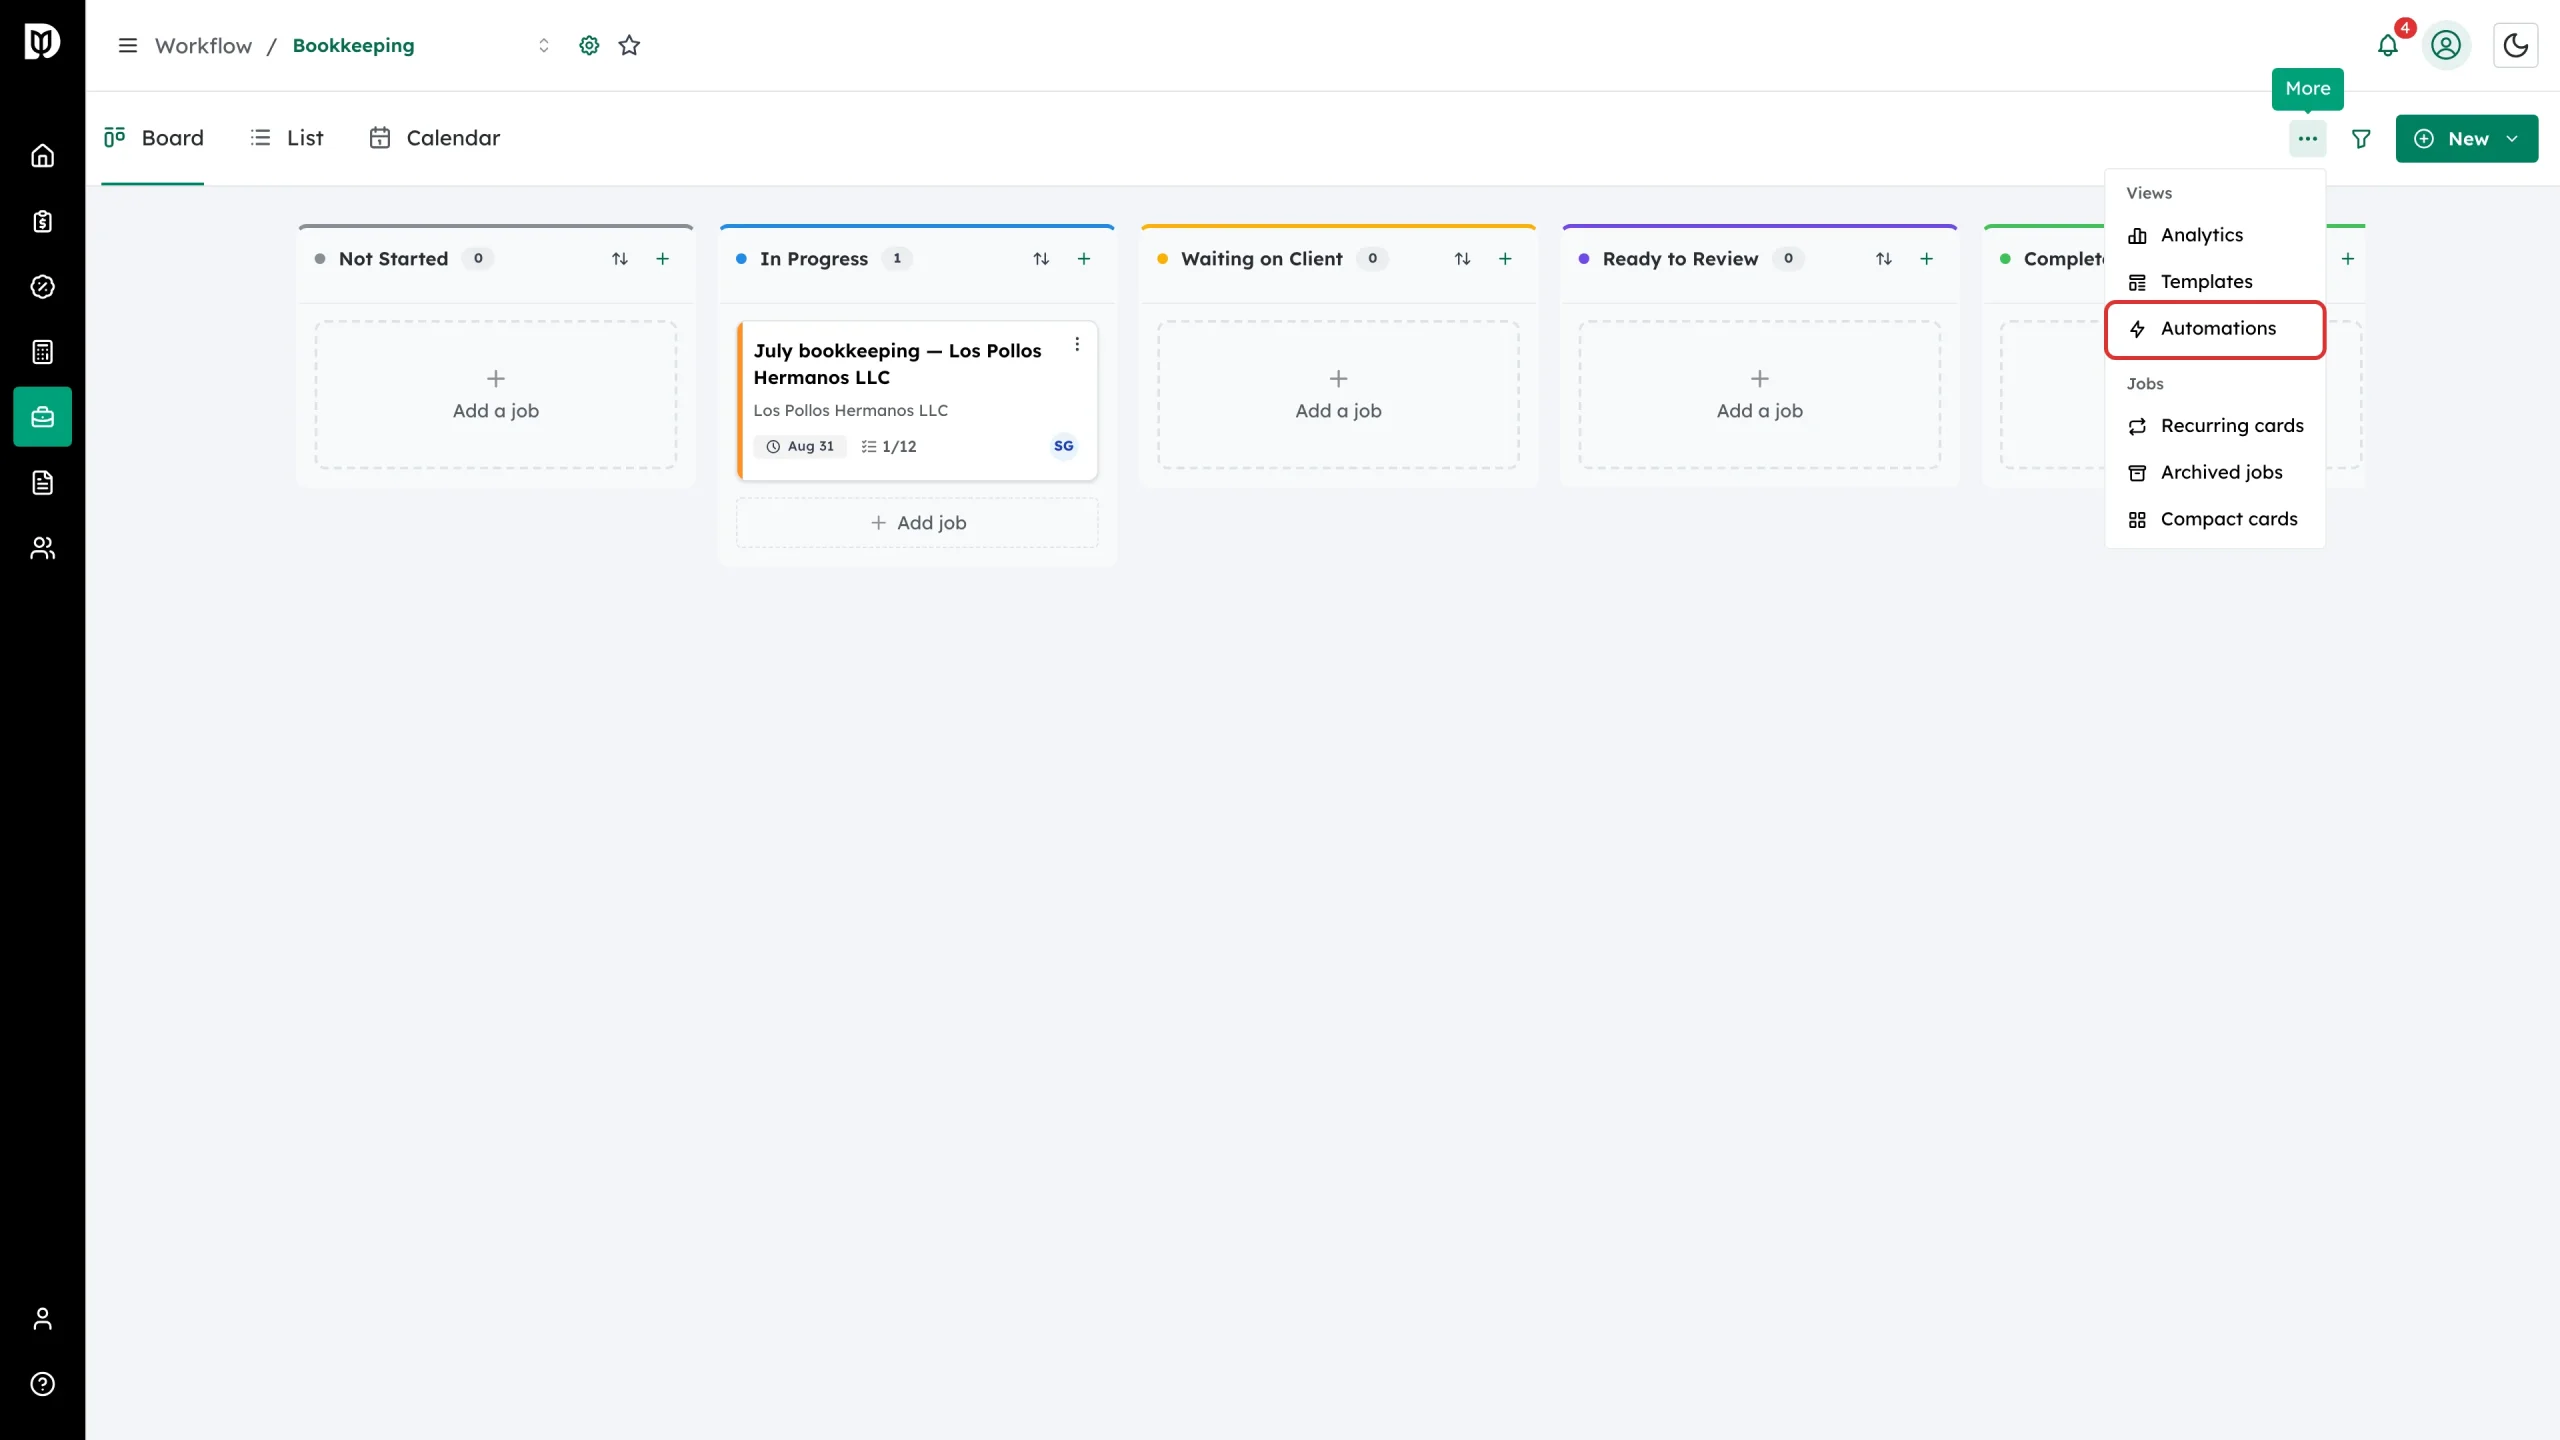
Step 2: Look at what is already there
My automations lists your firm’s rules, with a count of how many are active. Each row shows what triggers it, which boards it covers, how many actions it takes and how many times it has run.
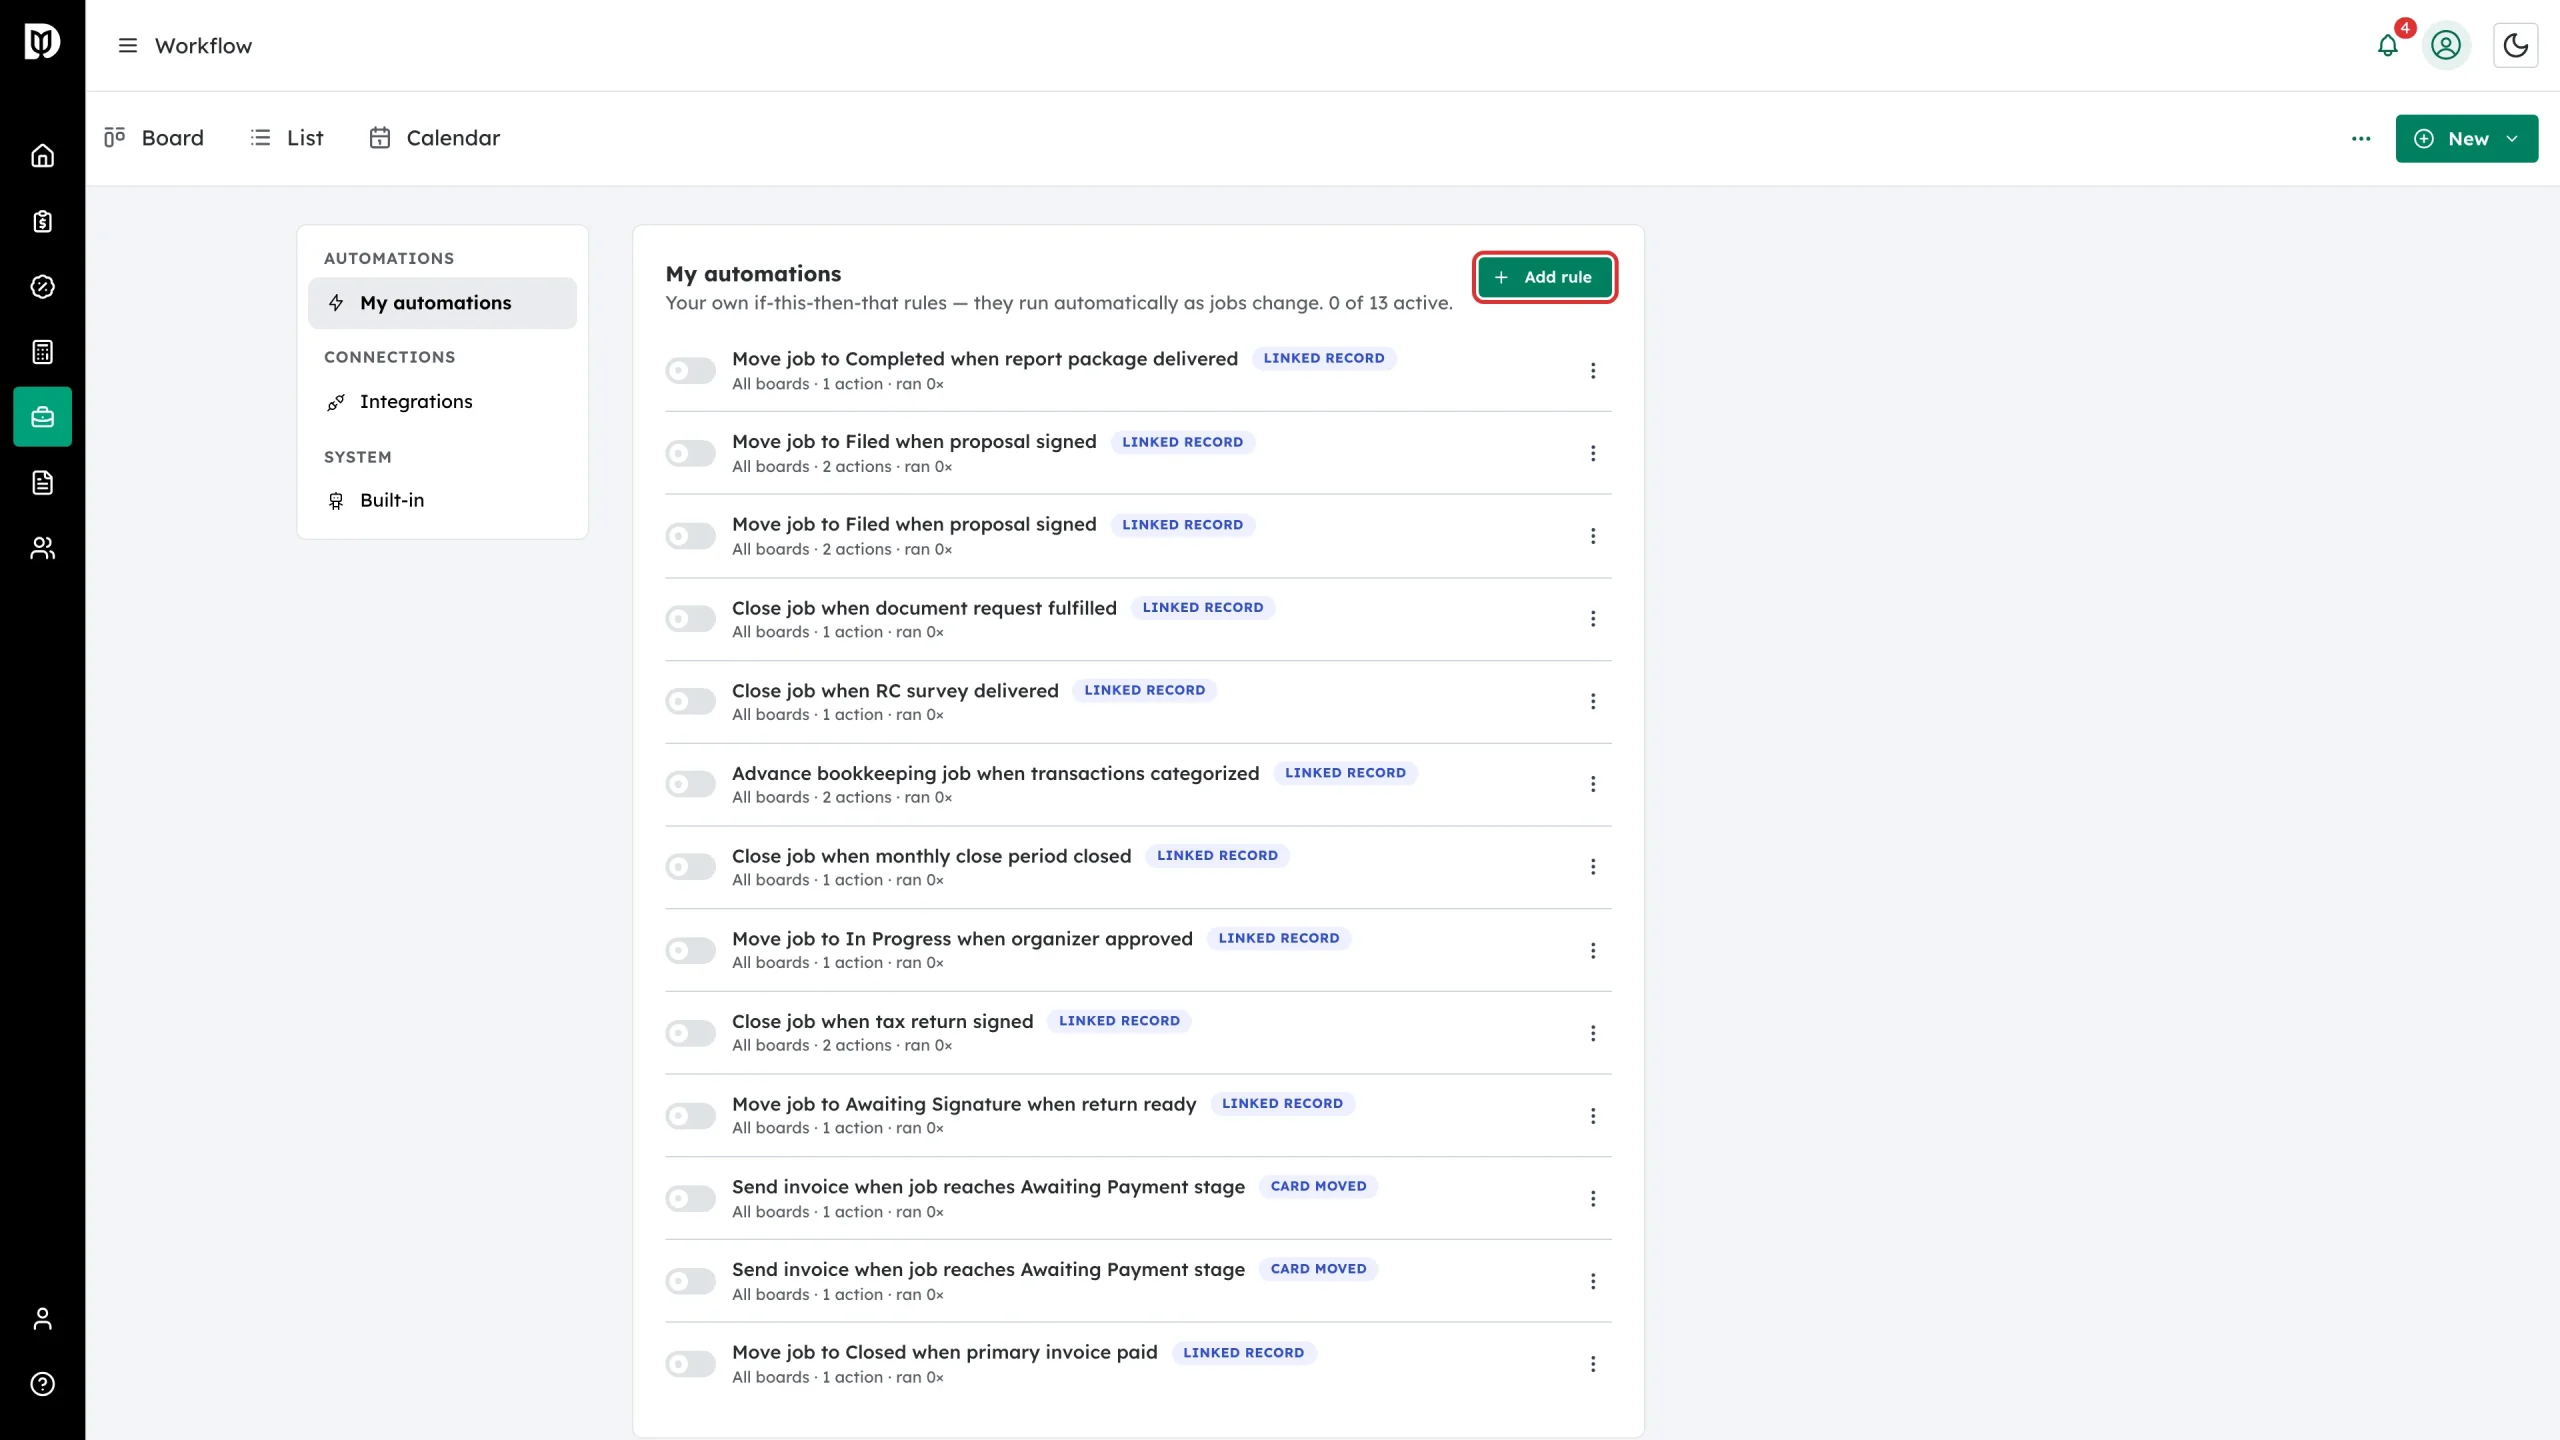
Step 3: Switch a ready-made rule on
Use the switch on the left of a row to enable or disable that rule. Nothing happens until a rule is on.
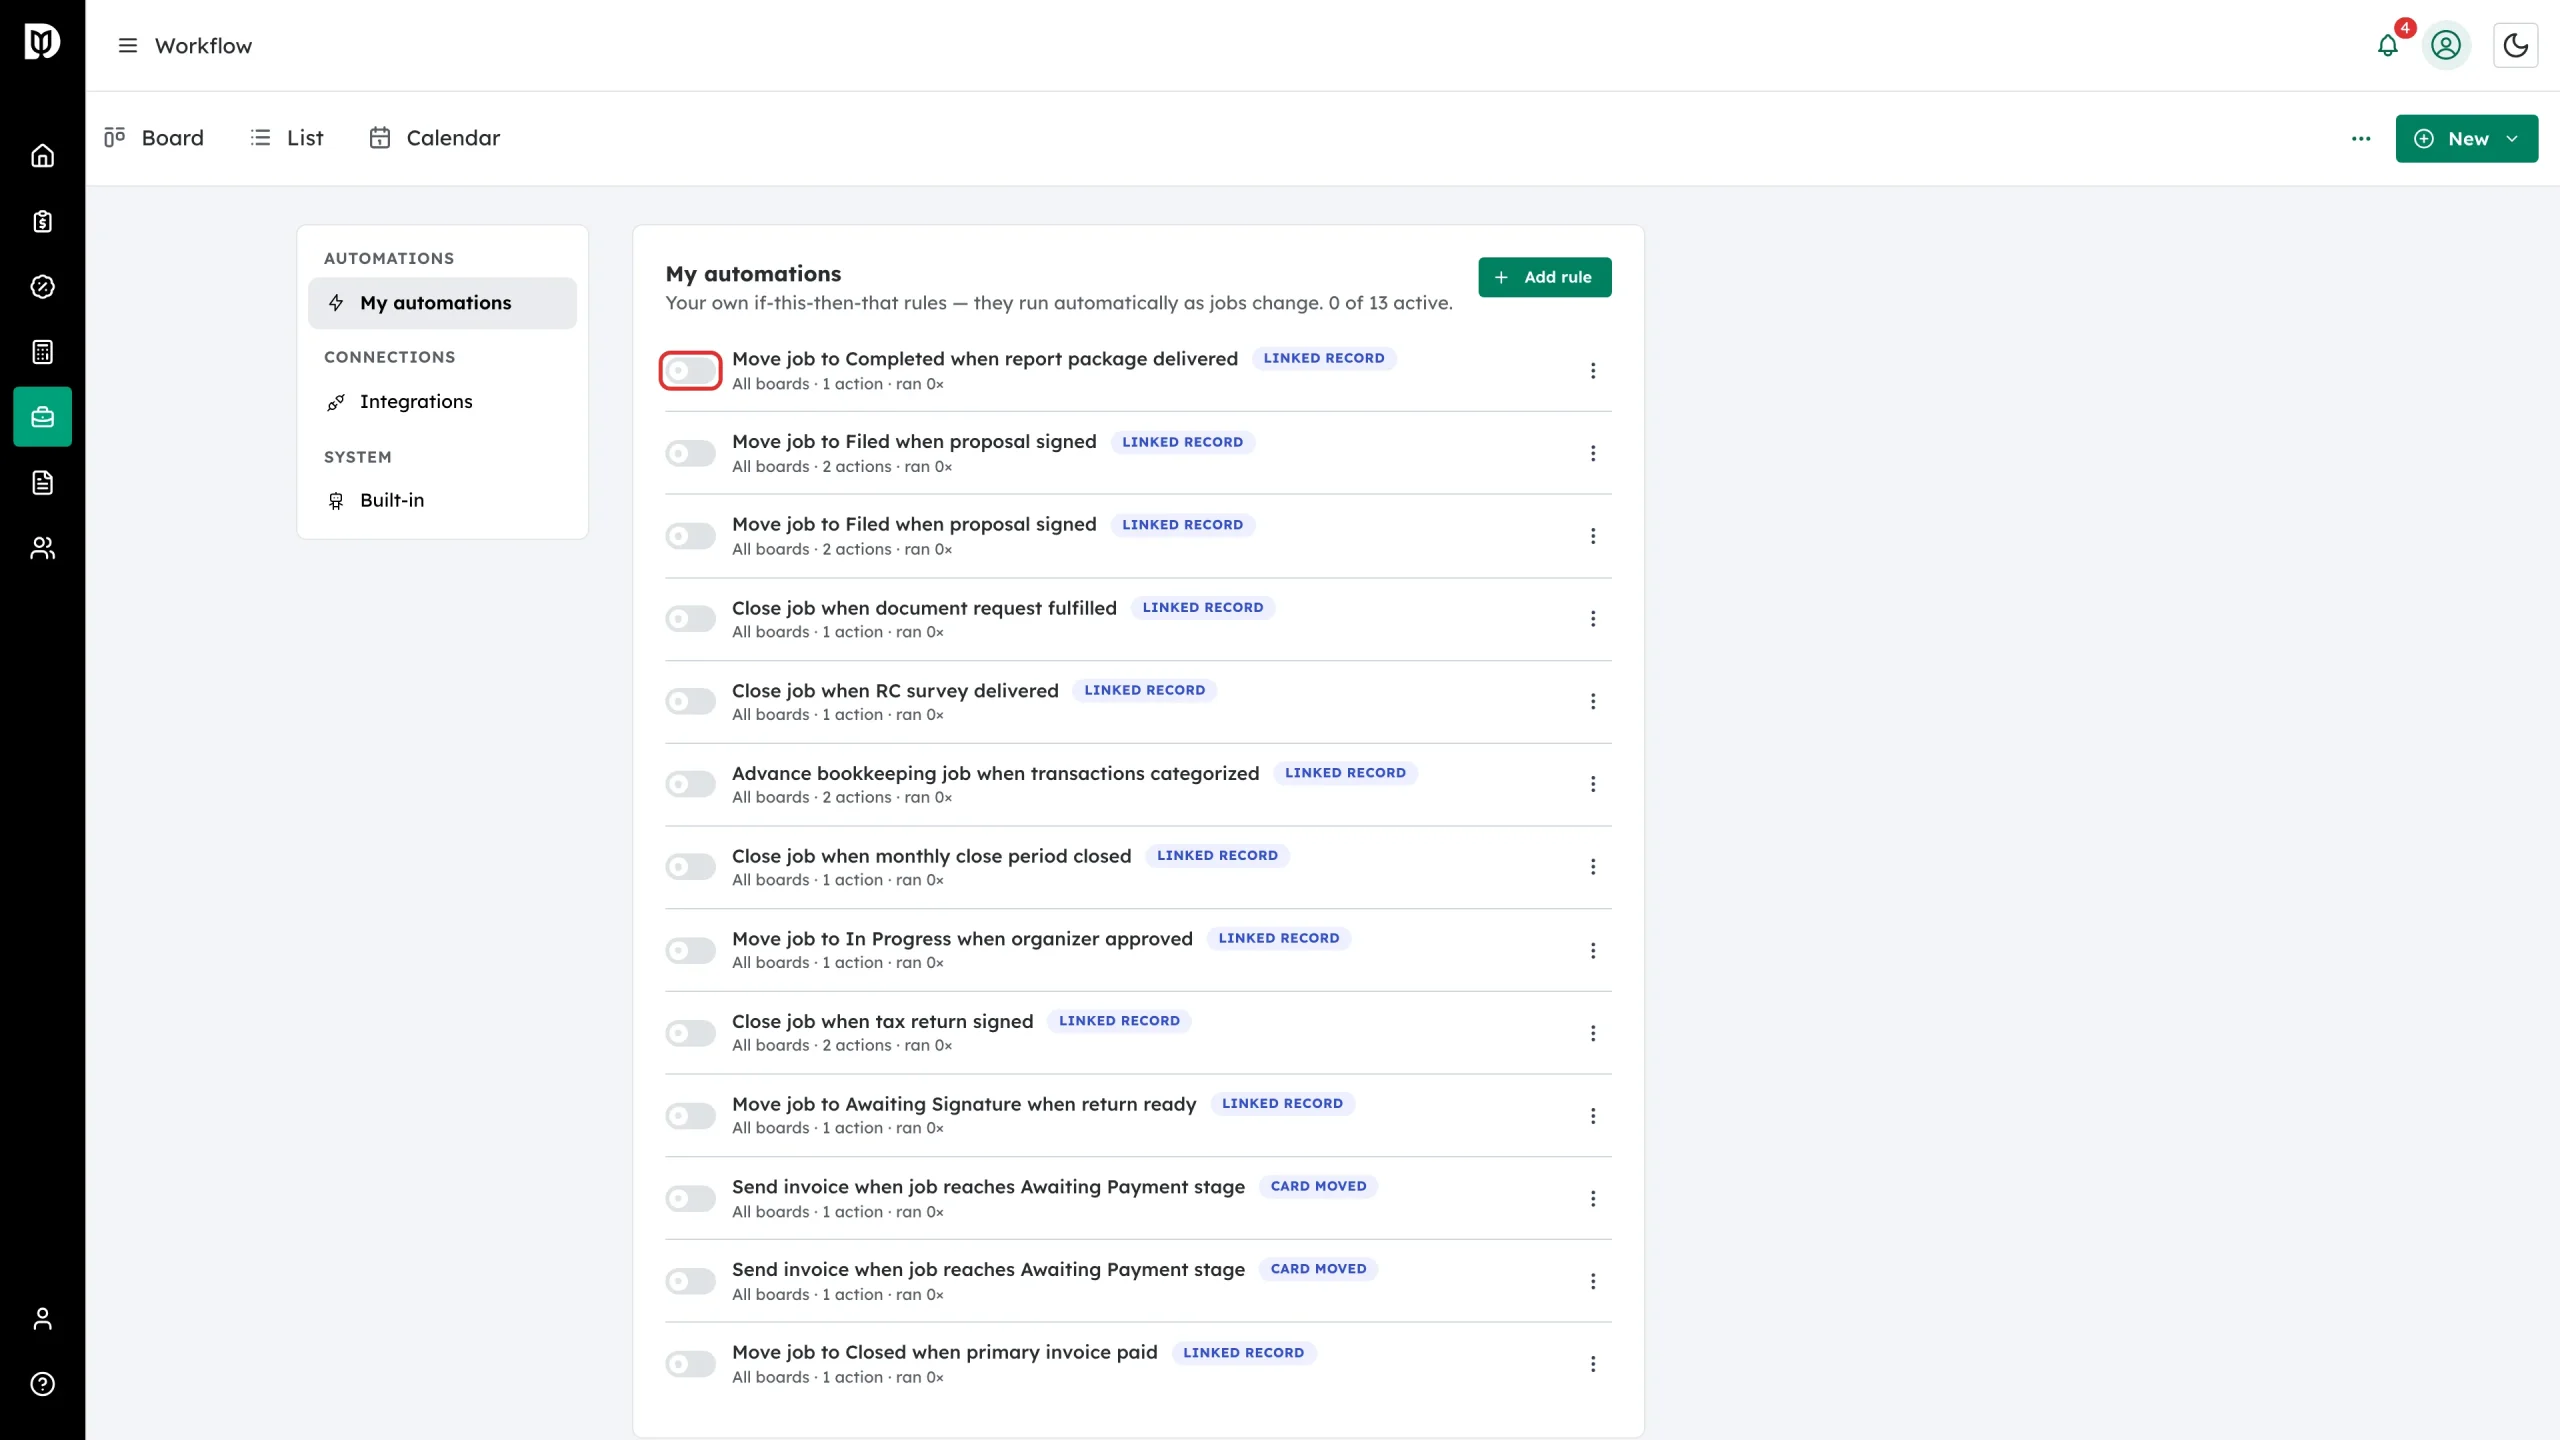
Step 4: Manage an existing rule
The three-dot menu on a row lets you edit the rule, test it, view its runs, or delete it. View runs is where you check whether a rule is actually doing anything.
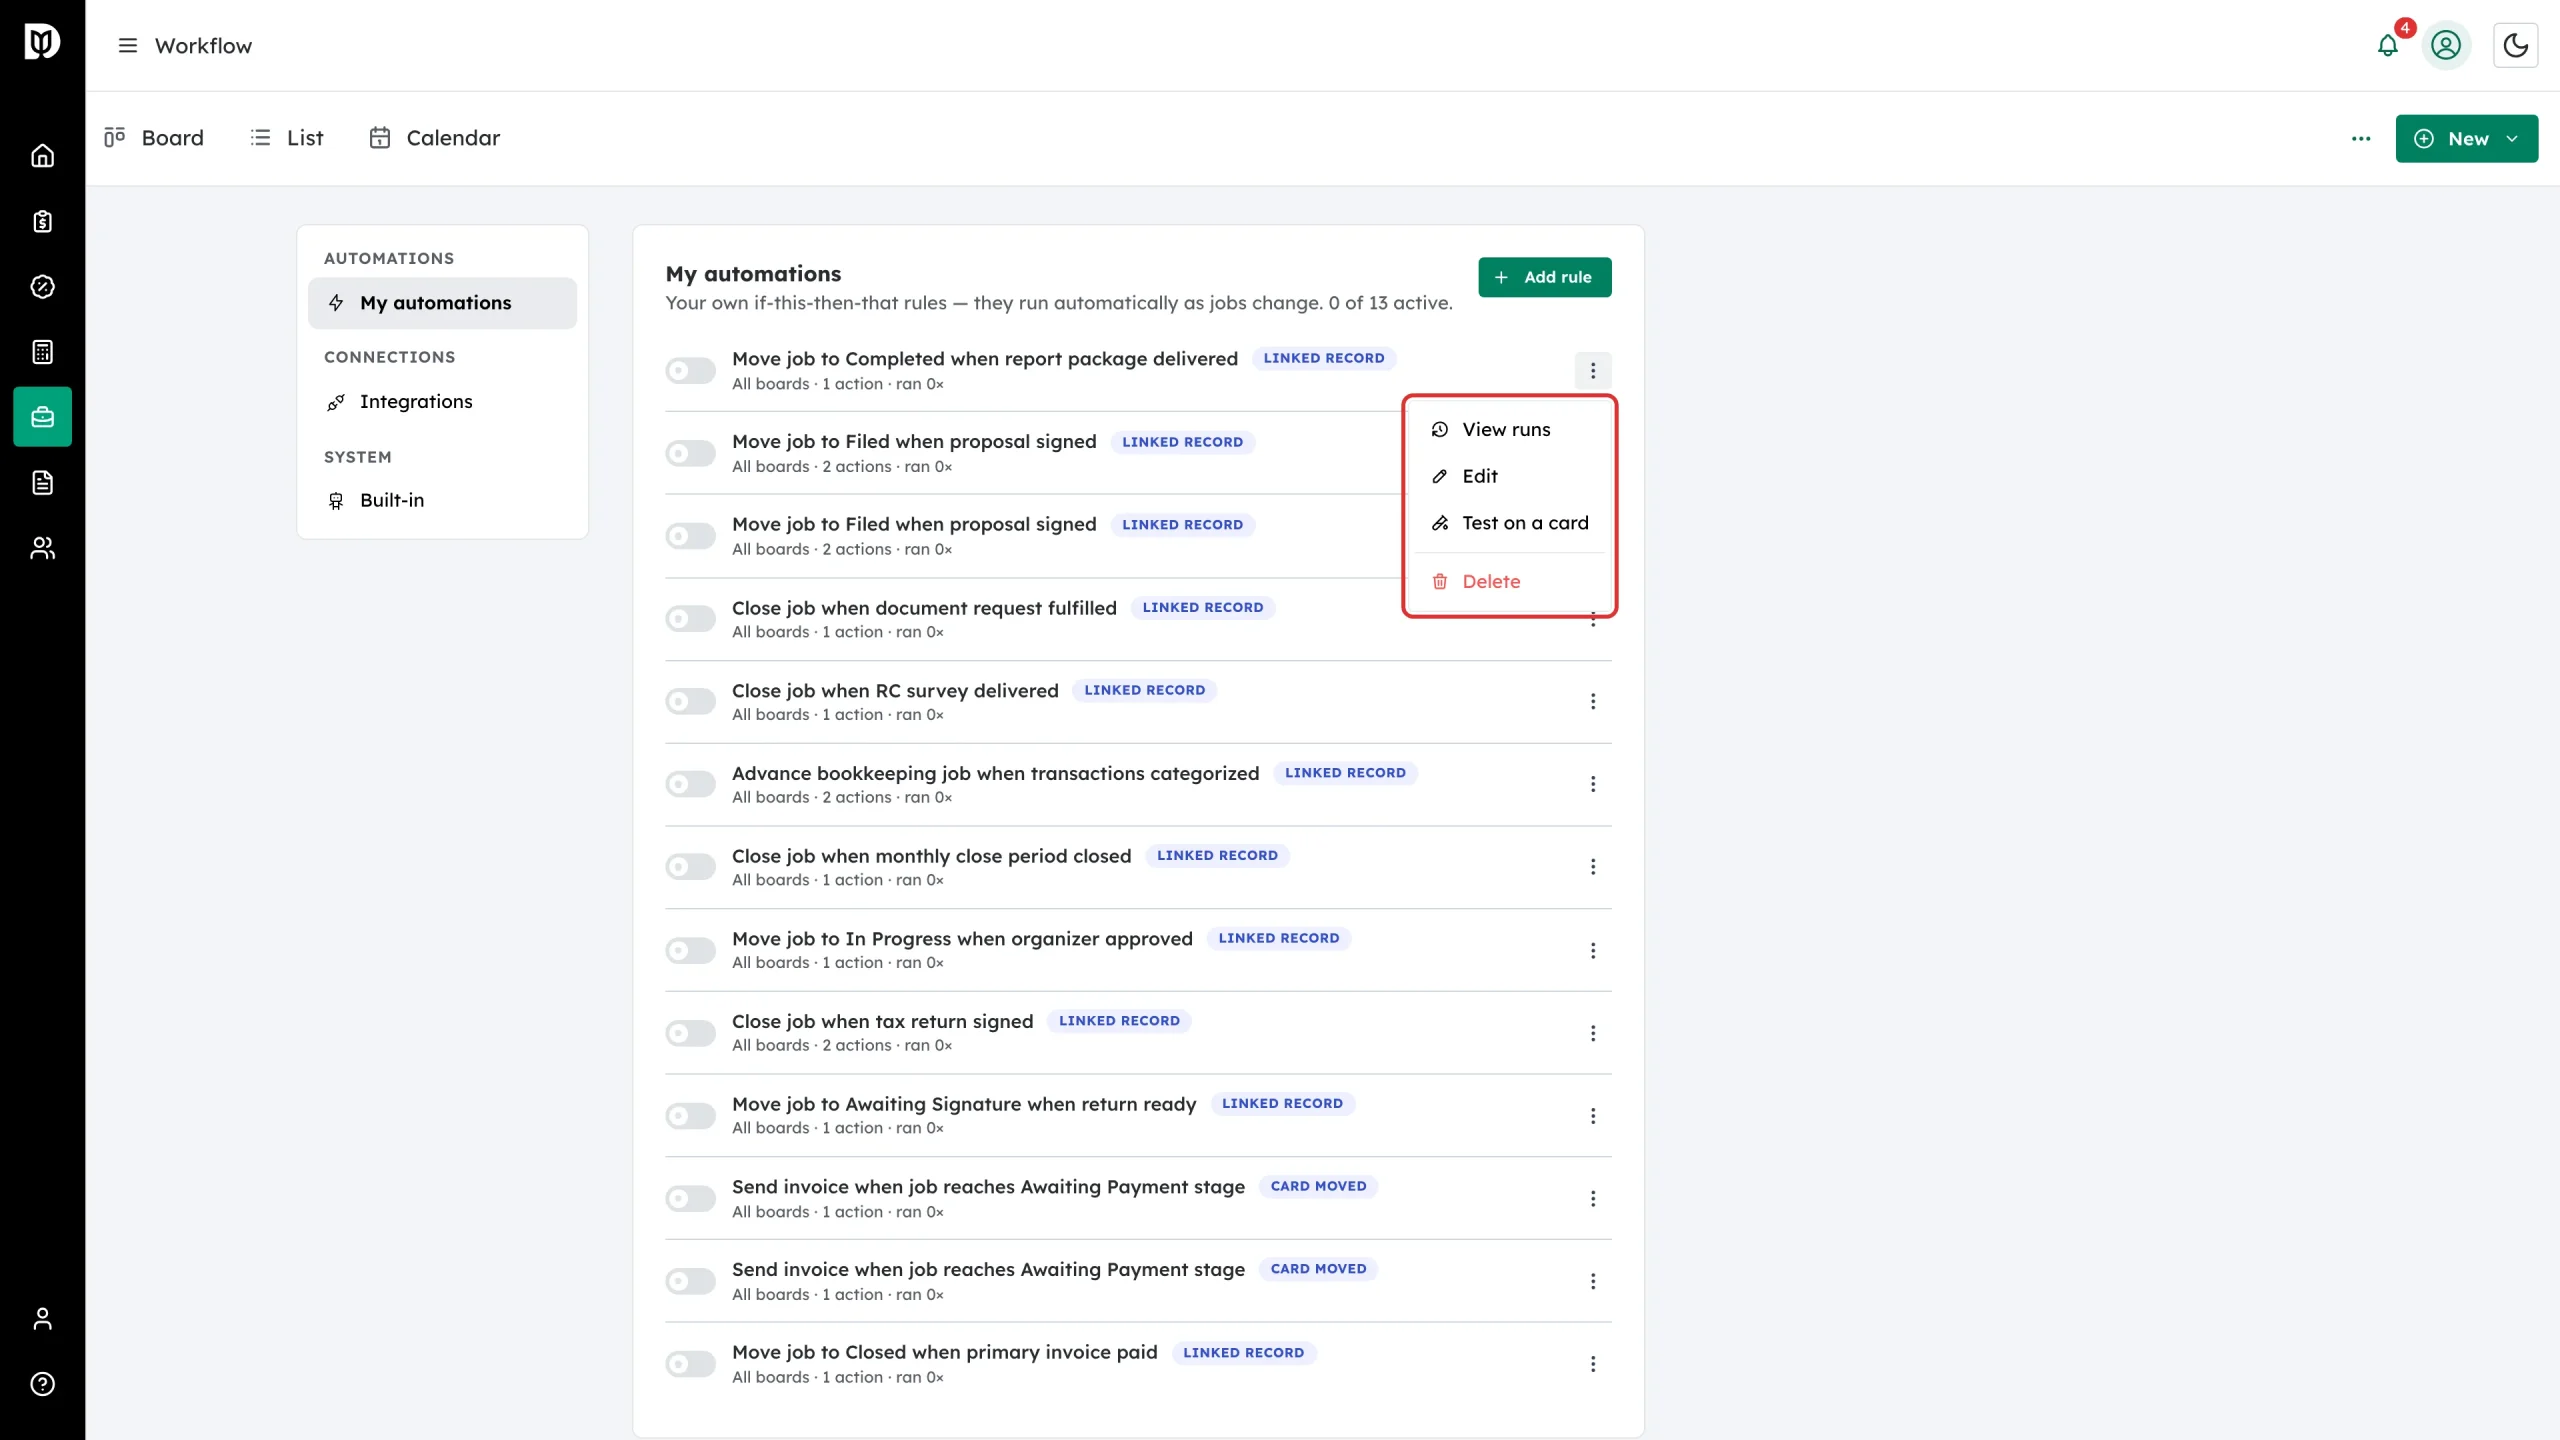
Step 5: Start your own rule
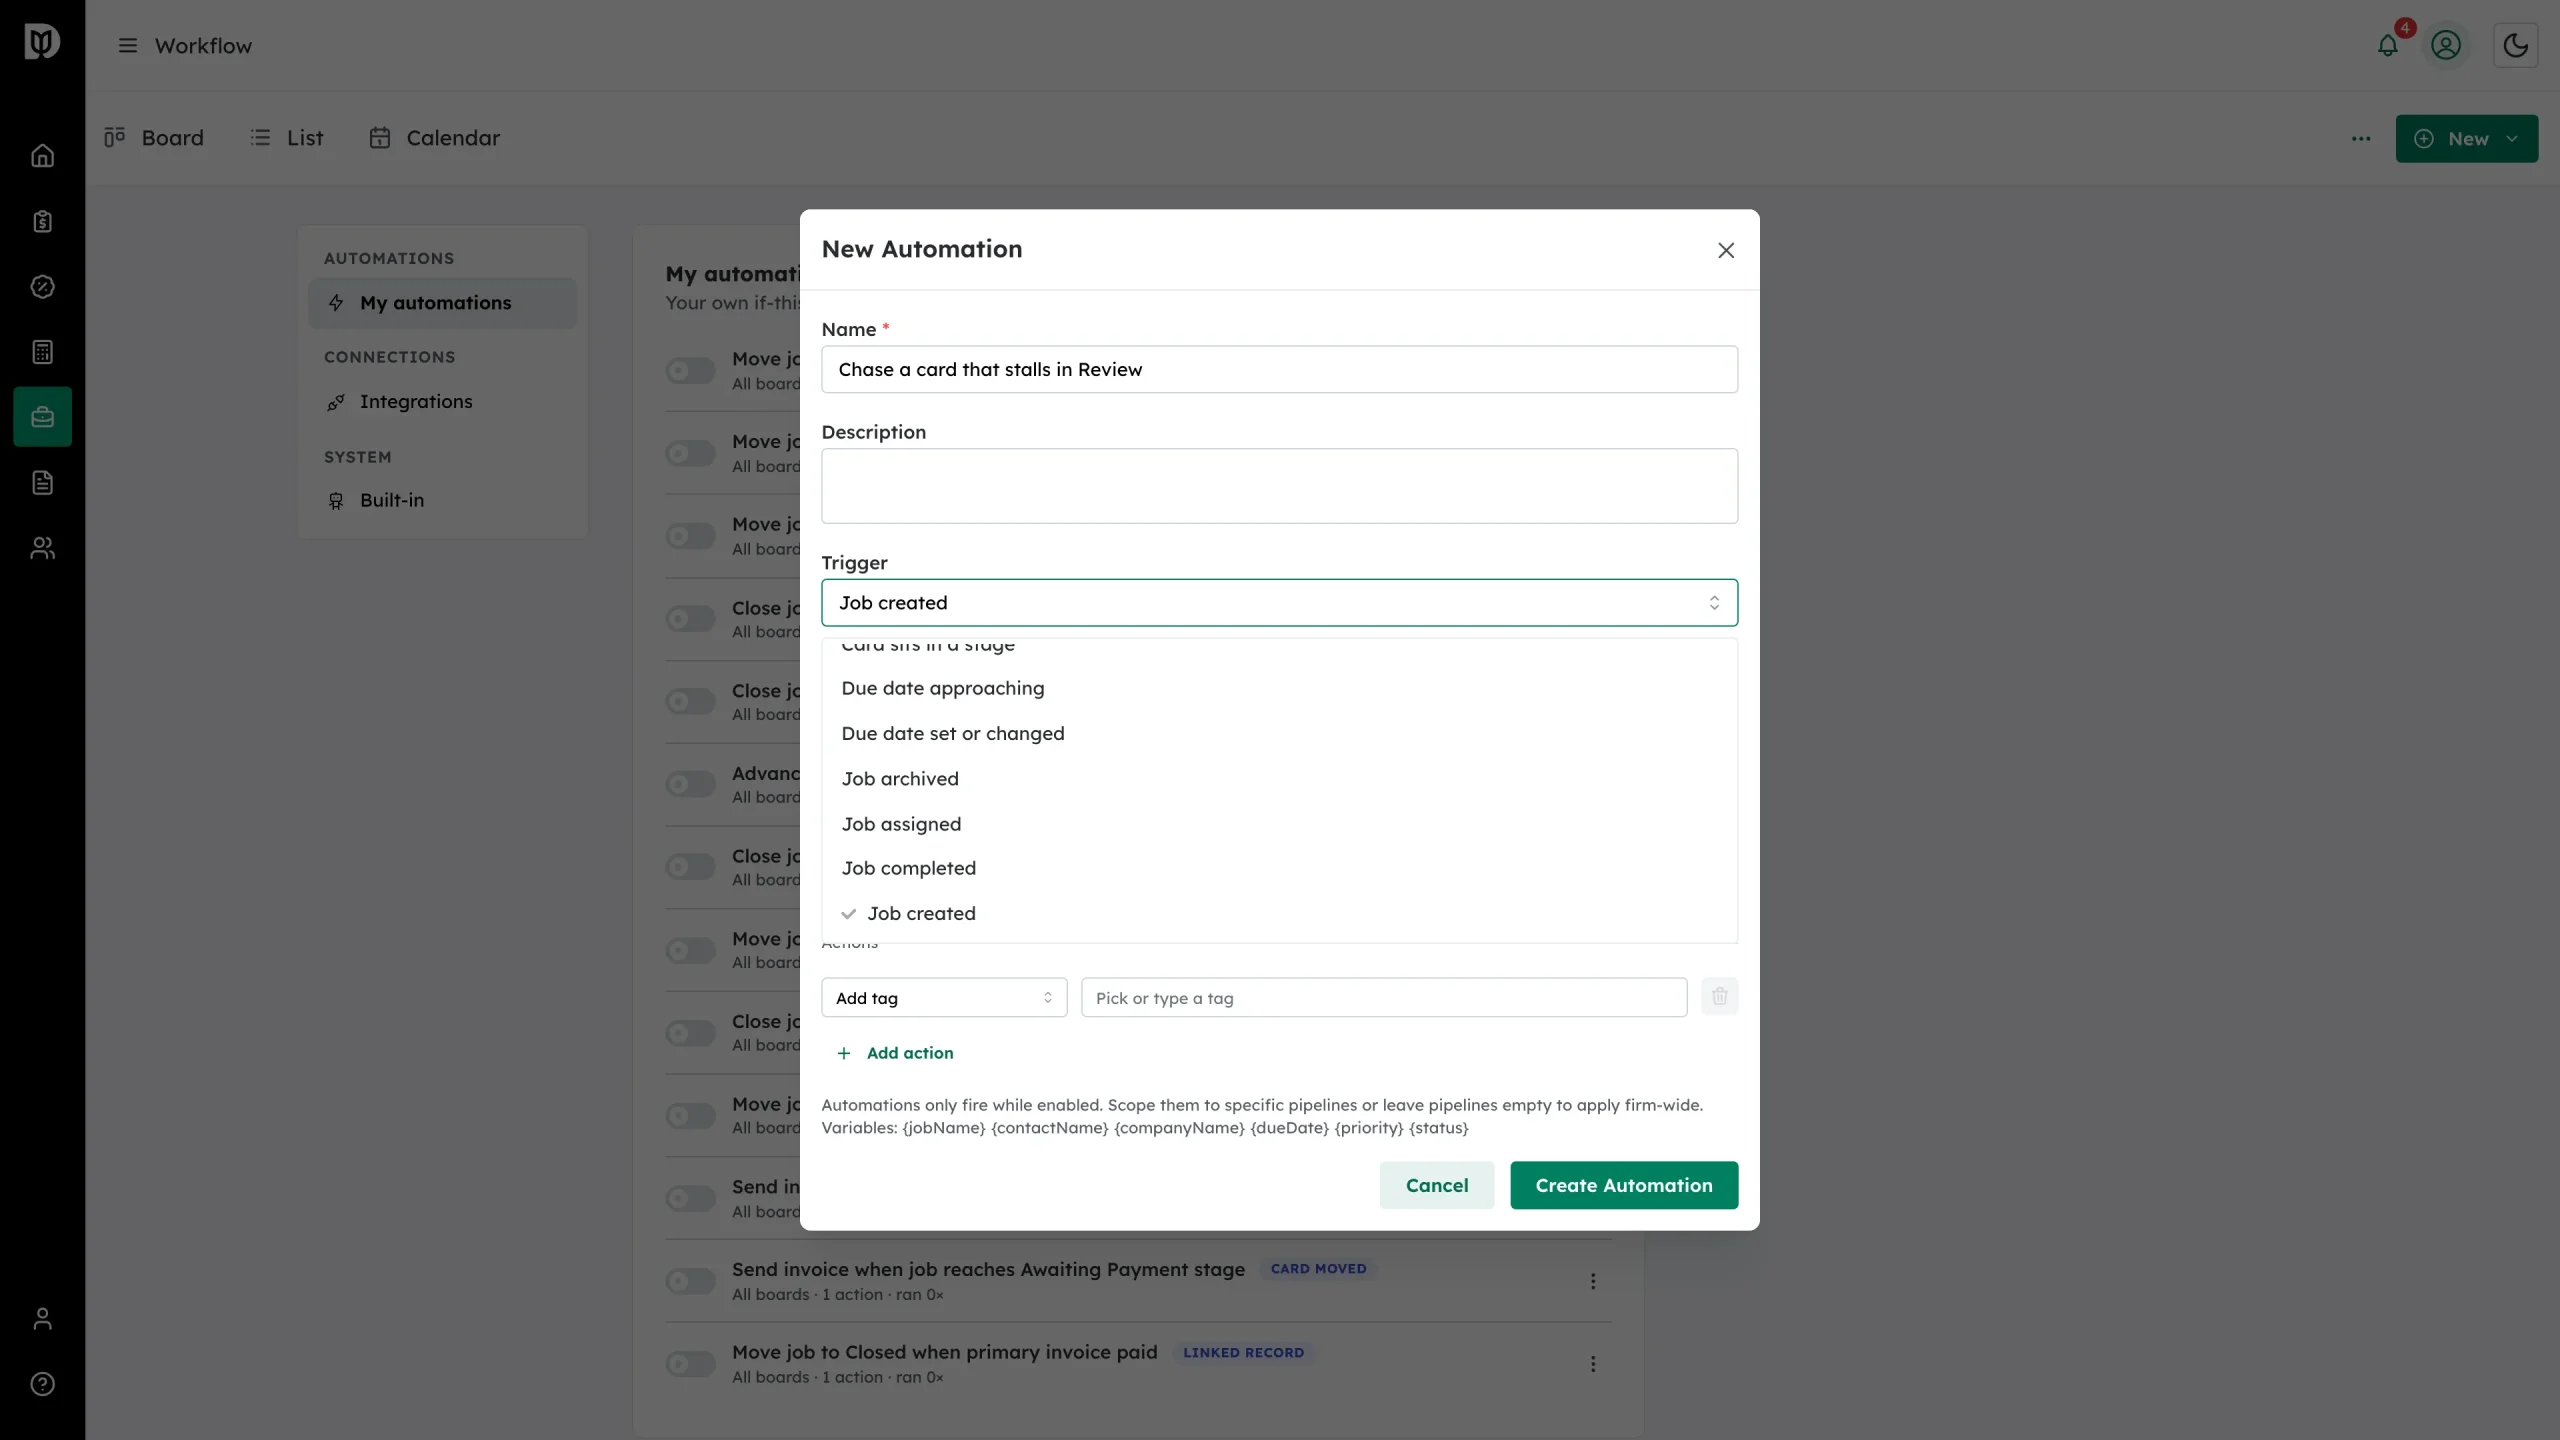
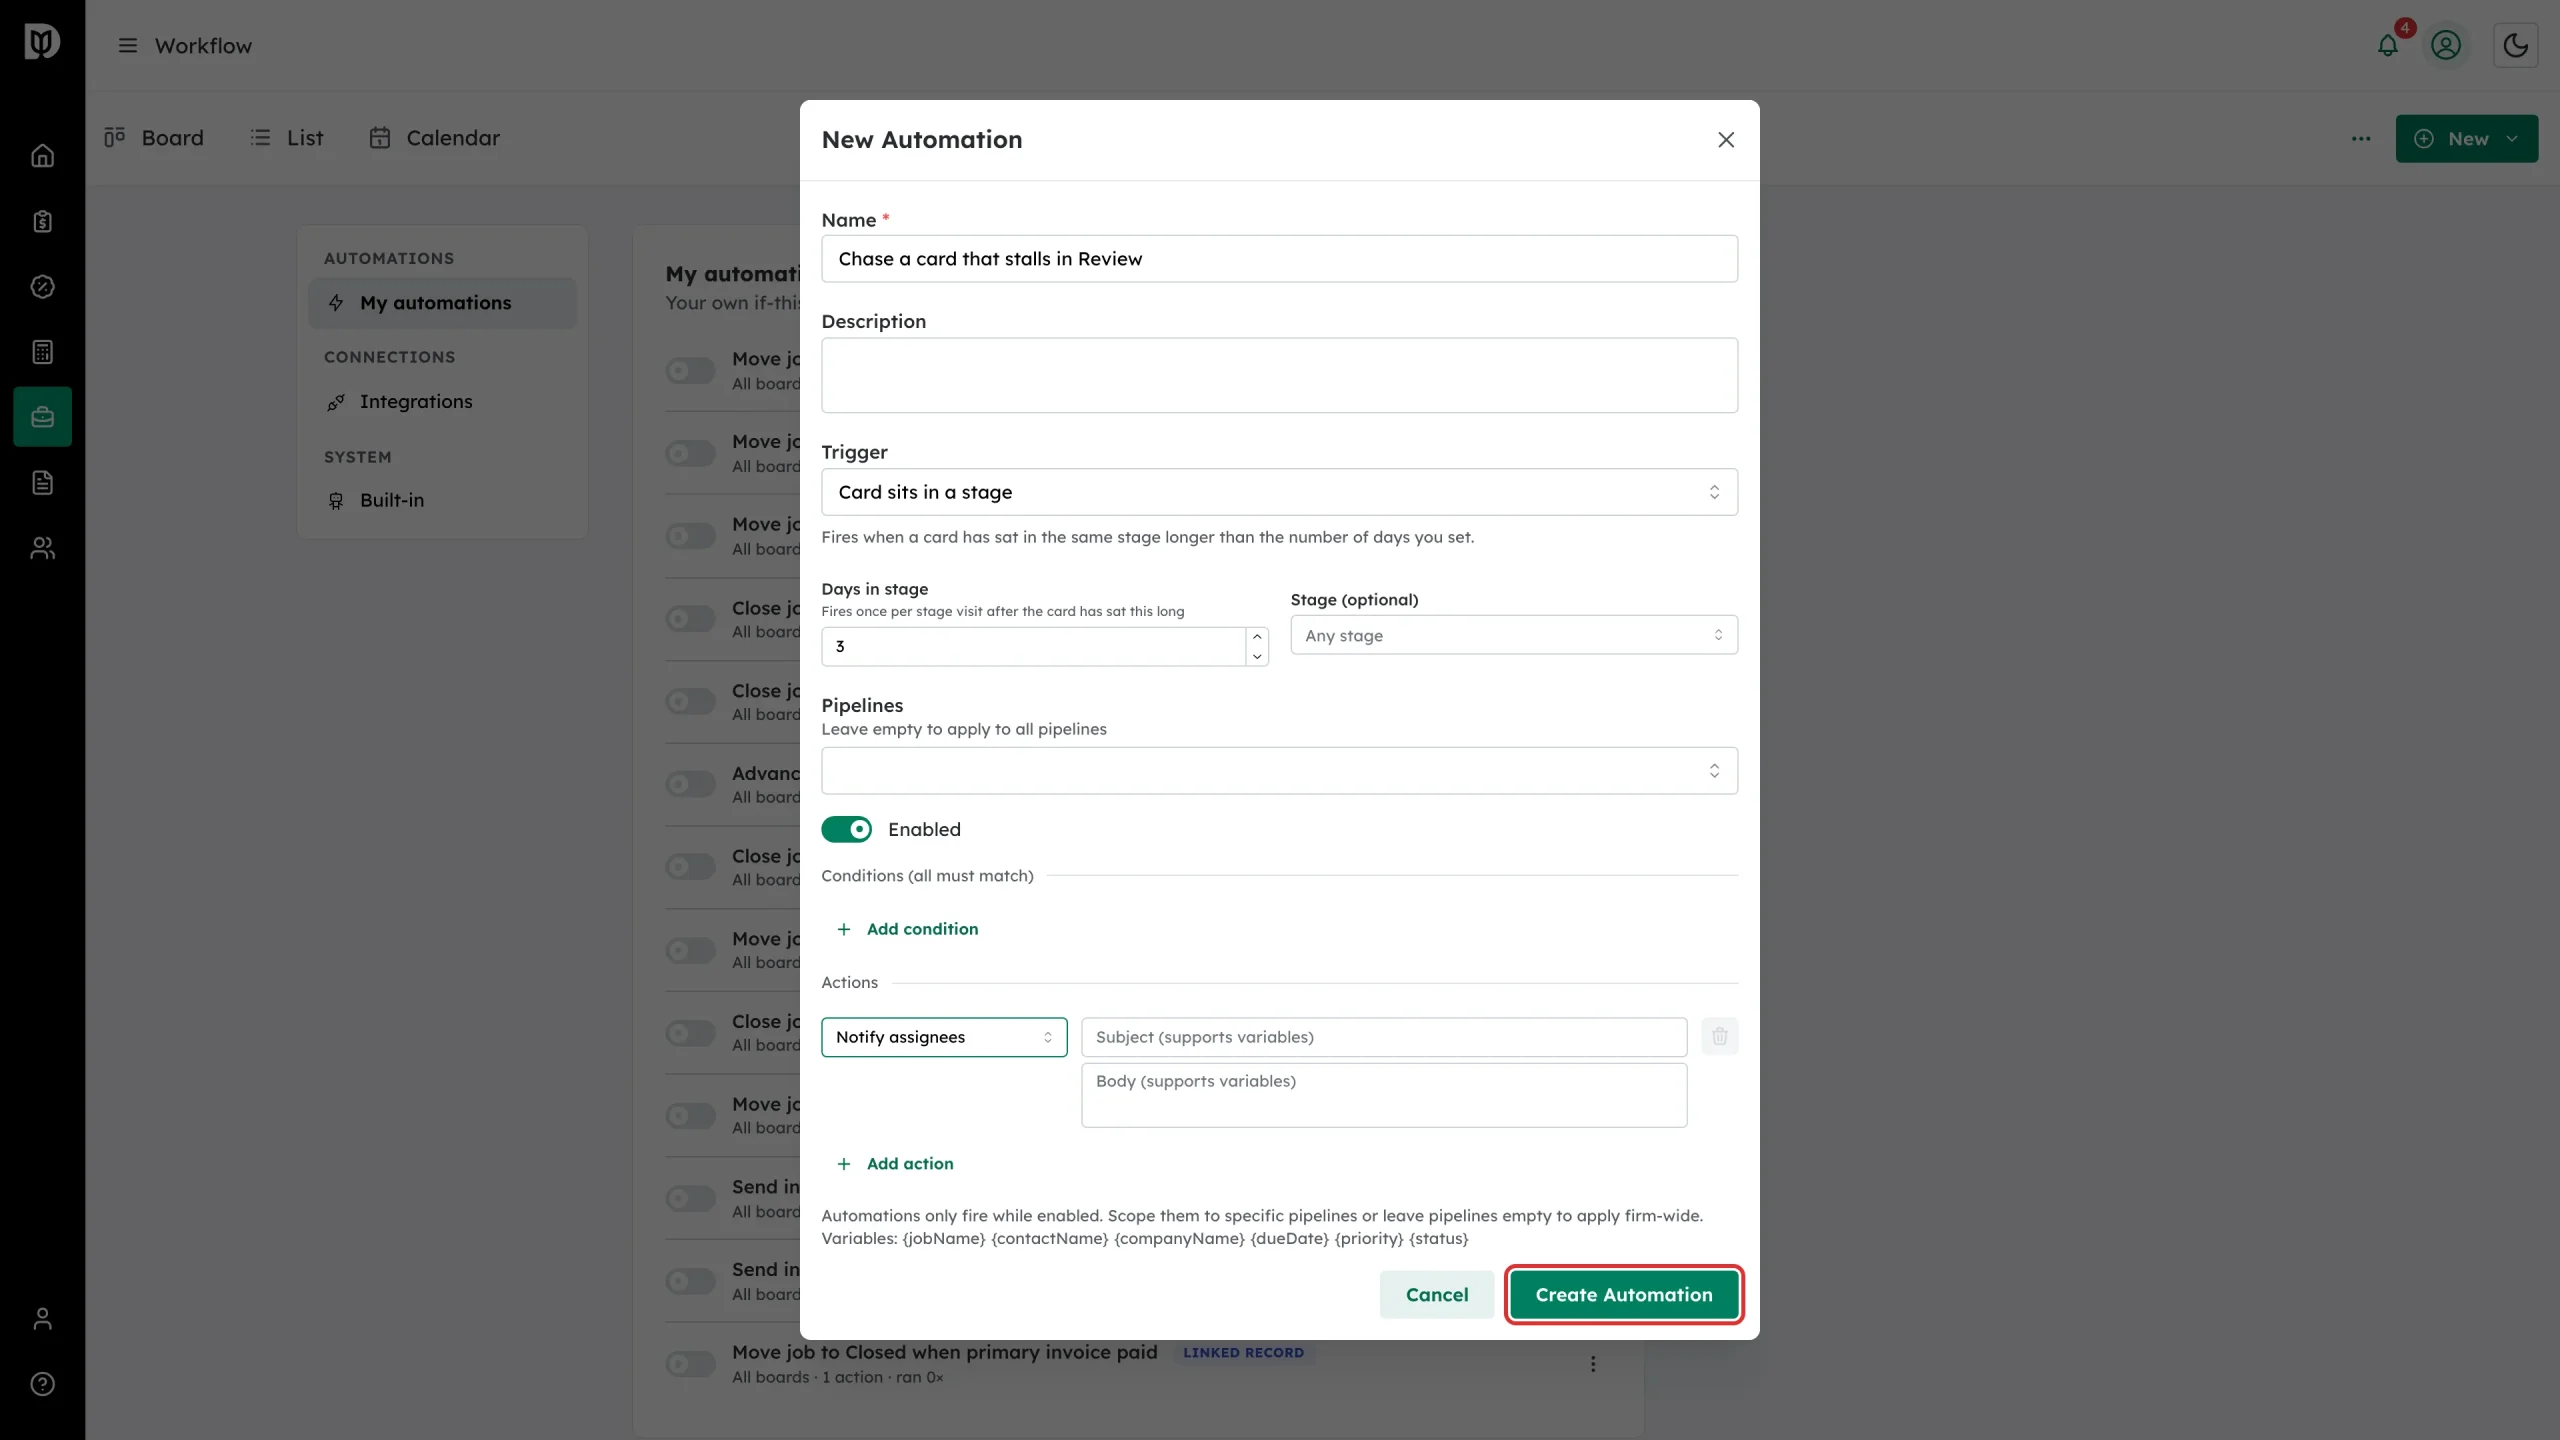
Select Add rule, give it a name, then choose a Trigger — the thing that sets the rule off. Triggers include a card being created, moved, assigned, completed or archived, a due date approaching or passing, a card sitting too long in one stage, a due date being set or changed, tags being added or removed, notes being added, a task being completed or all tasks being completed, a linked record changing status, and a plain schedule.
Step 6: Set the trigger up
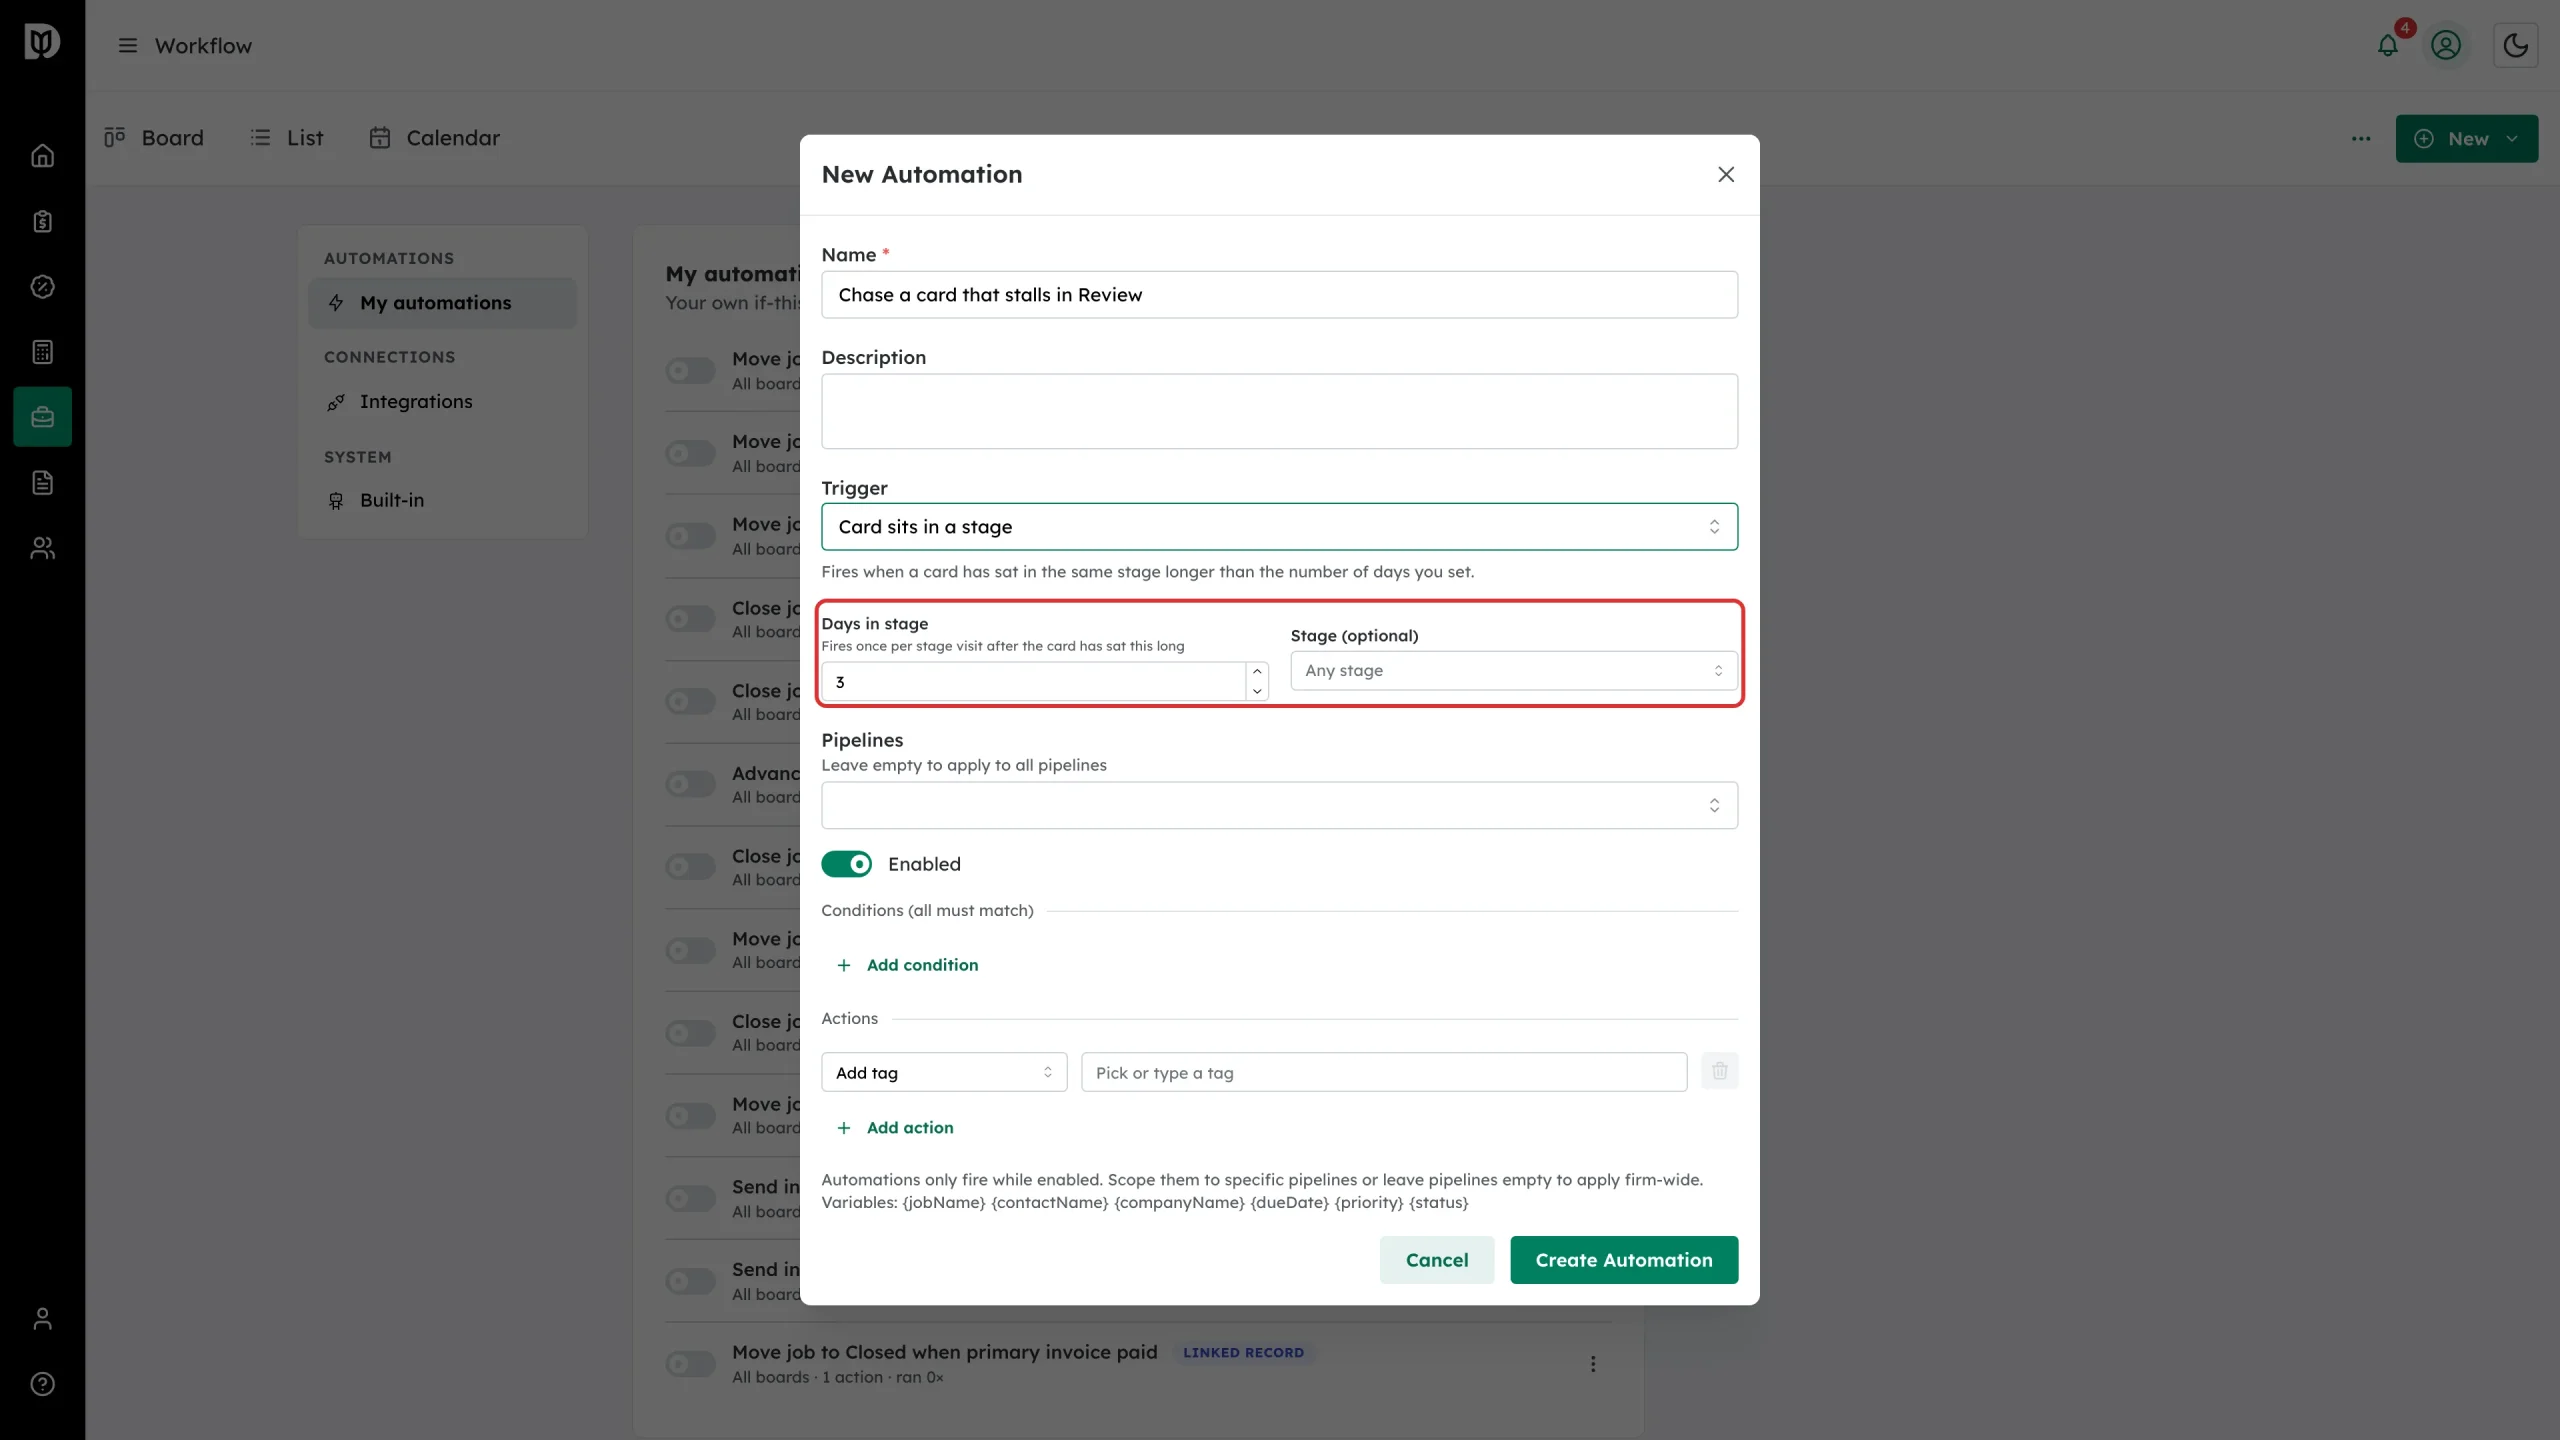
Most triggers have settings of their own. Card sits in a stage, for example, asks how many days and optionally which stage.
Step 7: Choose which boards it covers
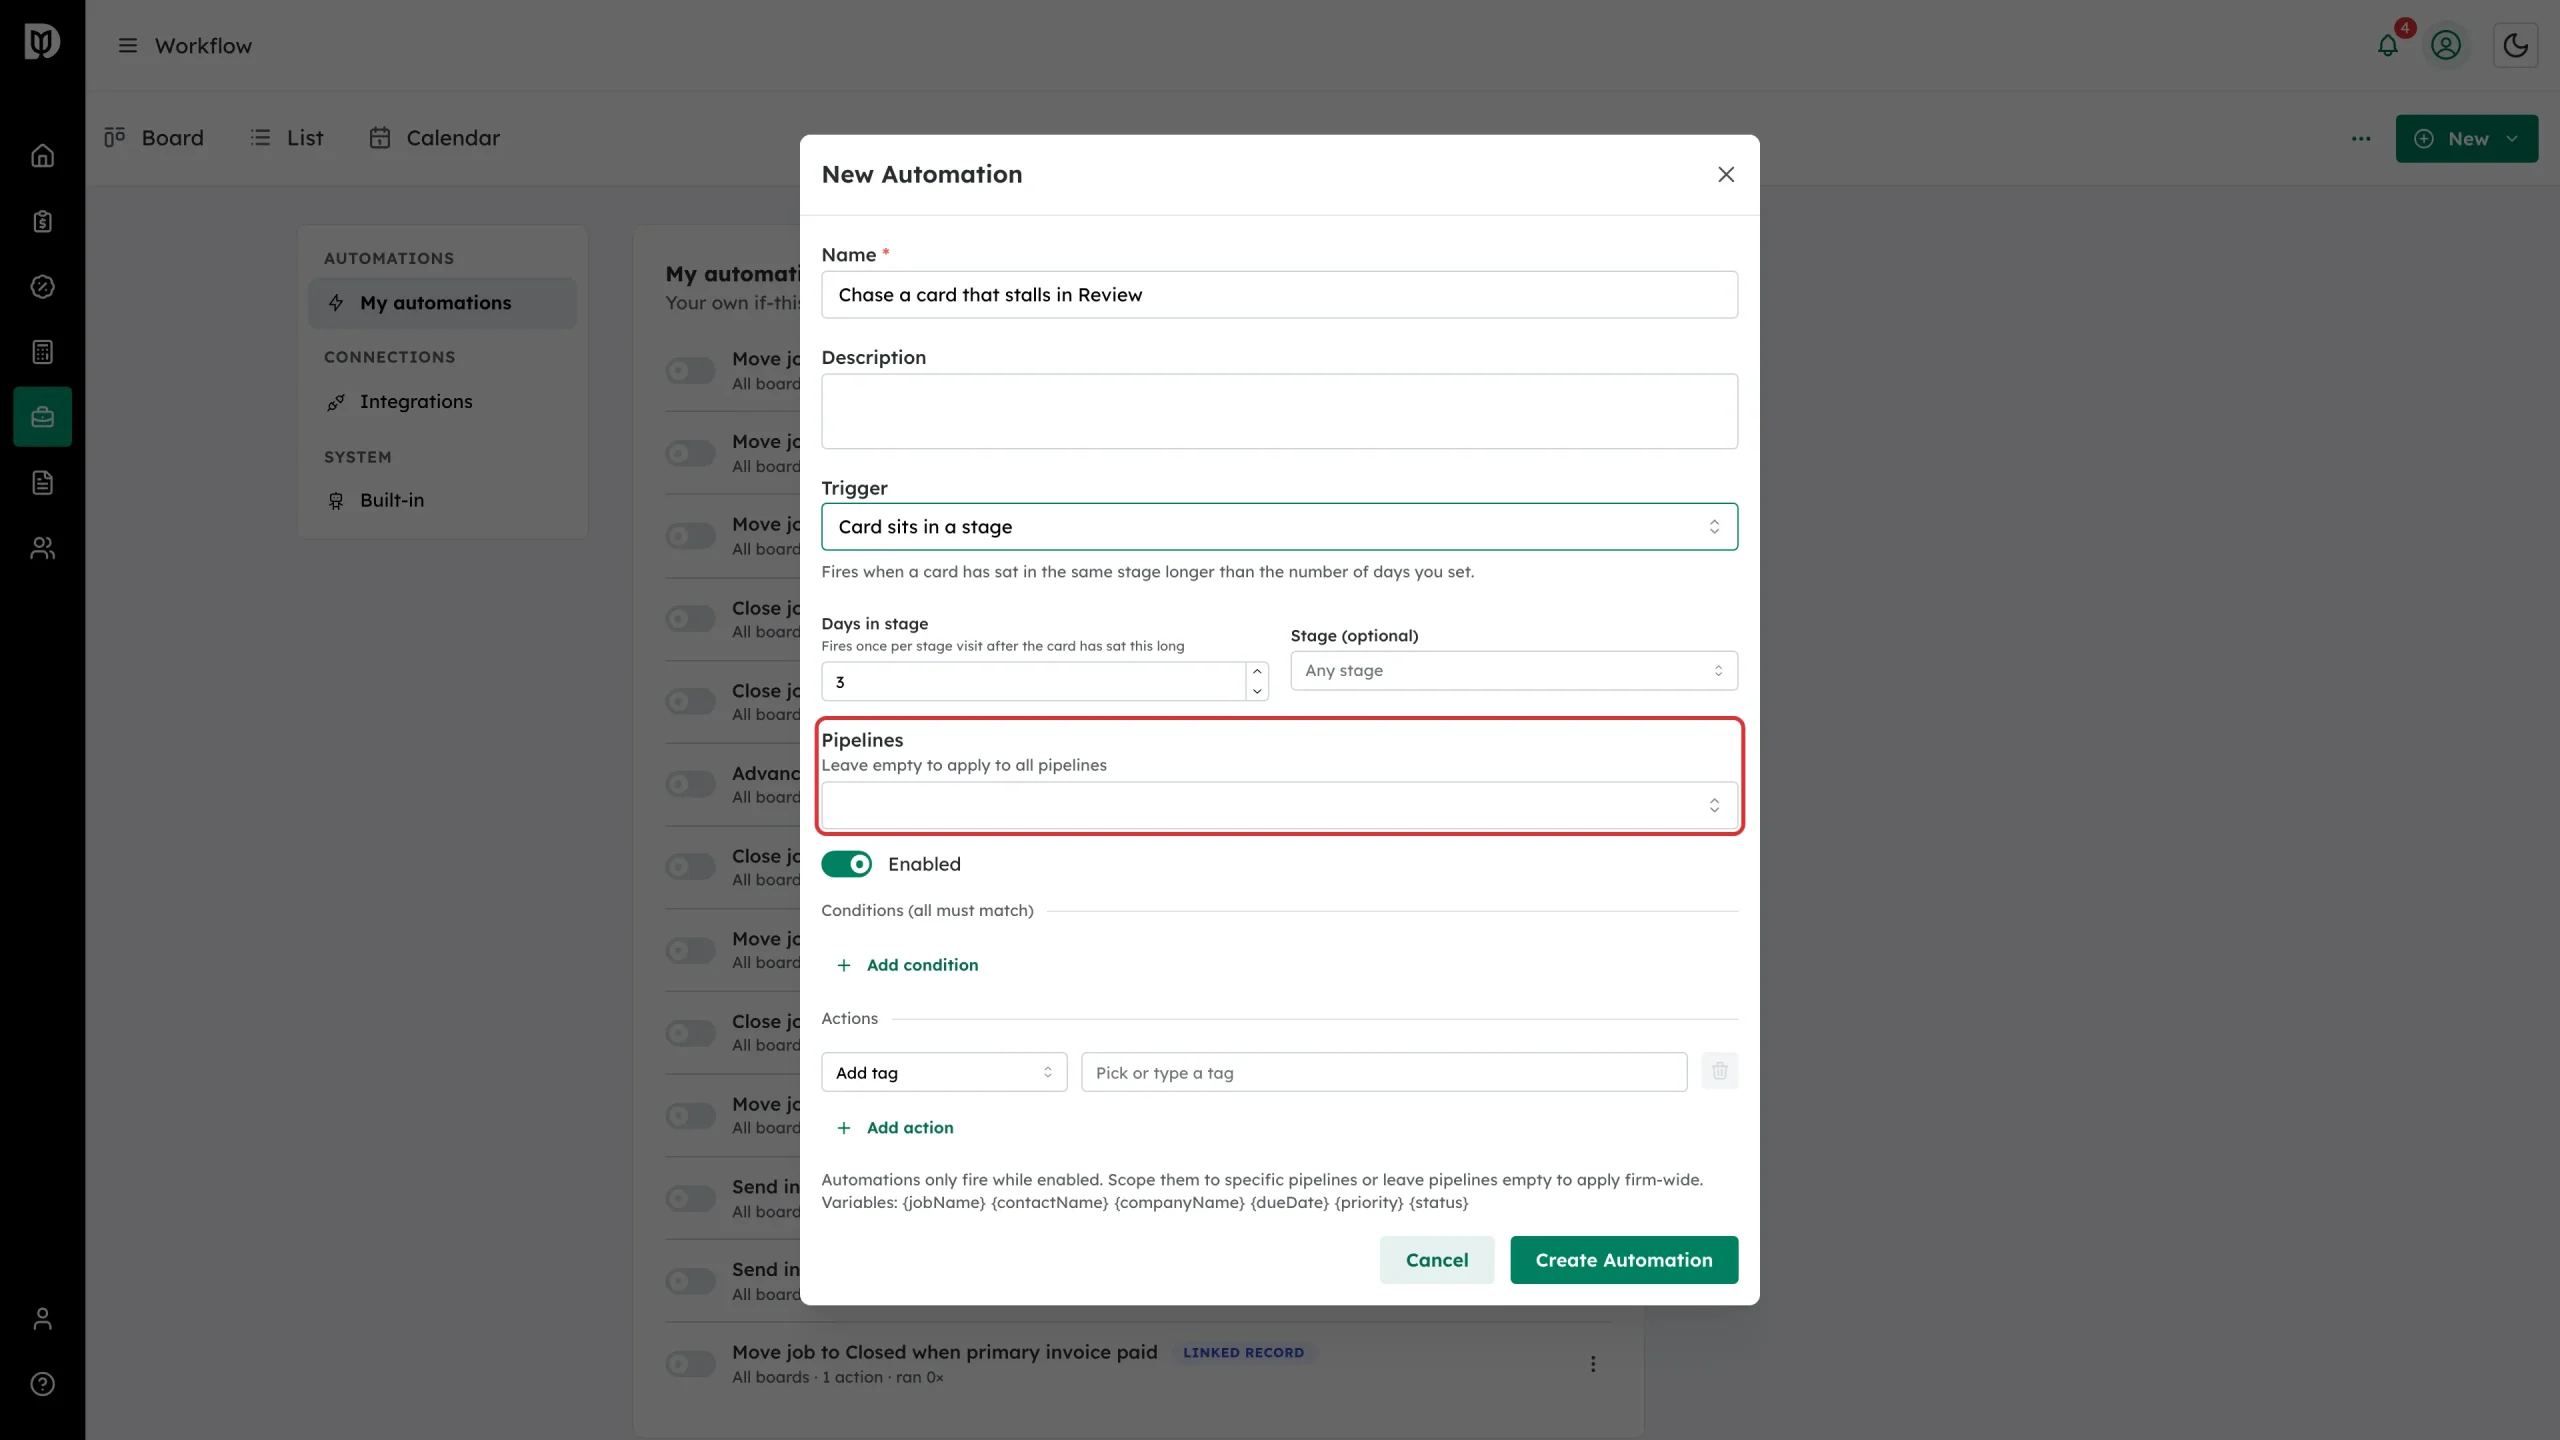
Leave Pipelines empty to apply the rule to every board, or pick the boards it should watch. Leave Enabled on if you want it live as soon as you save.
Step 8: Narrow it with conditions
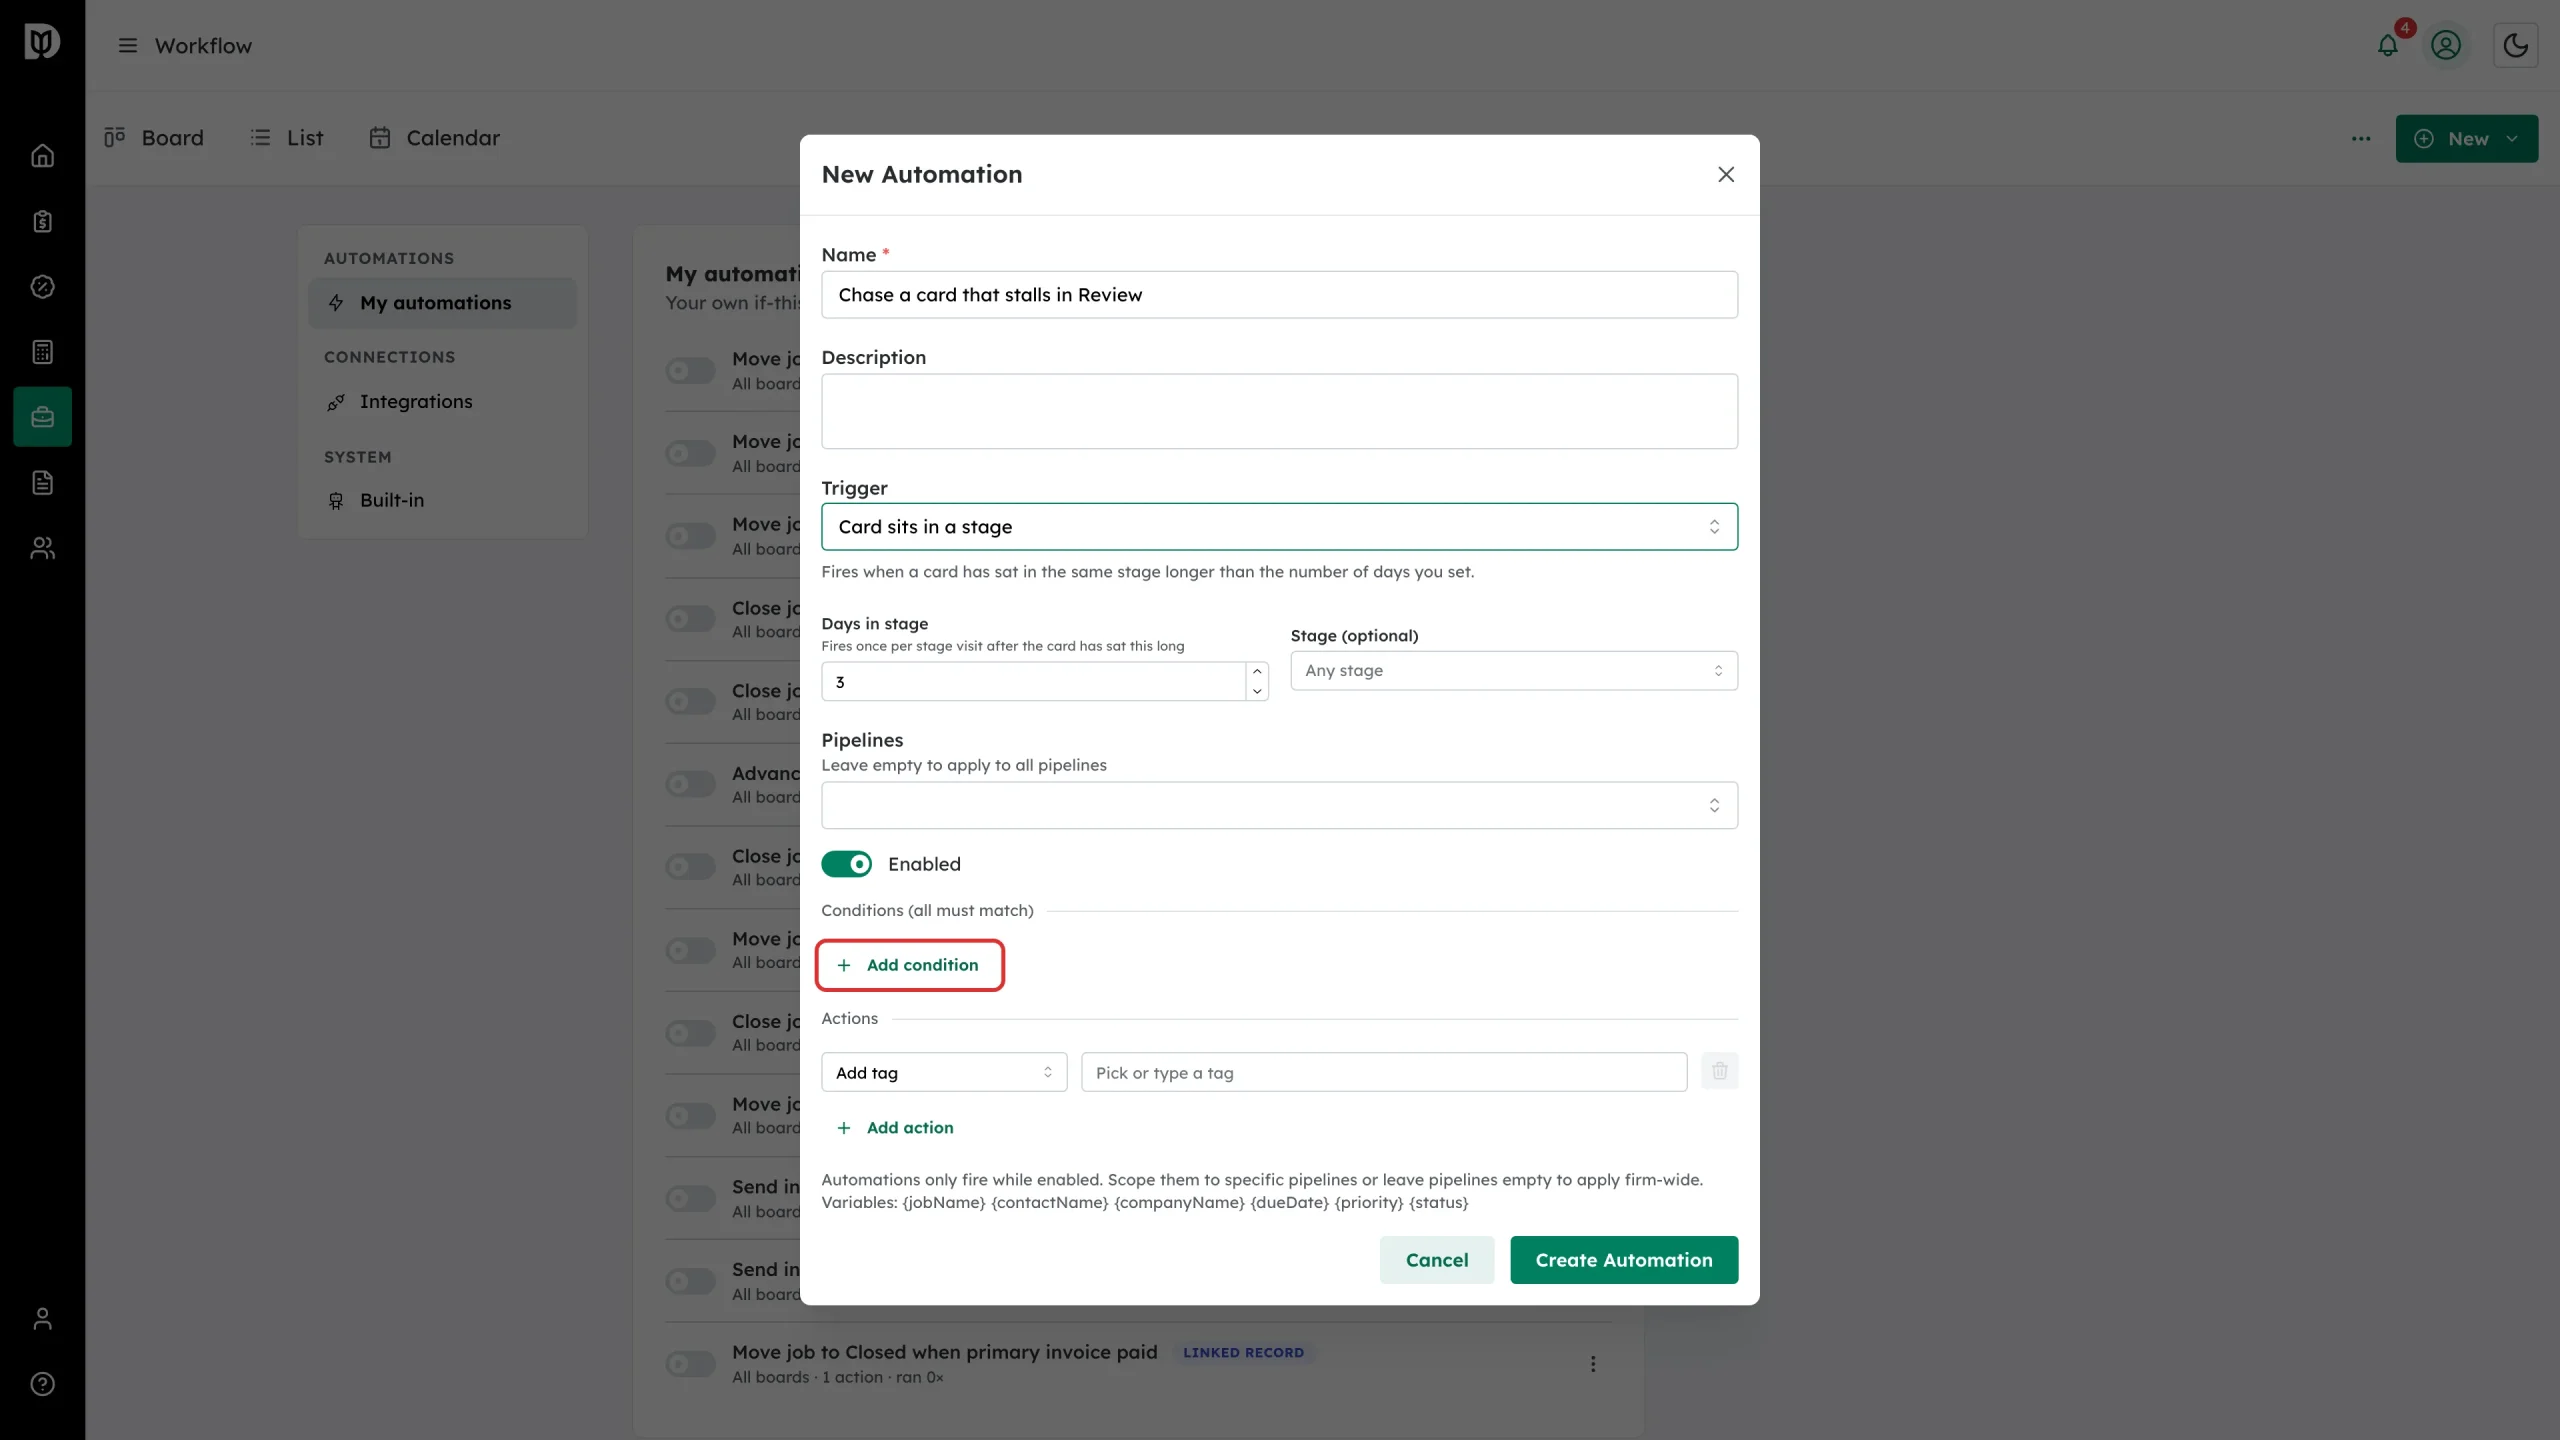
Select Add condition to make the rule fussier — priority, status, tags, stage, assignees, service type, tax year or days until due. All conditions must match for the rule to run.
Step 9: Say what should happen
Pick an action. You can assign or unassign someone, change priority or status, move the card, add or remove a tag, set or clear a due date, archive the job, create another job or task, add a note, apply a checklist template, notify the assignees, or email the client. Call feature action runs an action in another part of Debits, such as closing a month-end period, picked from dropdowns; when that action needs details, an input appears for each one, and a rule with a required input left blank cannot be enabled. Add more than one action with Add action.
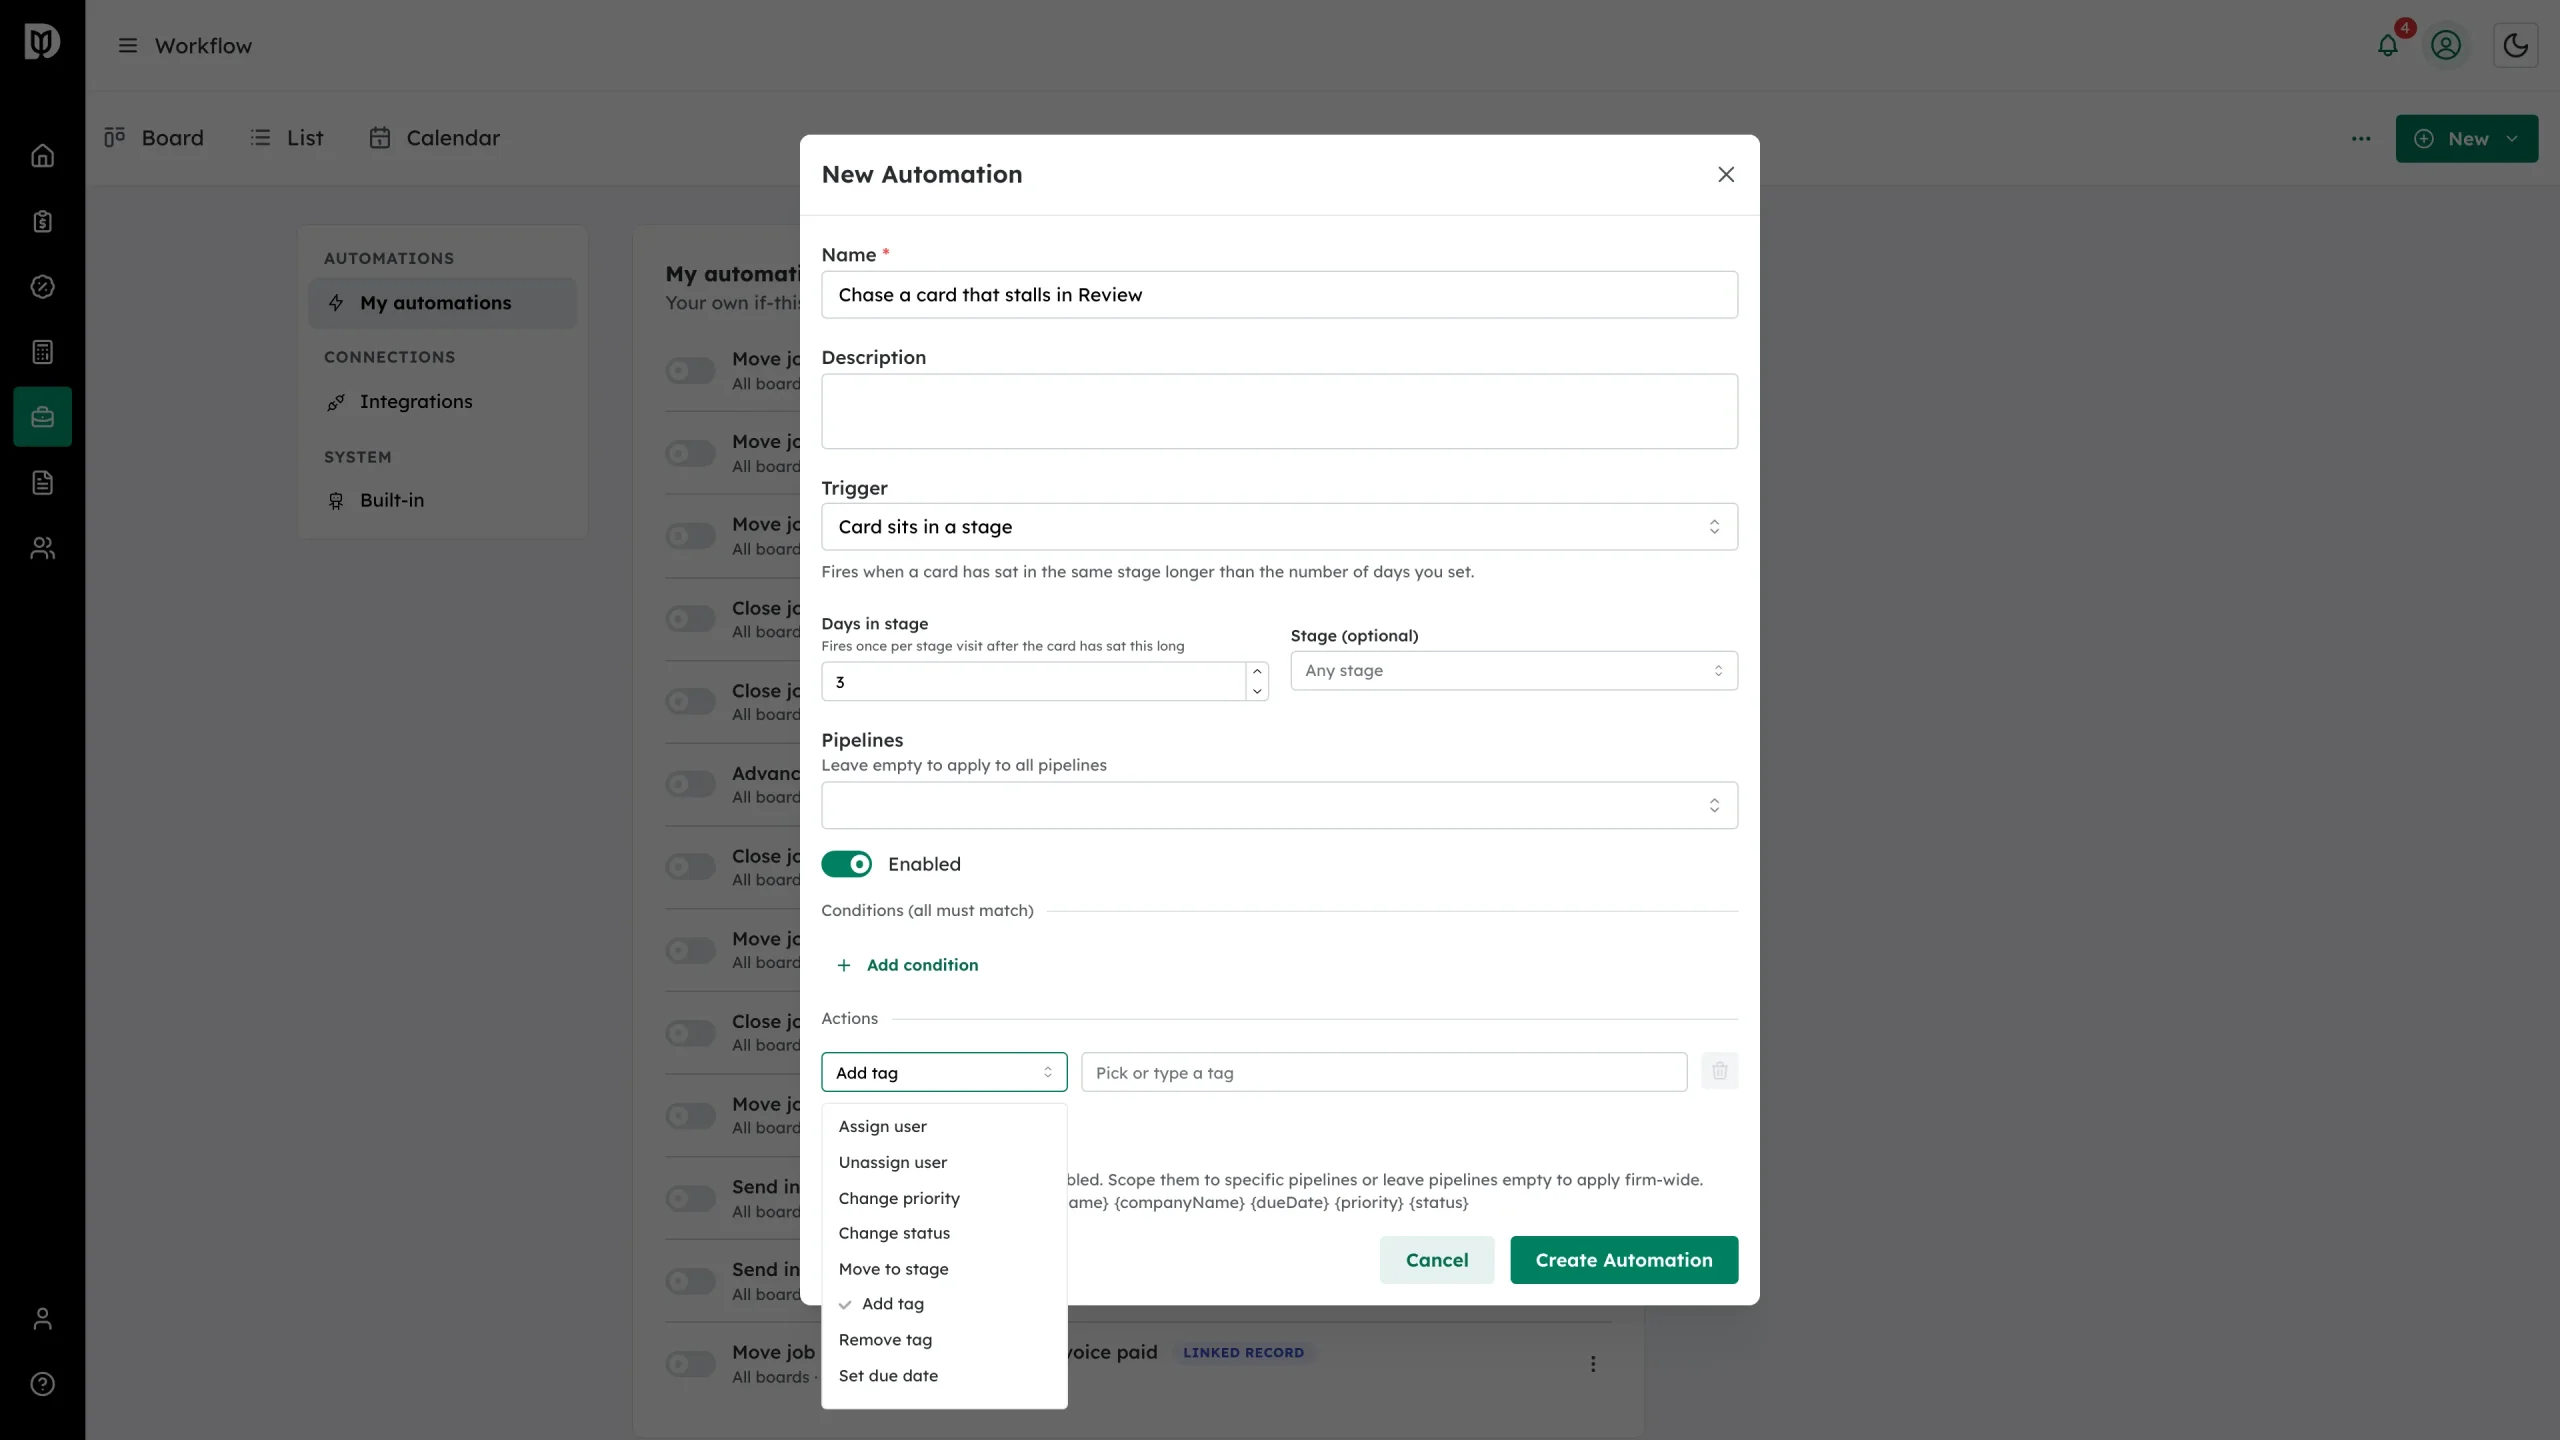
Step 10: Save the rule
Select Create Automation. The rule joins the list and the active count goes up.
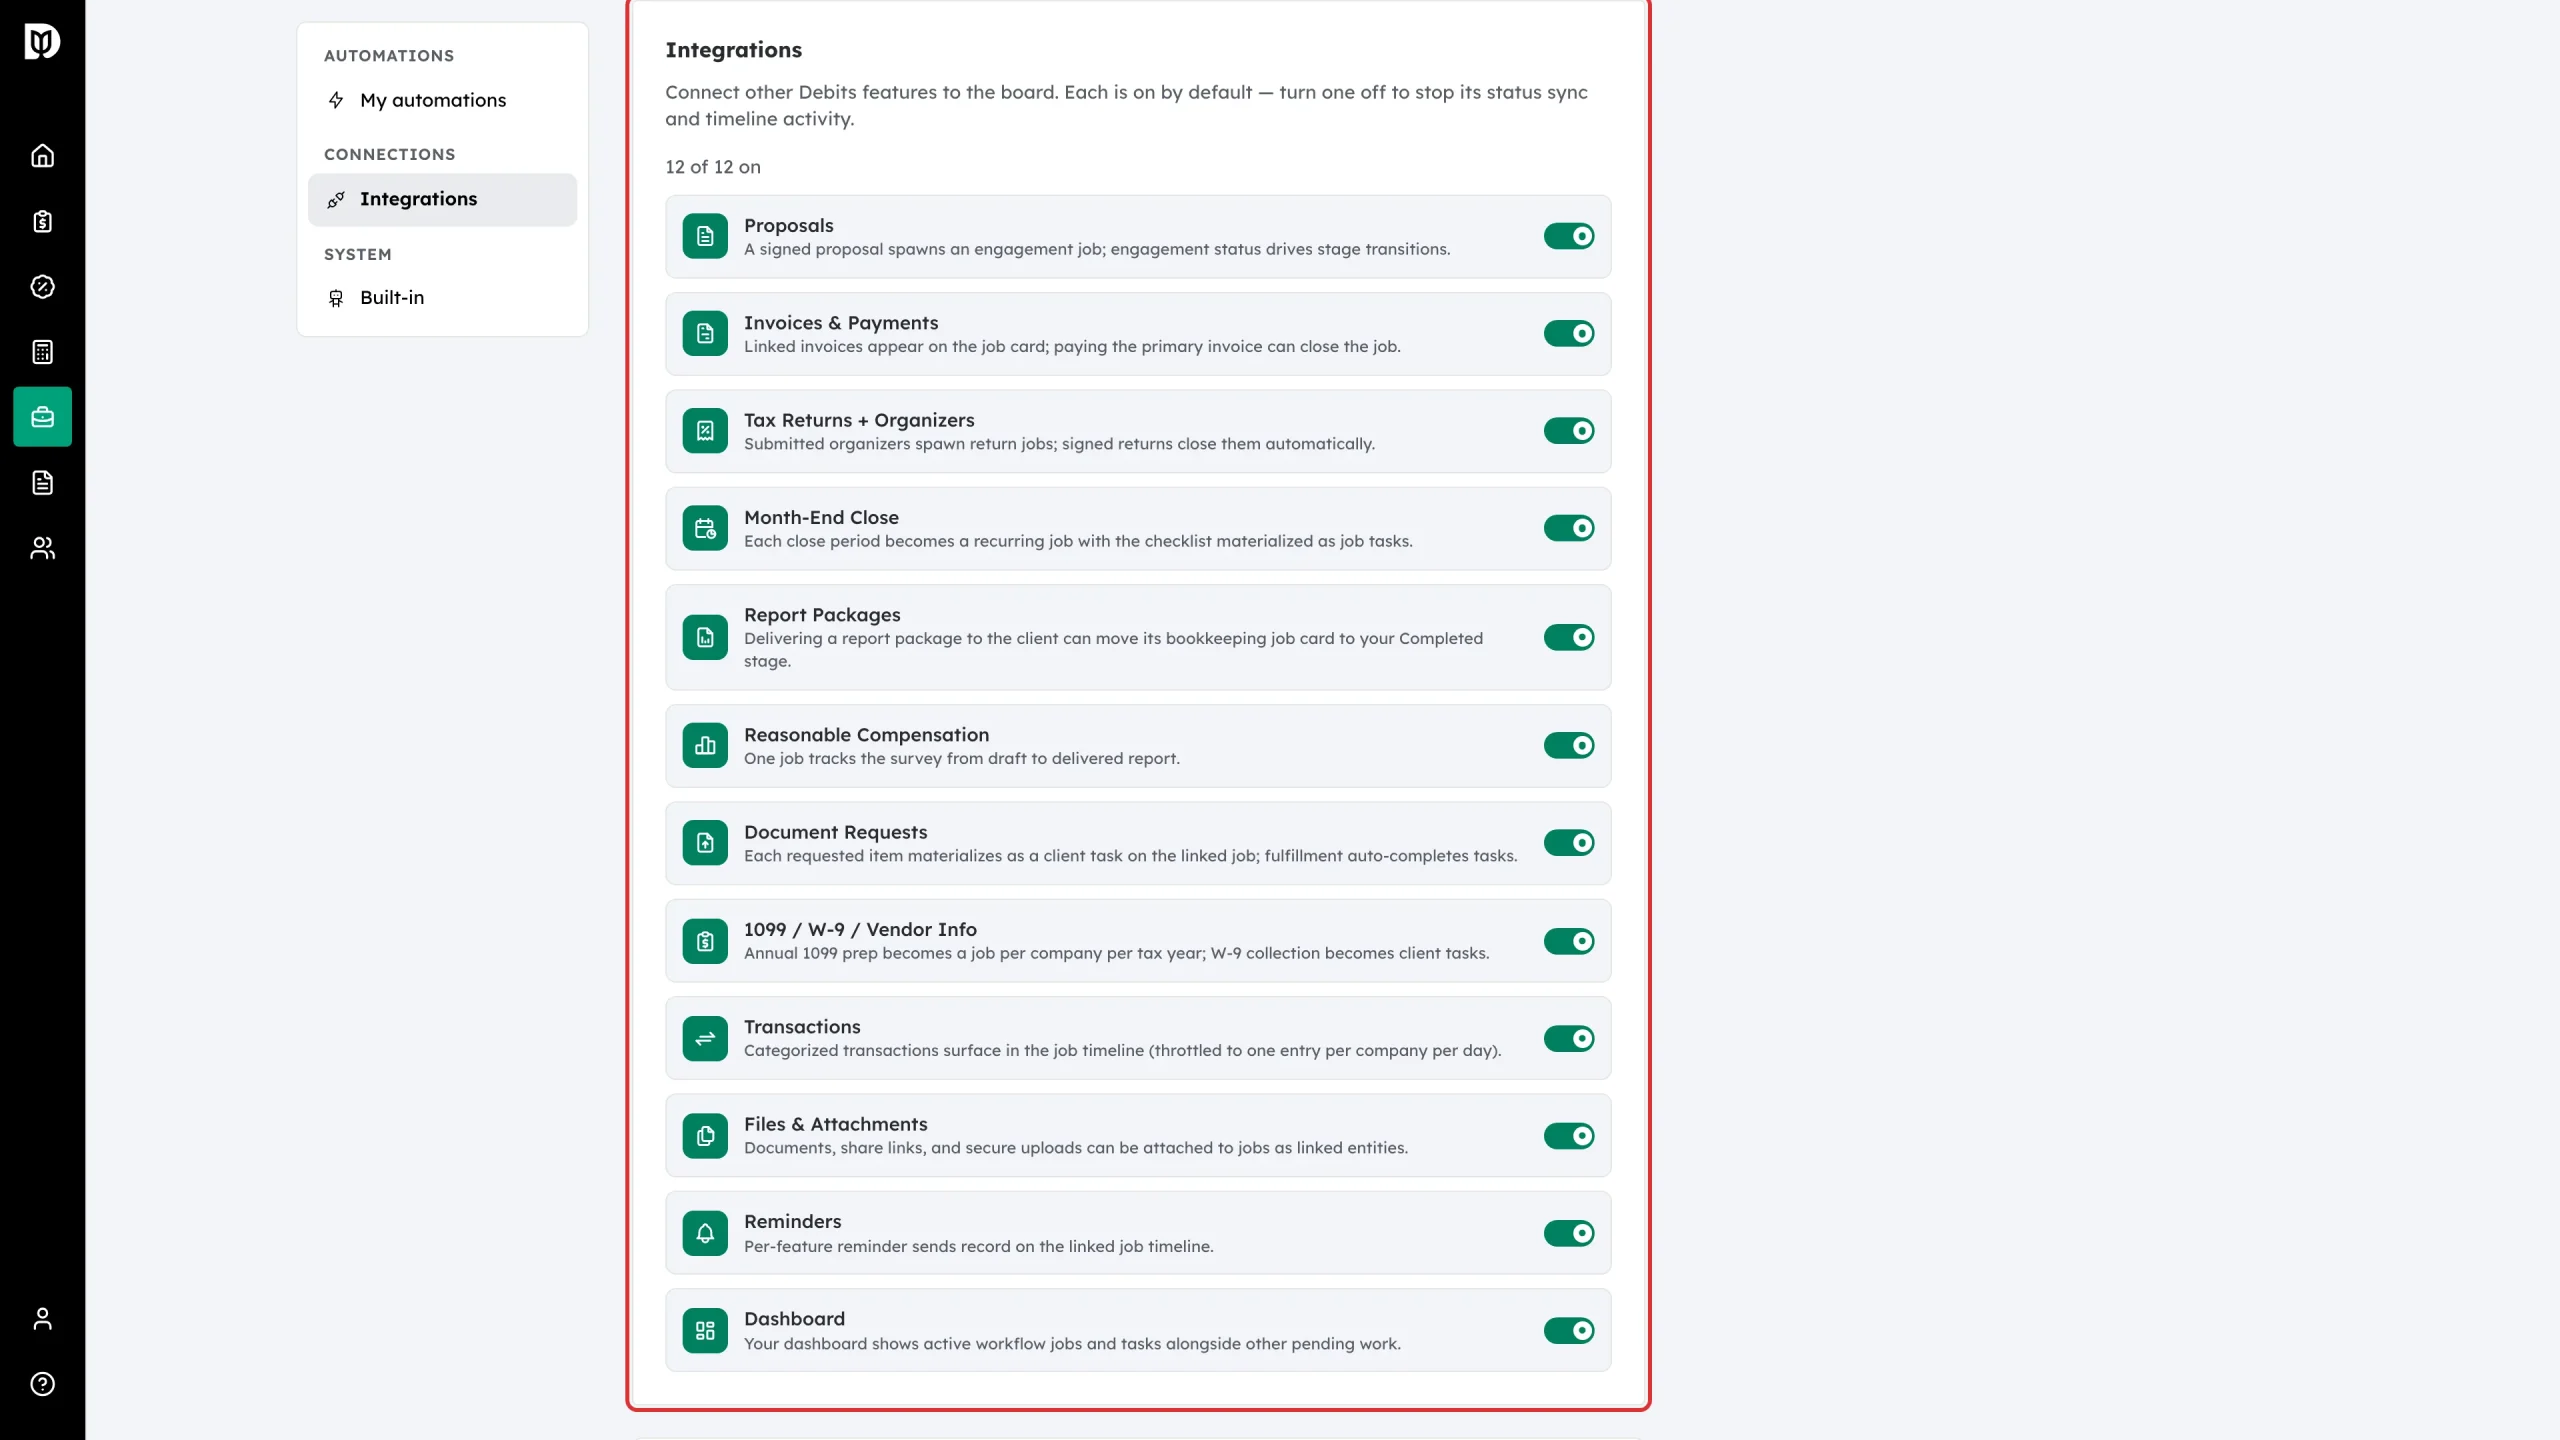
Step 11: Control what feeds the board
Integrations lists the other parts of Debits that talk to the board — proposals, invoices, tax returns and organizers, month-end close, report packages, reasonable compensation, document requests, 1099 and W-9 work, transactions, files, reminders and the dashboard. Each is on by default; turn one off to stop its status sync and its timeline entries.
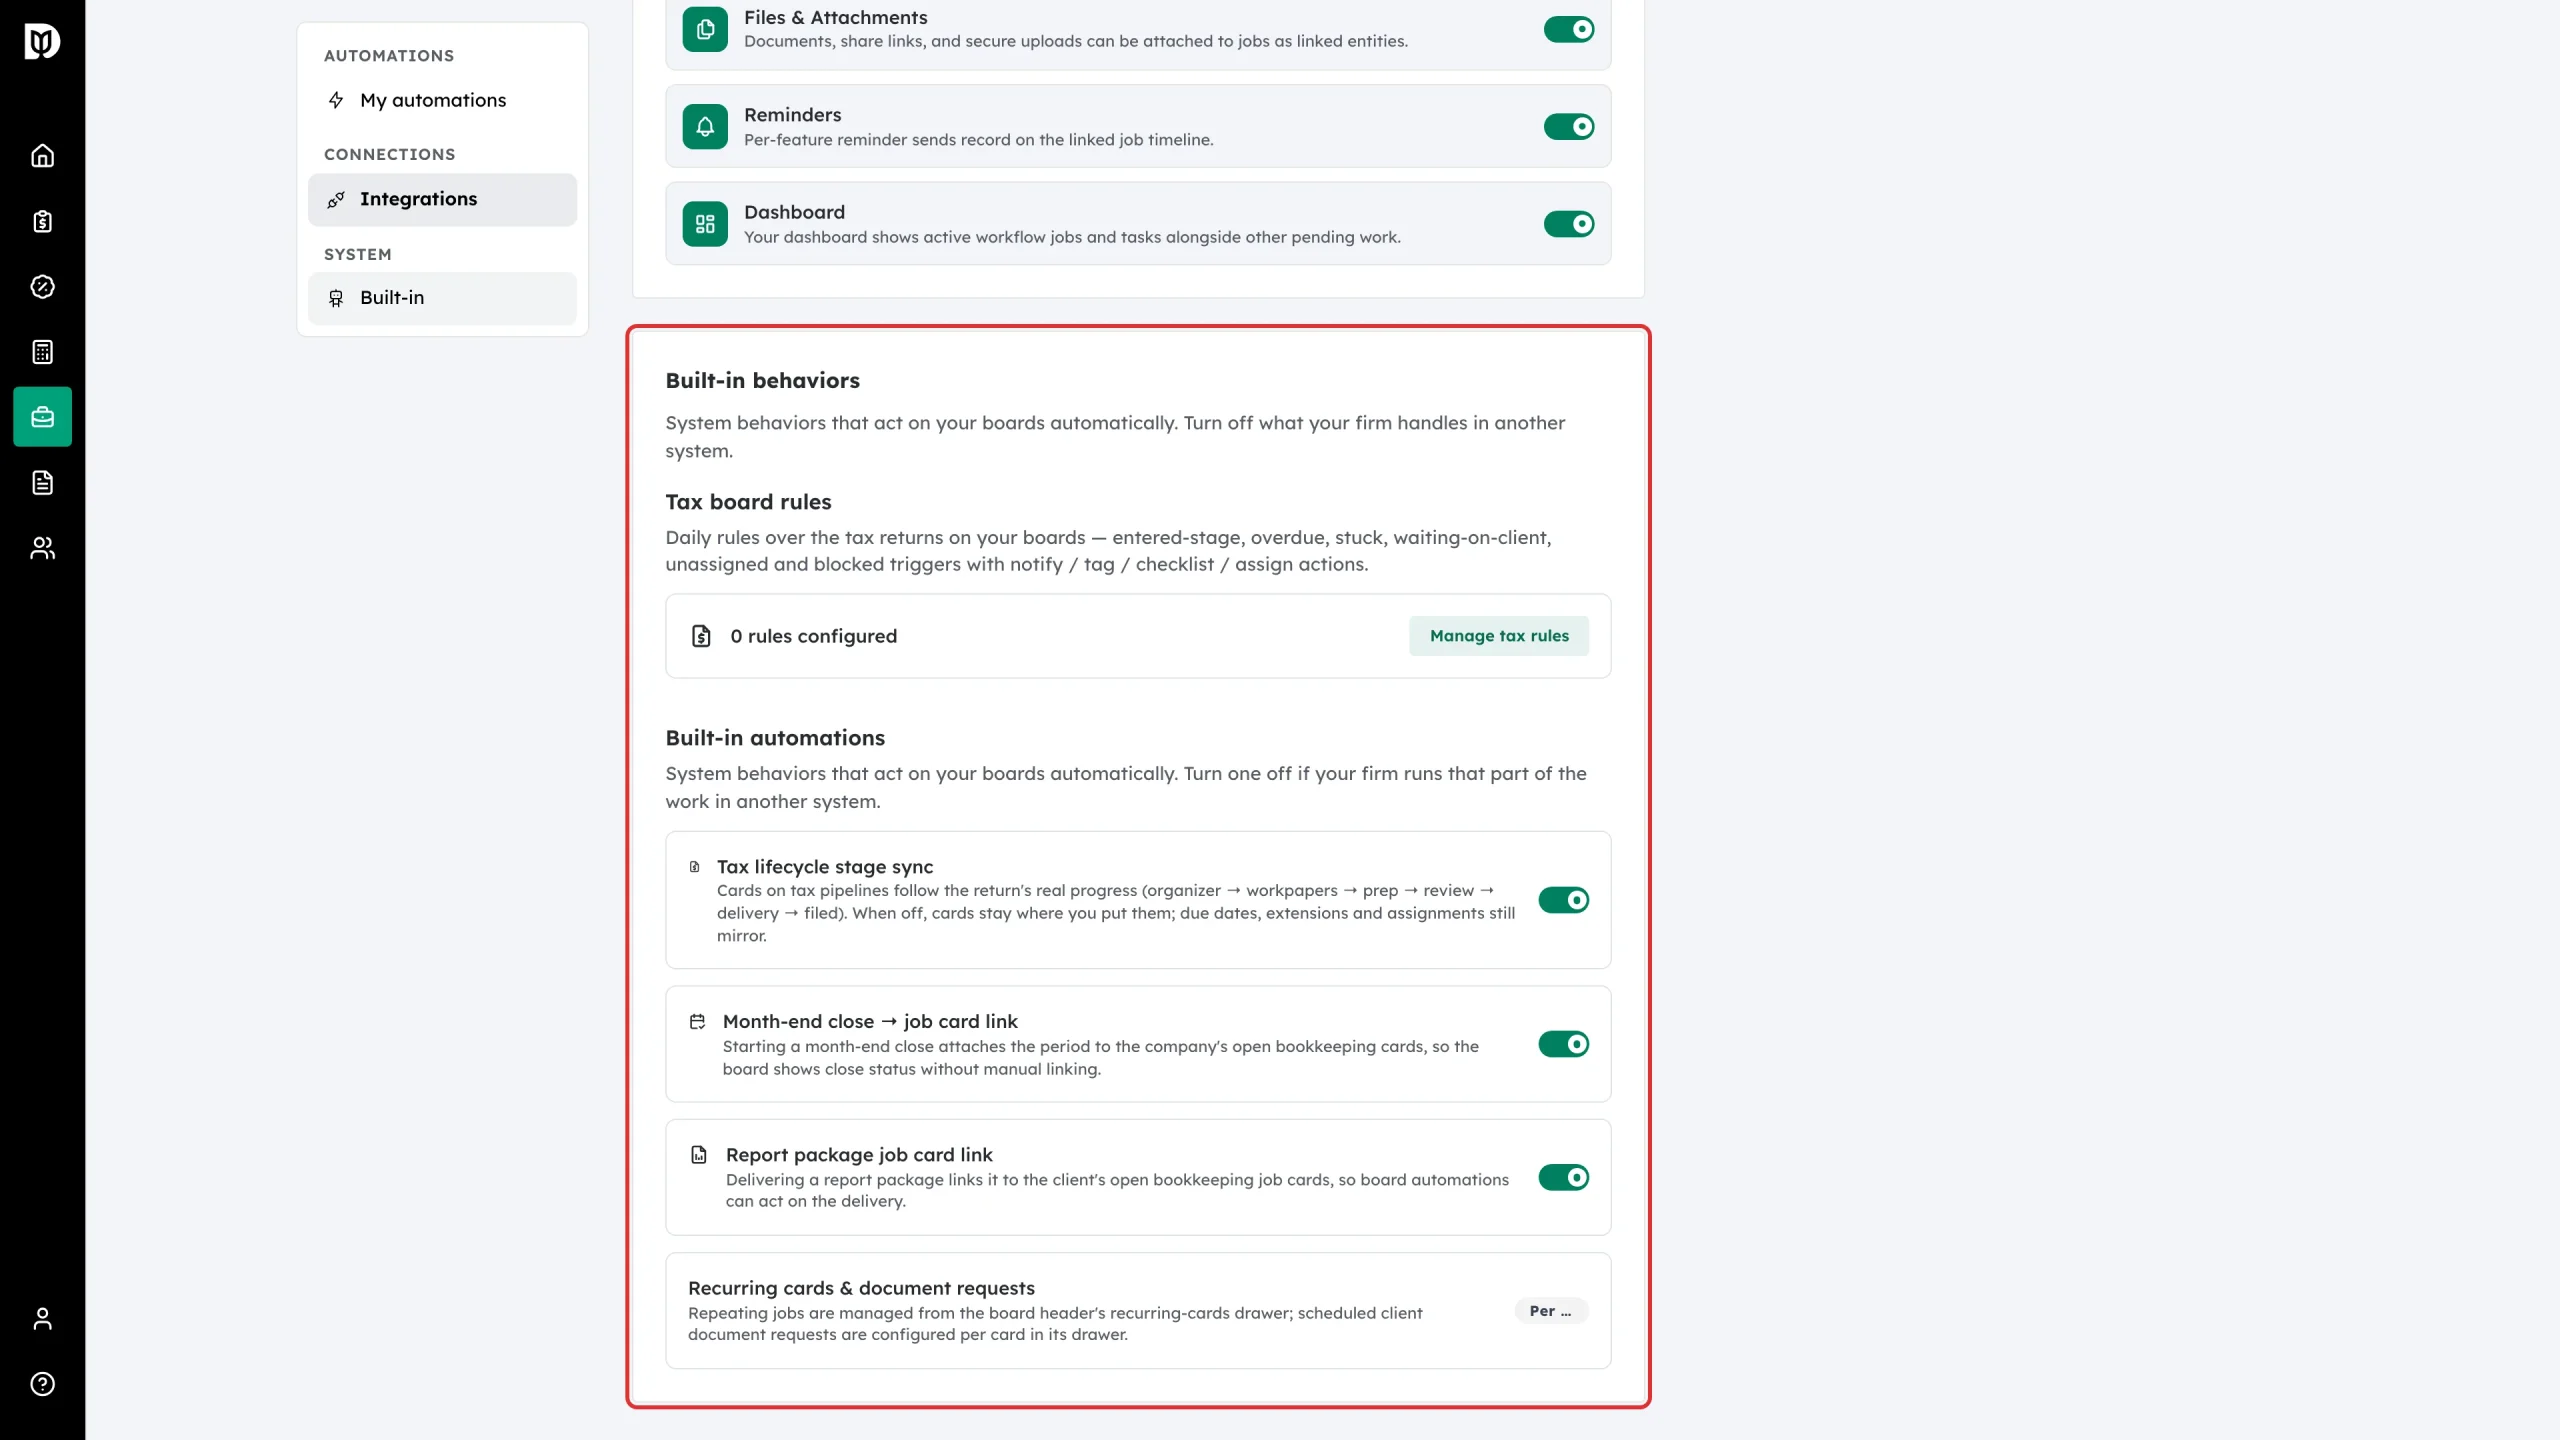
Step 12: Review the built-in behaviours
Built-in holds the things Debits does on its own: the daily tax board rules, the tax lifecycle stage sync, the month-end close and report package card links, and a pointer to where repeating cards are managed. Turn one off if your firm handles that part elsewhere.
What happens next
Enabled rules run on their own as jobs change. Each row keeps a count of how many times it has run; open View runs on a rule to see the individual runs. If a rule is not doing what you expected, use Test on its menu before changing it.
Troubleshooting
- The Automations option is missing. You need the “manage automations” permission.
- A rule shows “ran 0×”. It has never fired. Check it is enabled, that the boards it is scoped to are the right ones, and that its conditions are not too narrow.
- A rule is firing on boards you did not mean. An empty Pipelines field means every board. Scope it.
- Status changes from elsewhere in Debits stopped reaching the board. Check that feature’s toggle under Integrations.