Who this is for: Firm owners and admins who decide how work flows through the firm.
What you’ll learn: How to create a board, choose its stages, and set the rules that control who can move work and when.
Before you begin
- You need the “manage pipelines” permission. Firm owners and admins have it.
- Create one board per kind of service — for example 1040 returns, monthly bookkeeping, payroll.
- Tax and Bookkeeping service types only appear if your firm has those features switched on.
- Invite the staff who will work the board before you create it, so you can share it with them as you go.
Step-by-step instructions
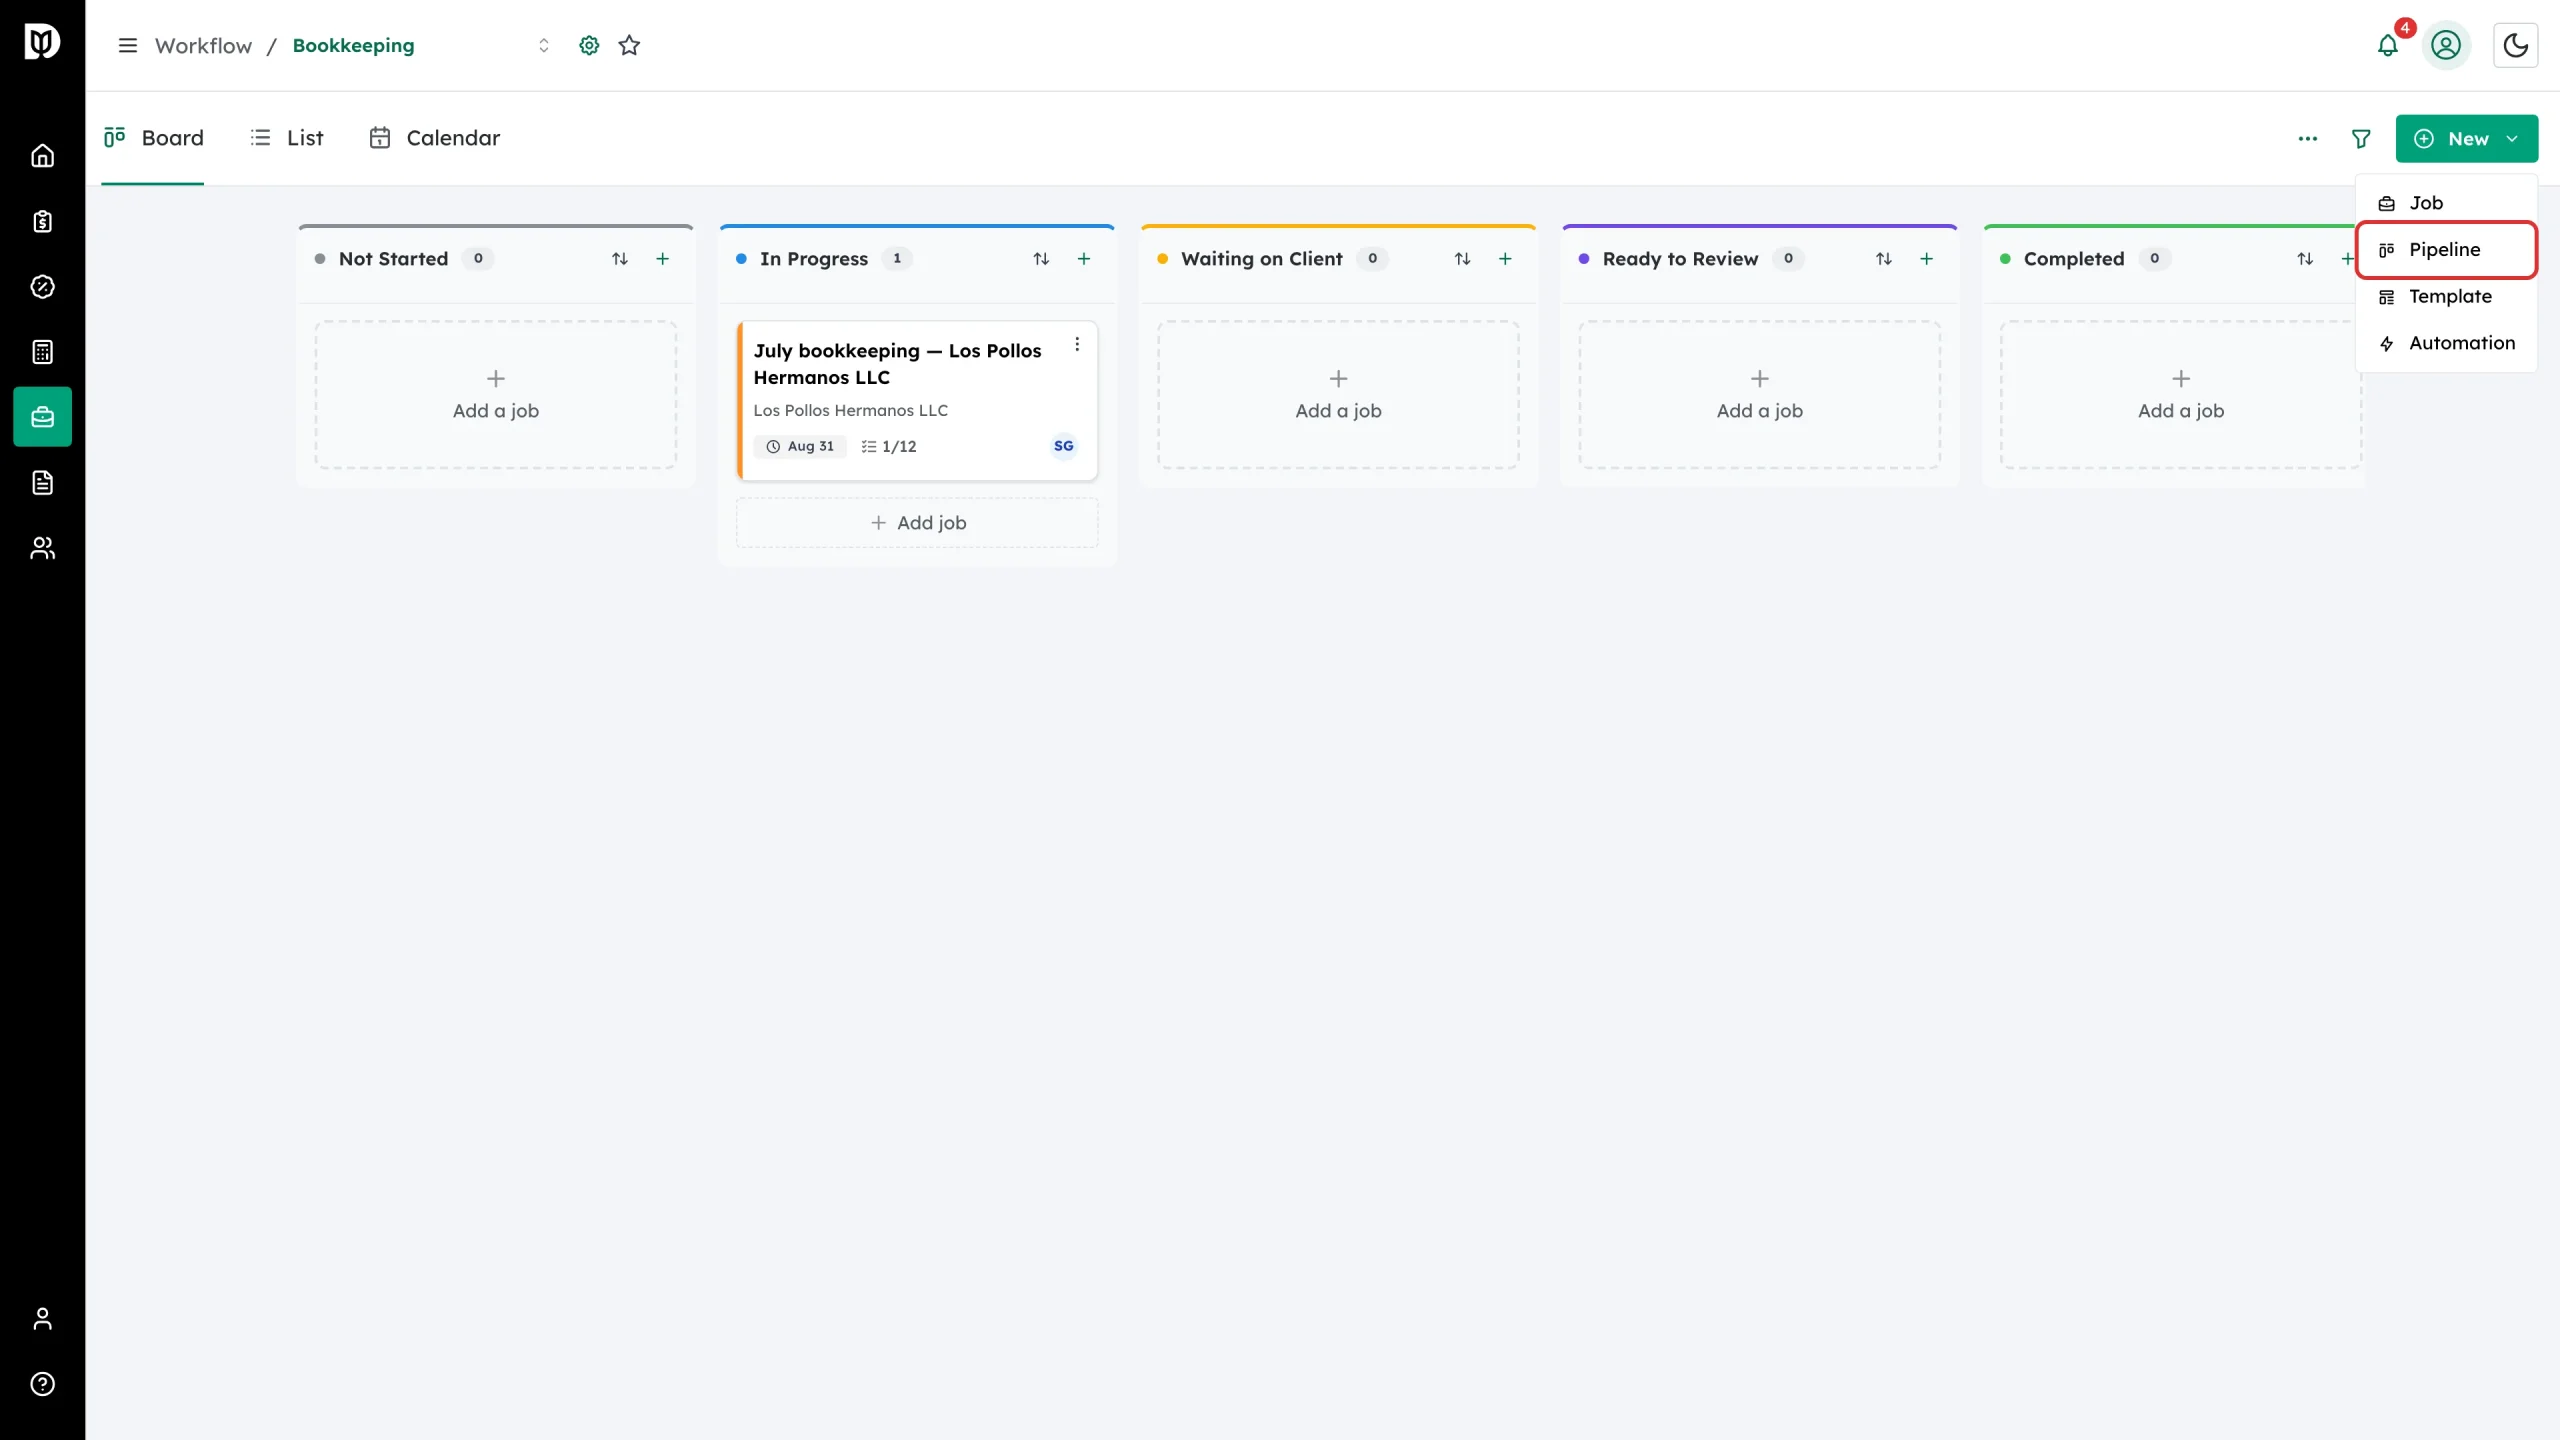
Step 1: Start a new pipeline
On the board, select New and then Pipeline.
Step 2: Name it
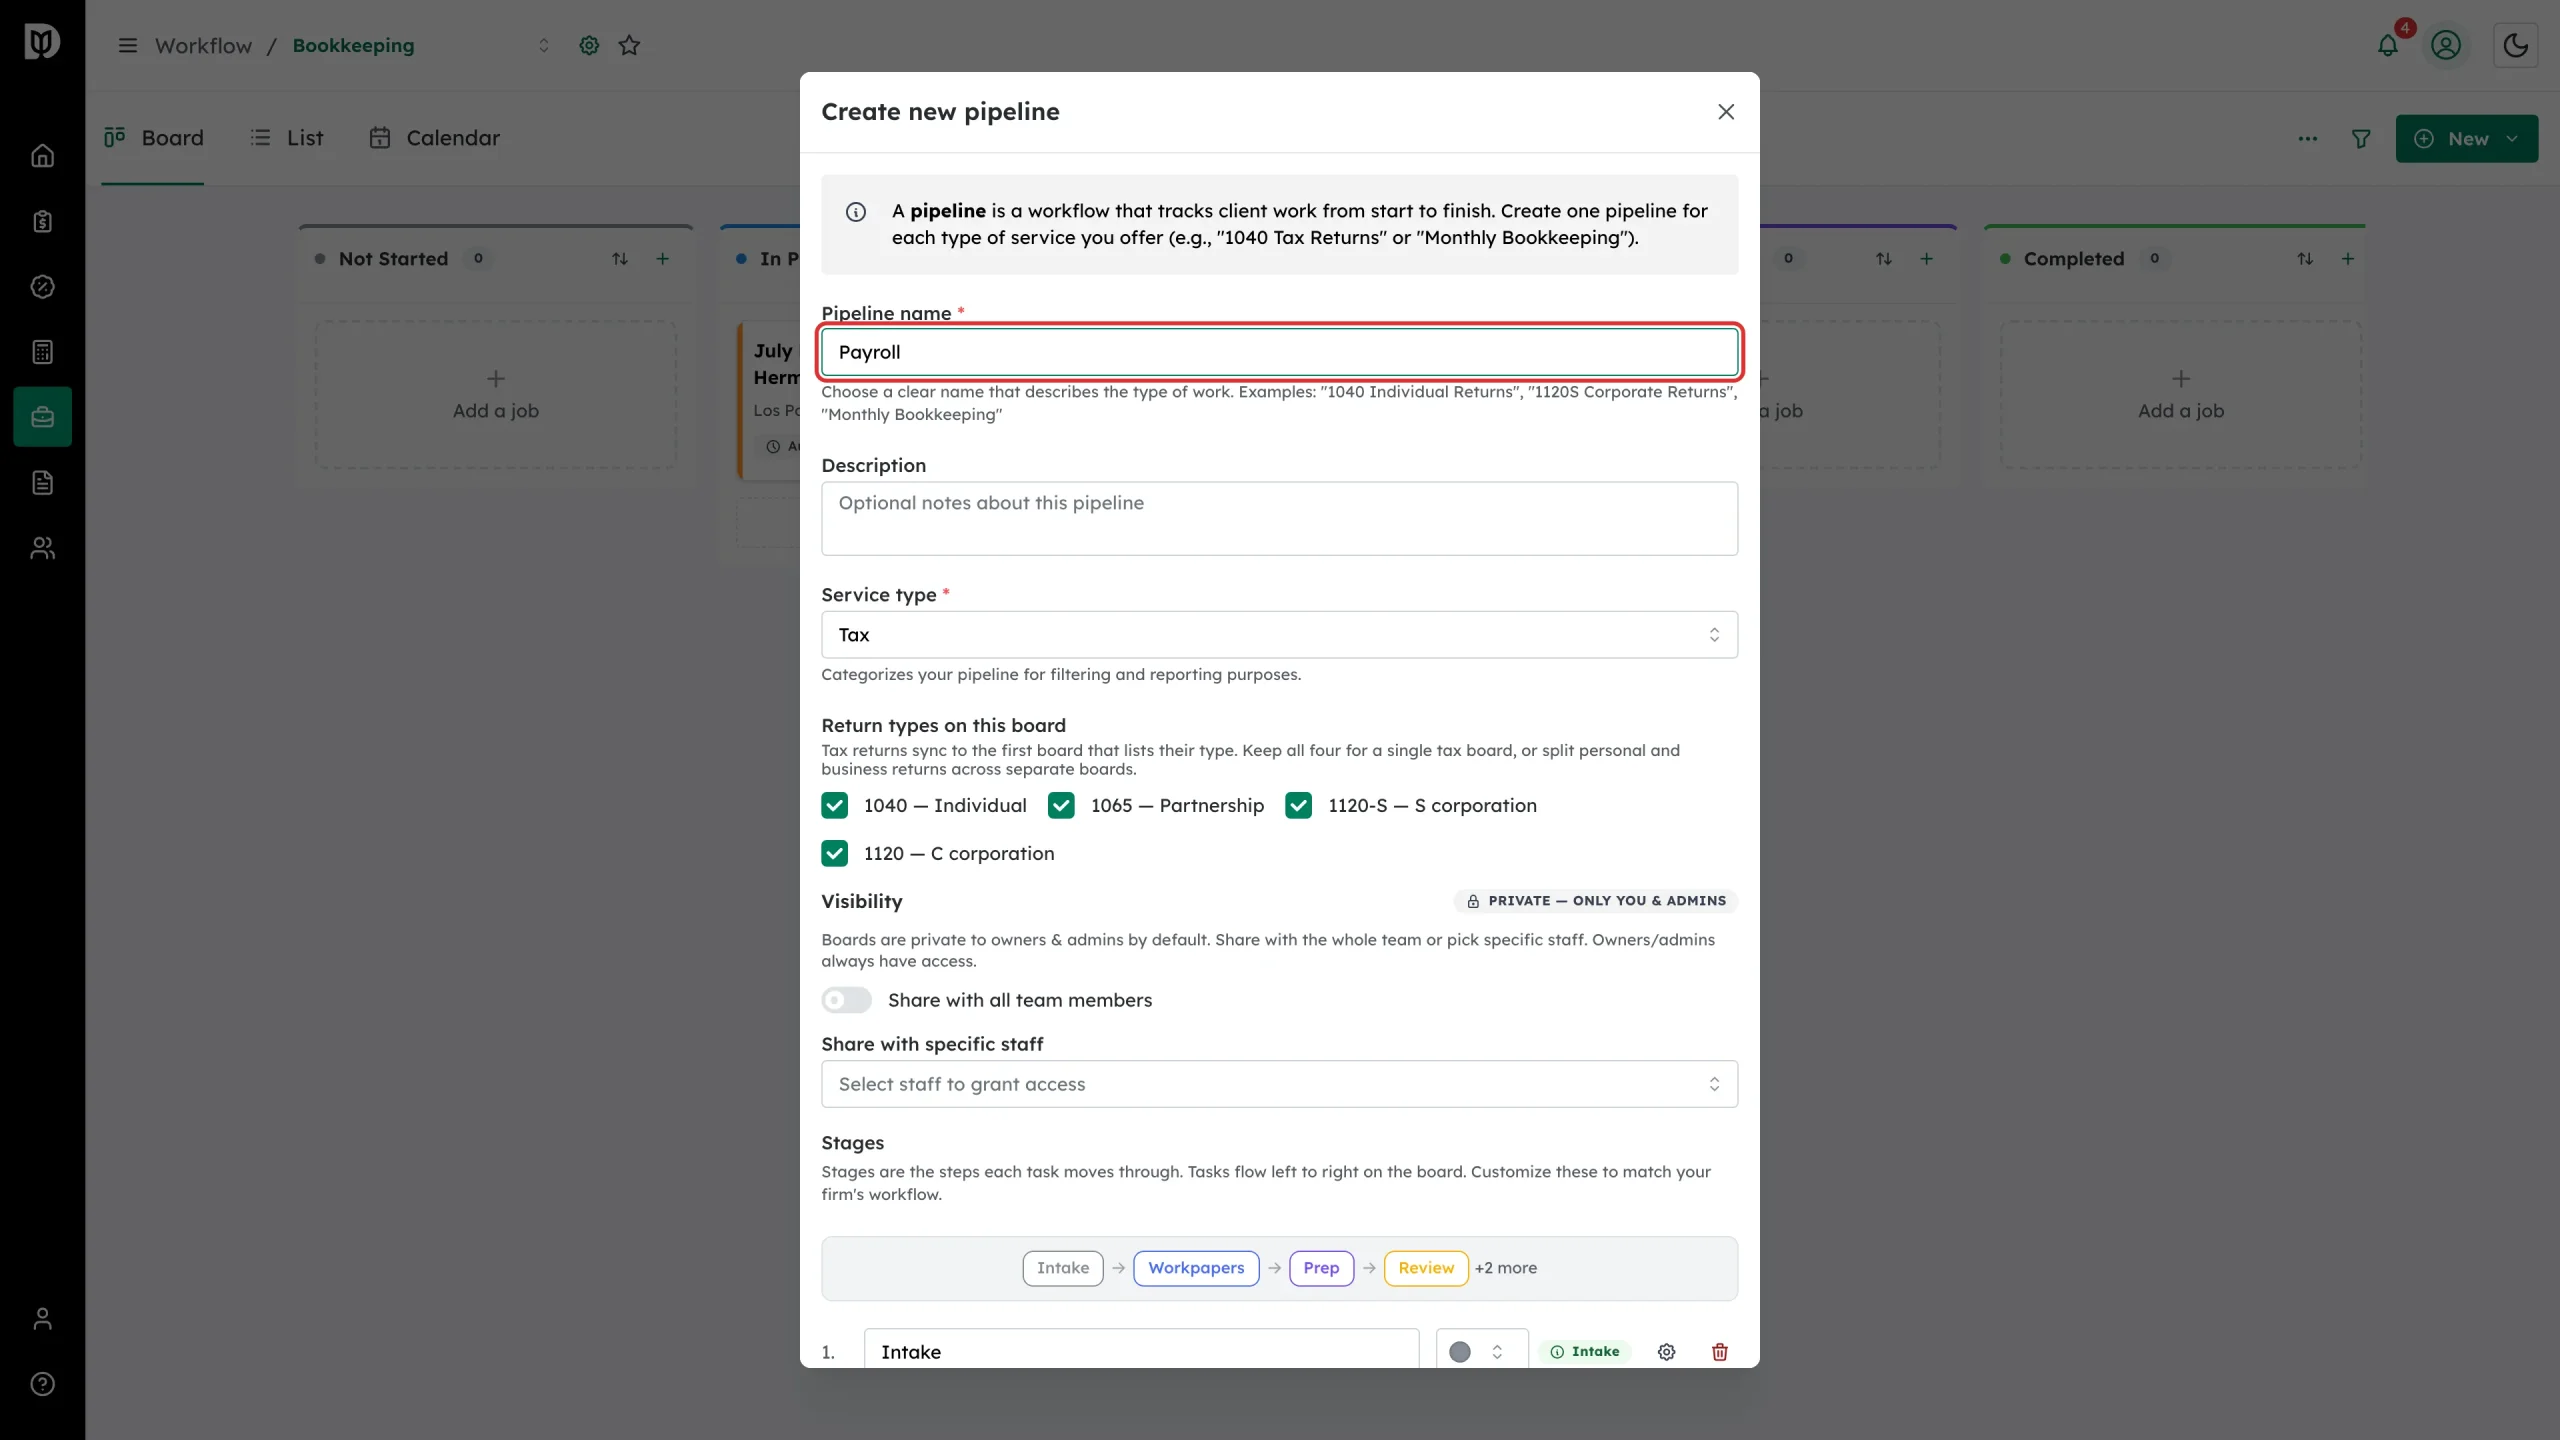
Give the board a name that describes the work — “1040 Individual Returns”, “Monthly Bookkeeping”, “Payroll”. The name is what people pick from the board list.
Step 3: Choose which returns a tax board handles
While Service type is Tax, the window shows Return types on this board. A tax return syncs to the first board that lists its type, so keep all four for a single tax board, or split personal and business returns across two boards.

Step 4: Set the service type
Pick the Service type that matches the work: Tax, Bookkeeping, Advisory, Payroll, Audit or Other. It groups the board for filtering and reporting, and it decides which extras the board gets — tax boards get the return queues, bookkeeping boards let a card link to a bookkeeping company.

Step 5: Decide who can see the board
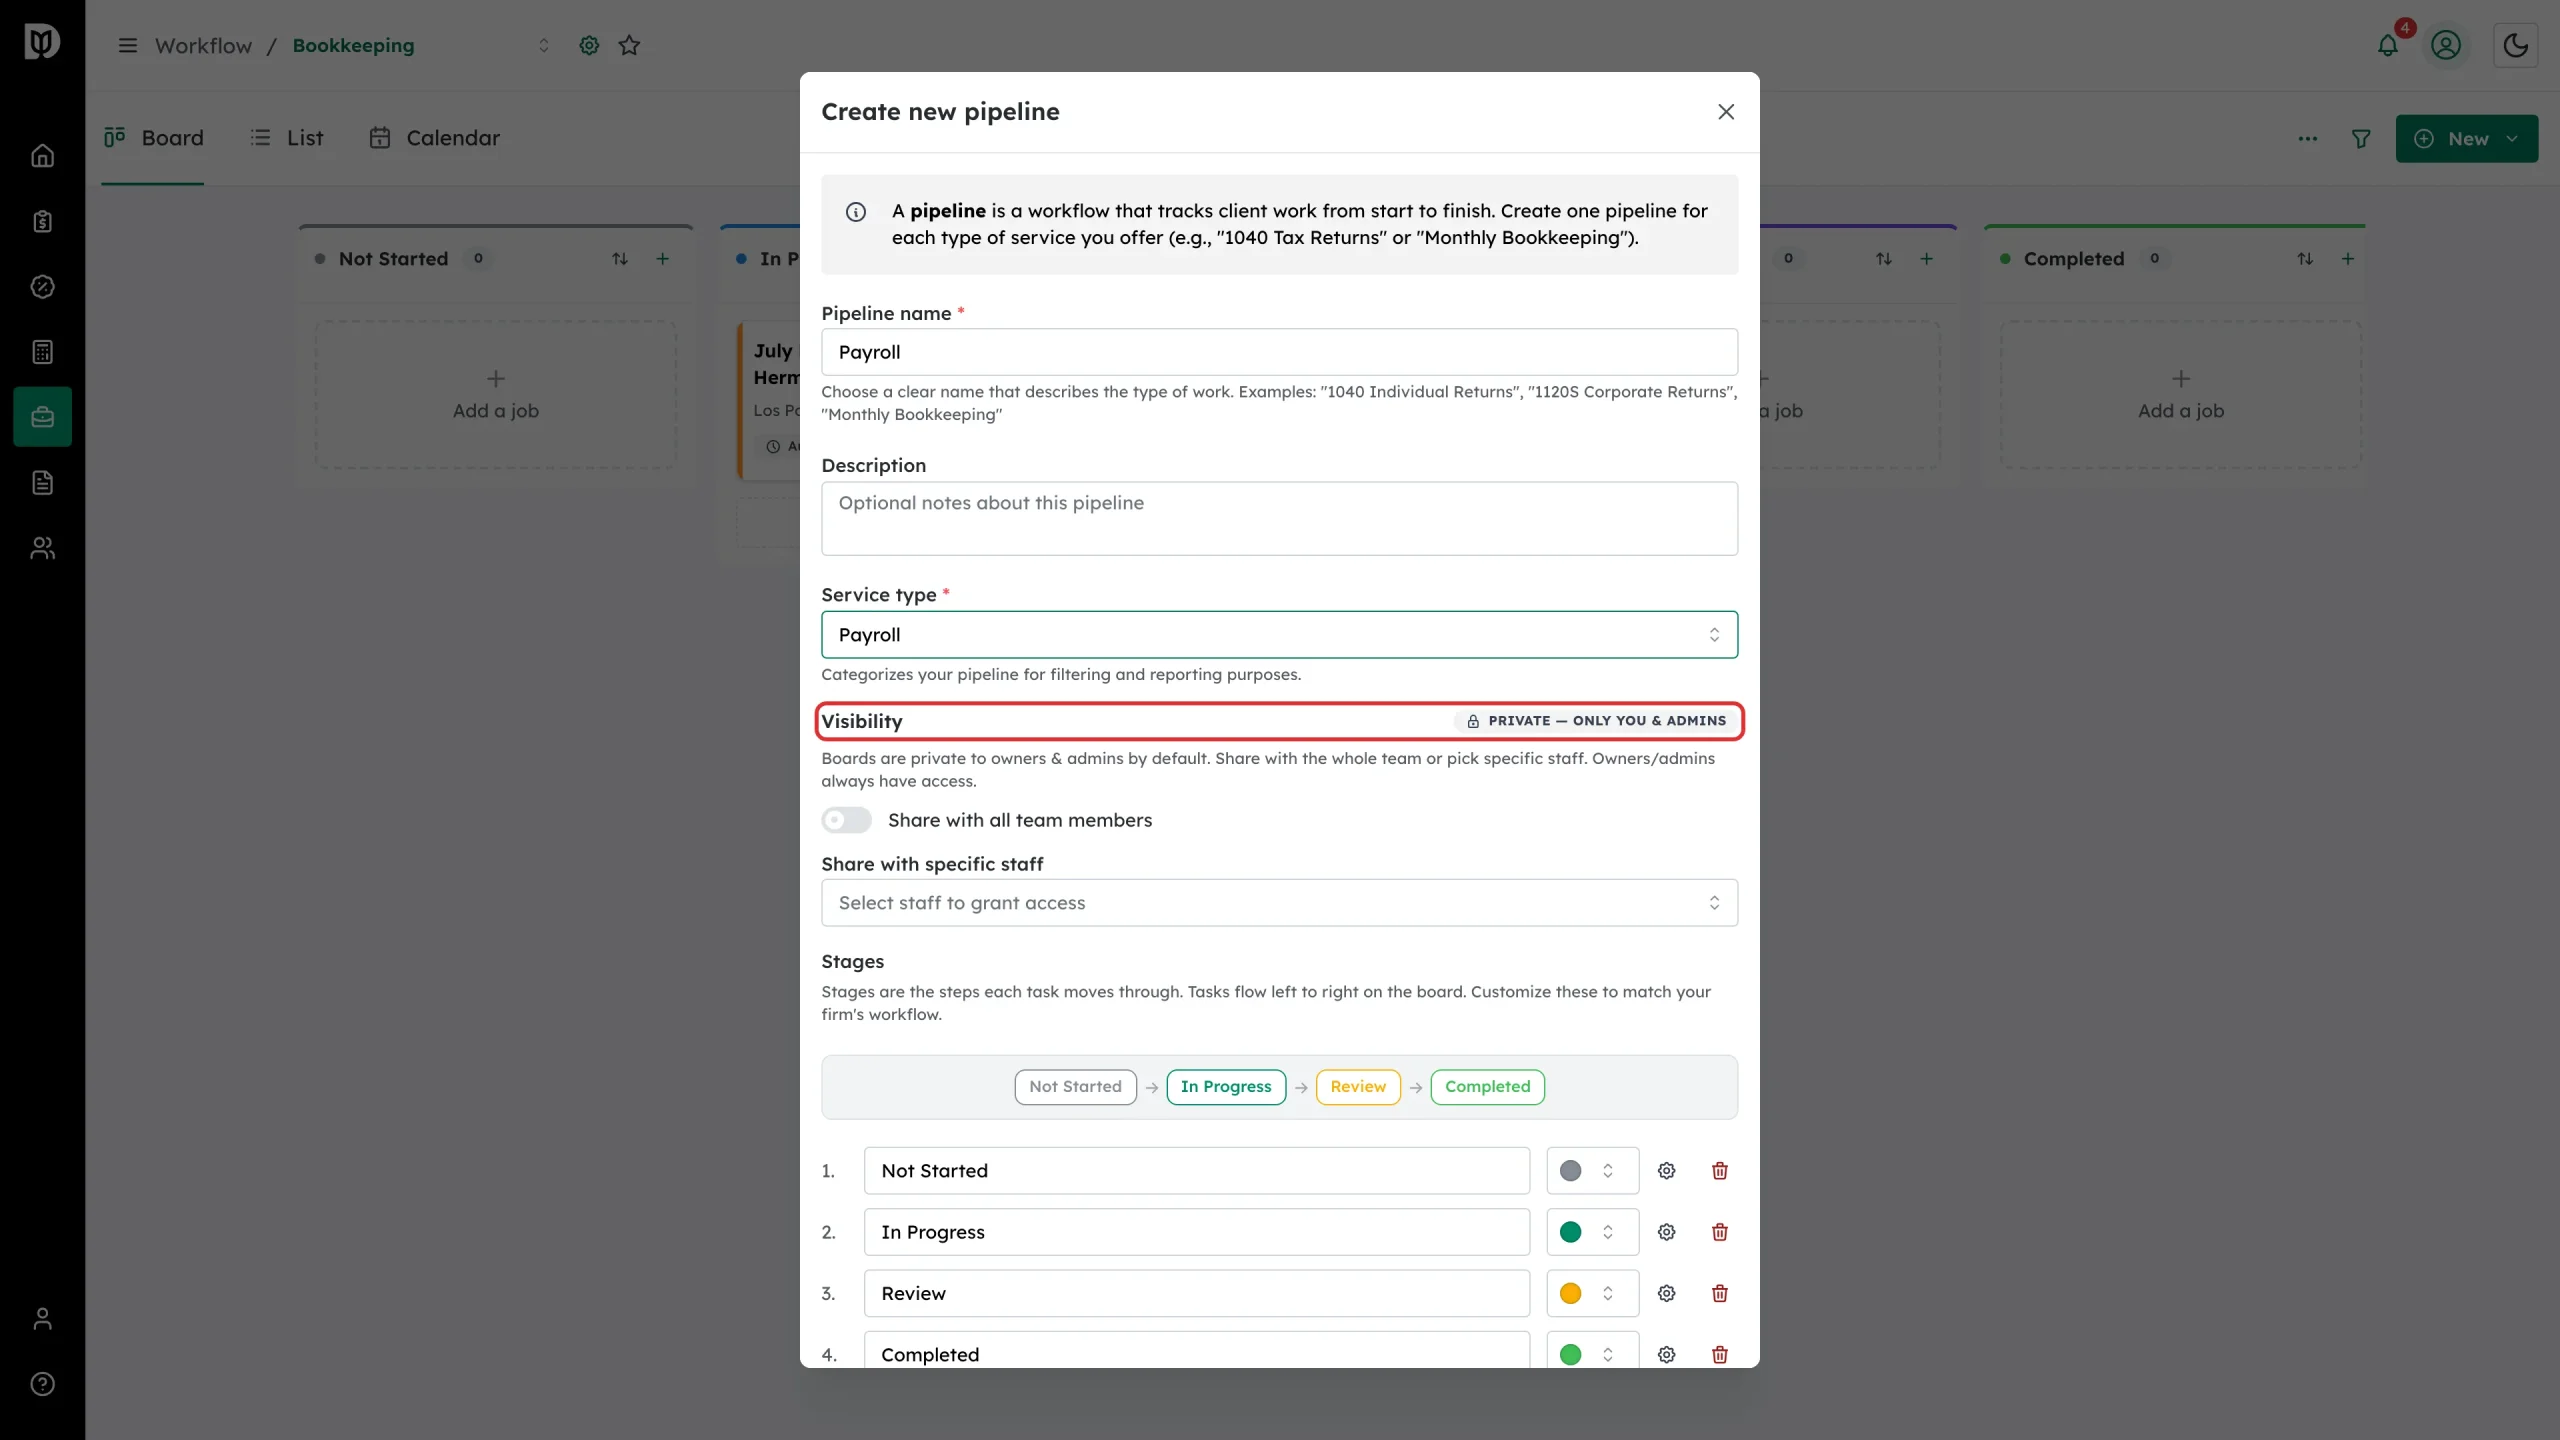
New boards are private to owners and admins. Turn on Share with all team members, or use Share with specific staff to pick people. Owners and admins always keep access.
Step 6: Name the stages
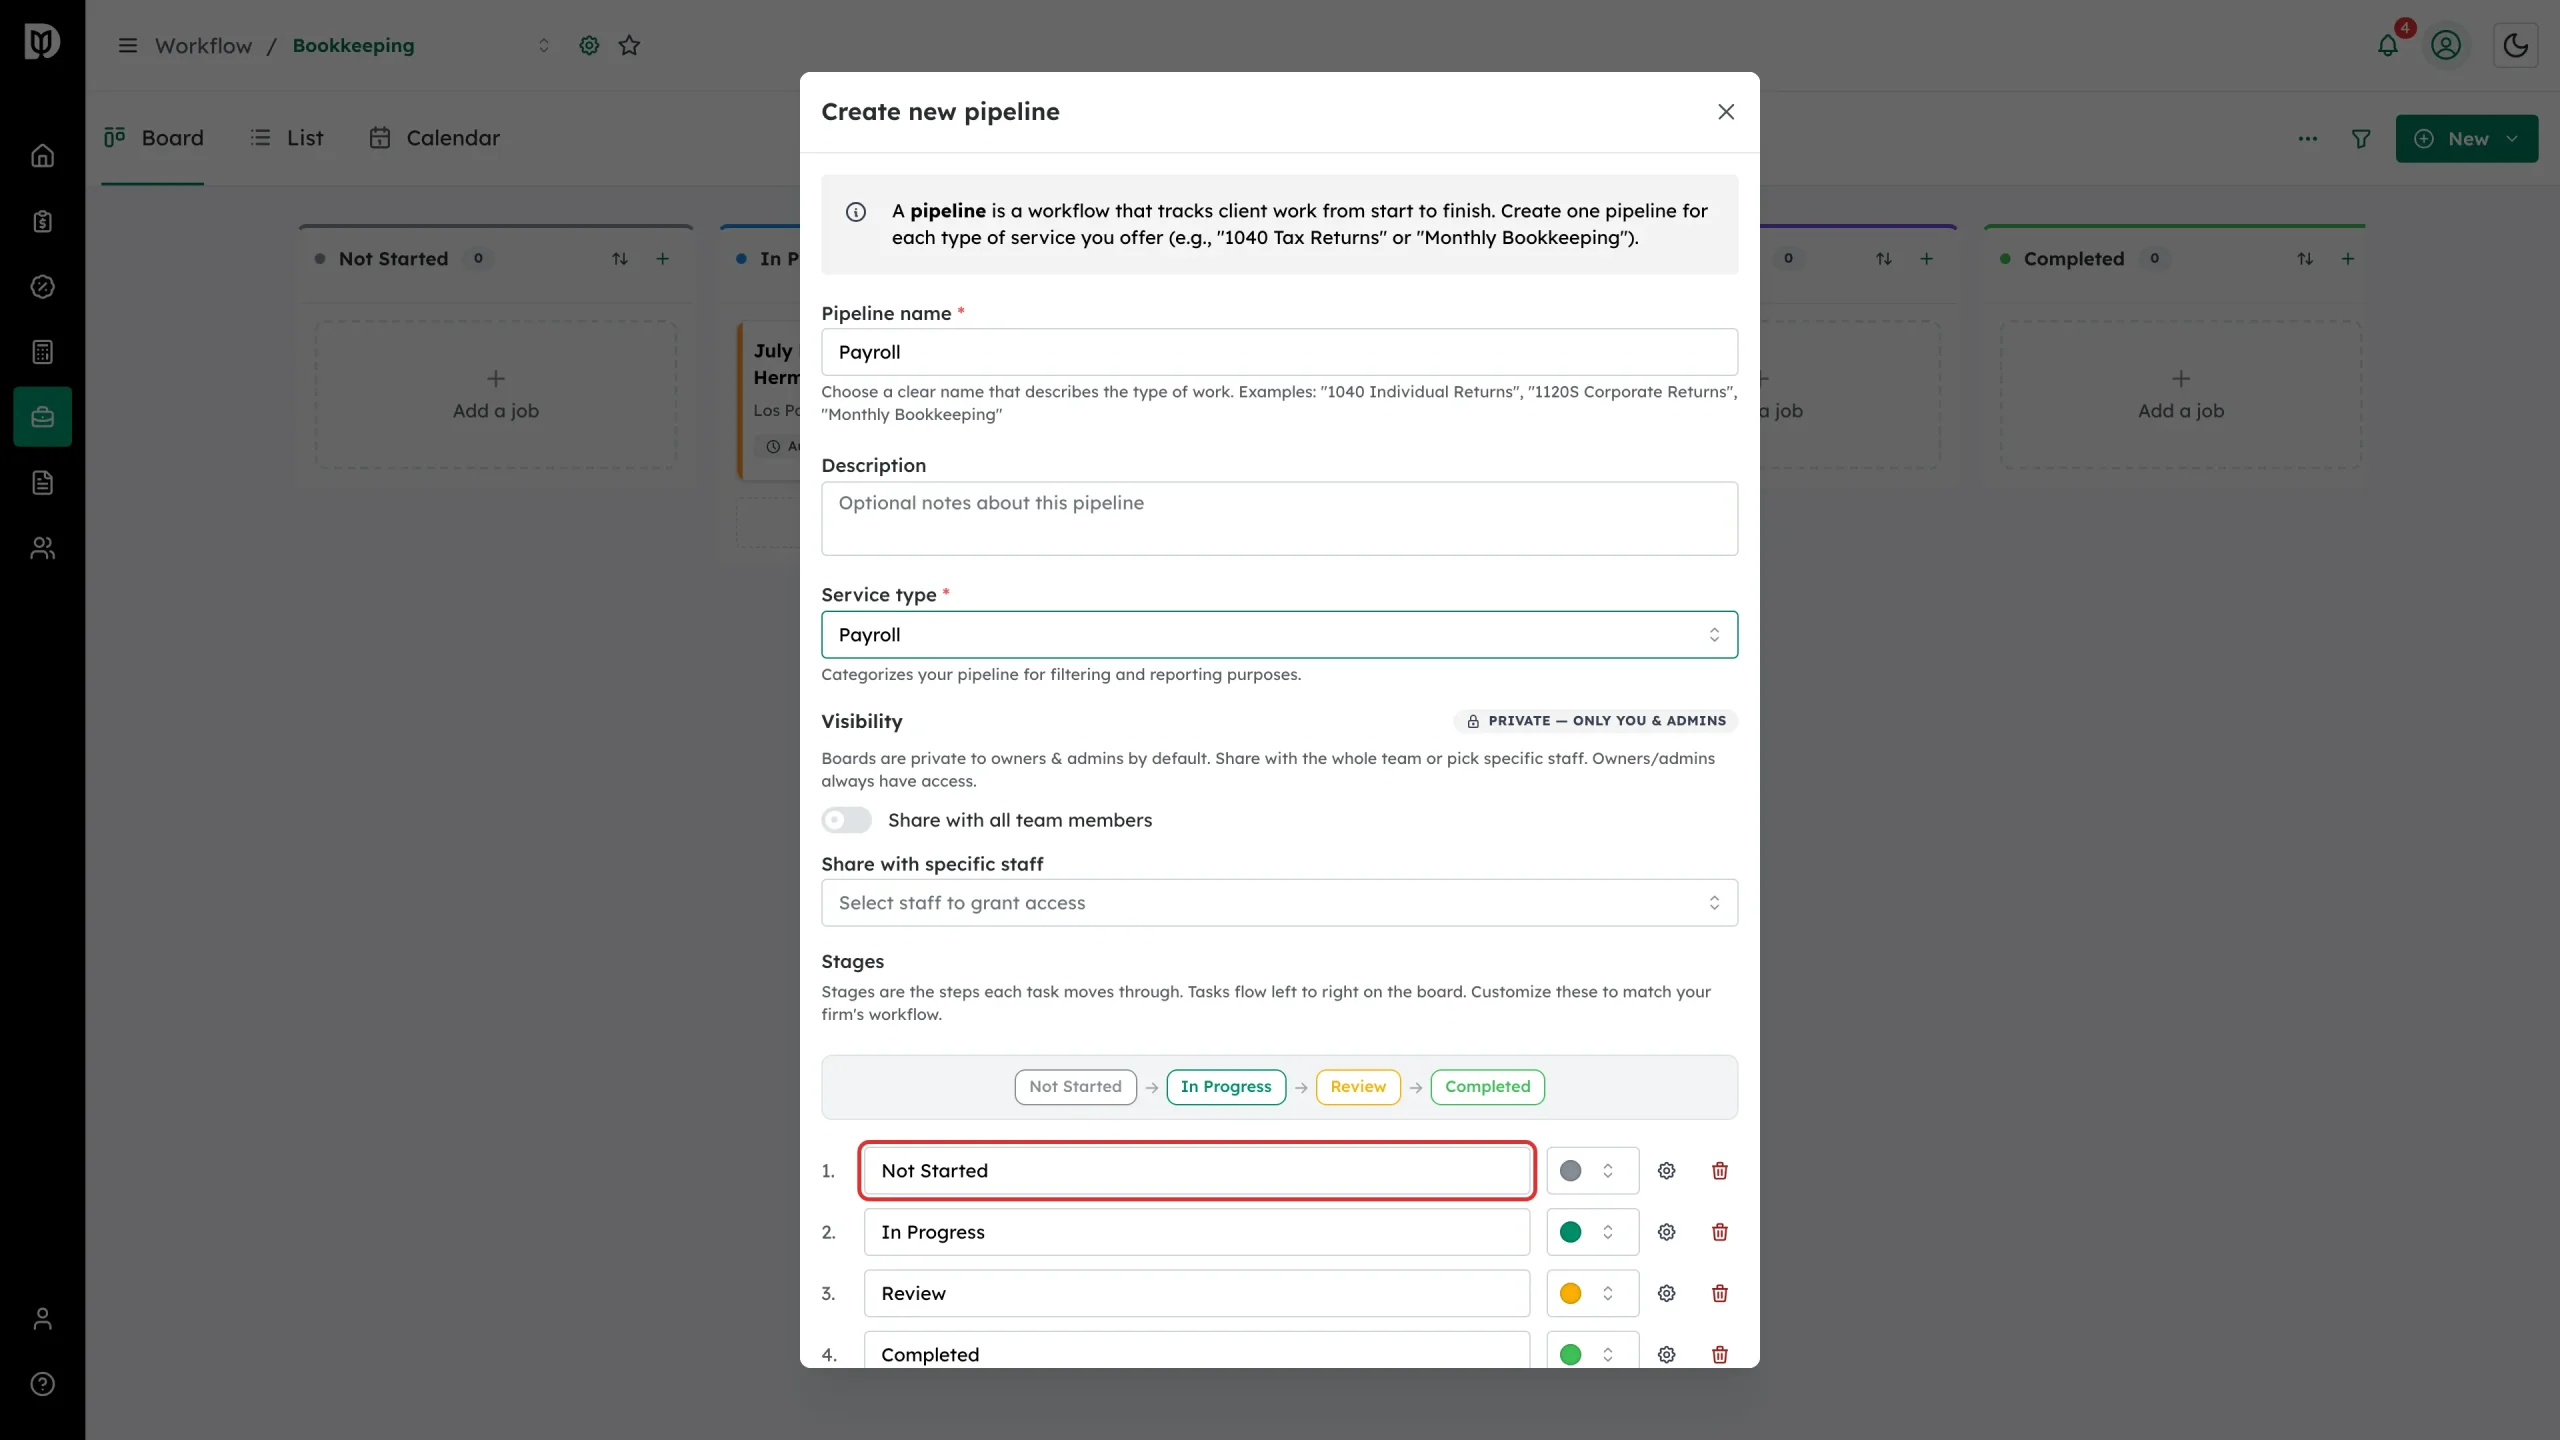
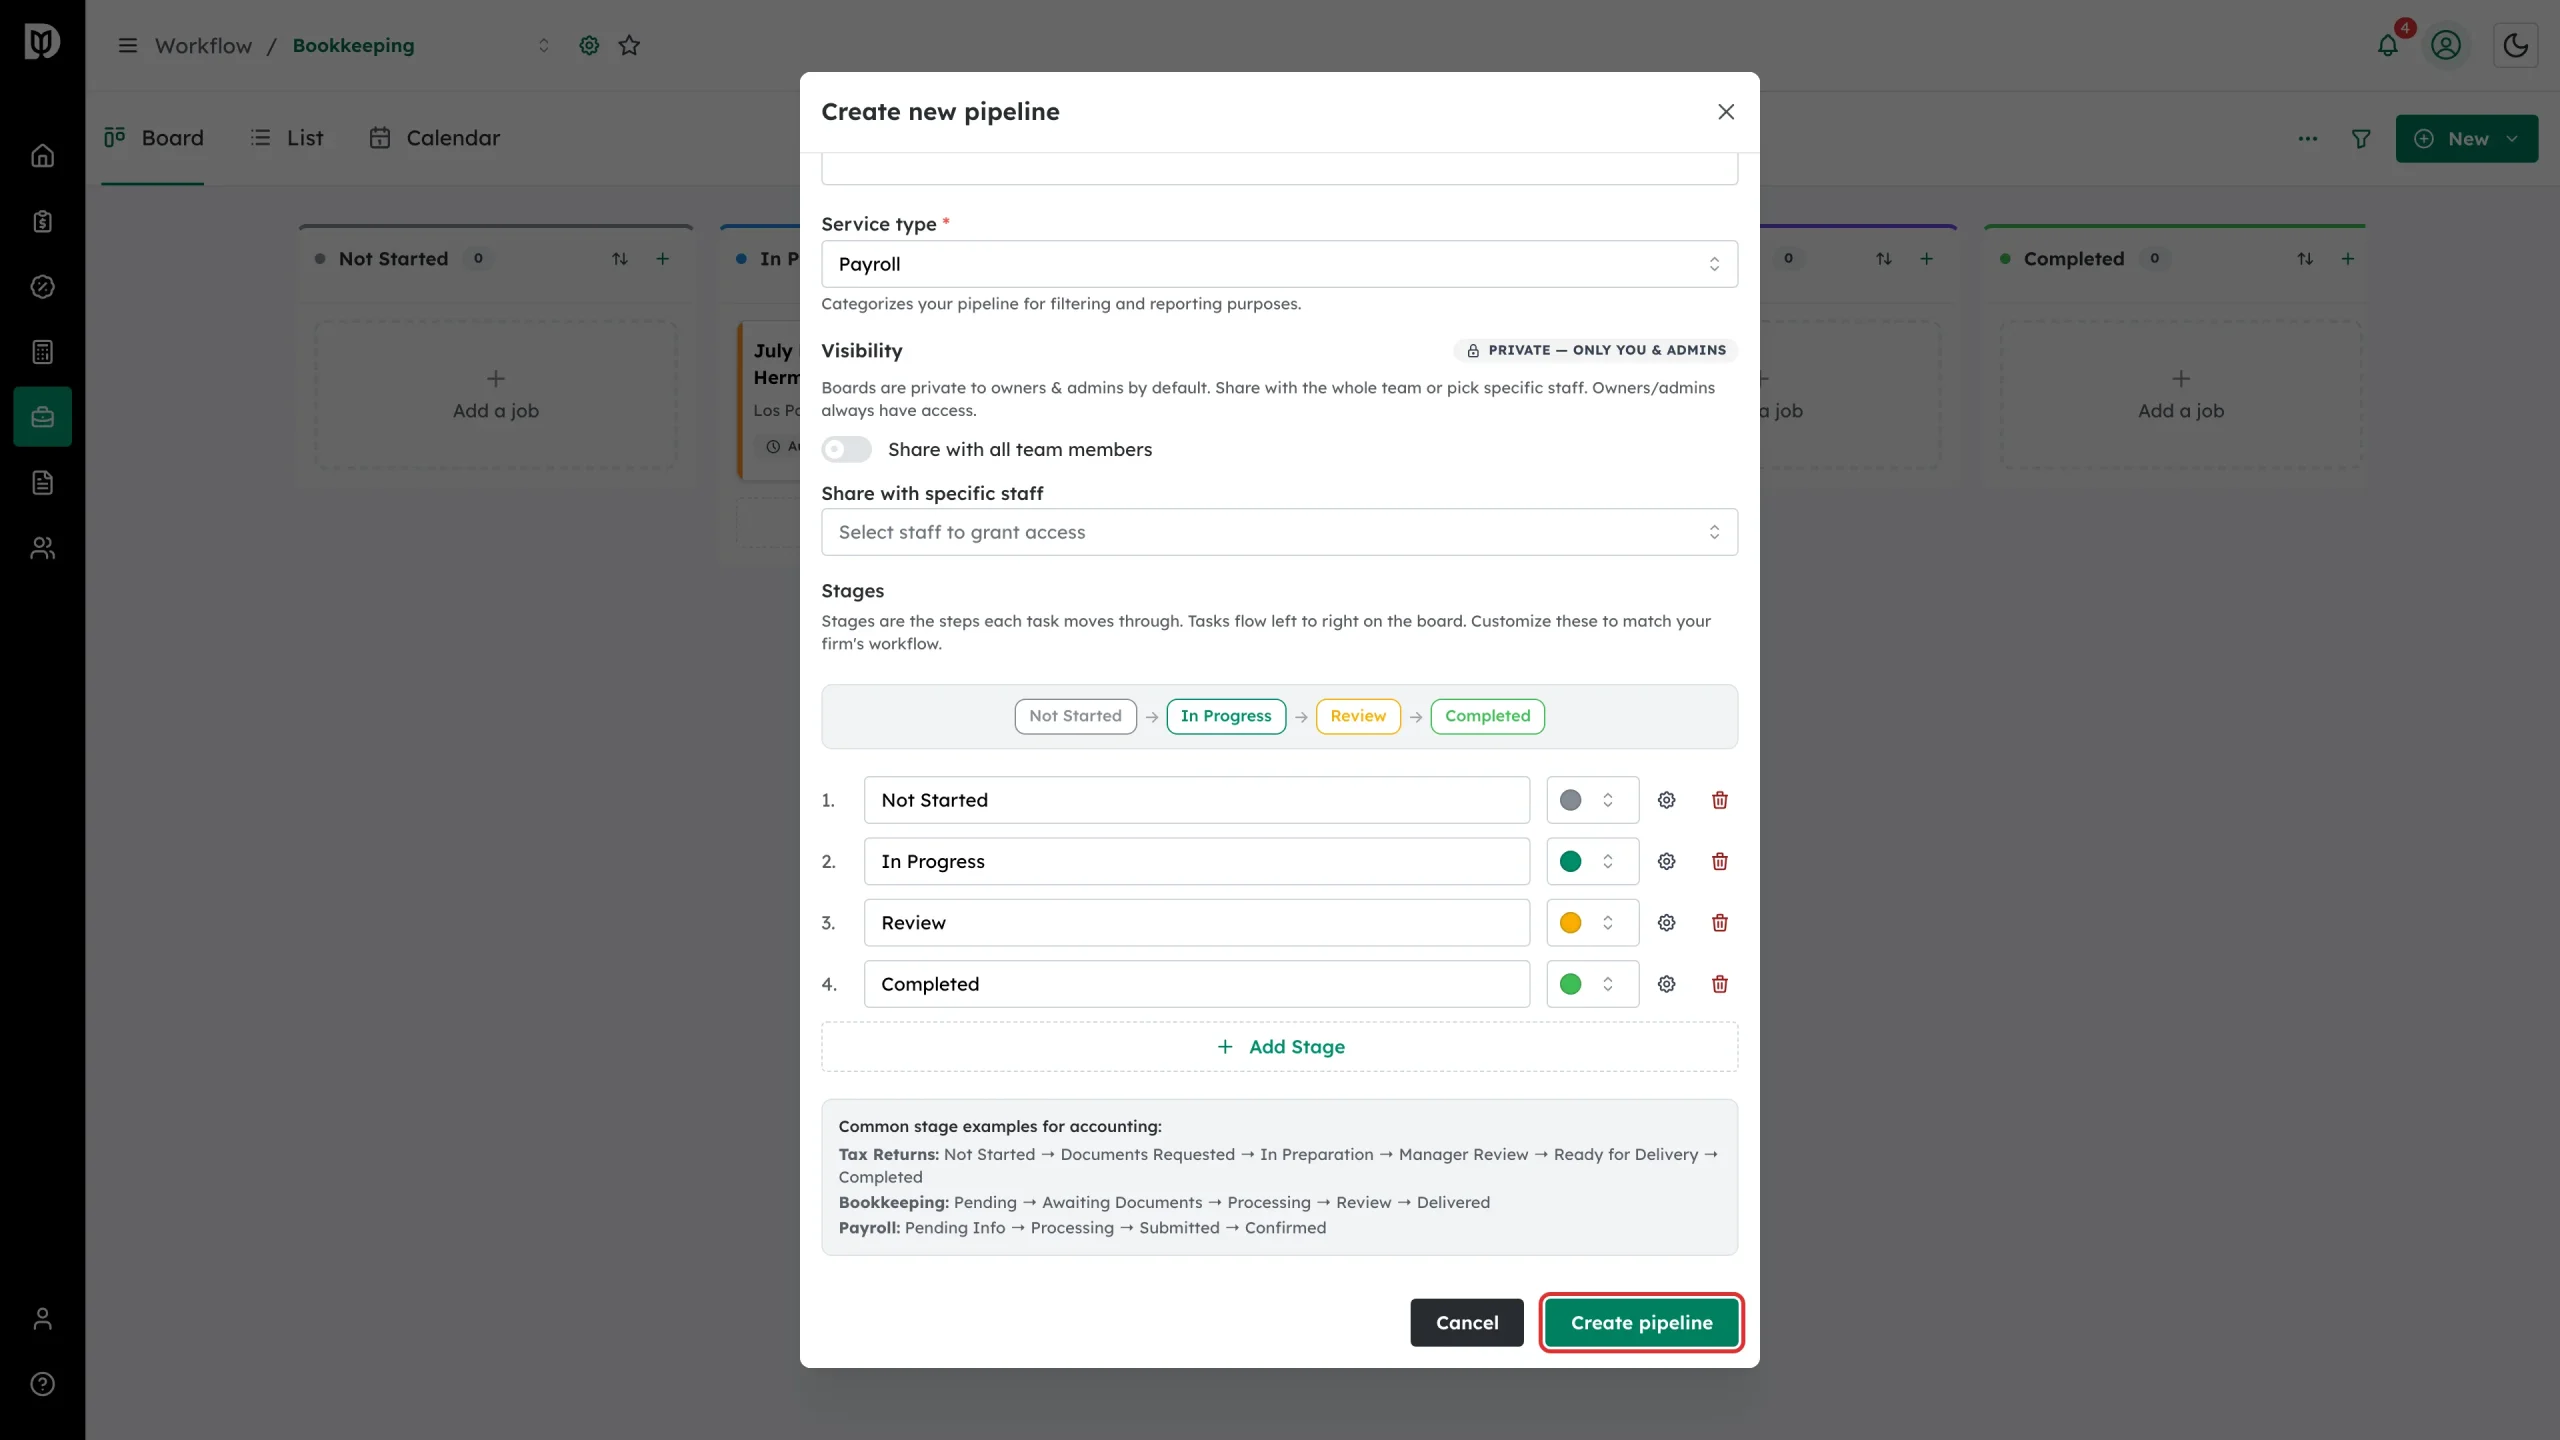
Stages are the steps a job moves through, left to right. Rename them, give each a colour, drag to reorder, remove the ones you do not need, or select Add Stage for more. A board needs at least two.
Step 7: Add rules to a stage
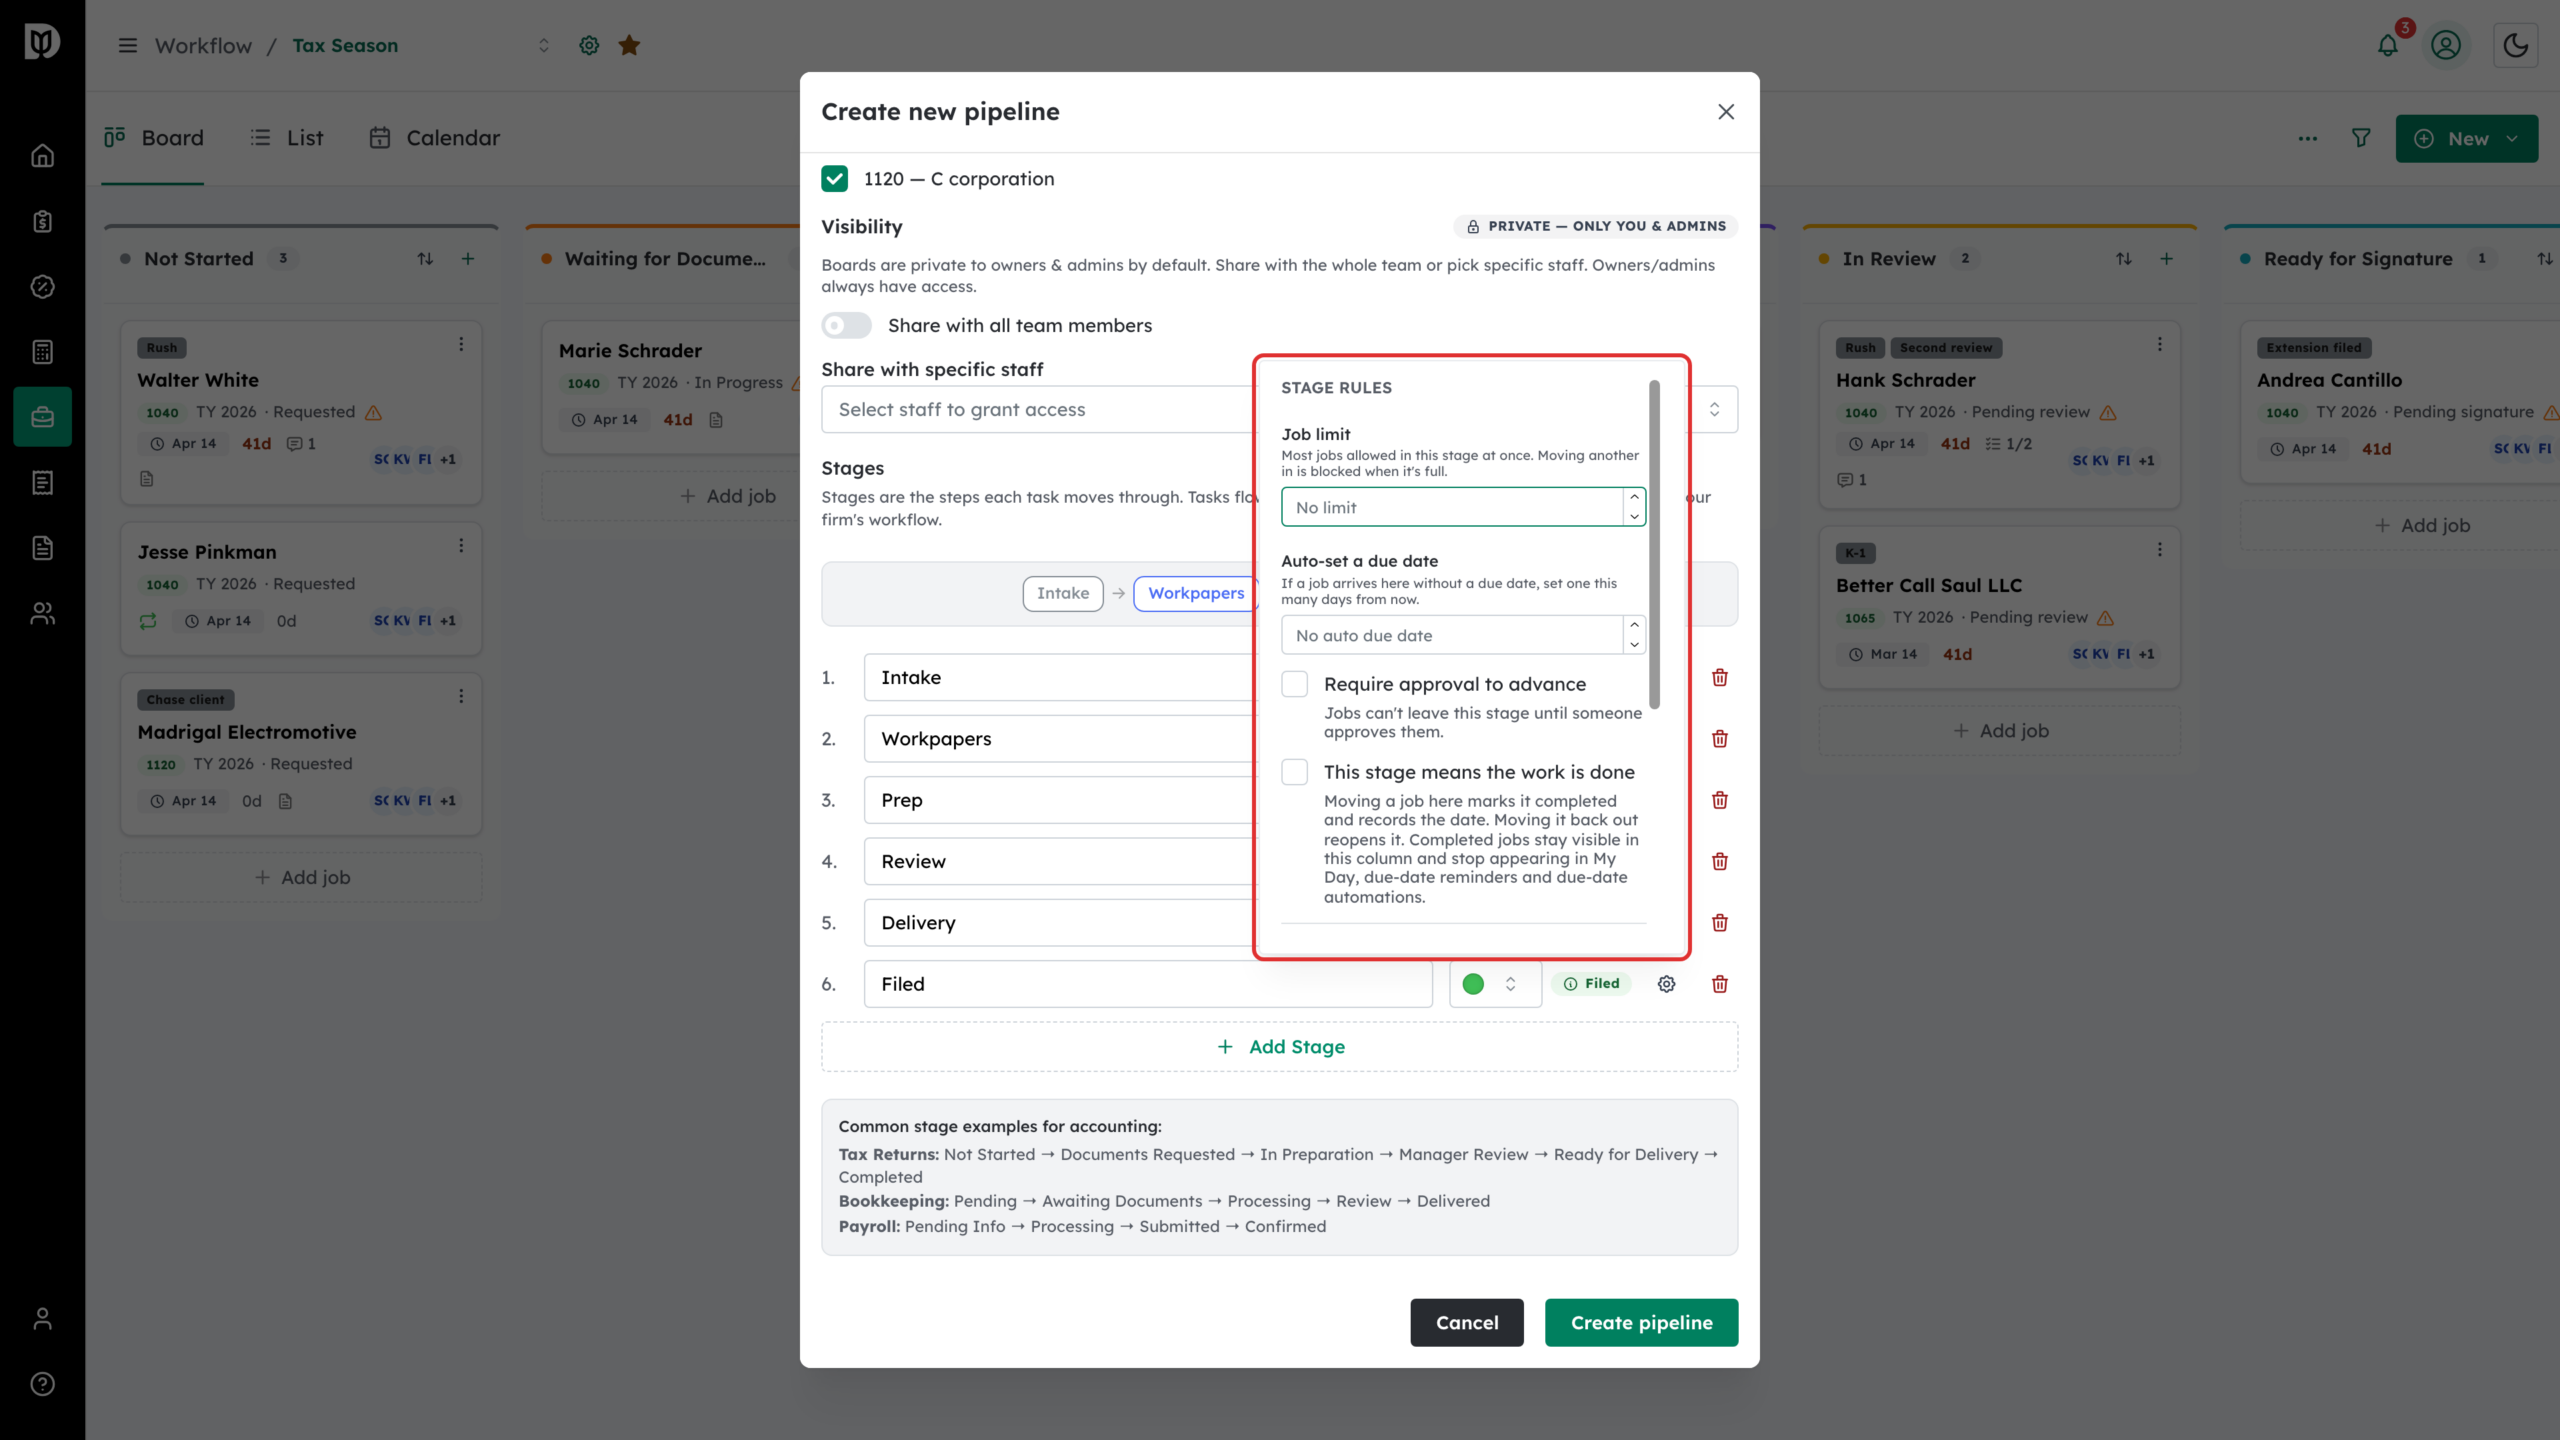
Select the gear on a stage row to open Advanced stage settings:
- Job limit — the most jobs allowed in the stage at once. Moving another one in is blocked when it is full.
- Auto-set a due date — if a job arrives here without a due date, set one this many days out.
- Require approval to advance — jobs cannot leave the stage until someone approves them.
- Who can move jobs here — limit which roles may move a job into the stage. Leave it empty for everyone. Anyone not listed is blocked, owners and admins included, except that Manager always inherits an Admin entry. Include your own role if you still need to move work in.
- This stage means the work is done — moving a job here marks it completed and records the date; moving it back out reopens it. Completed jobs stay visible in this column and stop appearing in My Day, due-date reminders and due-date automations. New boards start with a Completed stage that has this ticked.
- Require a second person to advance — whoever moves a job in cannot be the one to move it out. Useful on review and approval steps.
Step 8: Create the board
Select Create pipeline.
Step 9: Open the new board
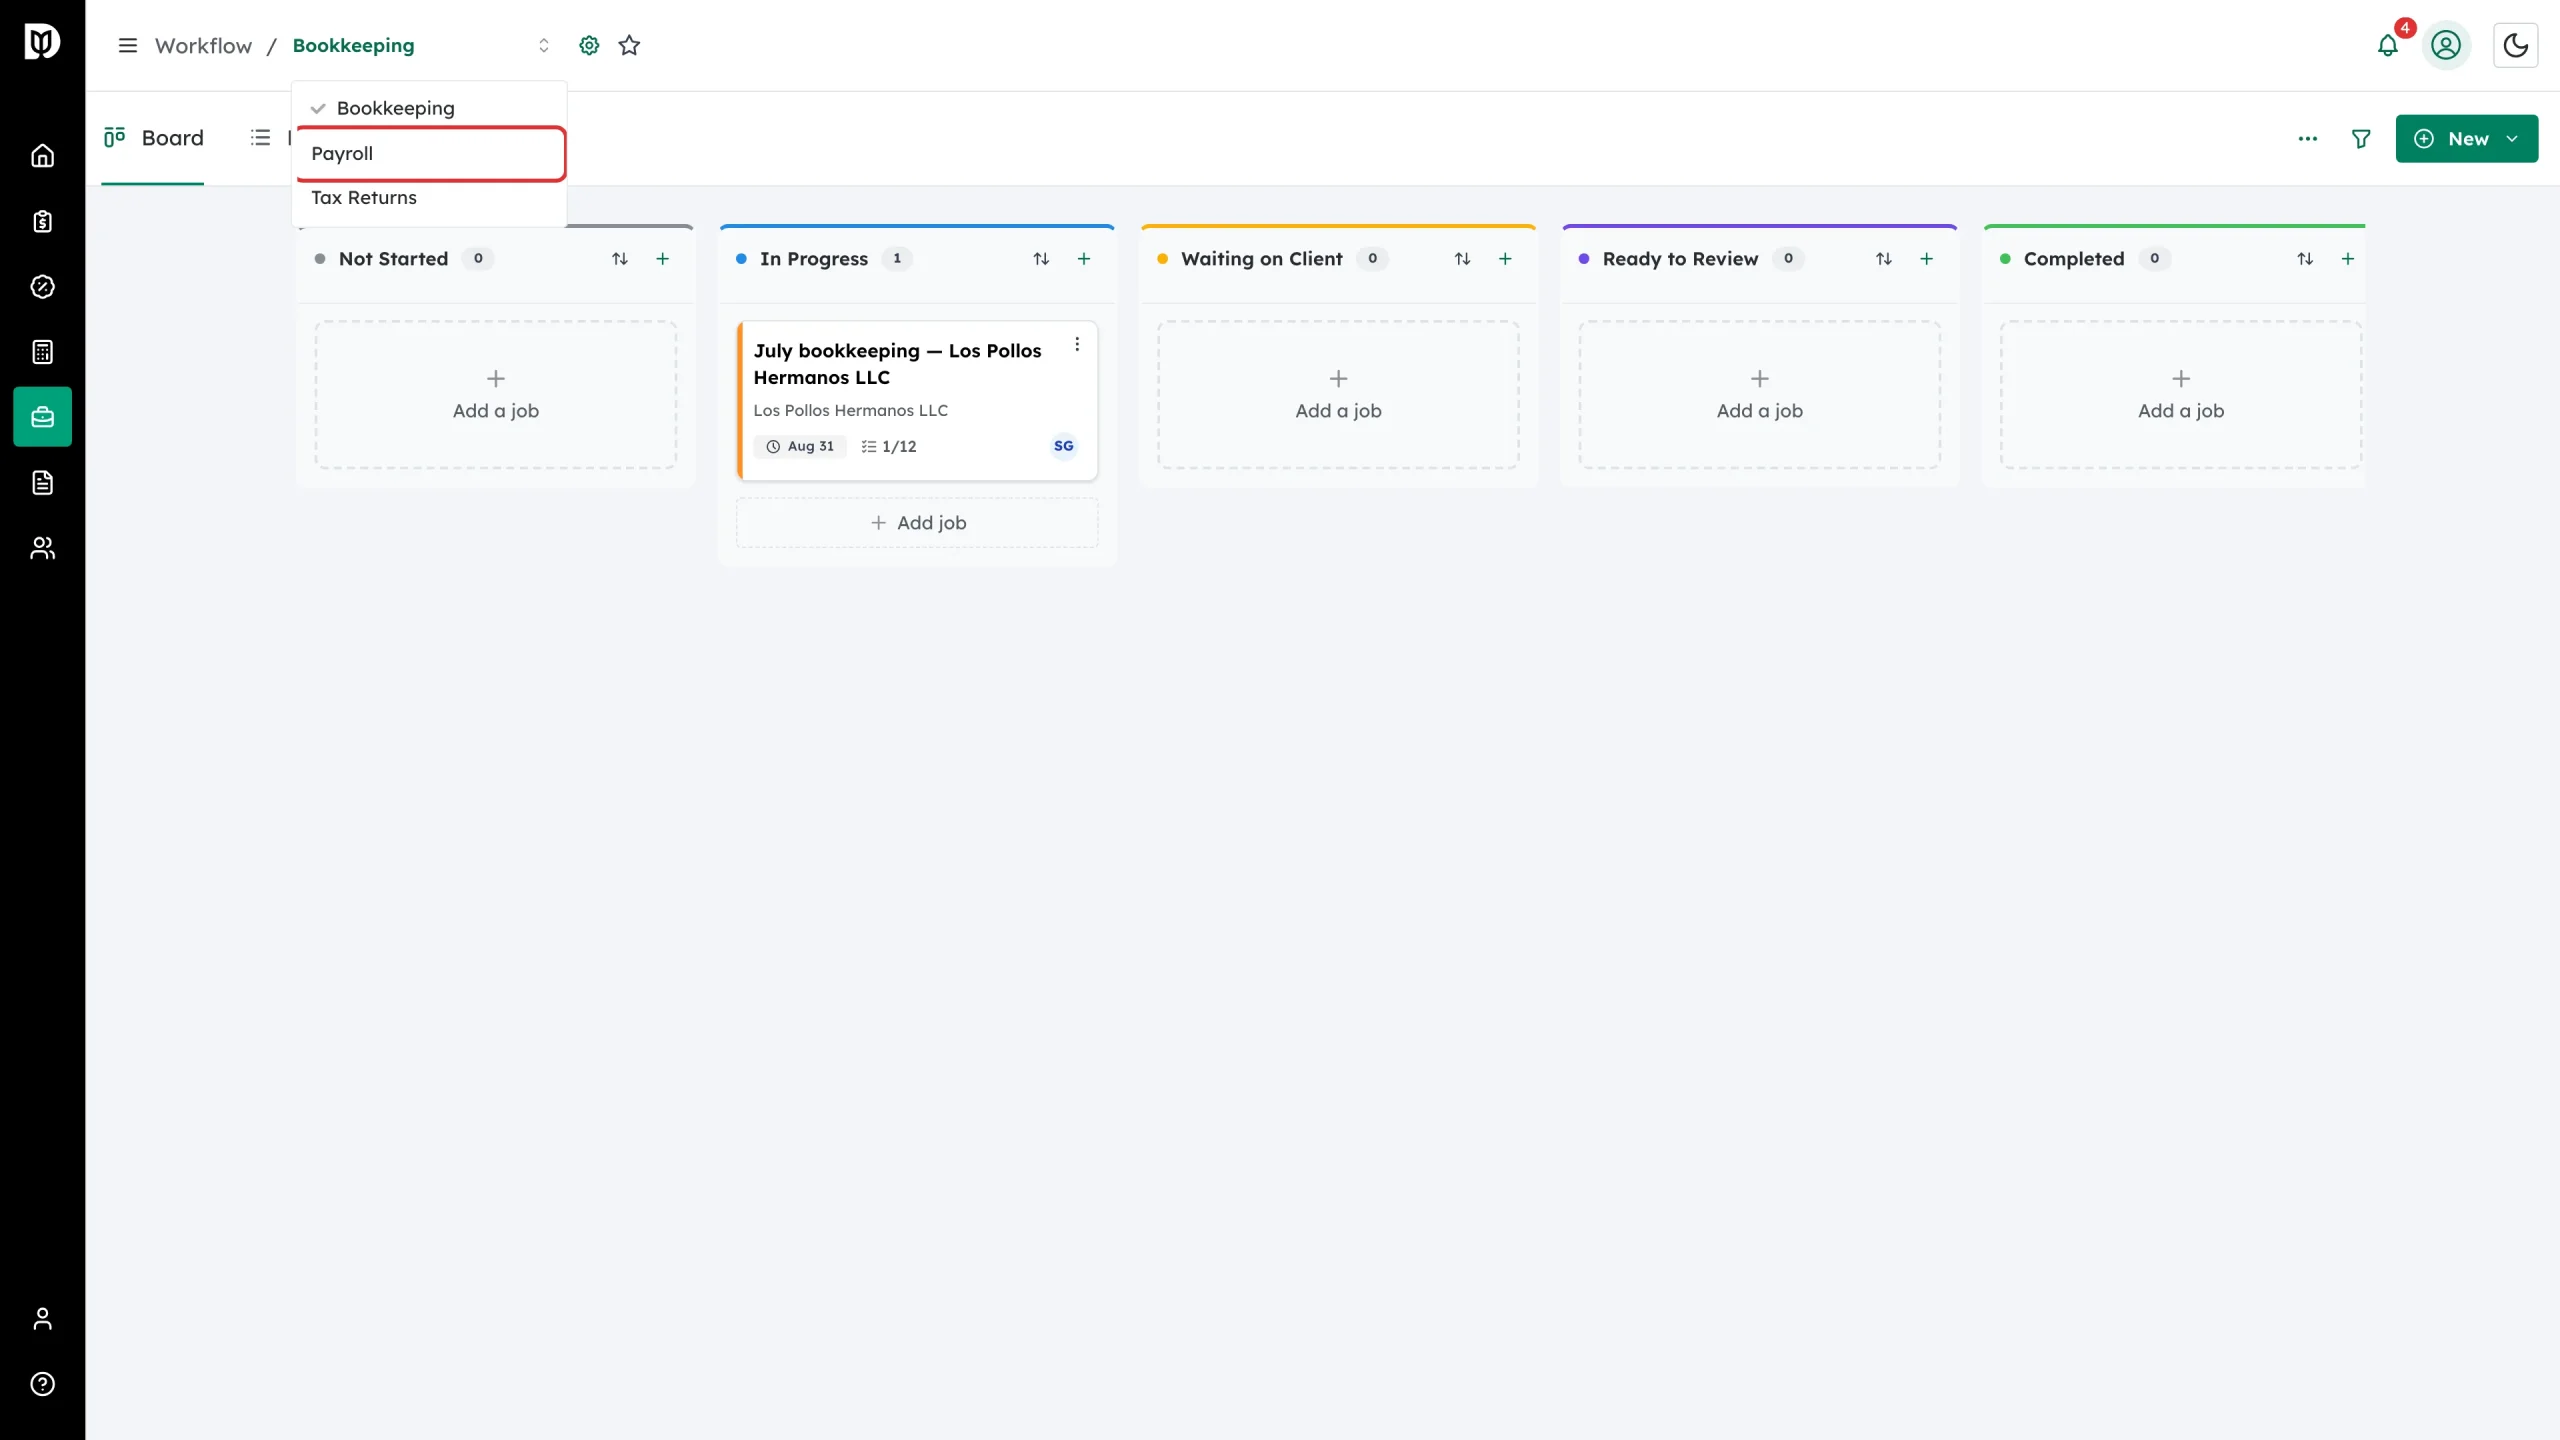
The board appears in the board picker in the breadcrumb, sorted alphabetically.
Step 10: Change the stages later
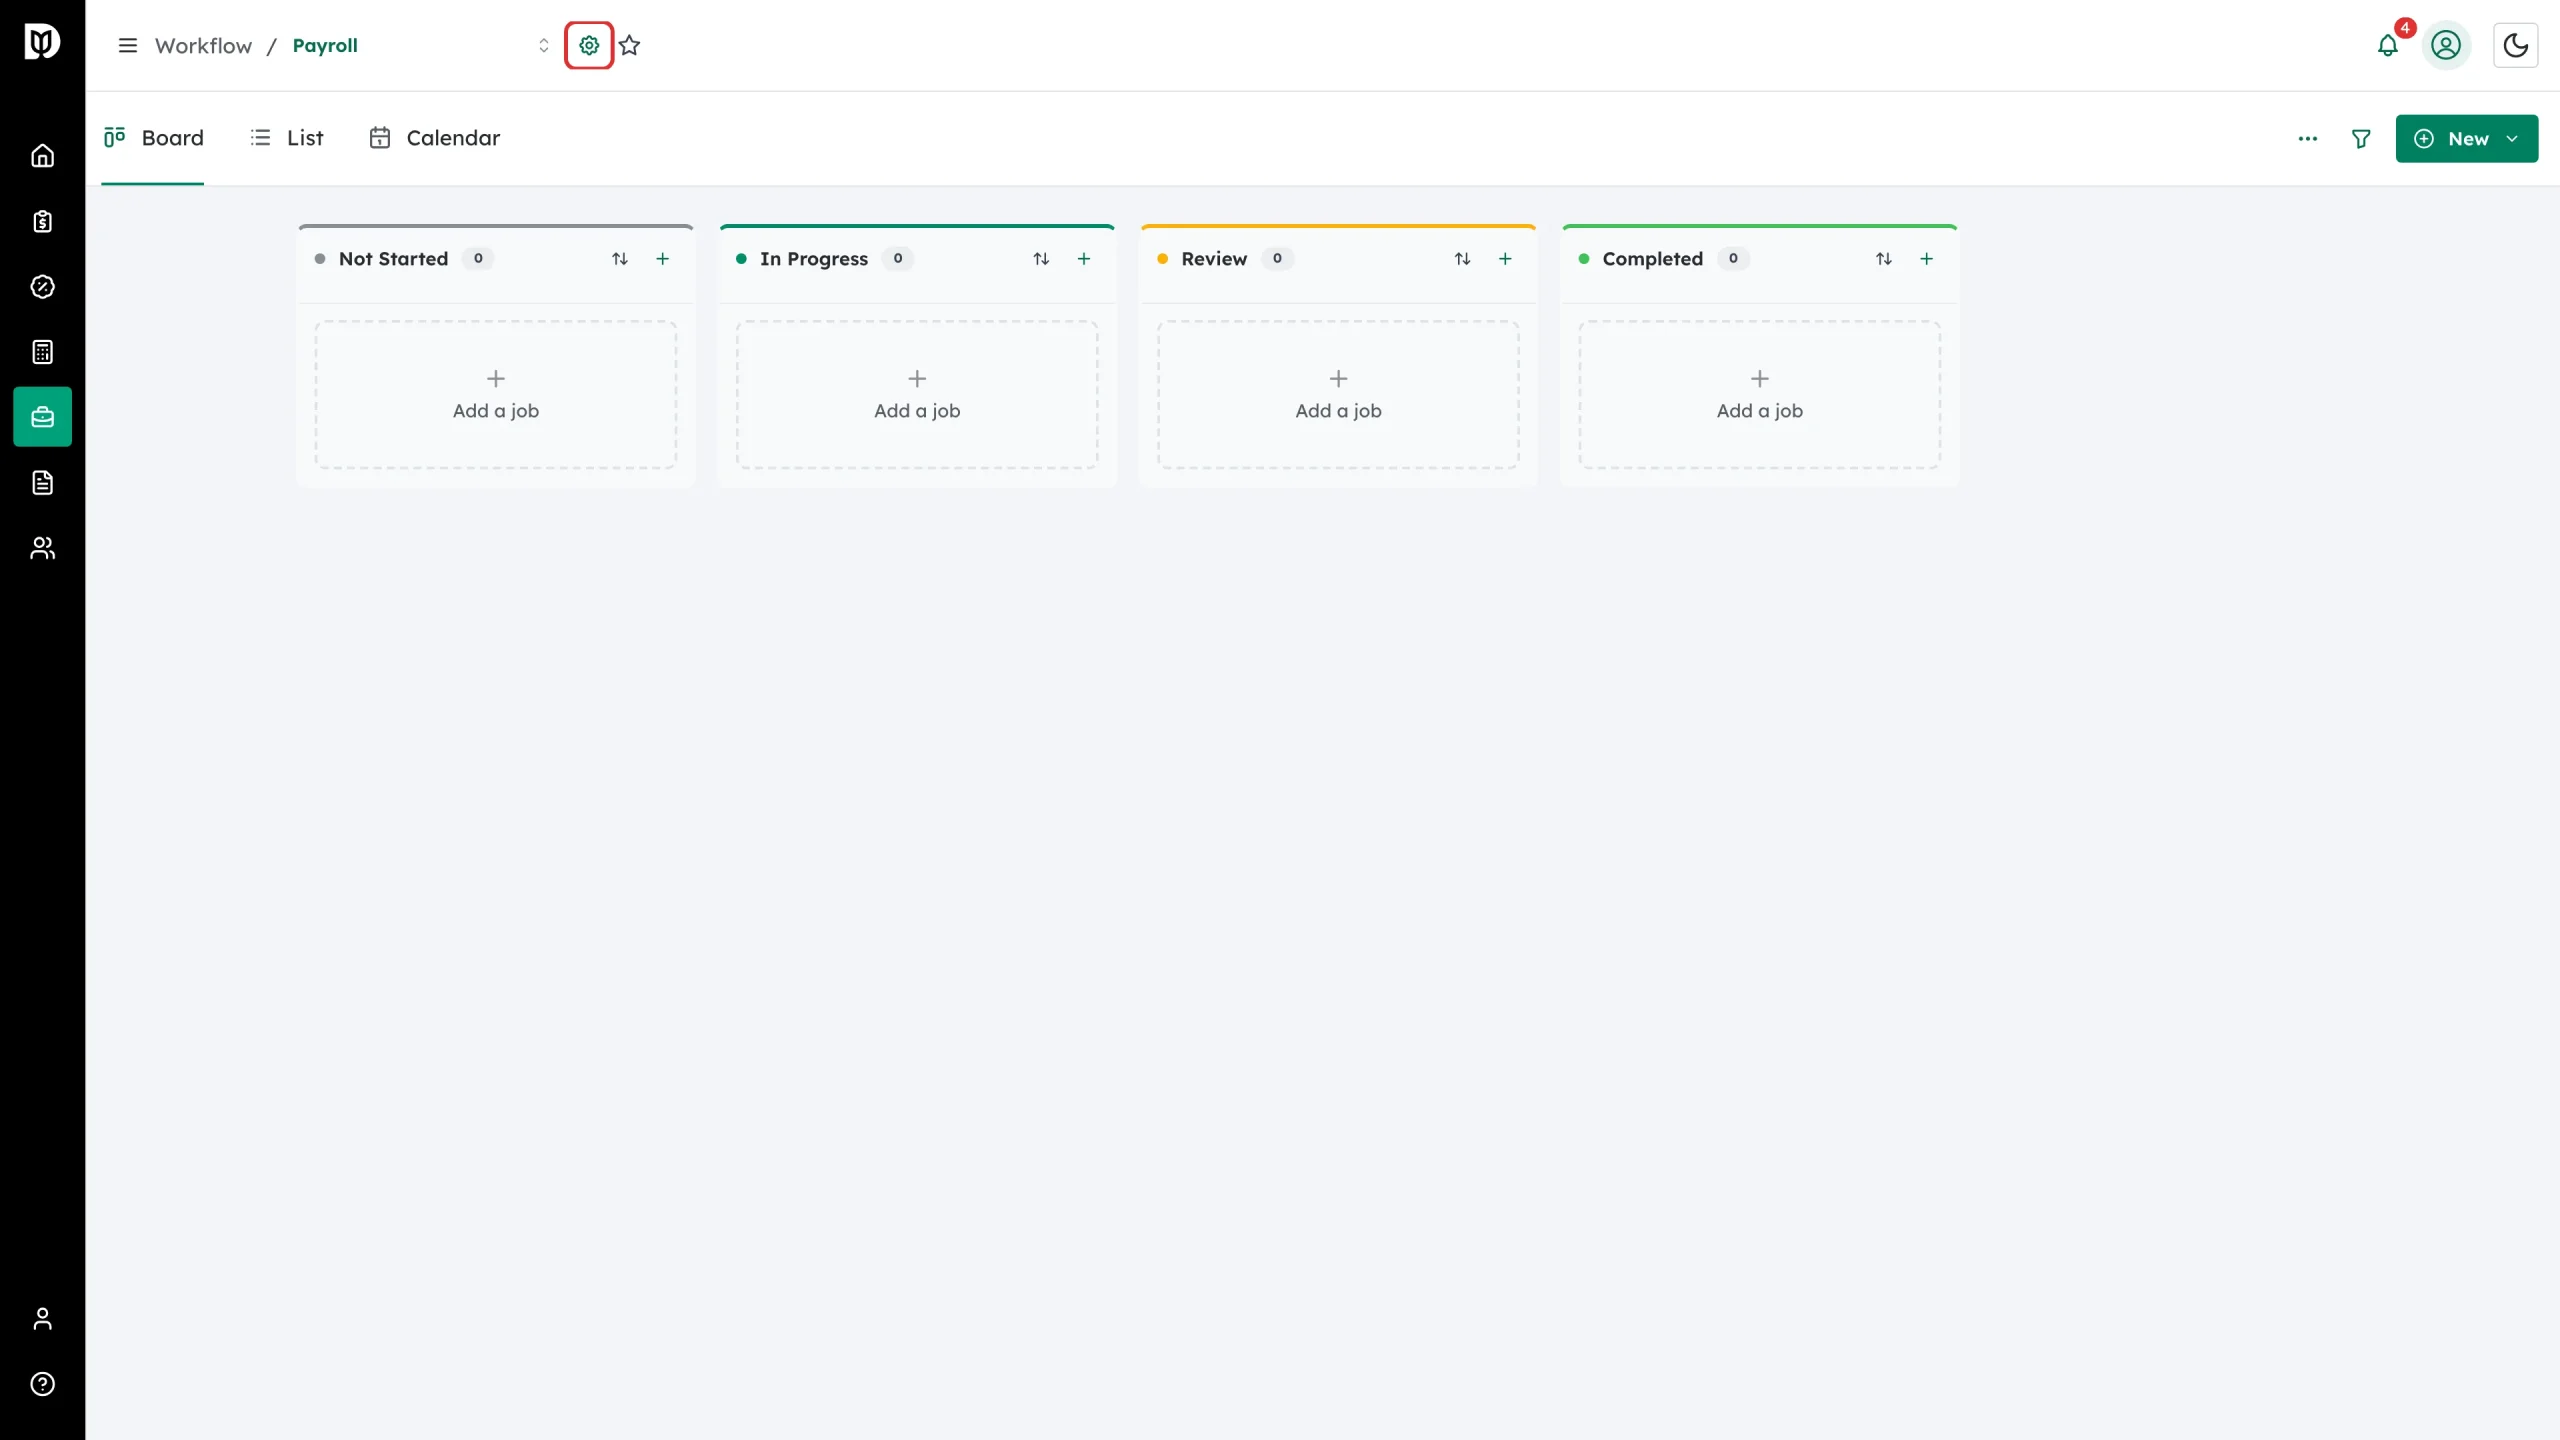
Select the gear beside the board name to reopen the same settings. You can rename, recolour, reorder, add and remove stages, and change the rules, at any time.
What happens next
The board is ready for work. New cards start in its first stage unless you add them straight into a column. On a tax board, returns of the types you ticked start appearing on it by themselves as clients submit organizers and returns progress.
Troubleshooting
- Tax or Bookkeeping is missing from Service type. Those service types are only offered when the matching firm feature is switched on.
- Nobody can move a job into a stage. Check Who can move jobs here on that stage. Owners and admins are blocked too if their role is not listed.
- You cannot remove a stage. A board must keep at least two stages.
- Tax returns are not landing on your new tax board. A return syncs to the first board that lists its return type. If an older tax board still claims that type, remove it there.
- Closing the window warns about unsaved changes. Name, stages, rules and sharing are all discarded together — choose Keep editing if you did not mean to lose them.