Who this is for: Preparers and reviewers working a job to completion.
What you’ll learn: How to work a job’s checklist, leave notes for the team, and log time against the job.
Before you begin
- Open the job by selecting its card on the board, or by selecting a row in the List view.
- Notes and time are internal. Clients never see them.
- Time you have already invoiced is locked and can no longer be edited or deleted.
Step-by-step instructions
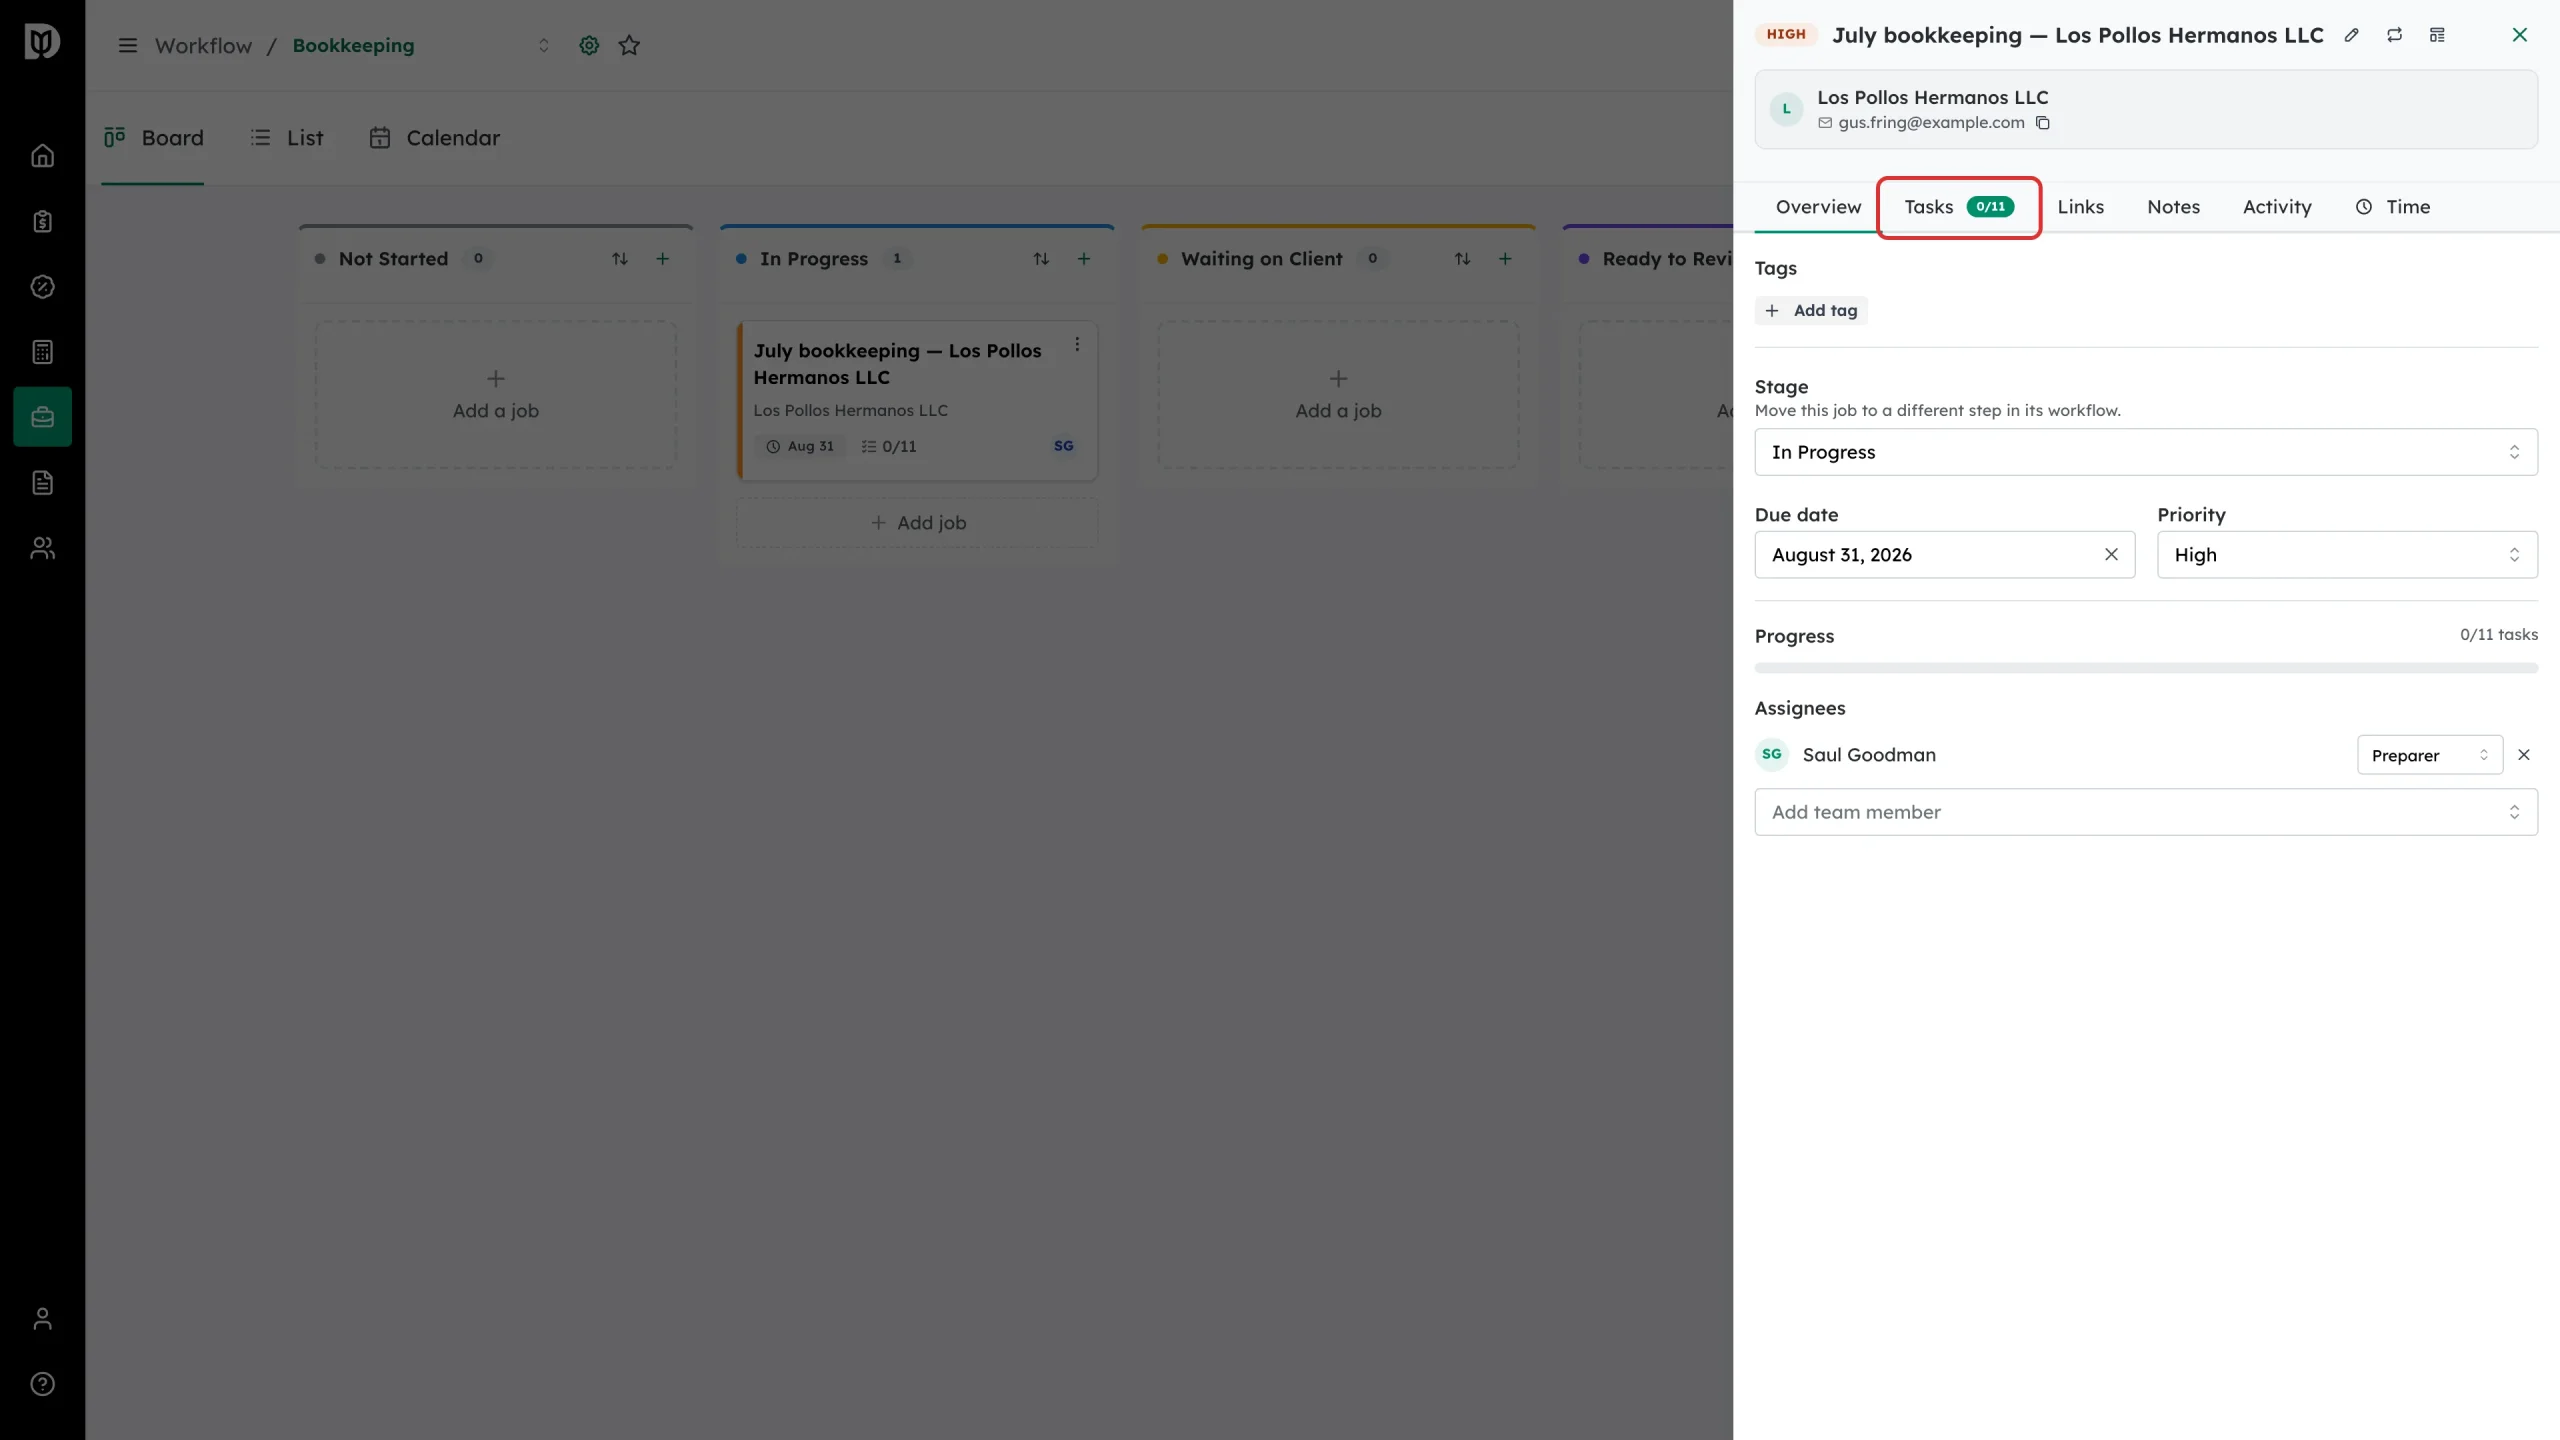
Step 1: Open the Tasks tab
In the job panel, select Tasks. The badge on the tab is how many of the job’s tasks are done.
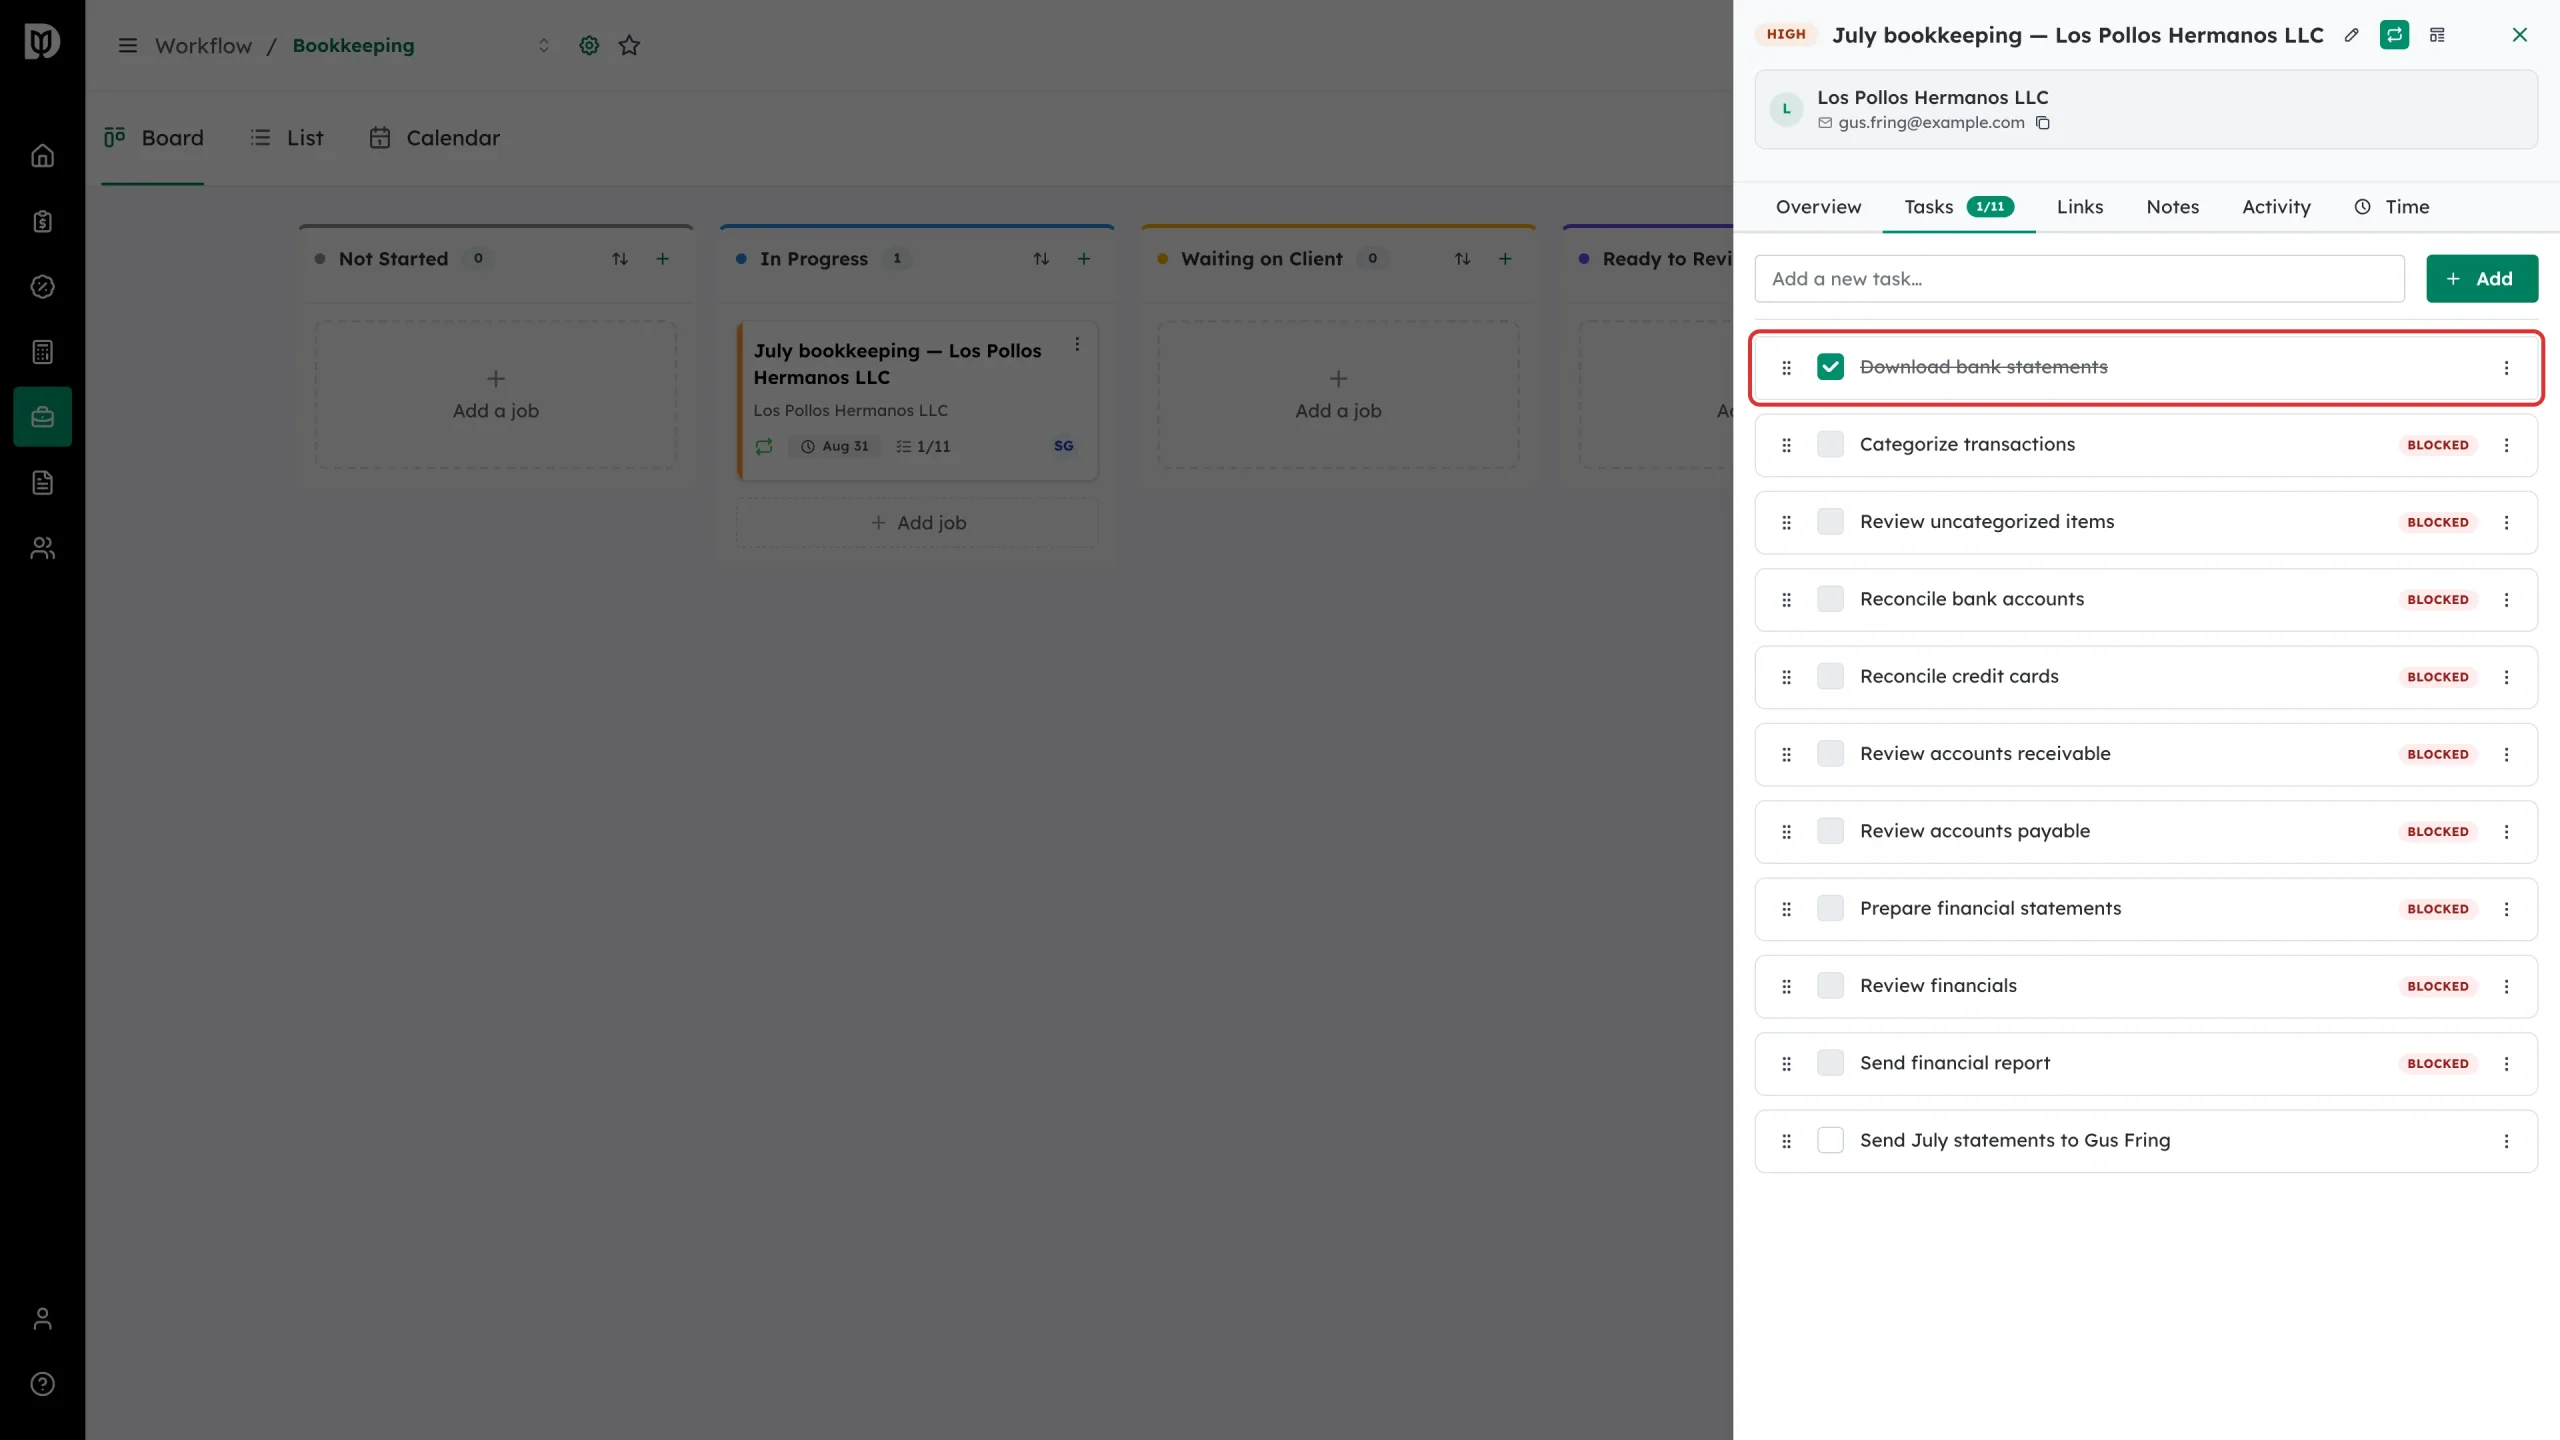
Step 2: Work through the checklist
If the job was created from a template, the template’s tasks are already here in order. Drag the grip handle on the left of a row to reorder them.
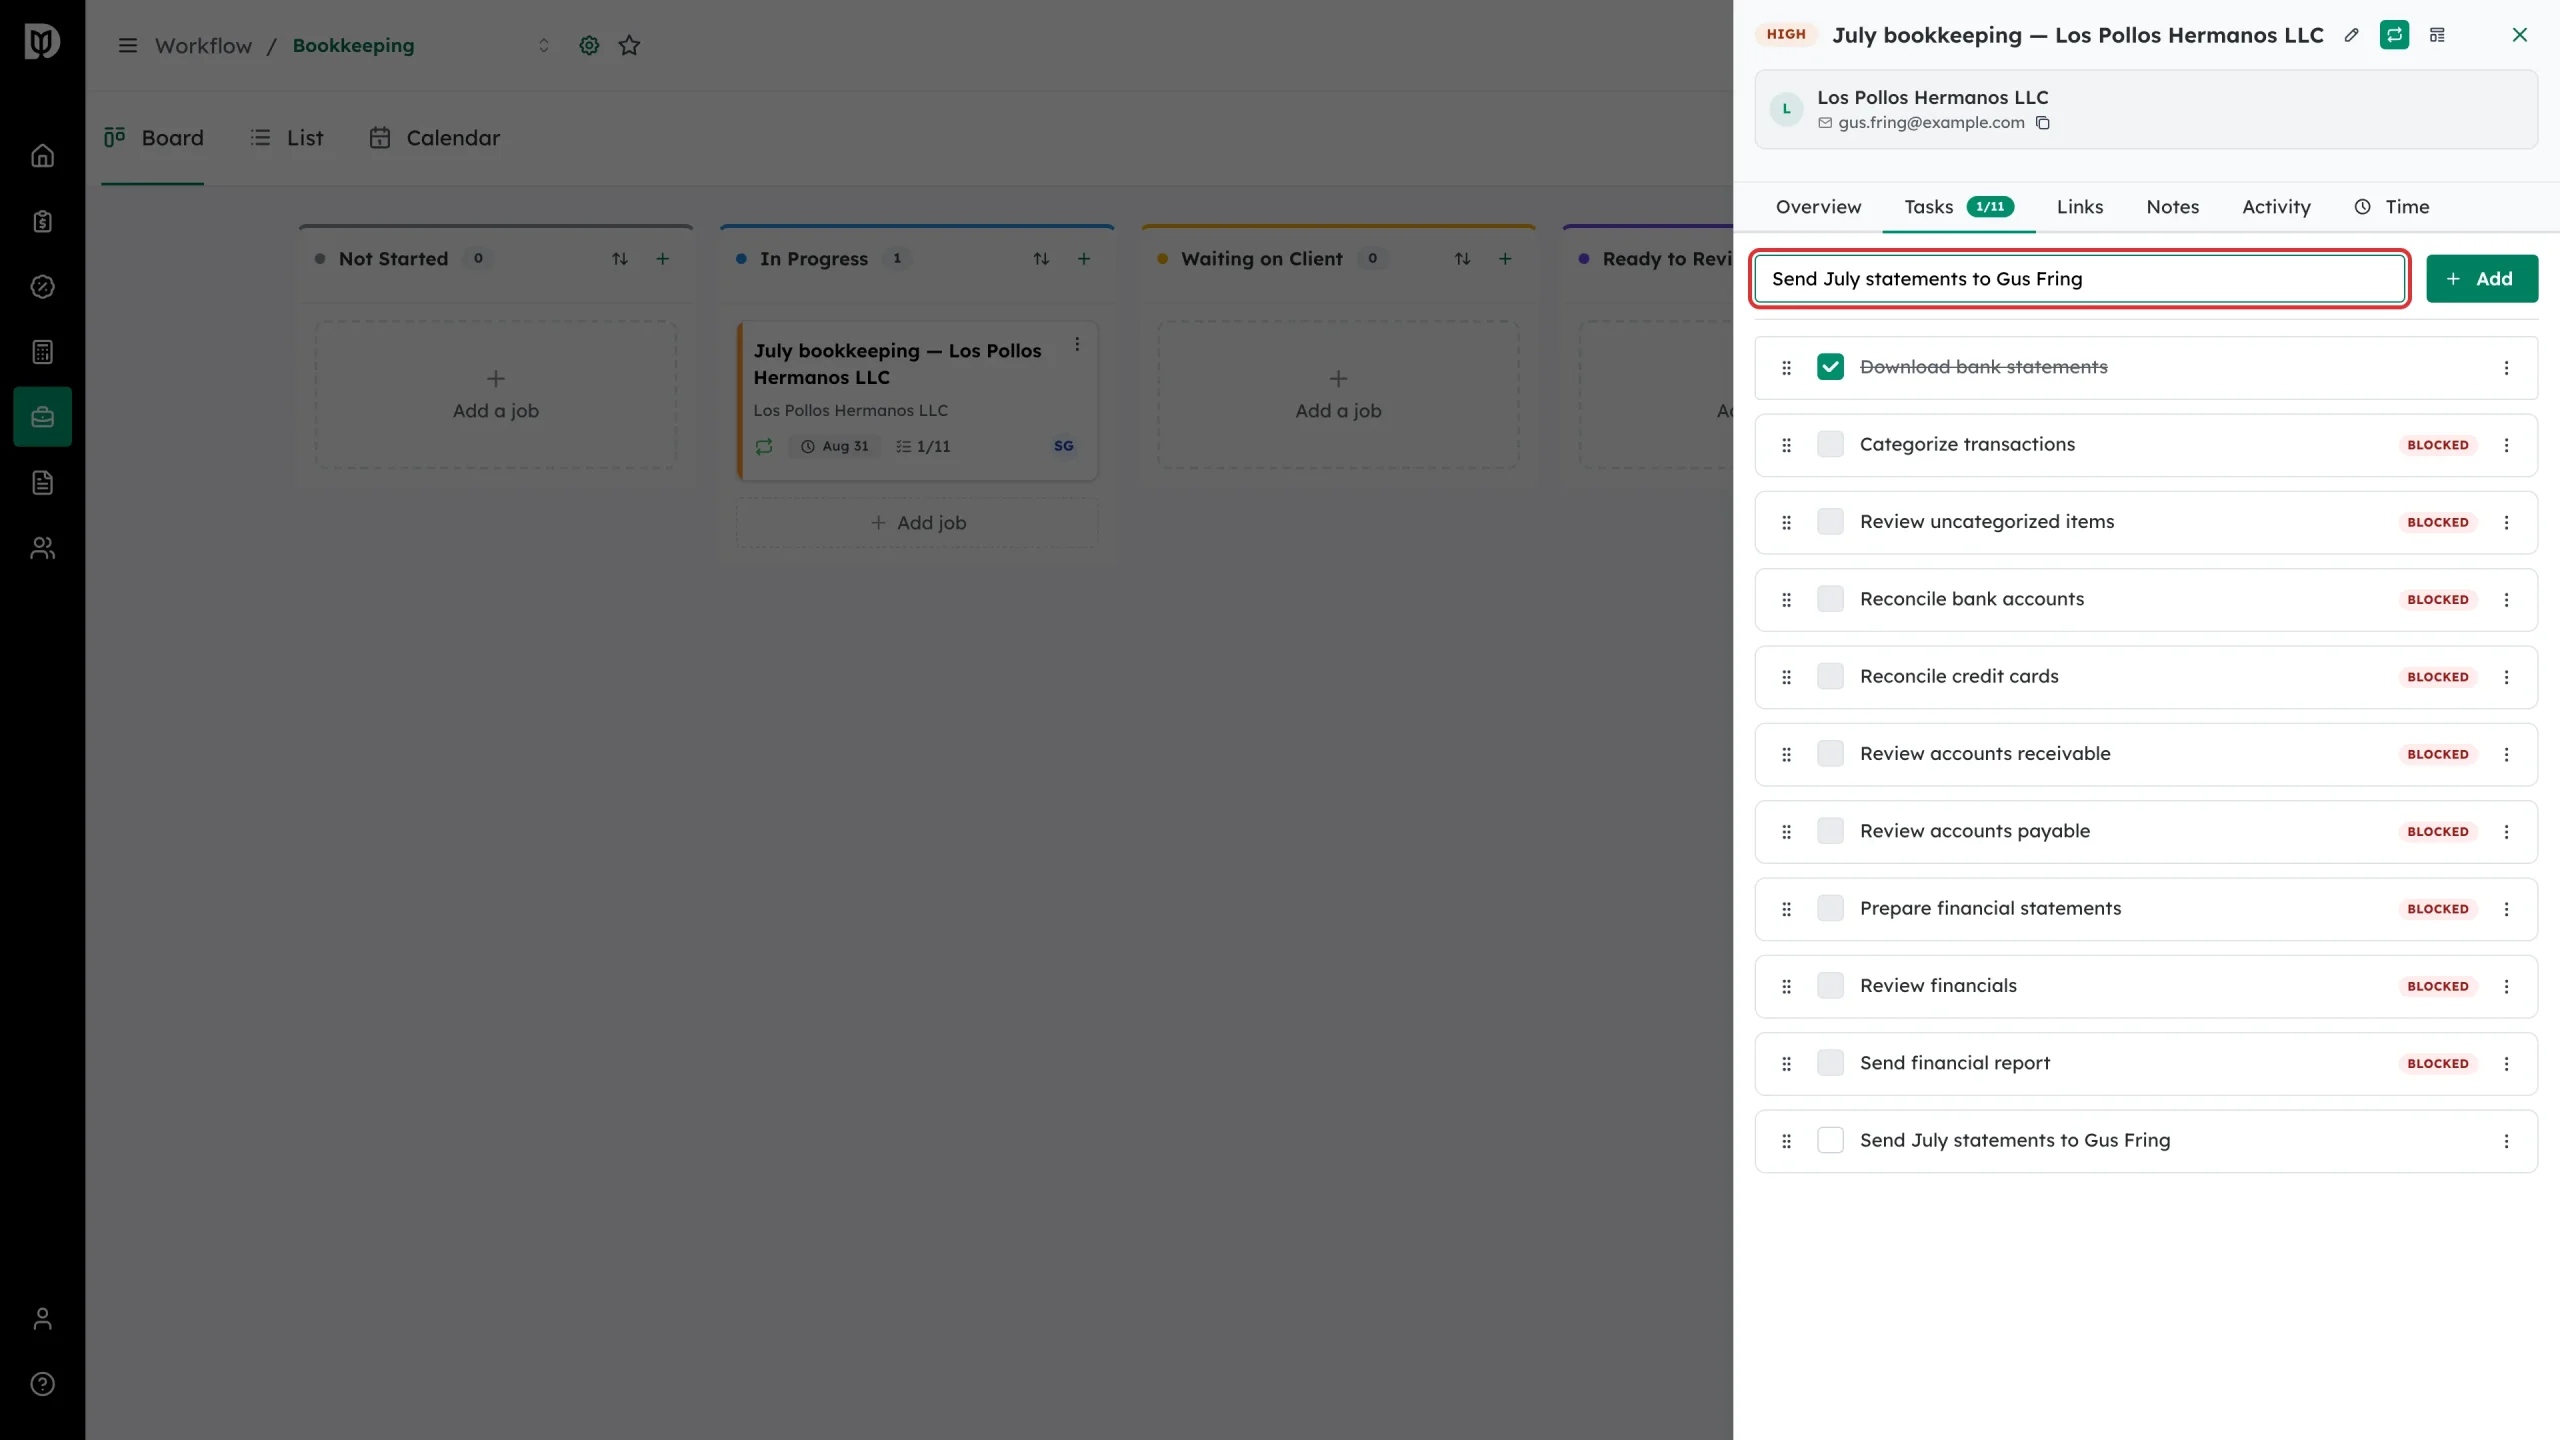
Step 3: Add your own task
Type in Add a new task… and select Add. Tasks you add go to the bottom of the list.
Each task has its own menu with Mark Complete and Delete. On a card created by a repeat schedule, the menu also offers Repeat on future cards, so the task is added to every card the schedule creates from now on; repeating tasks show a repeat icon, and Stop repeating turns it off.
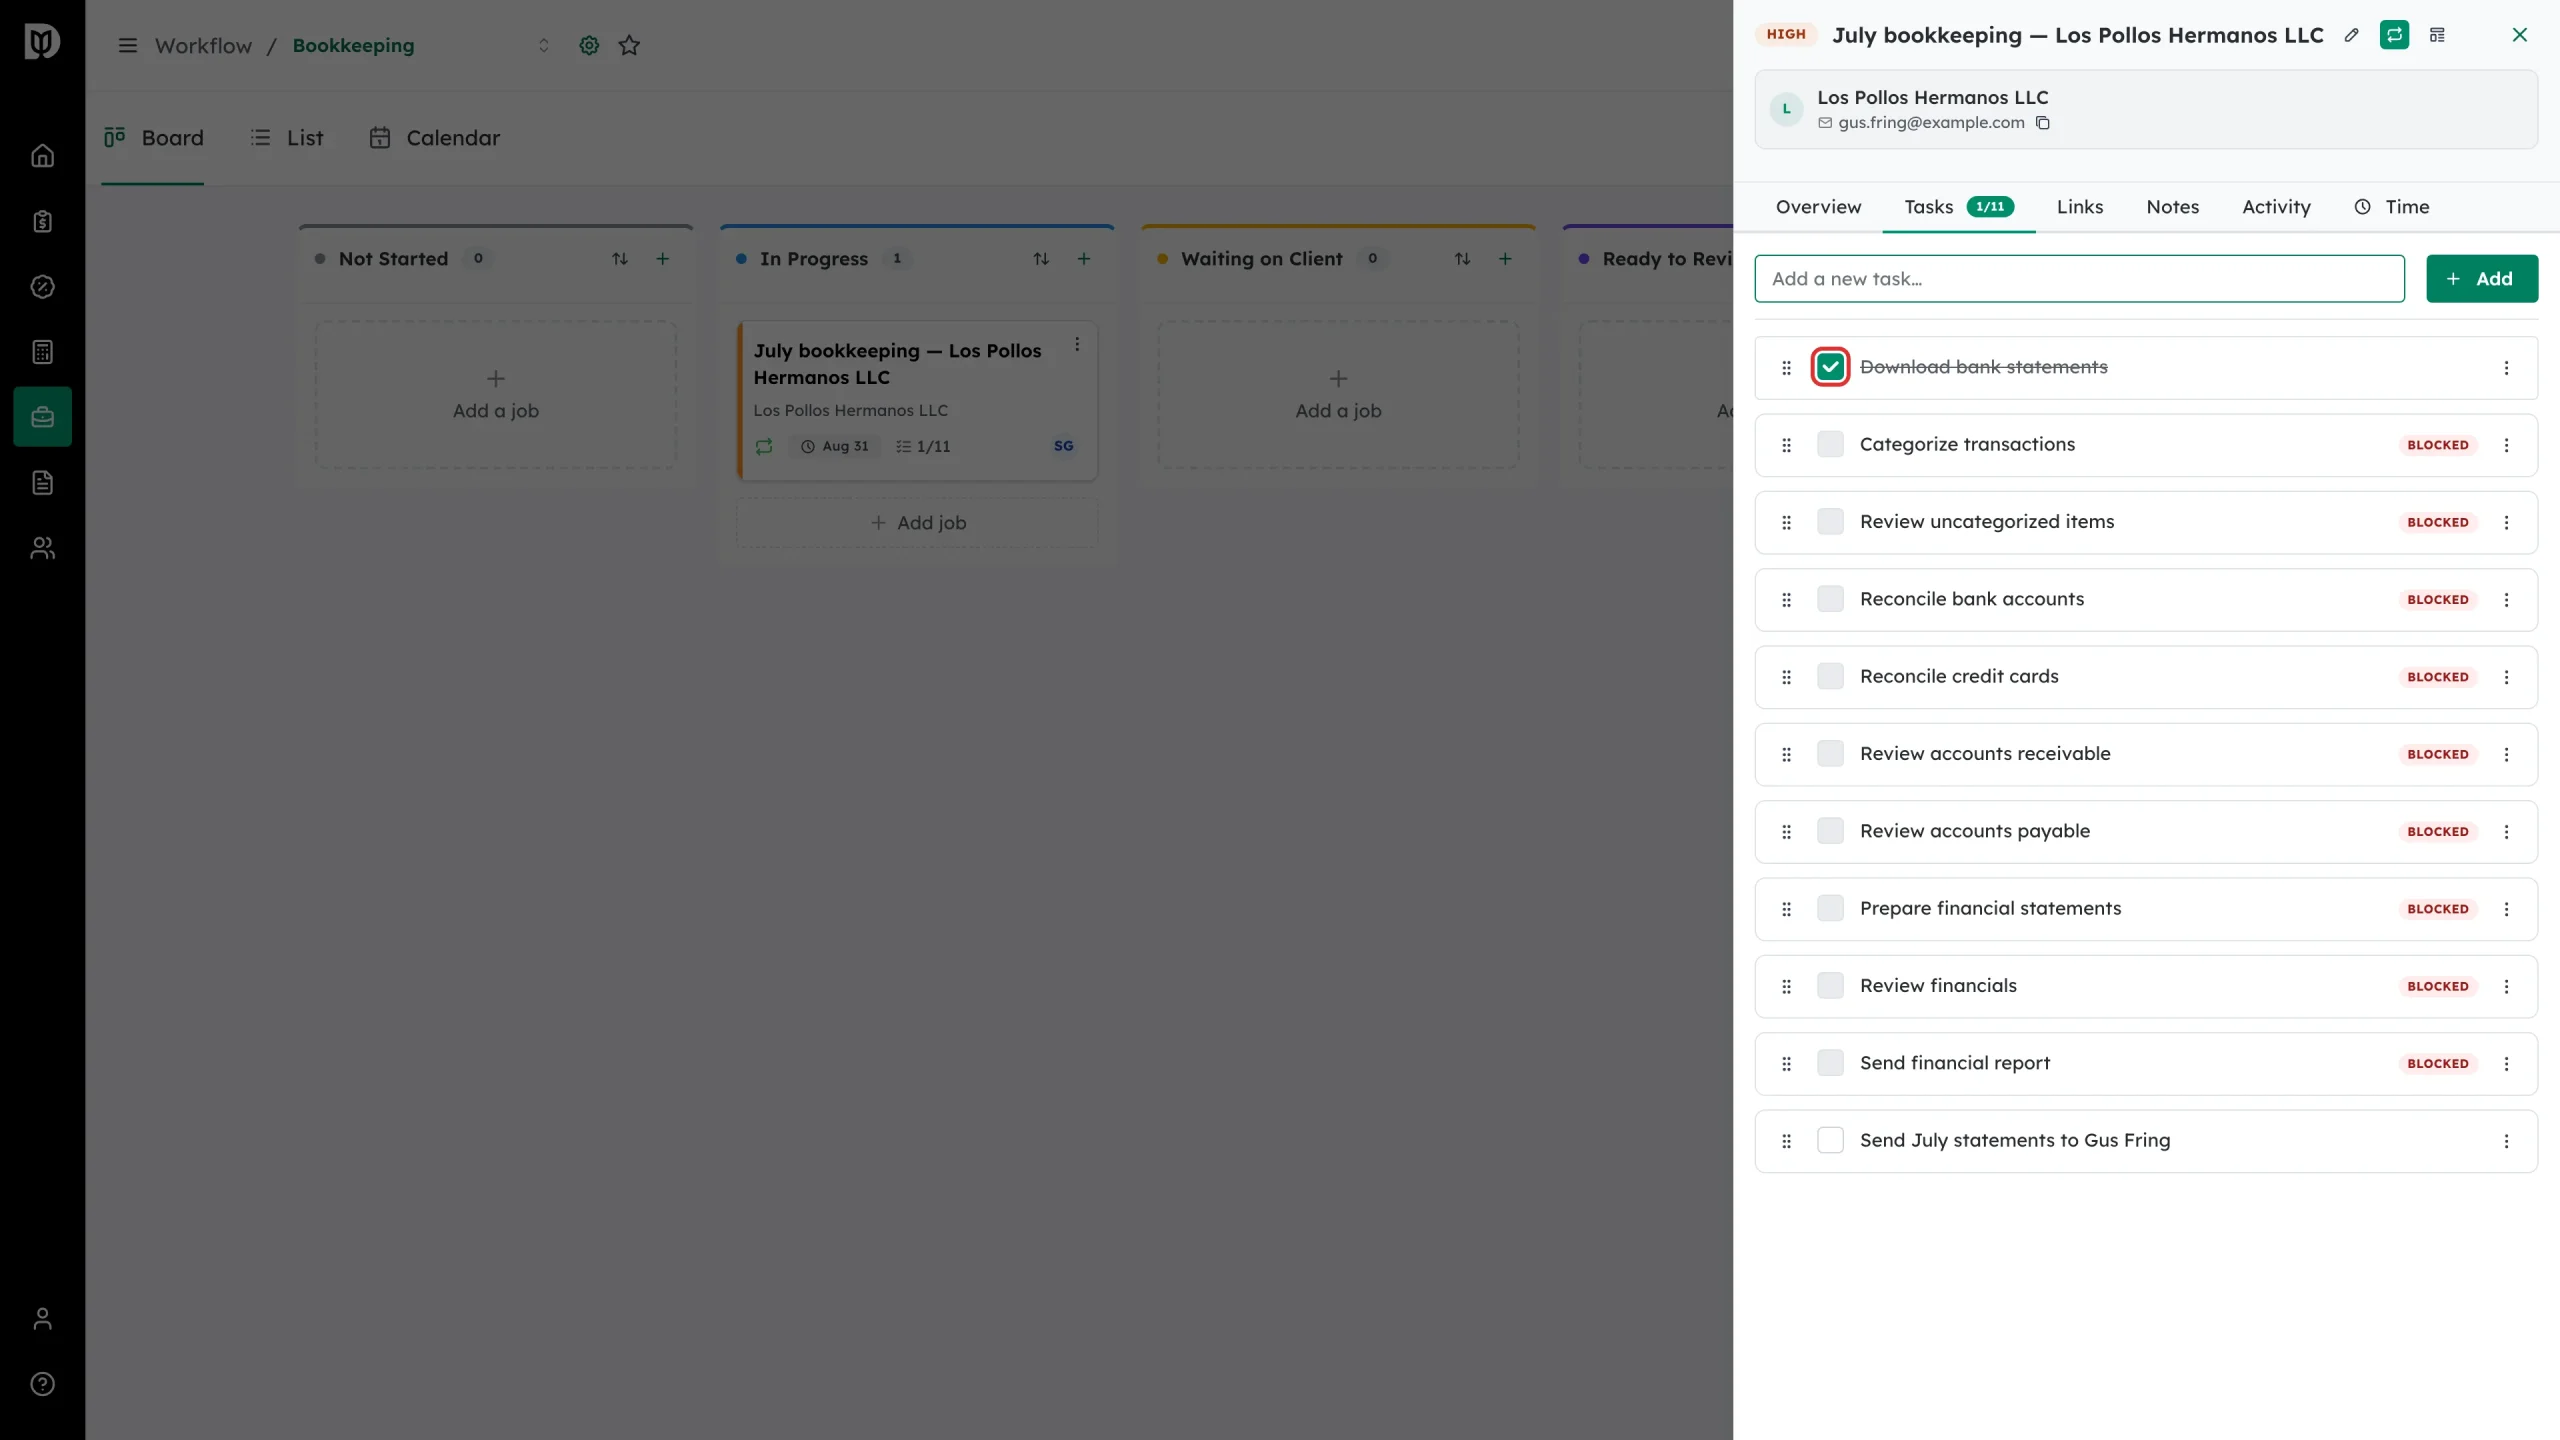
Step 4: Tick a task off
Select the checkbox on a row. The task is struck through, the tab badge goes up, and the progress bar on the Overview tab and the card on the board both move.
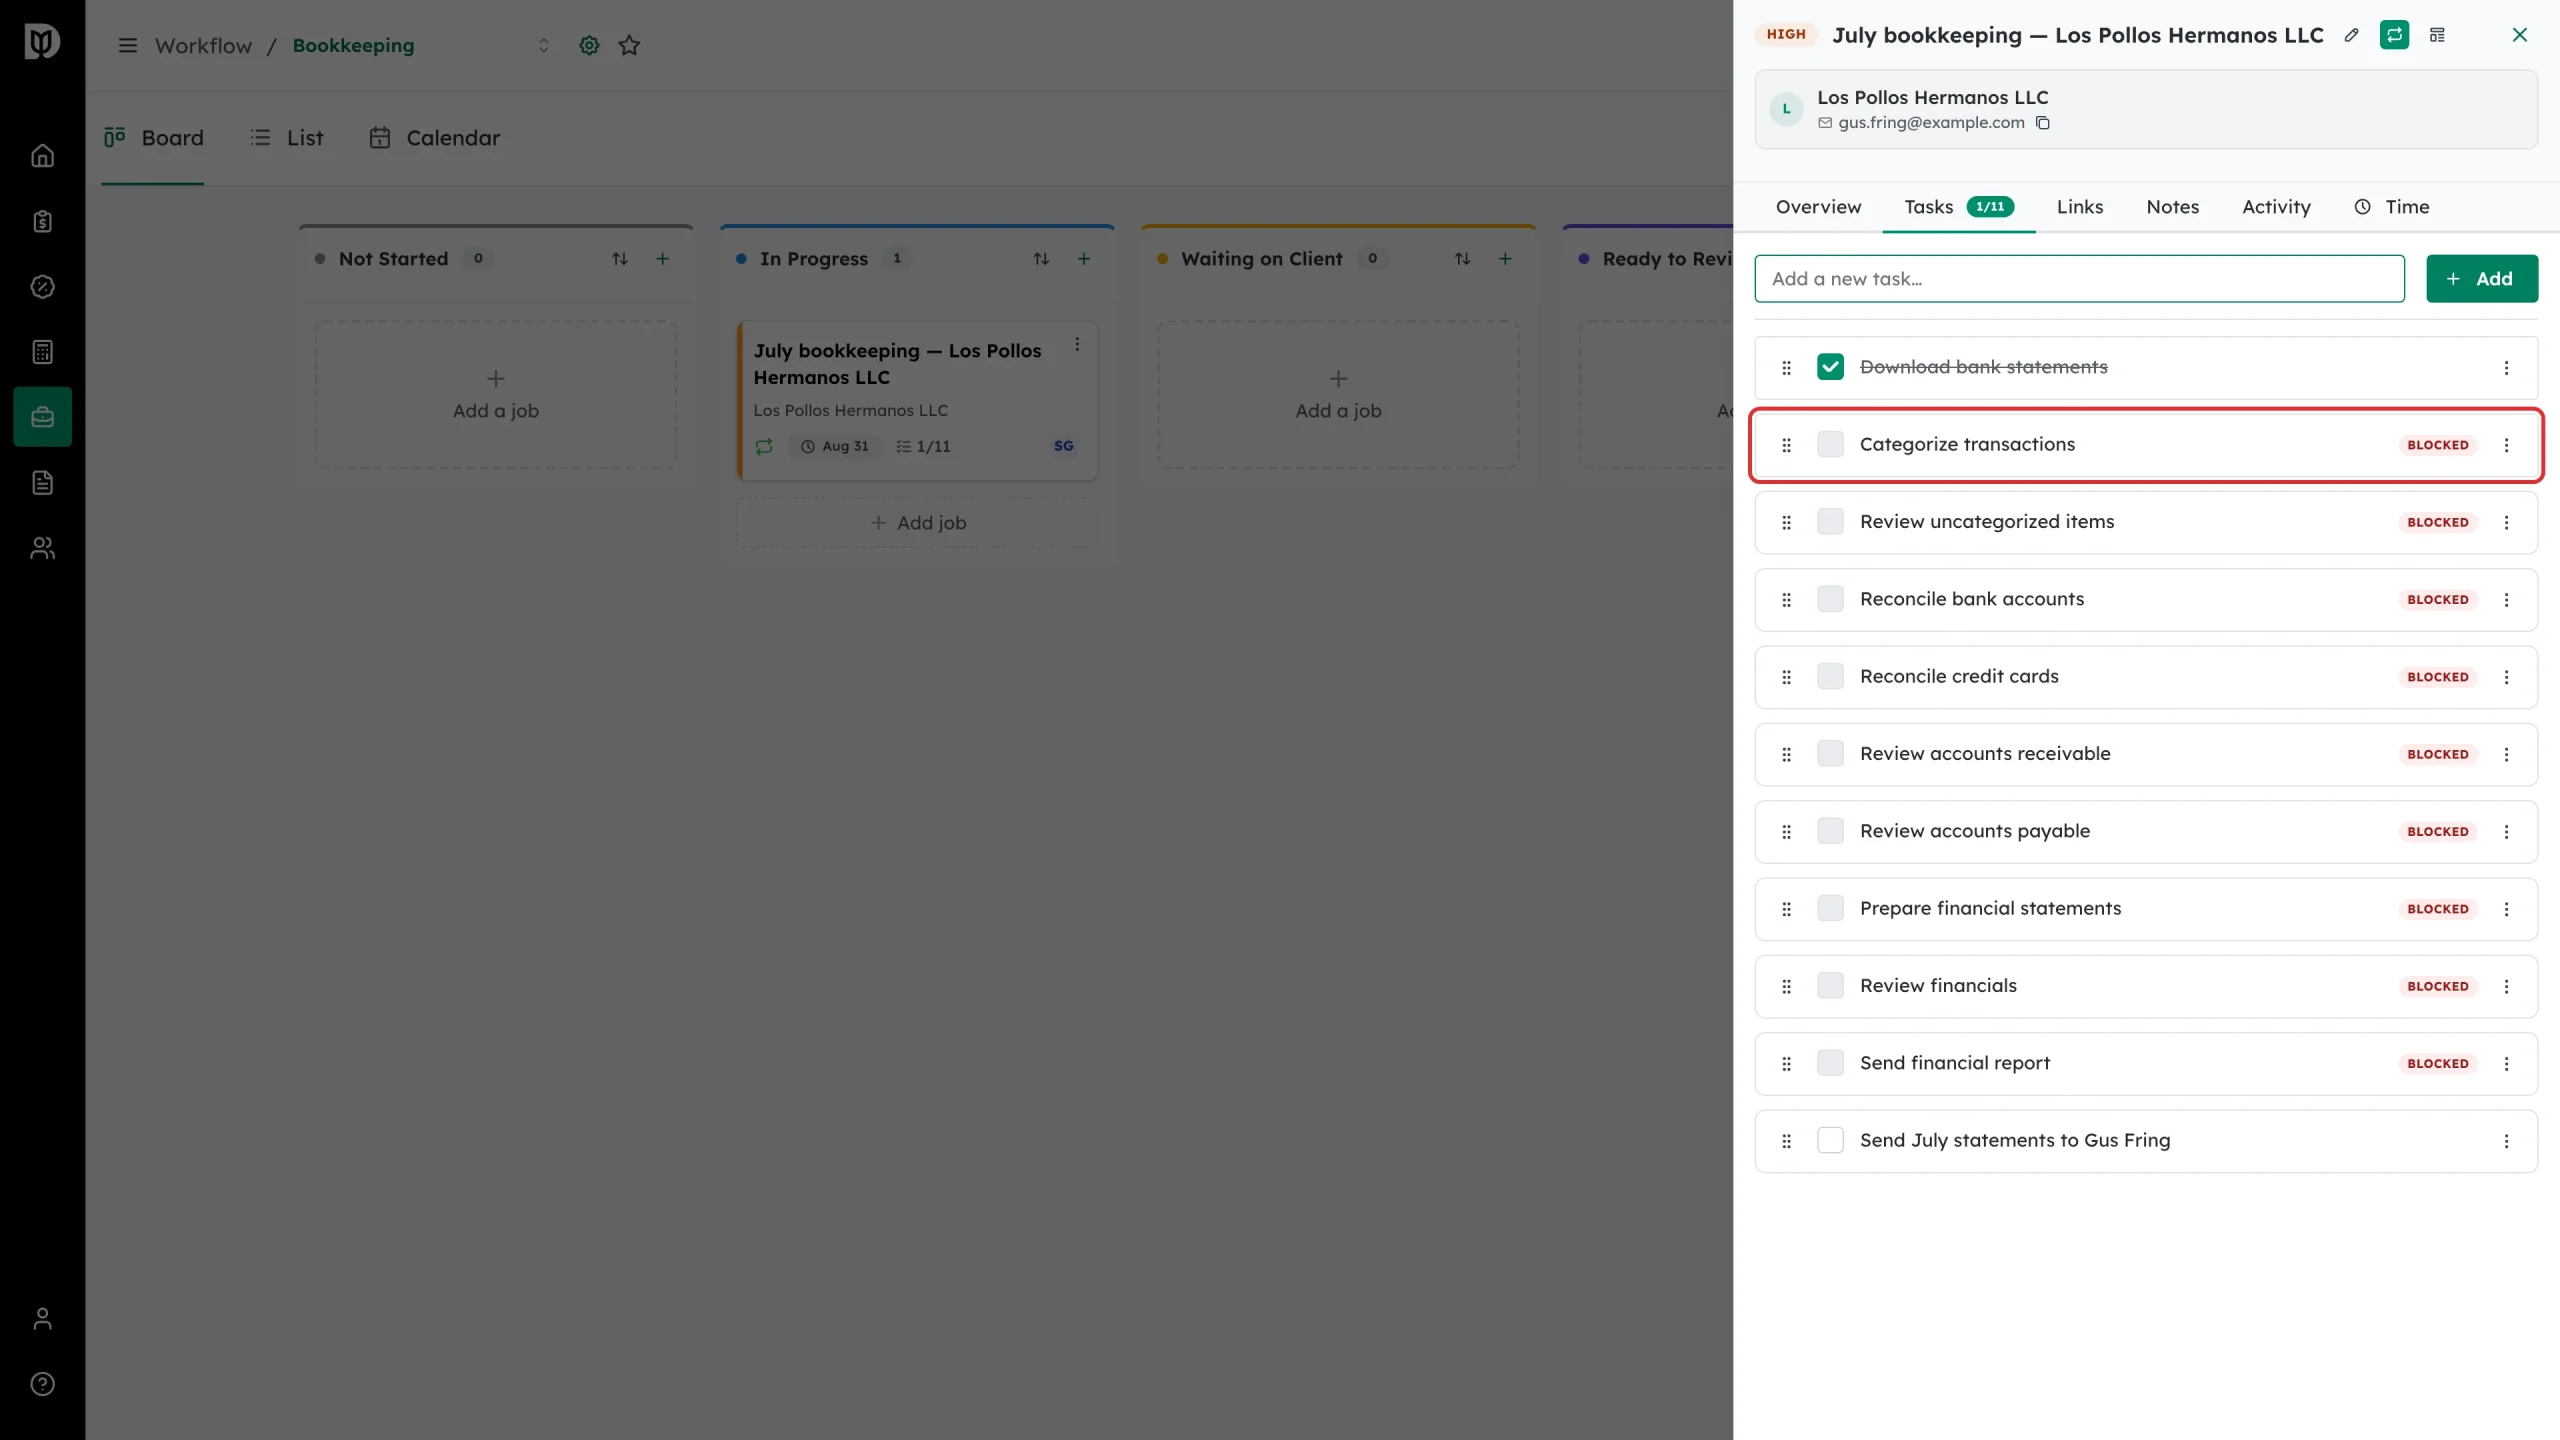
Step 5: Watch for Blocked tasks
Some template checklists link one task to another. A task that is waiting on an earlier one shows a Blocked badge and its checkbox is disabled until the block clears.
Step 6: Leave a note for the team
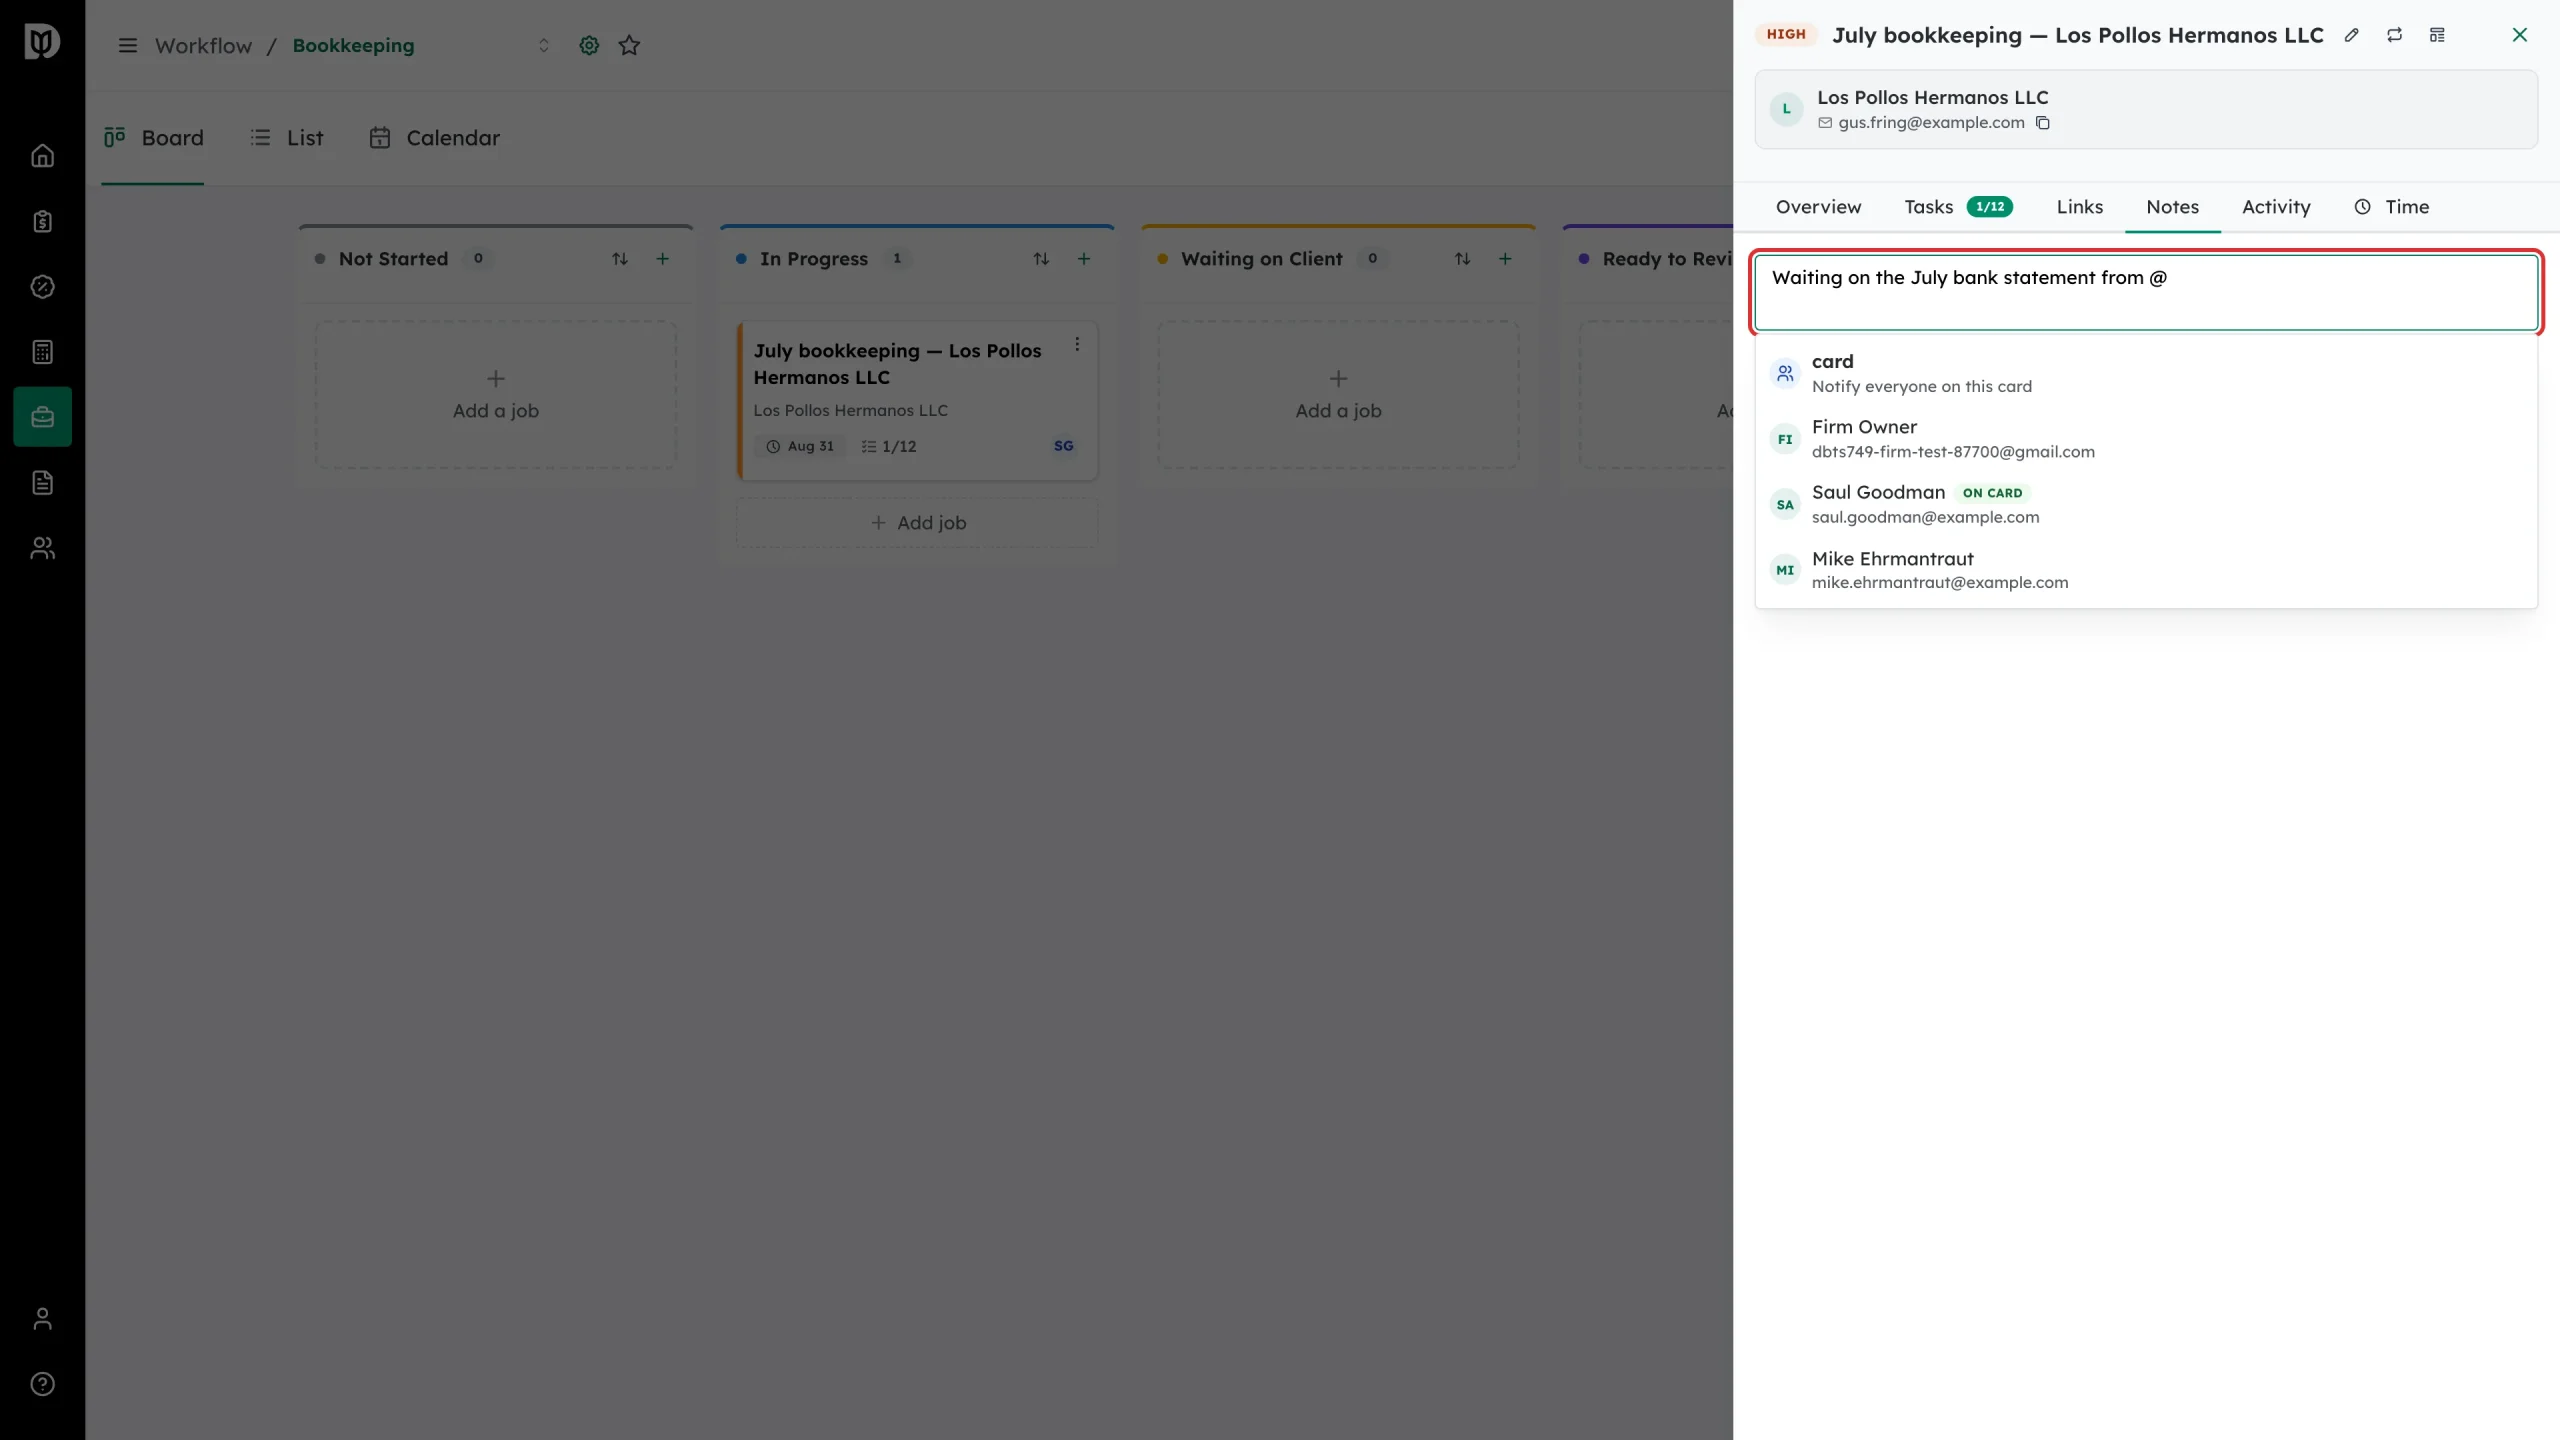
Select Notes and type in the note box. Type @ to pick a teammate, or @card to notify everyone on the job. Mentioned people get a notification in Debits.
Step 7: Open the Time tab
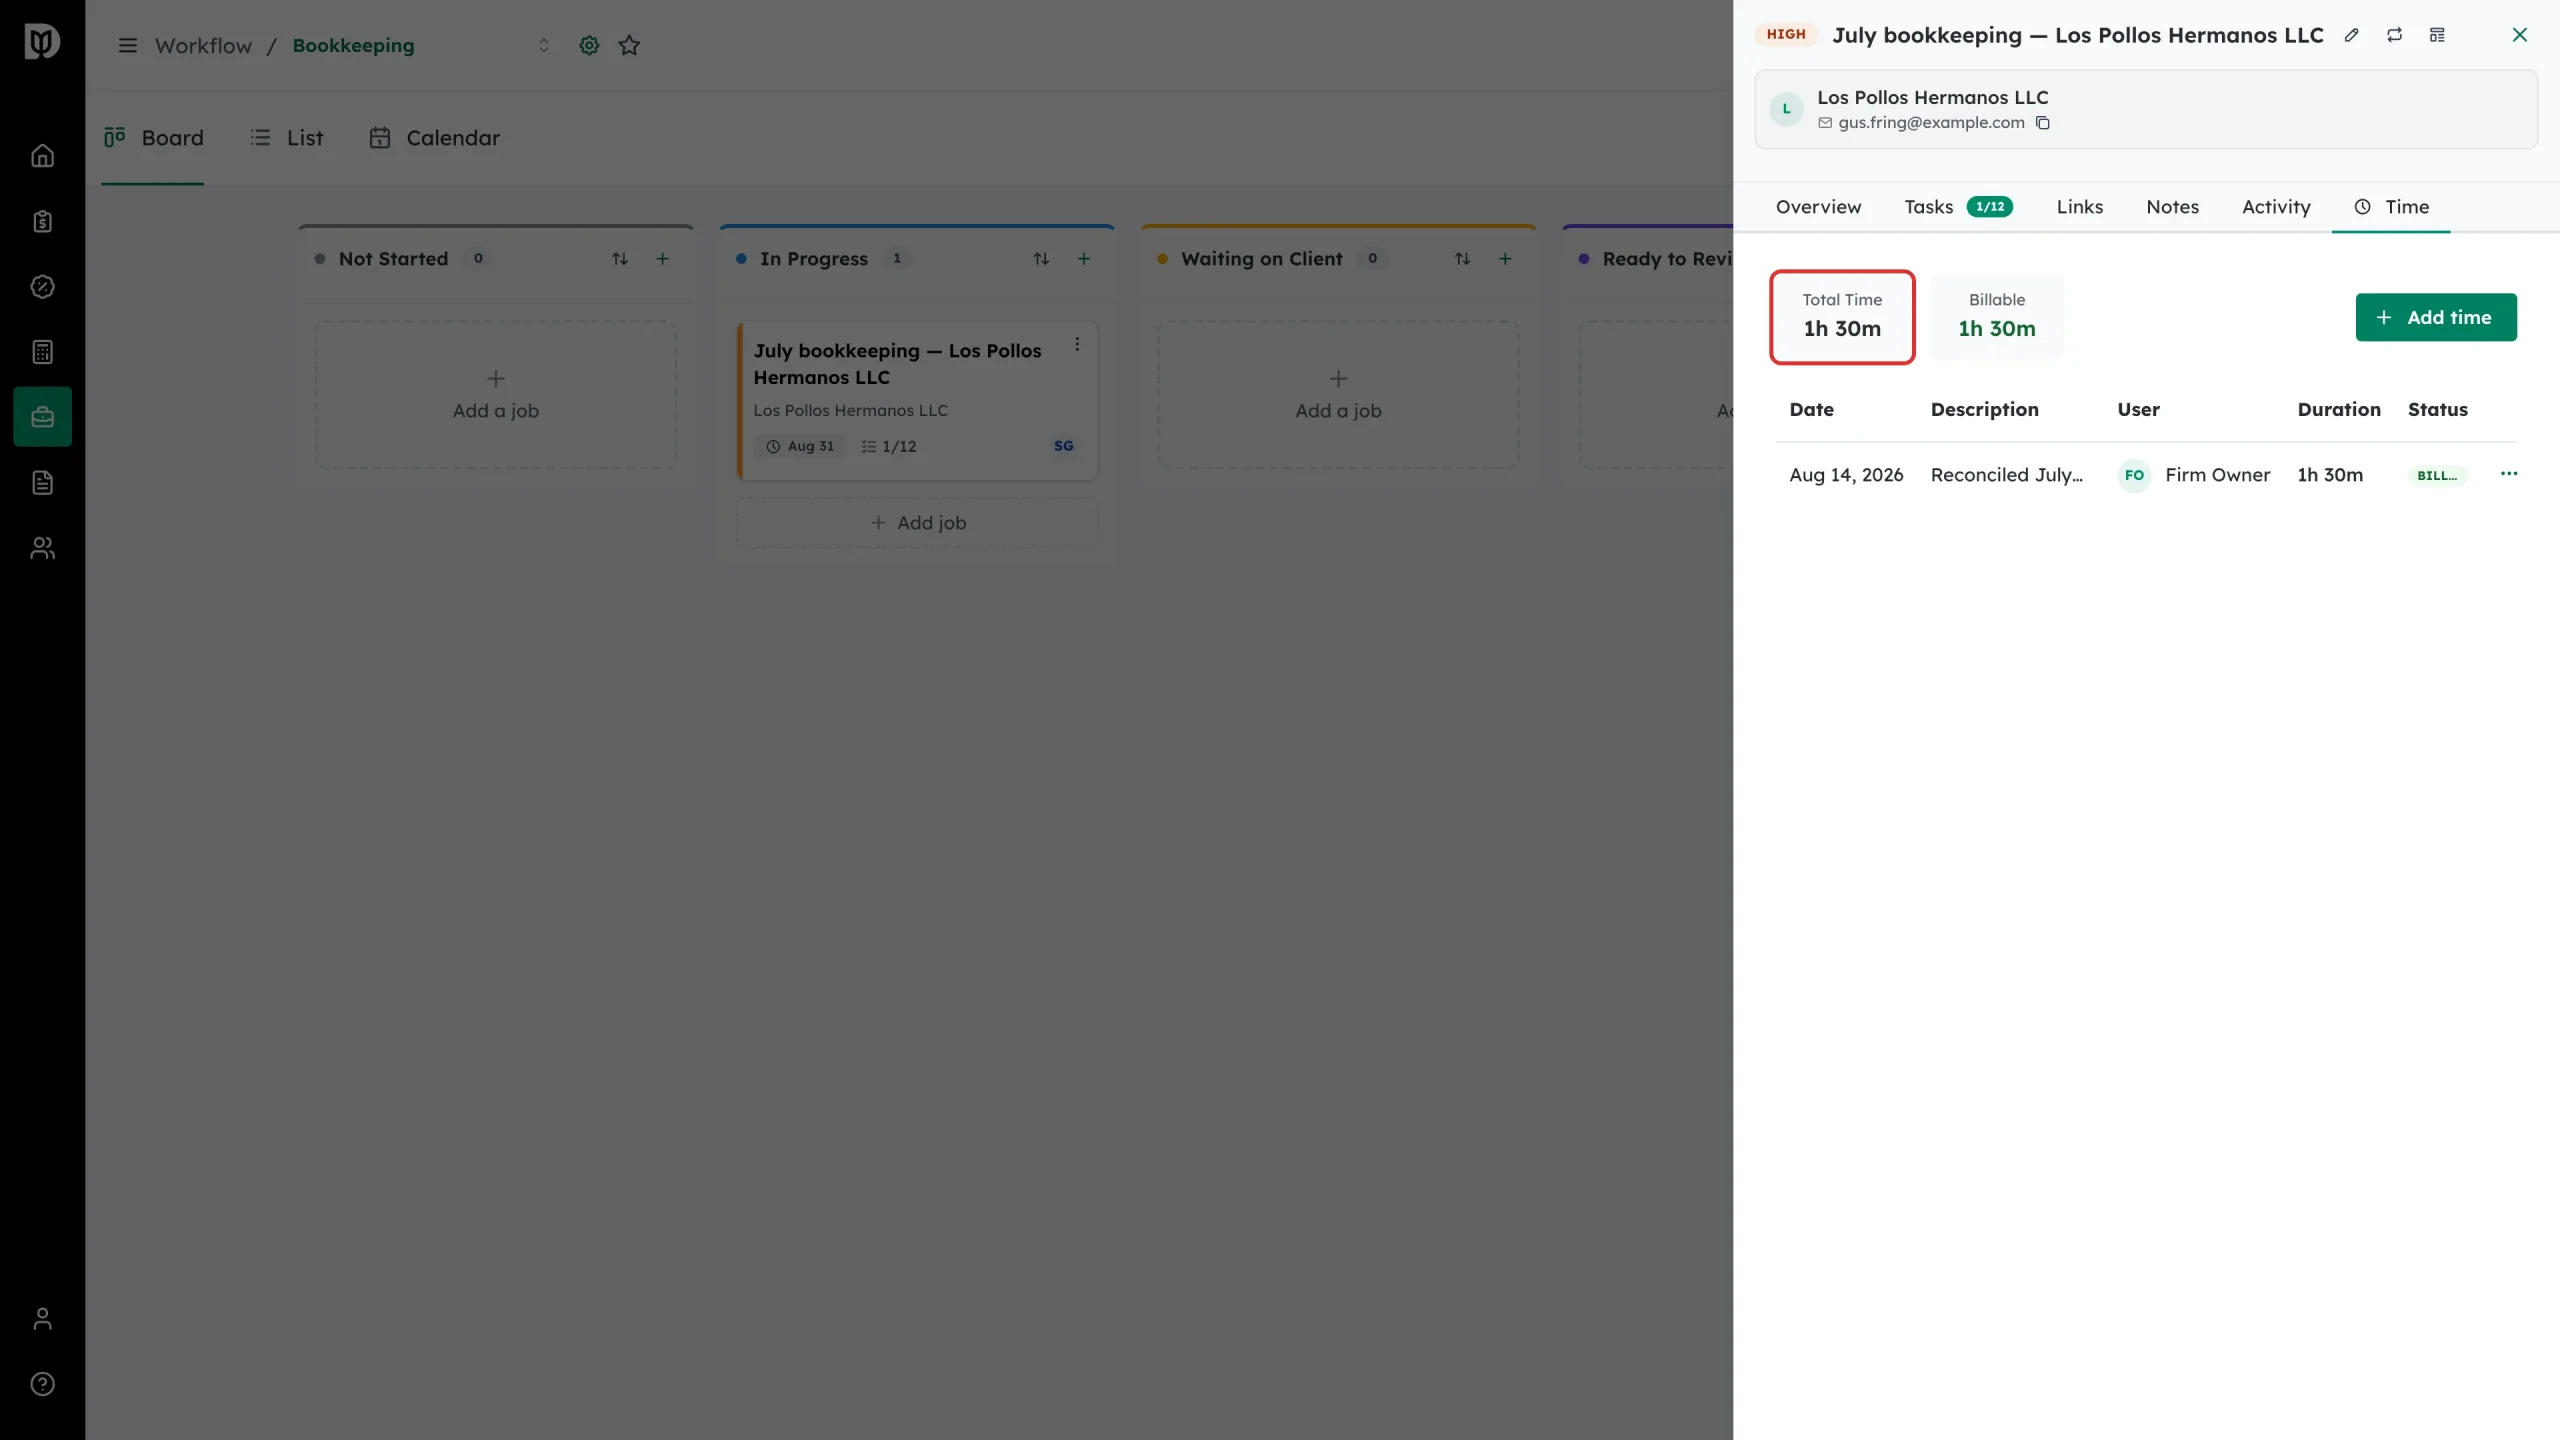
Select Time. The two boxes at the top are the job’s total time and its billable time.
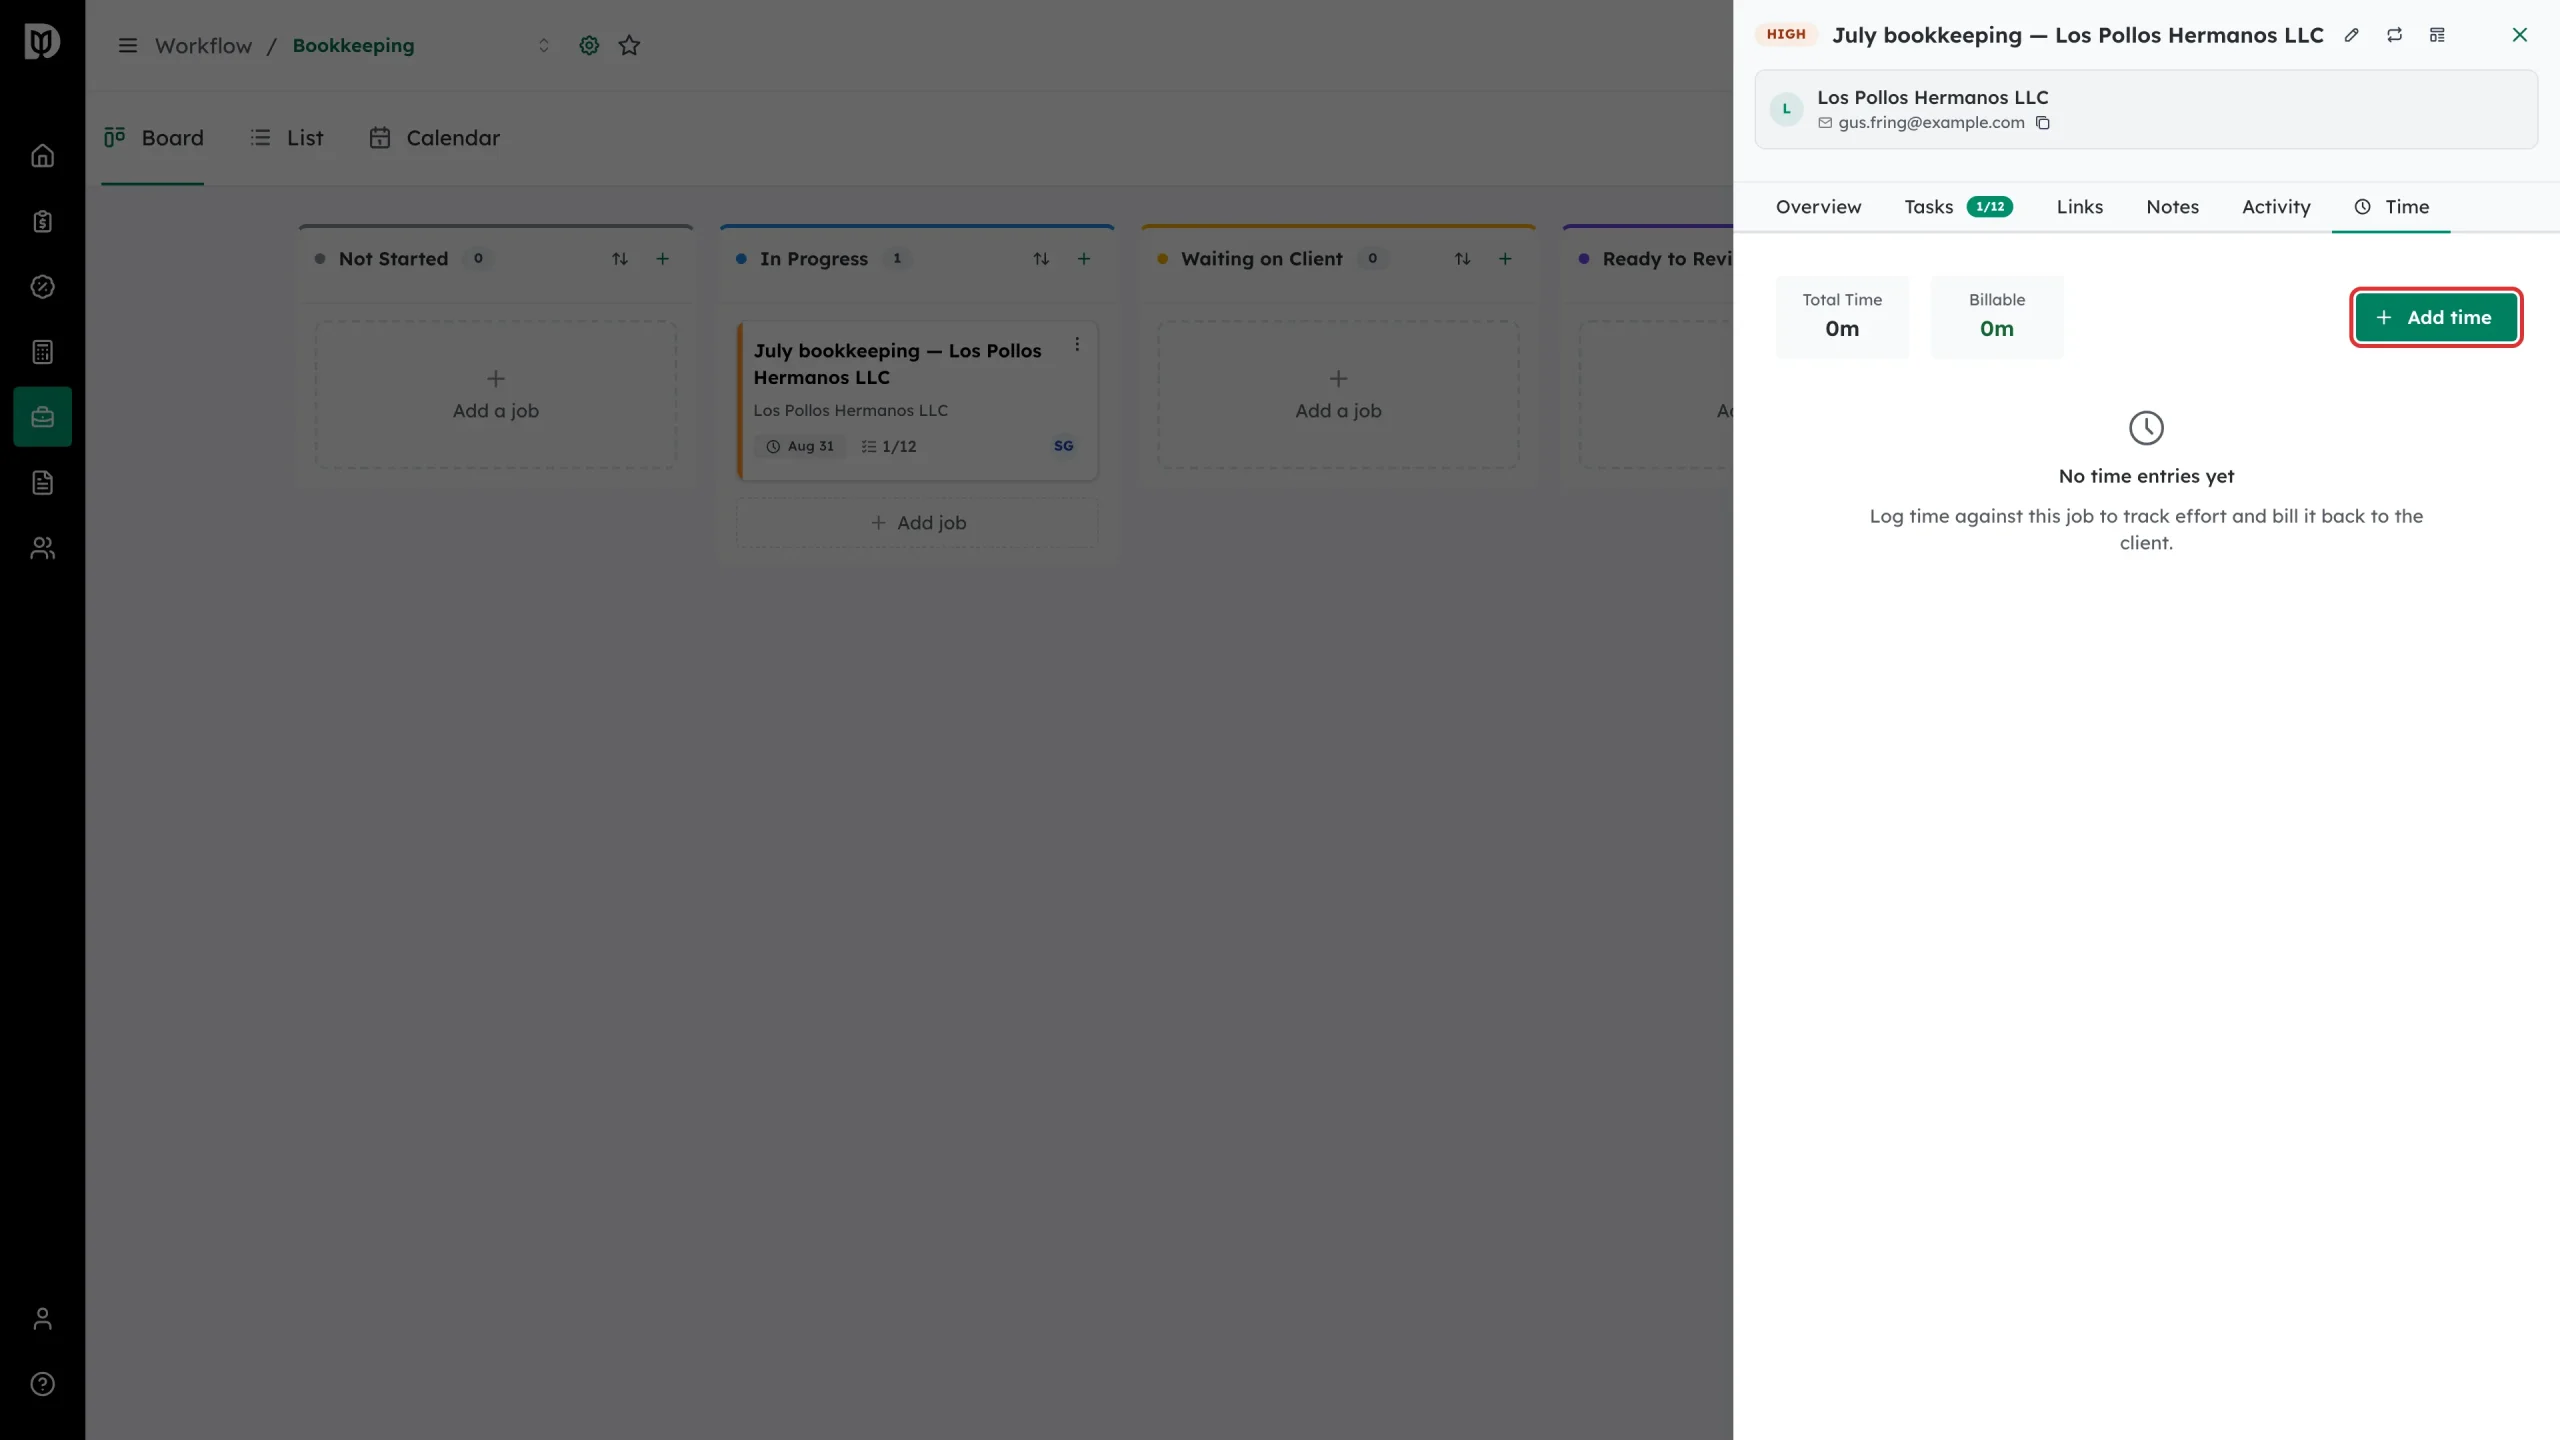
Step 8: Log time
Select Add time, set the date, enter Hours and Minutes, describe what you worked on, and leave Billable on if the client should be charged. Select Add.
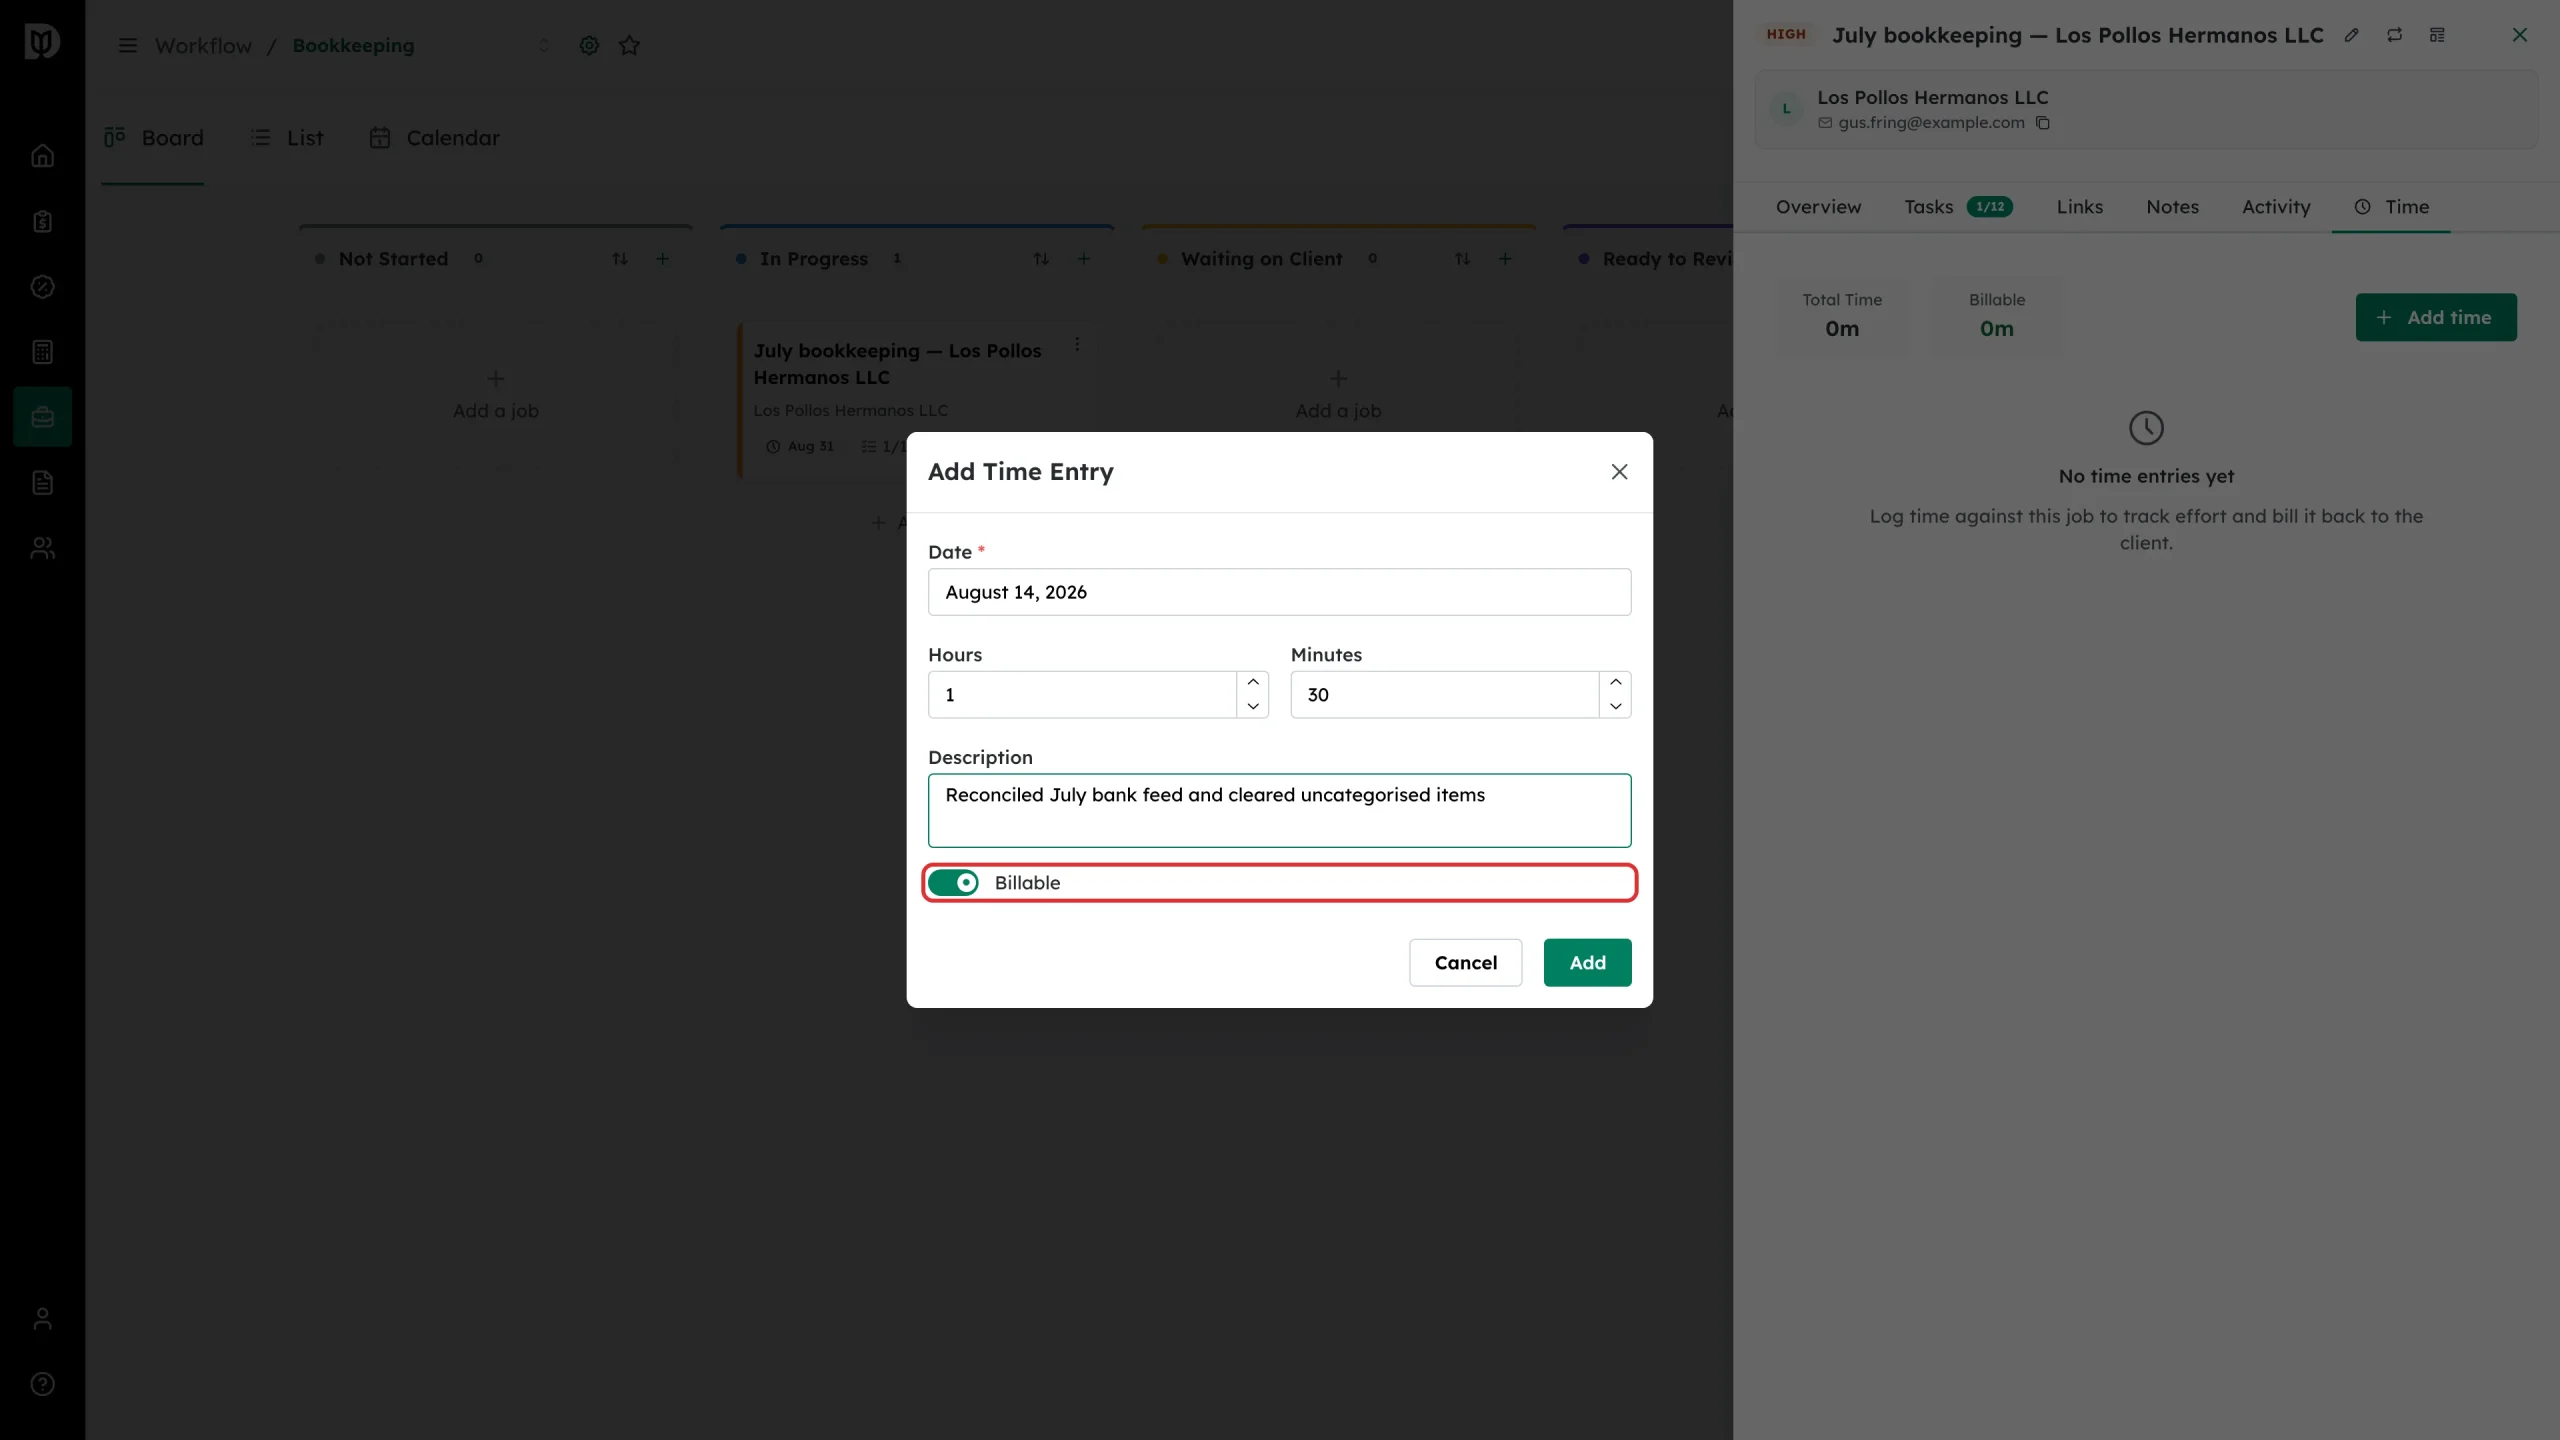
Step 9: Check the totals
The entry appears in the table with its date, description, who logged it, its duration and whether it is billable. The totals at the top update immediately.
What happens next
Task completions and notes are recorded on the job’s Activity tab, so anyone picking the job up can see what has happened. Completing every task on a job can trigger an automation if your firm has set one up. Billable time stays on the job until it is invoiced, and invoiced entries are then locked.
Troubleshooting
- A task’s checkbox will not tick. The task shows Blocked. It is waiting on another task in the list.
- A teammate is missing from the @ list. The mention list only offers people who have access to the job.
- A time entry cannot be edited or deleted. It has already been invoiced. Invoiced entries carry a receipt badge.