This guide is for accountants and firm staff. It explains every section of a reasonable compensation report, then how to lock it and send it to the client.
Before you begin
- You need a study with a status of Completed, Finalized or Delivered. If you have not calculated one yet, see How to create a reasonable compensation survey.
- To deliver the report you need an email address for the client.
Step 1: Open the report
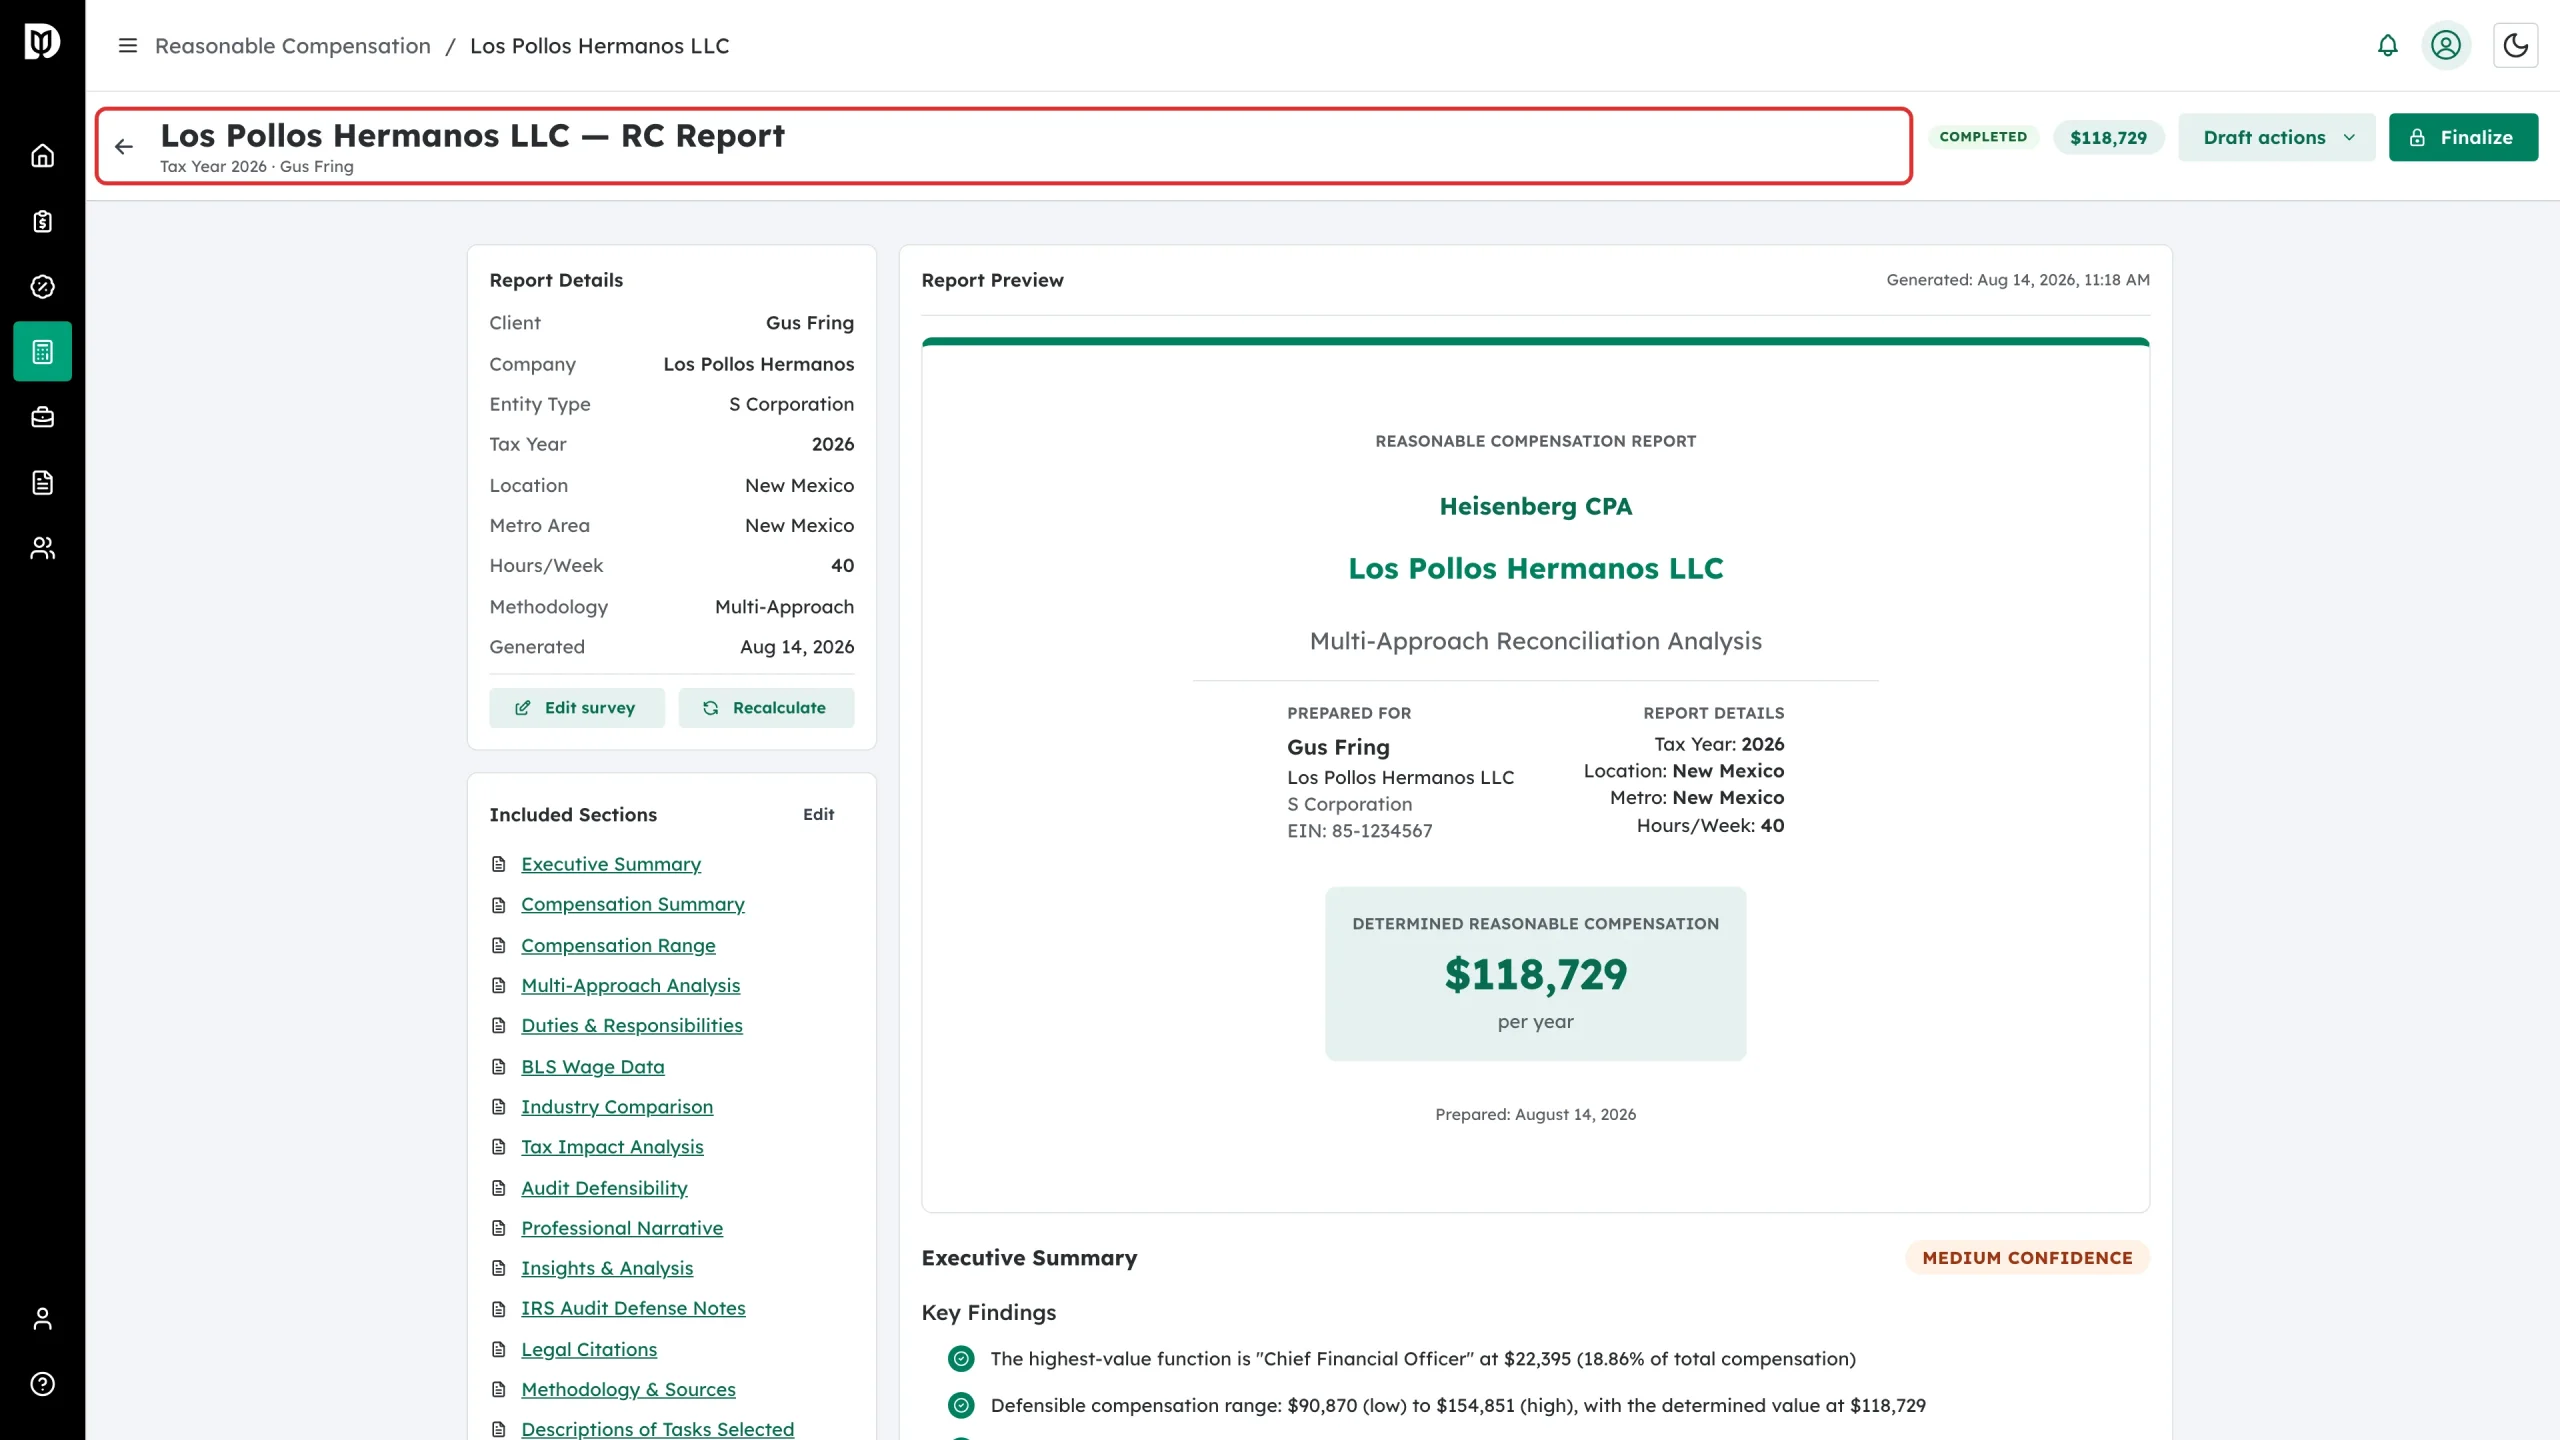
From Reasonable Comp, click the client’s name or the eye icon on the row. The page header shows the company, the tax year and the shareholder.
Step 2: Read the status and the headline figure
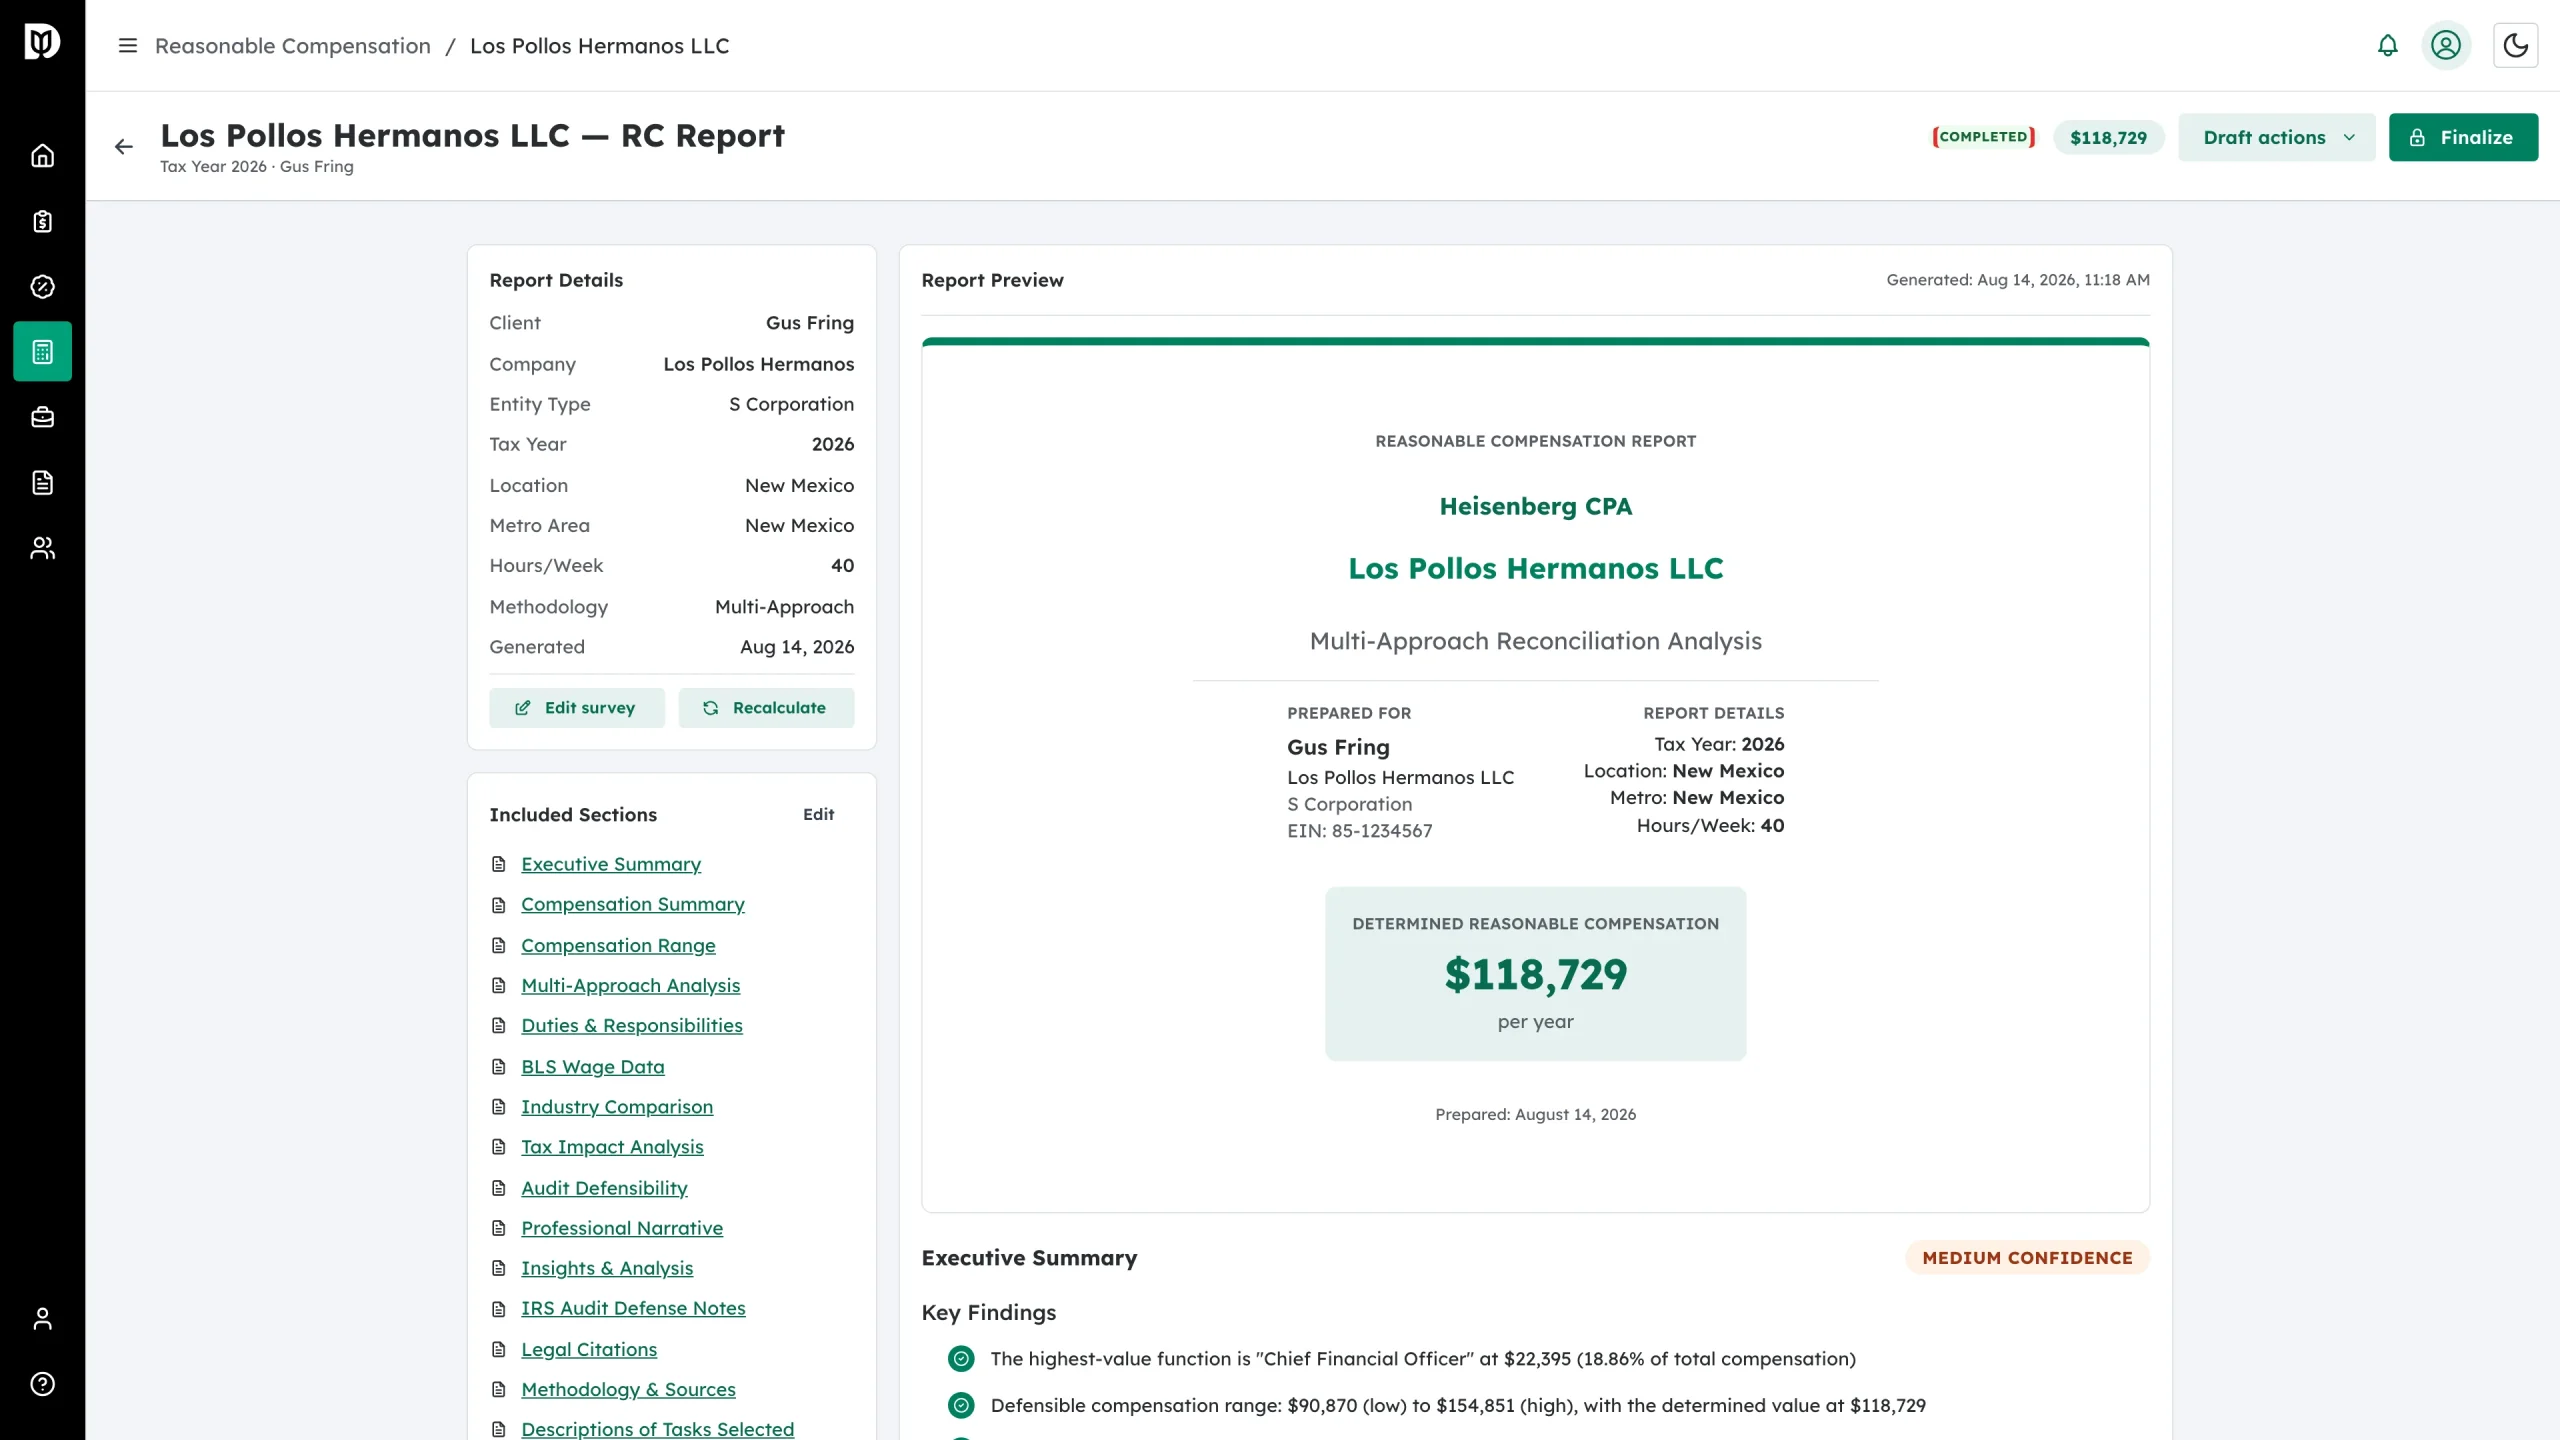
To the right of the header sit the status badge and the determined compensation. Both update as the study moves through Completed, Finalized and Delivered.
Step 3: Check the report details
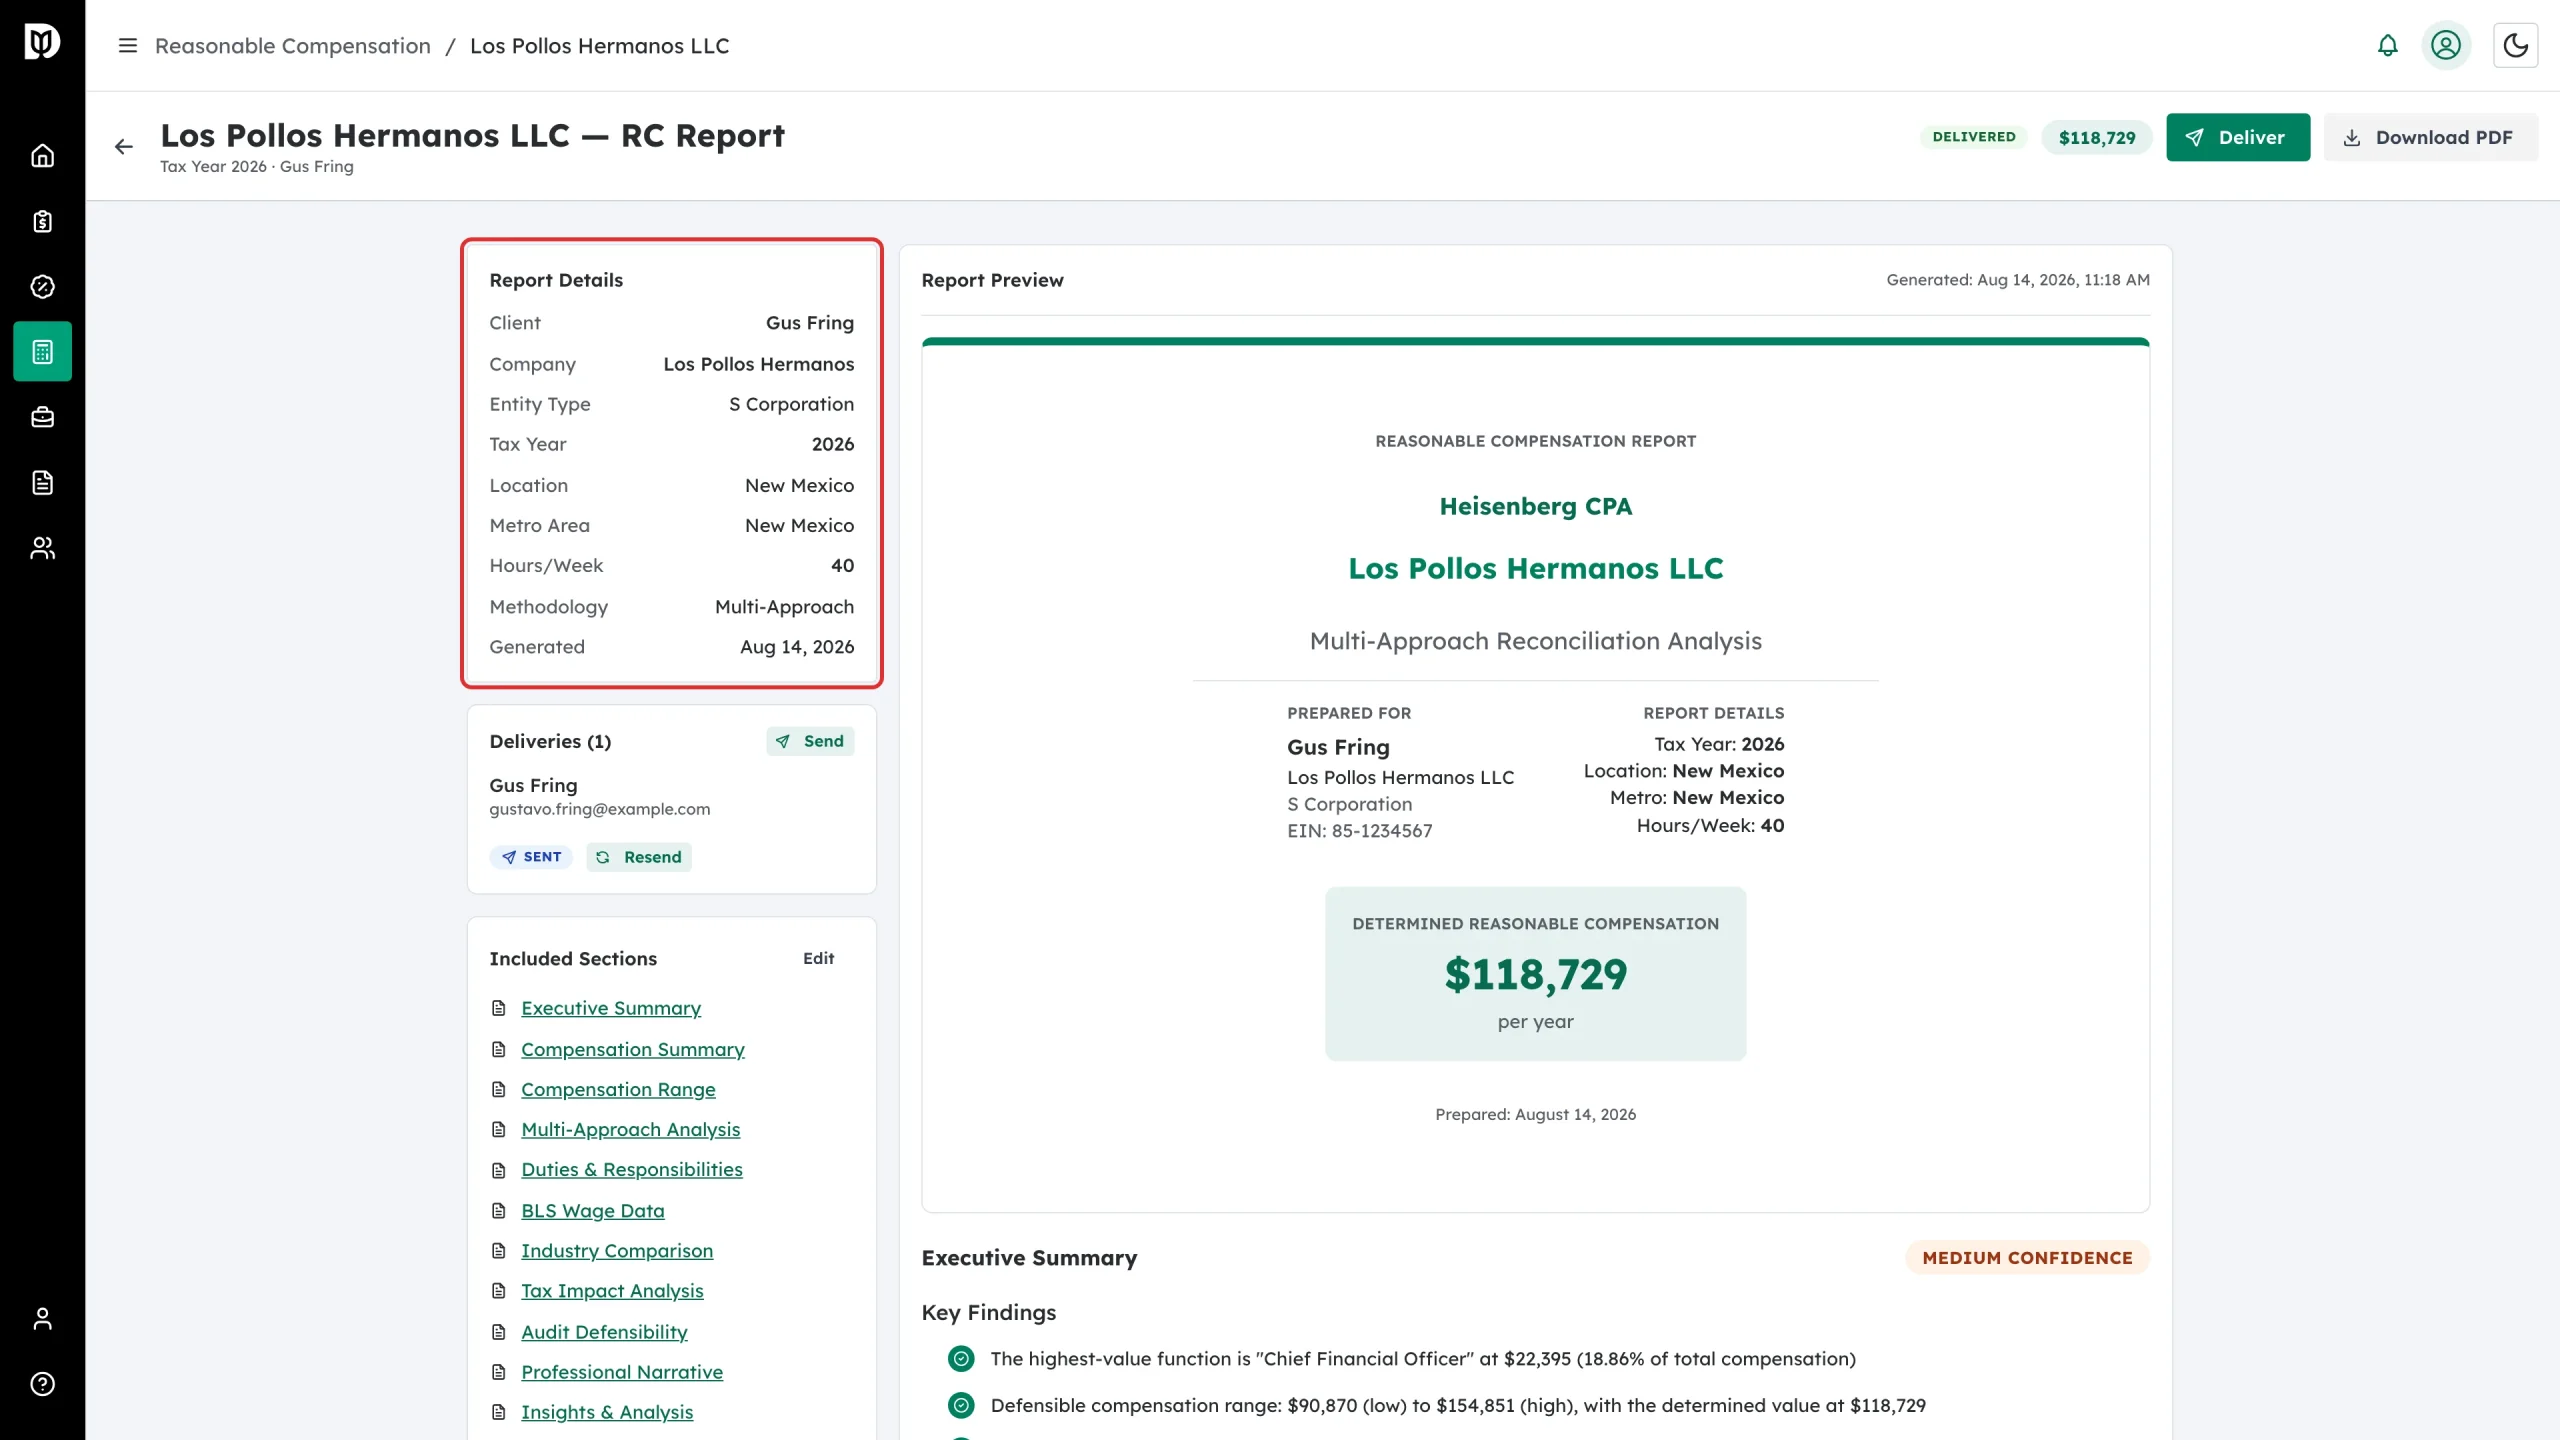
Report Details on the left lists client, company, entity type, tax year, location, metro area, hours per week, methodology and the date generated. Edit survey reopens the questions; Recalculate refreshes the wage data and works the figure out again.
Step 4: Choose which sections are included
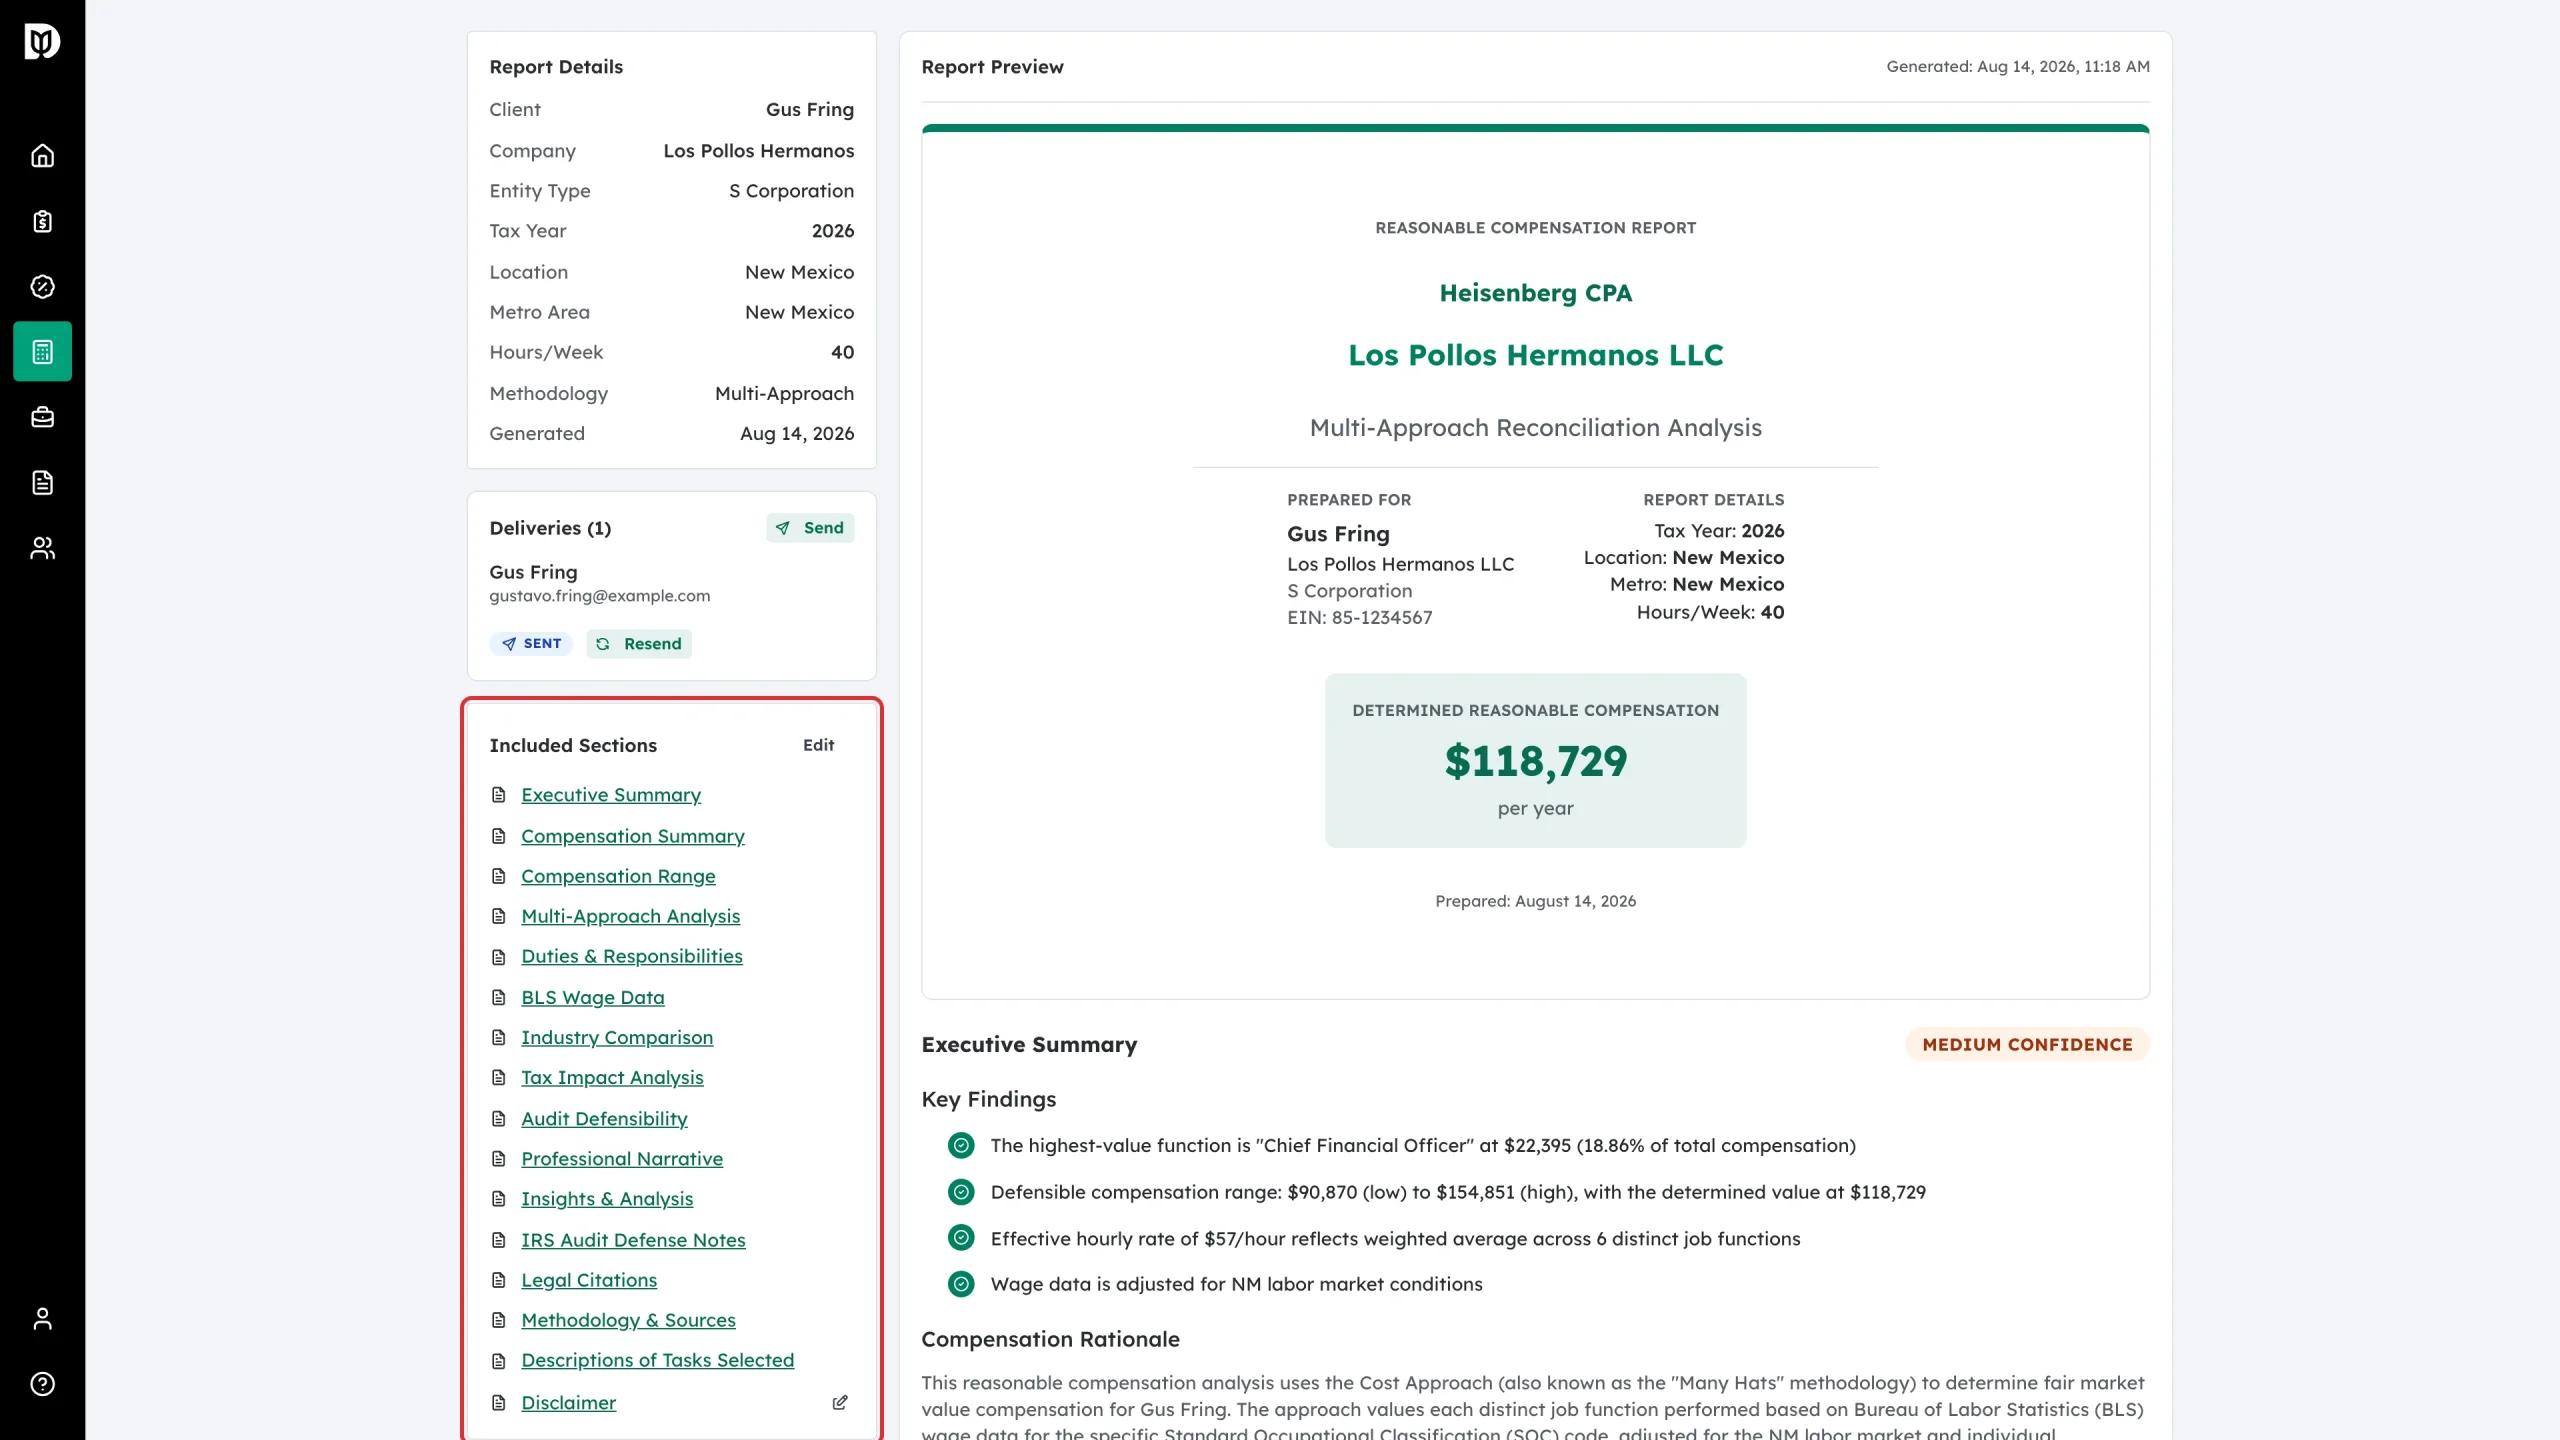
Included Sections lists every section of the report and doubles as a jump menu. Greyed entries marked NO DATA are skipped. Click Edit to reorder sections or hide the optional ones before you deliver.
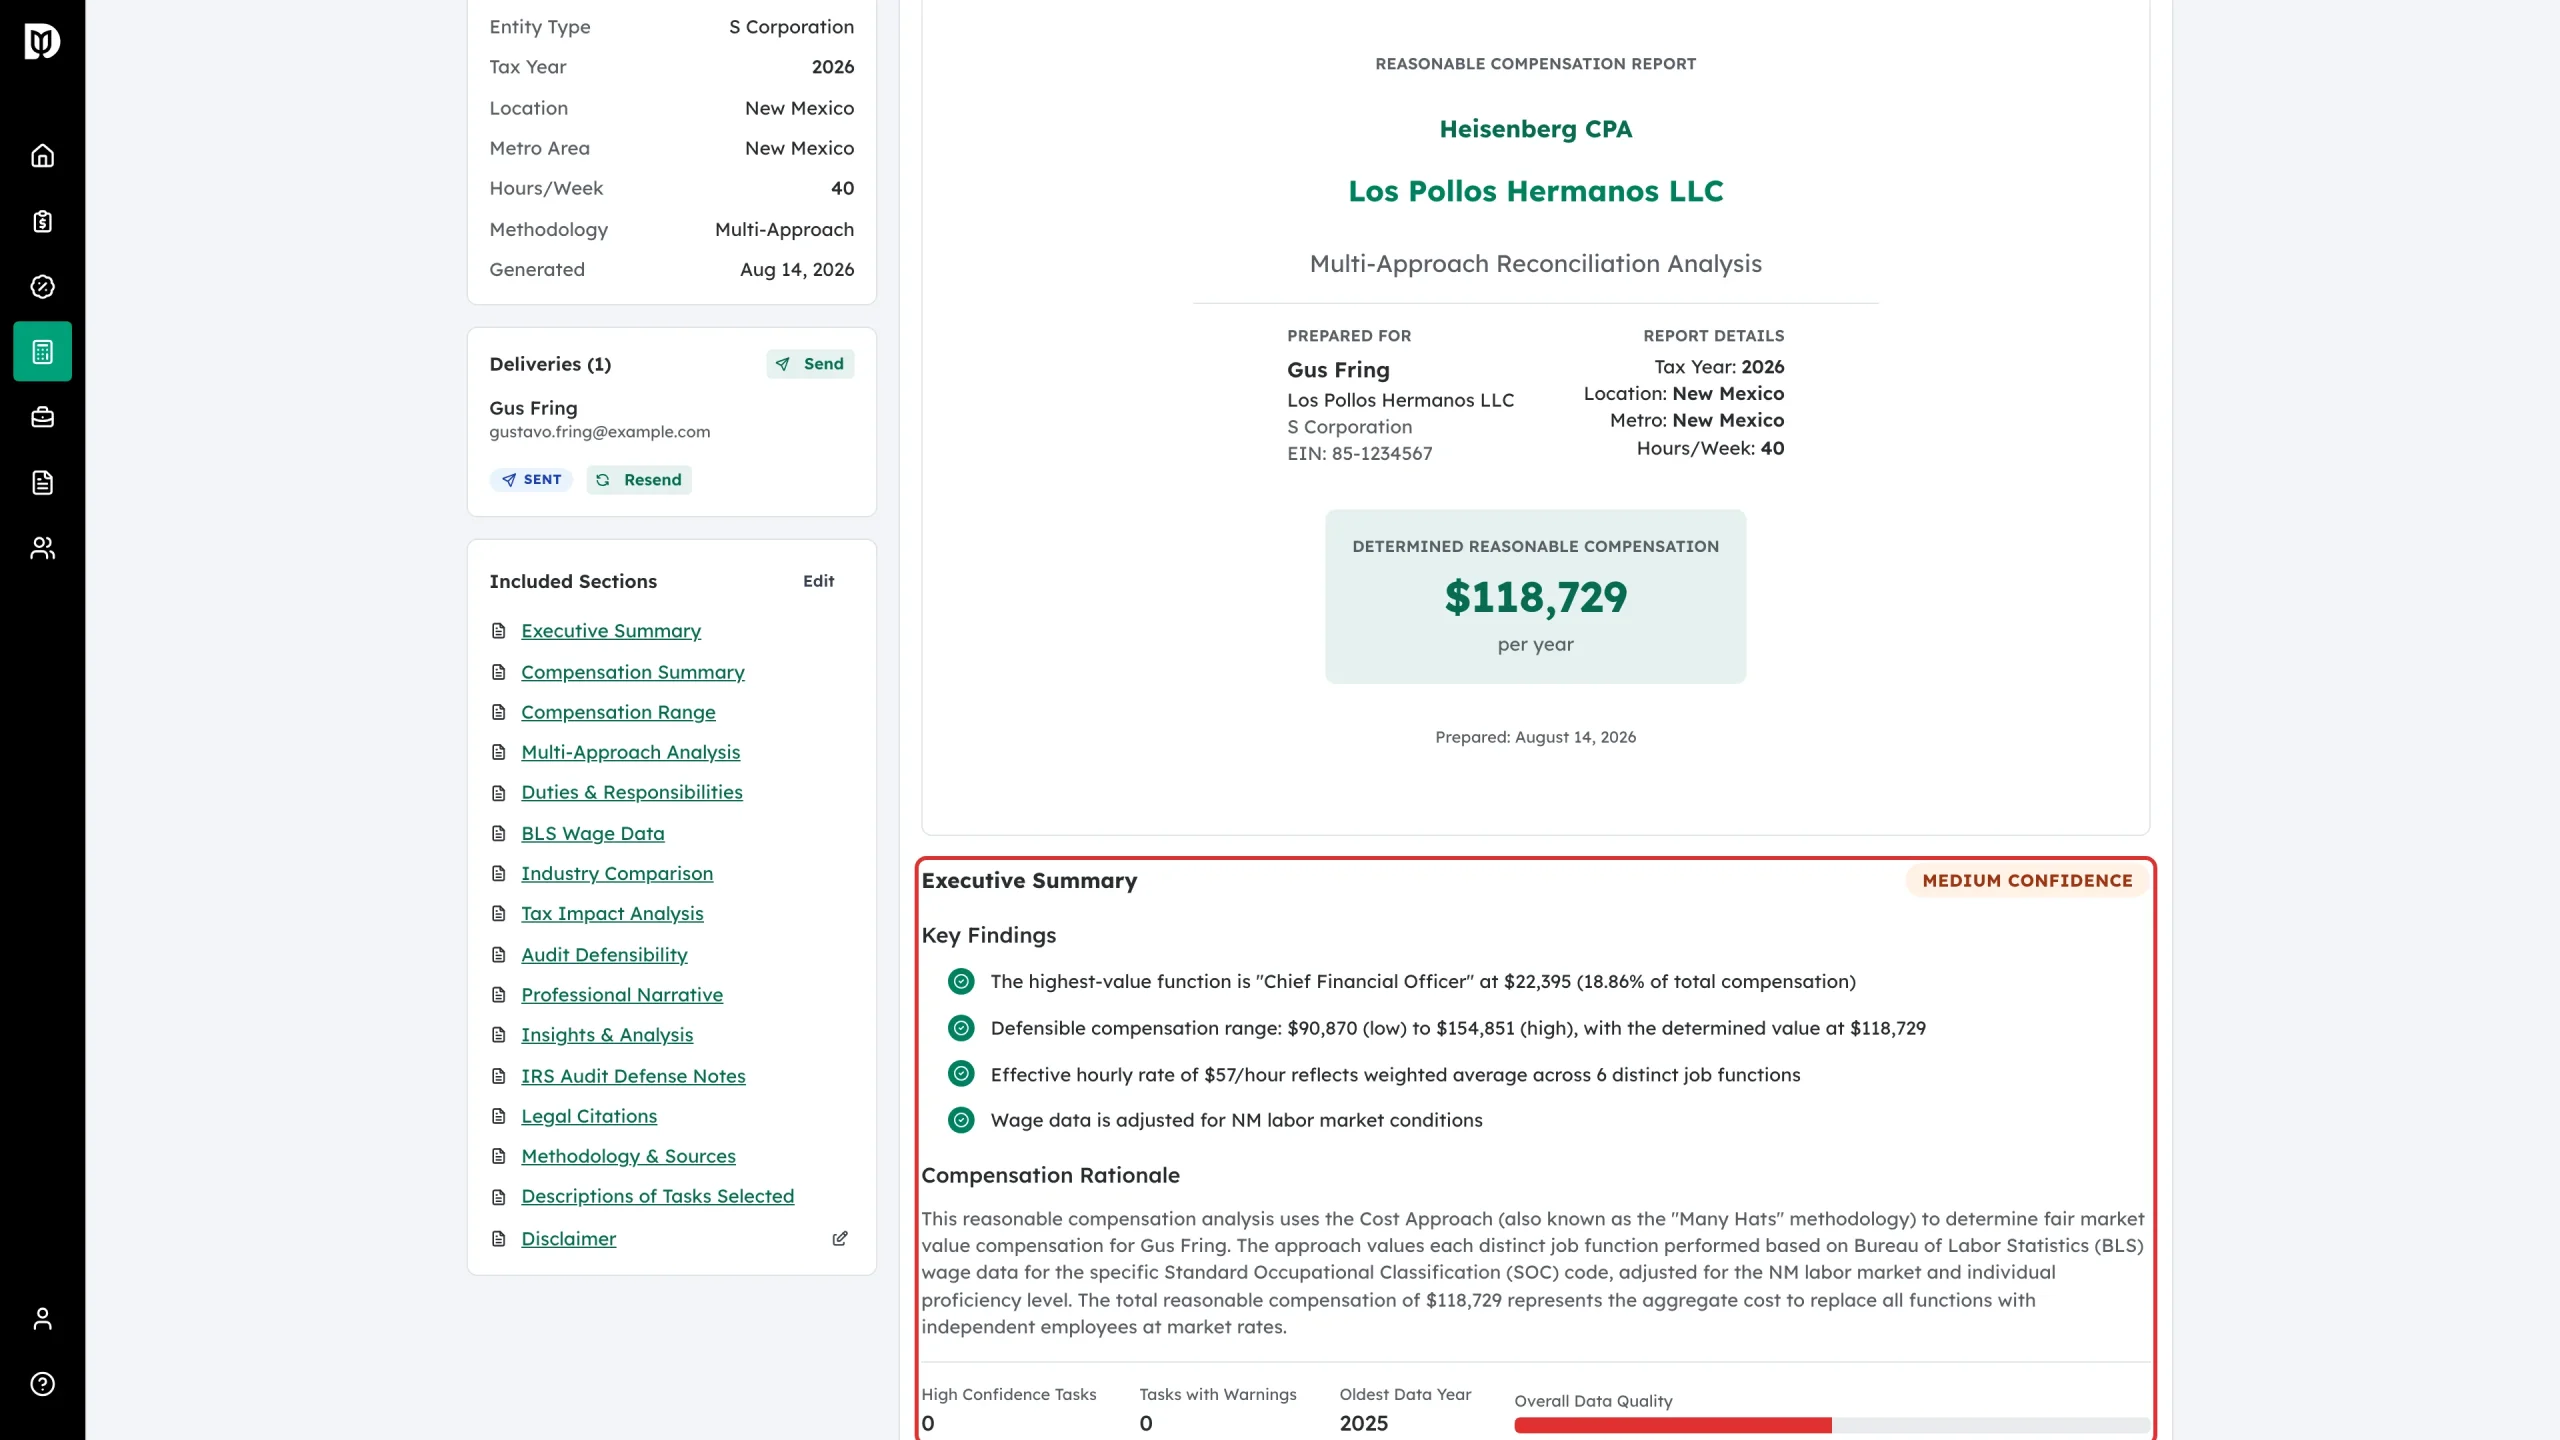
Step 5: Read the Executive Summary
The Executive Summary carries a confidence badge — High, Medium or Low — and a set of key findings: the highest-value function, the defensible range, the effective hourly rate and how the wage data was adjusted for the state.
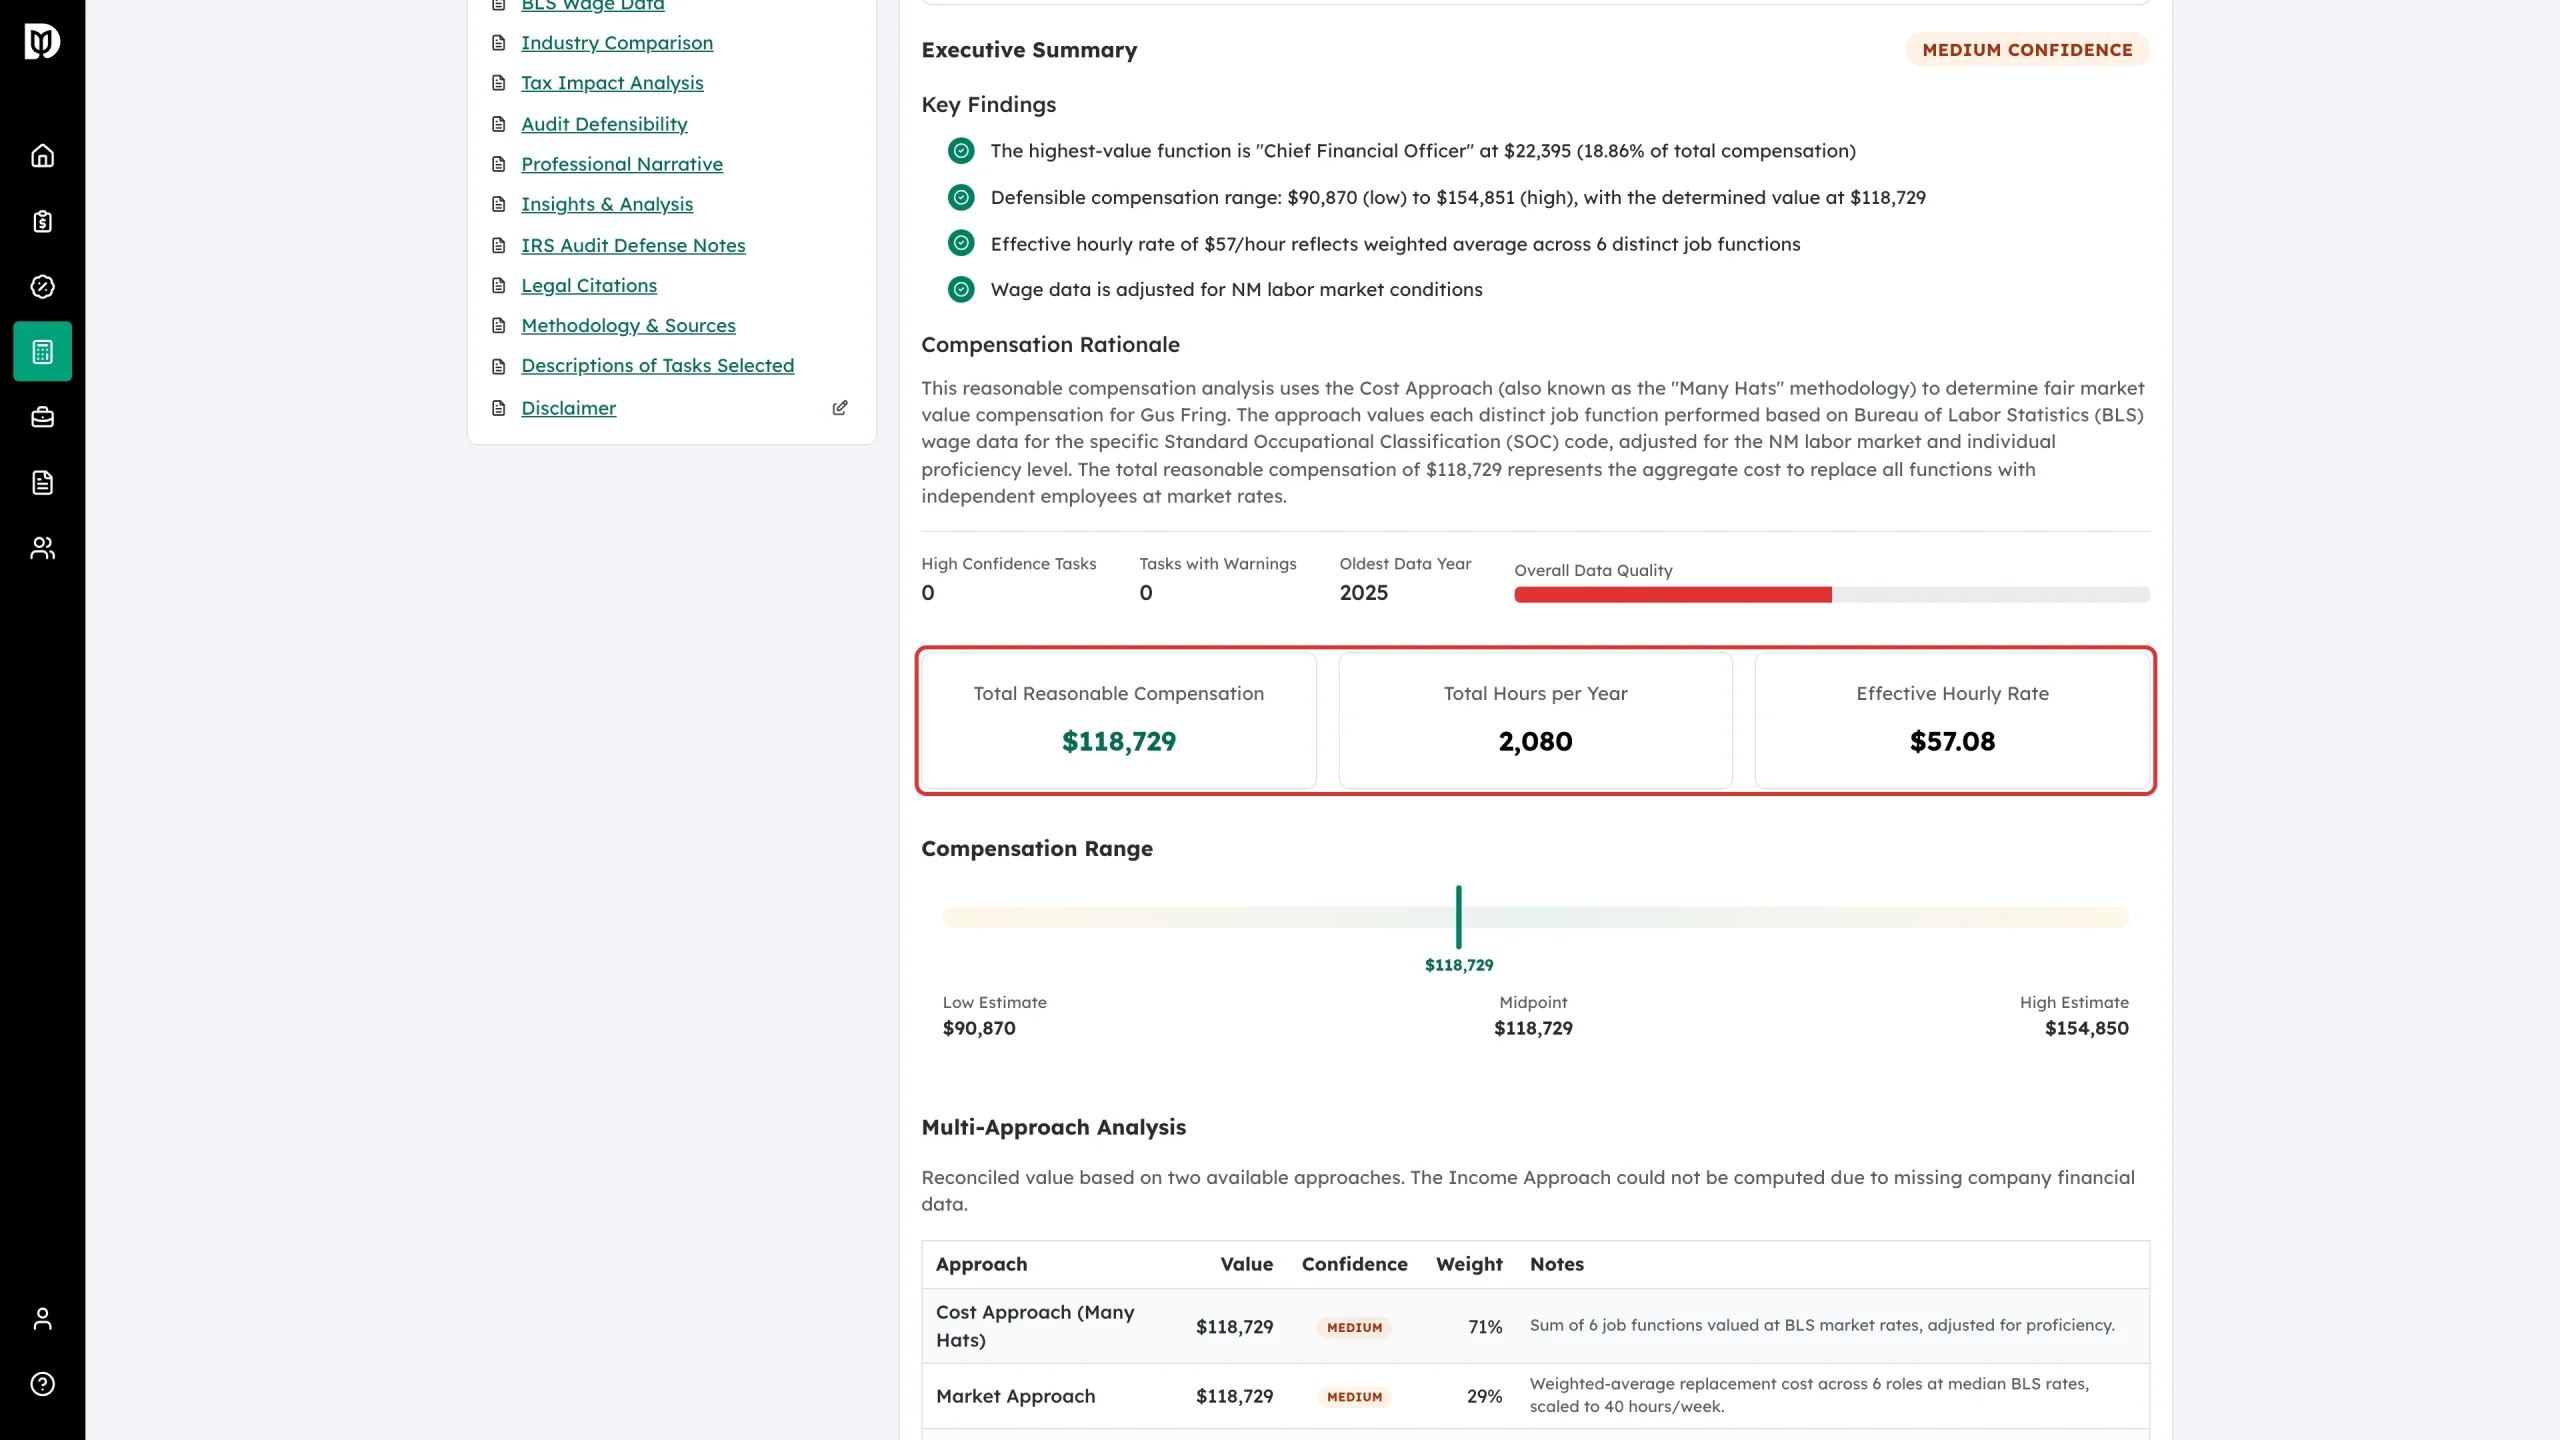
Step 6: Read the Compensation Summary
Compensation Summary is the number itself, with the split between salary and distribution and the total hours behind it.
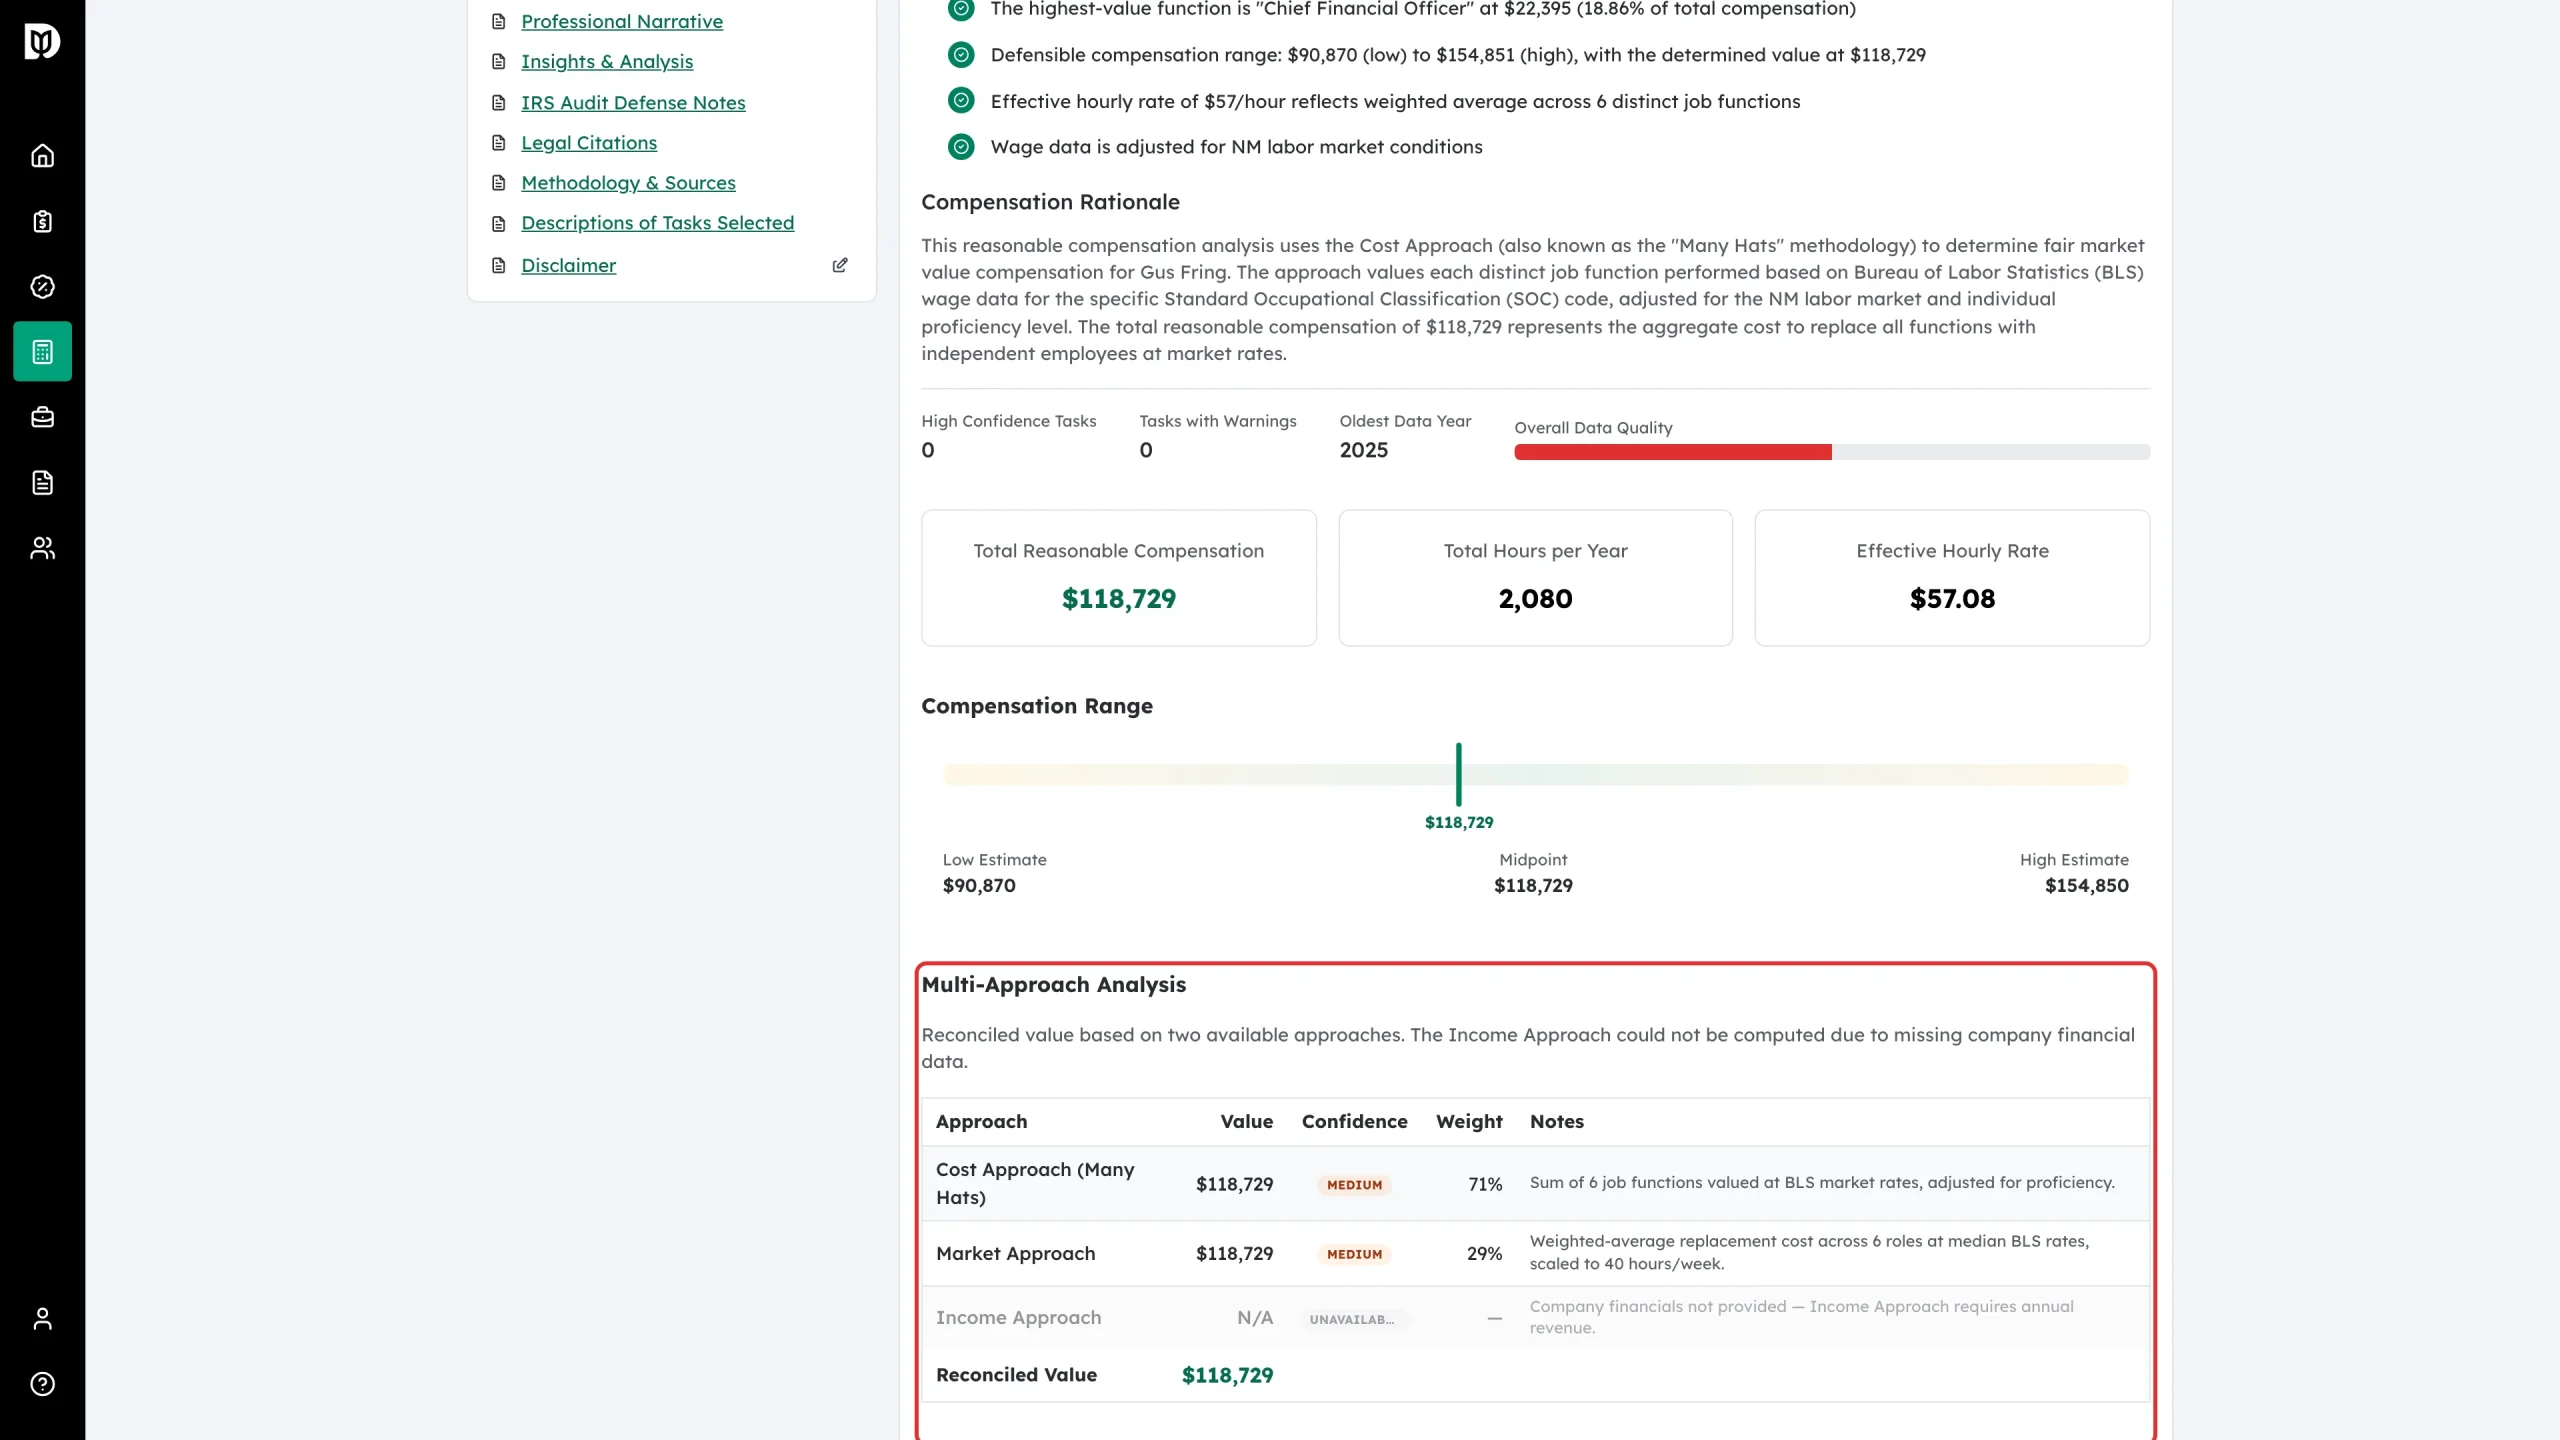
Step 7: Read the Multi-Approach Analysis
This is the heart of the defence. Each approach gets a value, a confidence, a weight and a note explaining it:
- Cost Approach (Many Hats) — every job function valued at market rates and added up.
- Market Approach — weighted-average replacement cost across the same roles, scaled to the working week.
- Income Approach — needs company financials. Without them it reads N/A and carries no weight.
The Reconciled Value at the foot is the figure the report determines.
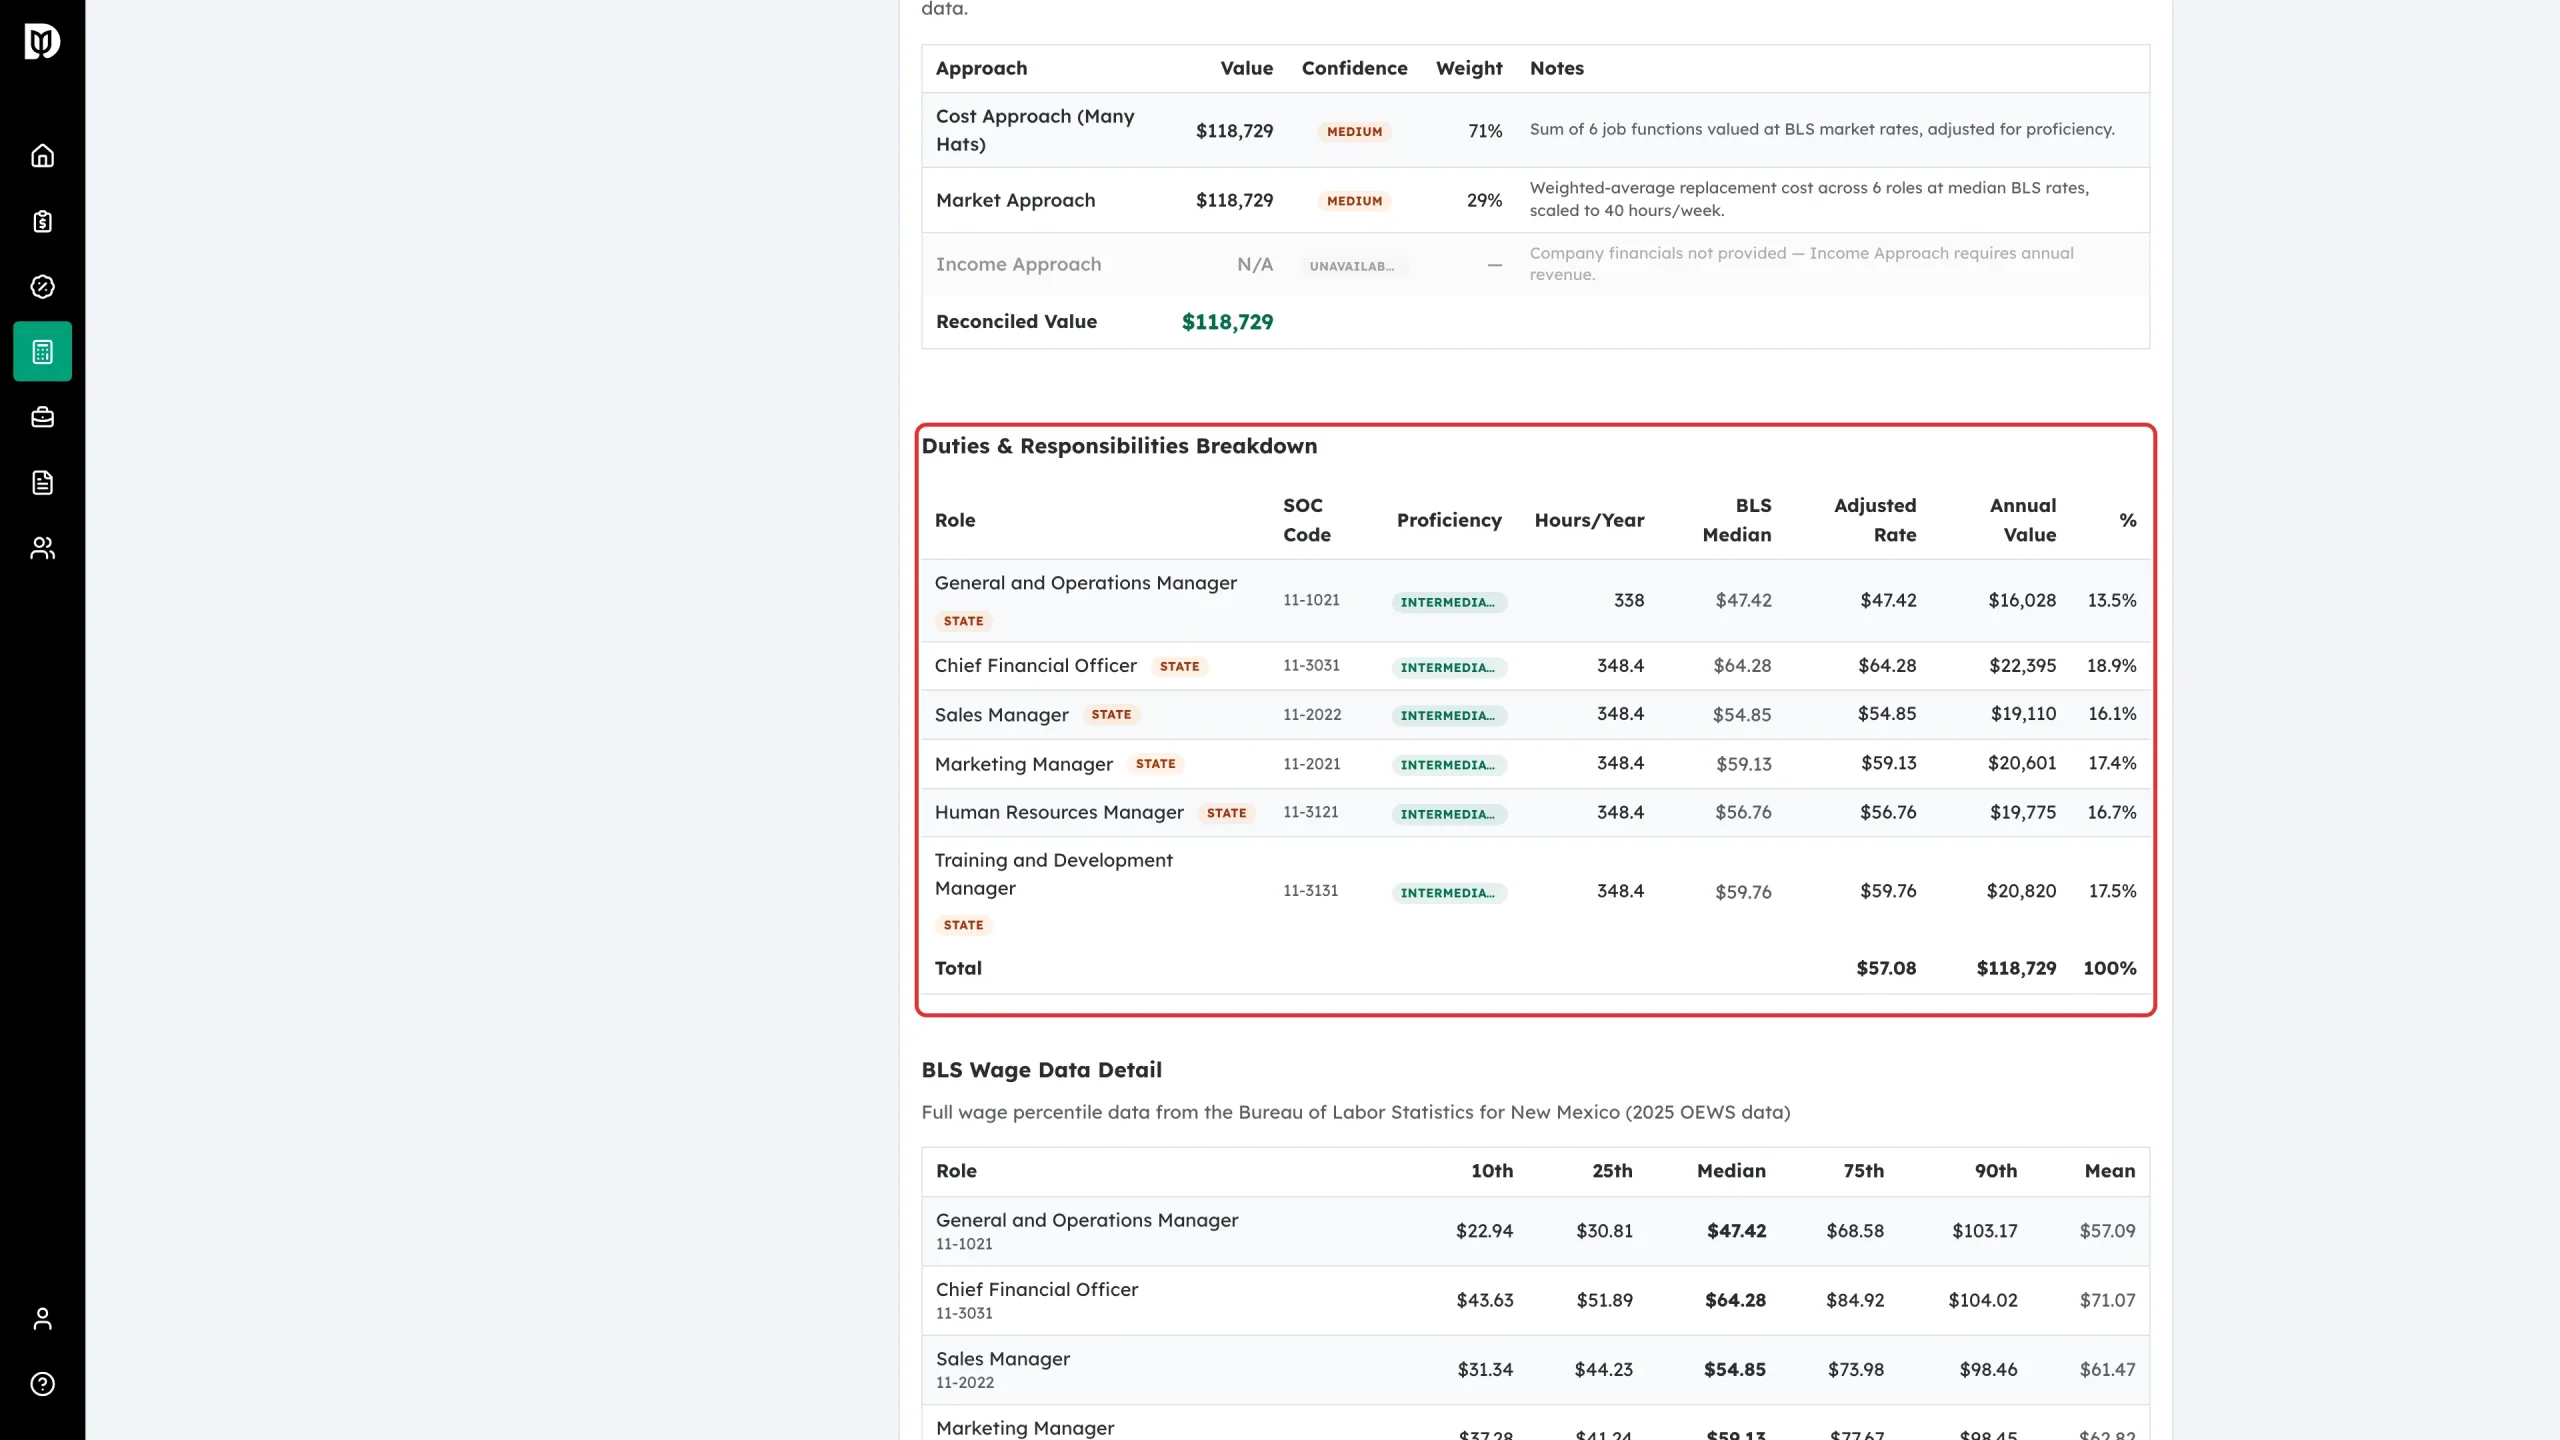
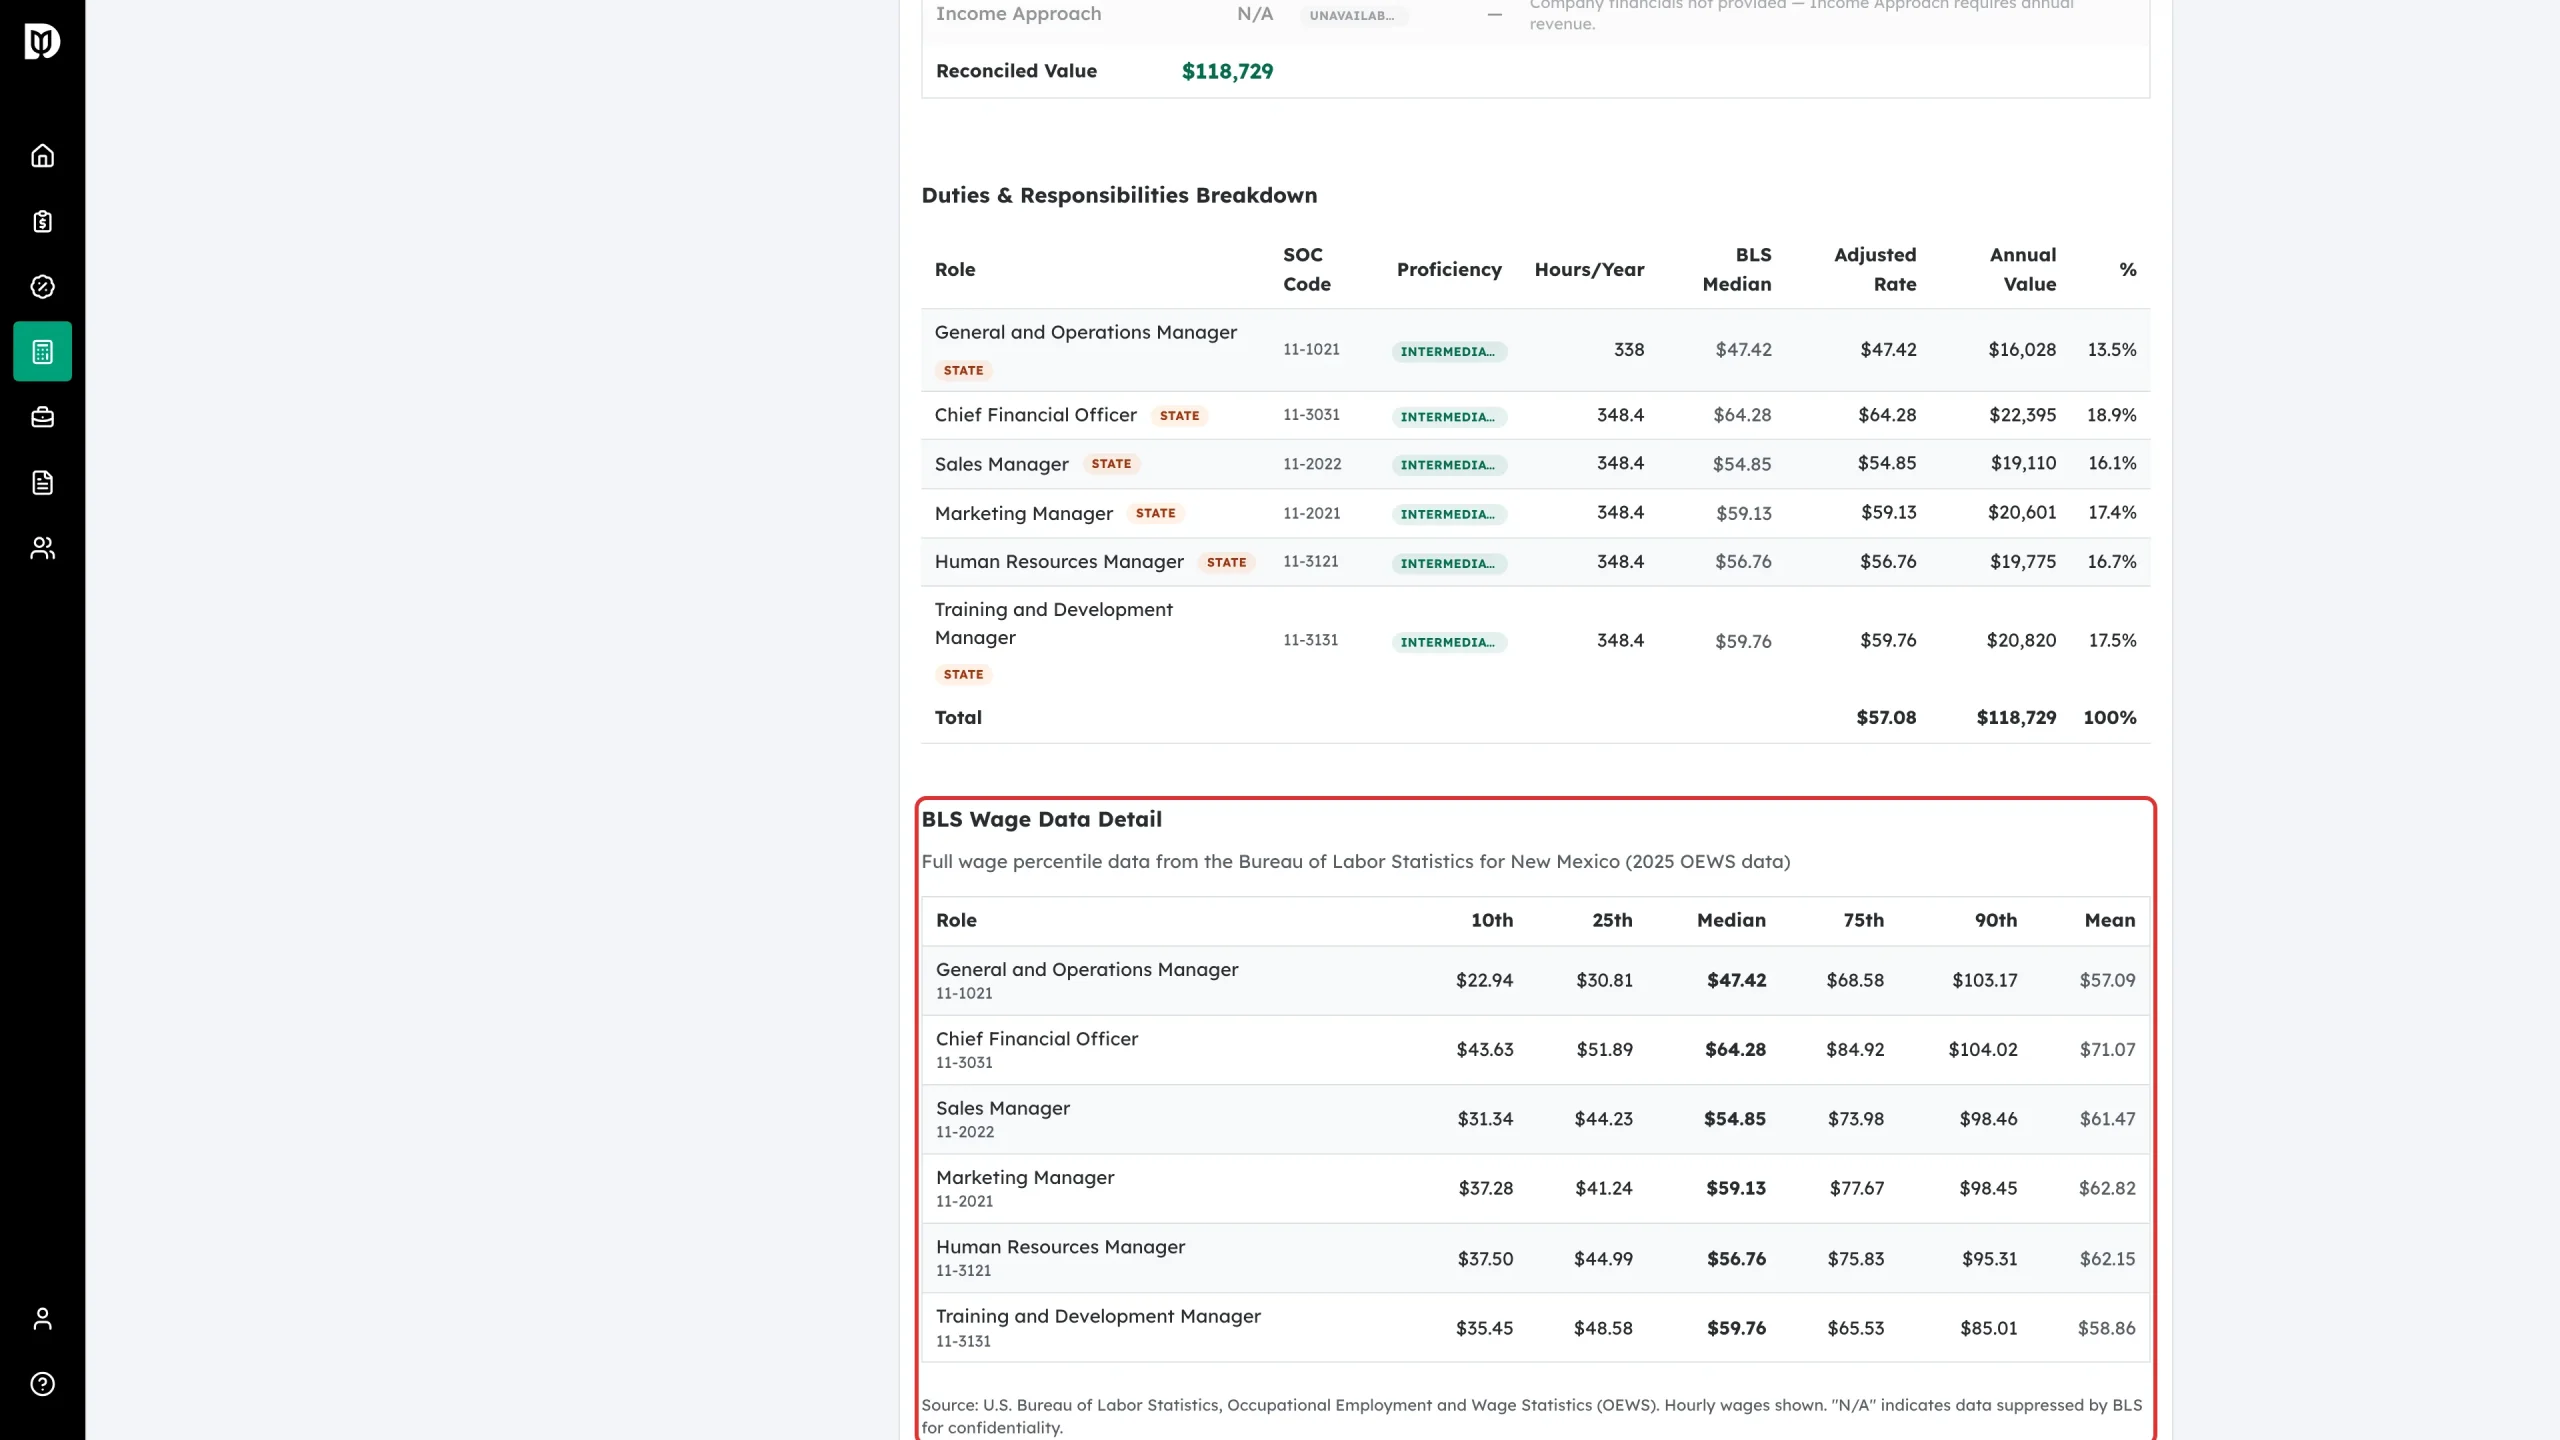
Step 8: Read the Duties & Responsibilities Breakdown
One row per role, showing the SOC code, the proficiency you set, hours per year, the BLS median wage, the adjusted rate after location and proficiency, the annual value and the share of the total. A STATE or METRO tag tells you which wage table was used. The footer row totals everything.
Step 9: Check the BLS wage data
BLS Wage Data Detail prints the full percentile spread — 10th, 25th, median, 75th, 90th and mean — for every role, with the source state and data year named. This is what an examiner will want to see.
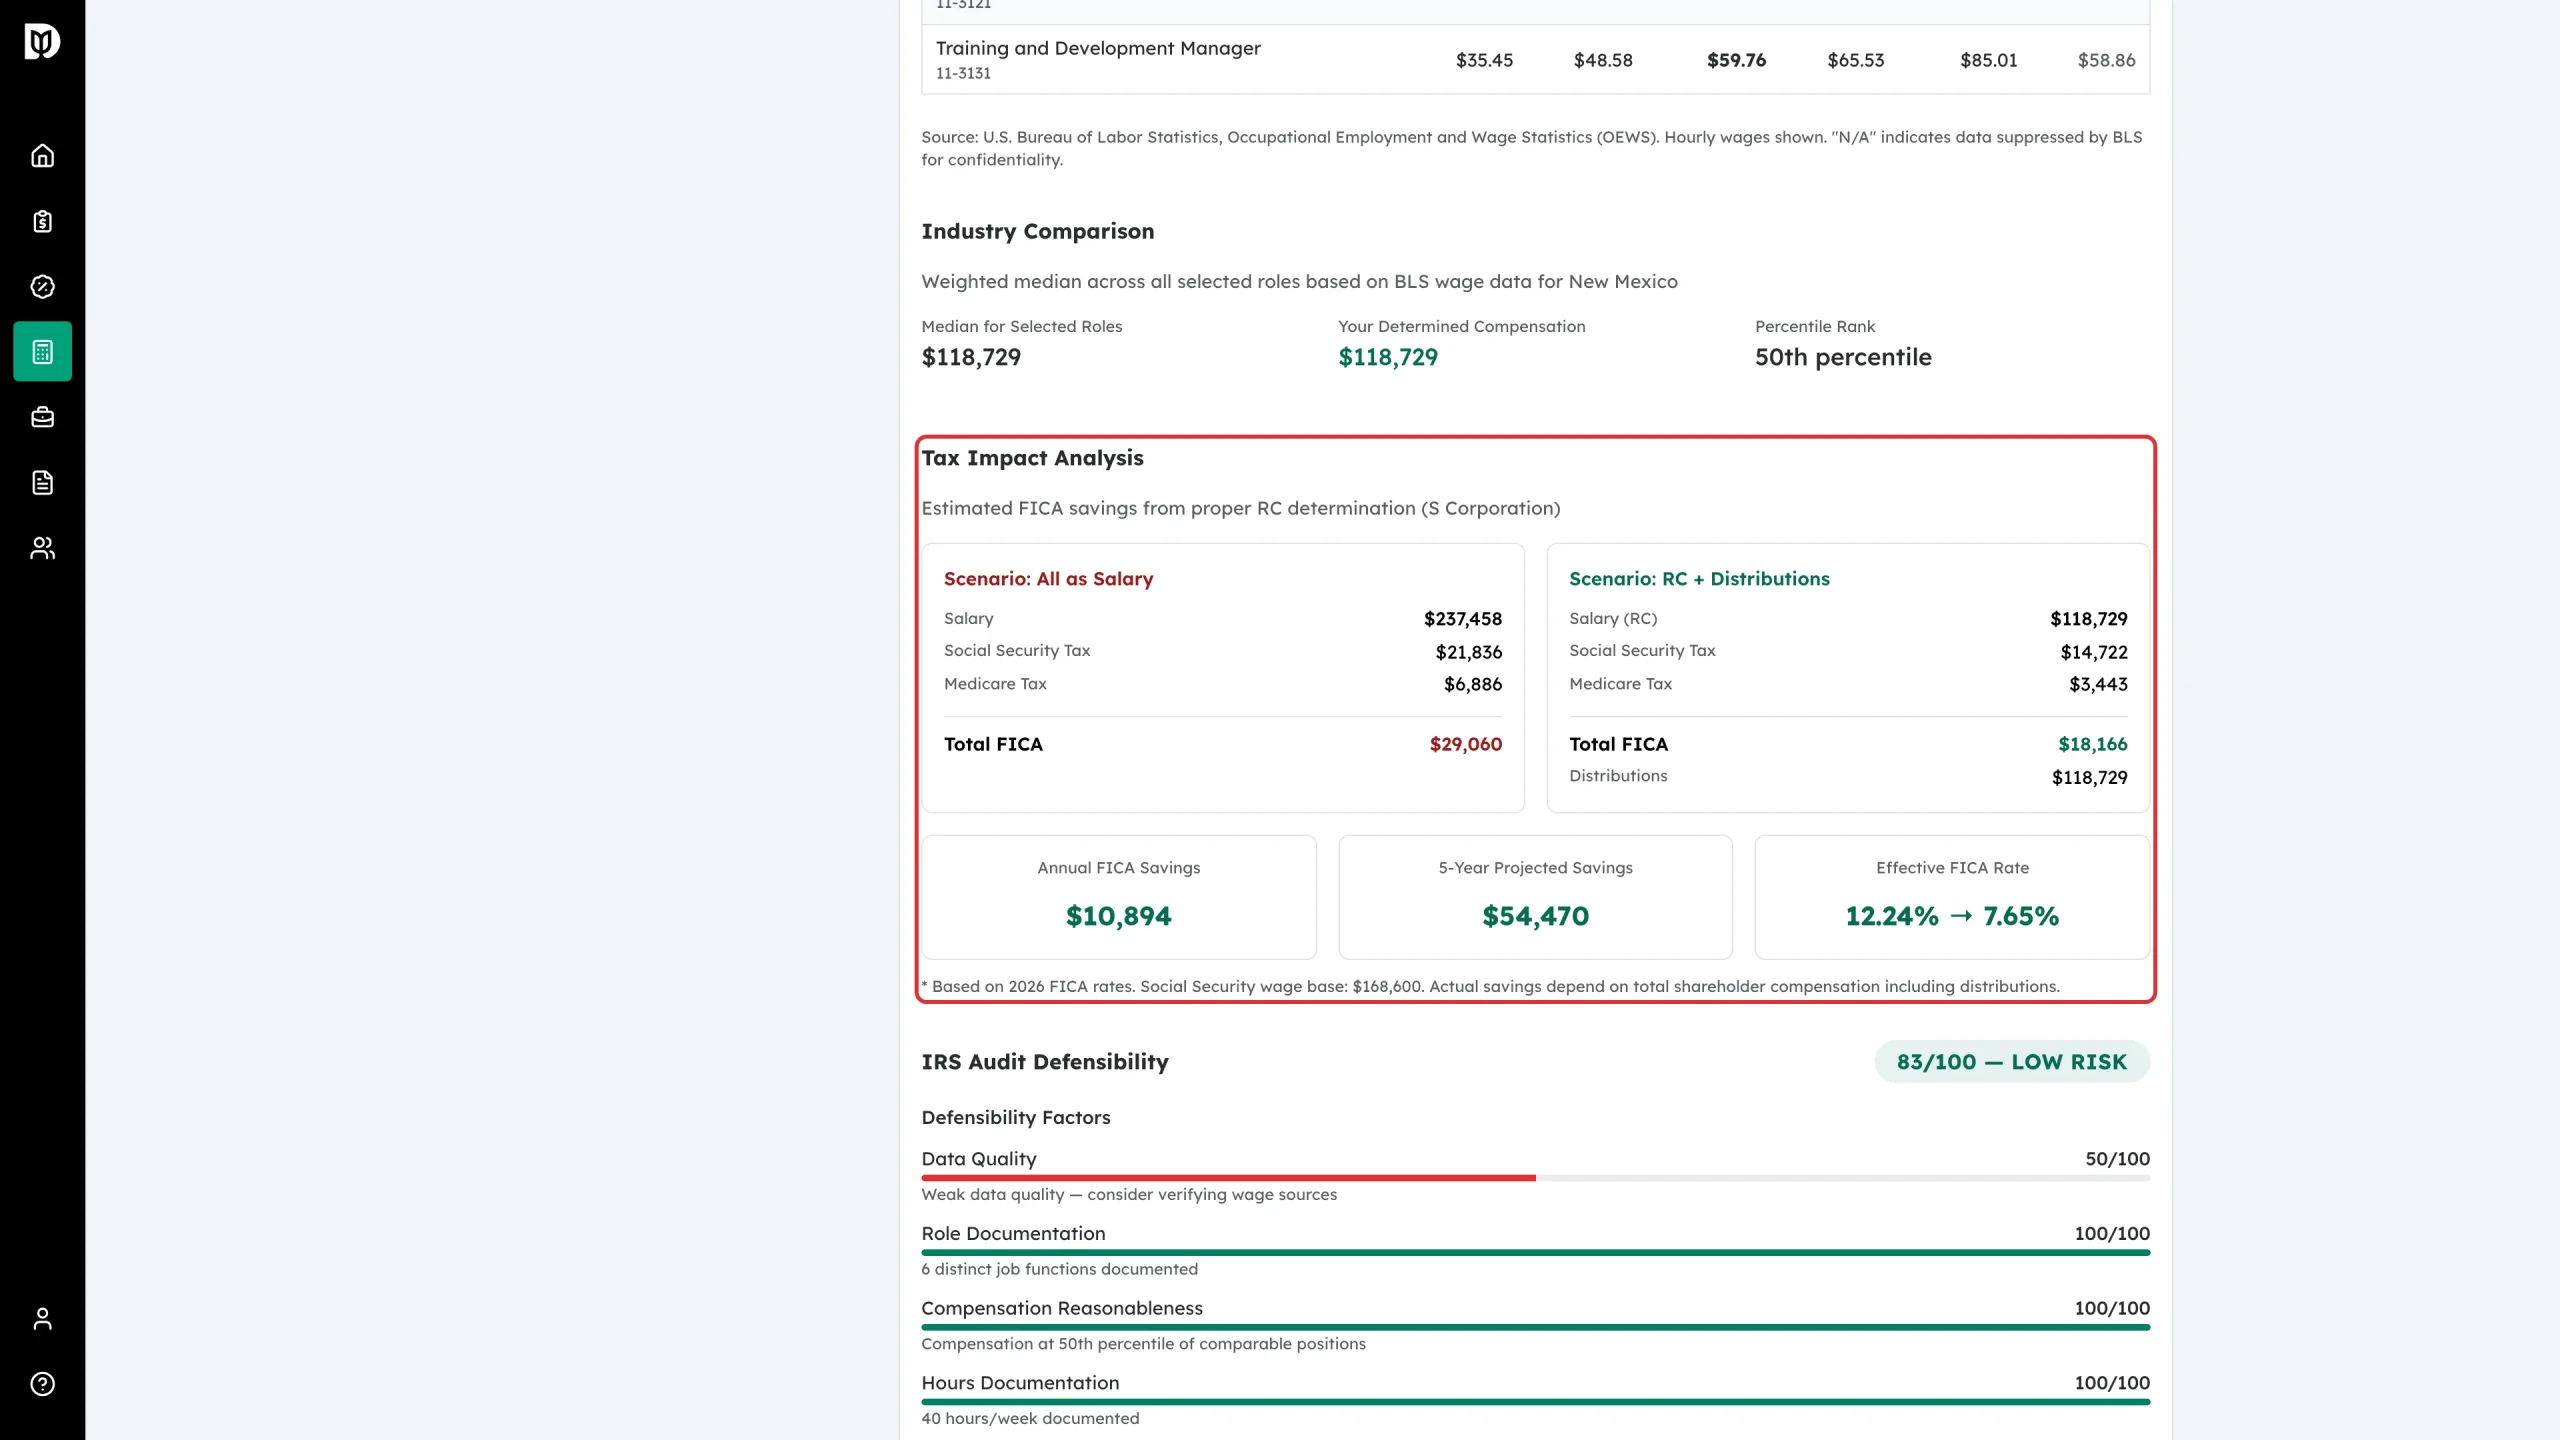
Step 10: Check the tax impact
Tax Impact Analysis shows what the determined salary means in payroll tax against the distribution the shareholder takes.
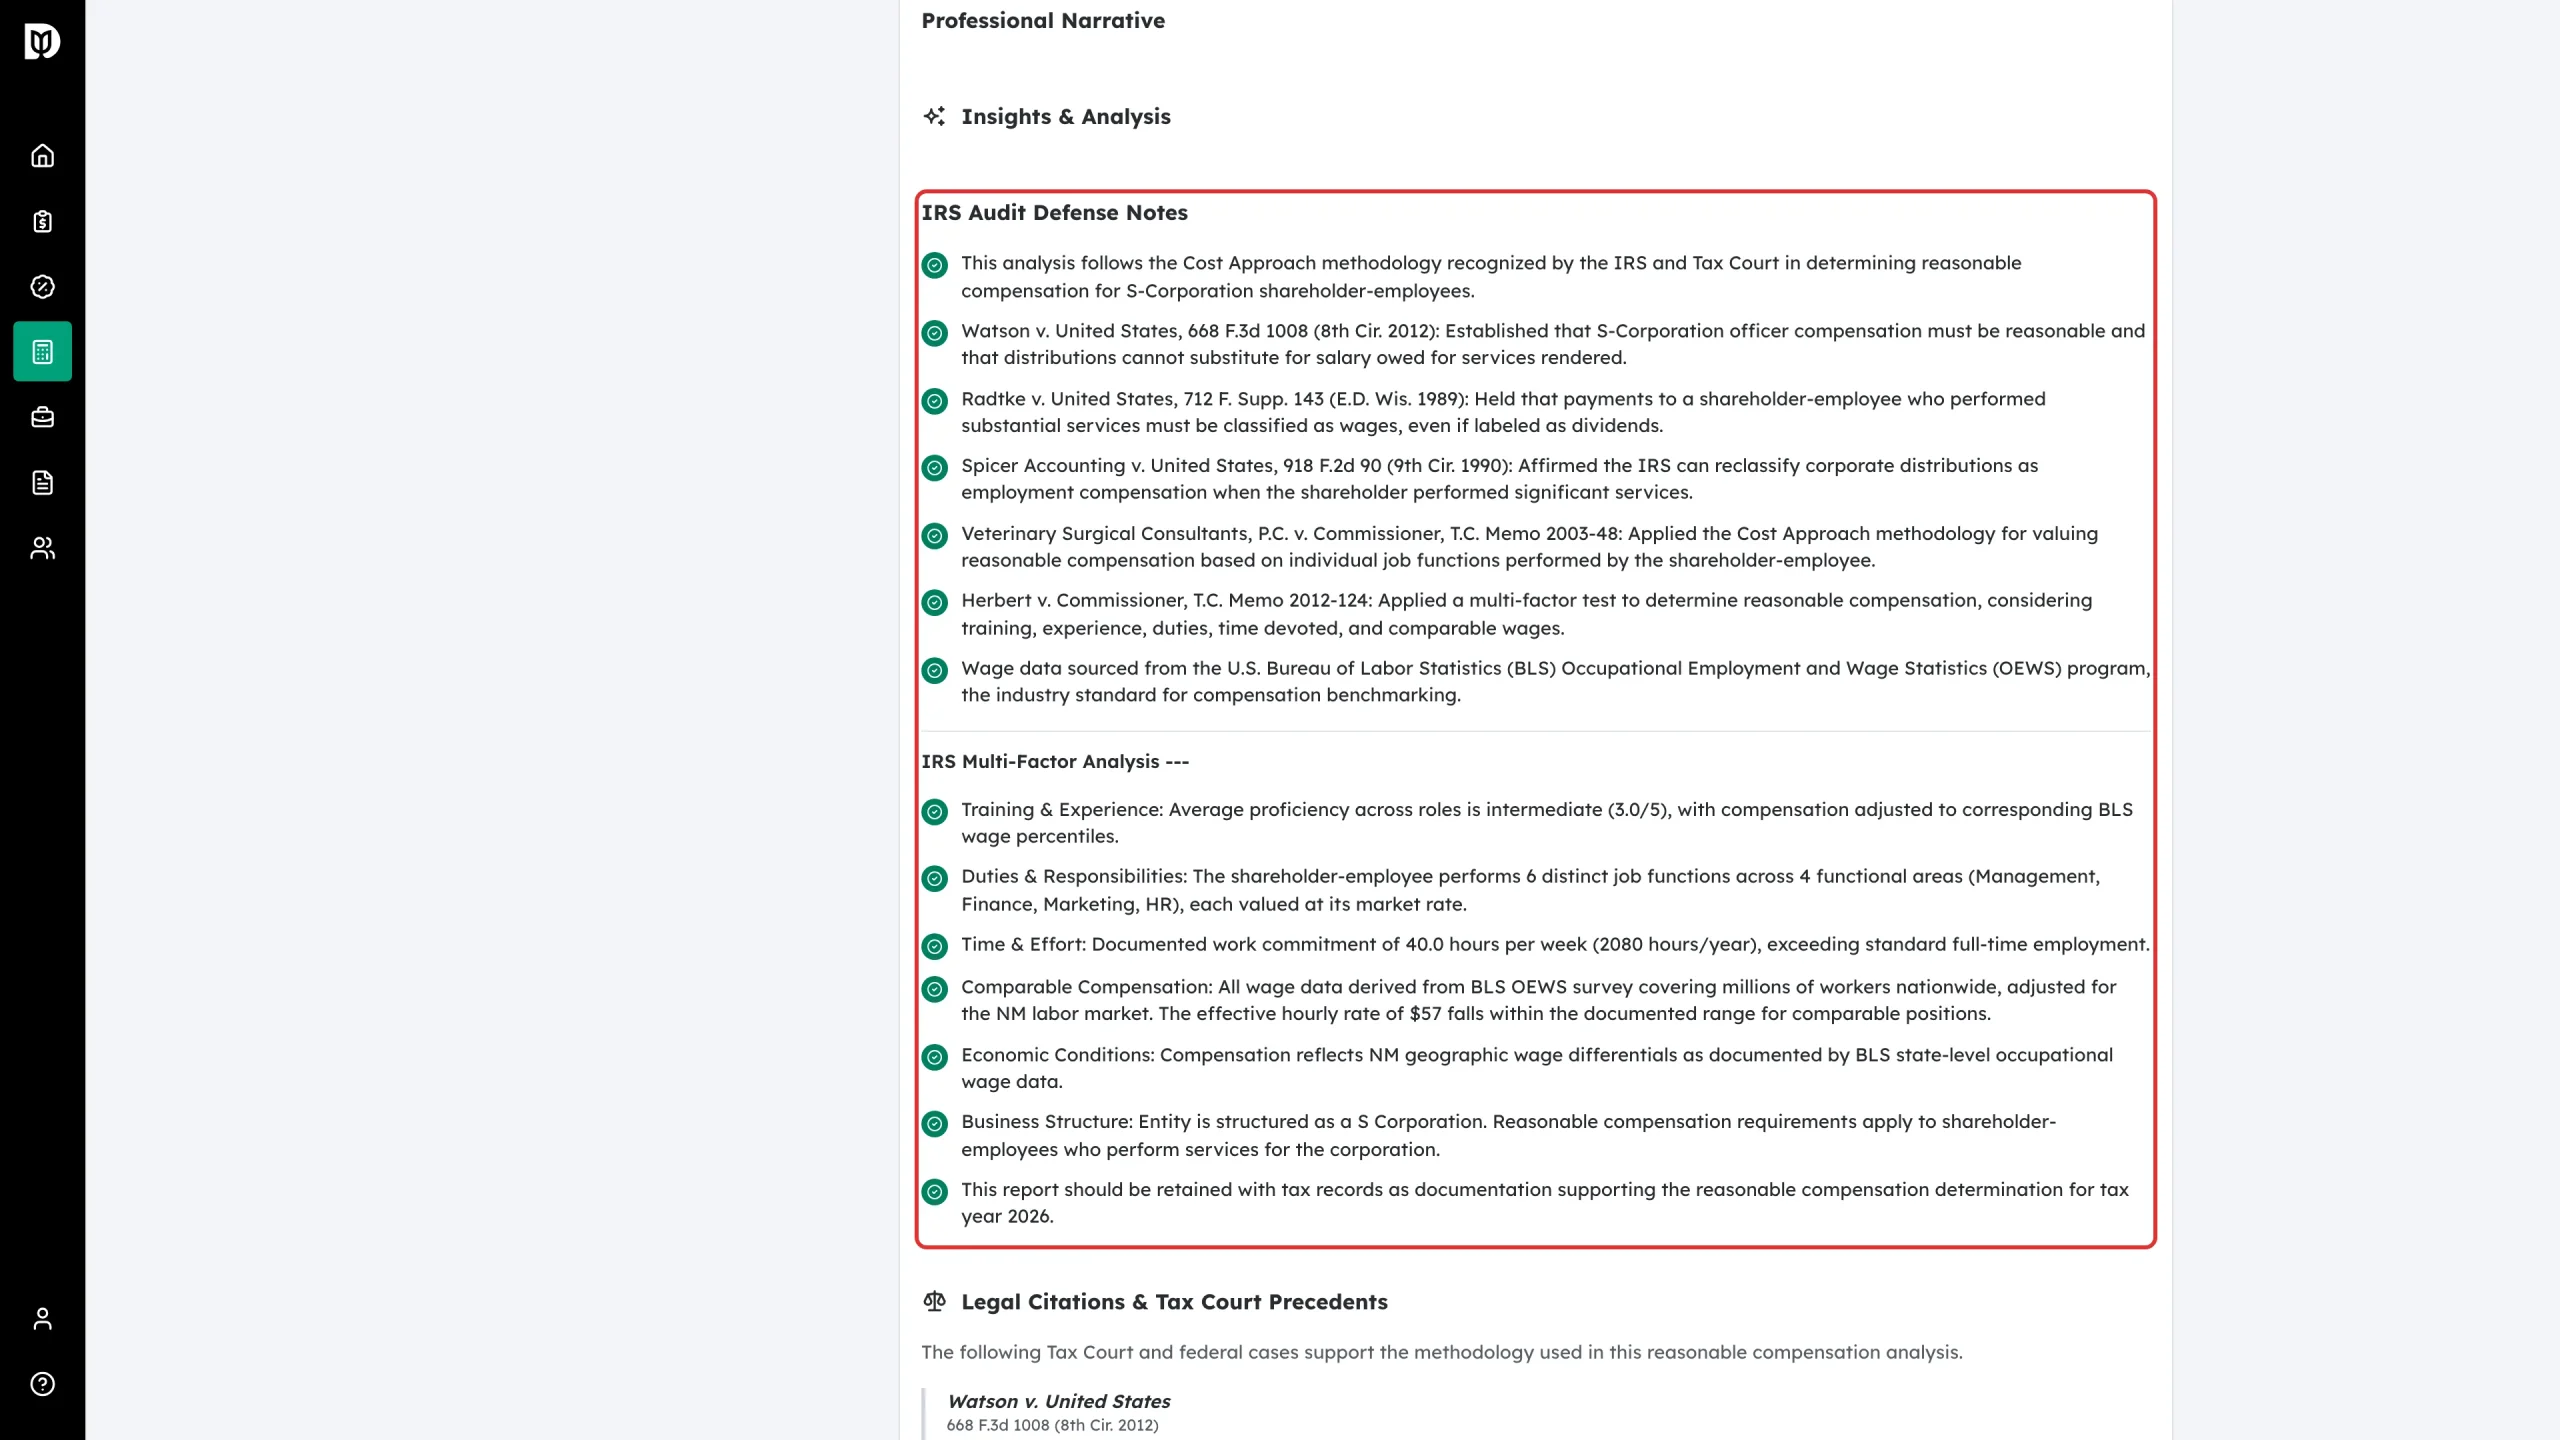
Step 11: Read the IRS audit defence notes
IRS Audit Defense Notes is the narrative you keep on file: the methodology, the data source, the geographic adjustment, the multi-role justification, the proficiency adjustments, how hours were documented and a reasonableness check on the effective rate.
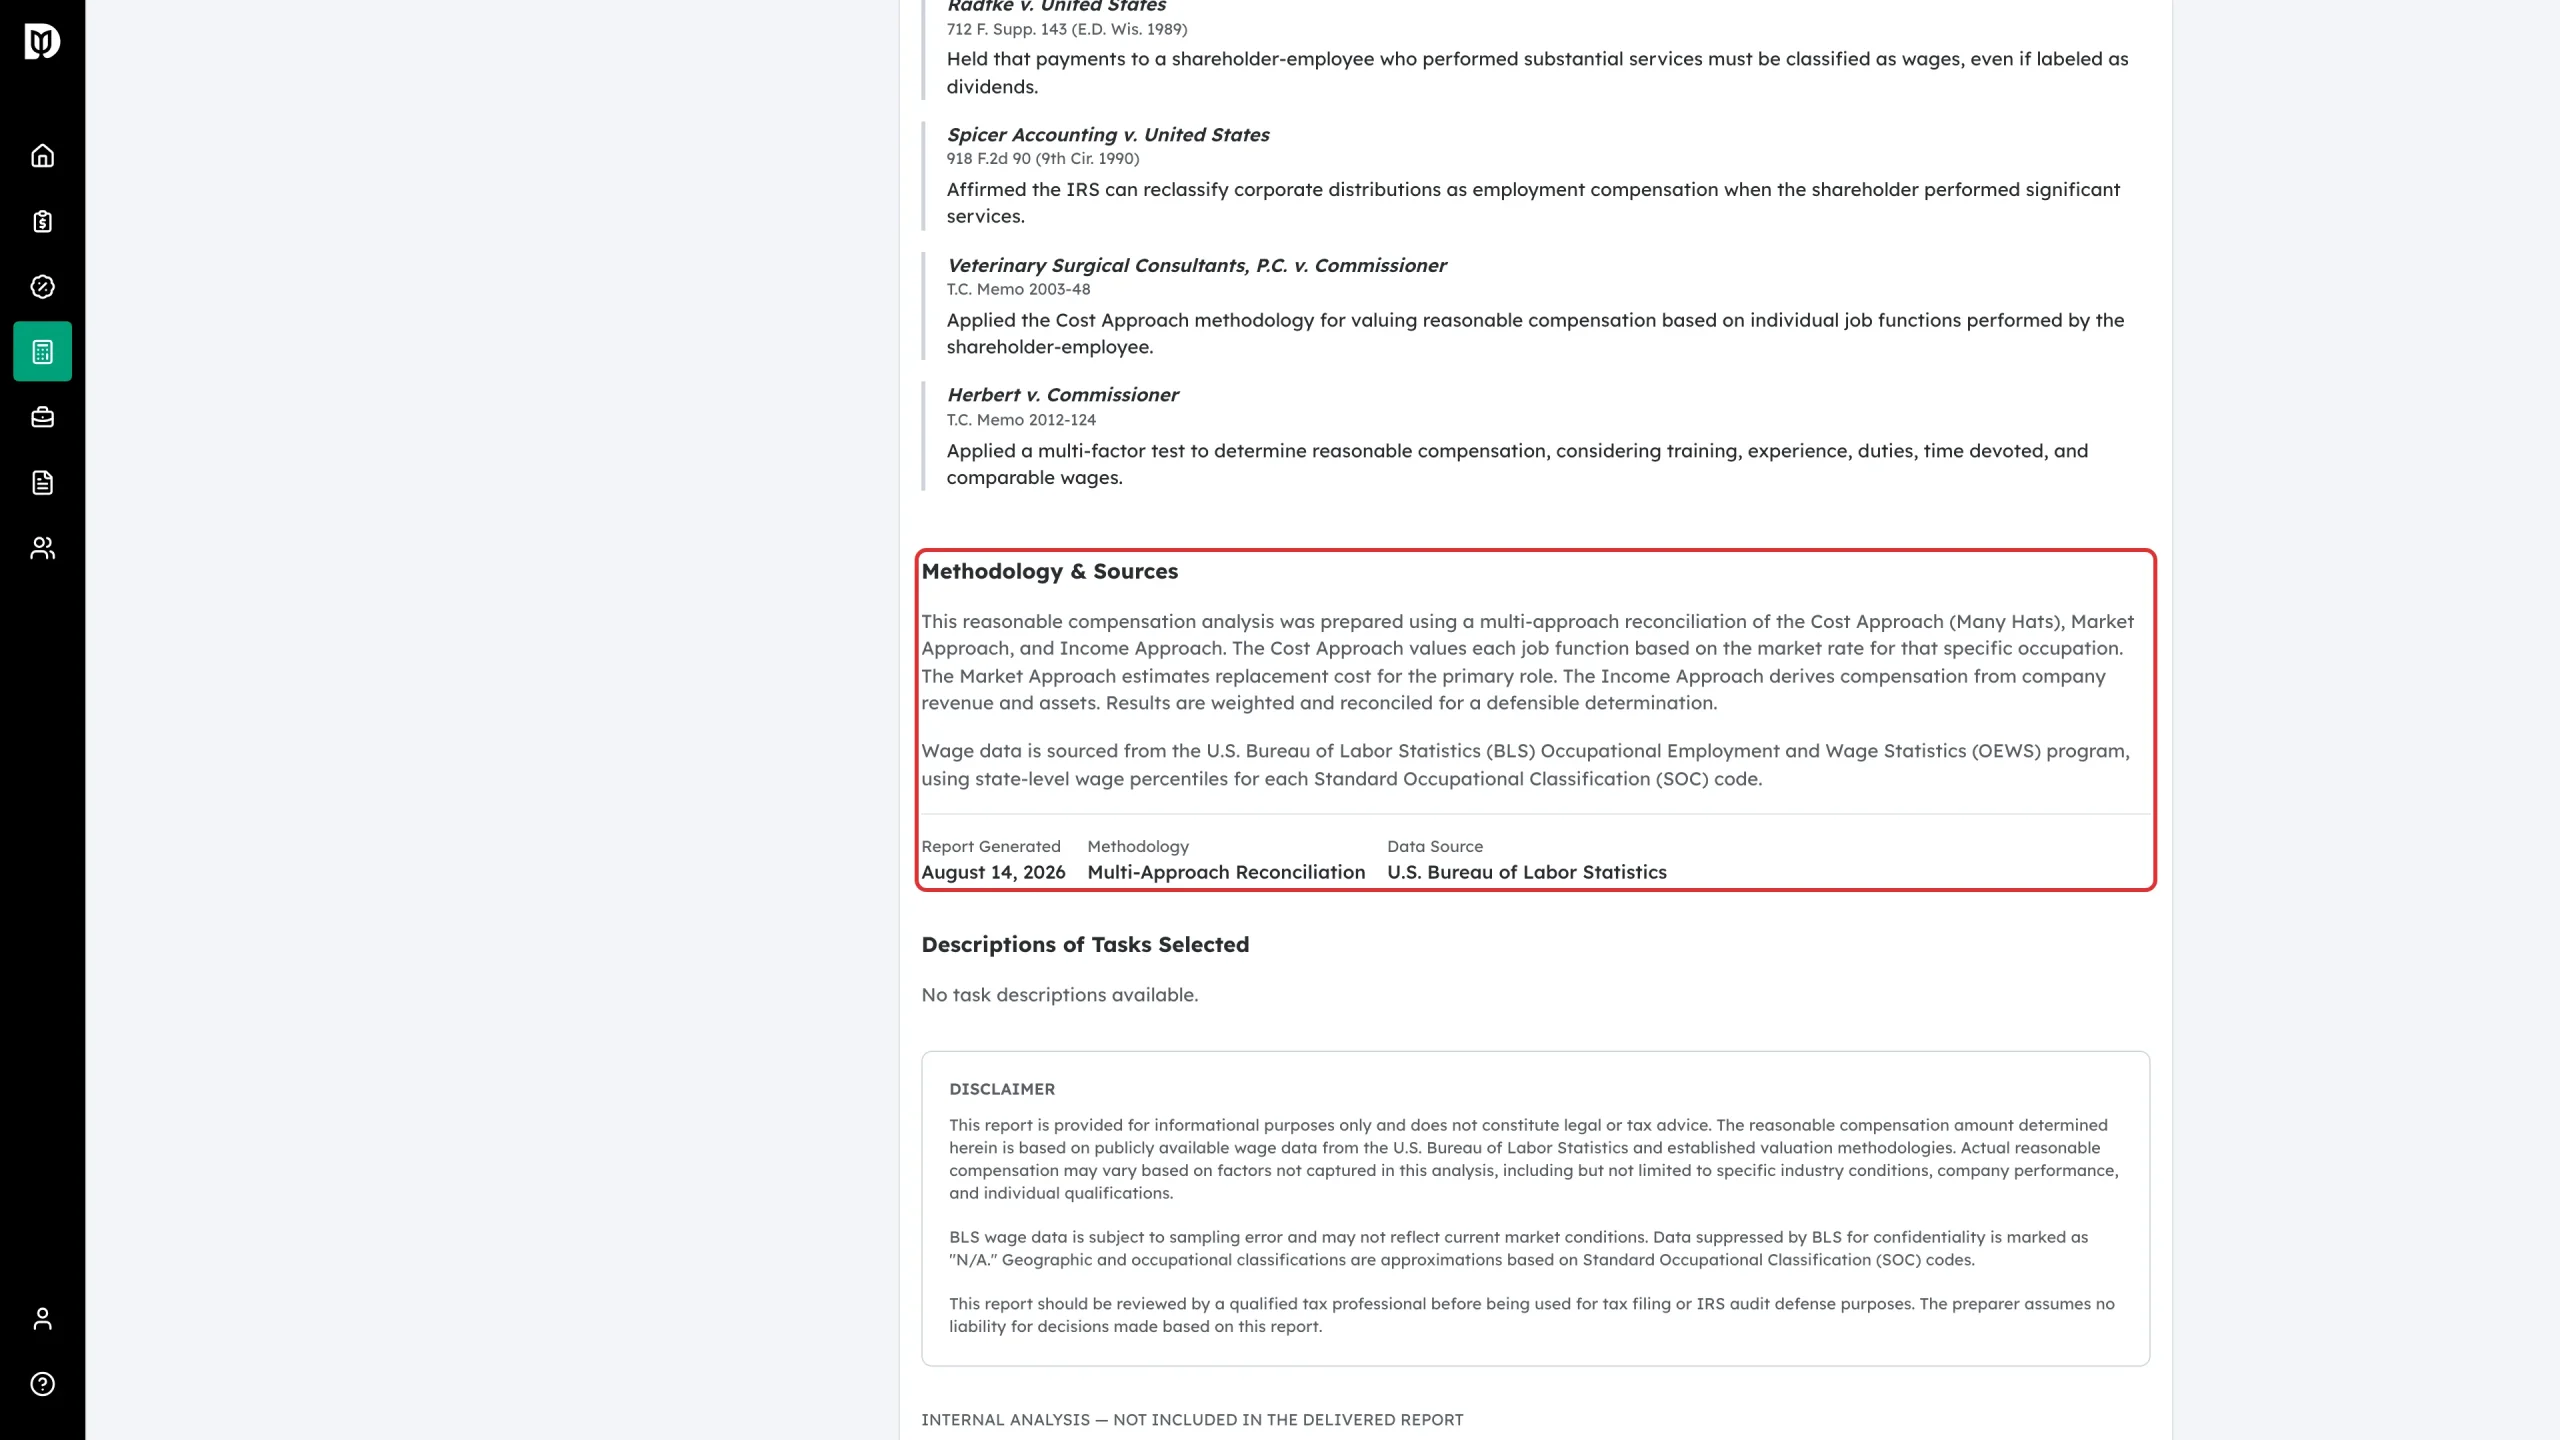
Step 12: Check the methodology and sources
Methodology & Sources names the approaches used and cites the Bureau of Labor Statistics data. Legal Citations, Descriptions of Tasks Selected and Disclaimer follow it.
Step 13: Preview or share the draft
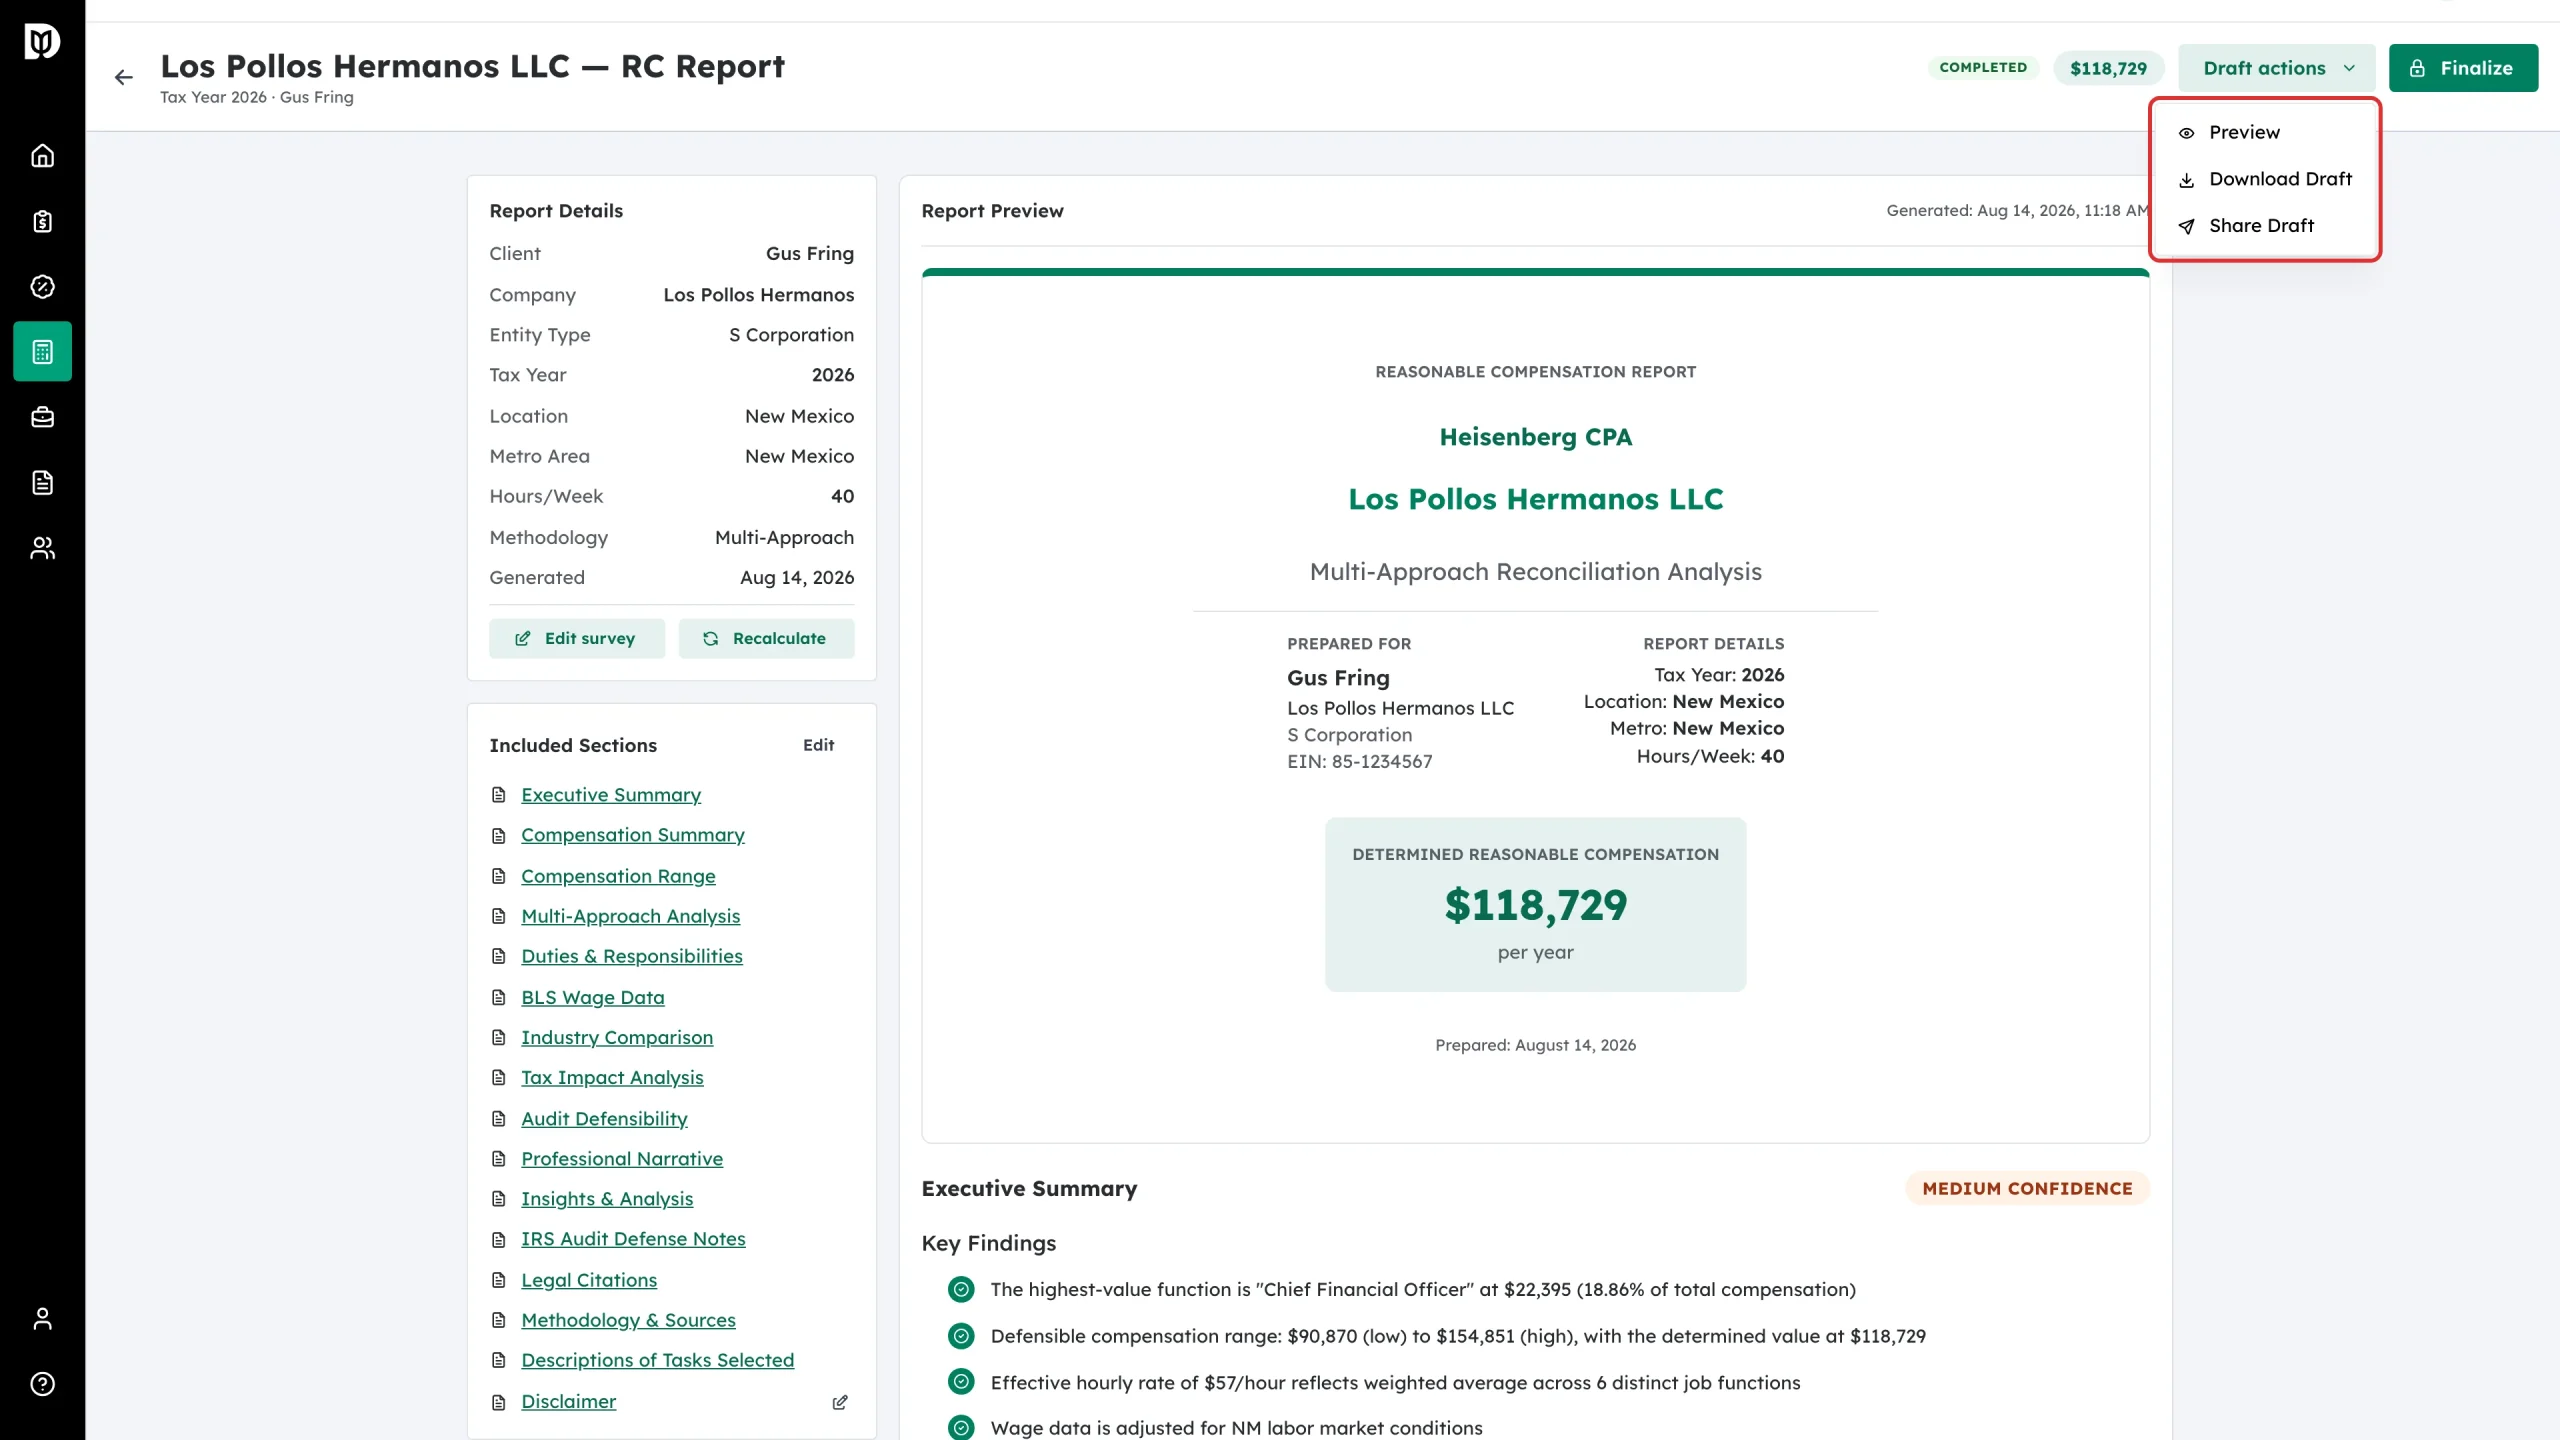
While the study is Completed, the Draft actions menu offers three things:
- Preview — opens the PDF in a window without saving it.
- Download Draft — saves a draft PDF for internal review.
- Share Draft — sends the draft to a recipient, clearly marked as a draft.
Step 14: Finalize
When you are happy with the figures and the section list, click Finalize.
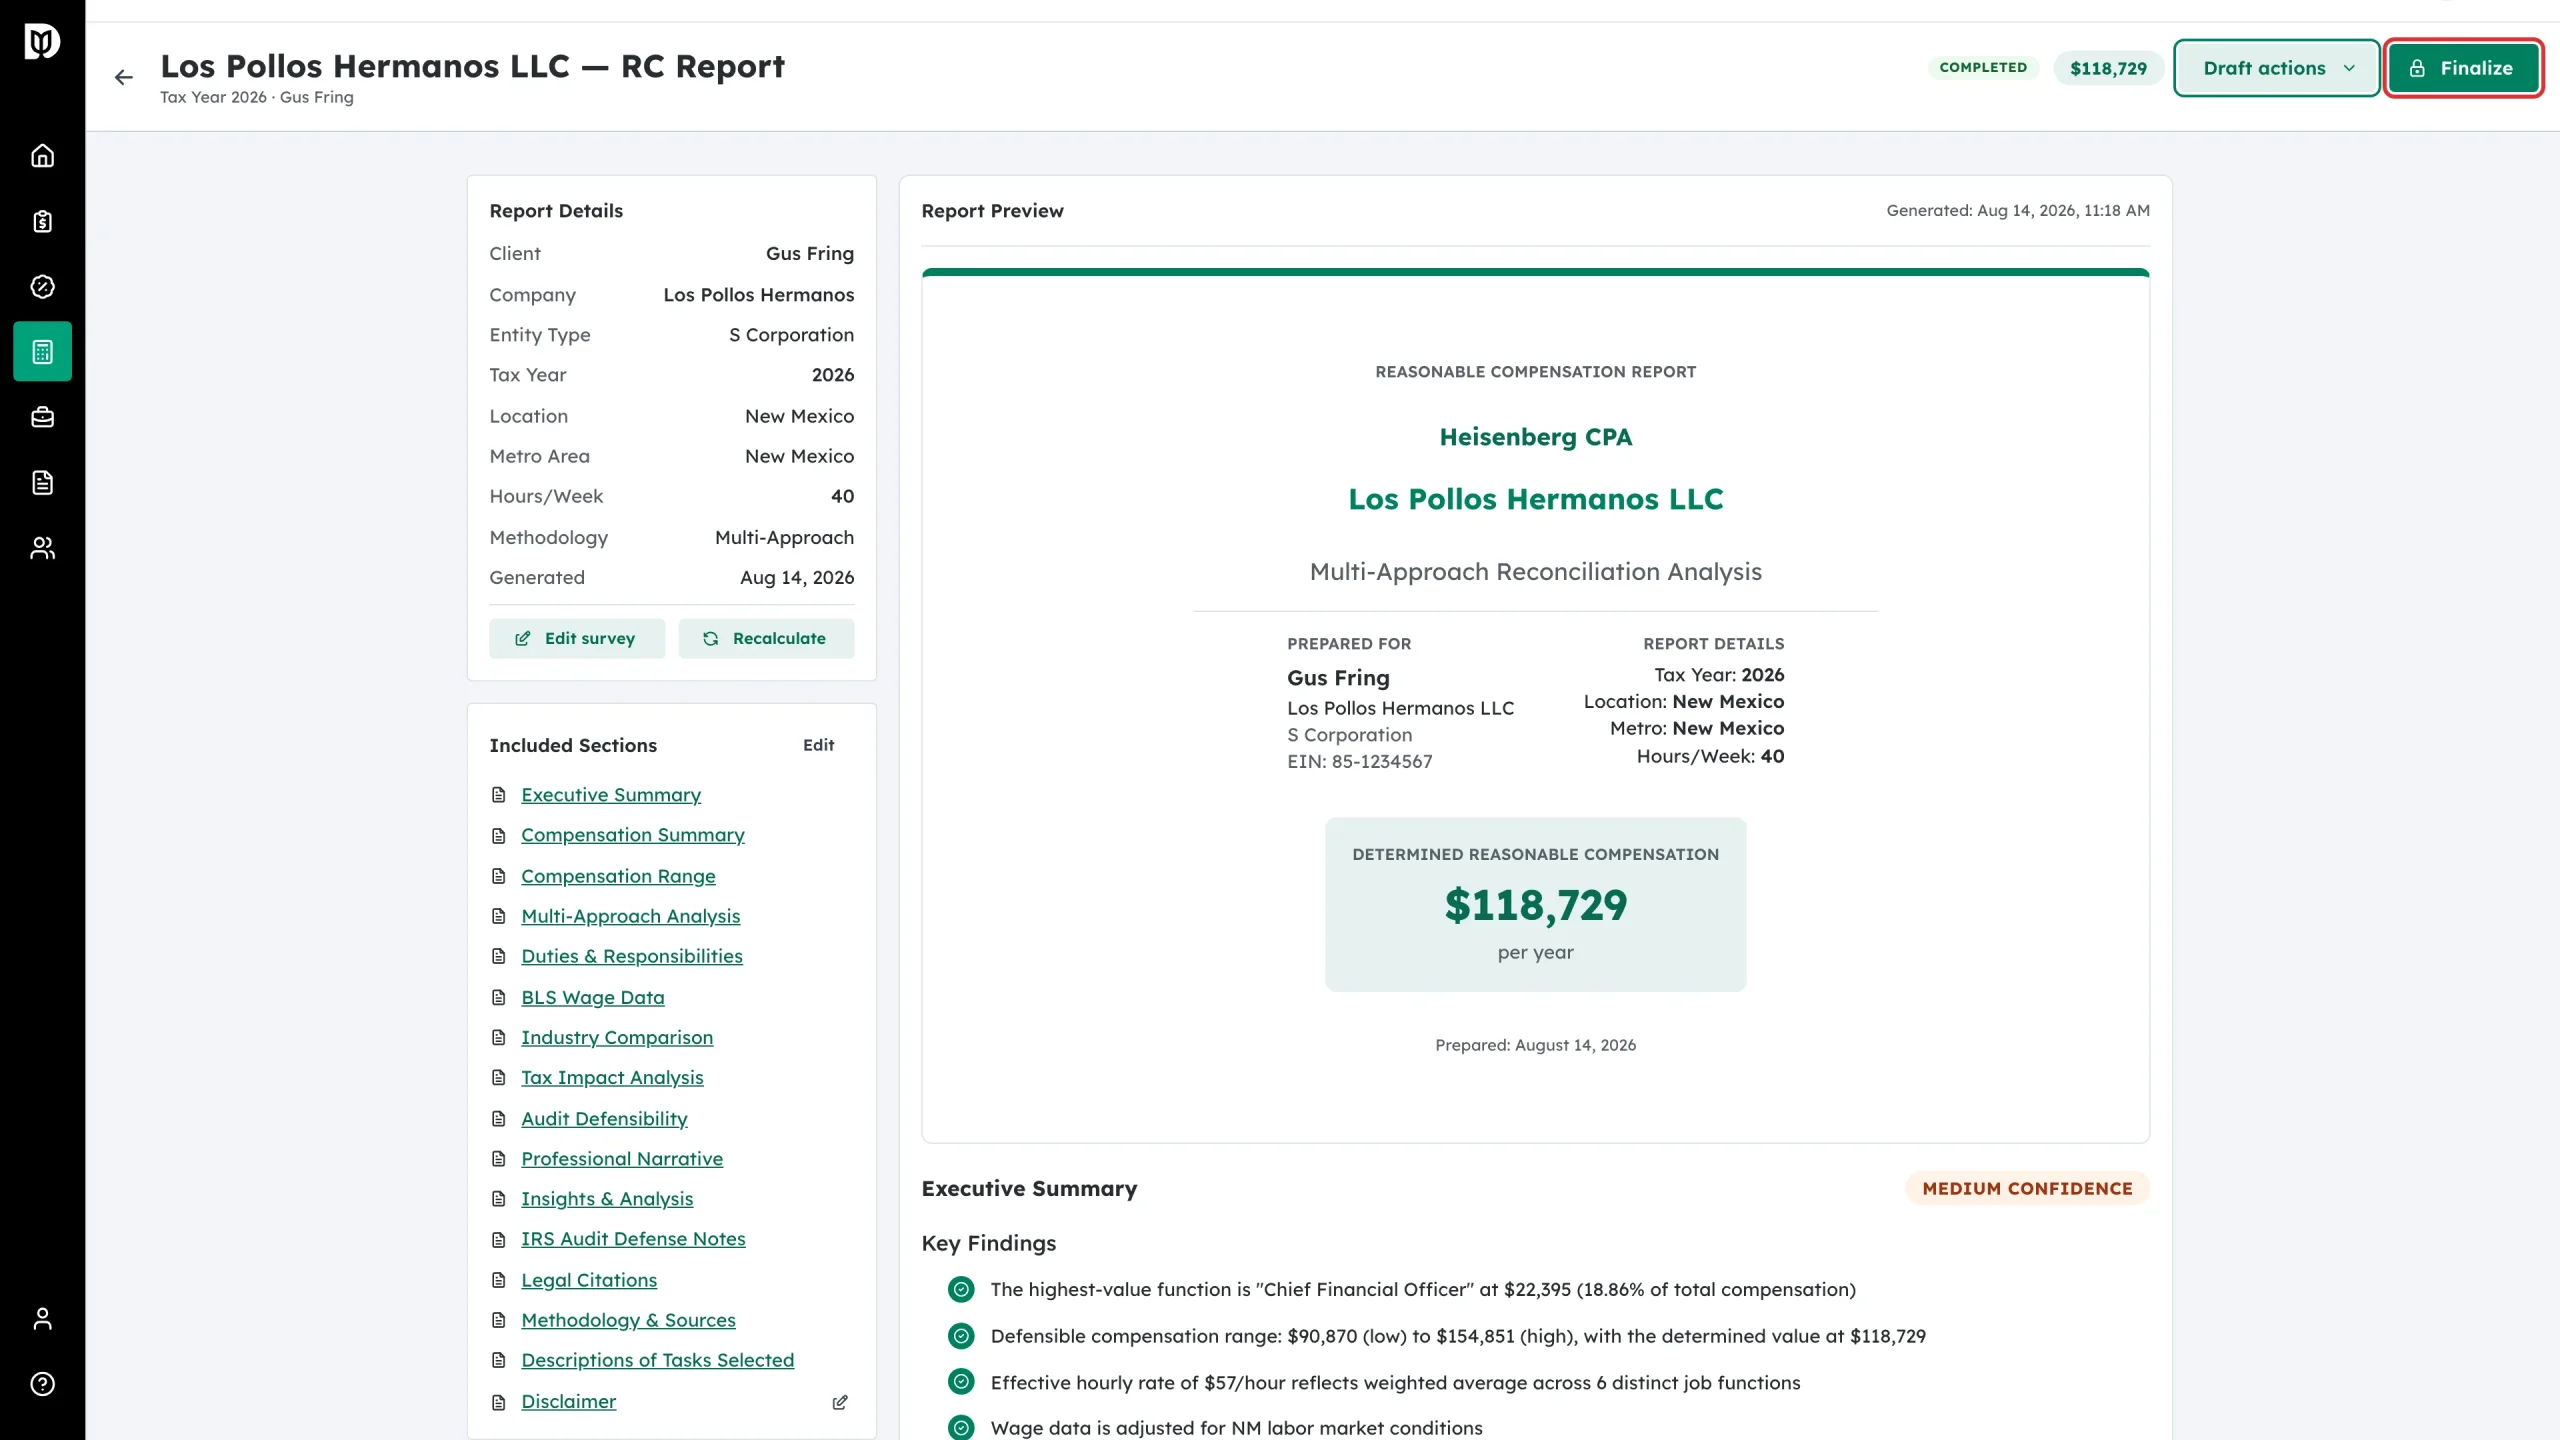
The confirmation window explains what happens: the report is locked, the professional PDF is generated and stored, and the status becomes Finalized. Click Finalize report.
Step 15: Confirm it is finalized
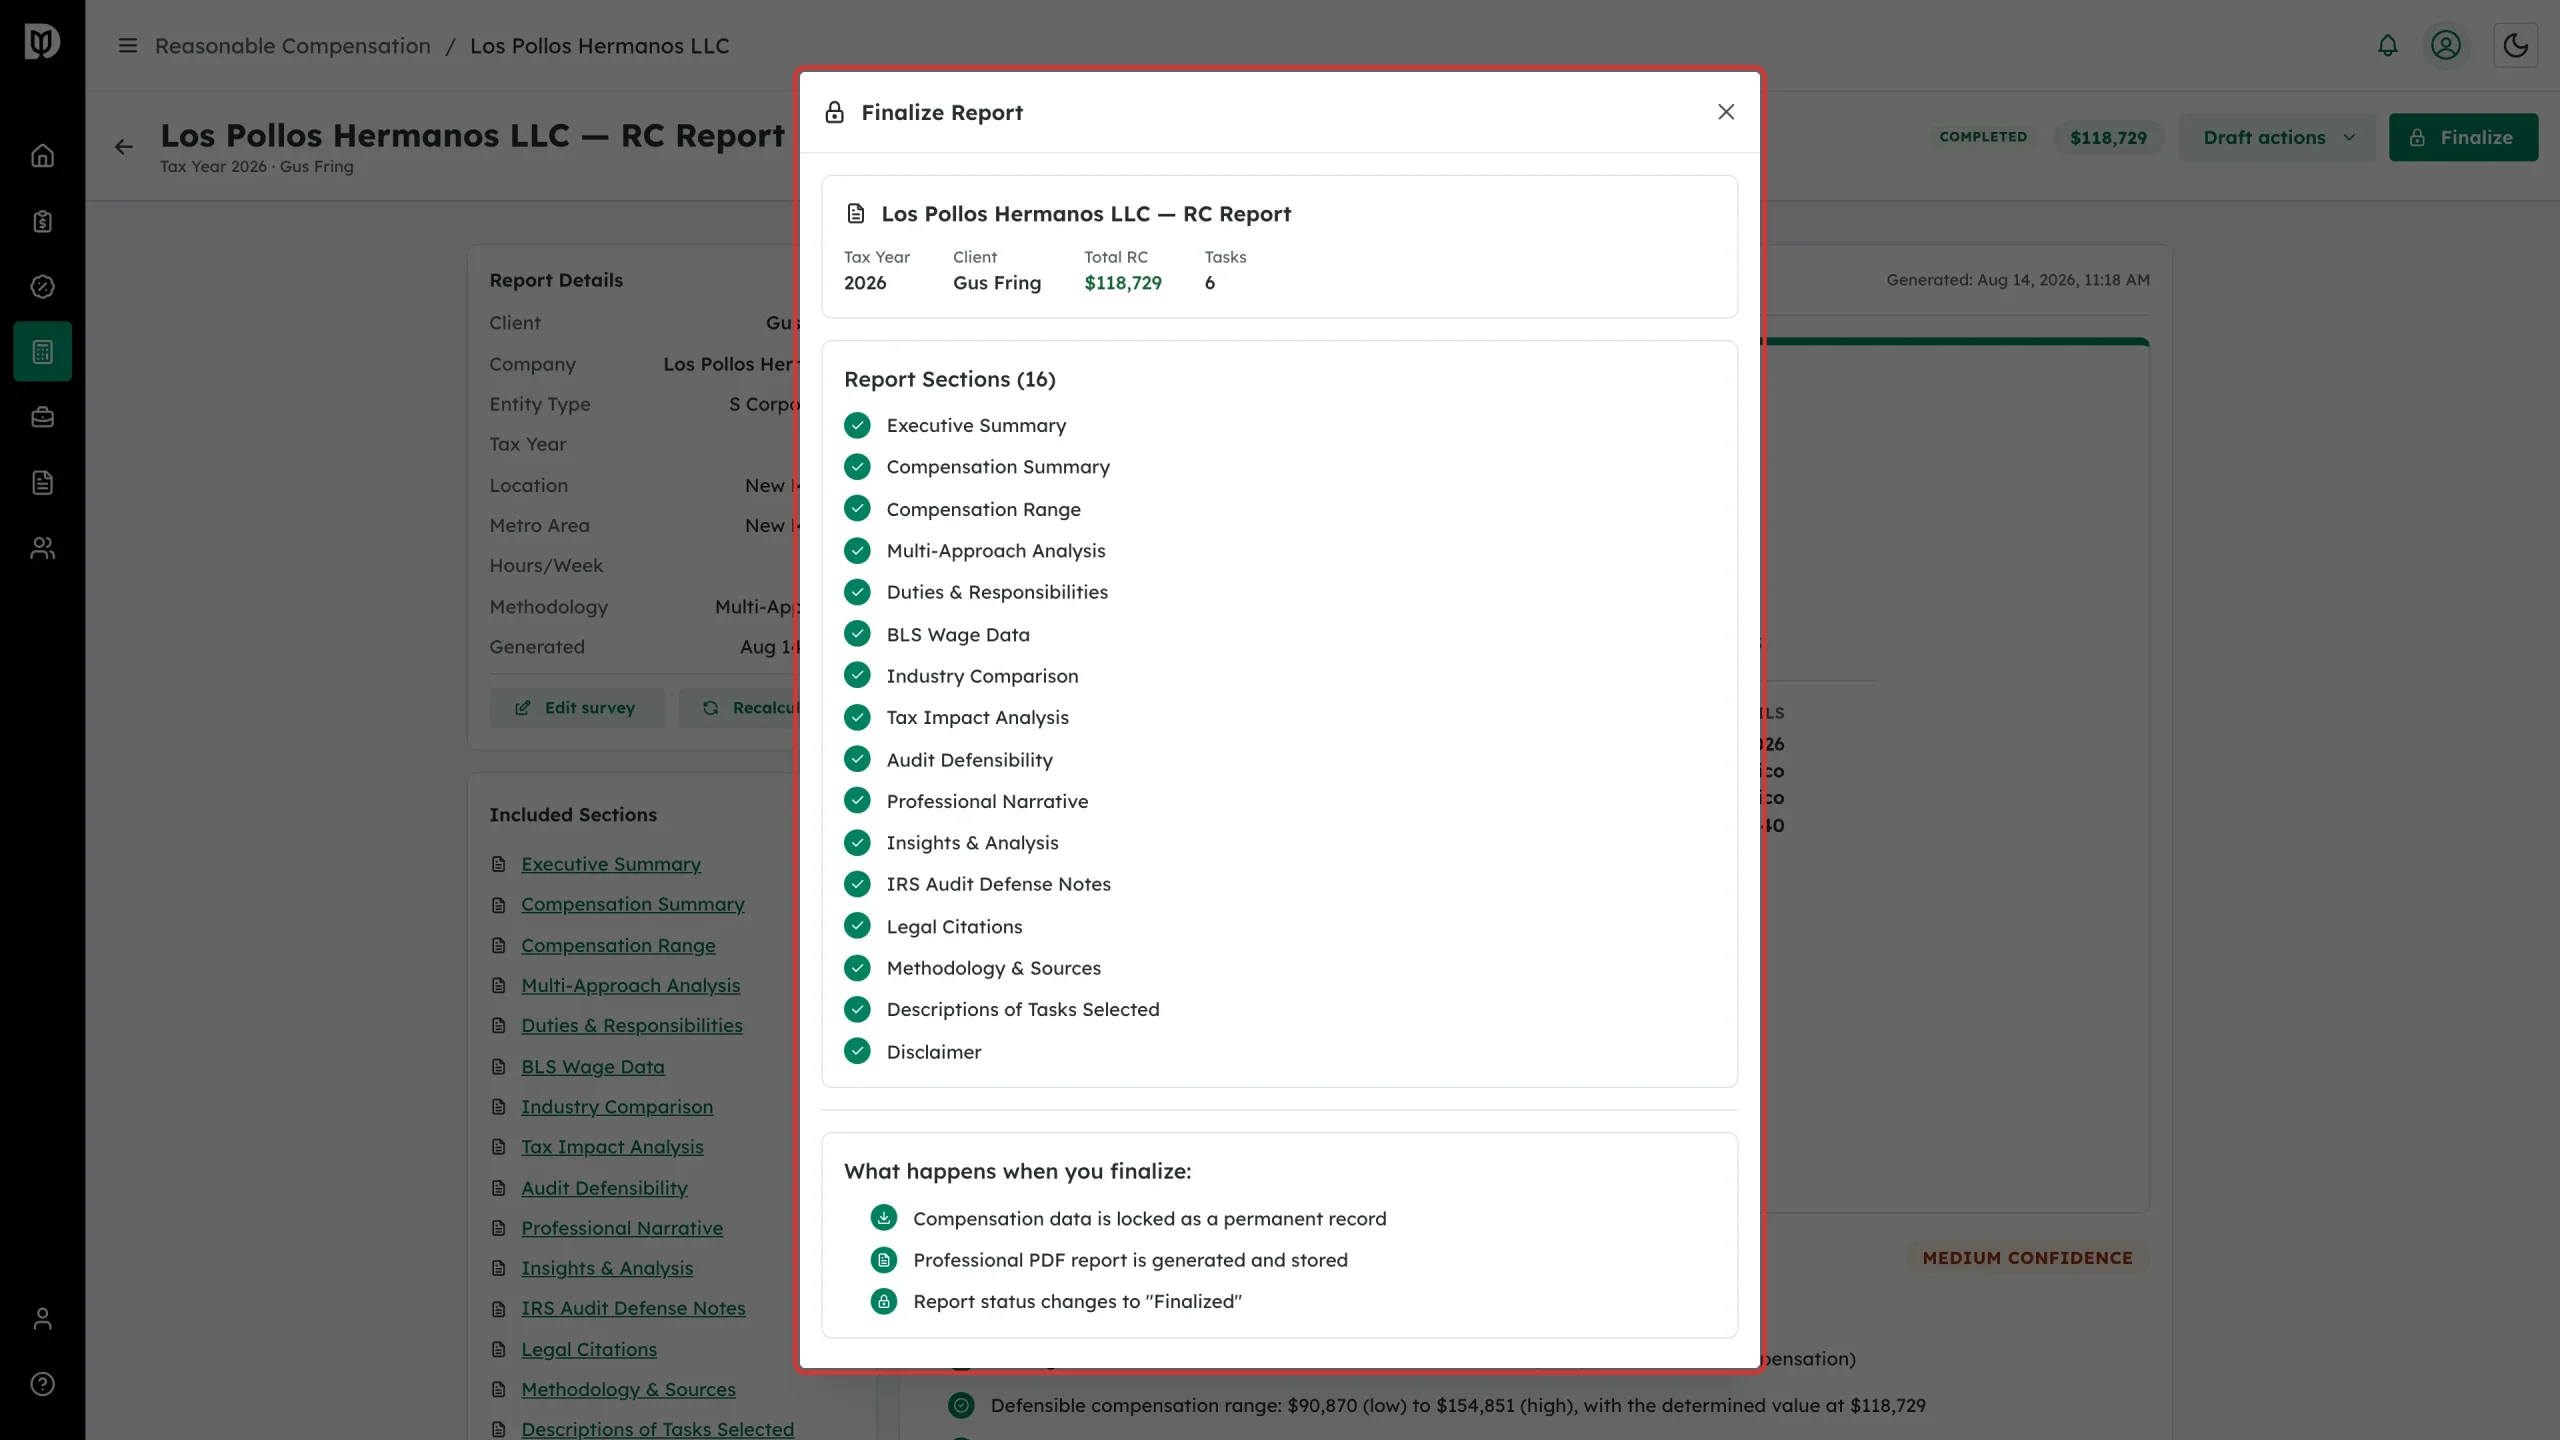
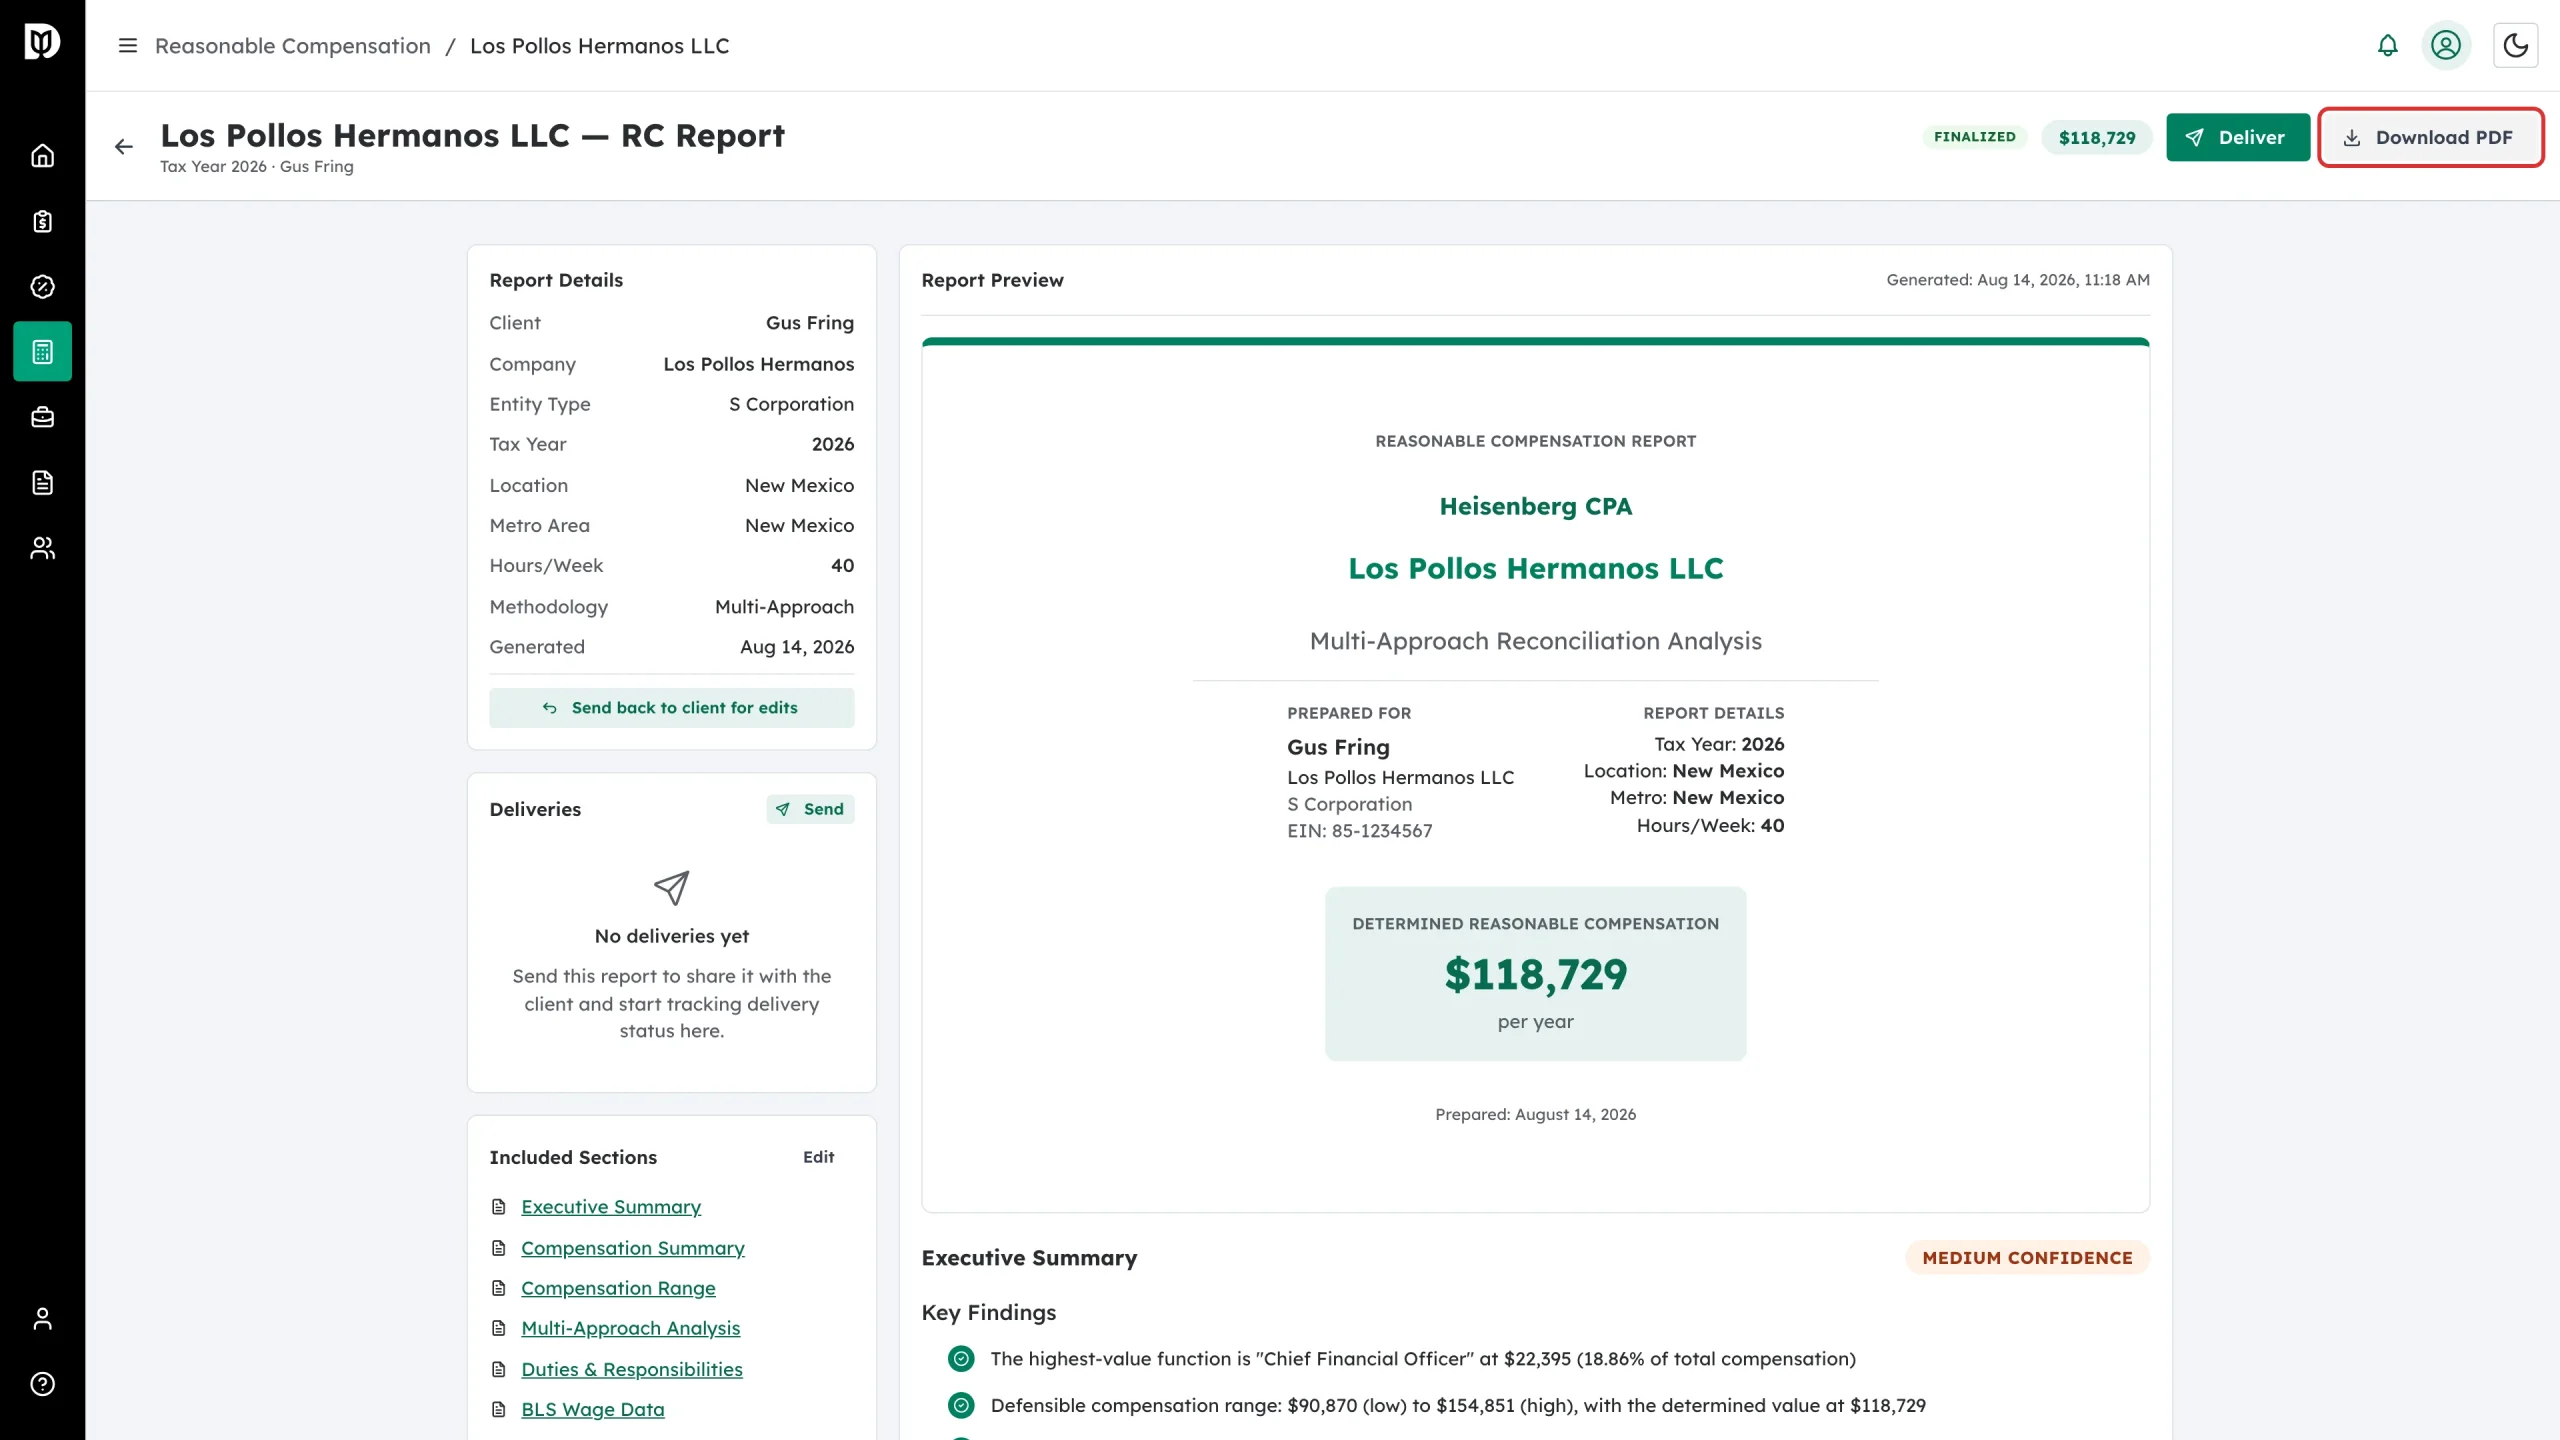
The badge changes to FINALIZED and the header actions change with it.
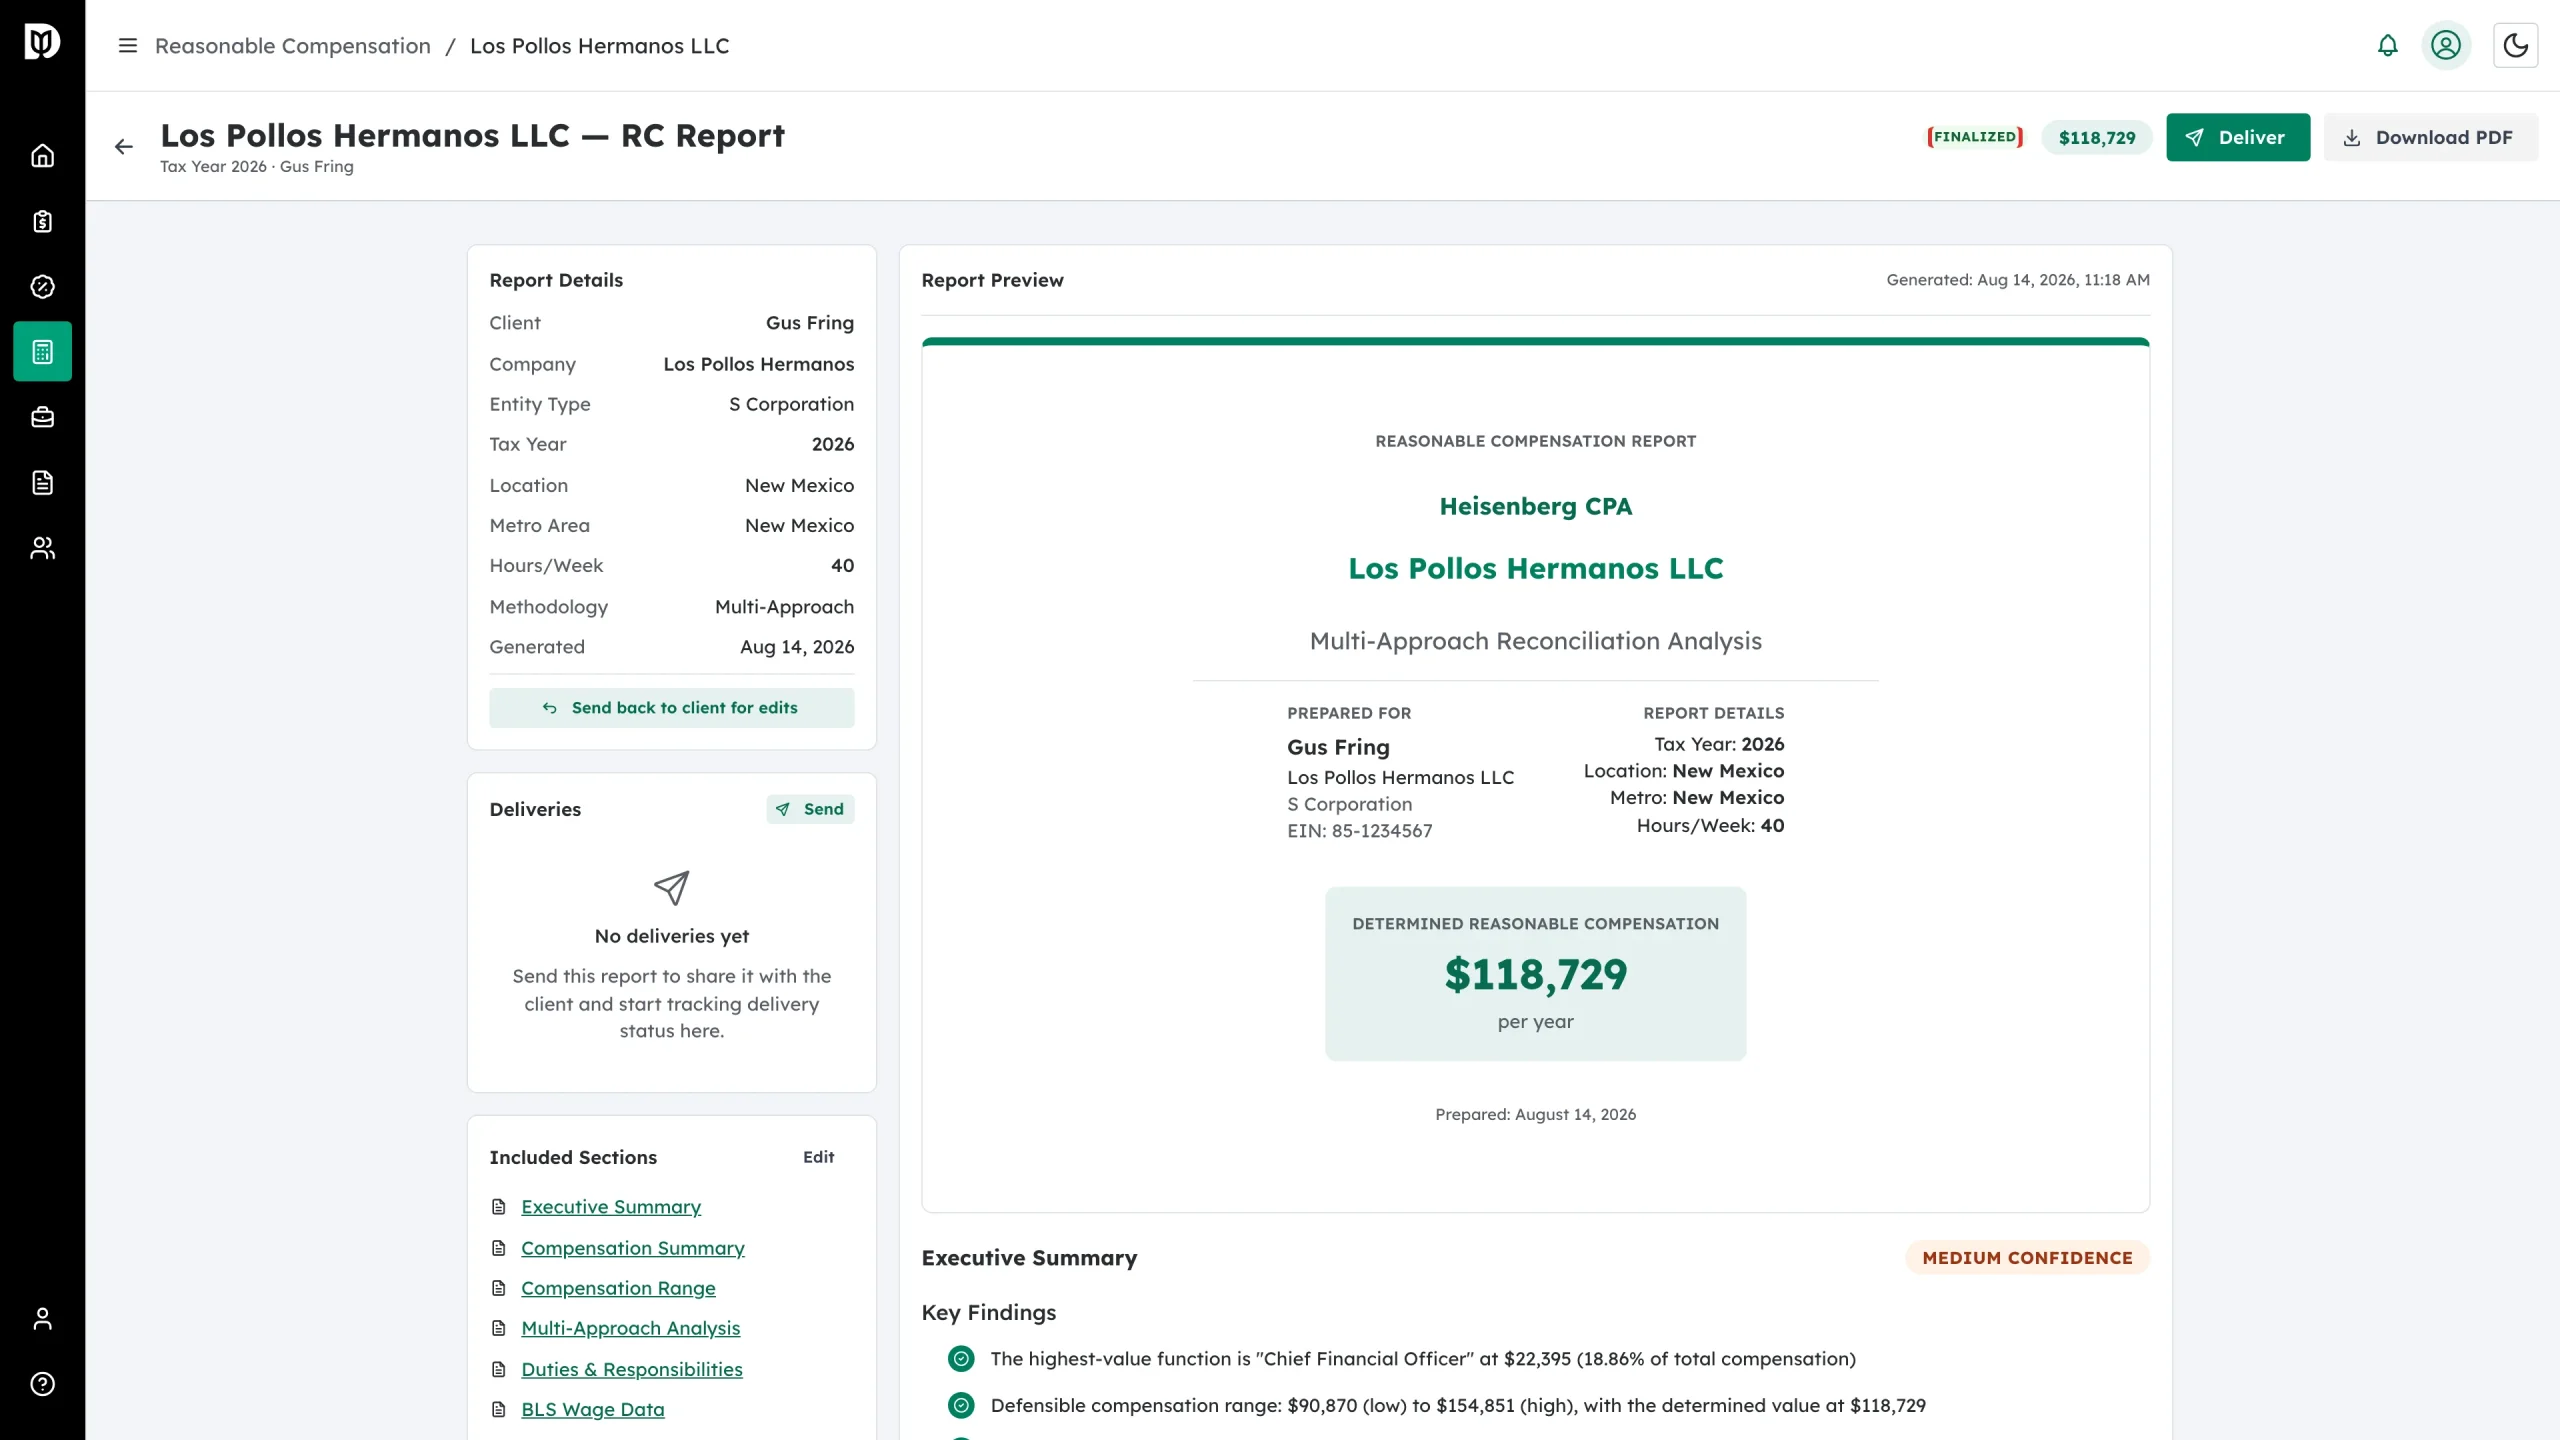
Download PDF now saves the stored, final PDF rather than a draft.
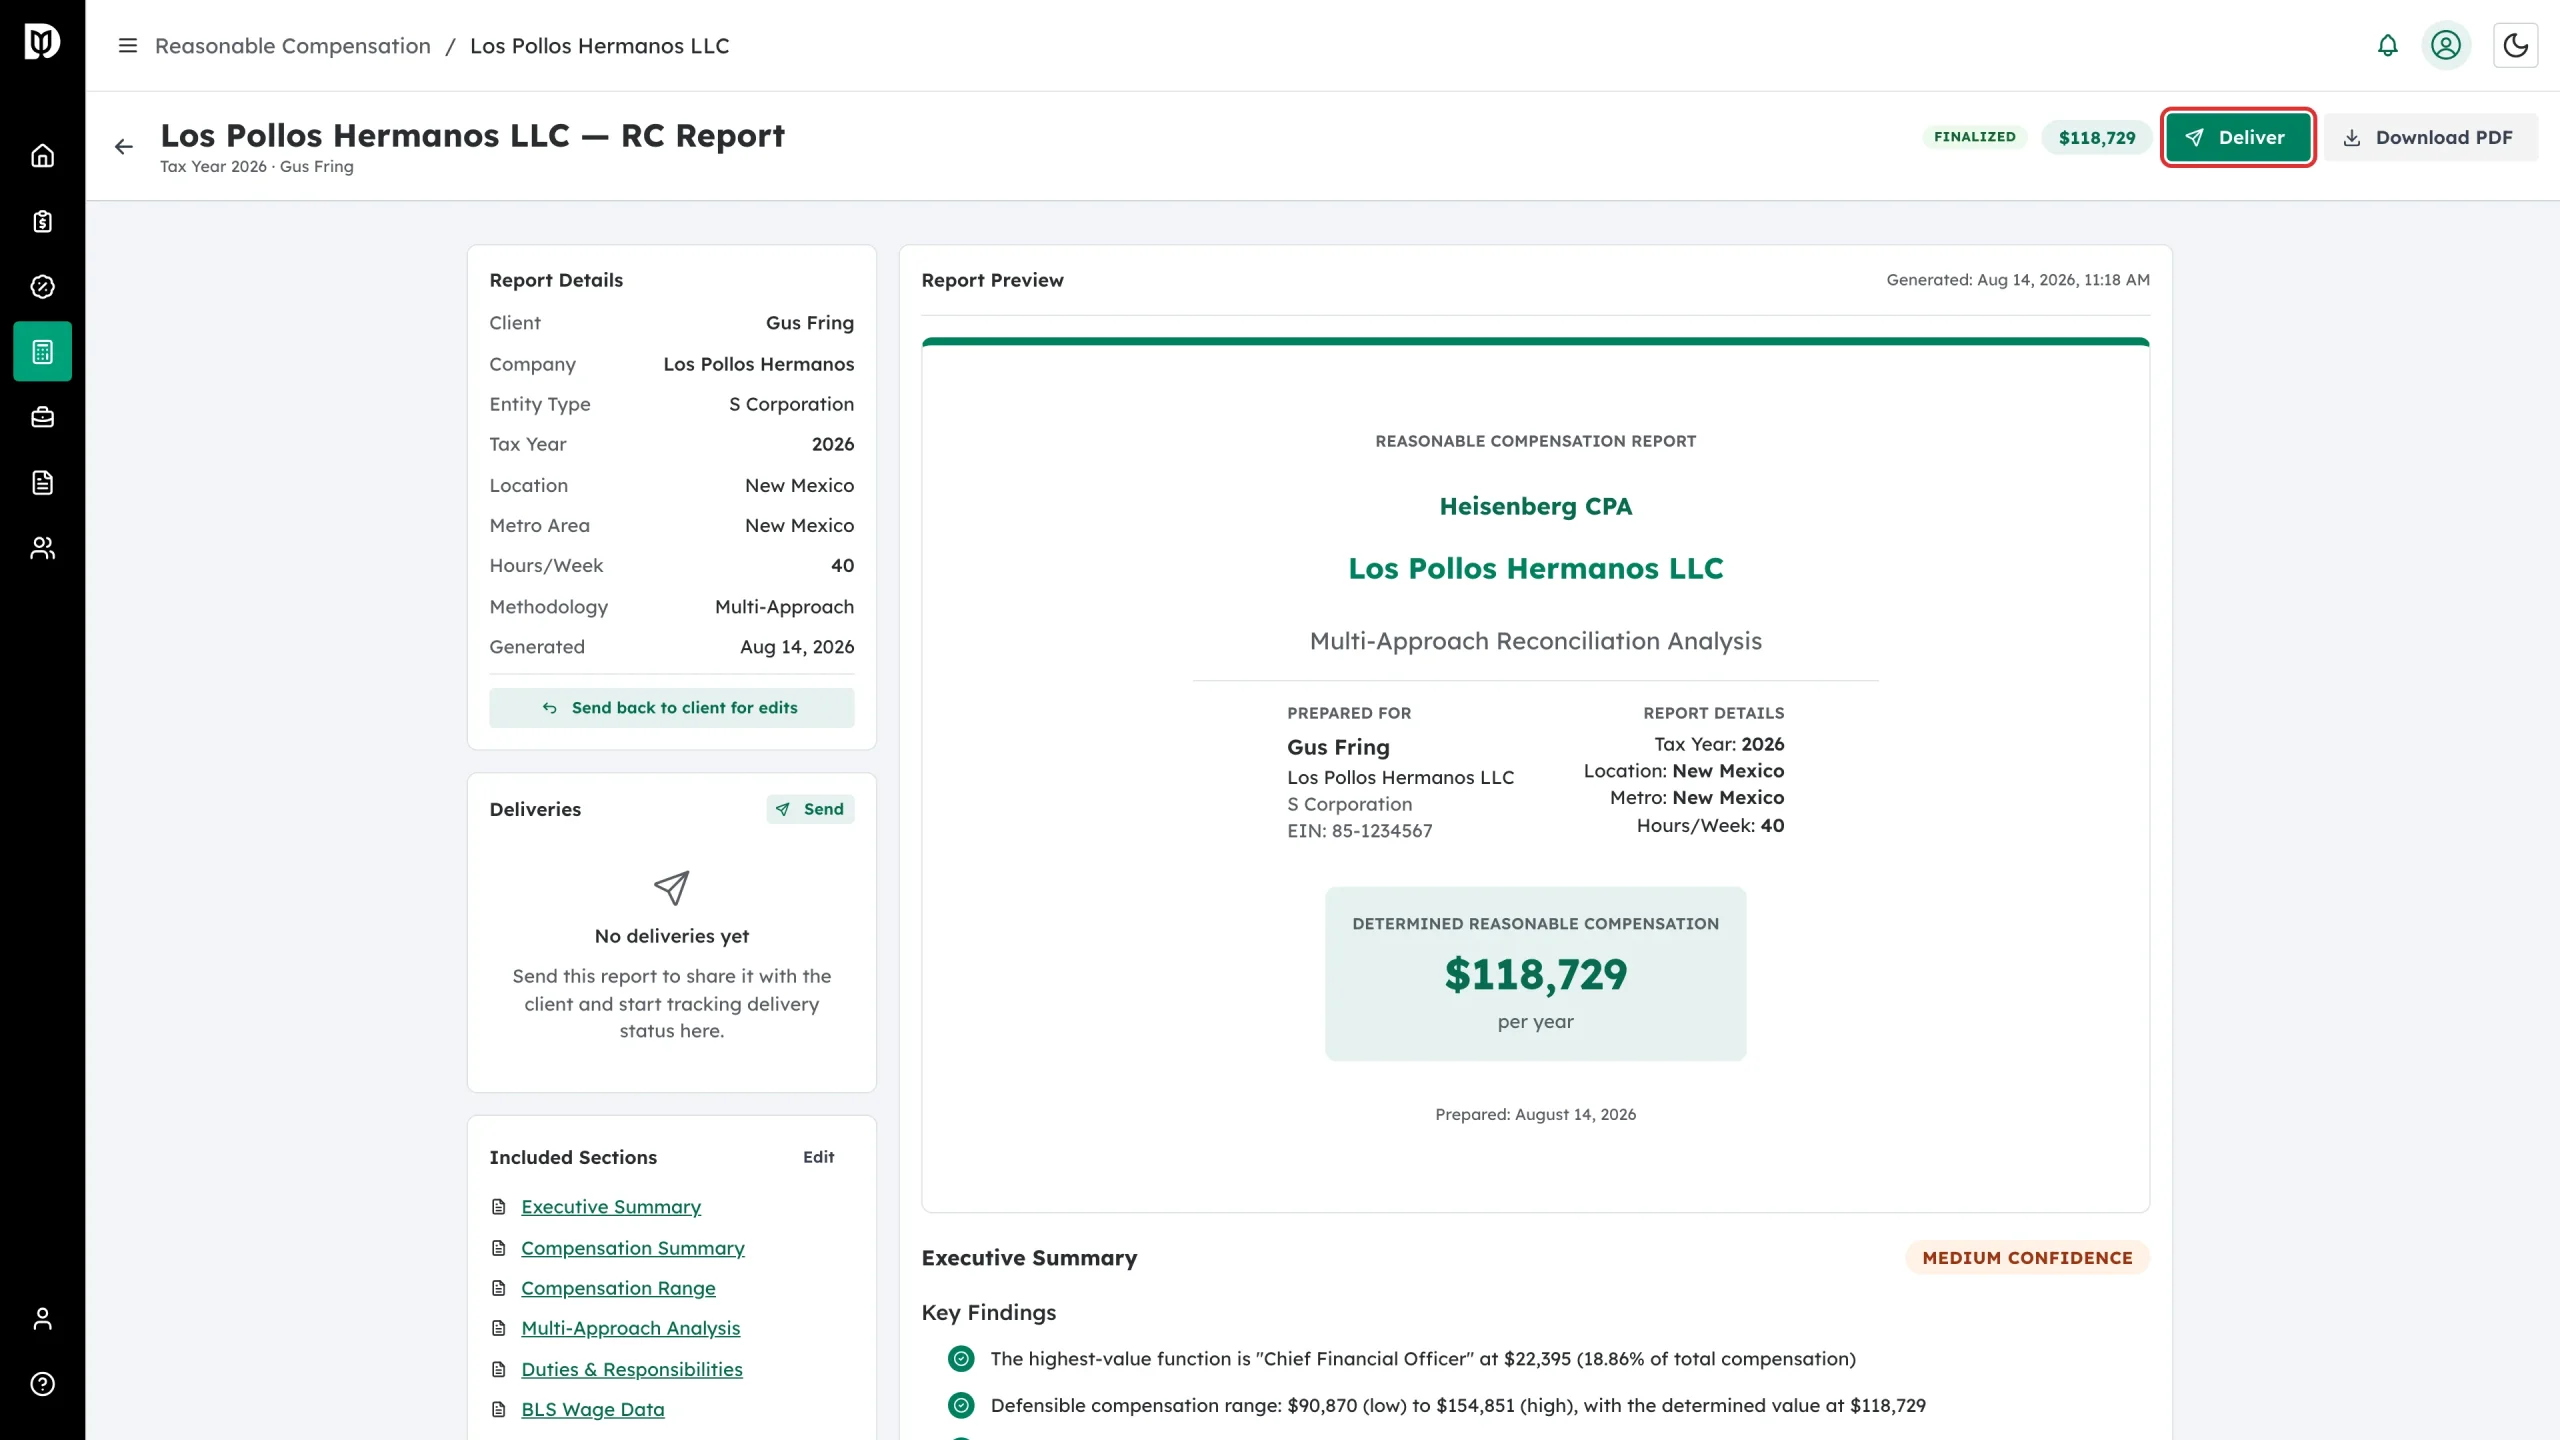
Step 16: Deliver it to the client
Click Deliver.
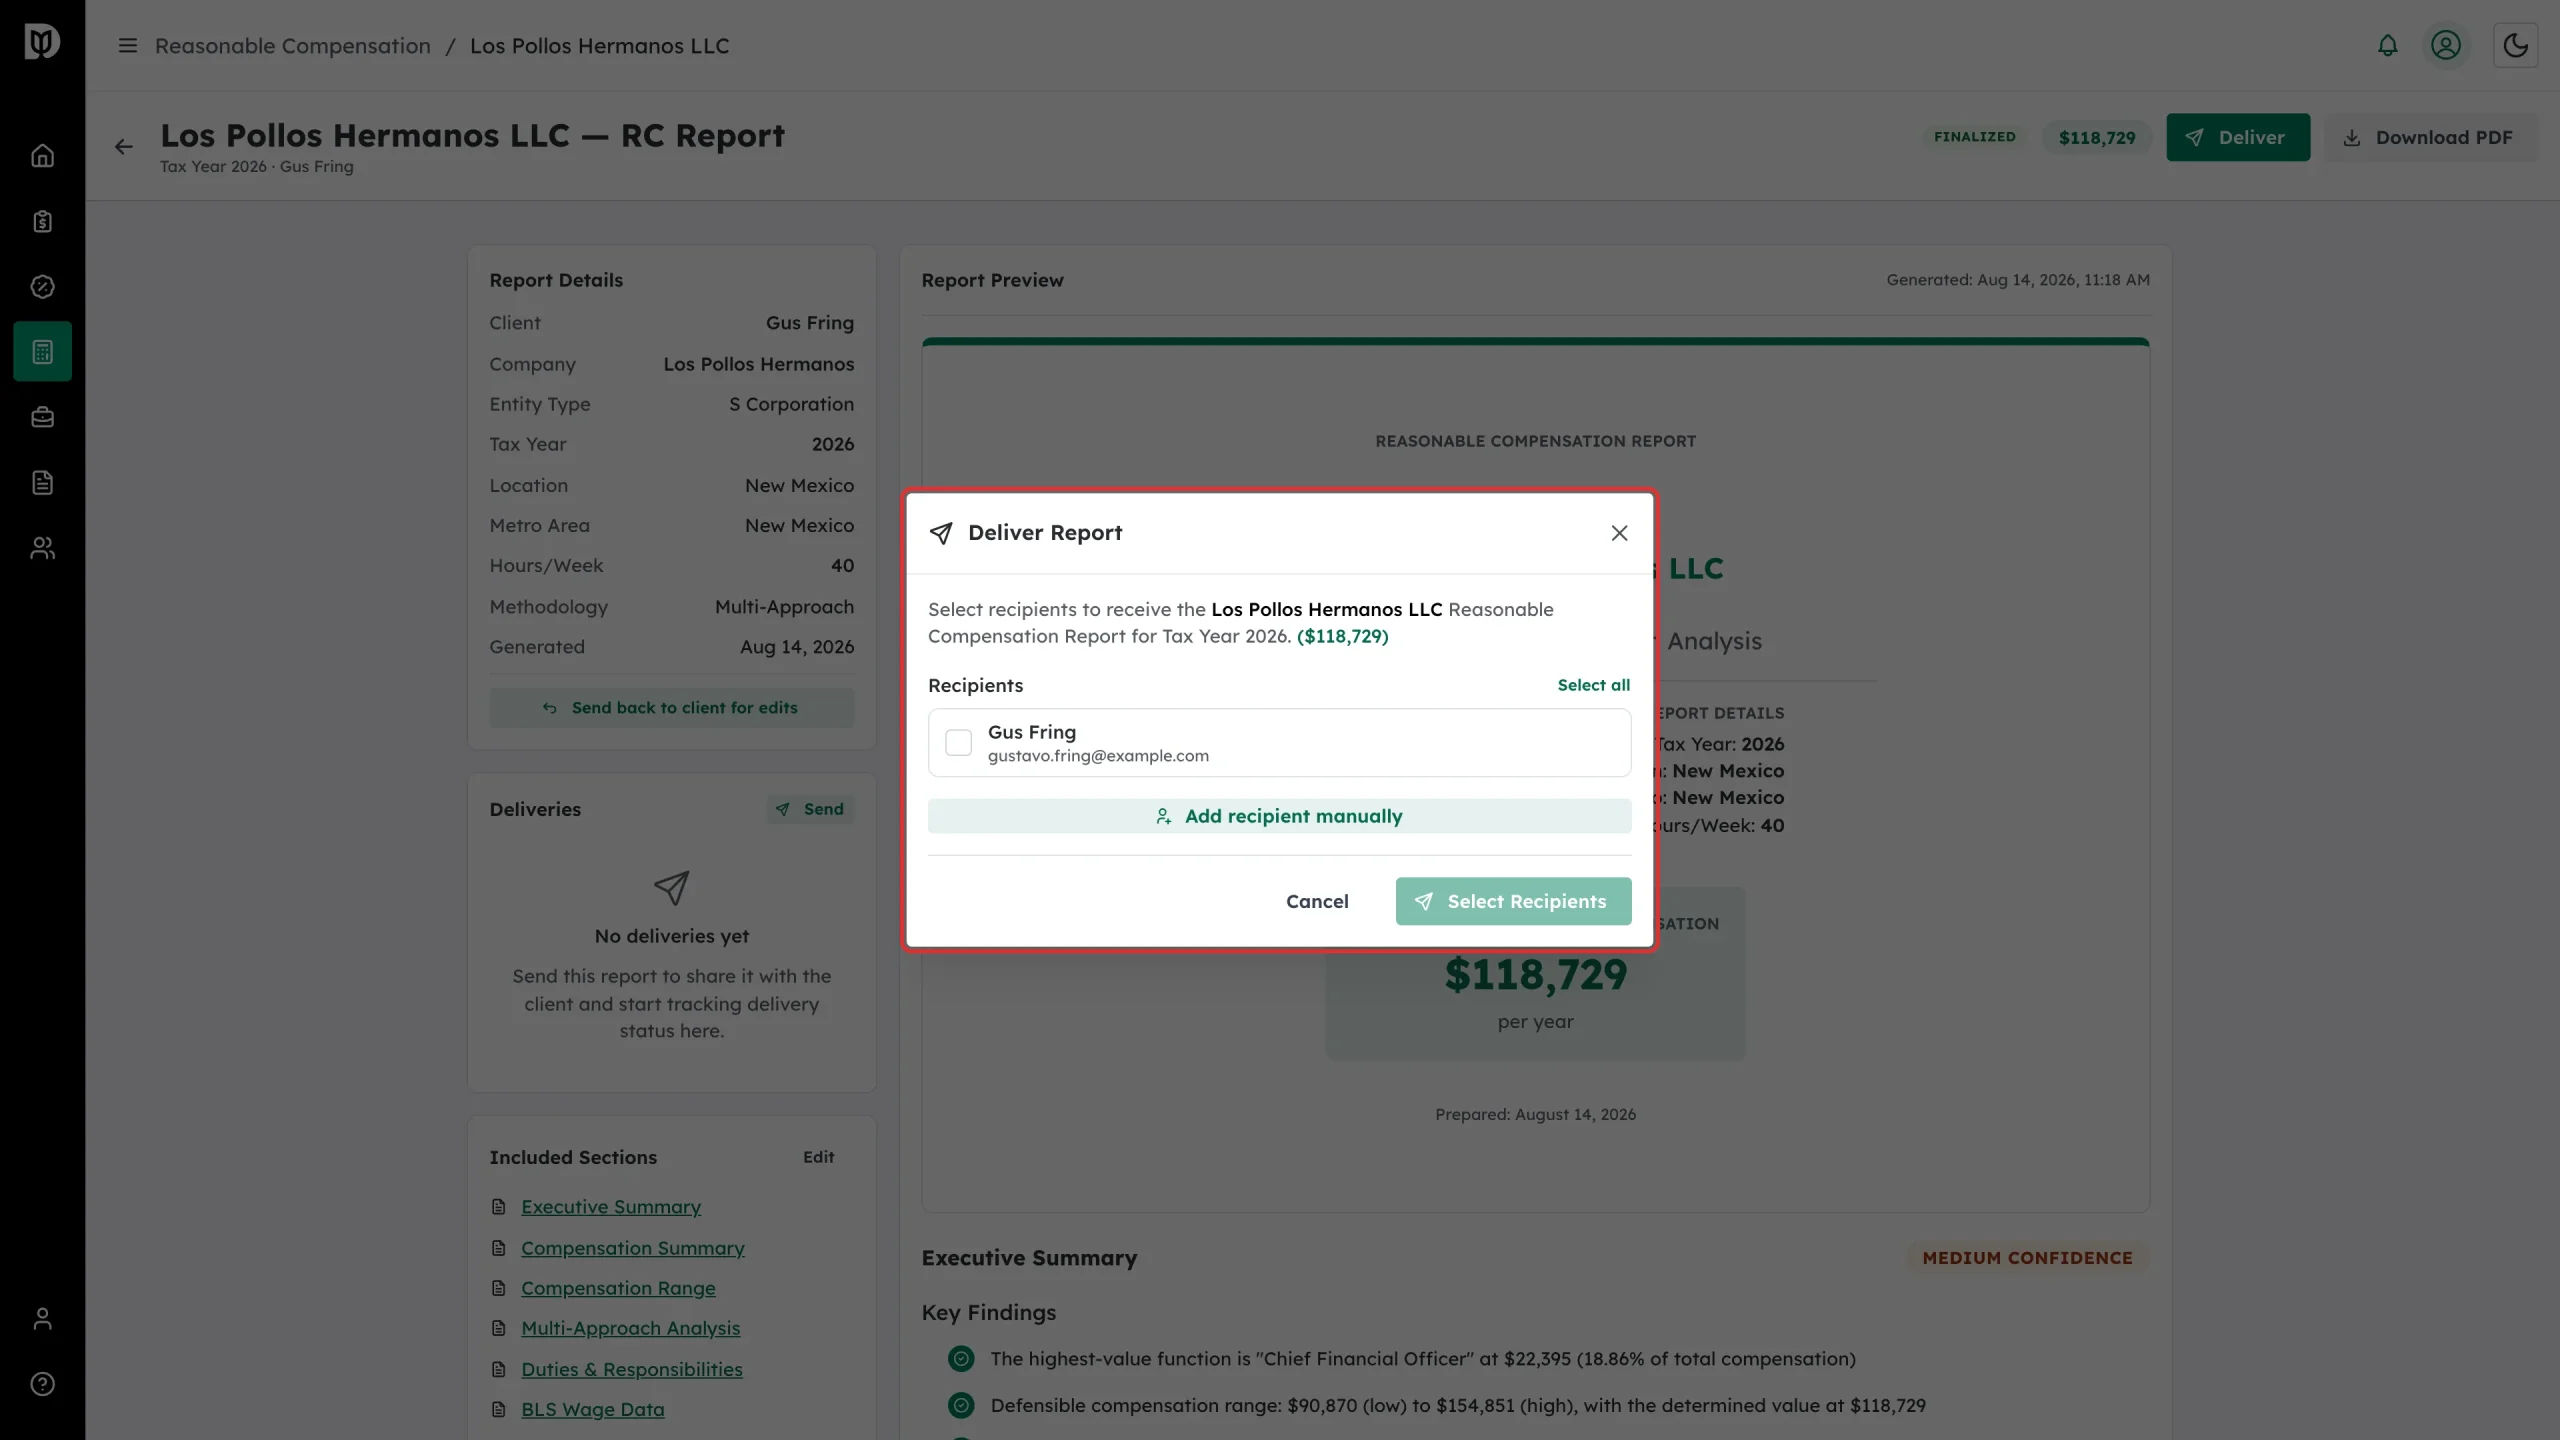
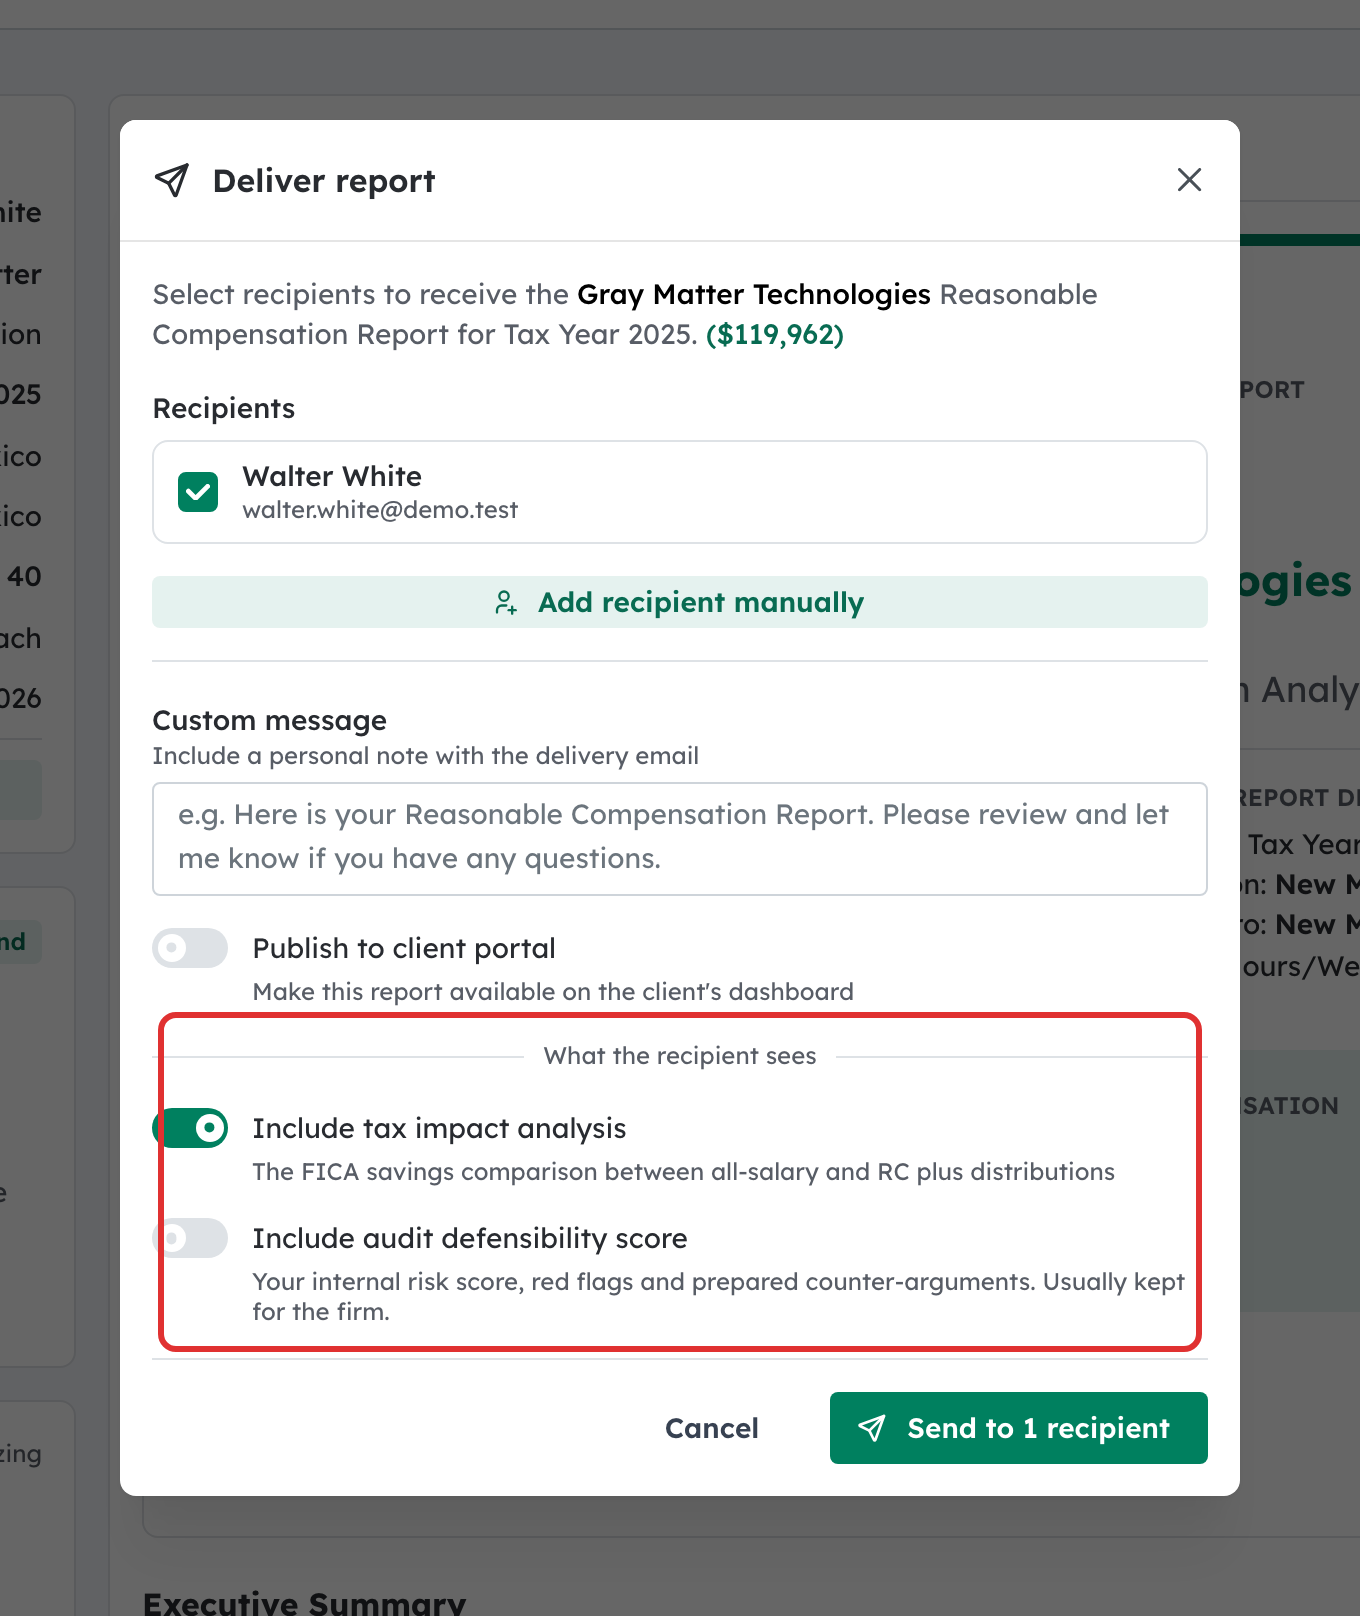
The Deliver Report window names the company, the tax year and the figure being sent.
Step 17: Choose the recipients
Tick the people who should receive it, or use Select all. Add recipient manually lets you type an address that is not on the record — a spouse or an attorney, say.
Step 18: Add a note and send
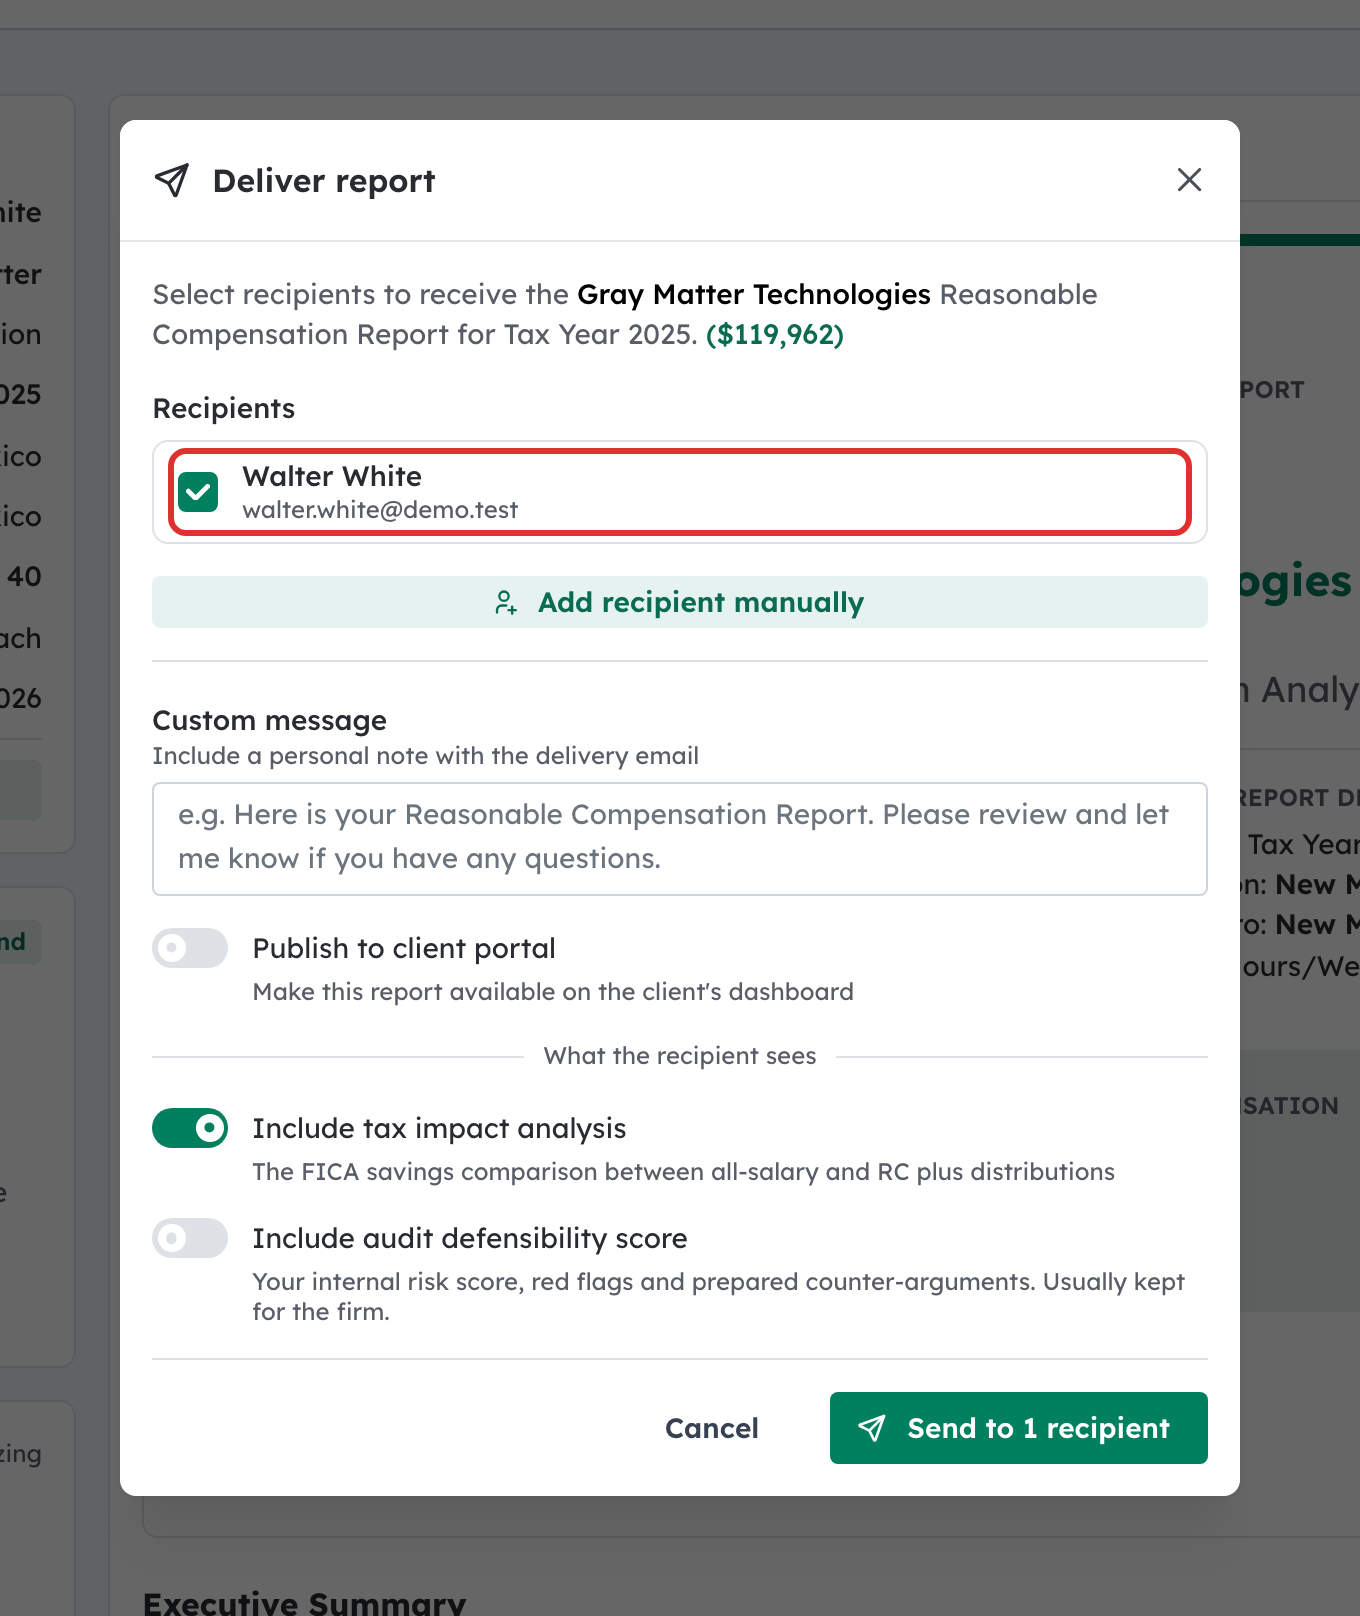
Selecting a recipient reveals two more controls:
- Custom message — a personal note included in the delivery email.
- Publish to client portal — also makes the report available on the client’s dashboard, so they can find it again without hunting for the email.
Under What the recipient sees, choose whether to Include tax impact analysis and Include audit defensibility score. The audit defensibility score is your internal risk score and is usually kept for the firm. If you hide a section that the Professional Narrative still discusses, a warning tells you so; edit the narrative or hide it too.
Click Send to N Recipients.
Step 19: Track the delivery
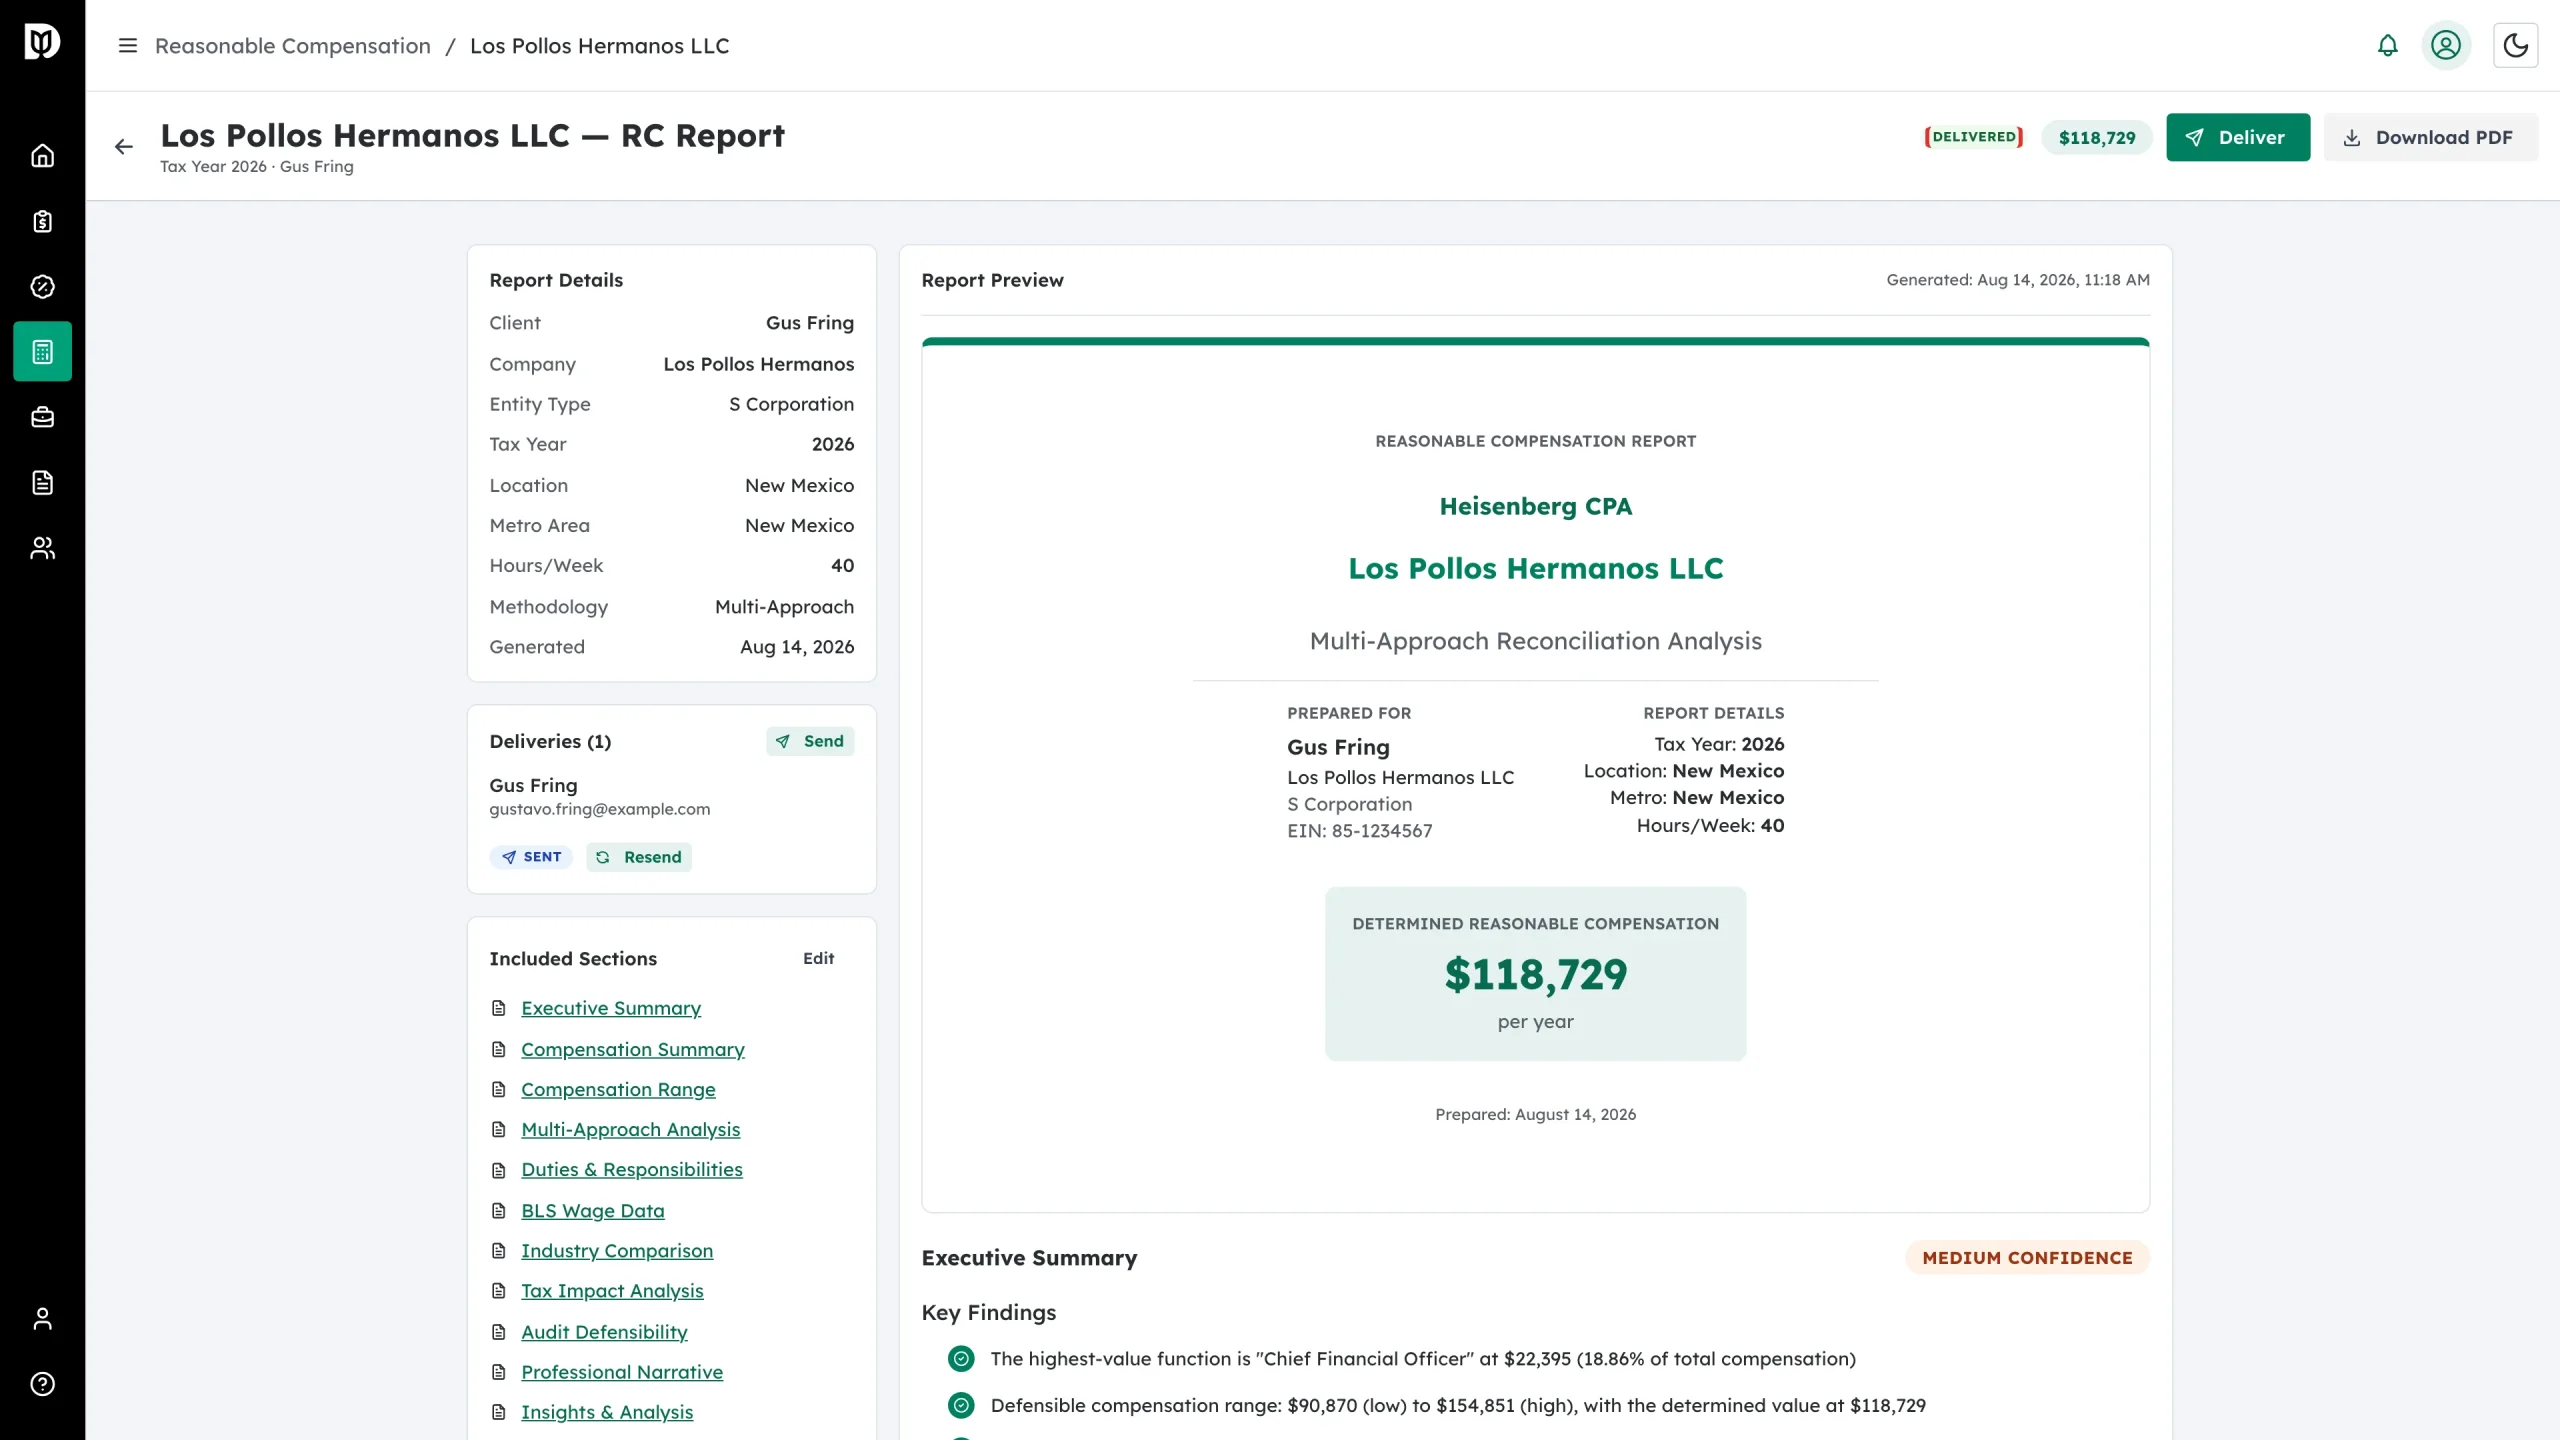
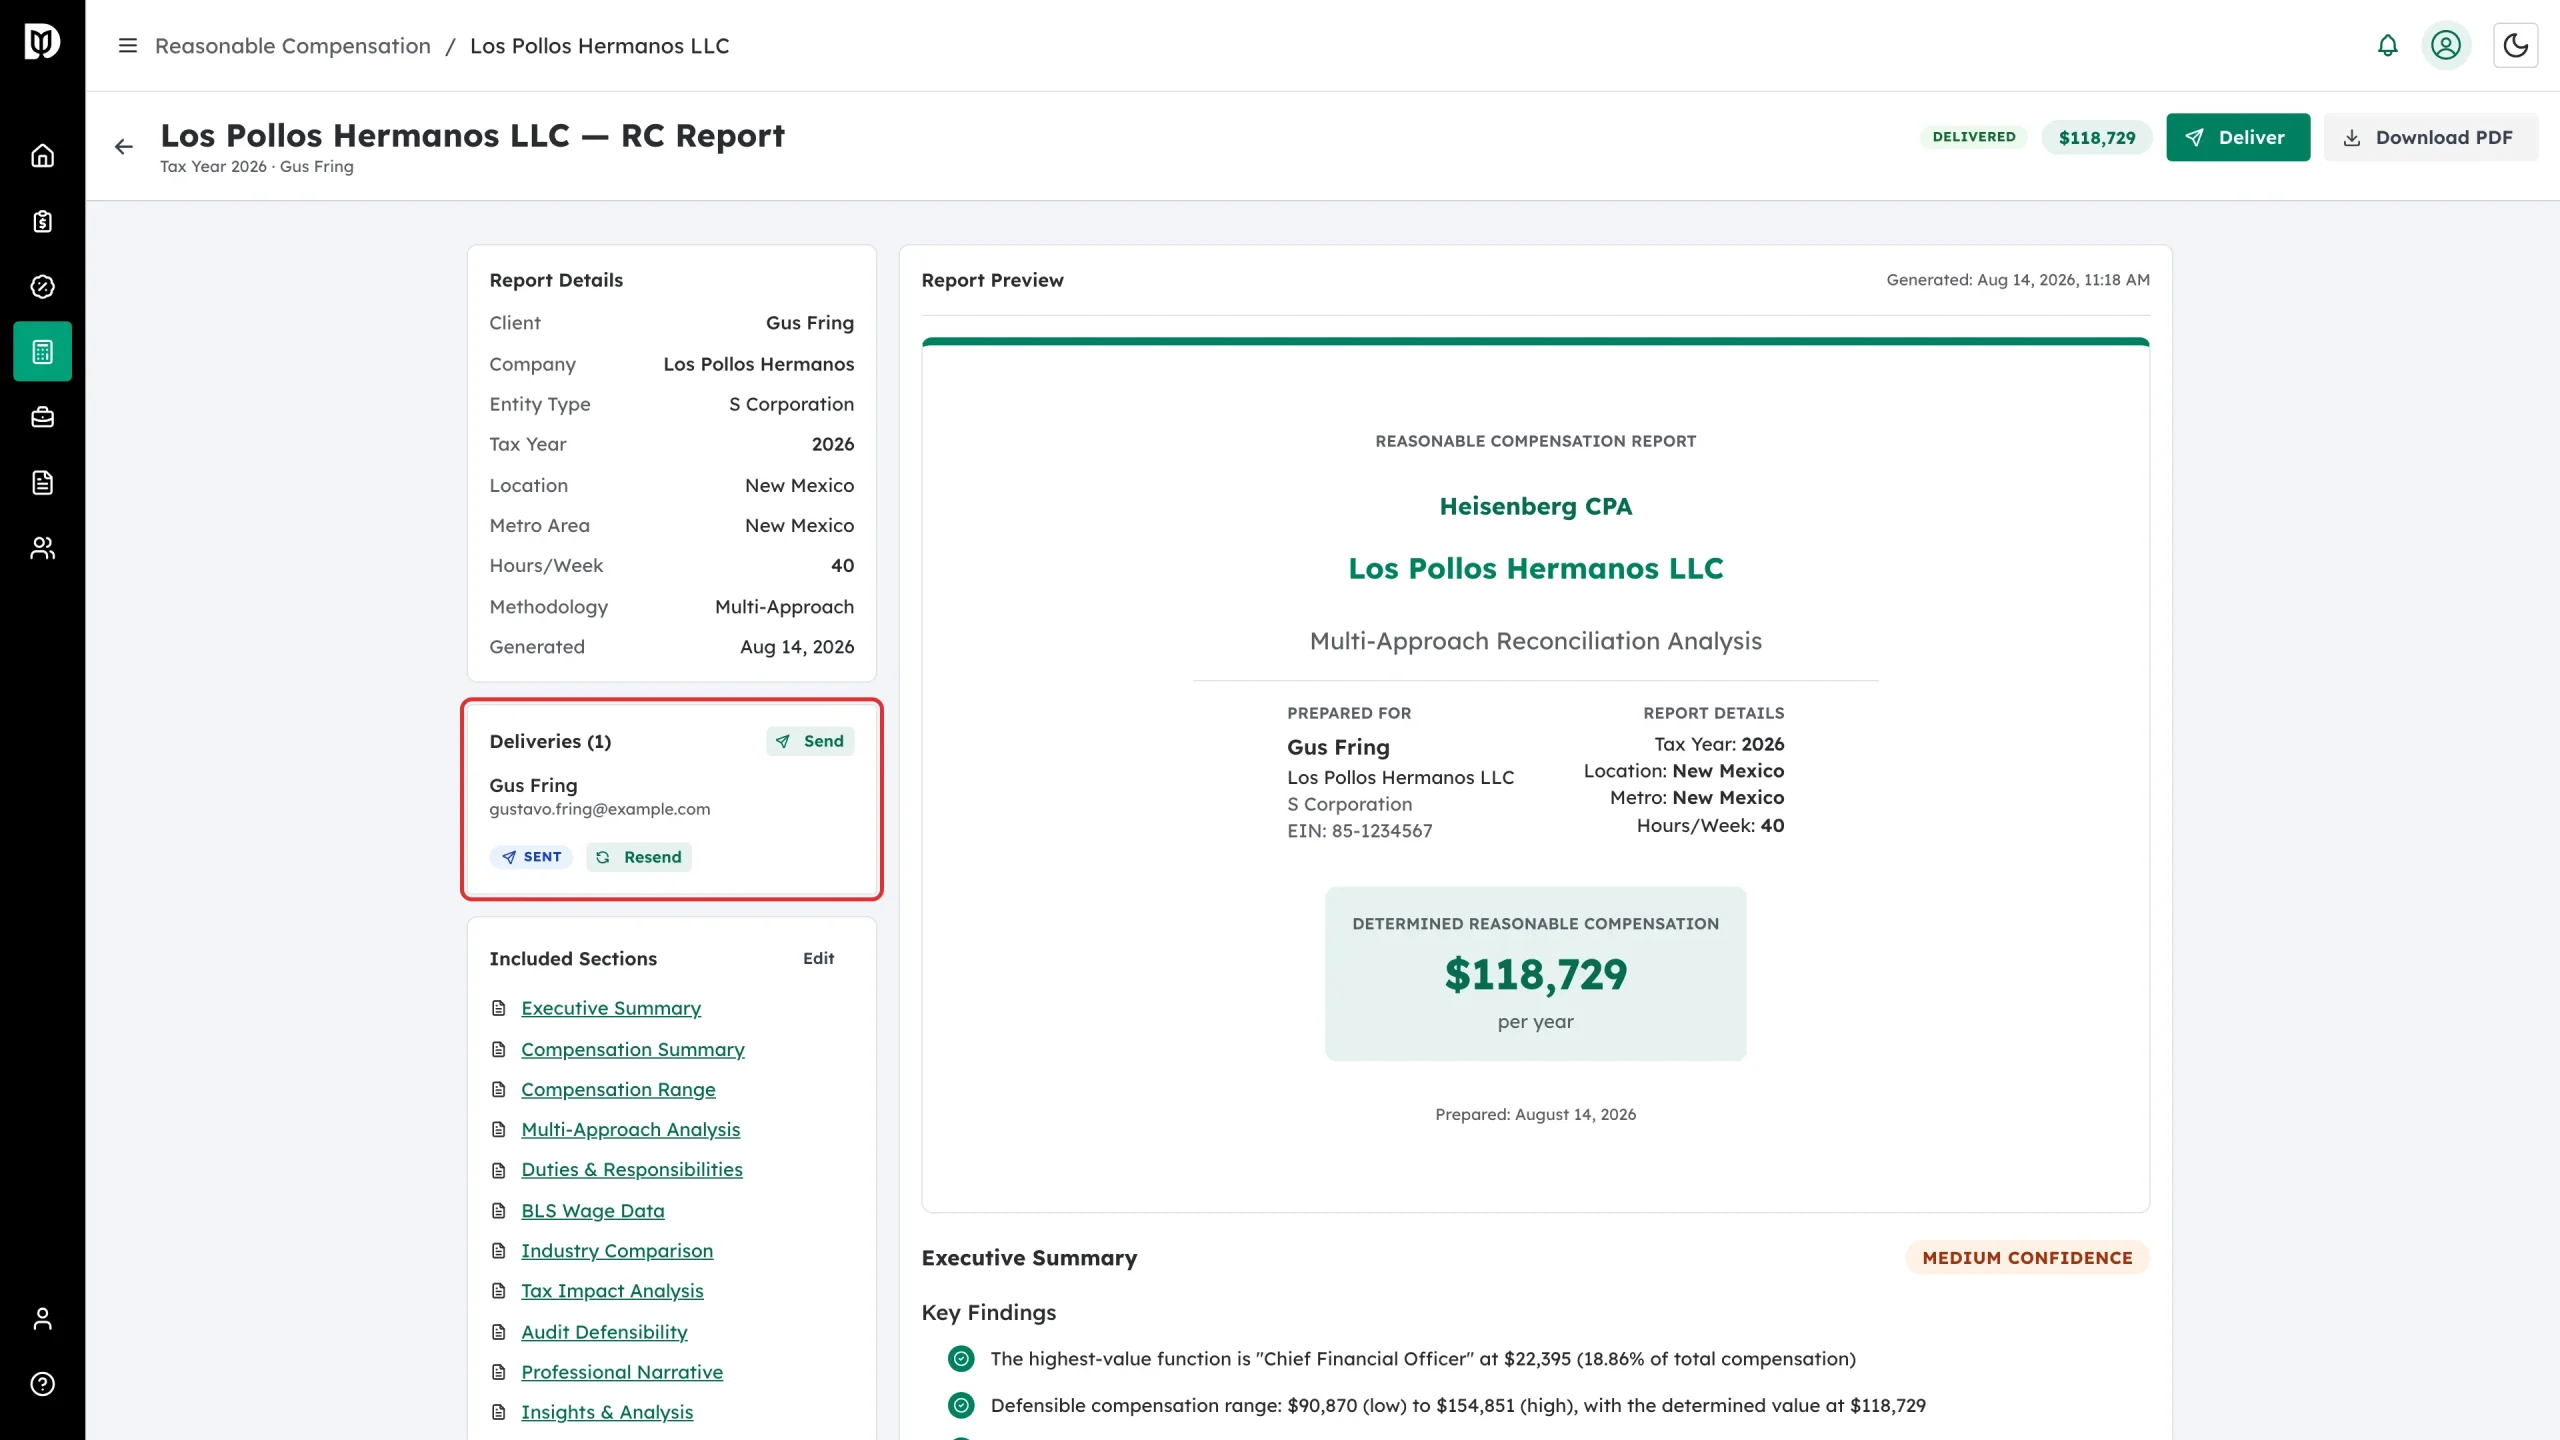
The status becomes DELIVERED and a Deliveries panel appears on the left, listing each recipient with a SENT badge and a Resend button.
What happens next
The client receives the report by email and, if you published it, on their dashboard. Keep the PDF in the client file as the documentation behind the salary you set. If wage data or the client’s hours change, duplicate the study for the next tax year rather than editing the delivered one — the Monitor view flags studies that are getting stale.
Troubleshooting
- The page shows “Oops! Something Went Wrong” right after finalizing. The finalize itself usually succeeded. Reload the page — you should see the report with a FINALIZED badge. If it still shows as Completed, finalize again.
- Finalize is not offered. Only a Completed study can be finalized. A draft still needs calculating; a finalized one is already locked.
- Deliver is not offered. Finalize the report first.
- The send button reads “Select Recipients” and will not click. Nobody is ticked. Choose at least one recipient.
- The Income Approach shows N/A. No company financials were entered. Use Edit survey to add revenue, assets, employees and shareholder compensation, then Recalculate.
- Confidence is Medium or Low. Usually national rather than state or metro wage data, or an older data year. Adding a metro area or revisiting the role selection normally raises it.
- The client needs a change after delivery. Use Send back to client for edits on a finalized report to reopen their answers. A report that has already been delivered cannot be sent back.