This guide is for business owners and staff using the Debits client portal. It shows how to create a new account (an expense or income category) when none of the existing ones fit the transaction you are categorising.
Before you begin
- Your accounting firm has to allow clients to create accounts. If the + button next to Select Account is missing, they have not, and you should ask them to add the account for you.
- Check the existing list first. Type in the account search box before creating a duplicate.
Step 1: Open the transaction
Go to Bookkeeping, open your company, and find the transaction on the Categorize tab.
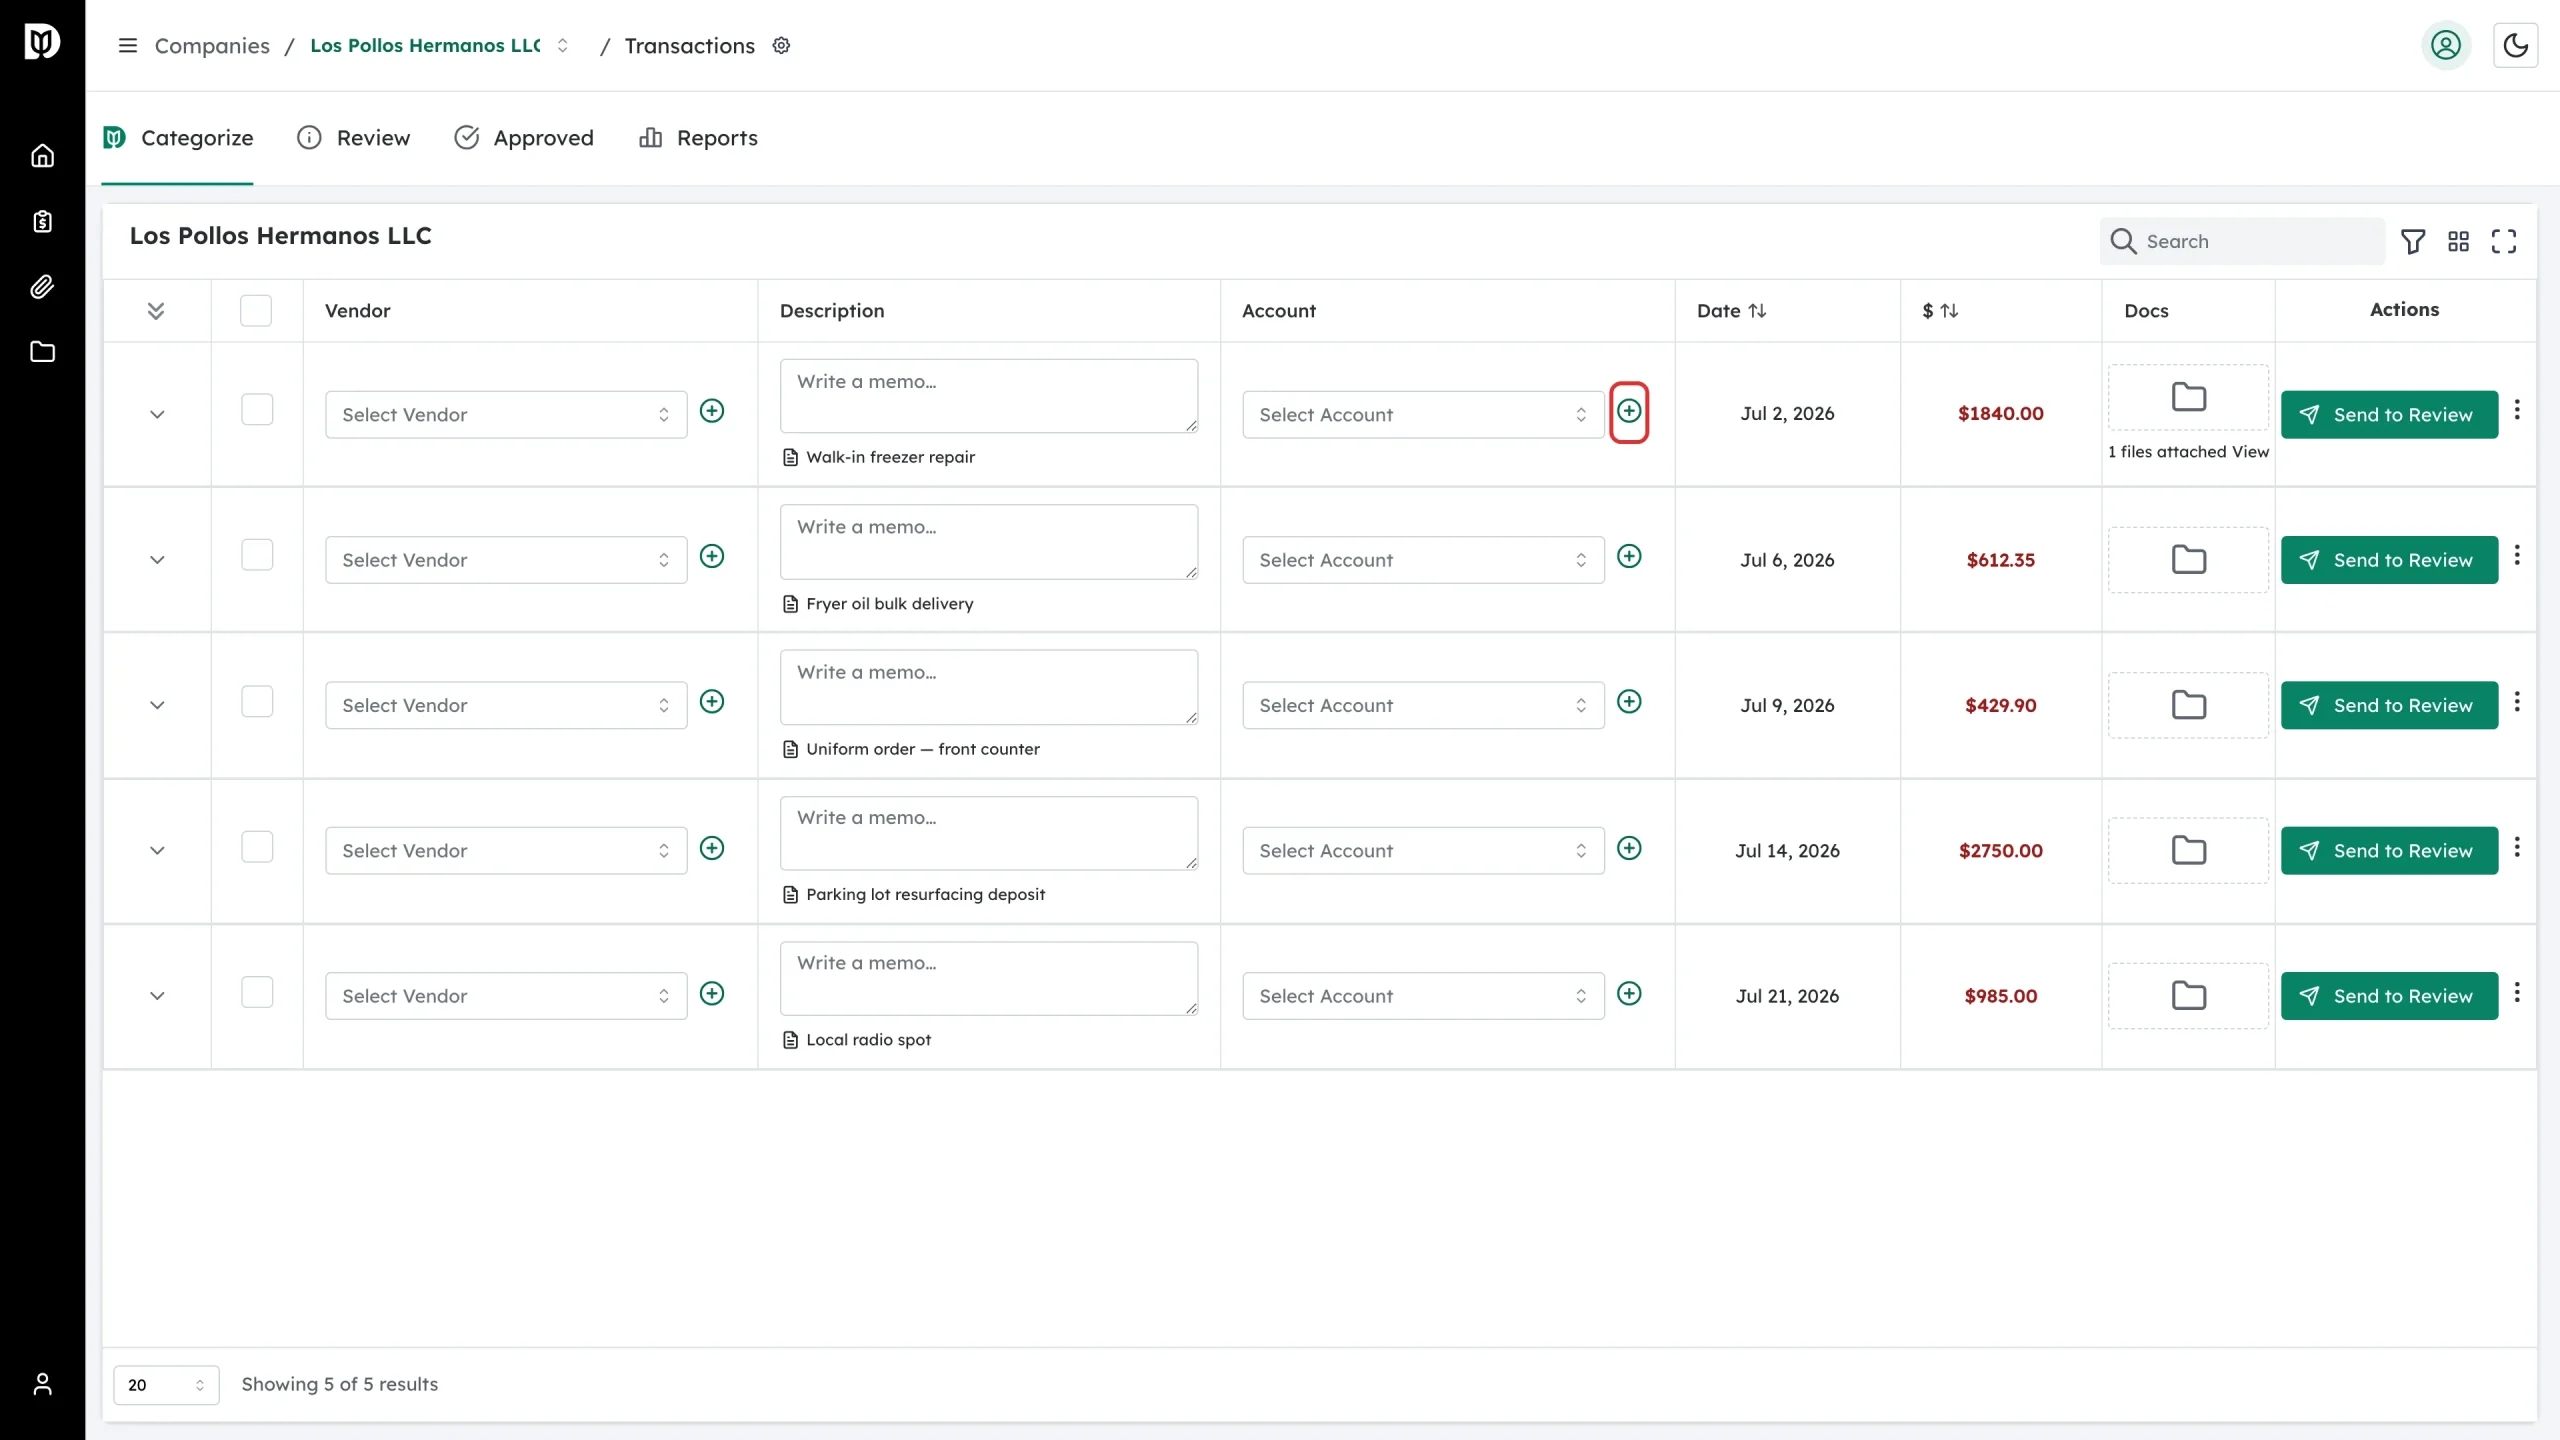
Step 2: Click the + beside Select Account
The + sits immediately to the right of the Select Account field on that row.
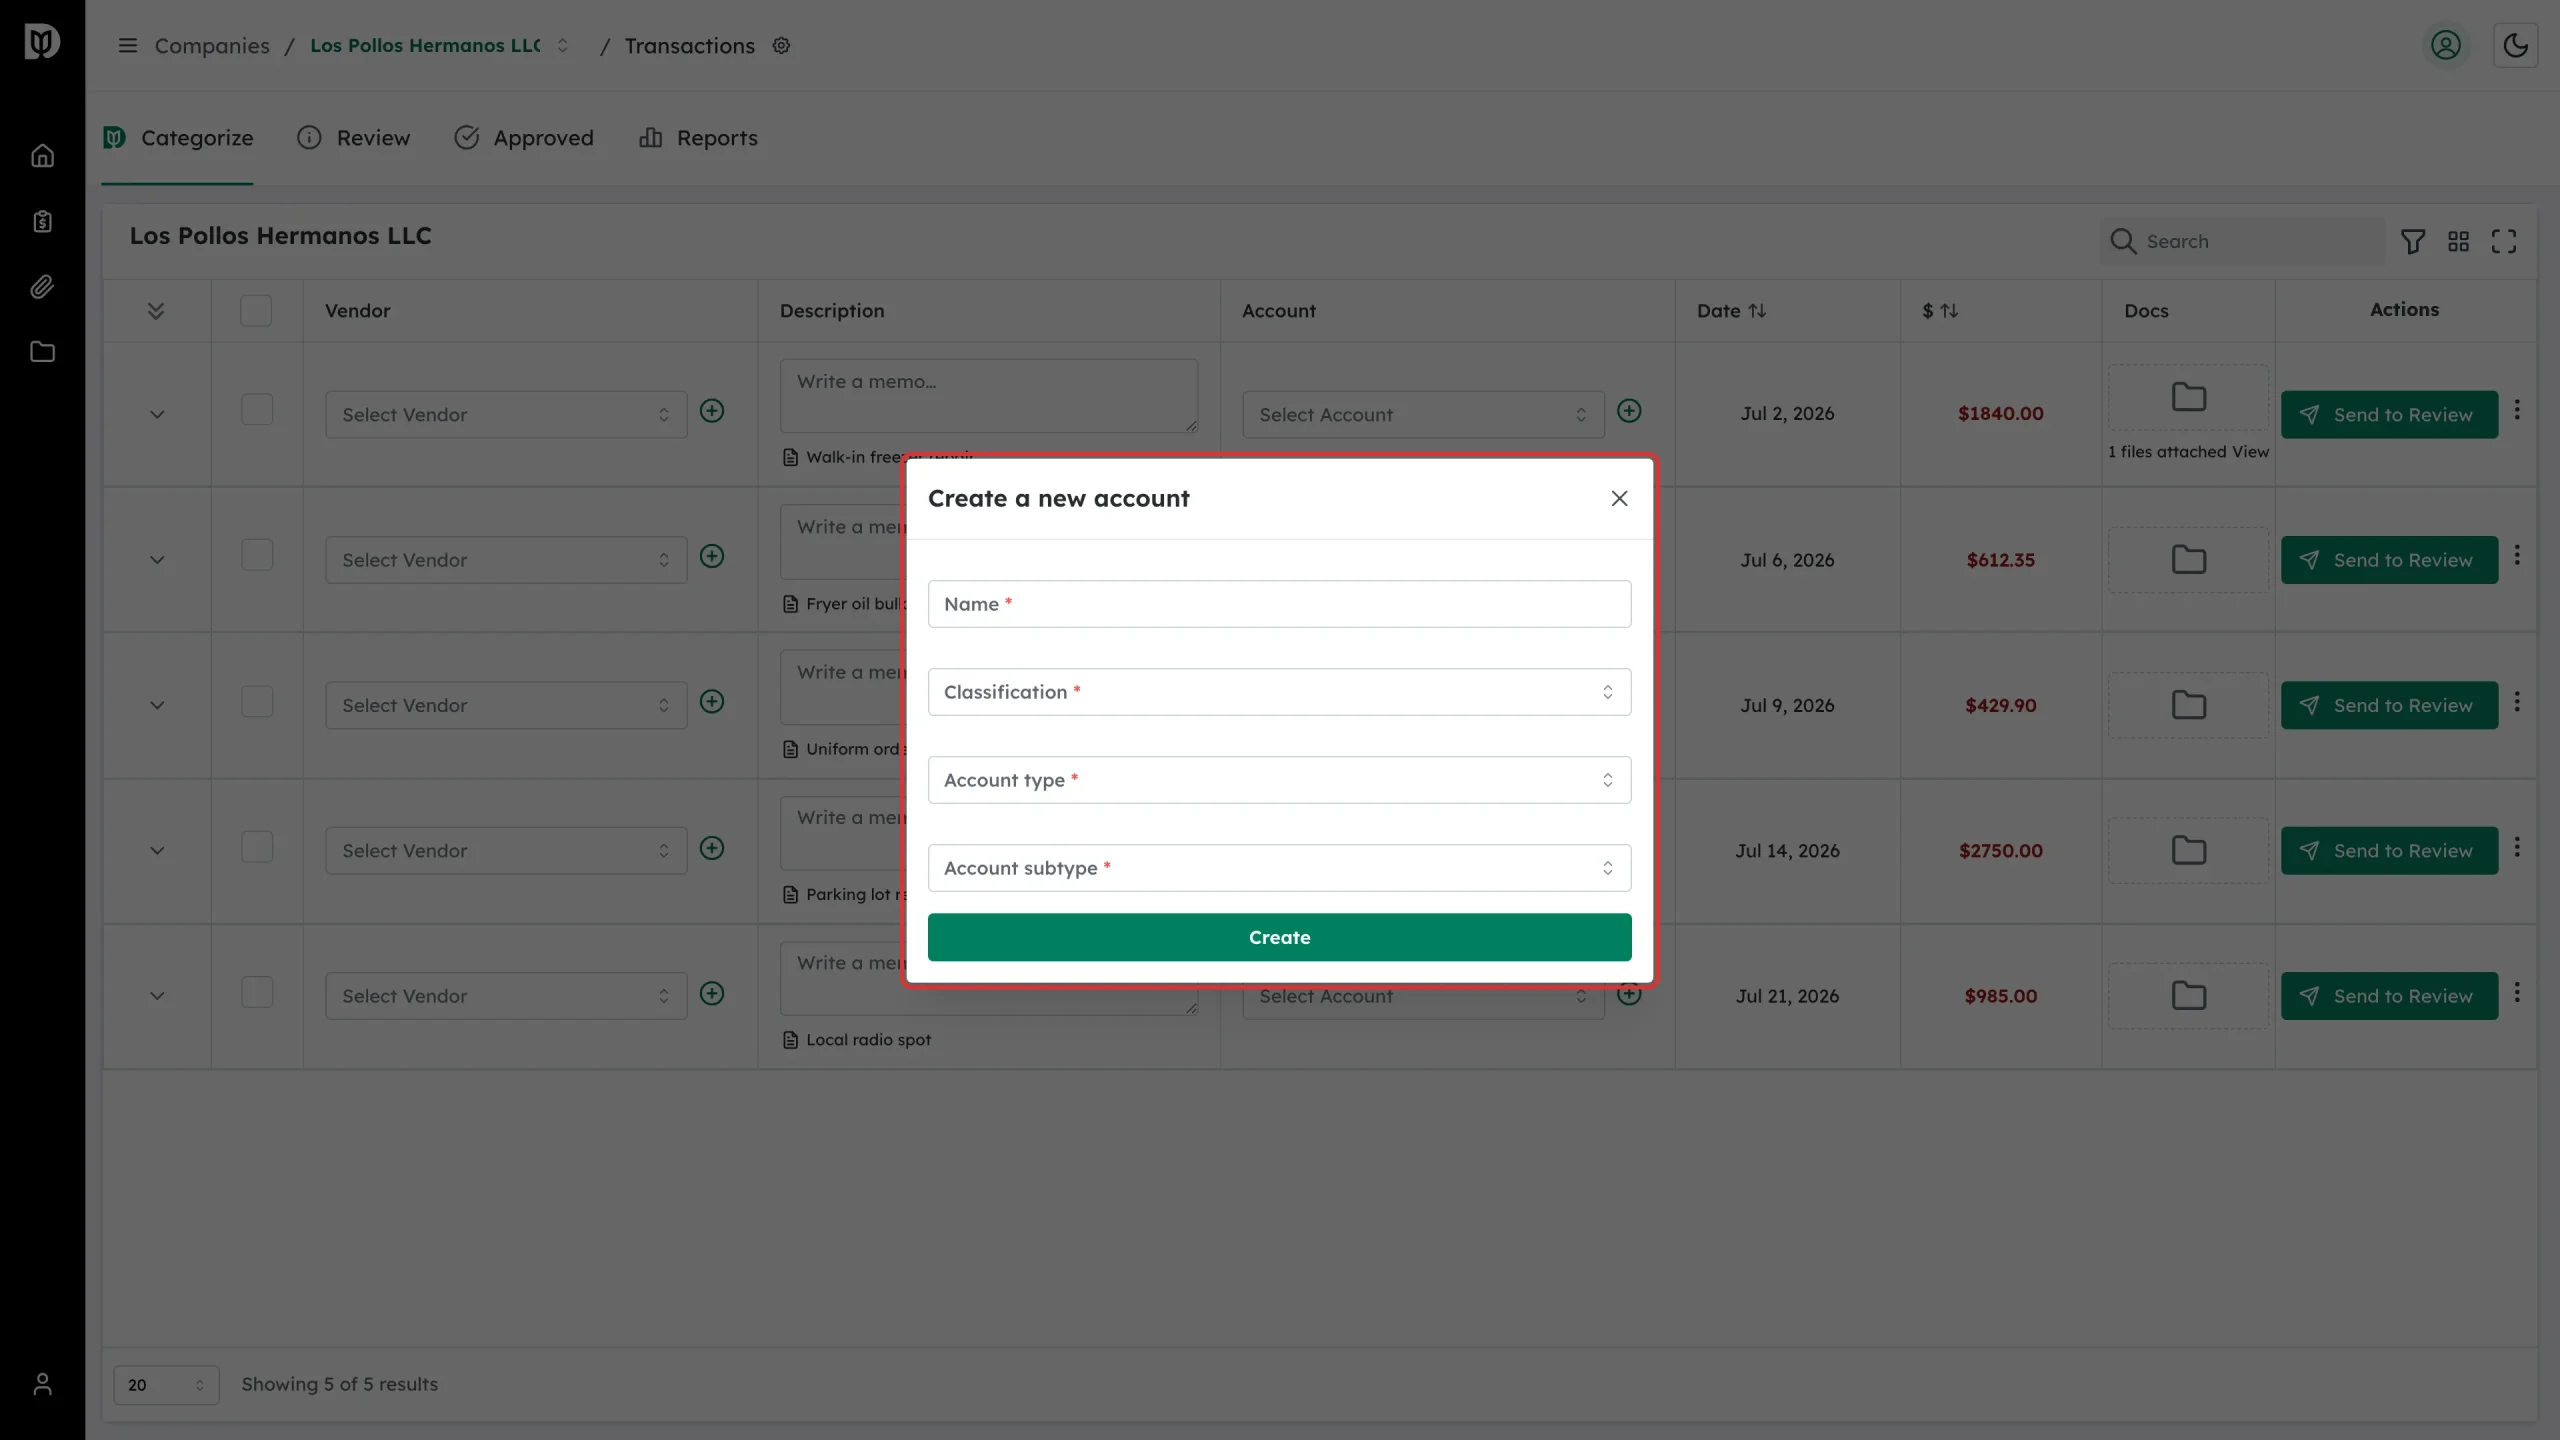
Step 3: Name the account
The Create a new account window opens. Type a short, clear name in Name — for example, Restaurant Equipment Repairs.
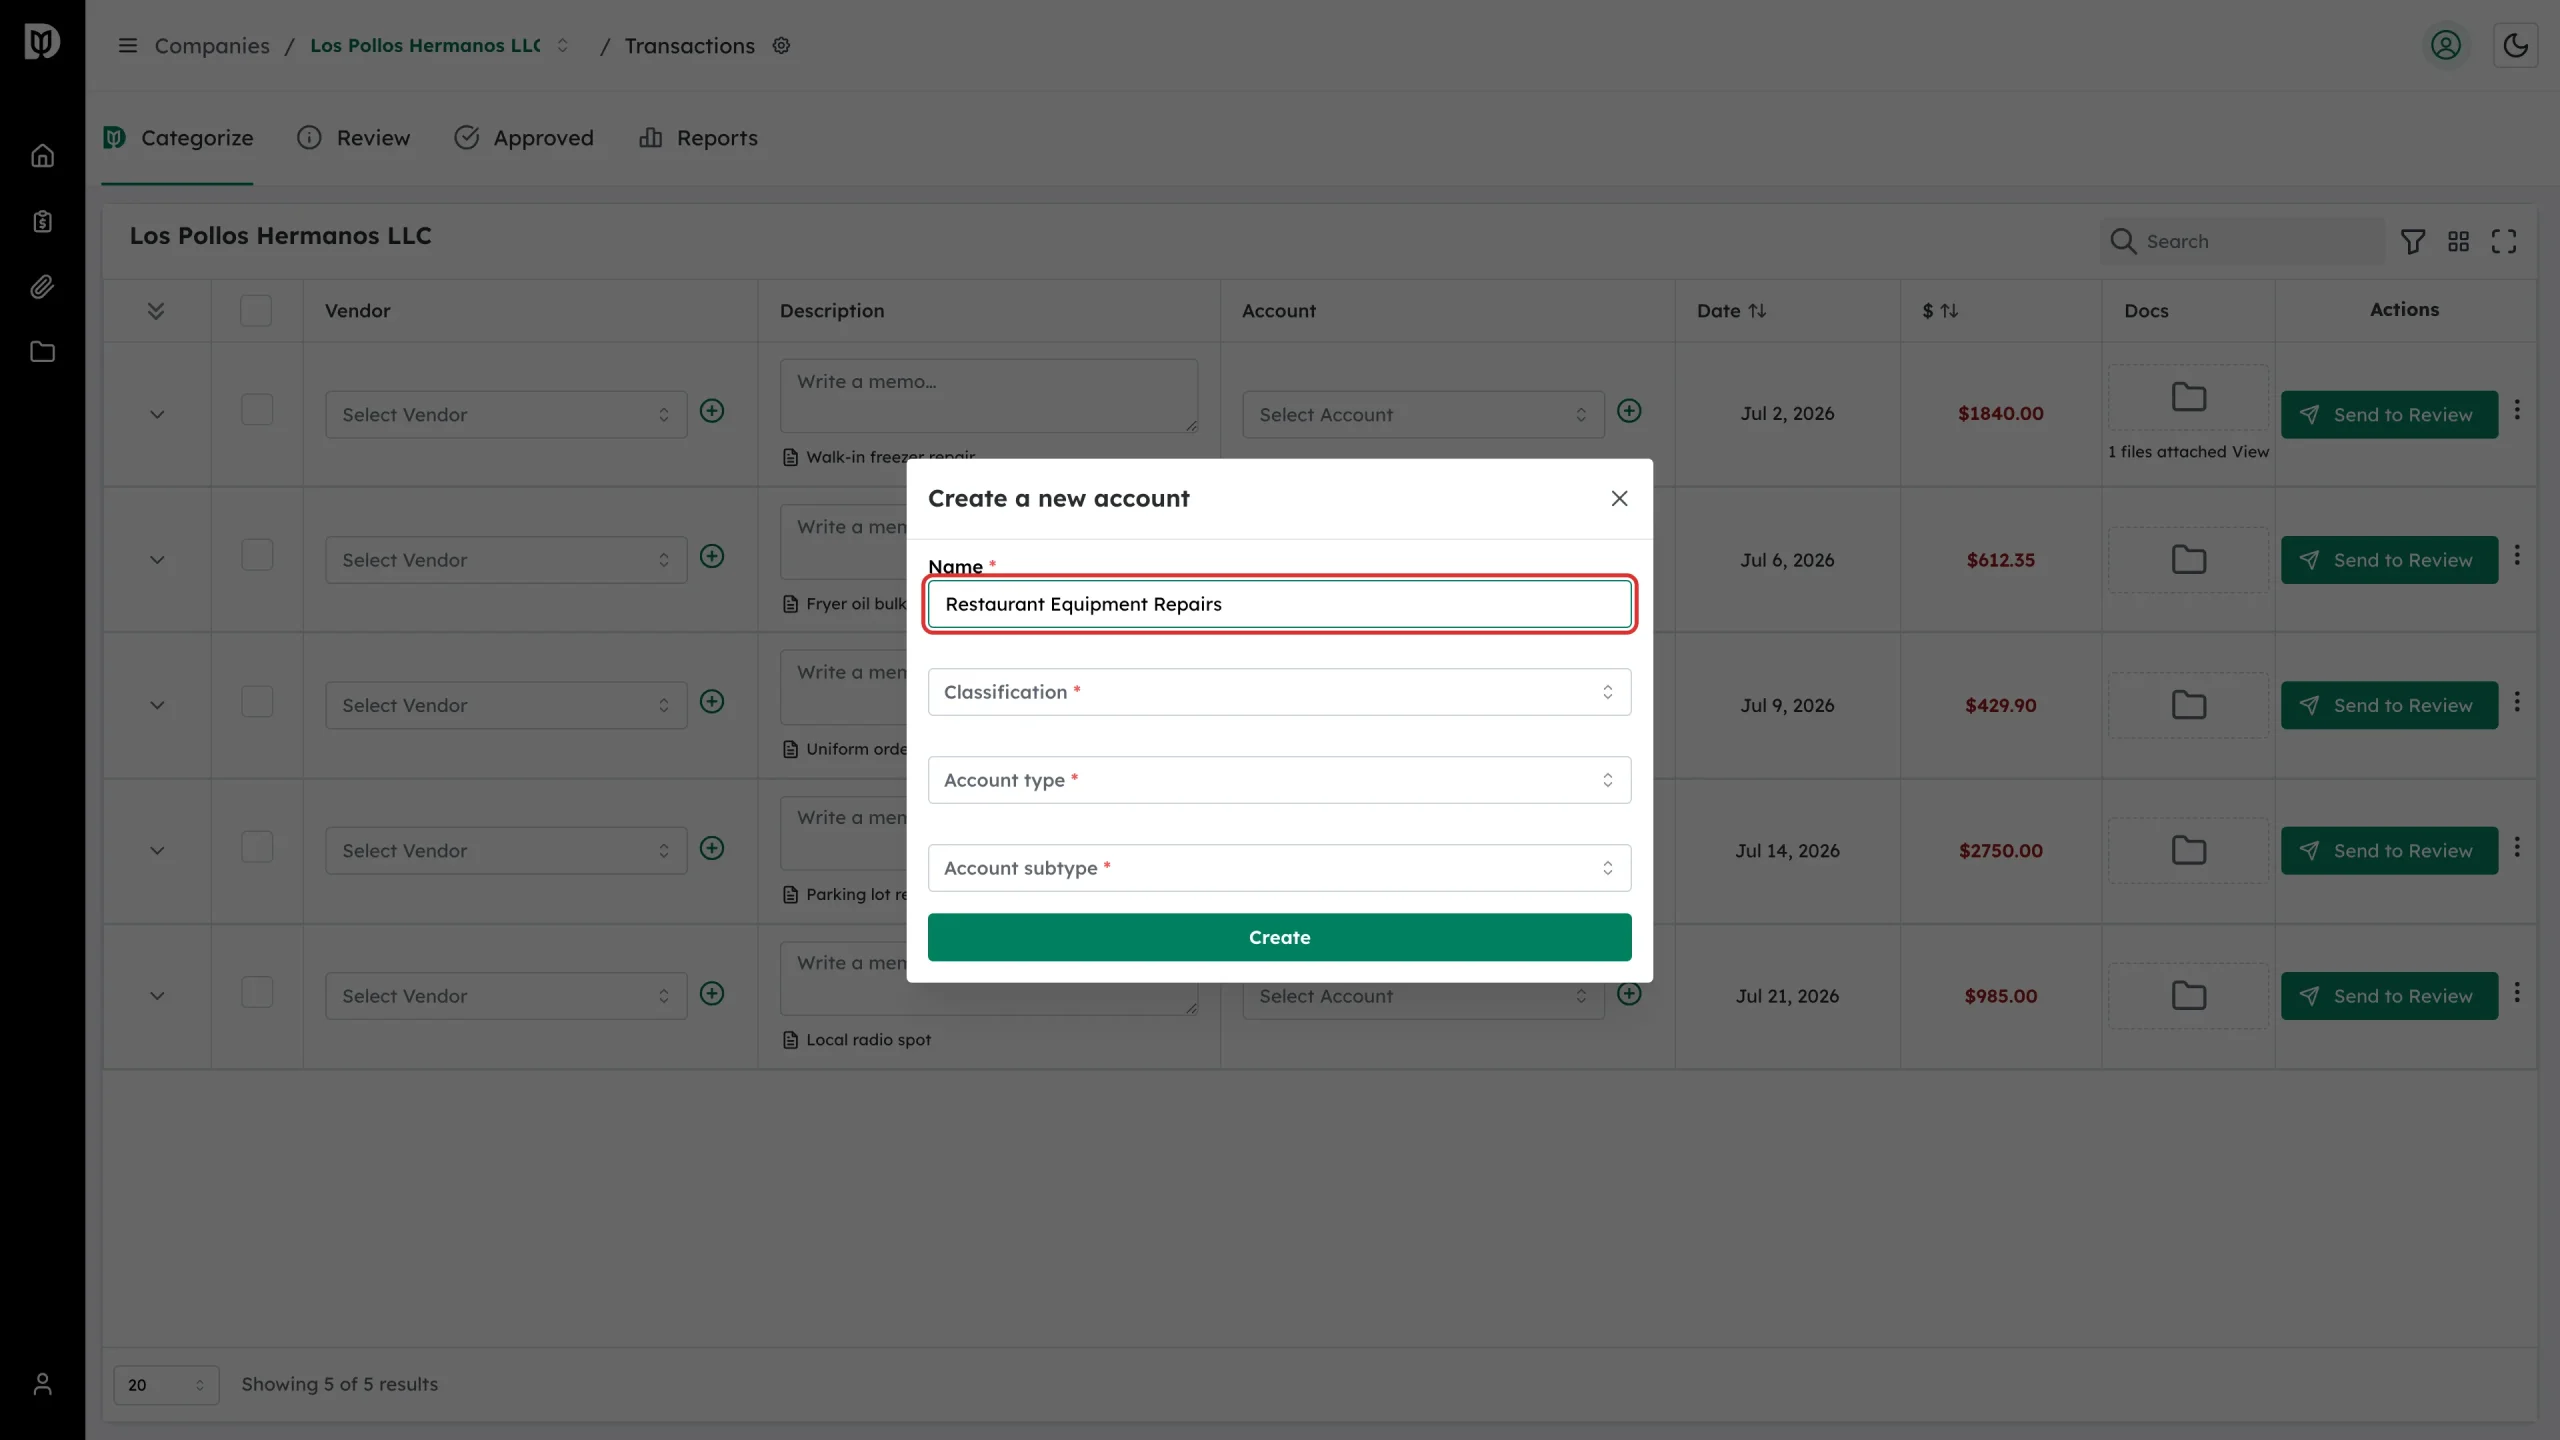
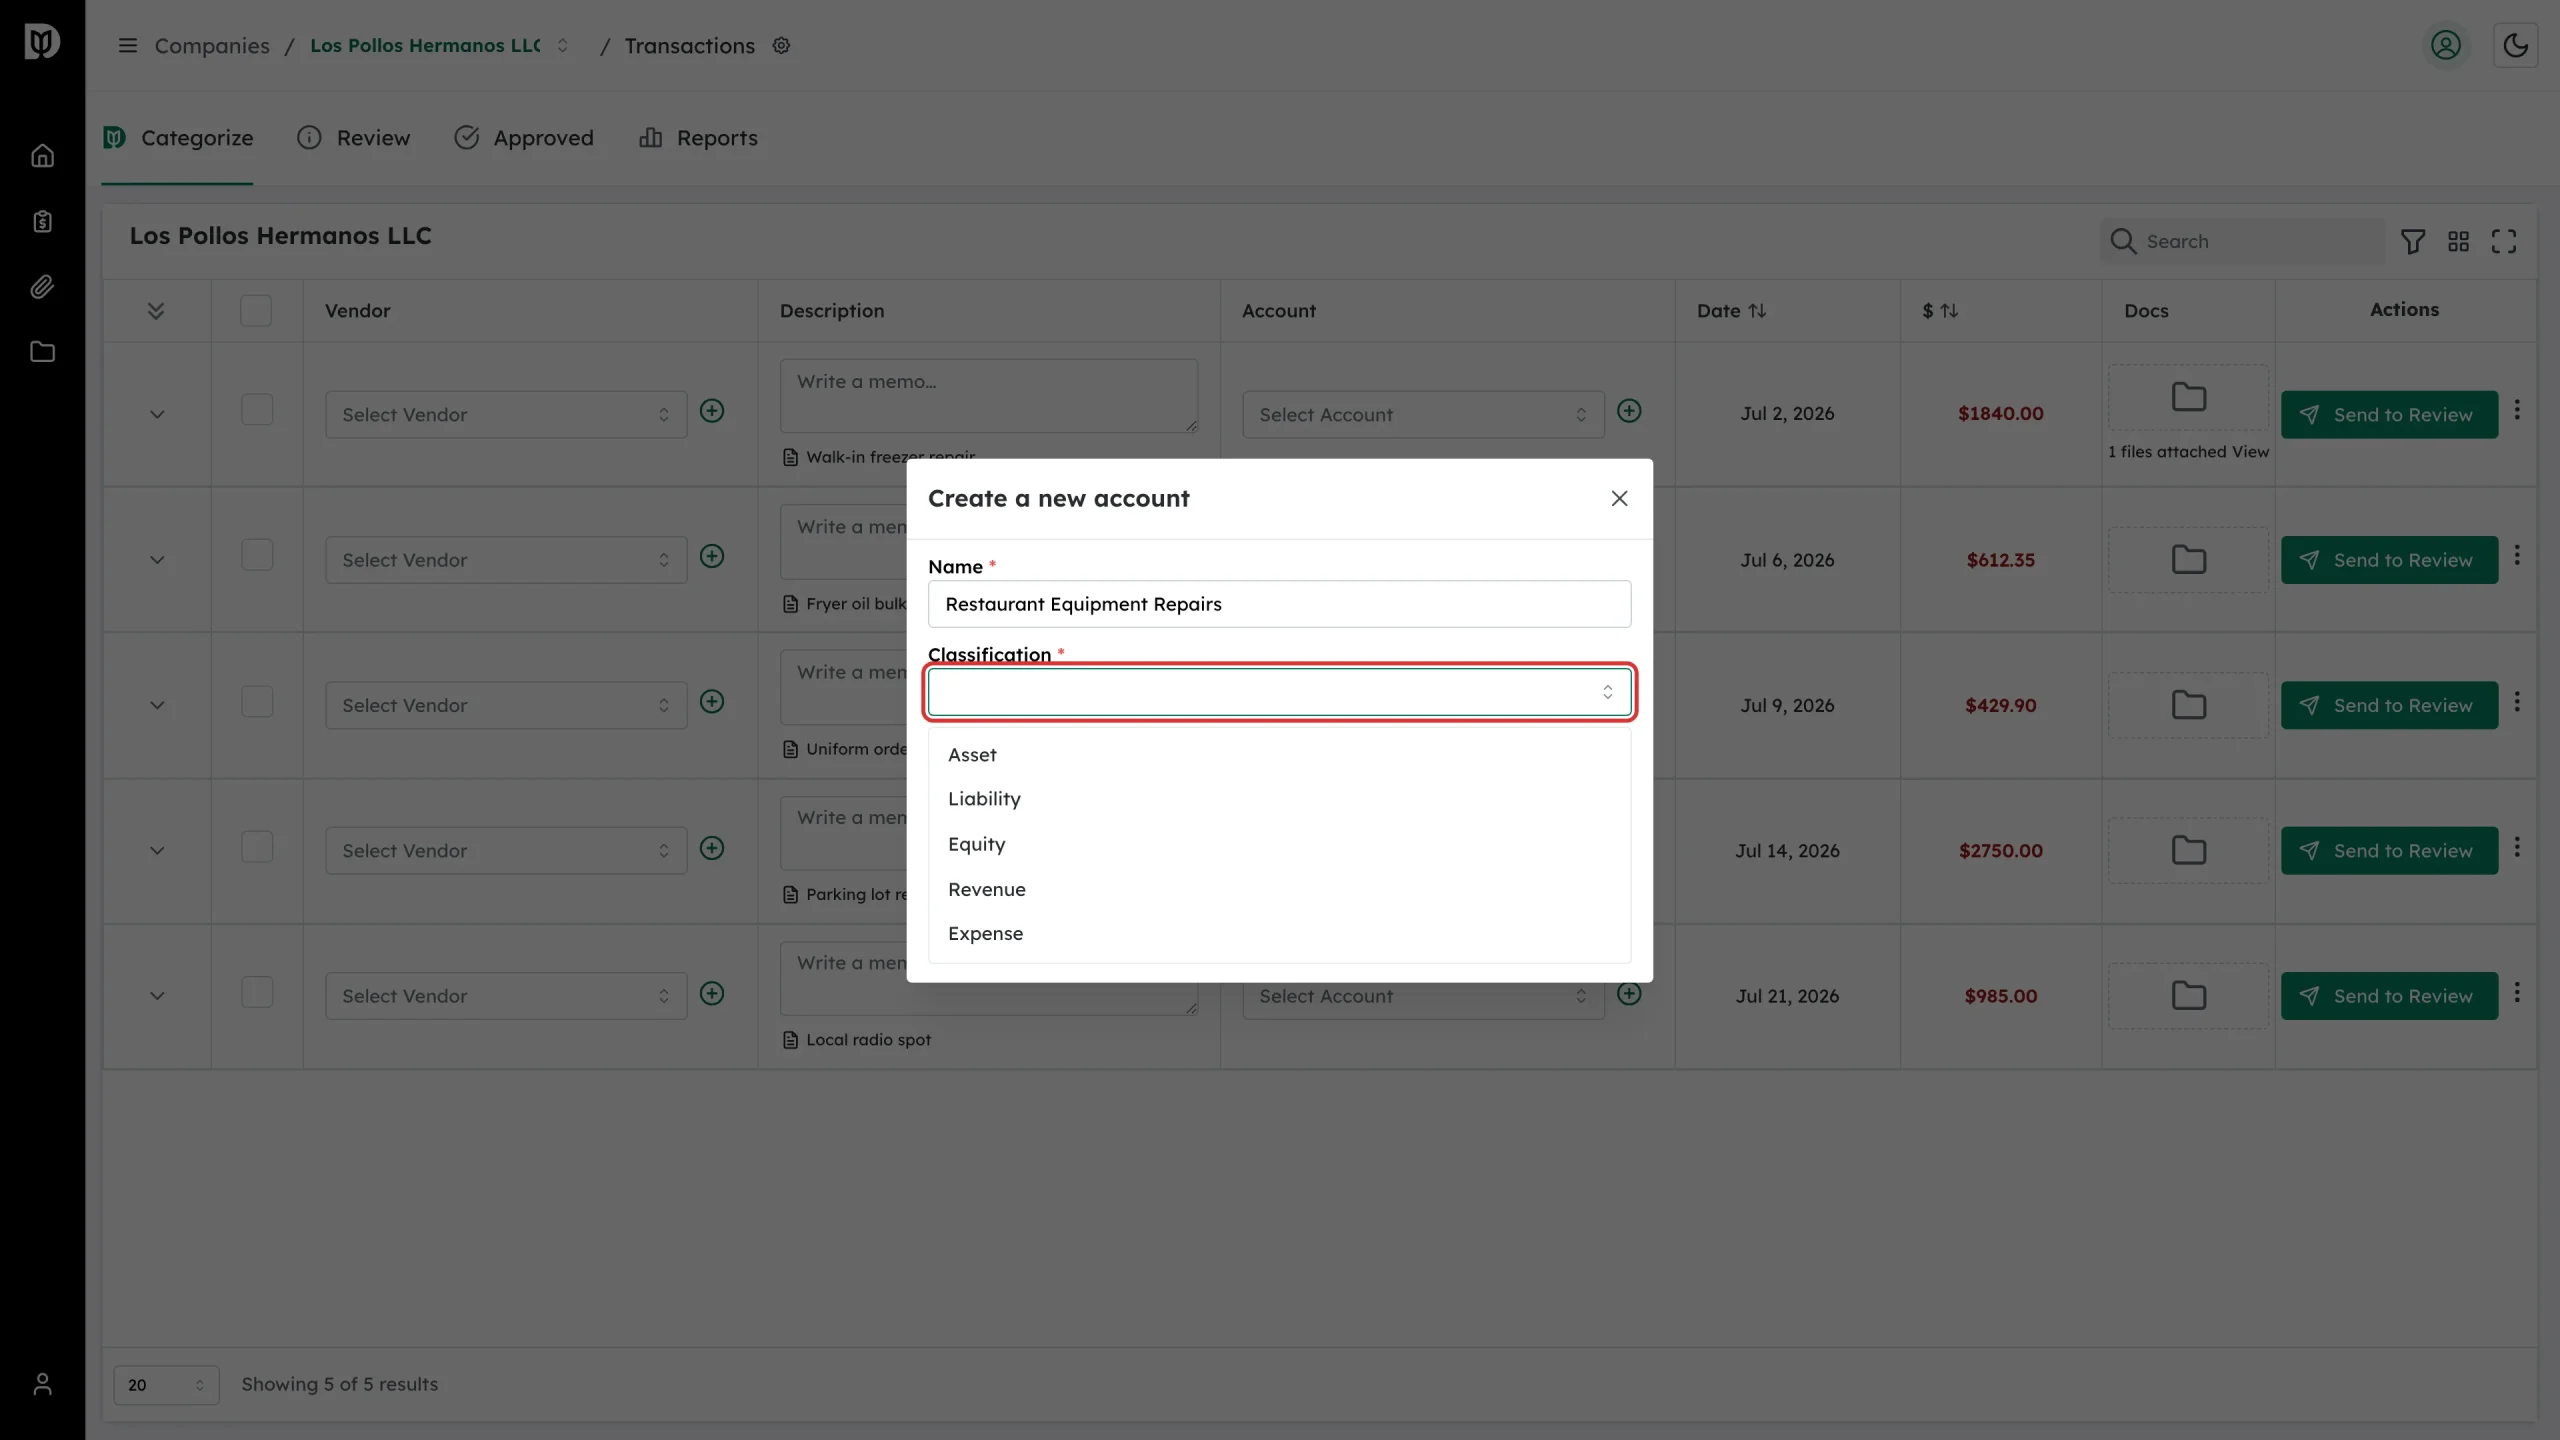
Step 4: Choose the classification
Pick one of Asset, Liability, Equity, Revenue or Expense. Day-to-day running costs are Expense.
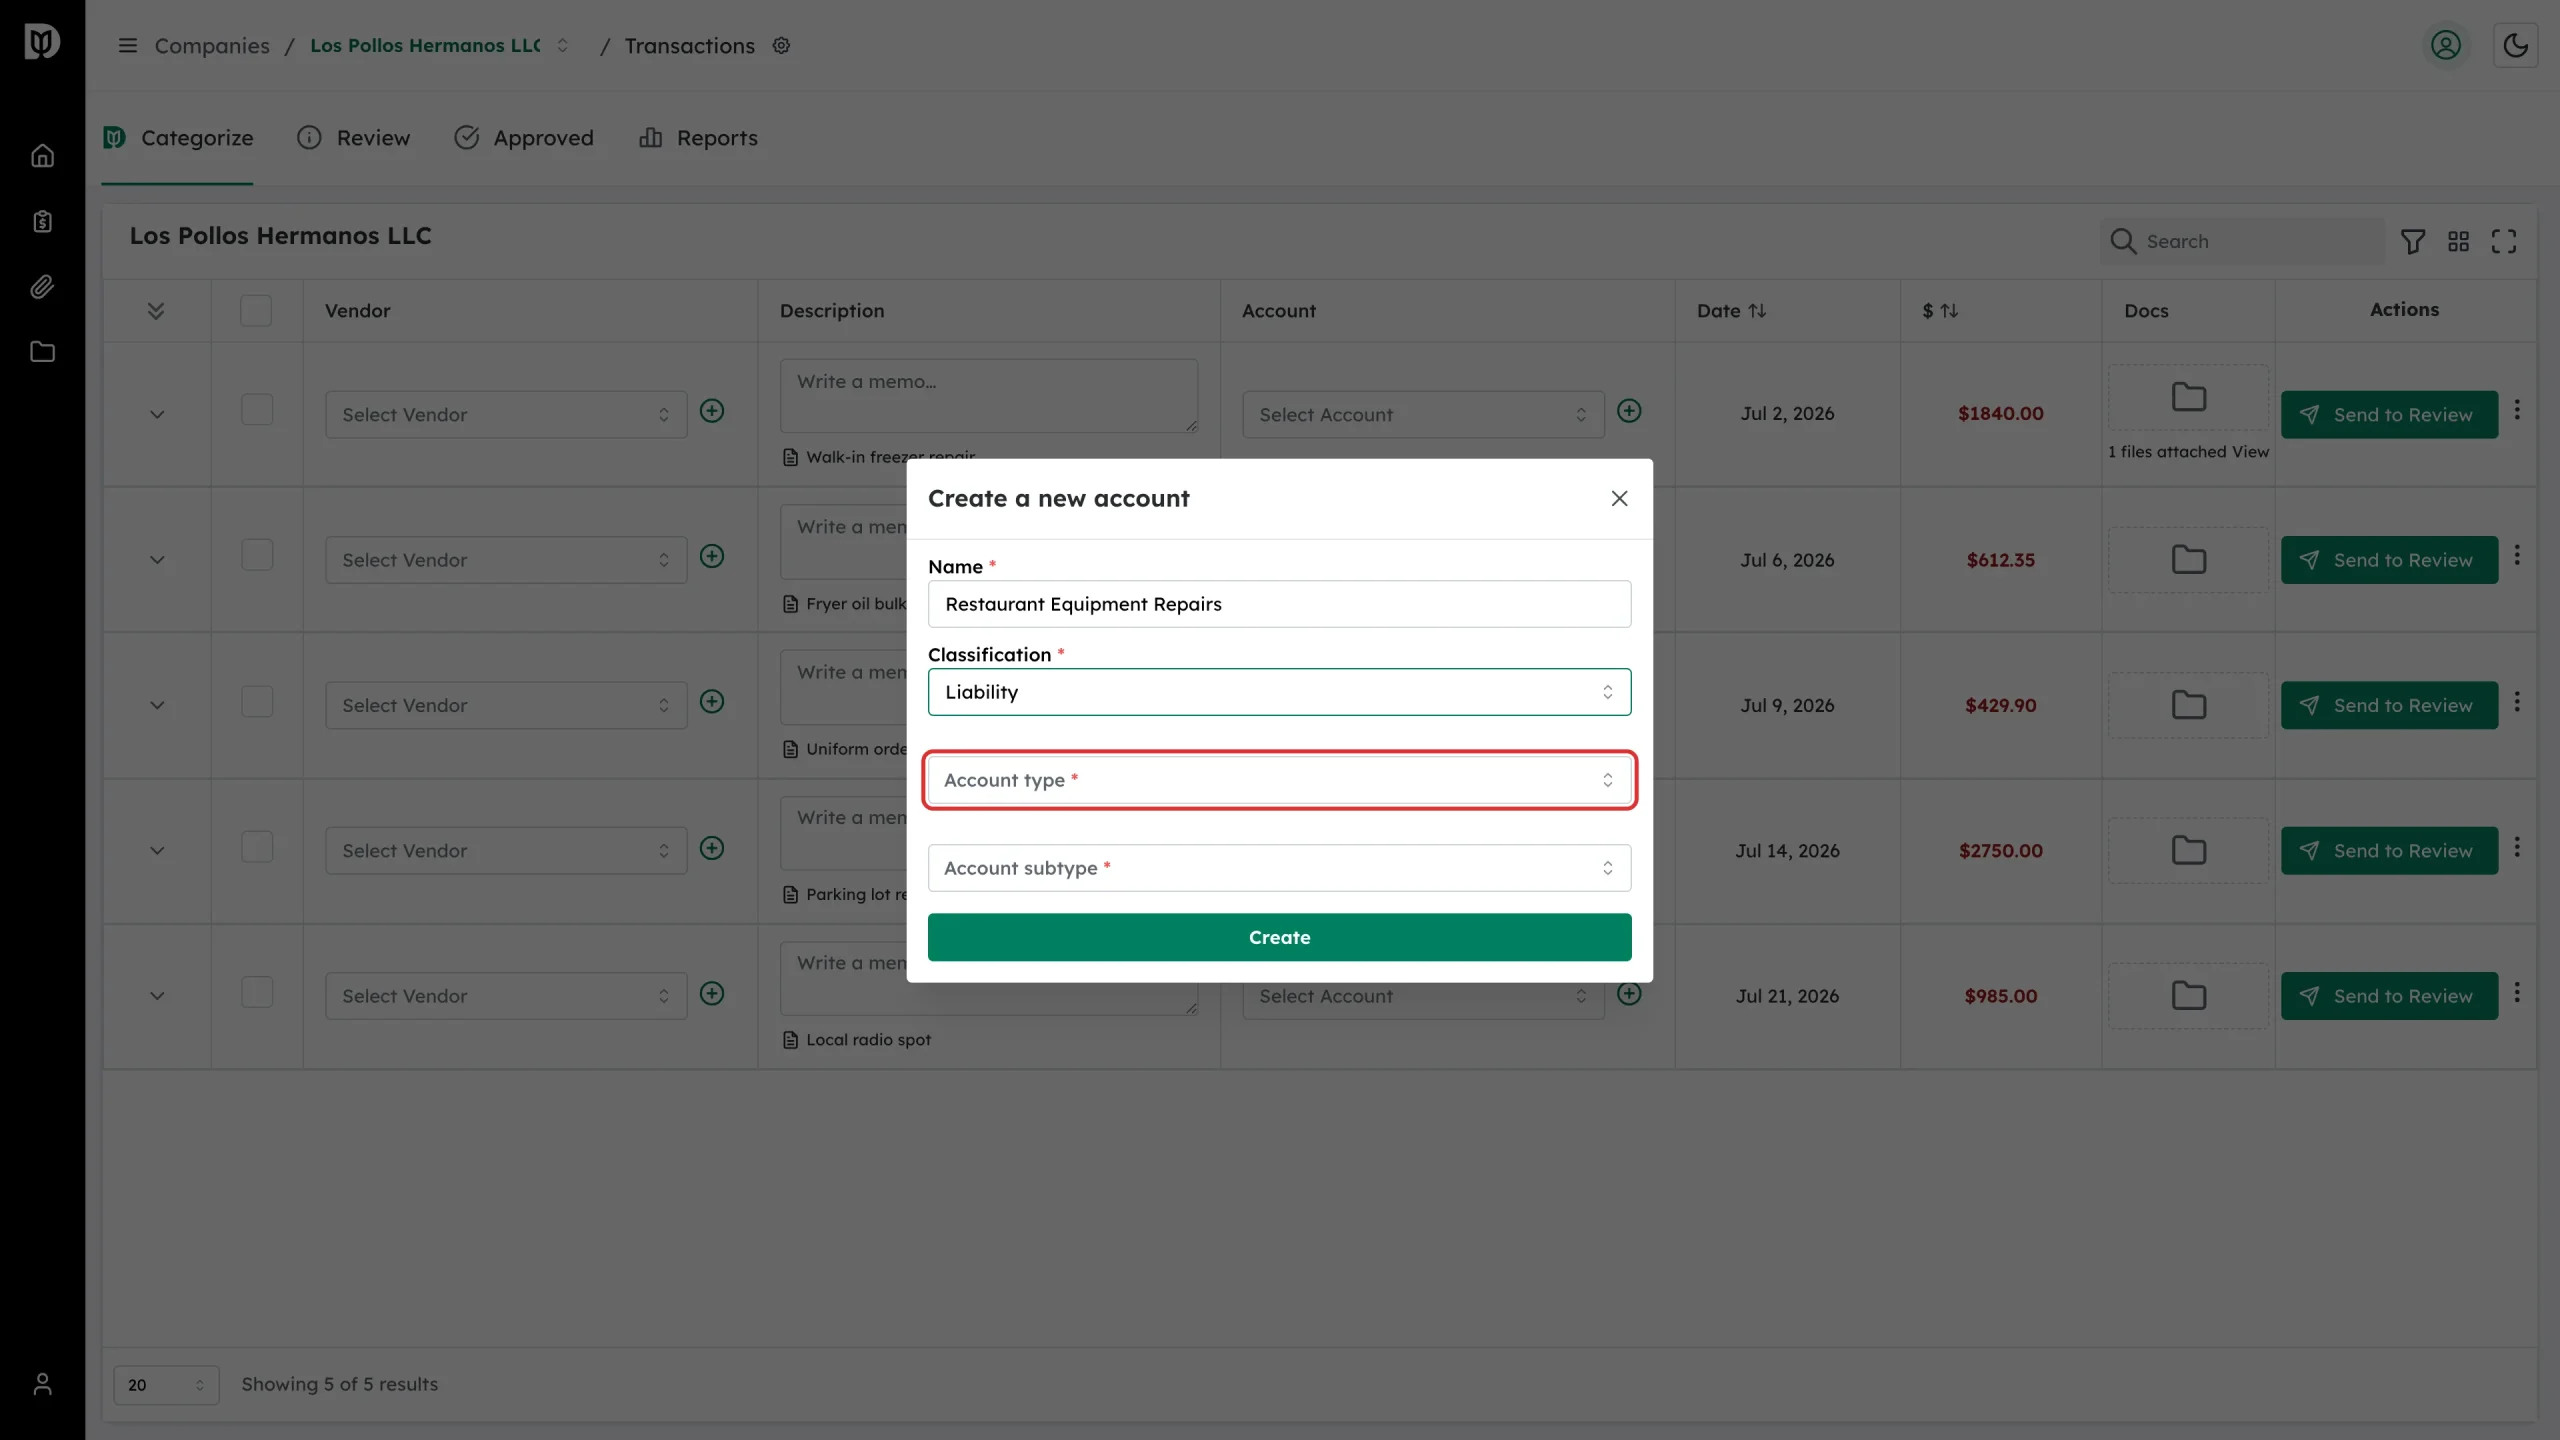
Step 5: Choose the account type
Account type only offers types that fit the classification you picked.
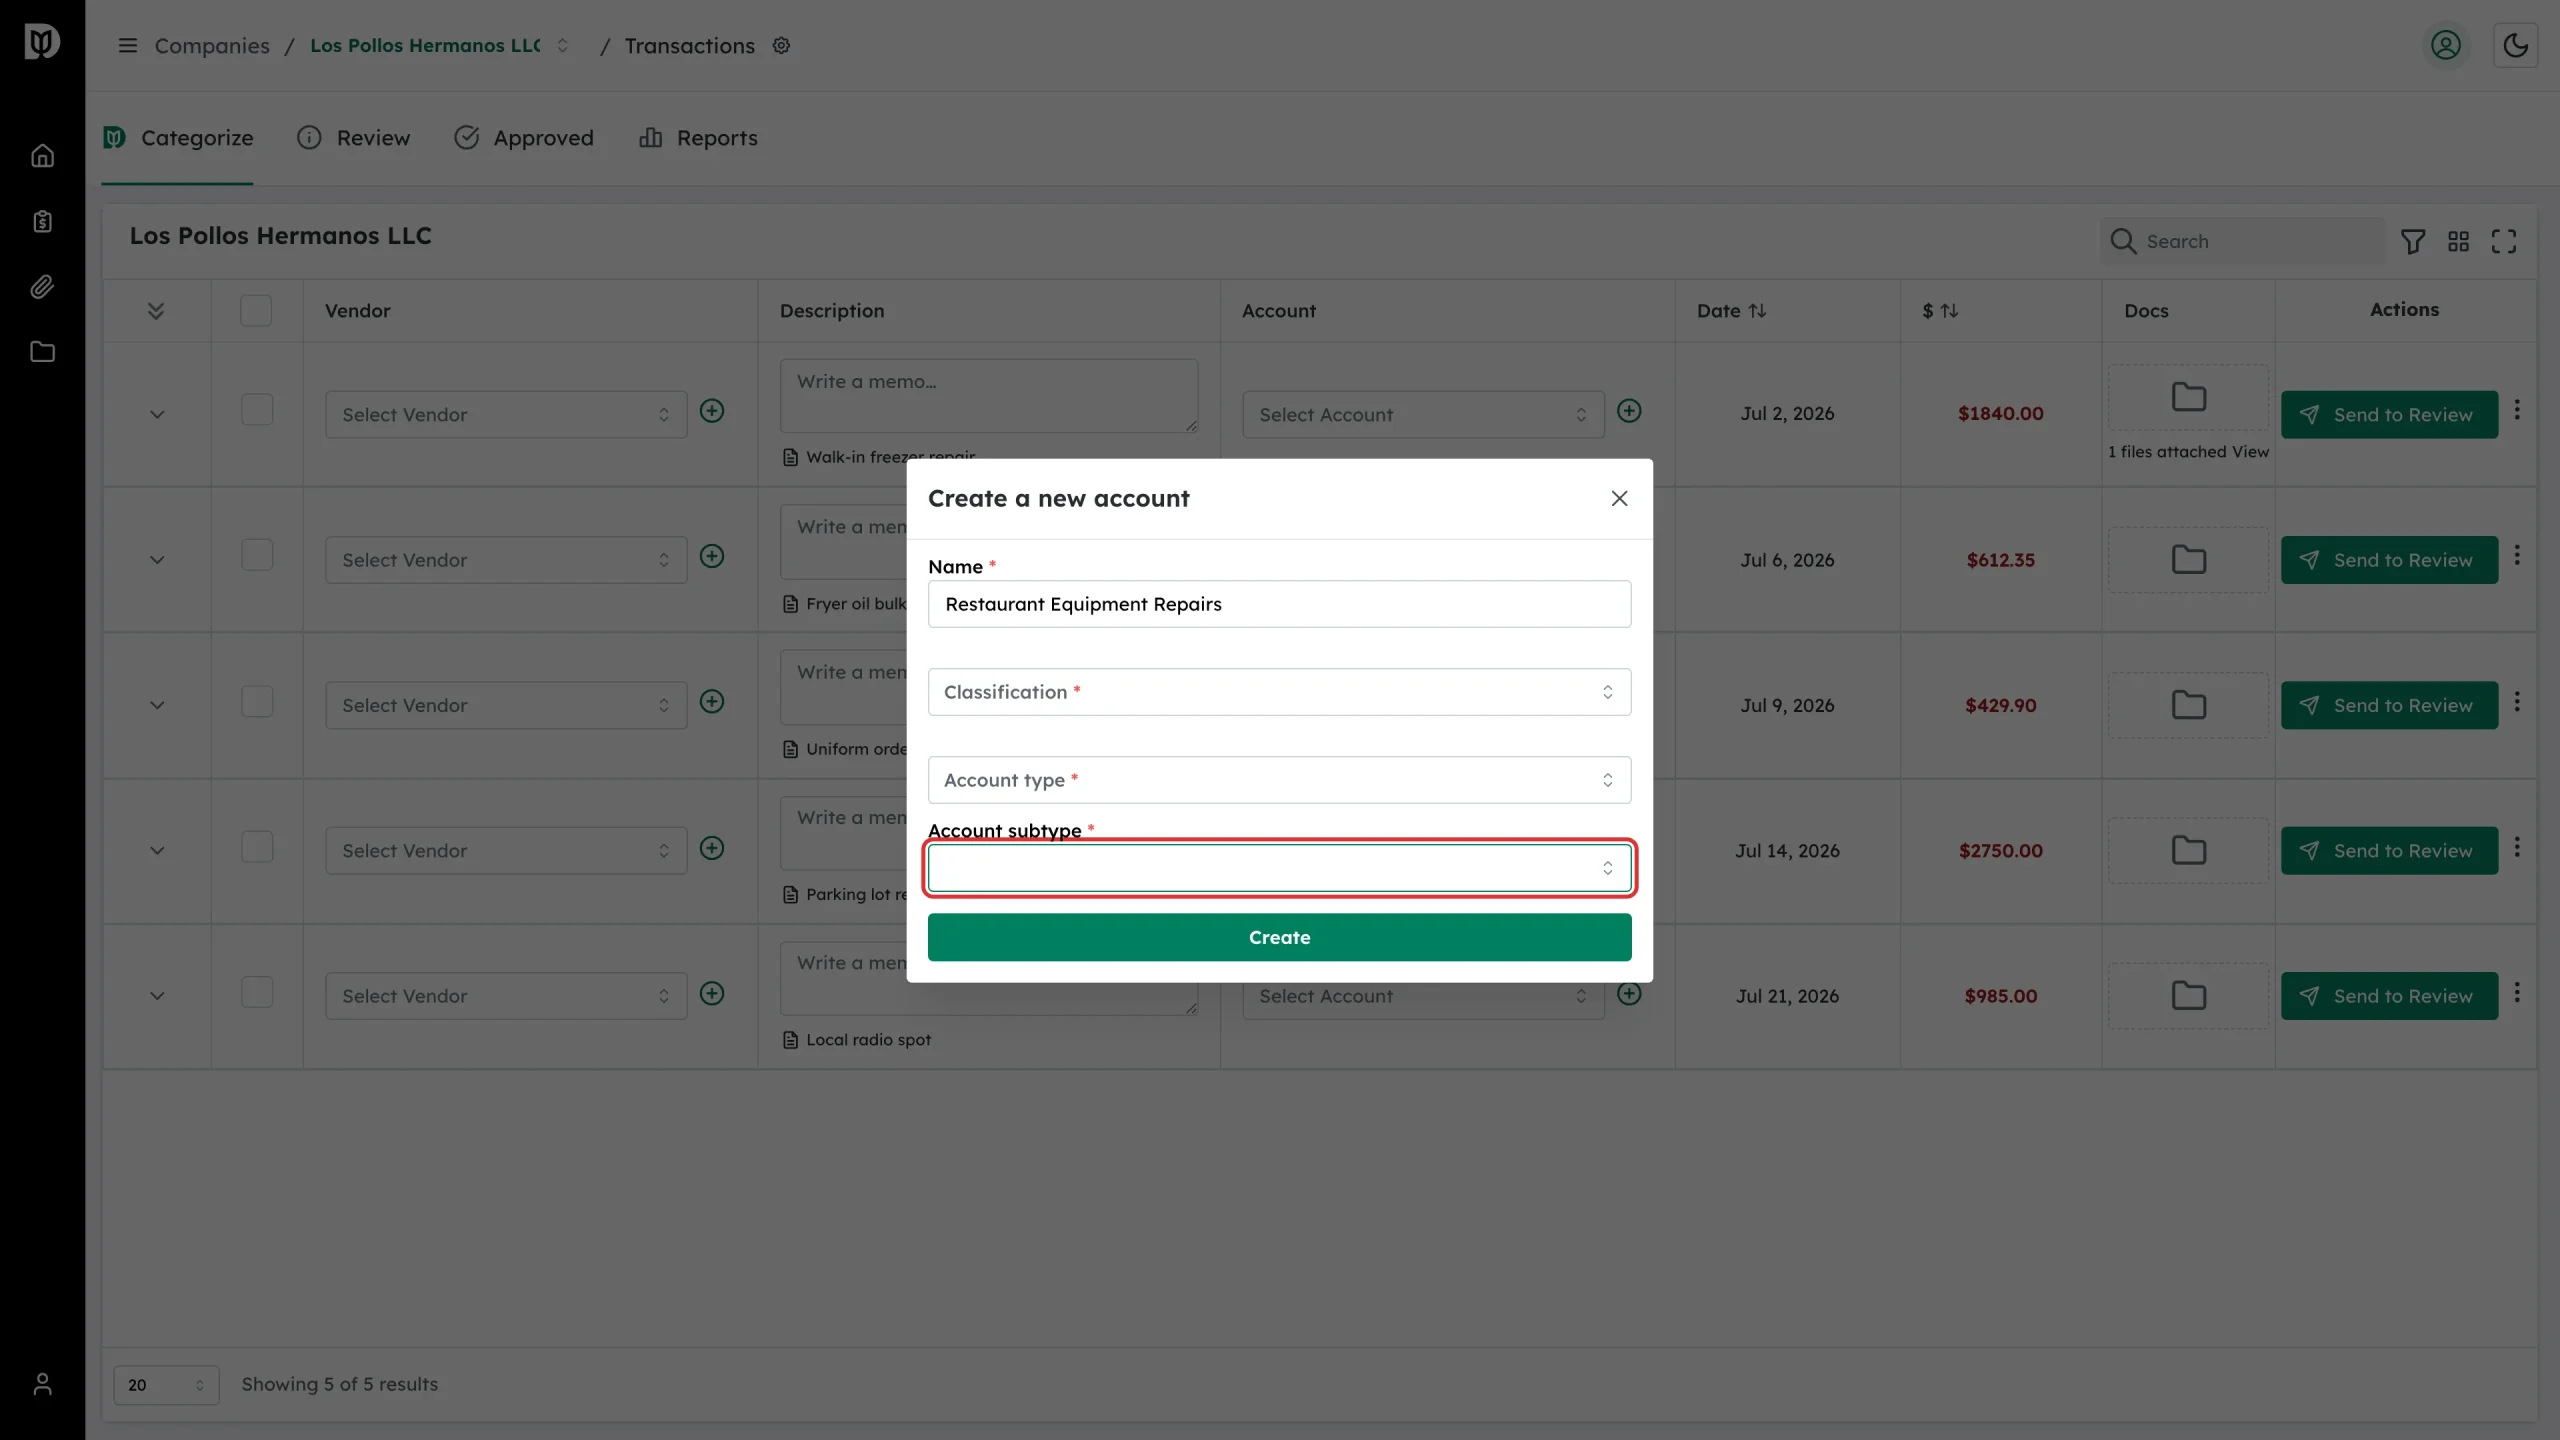
Step 6: Choose the account subtype
Account subtype narrows it further. This is the level that decides where the amount lands in your accounts, so pick the closest match.
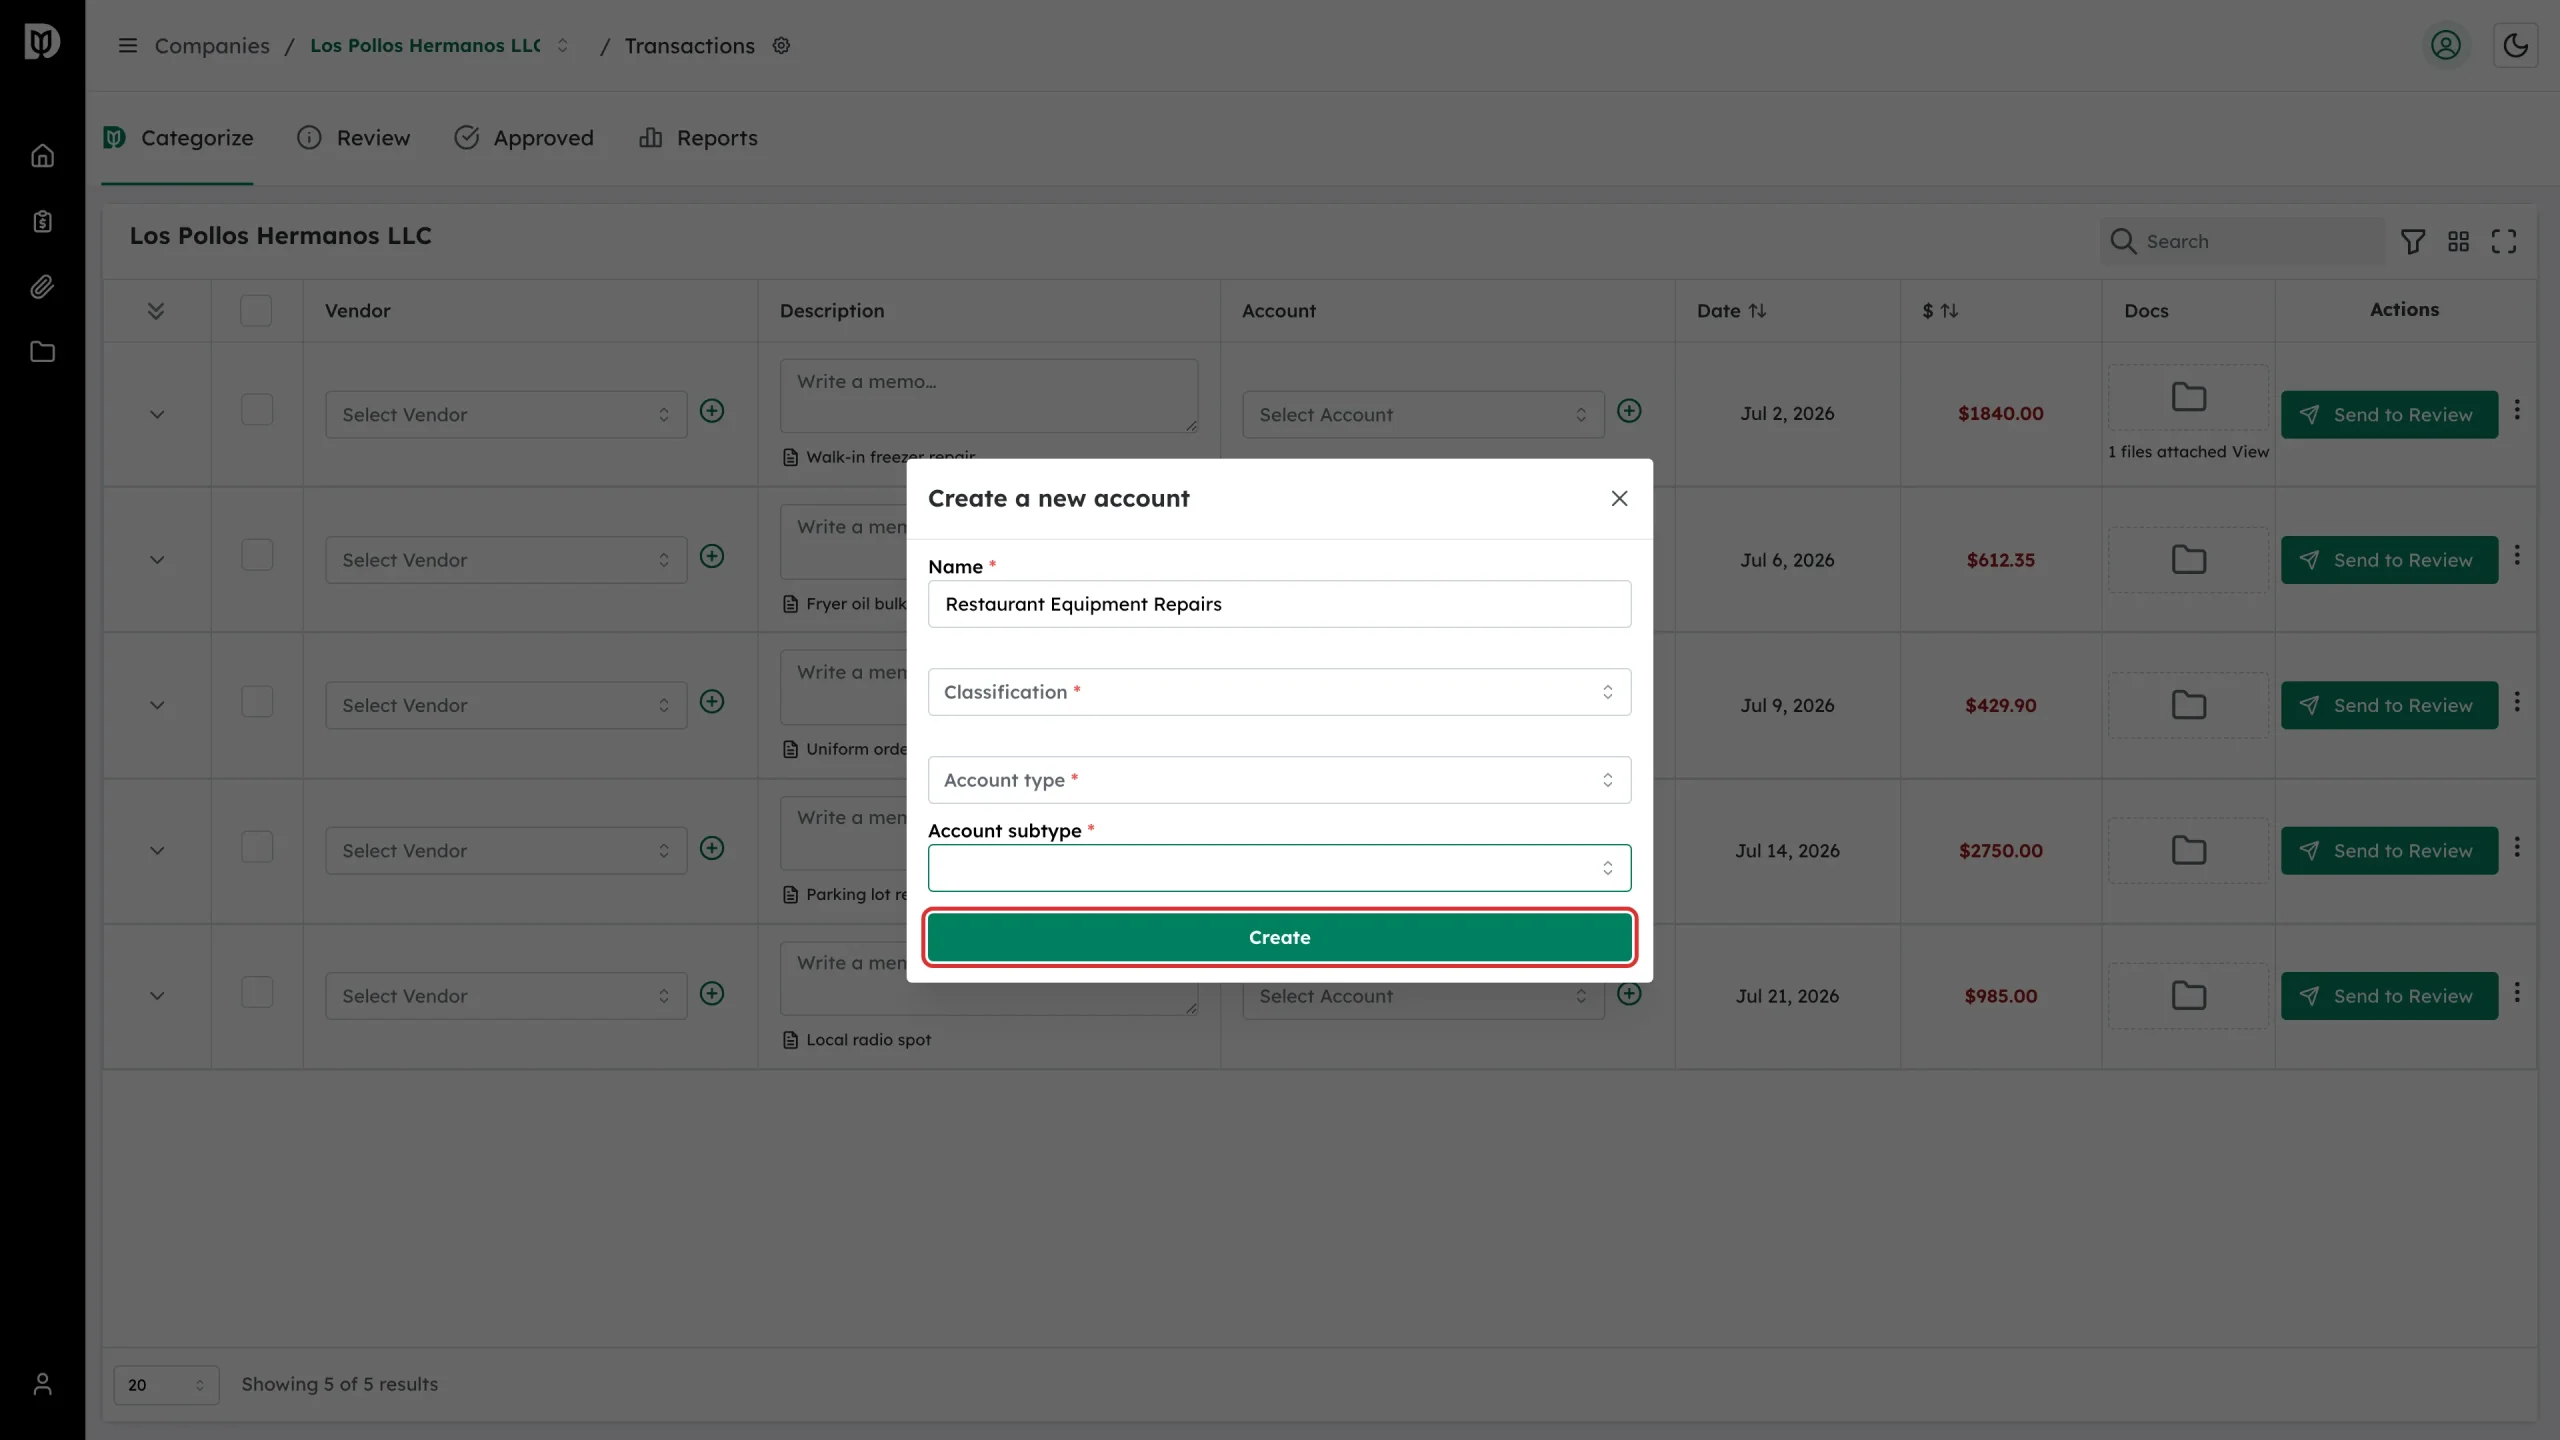
Step 7: Create it
Click Create. The window closes and the new account is available in Select Account straight away.
What happens next
The account is added to your company’s chart of accounts and can be used on any transaction. Your accountant sees it too and can rename or merge it if it duplicates something they already use, so leave a memo on the transaction explaining why you added it.
Troubleshooting
- There is no + beside Select Account. Your firm has not enabled client-created accounts. Ask them to add it.
- Create is greyed out. All four fields are required. Fill Name, Classification, Account type and Account subtype.
- I cannot find the right account type. Go back and change the classification — the type and subtype lists follow it.
- I created the wrong account. You cannot delete it from the client portal. Ask your accountant to remove it.