This guide is for business owners and staff using the Debits client portal. It shows how to attach an invoice, receipt or statement to a transaction so your accountant has the proof with the entry.
Before you begin
- You need access to a company under Bookkeeping.
- Have the file ready on your computer. Debits accepts .pdf, .jpg, .png and .docx, up to 5 files per transaction.
Step 1: Open the transaction
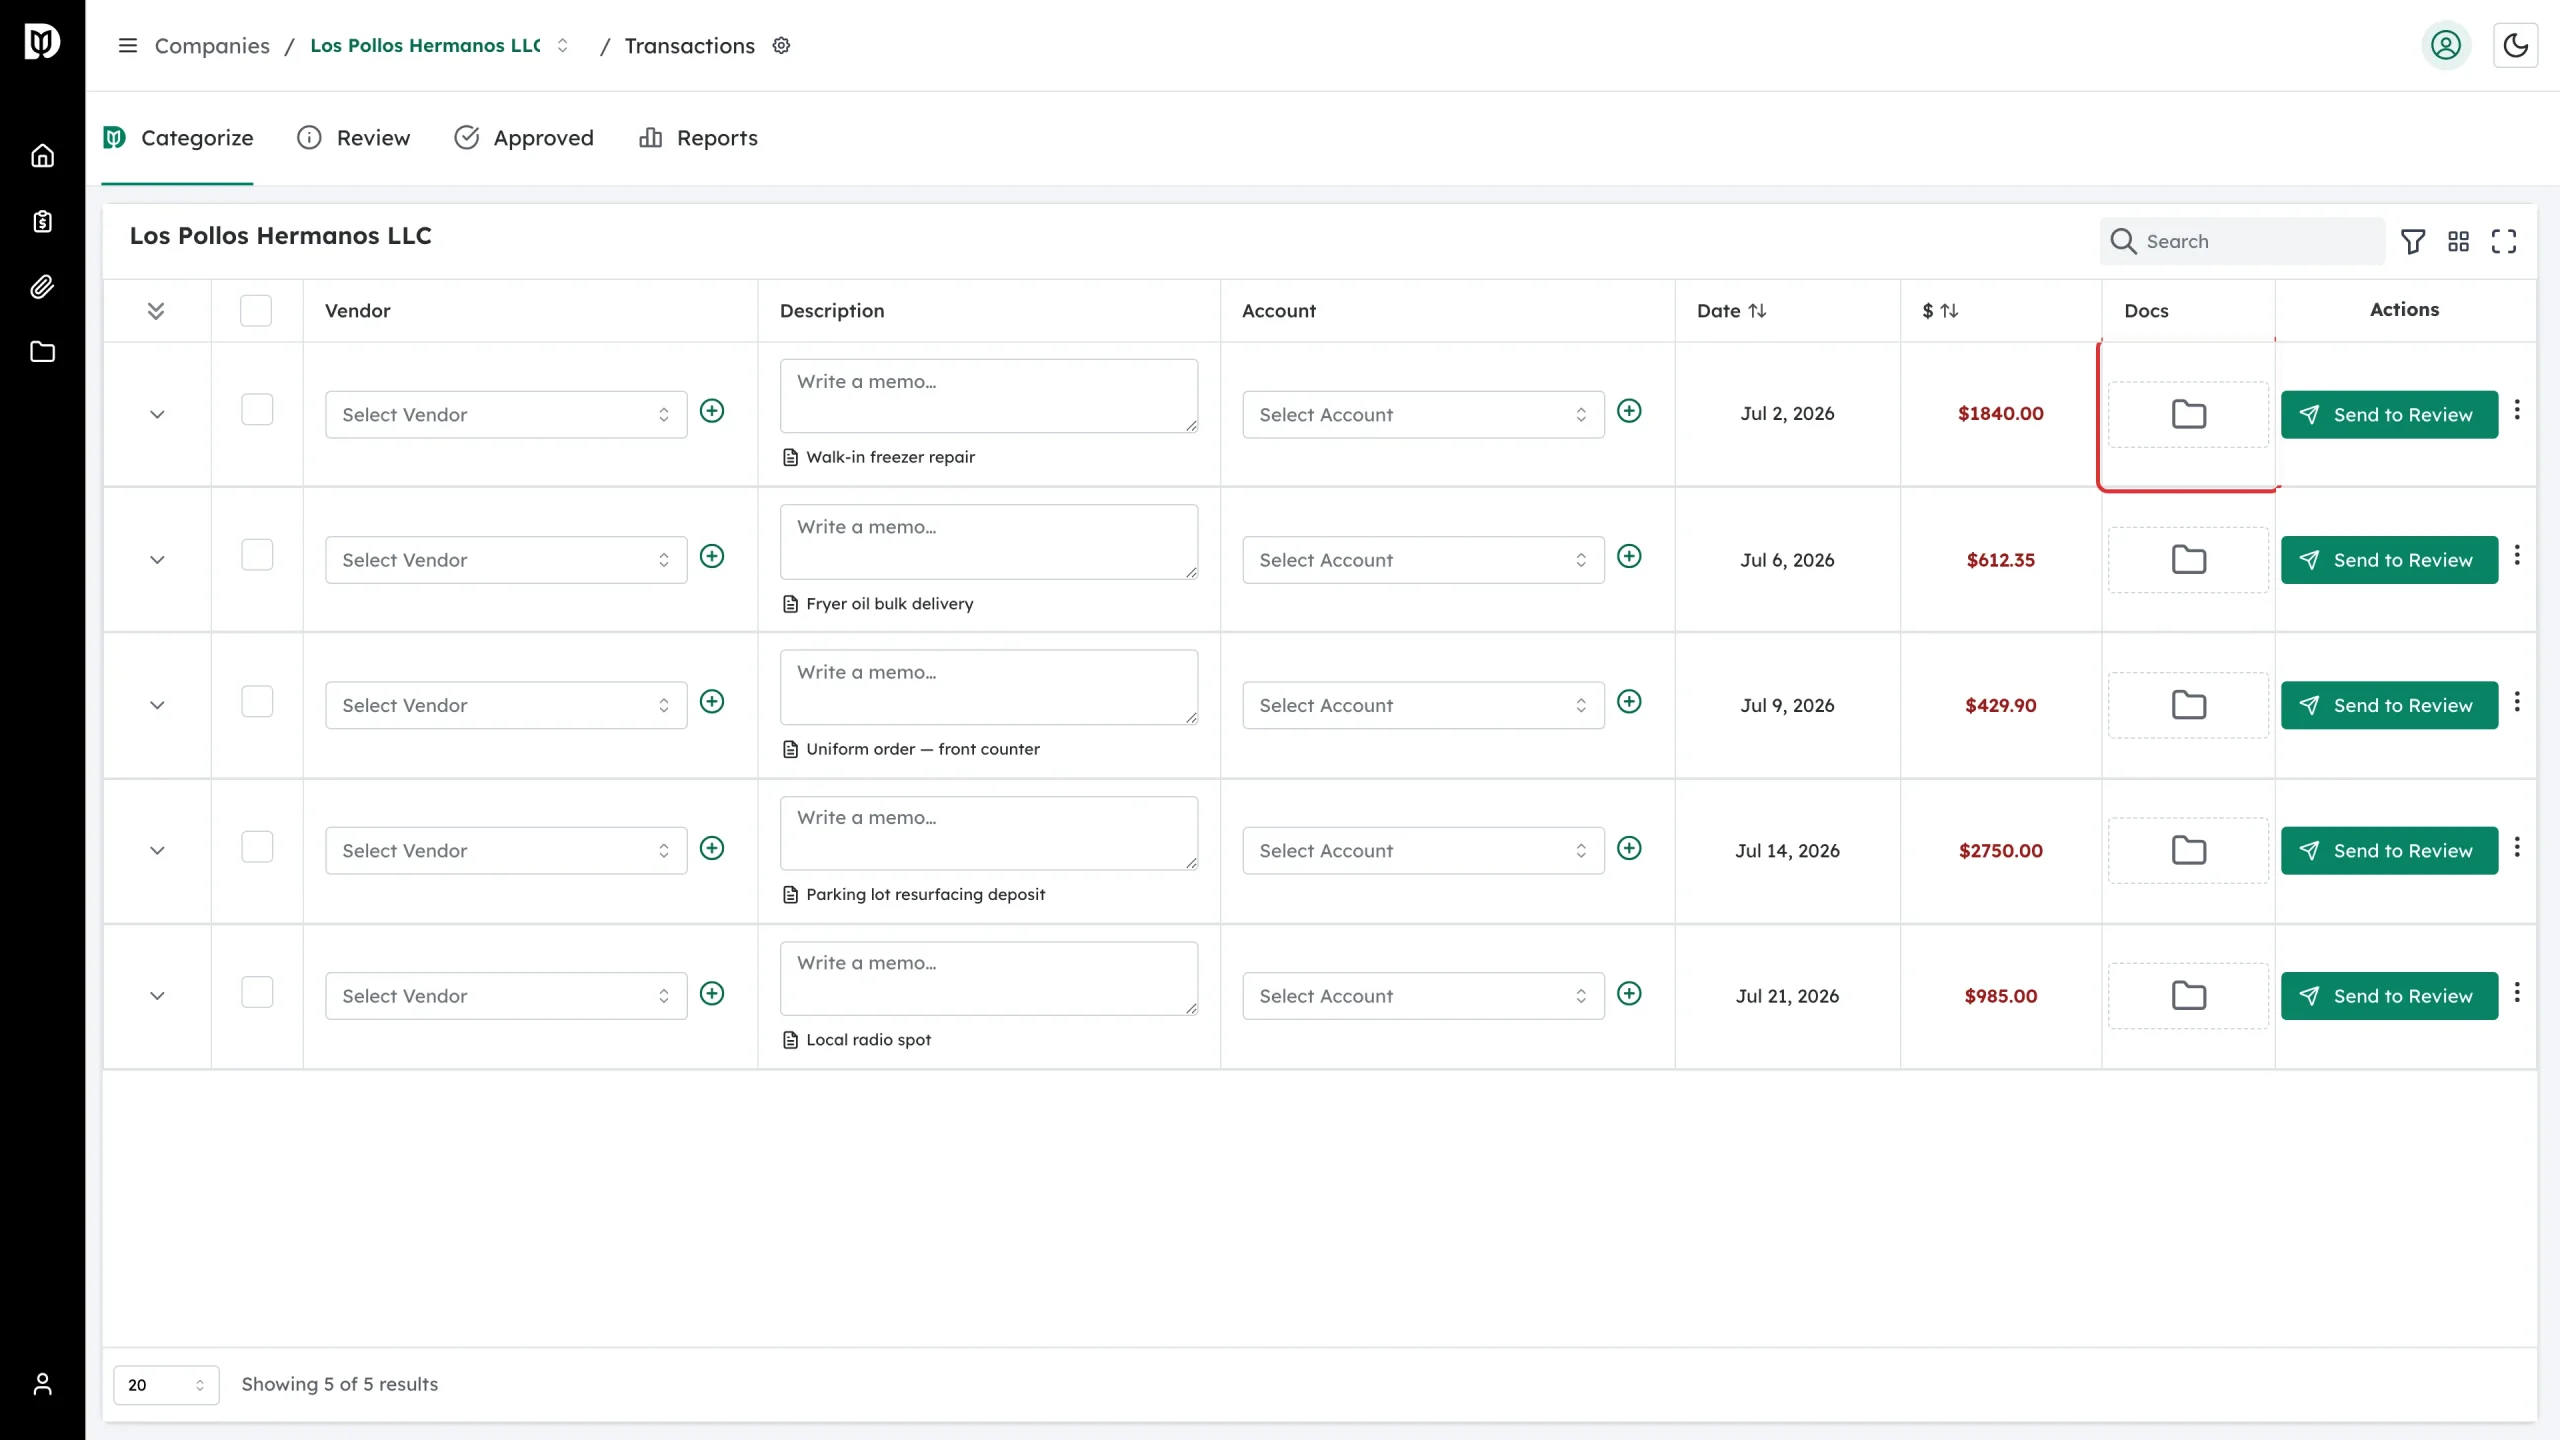
Go to Bookkeeping, open your company, and find the transaction on the Categorize, Review or Approved tab. Each row has a Docs column with a dashed drop zone.
Step 2: Add the file
Click the drop zone to browse your computer, or drag the file onto it. The upload starts as soon as you choose the file.
Step 3: Confirm it attached
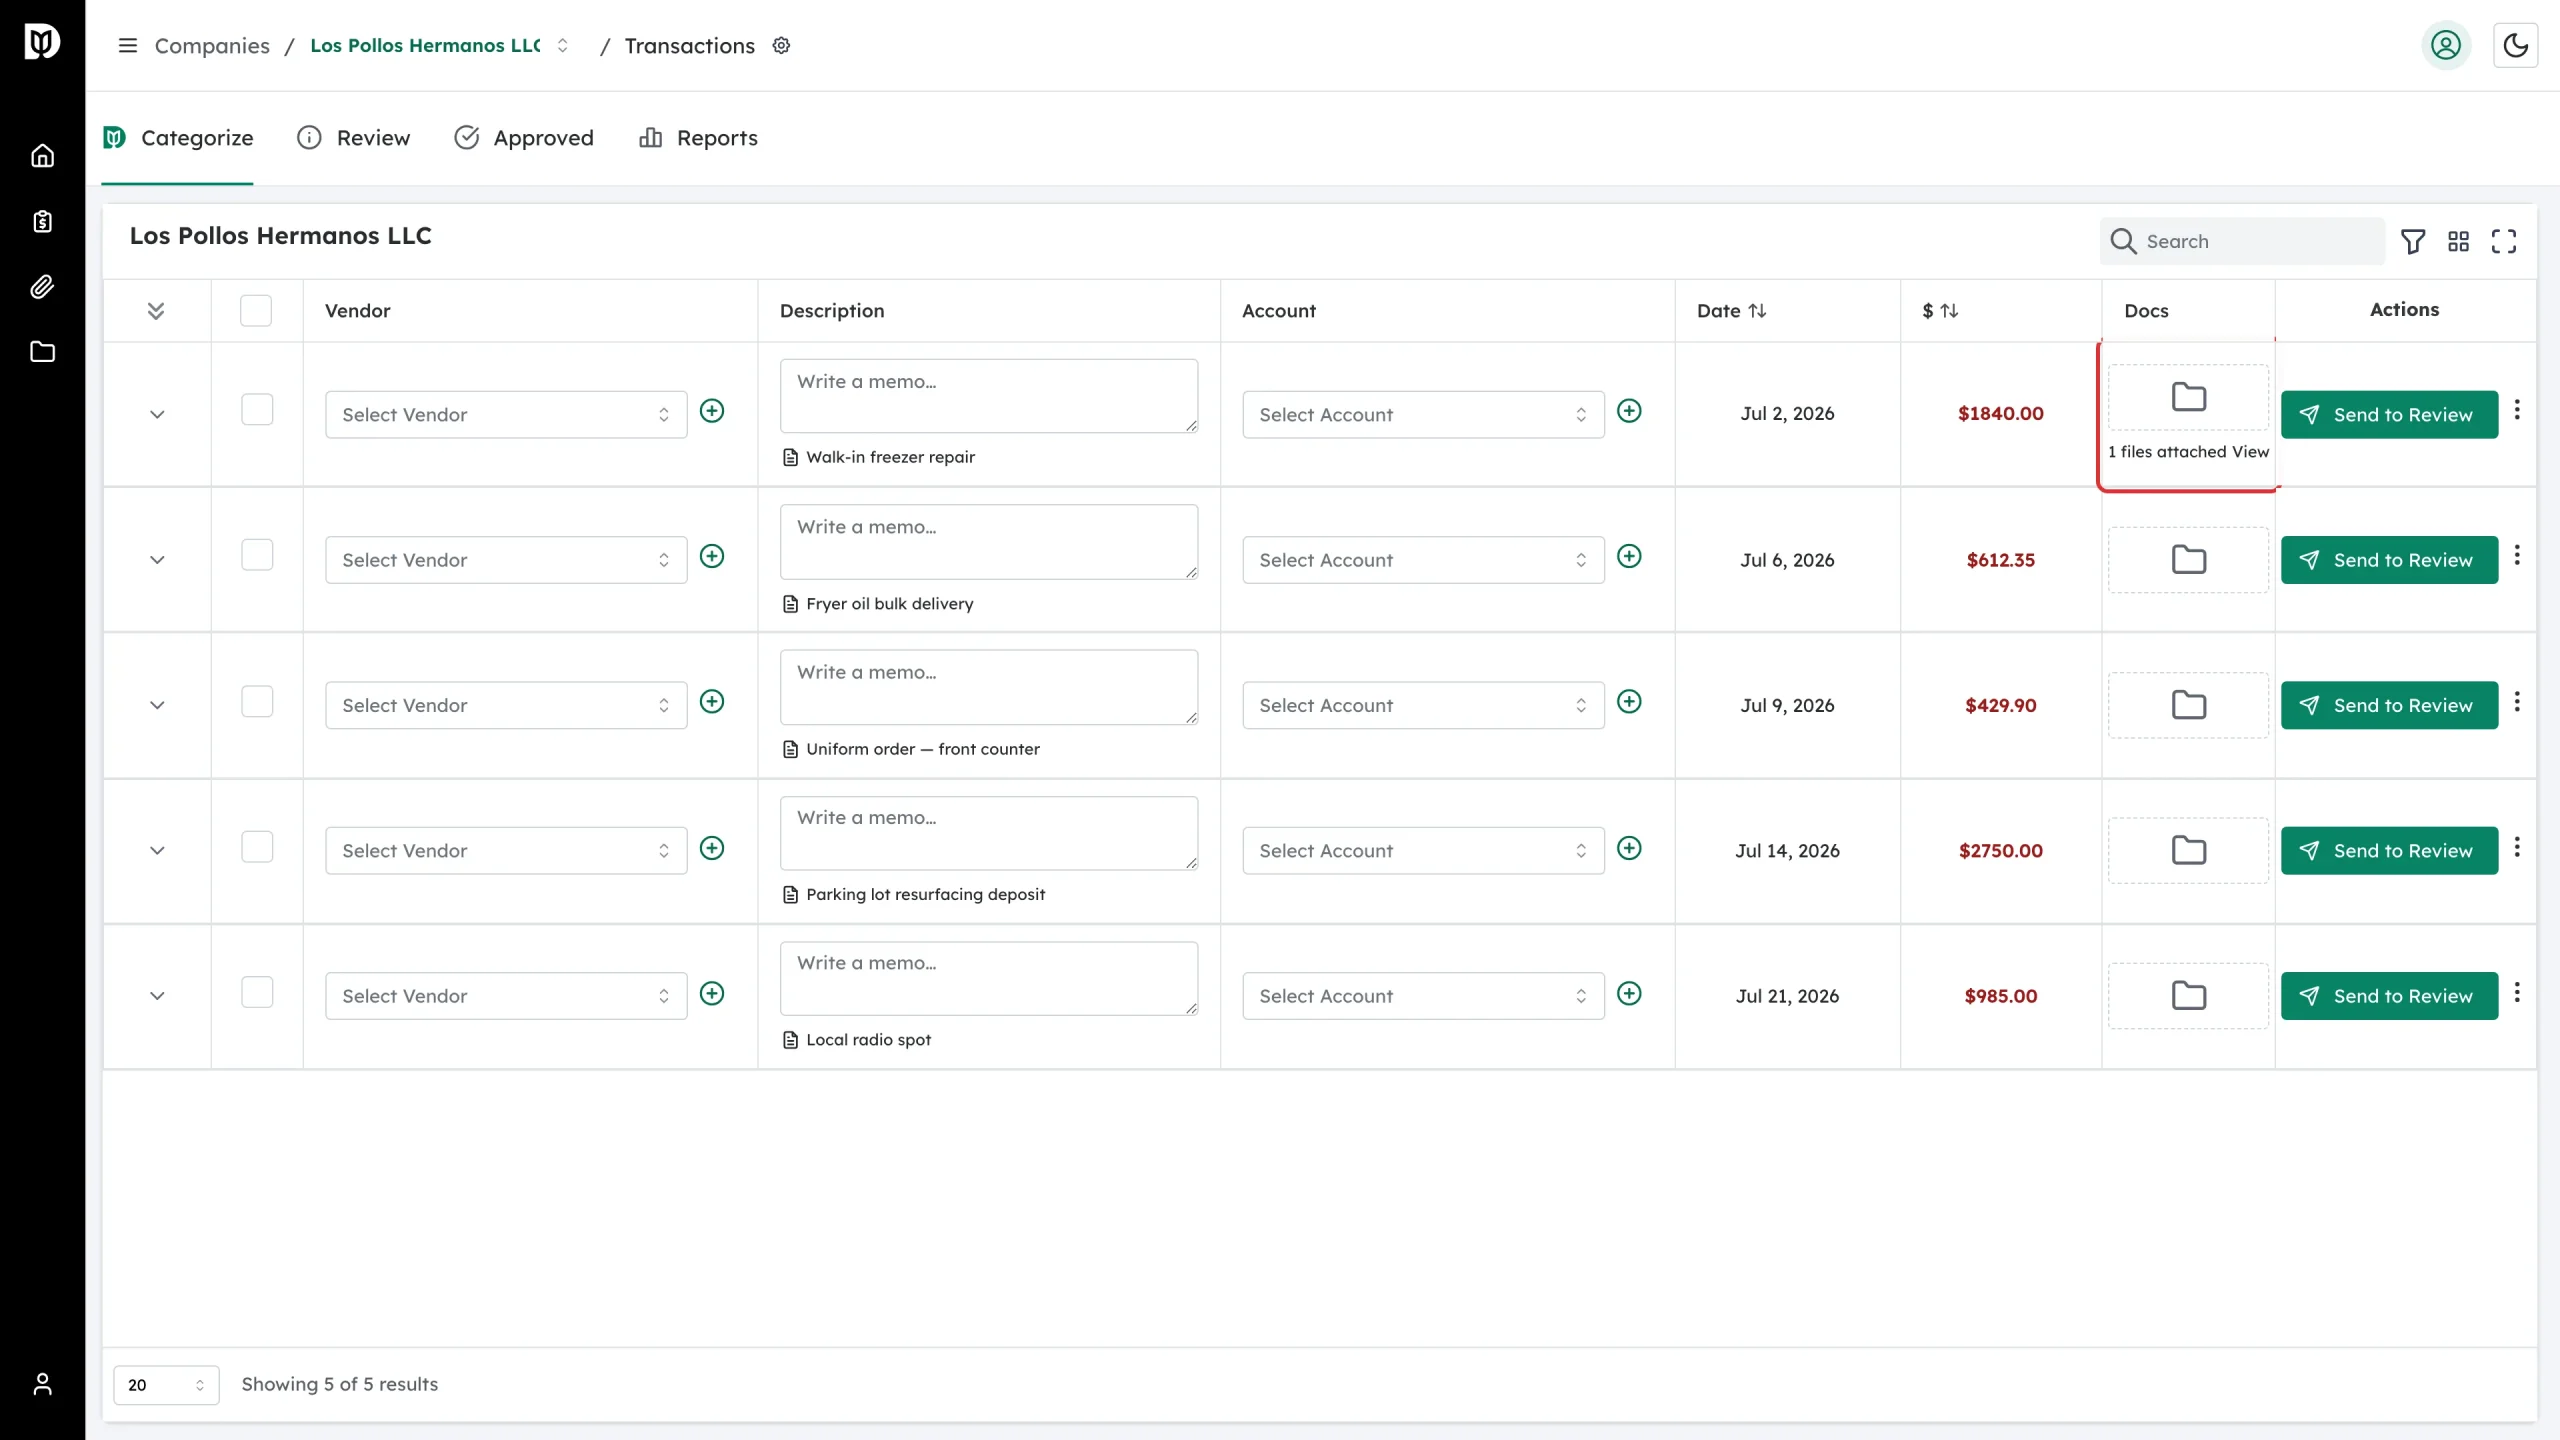
When the upload finishes, the cell shows 1 files attached with a View link. Repeat for any other documents that belong to the same transaction.
Step 4: Open, check or remove the file
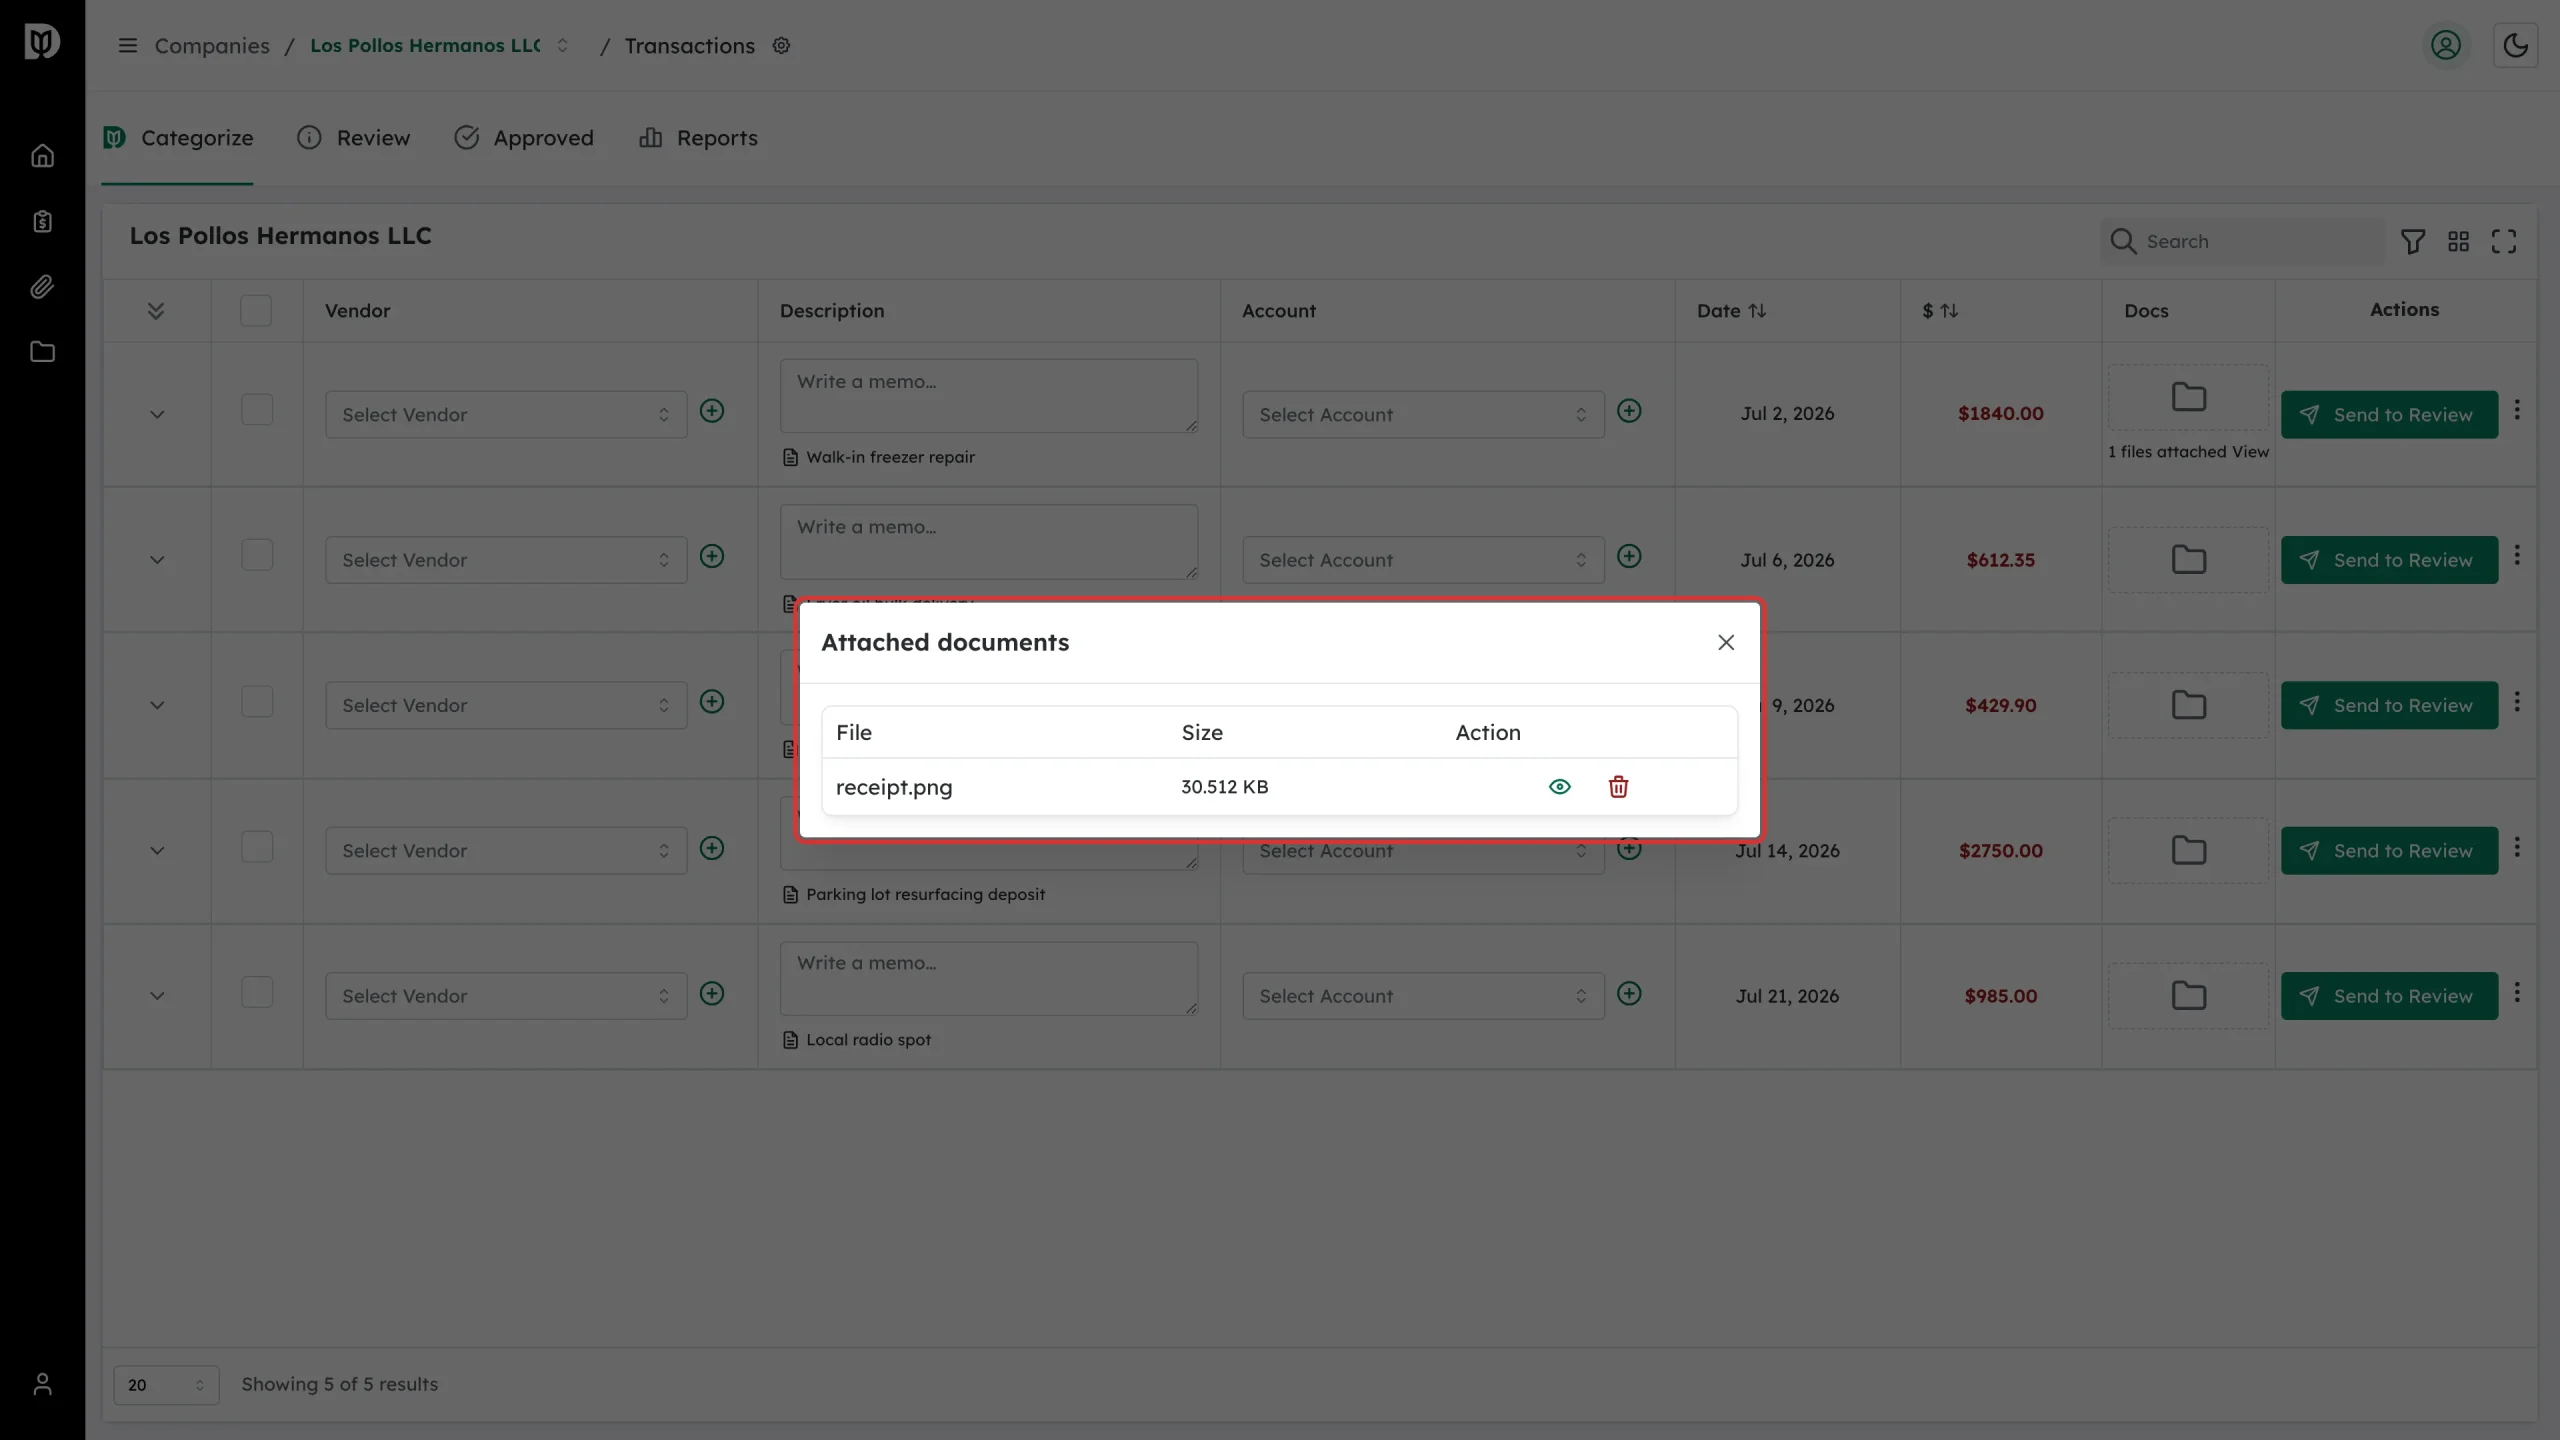
Click View to open the Attached documents window. It lists each file with its size, an eye icon to open it, and a bin icon to delete it.
What happens next
The file stays with the transaction. Your accounting firm can open it whenever they look at that entry, so you do not need to email it separately. If you have not sent the transaction yet, finish categorising it and click Send to Review.
Troubleshooting
- Nothing happens when I drop the file. Check the file type. Only .pdf, .jpg, .png and .docx are accepted.
- The upload is refused. A single file must be under 5 MB, and a transaction can hold at most 5 files. Delete one first if you have hit the limit.
- The drop zone is greyed out. The transaction has been approved and locked, or the company has been disconnected from QuickBooks. Ask your accountant.
- I attached the file to the wrong row. Open View, delete it with the bin icon, then attach it to the right row.