Who this is for: Anyone at the firm who quotes clients.
What you’ll learn: How to build a proposal in the four-step wizard (Client, Engagements, Client setup, Review), what each review option does, and how to send it and track it.
Before you begin
- You need permission to create proposals. Editing what a proposal quotes also needs pricing permission.
- Add the services you sell to the Service Catalog first. The wizard picks scope from that list.
- Your clause library supplies the engagement-letter wording. You do not need to prepare anything — the defaults are attached for you.
- Only Draft proposals can be edited later. Once a proposal is sent you have to cancel it before its price can change.
Step-by-step instructions
Step 1: Start a new proposal
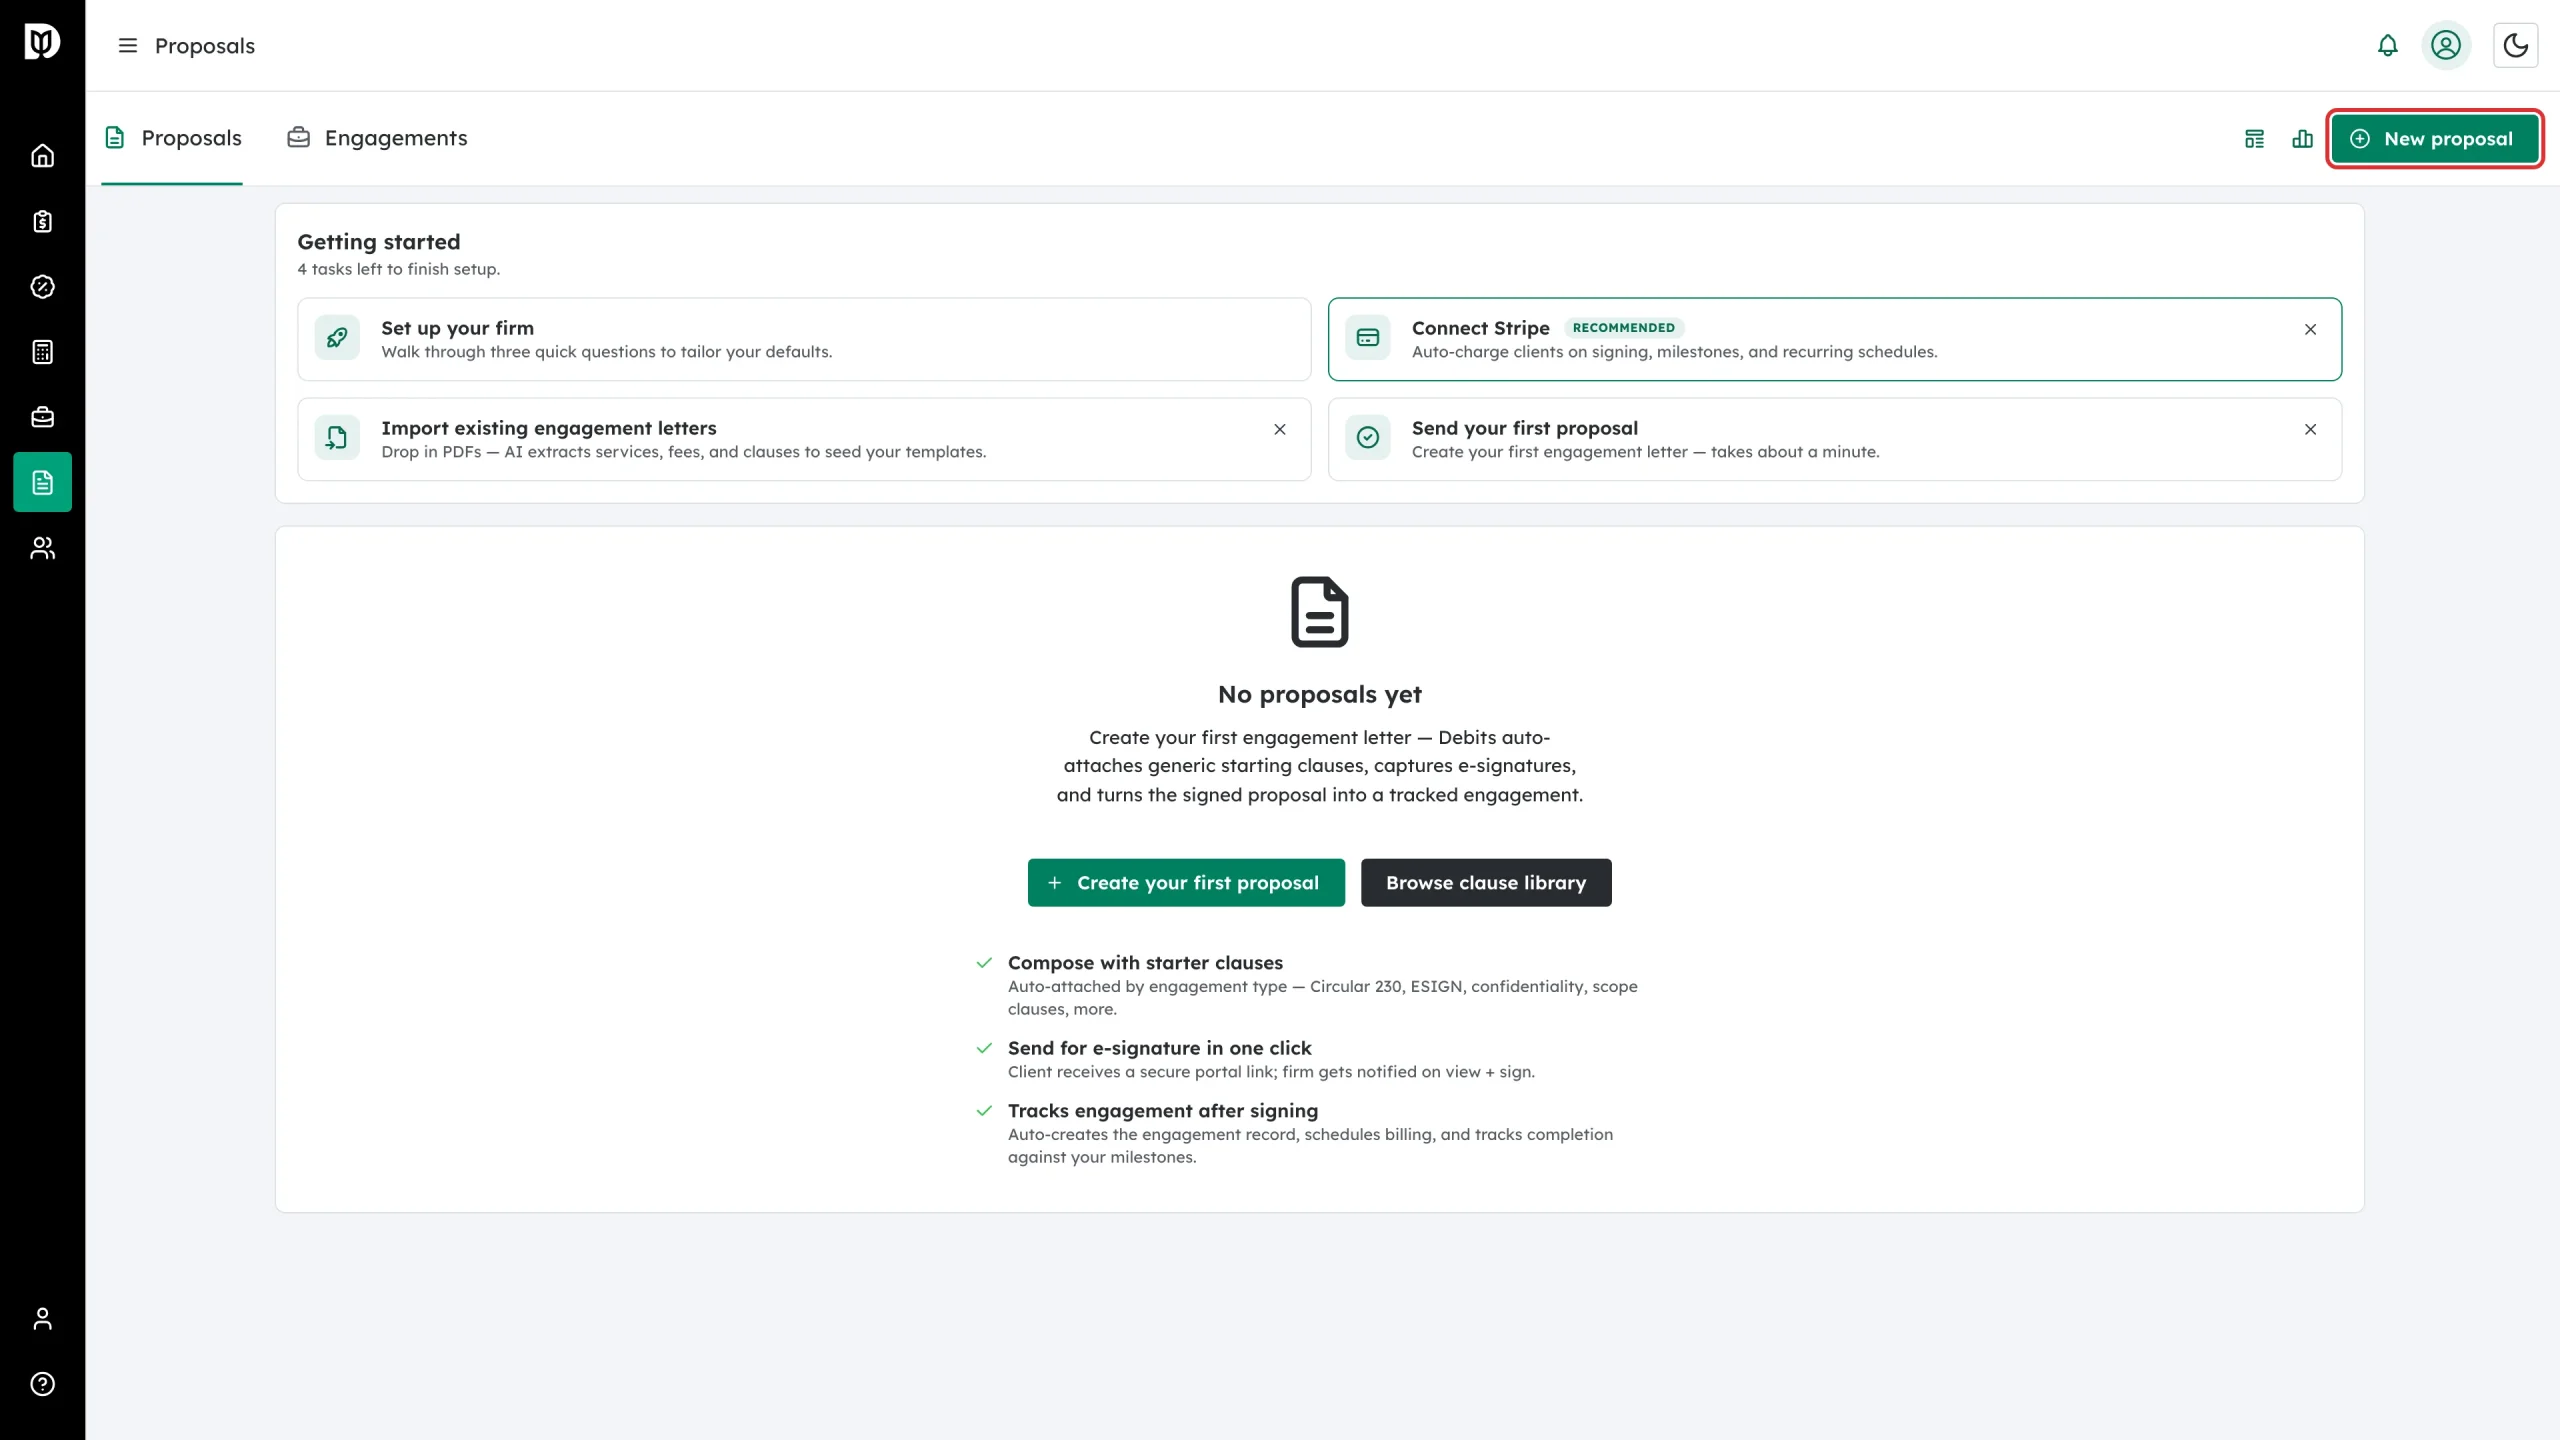
Go to Proposals and click New proposal.
Step 2: Pick the engagement types you’re quoting
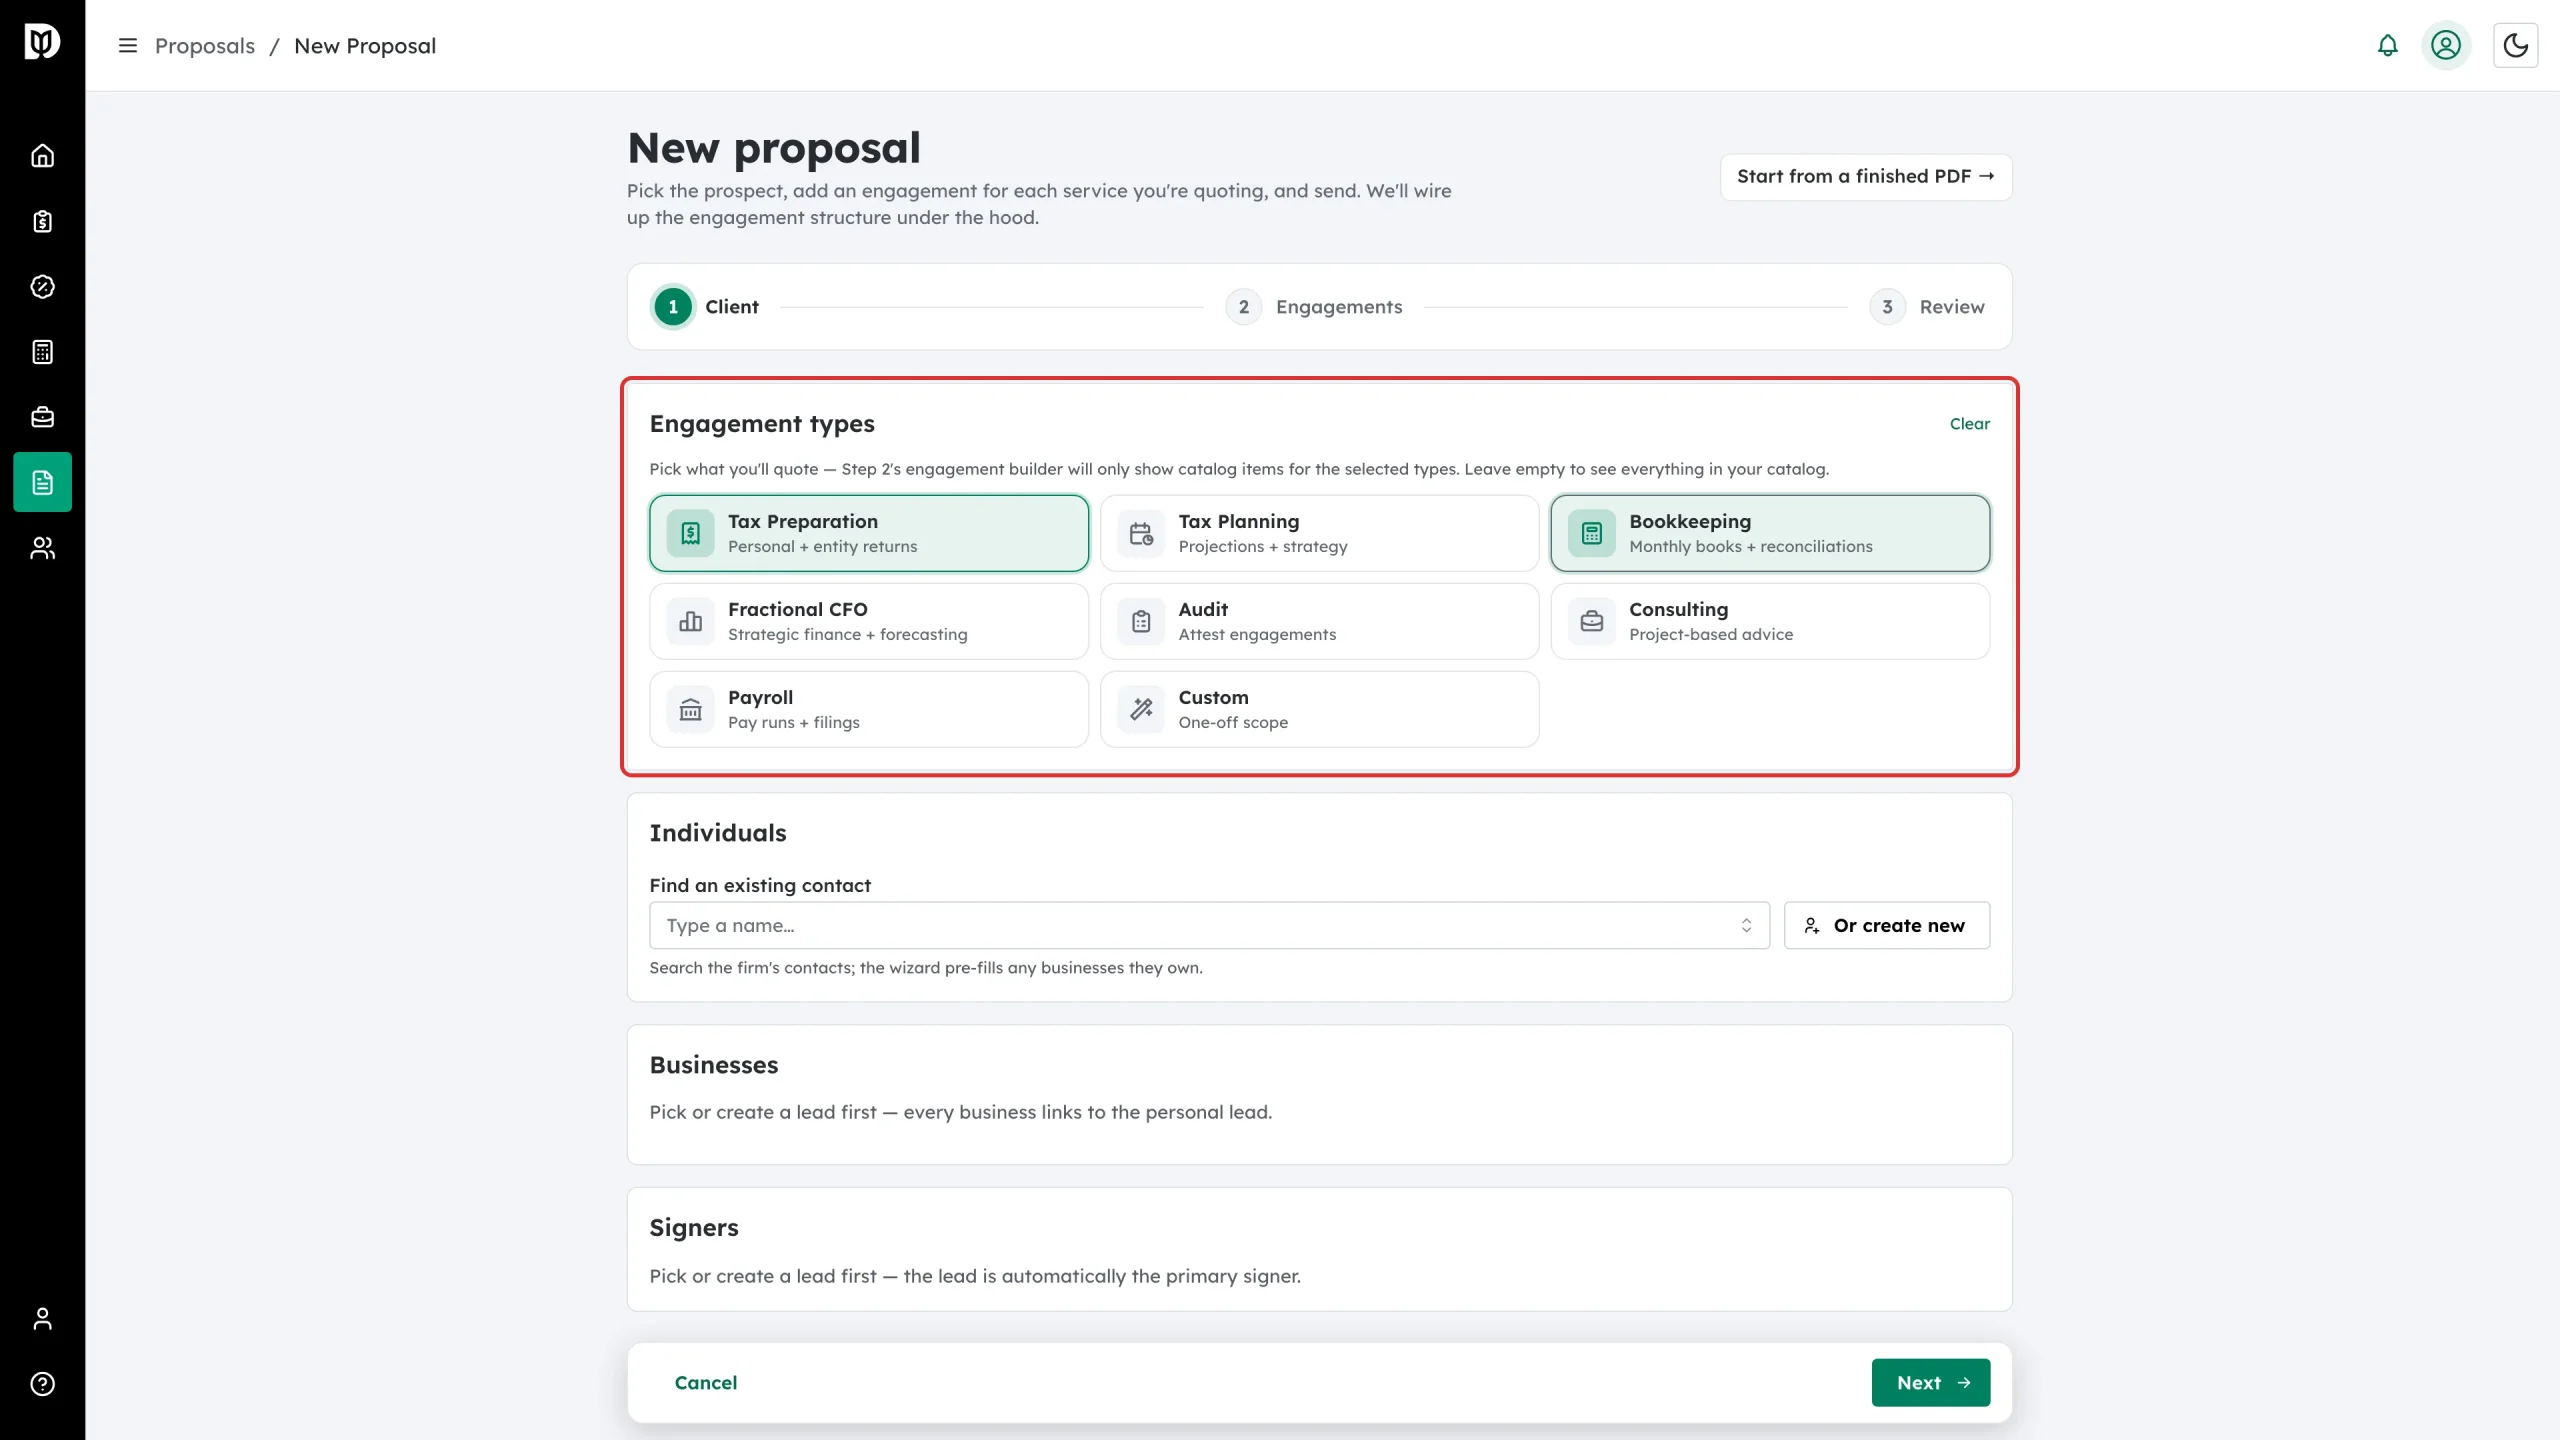
On the Client step, click the types you are quoting — for example Tax Preparation and Bookkeeping. This filters the service catalog on the next step so you only see relevant items. Leave them all unselected to see your whole catalog.
Step 3: Choose the client
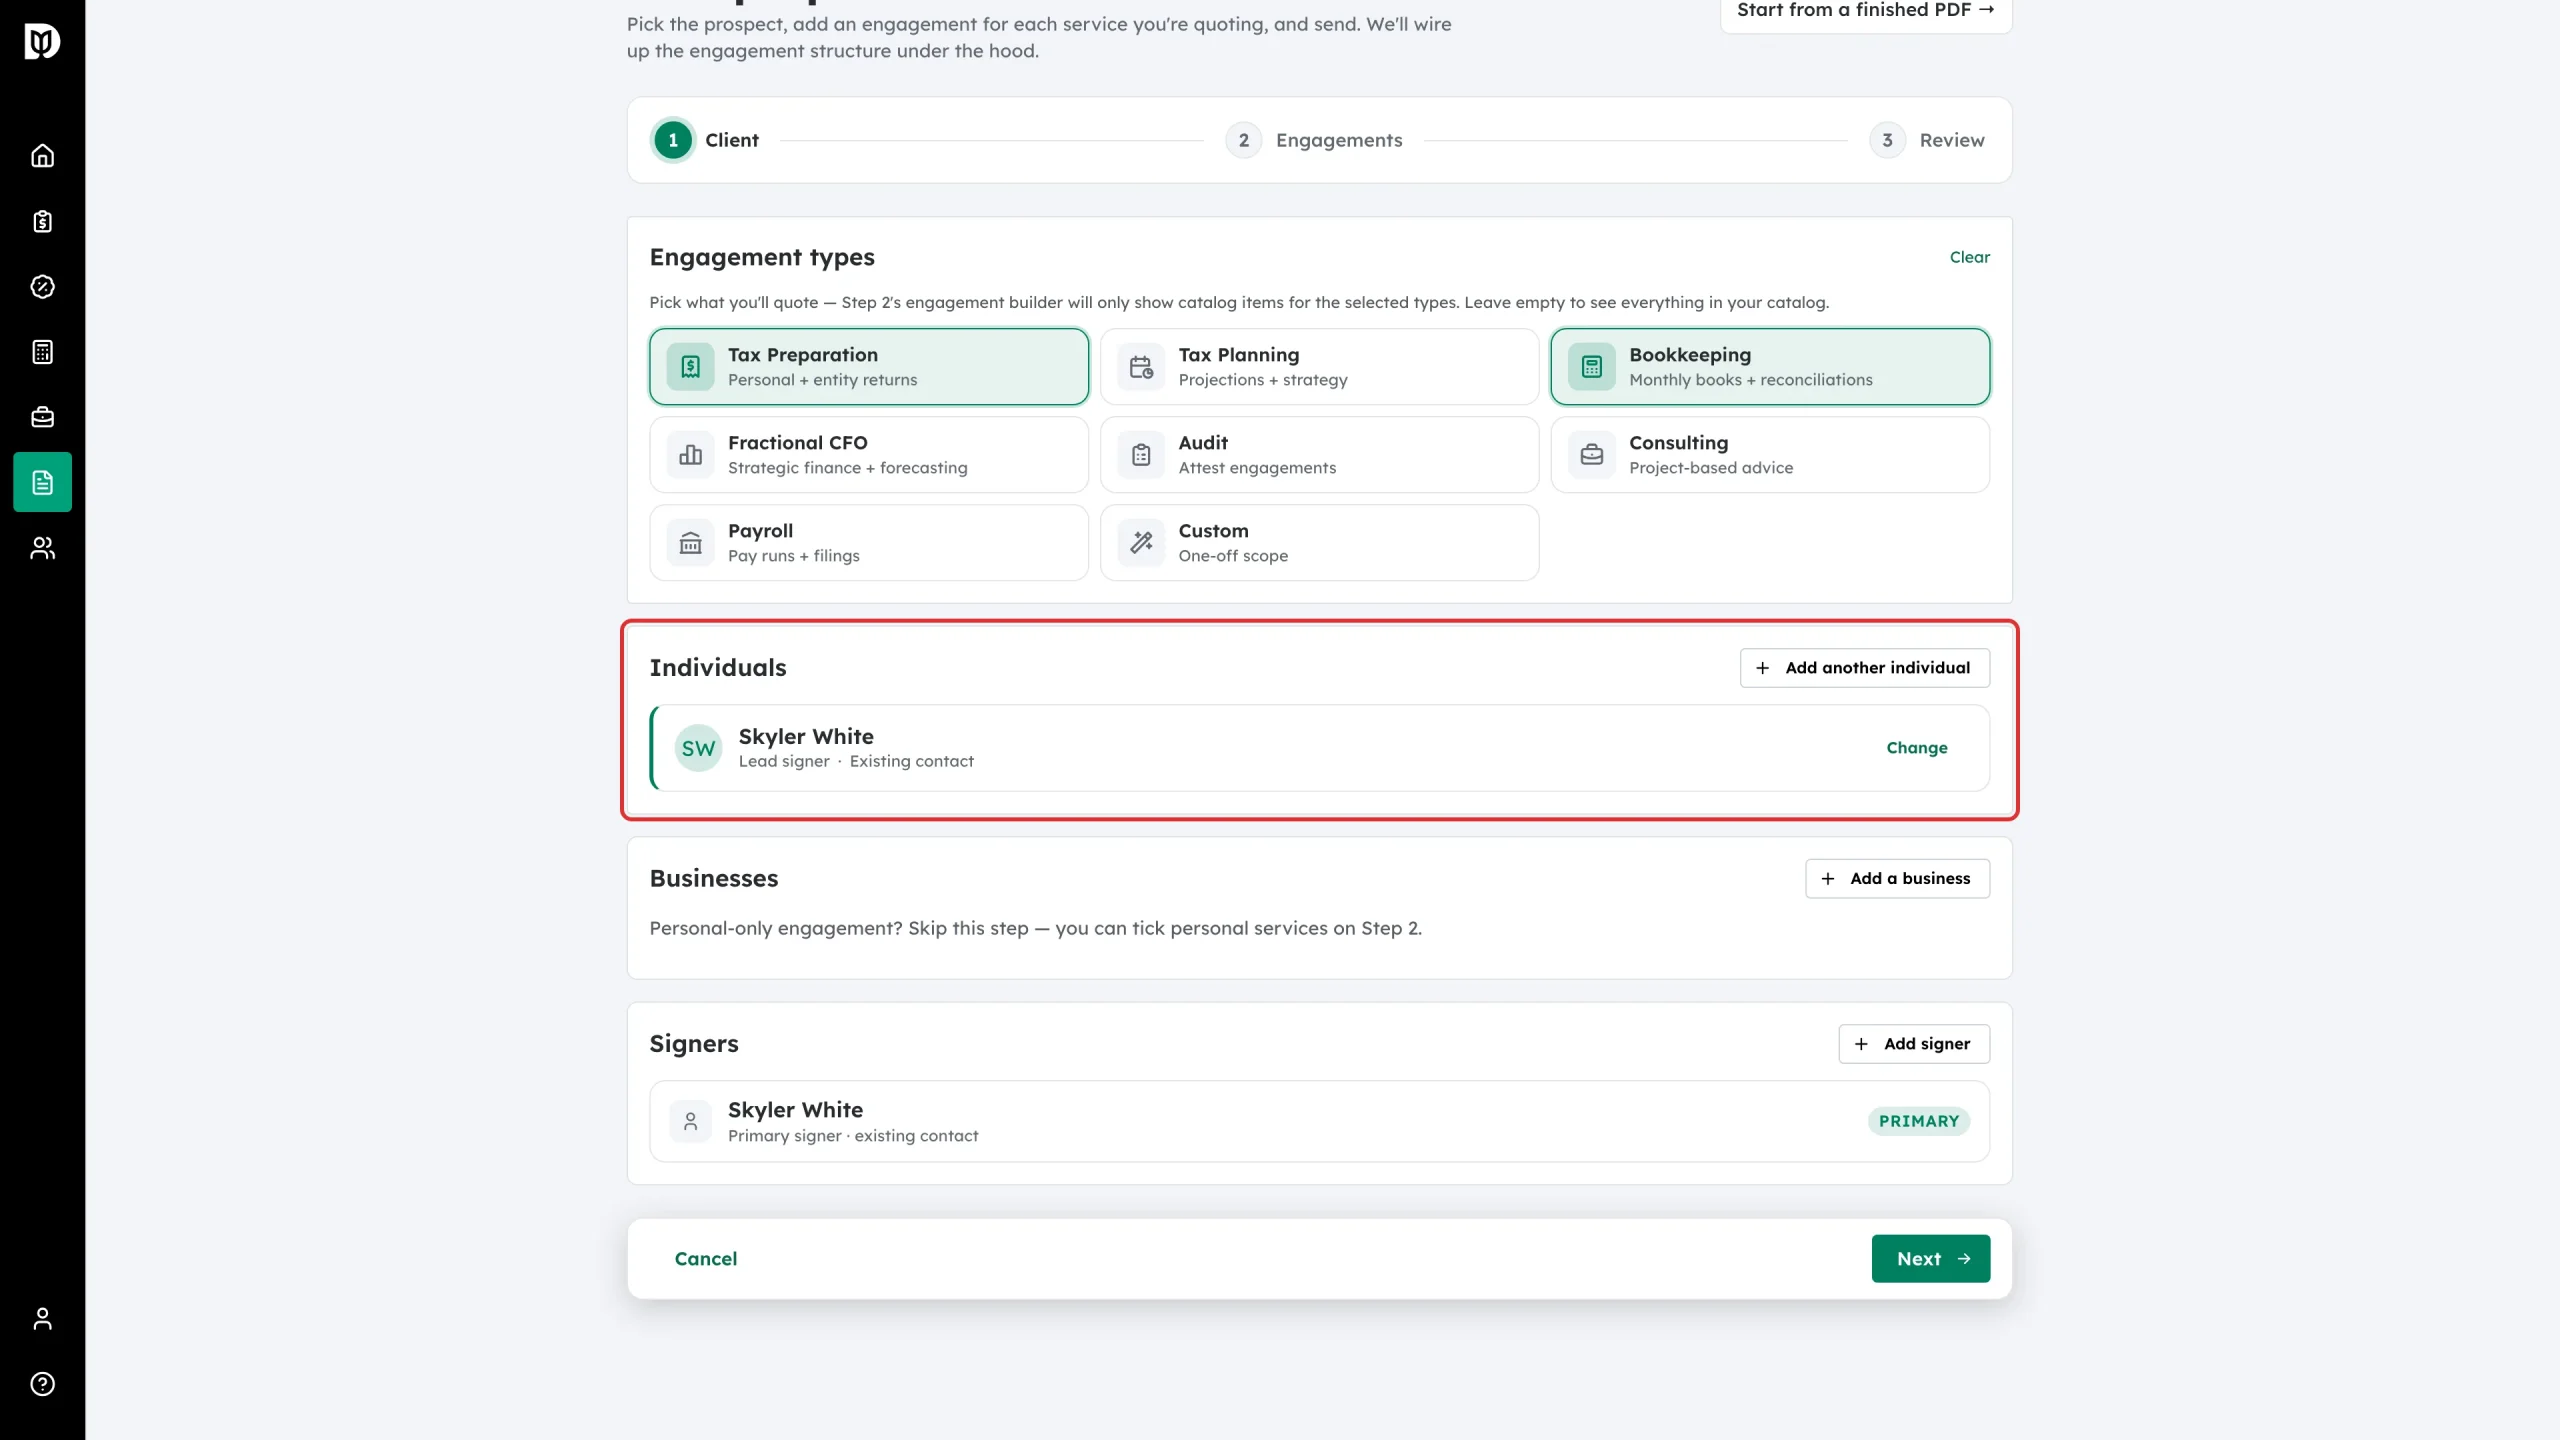
Under Individuals, search Find an existing contact and pick the person, or click Or create new to type a new prospect. The first individual is the lead: they are the primary signer and the client the engagements attach to. To quote separate returns for more people — for example two individual 1040s — click Add another individual. If you are also quoting a company, use Add a business under Businesses.
Step 4: Add any co-signers
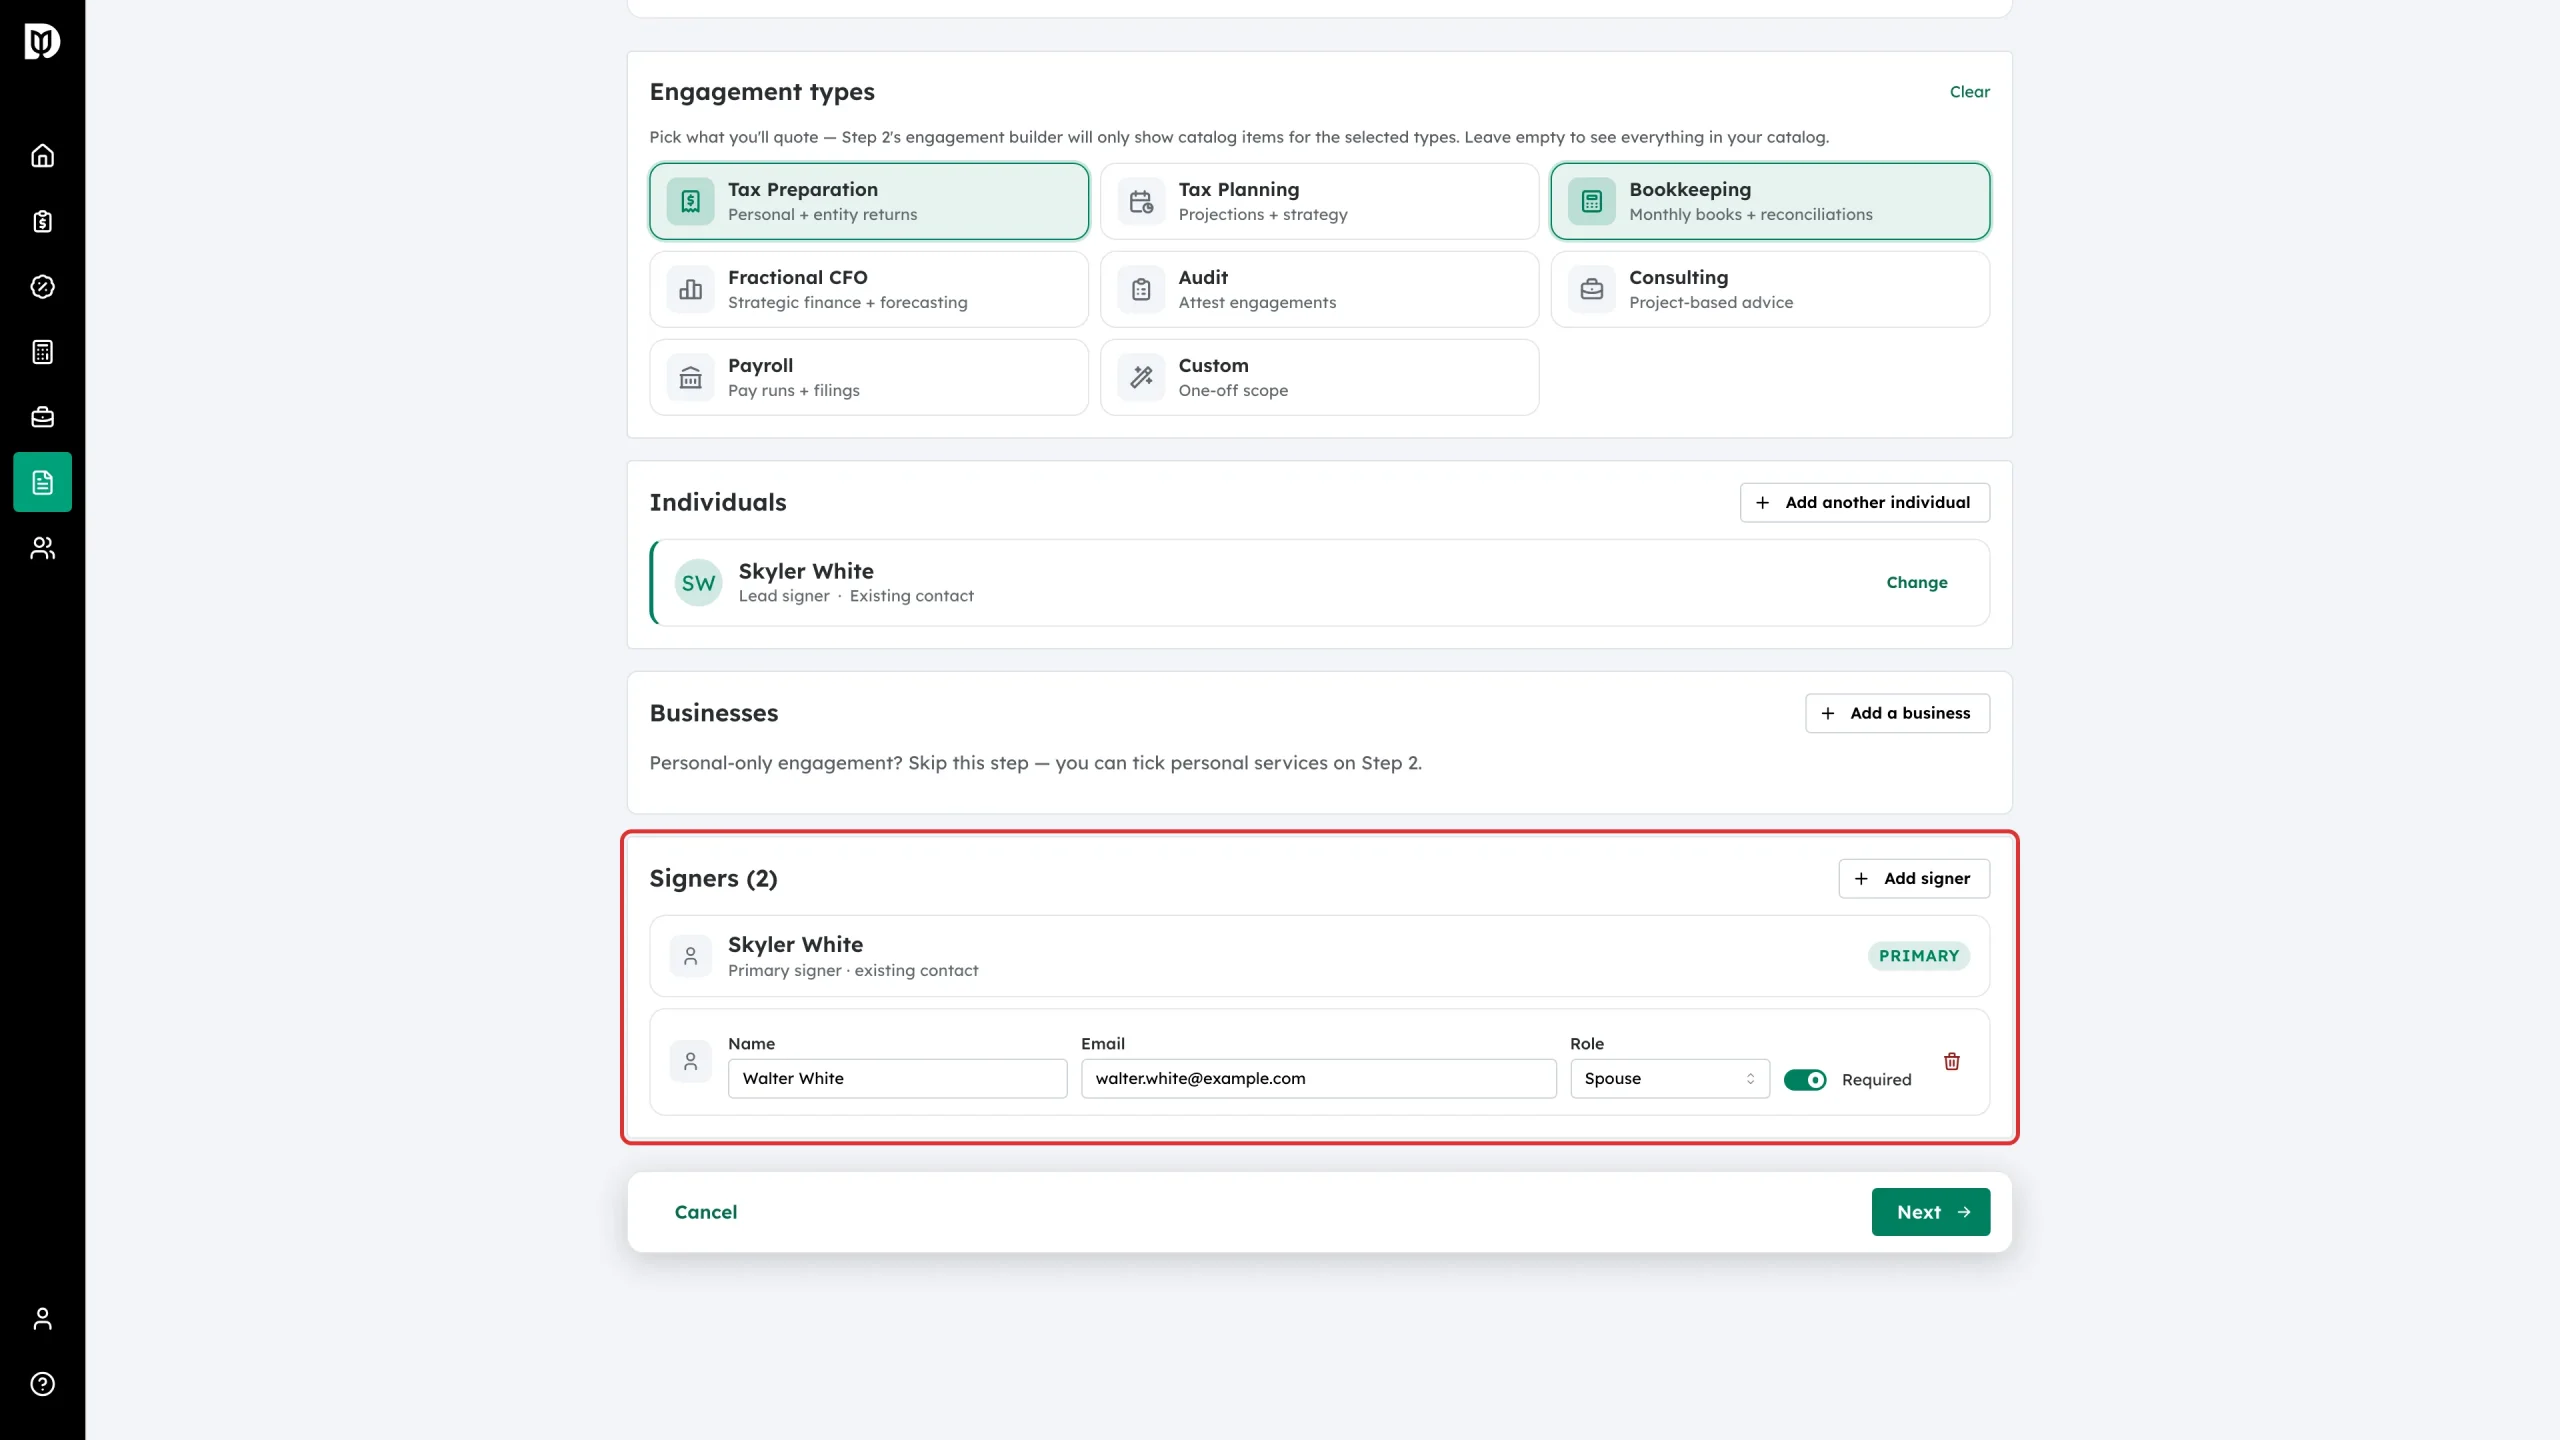
Under Signers, click Add signer, then Pick an existing contact or type a name and email. Set the Role (Primary, Spouse, Partner, Officer or Authorized Representative) and whether the signature is Required. Click Next.
Step 5: Add an engagement
On the Engagements step, click Add engagement. Each engagement walks you through three questions: What’s the work?, What will you charge? and How should invoices go out? On the first, choose What kind of work? and For whom?, then the period (Which tax years? for a return, or Starting when? and Until). Add one engagement per service you are quoting — each keeps its own period, price and billing cadence. A proposal can also quote the same return type for two tax years, for example a catch-up year.
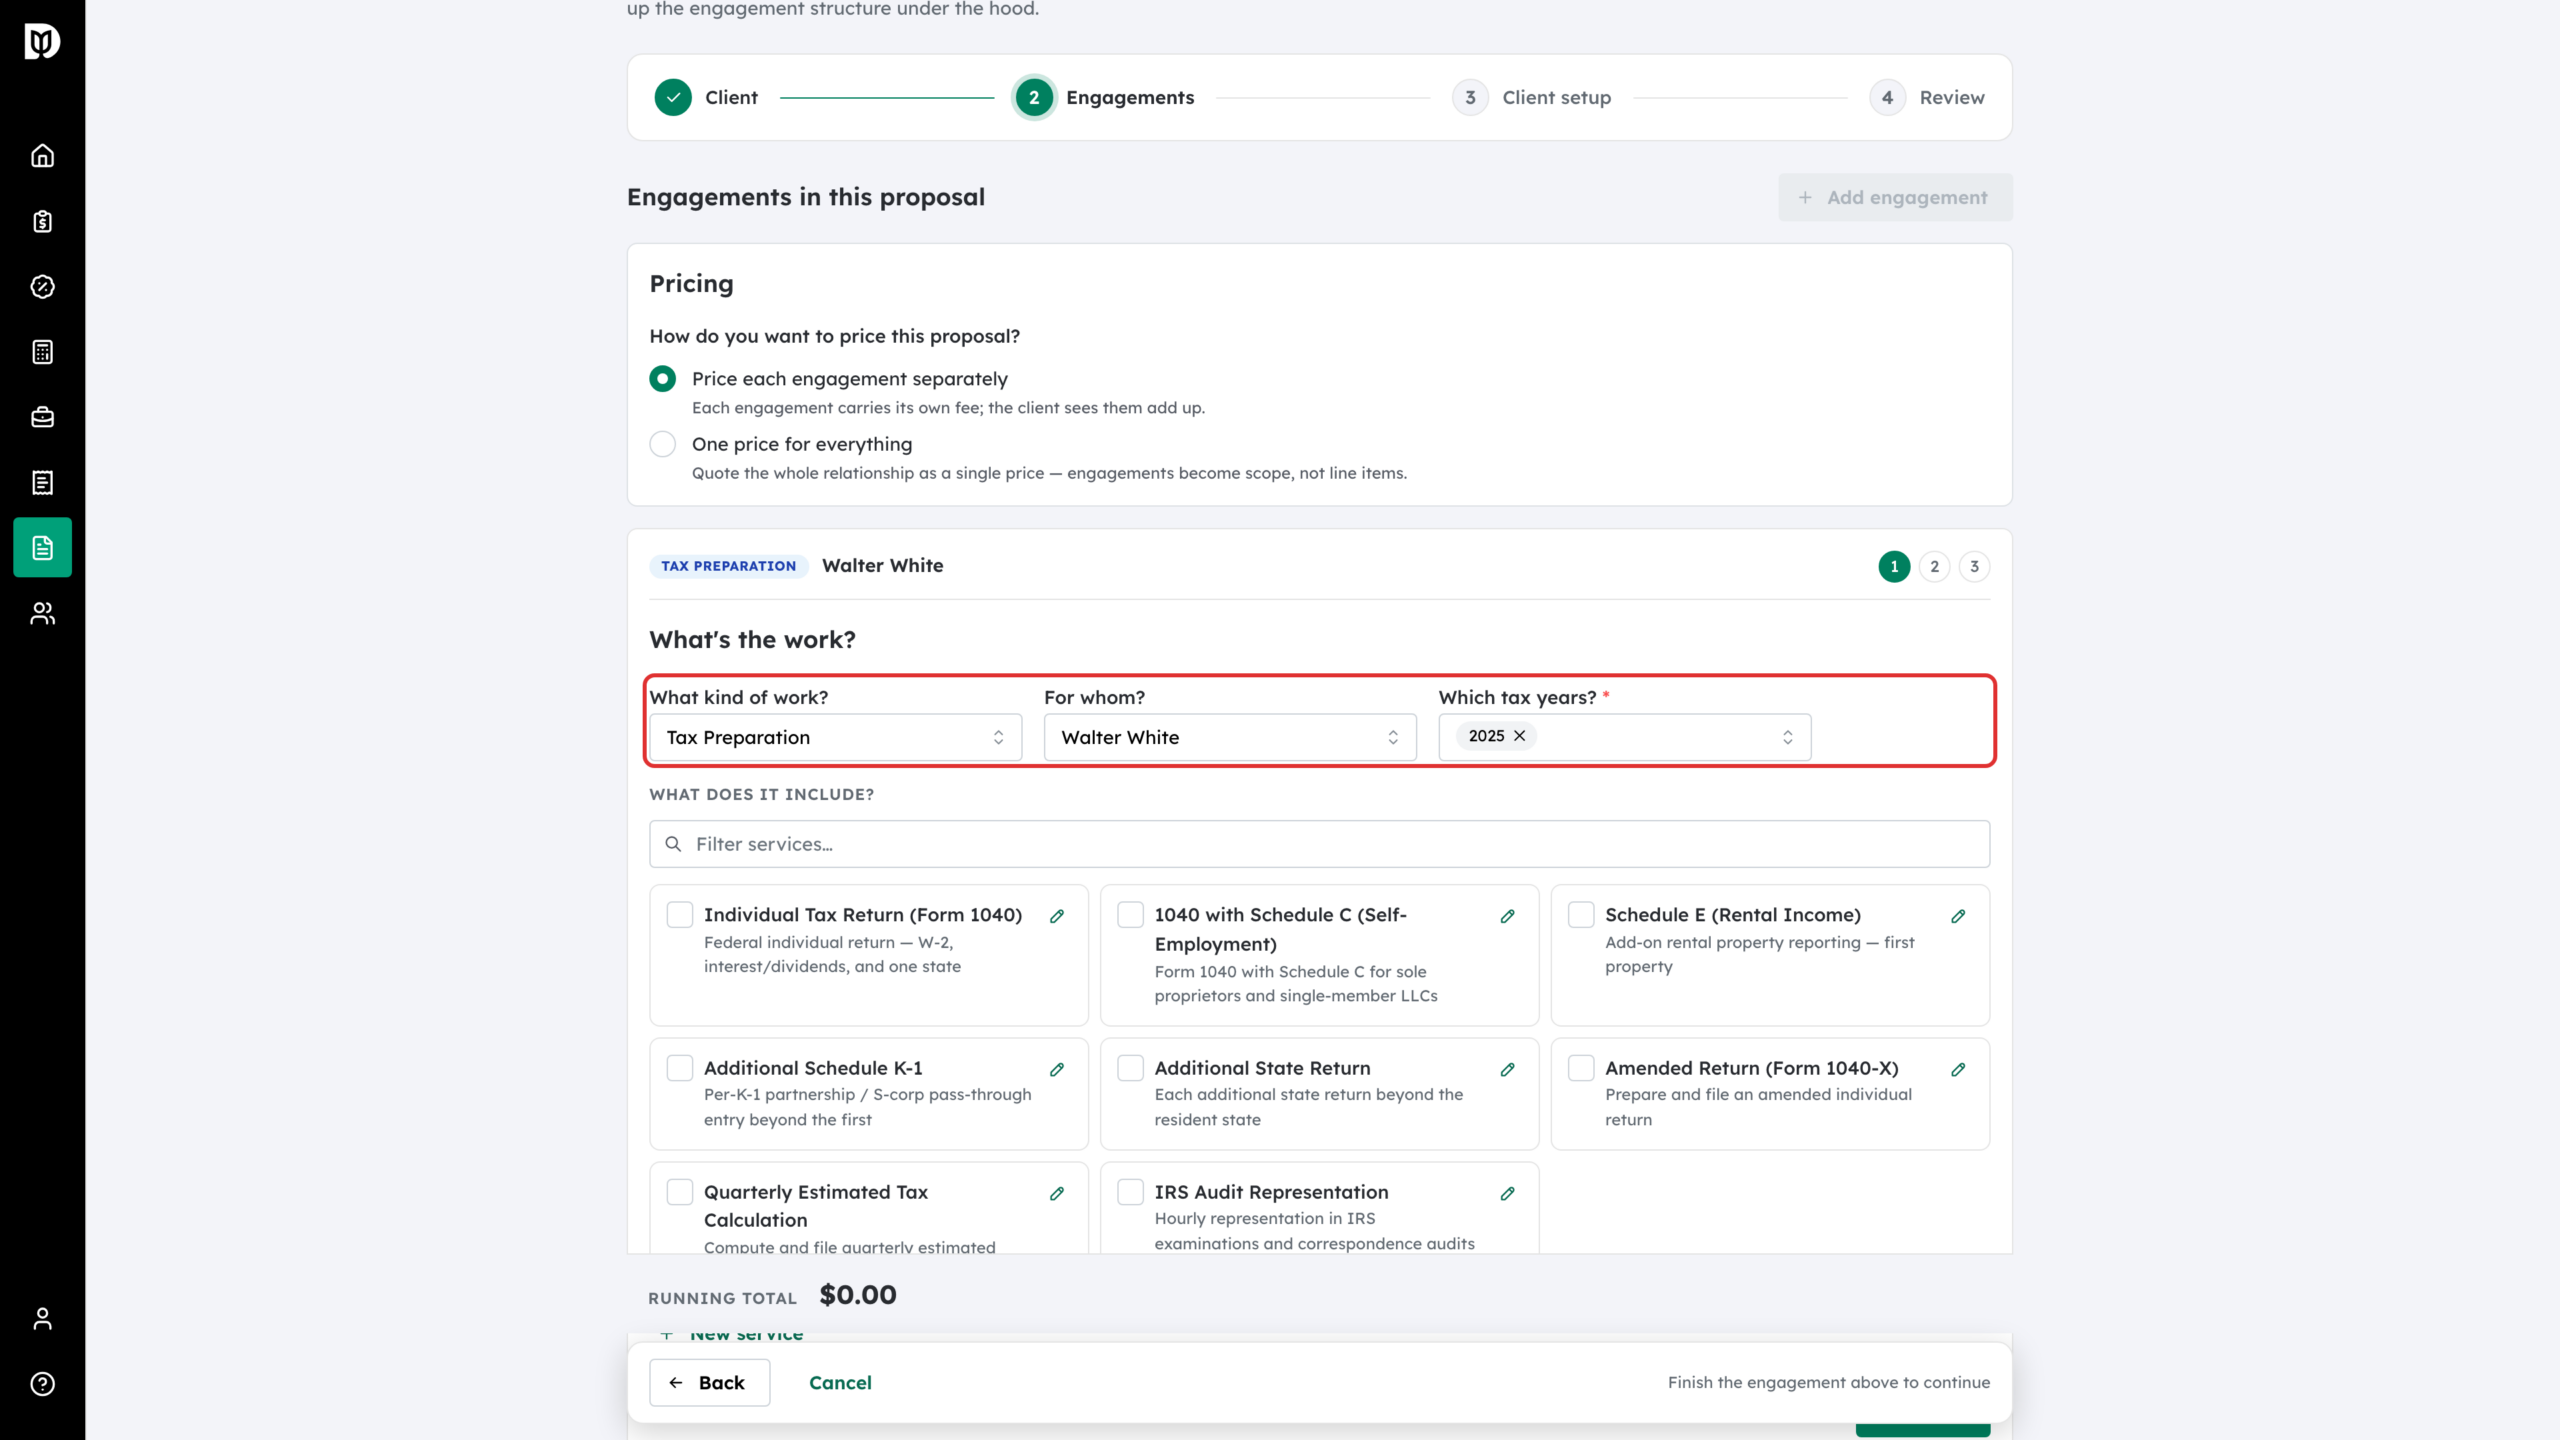
Step 6: Tick the services in scope
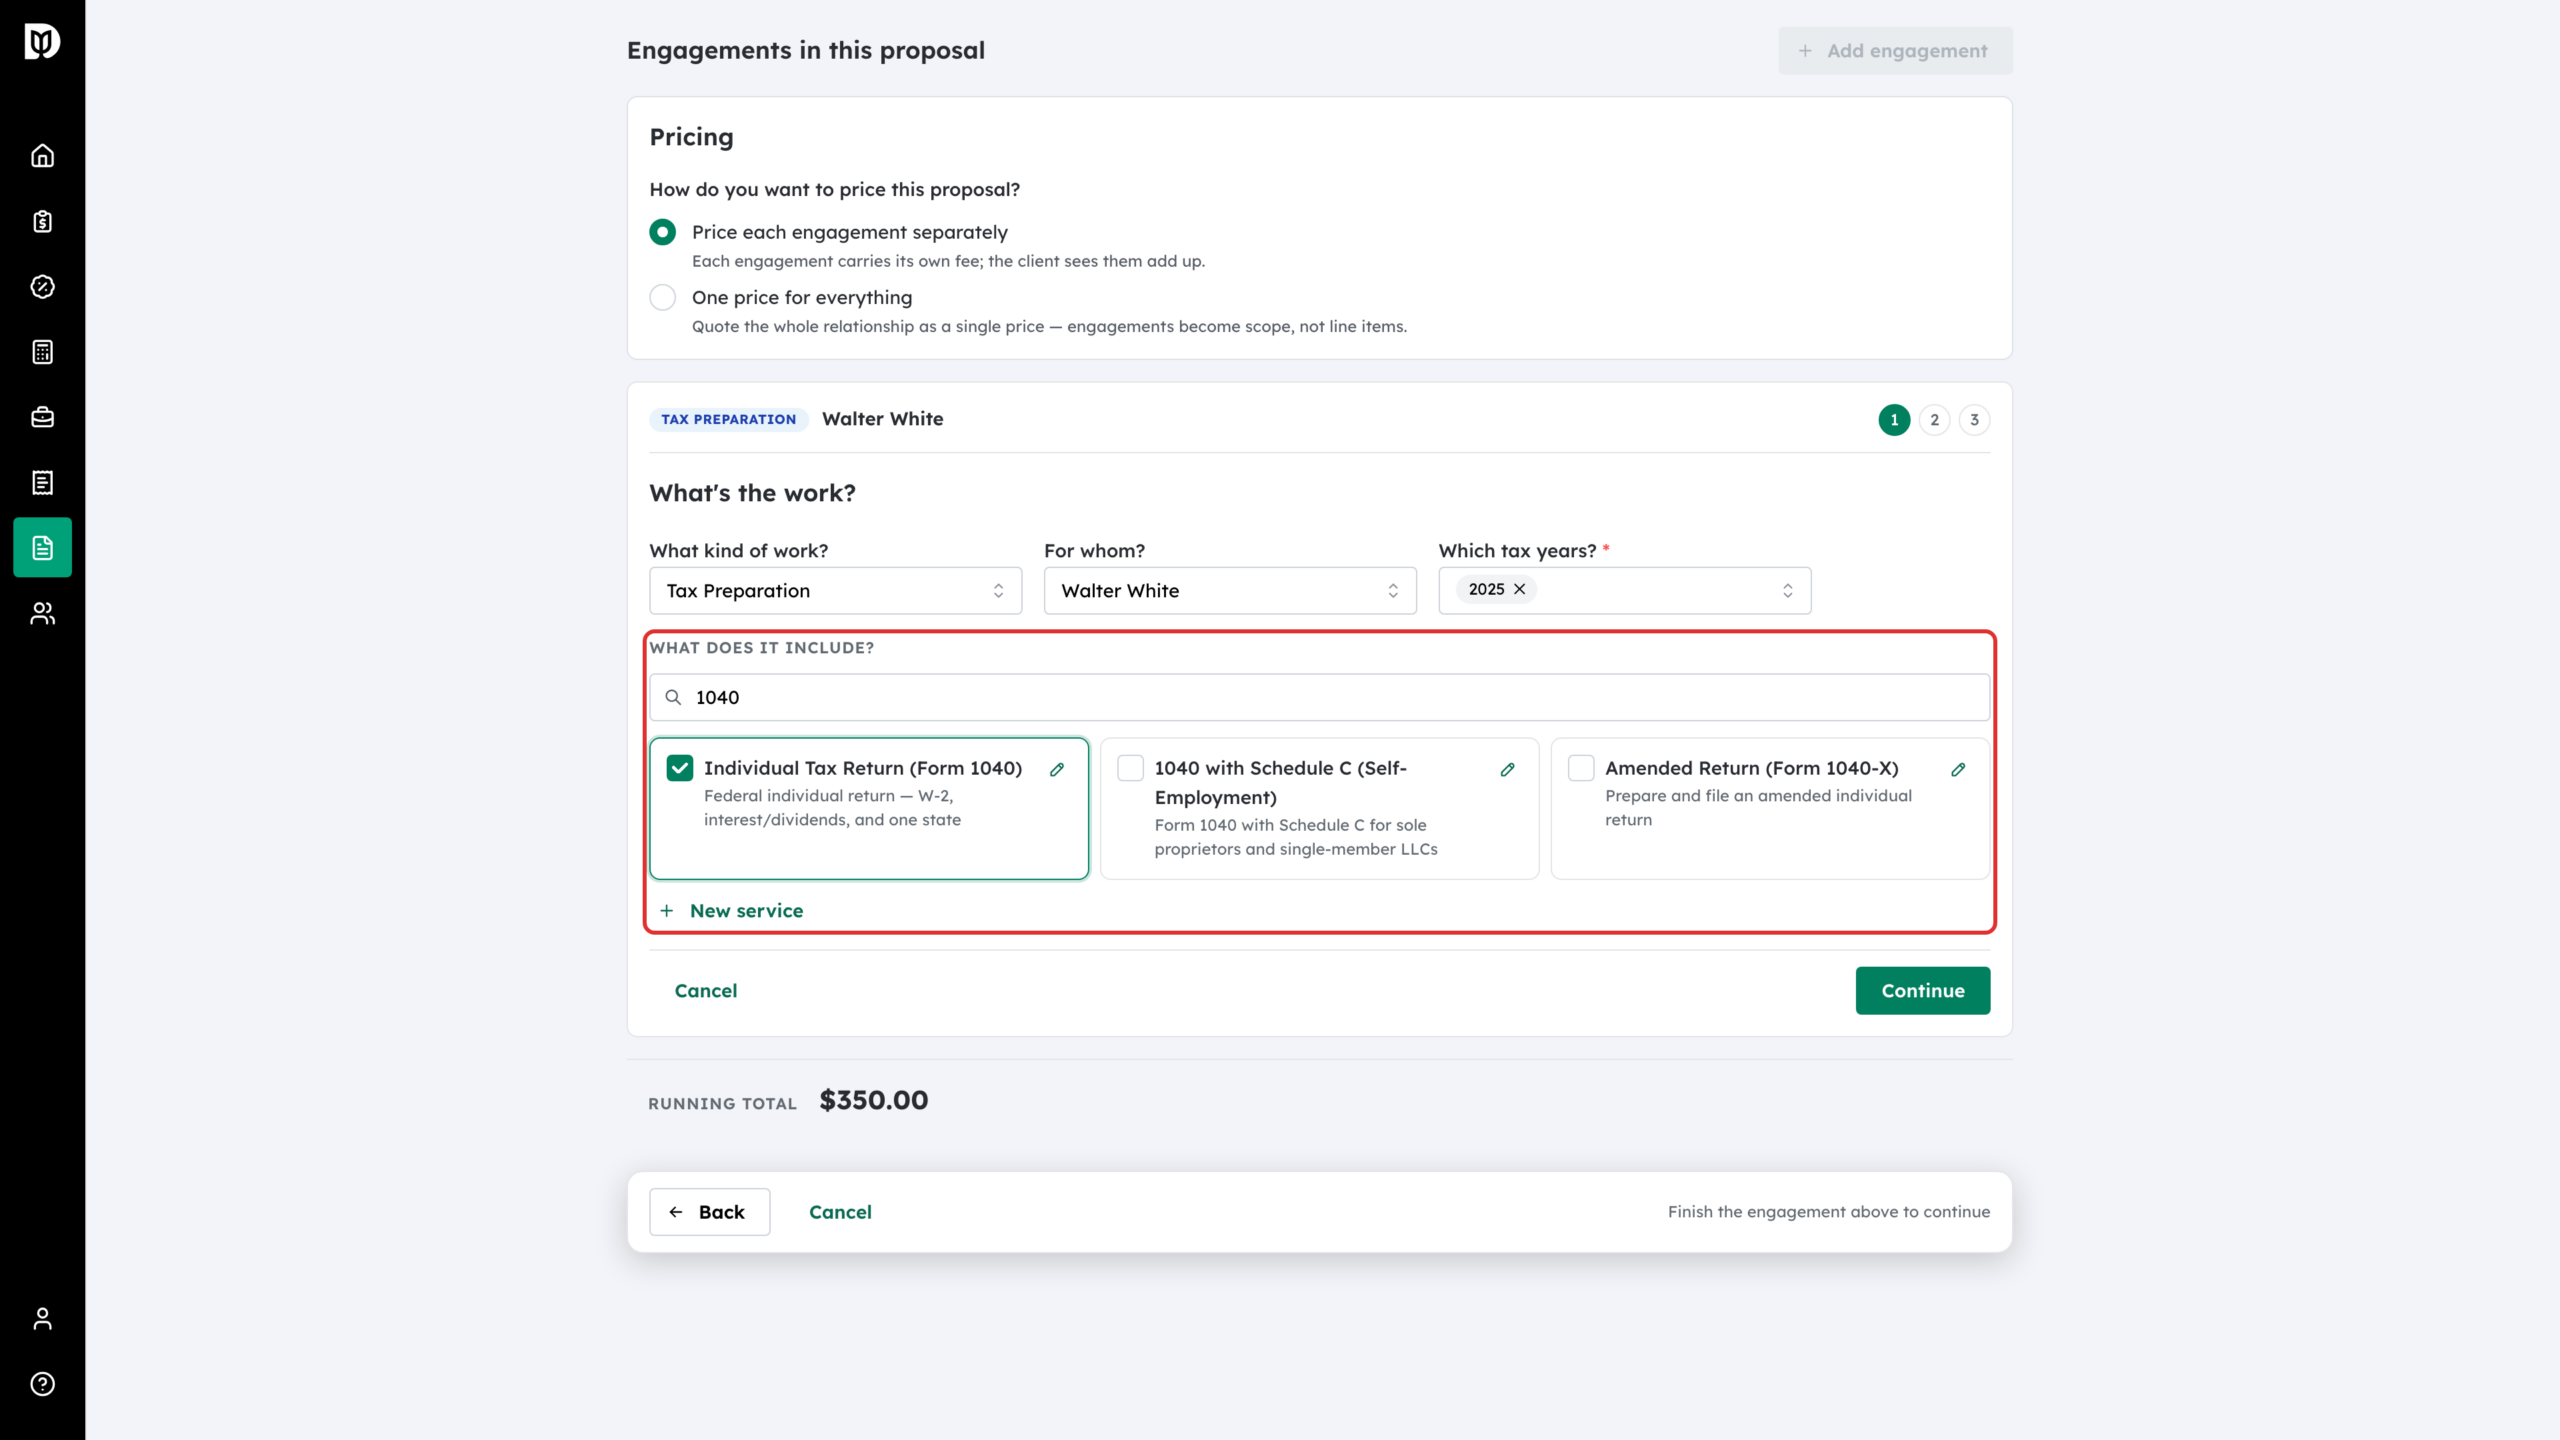
On the same question, every catalog service that fits the engagement type is listed; use Filter services… to narrow it. Ticking an item adds it to the scope the client sees. If the engagement is priced as a Flat fee, the item’s default rate is also added to the fee, so check the amount afterwards.
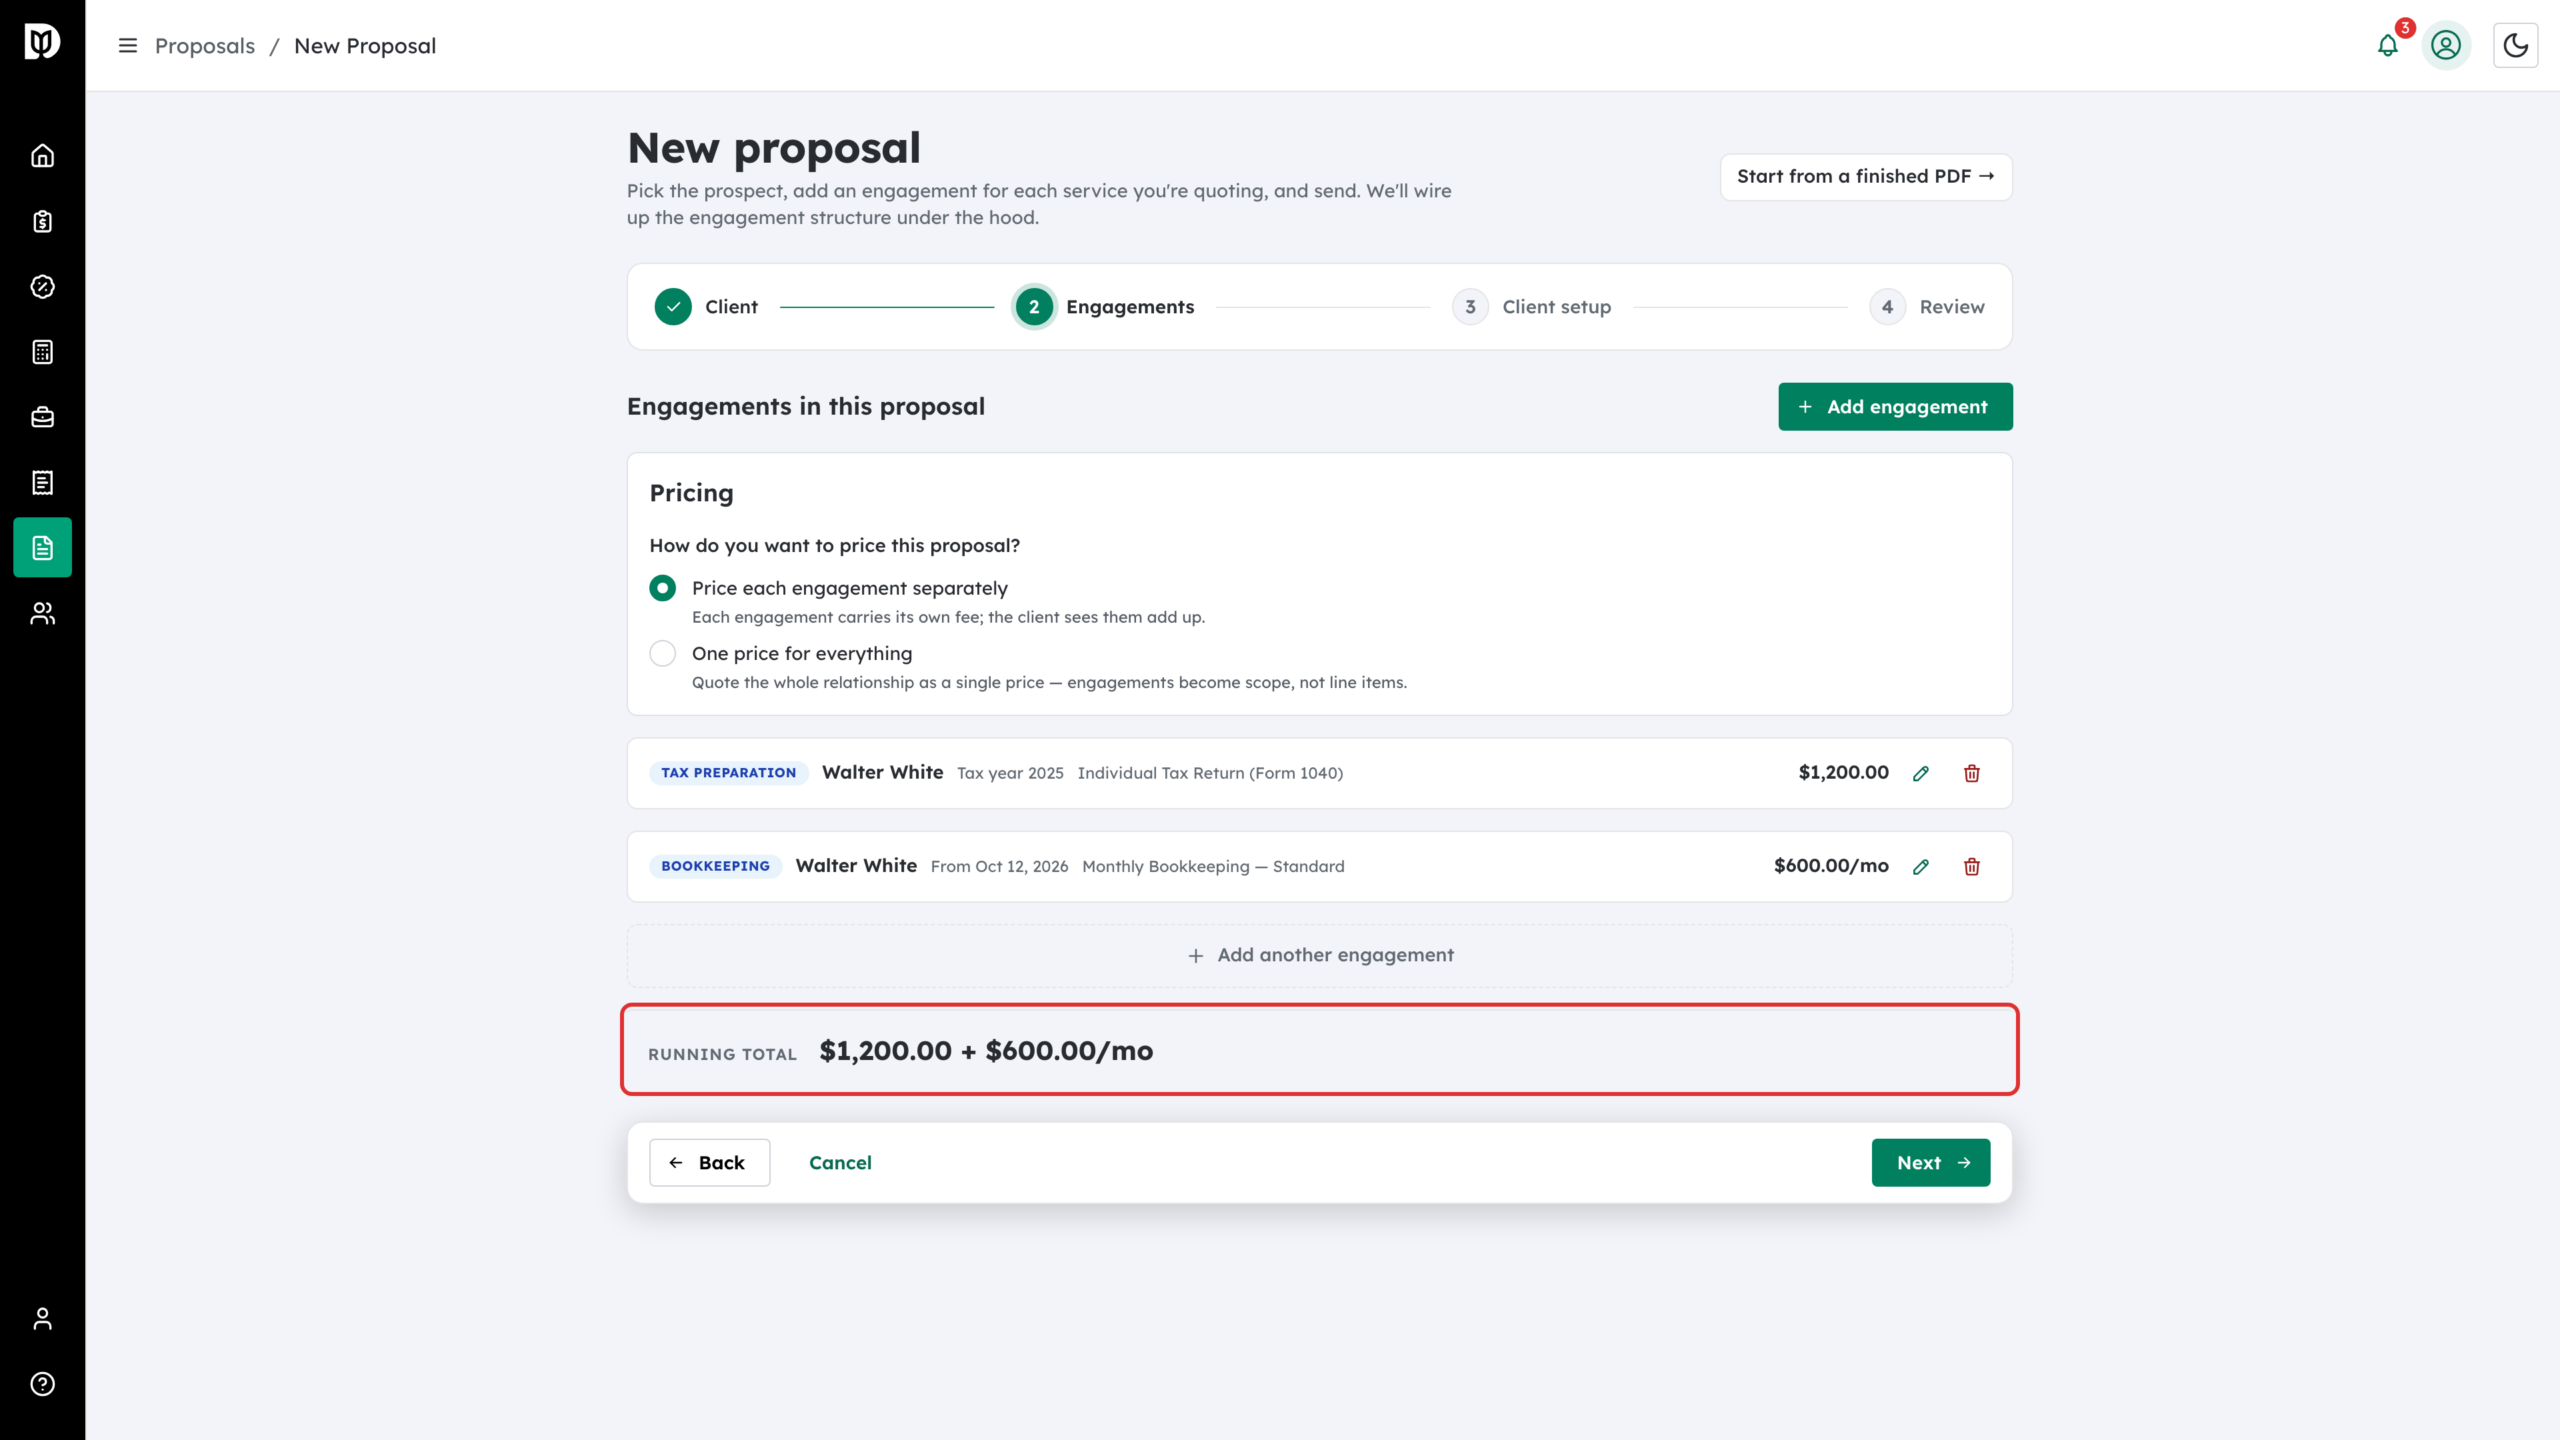
Step 7: Check the running total
Click Continue to set the price and billing for each engagement, then Done (see the pricing article for the options). The Running total bar at the bottom shows one-off and recurring amounts separately — for example $1,200.00 + $600.00/mo. Click Next.
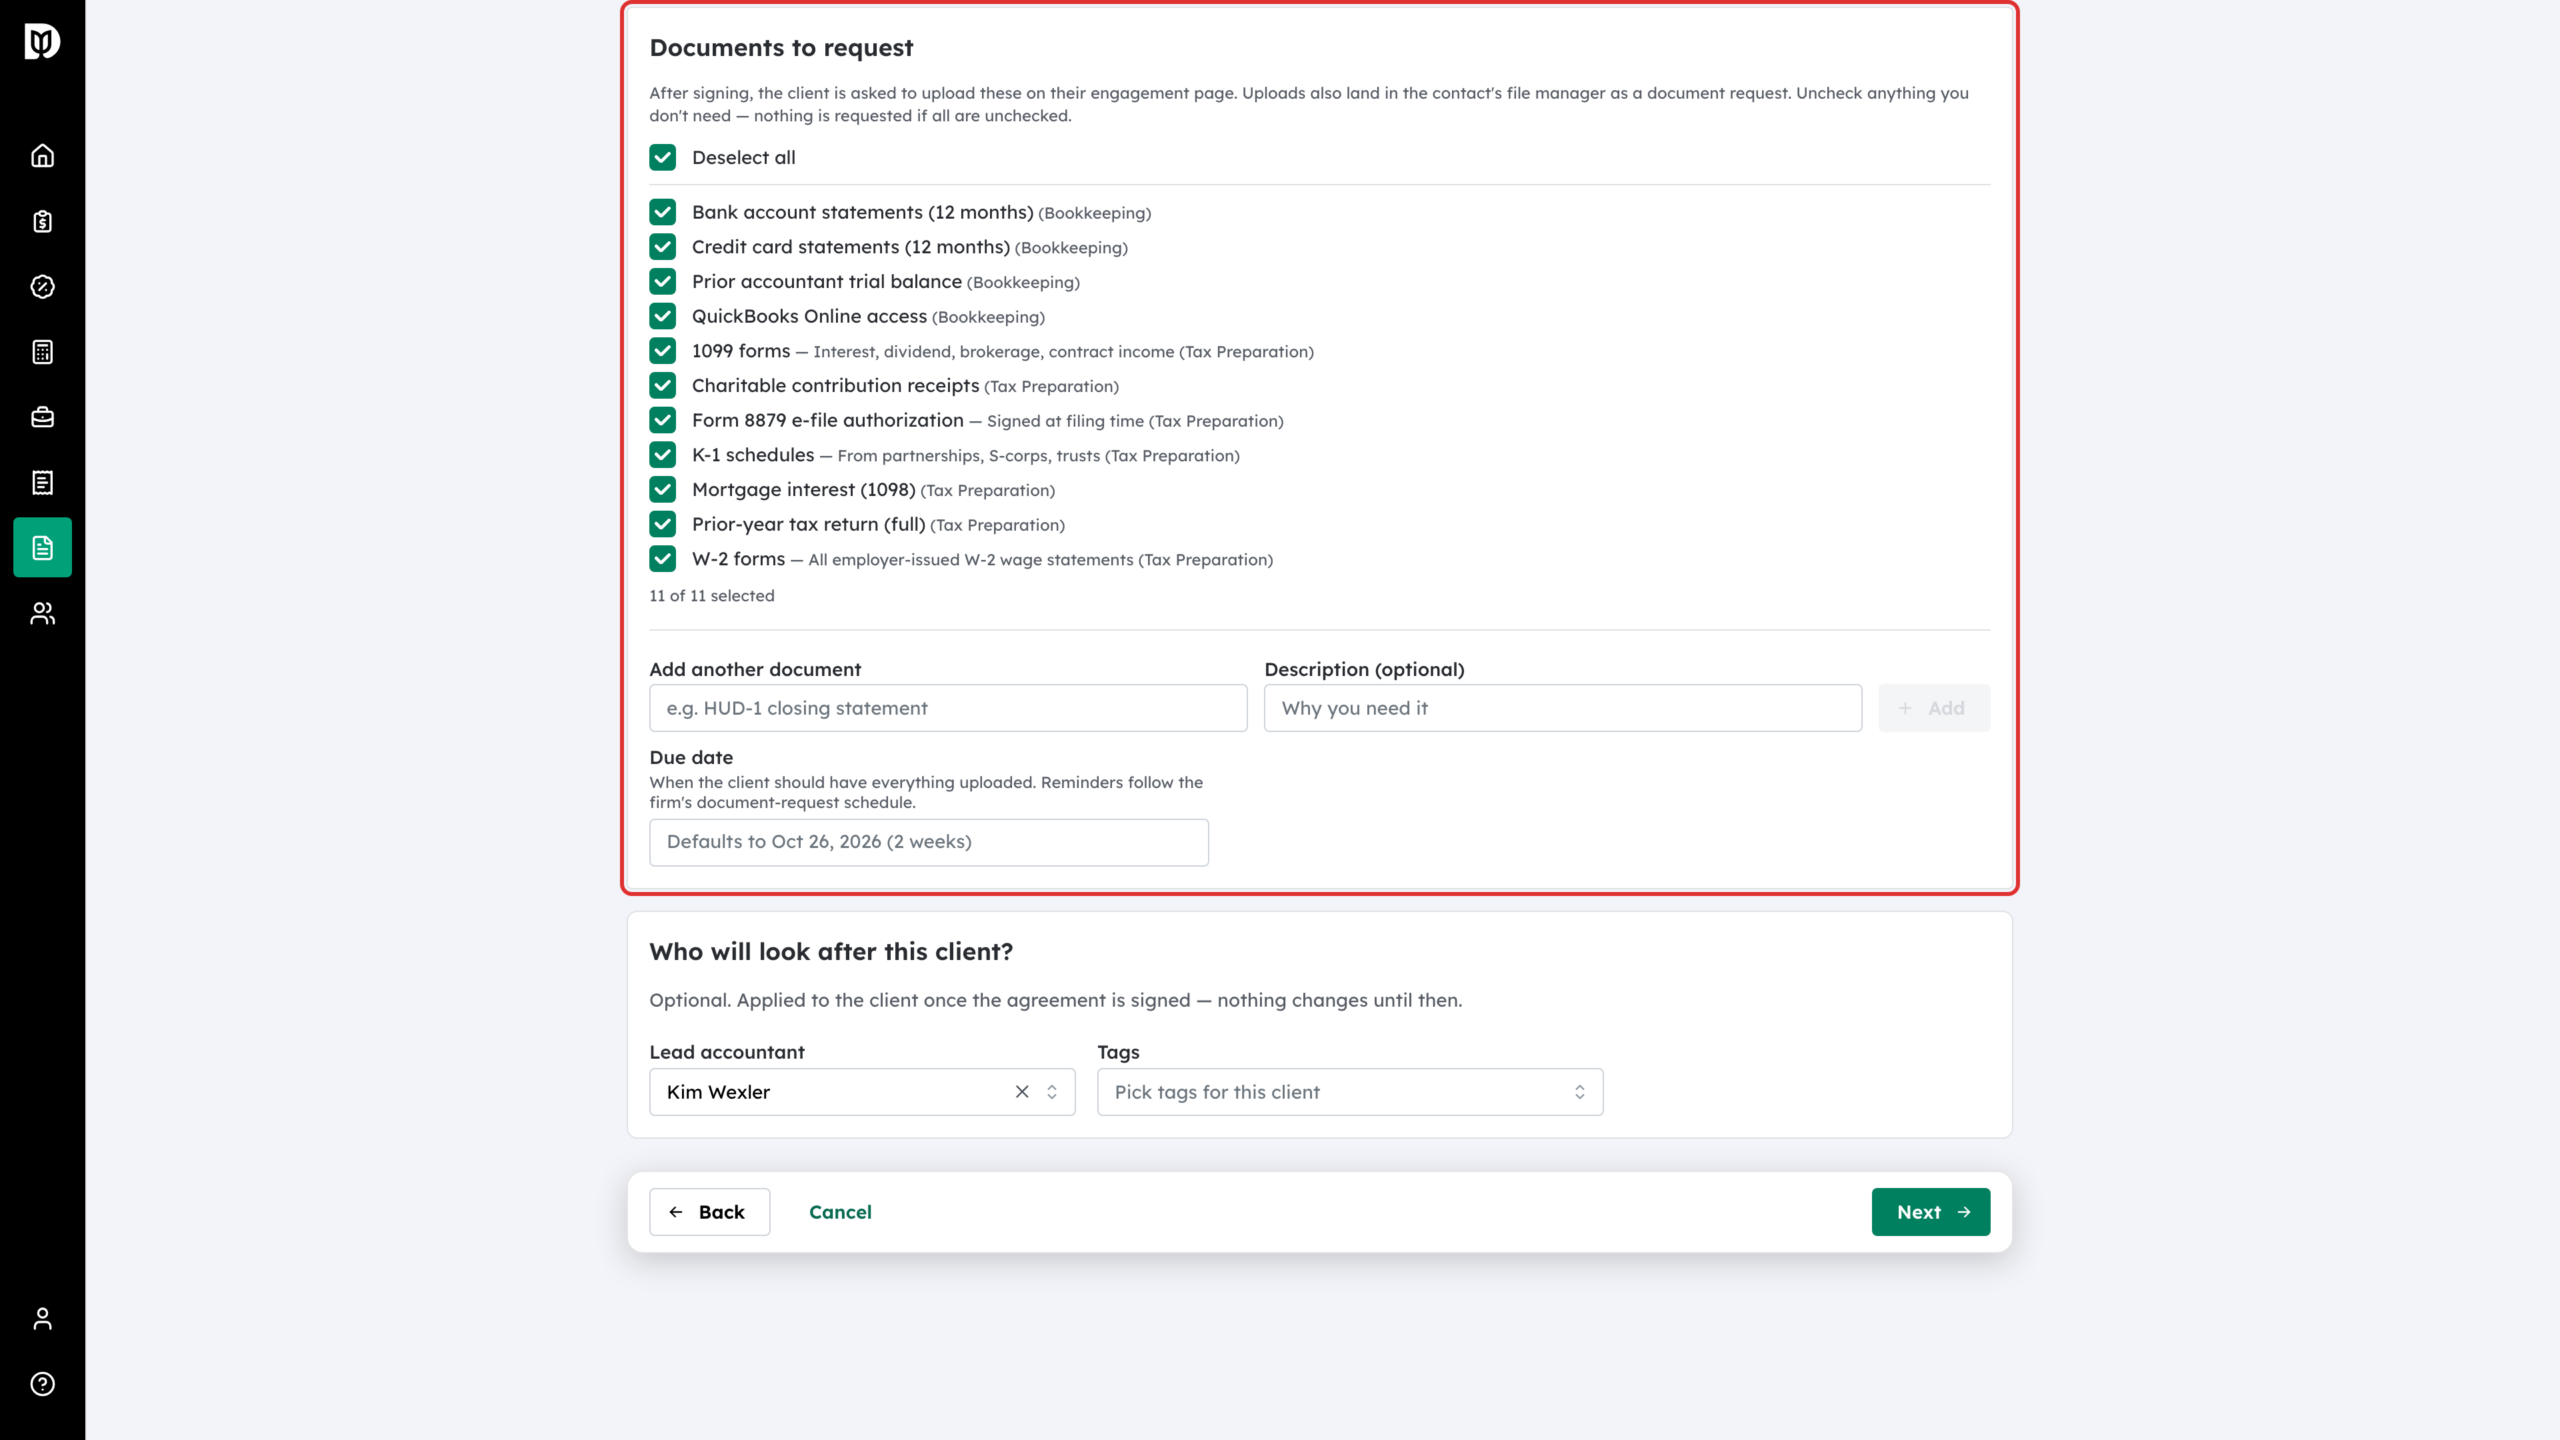
Step 8: Choose the documents to request and set up the client
On the Client setup step, Documents to request comes first. It is pre-ticked with the standard list for the engagement types on the proposal. Untick anything you do not need, add your own with Add another document, and set a Due date. After signing, the client is asked to upload these, and the requests also land in the contact’s file manager.
Below it, under Who will look after this client?, you can pick a Lead accountant and Tags. Both are optional, and they are applied to every contact on the proposal only once it is fully signed. Click Next.
Step 9: Review what will be sent
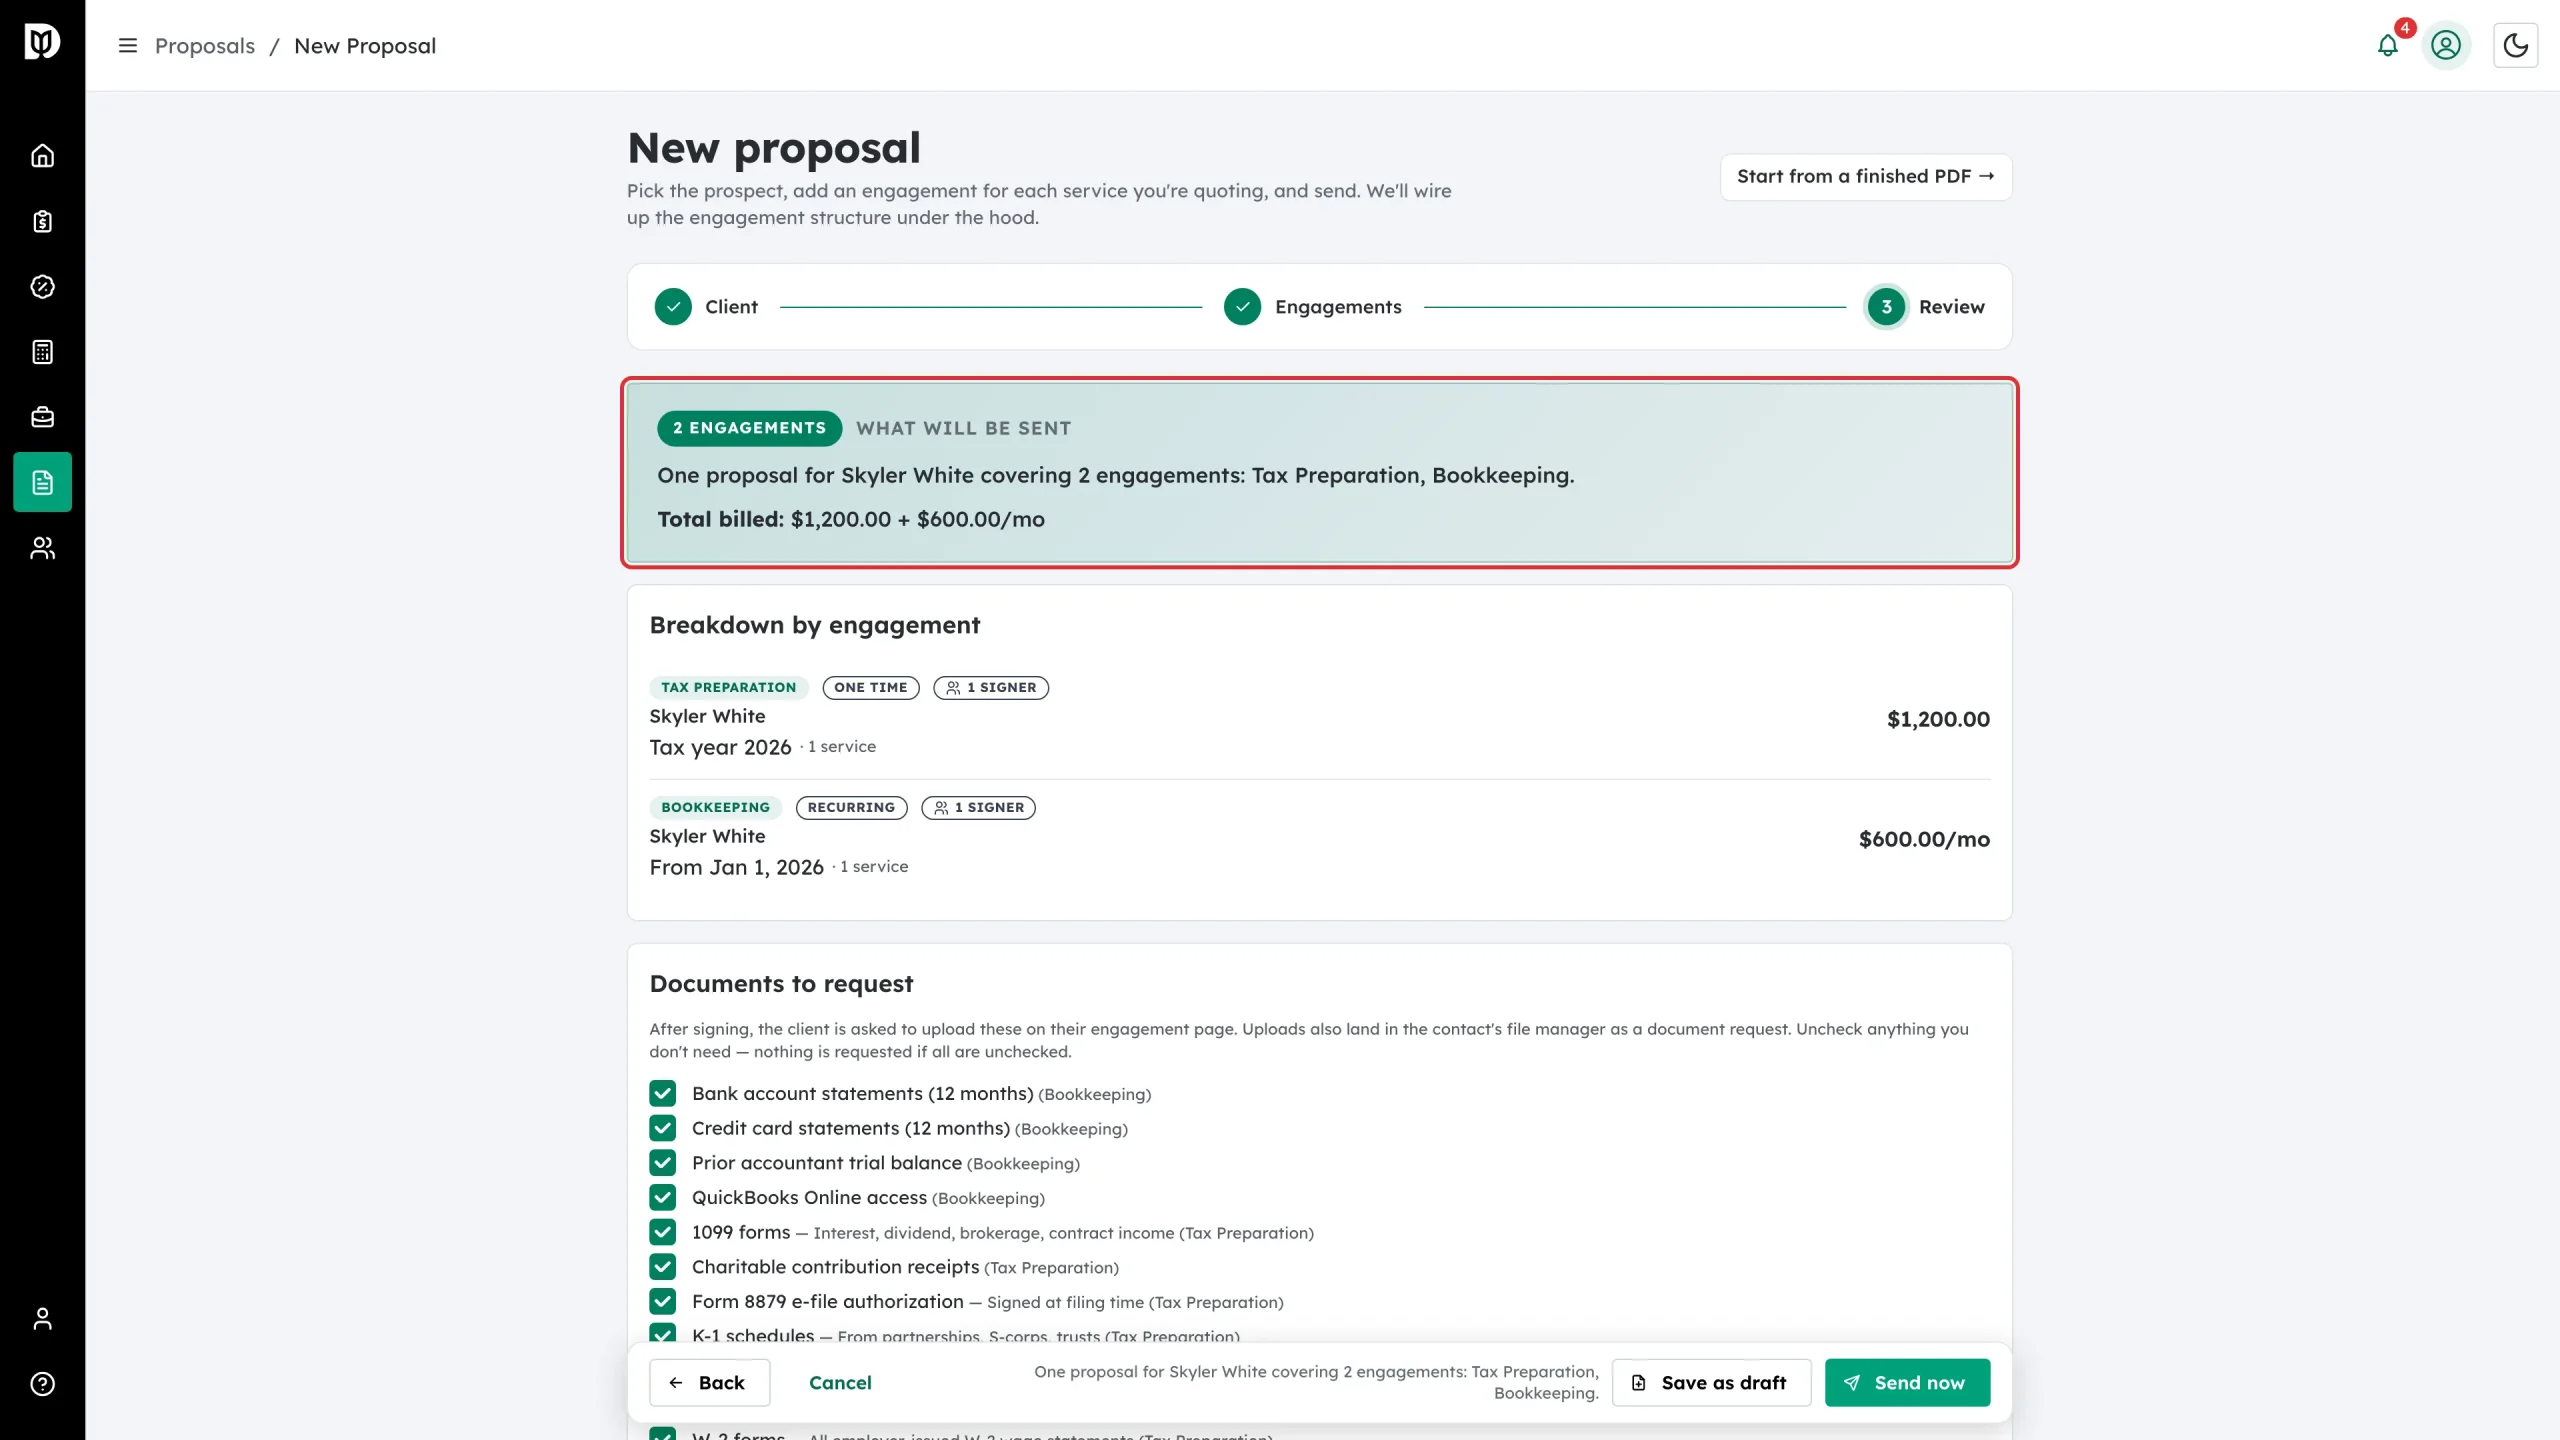
The Review step opens with a plain-English summary: one proposal, who it is for, and how many engagements it carries. Breakdown by engagement underneath lists each engagement with its period, signer count and price.
Step 10: Check the engagement terms
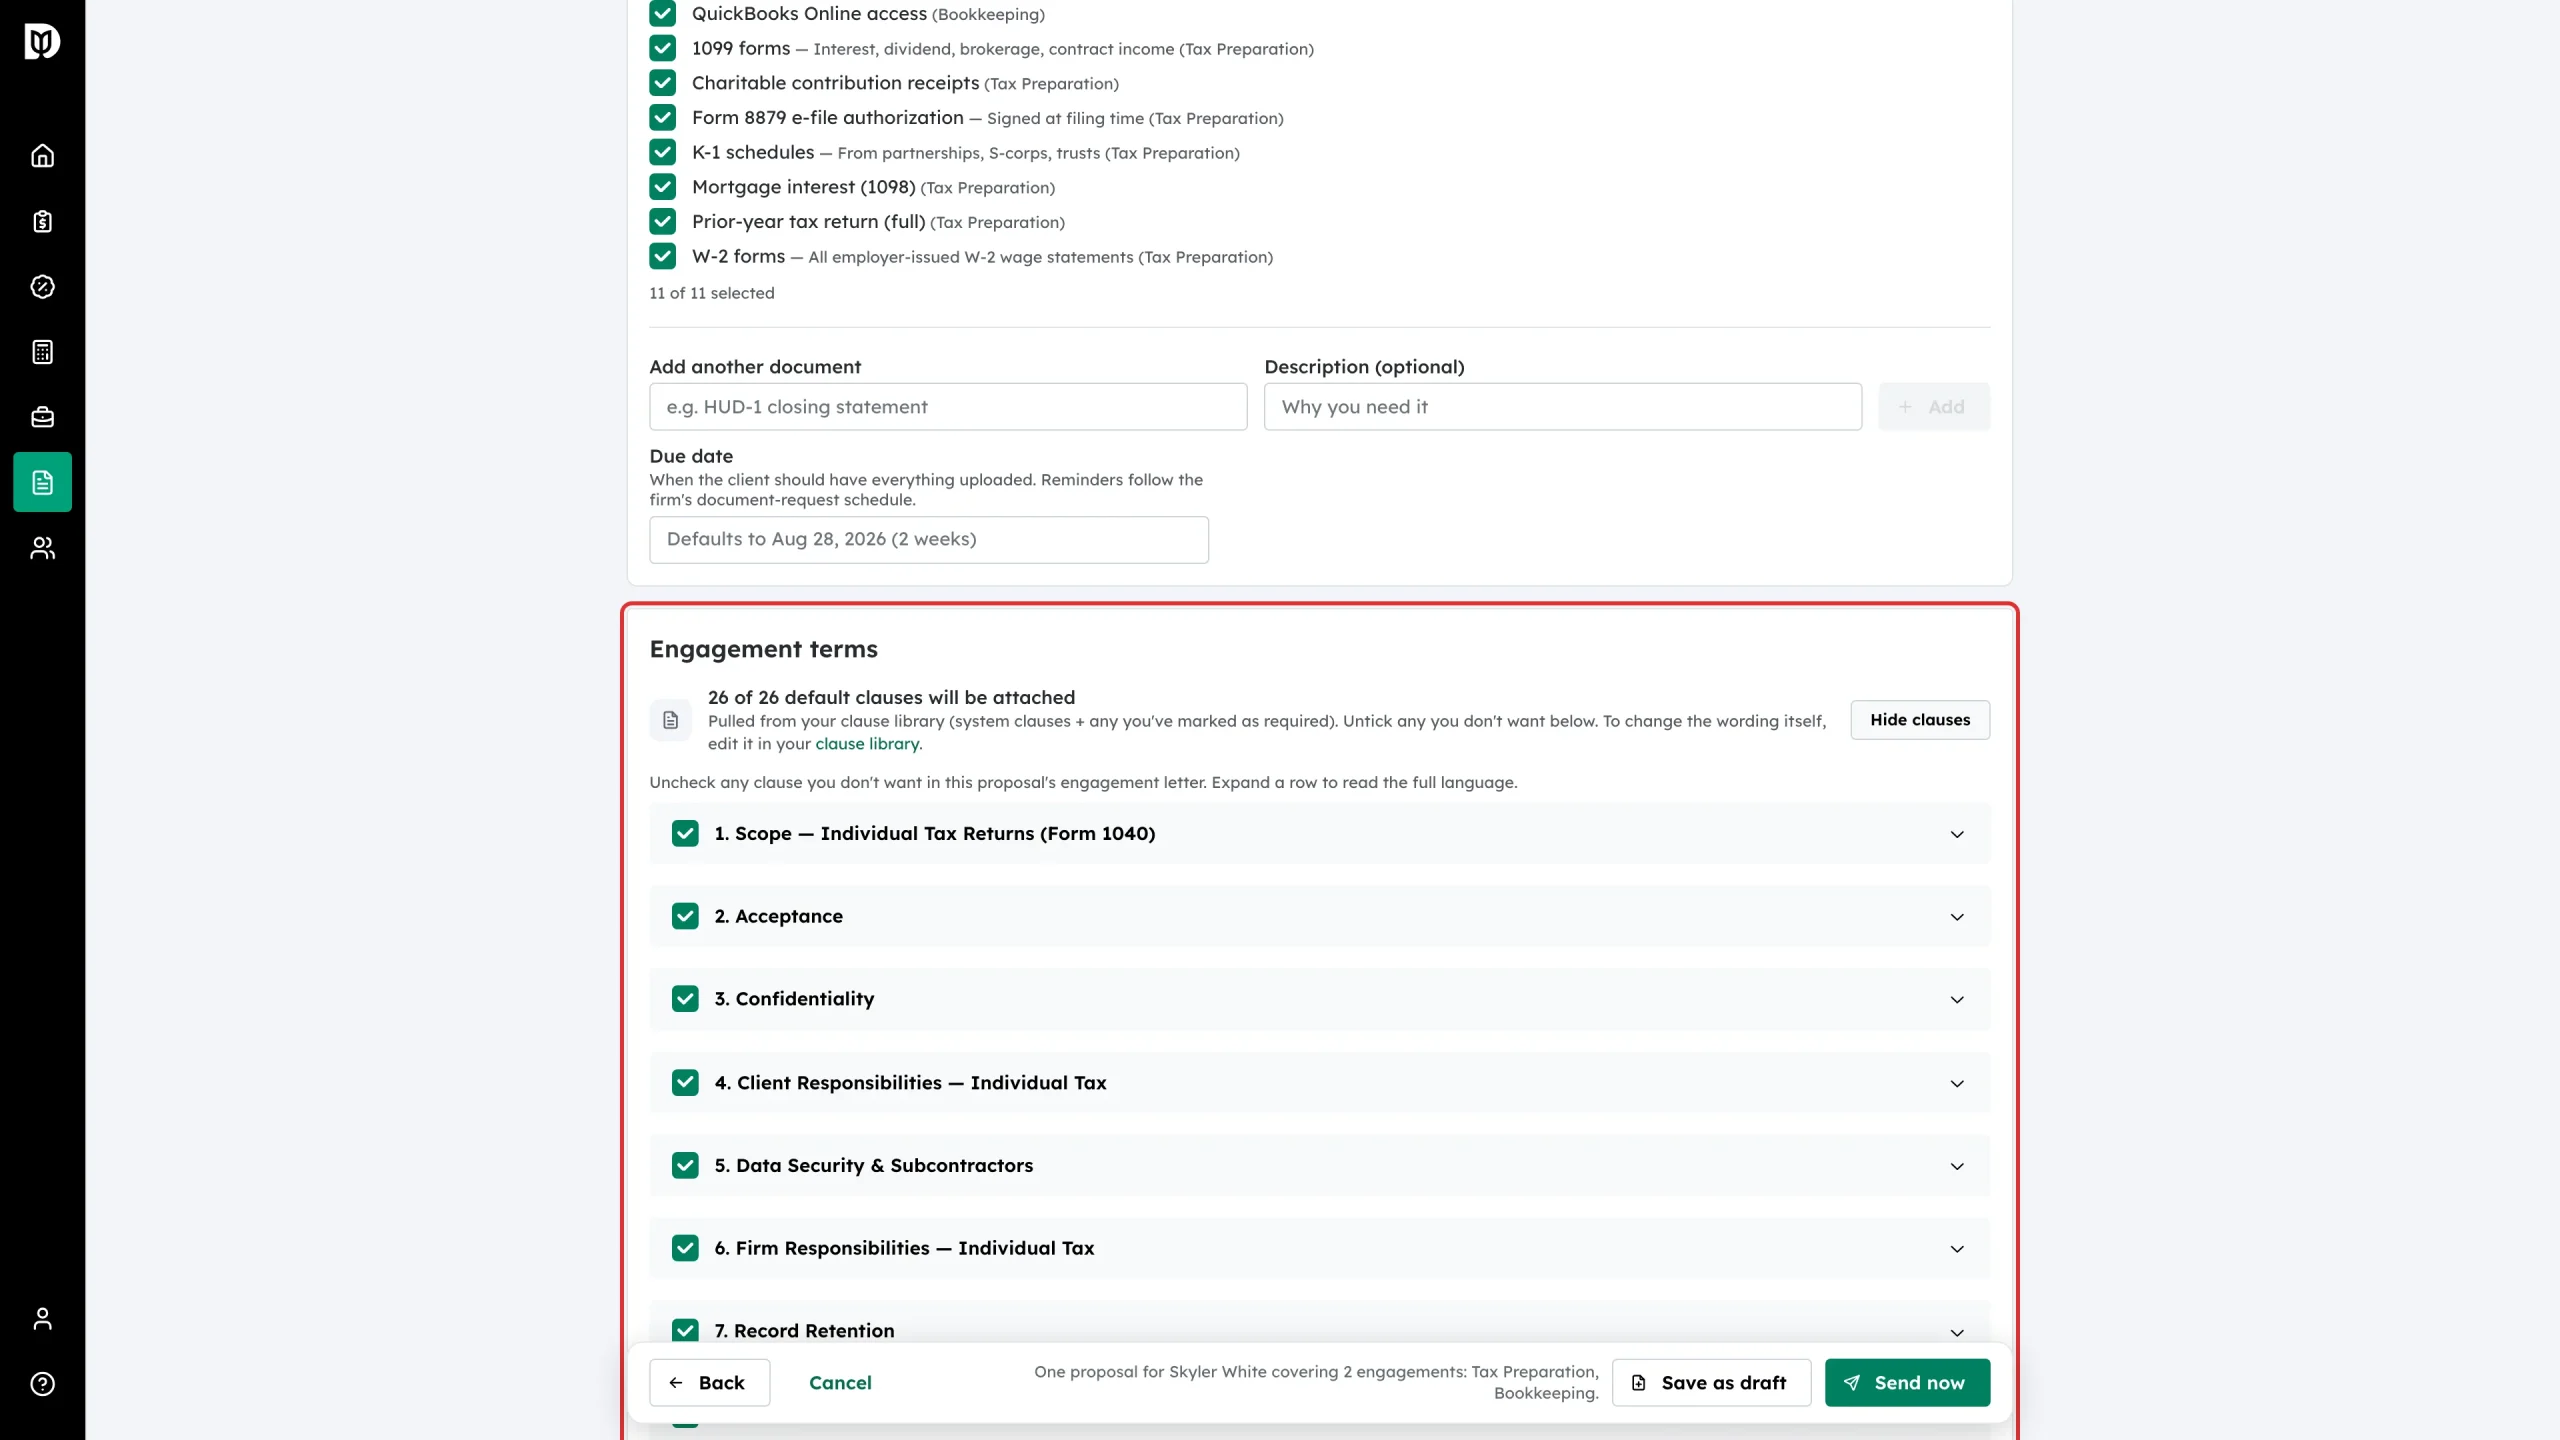
Engagement terms tells you how many clauses will be attached. Click Show clauses to read them, untick any you do not want on this proposal, and expand a row to read the full language. To change the wording itself, edit the clause in your clause library — the next proposal picks it up.
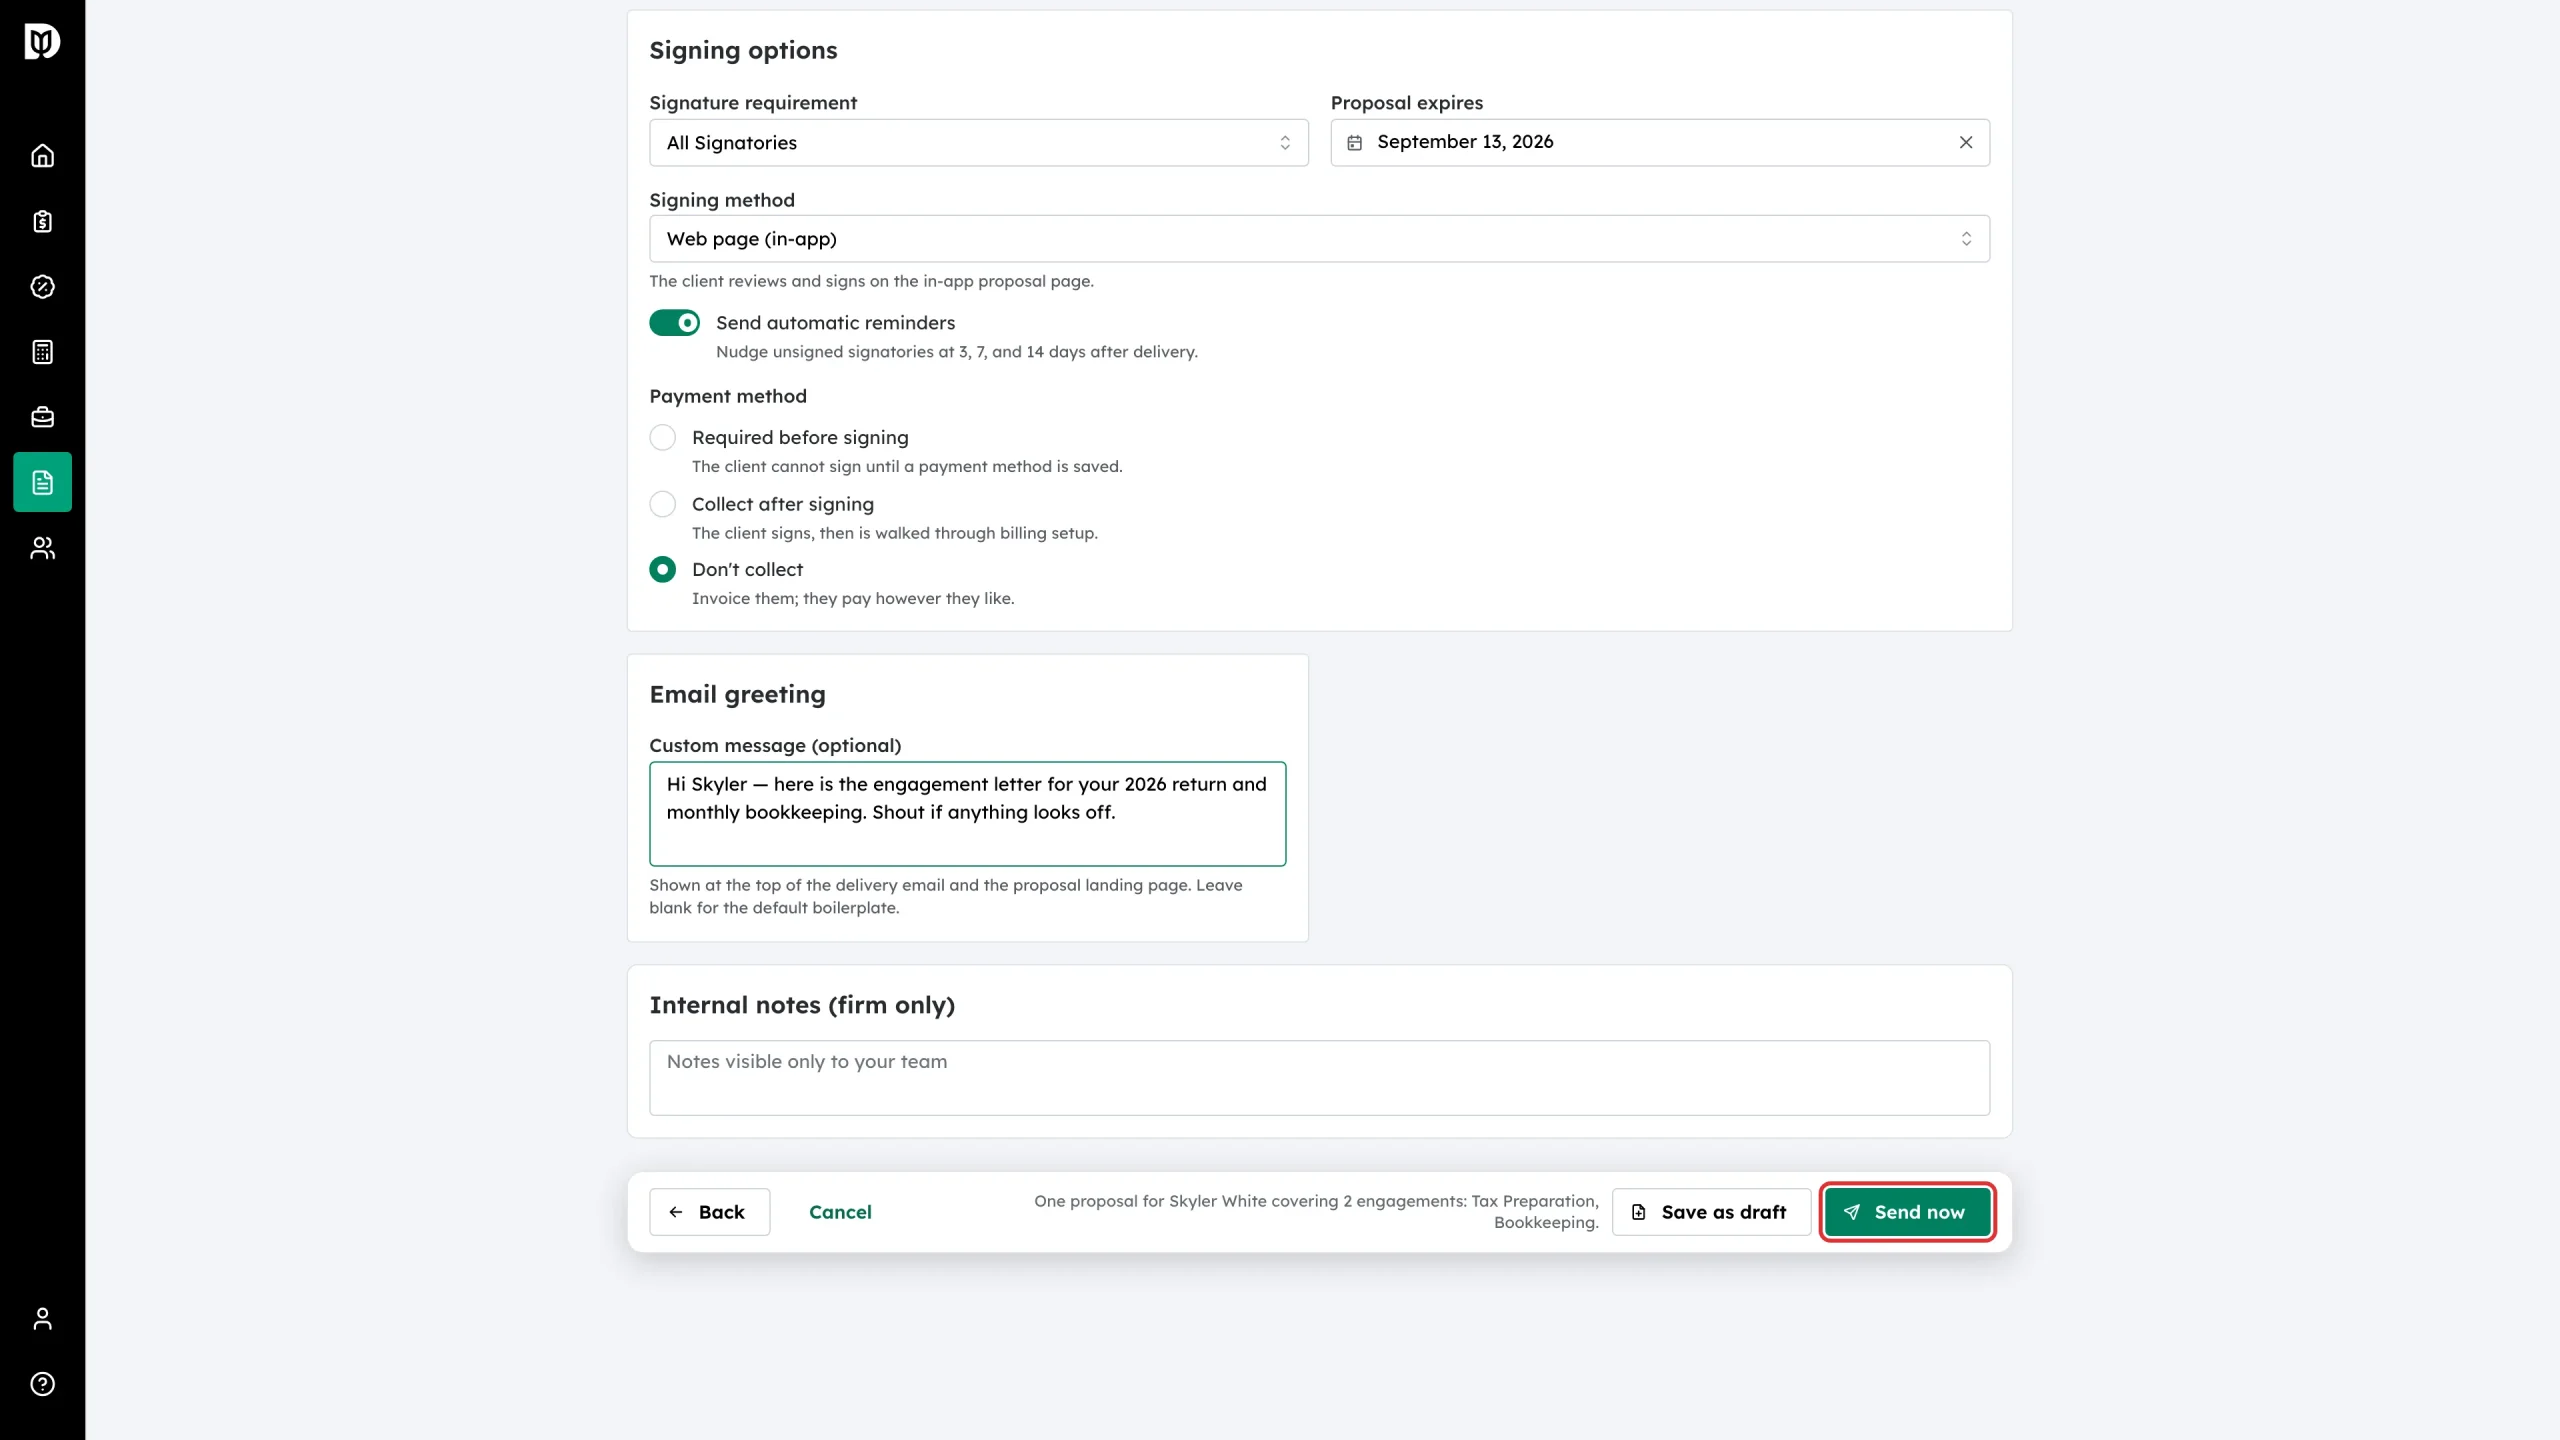
Step 11: Set the signing options
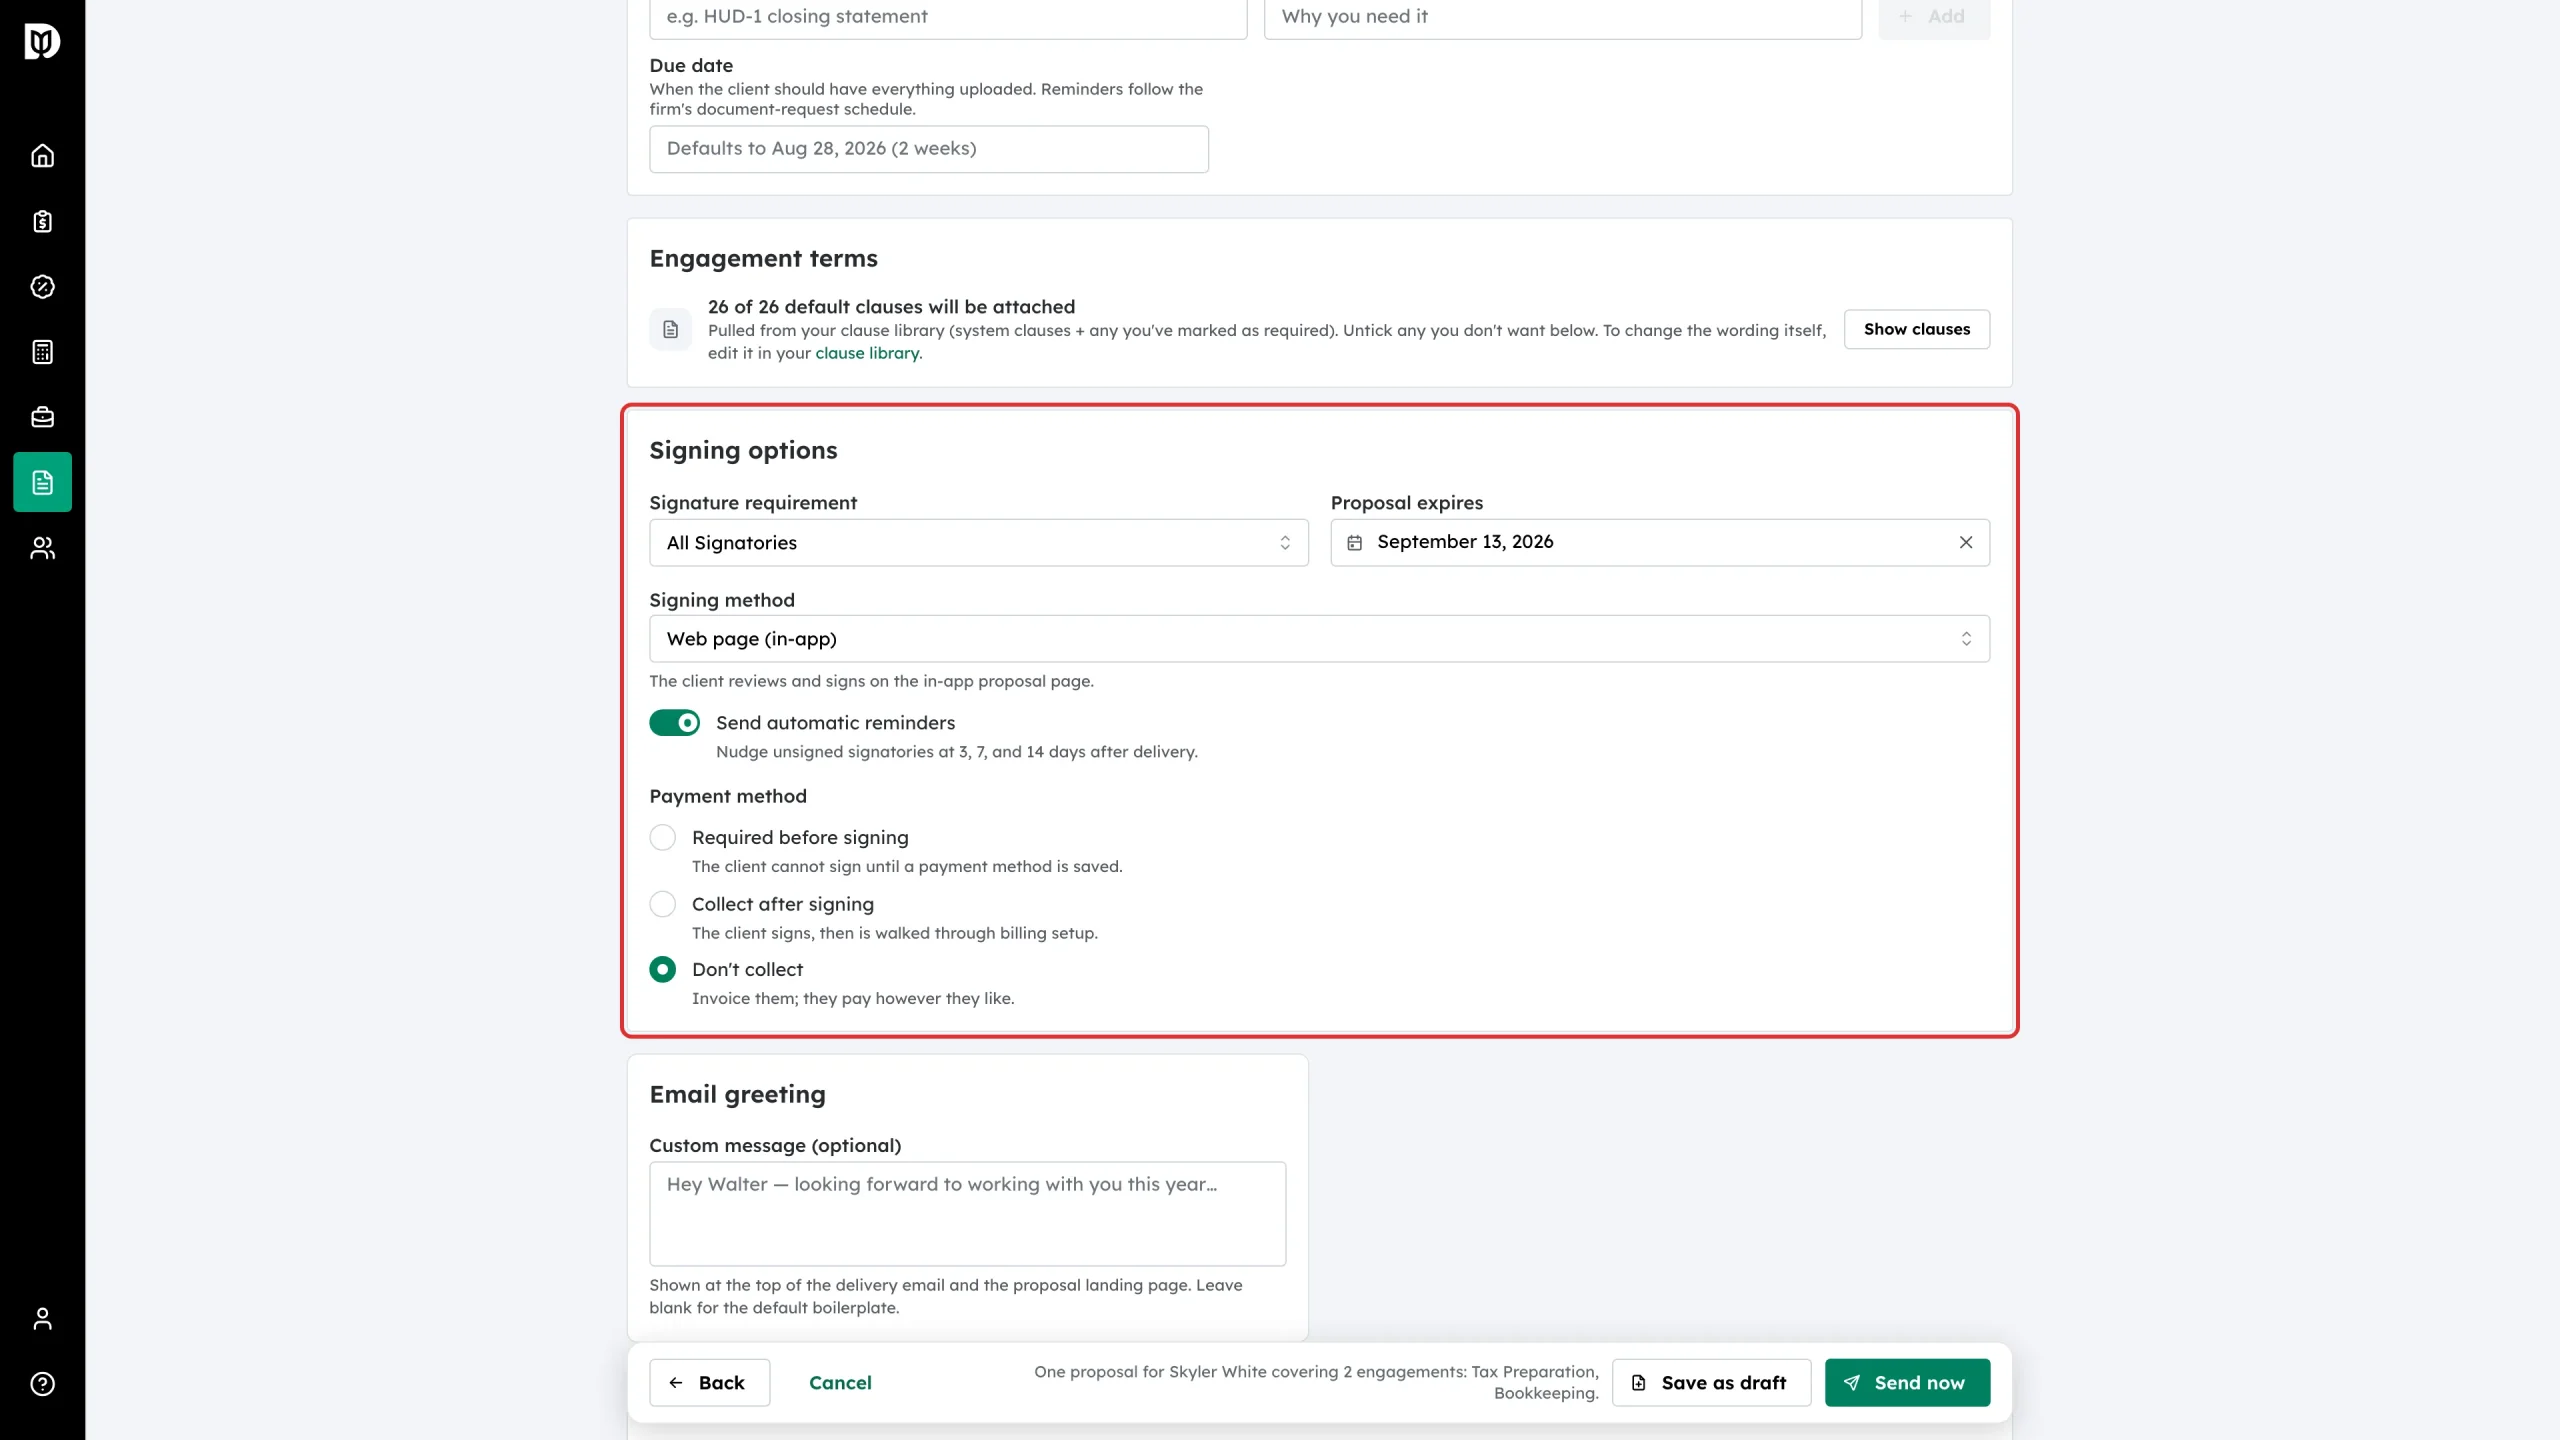
Choose the Signature requirement (All Signatories, Any One Signatory or Primary Only), the date the proposal expires, and the Signing method — Web page (in-app) or PDF document. Leave Send automatic reminders on to nudge unsigned signatories at 3, 7 and 14 days. Under Payment method, pick whether a card is required before signing, collected after signing, or not collected at all.
Step 12: Add an email greeting
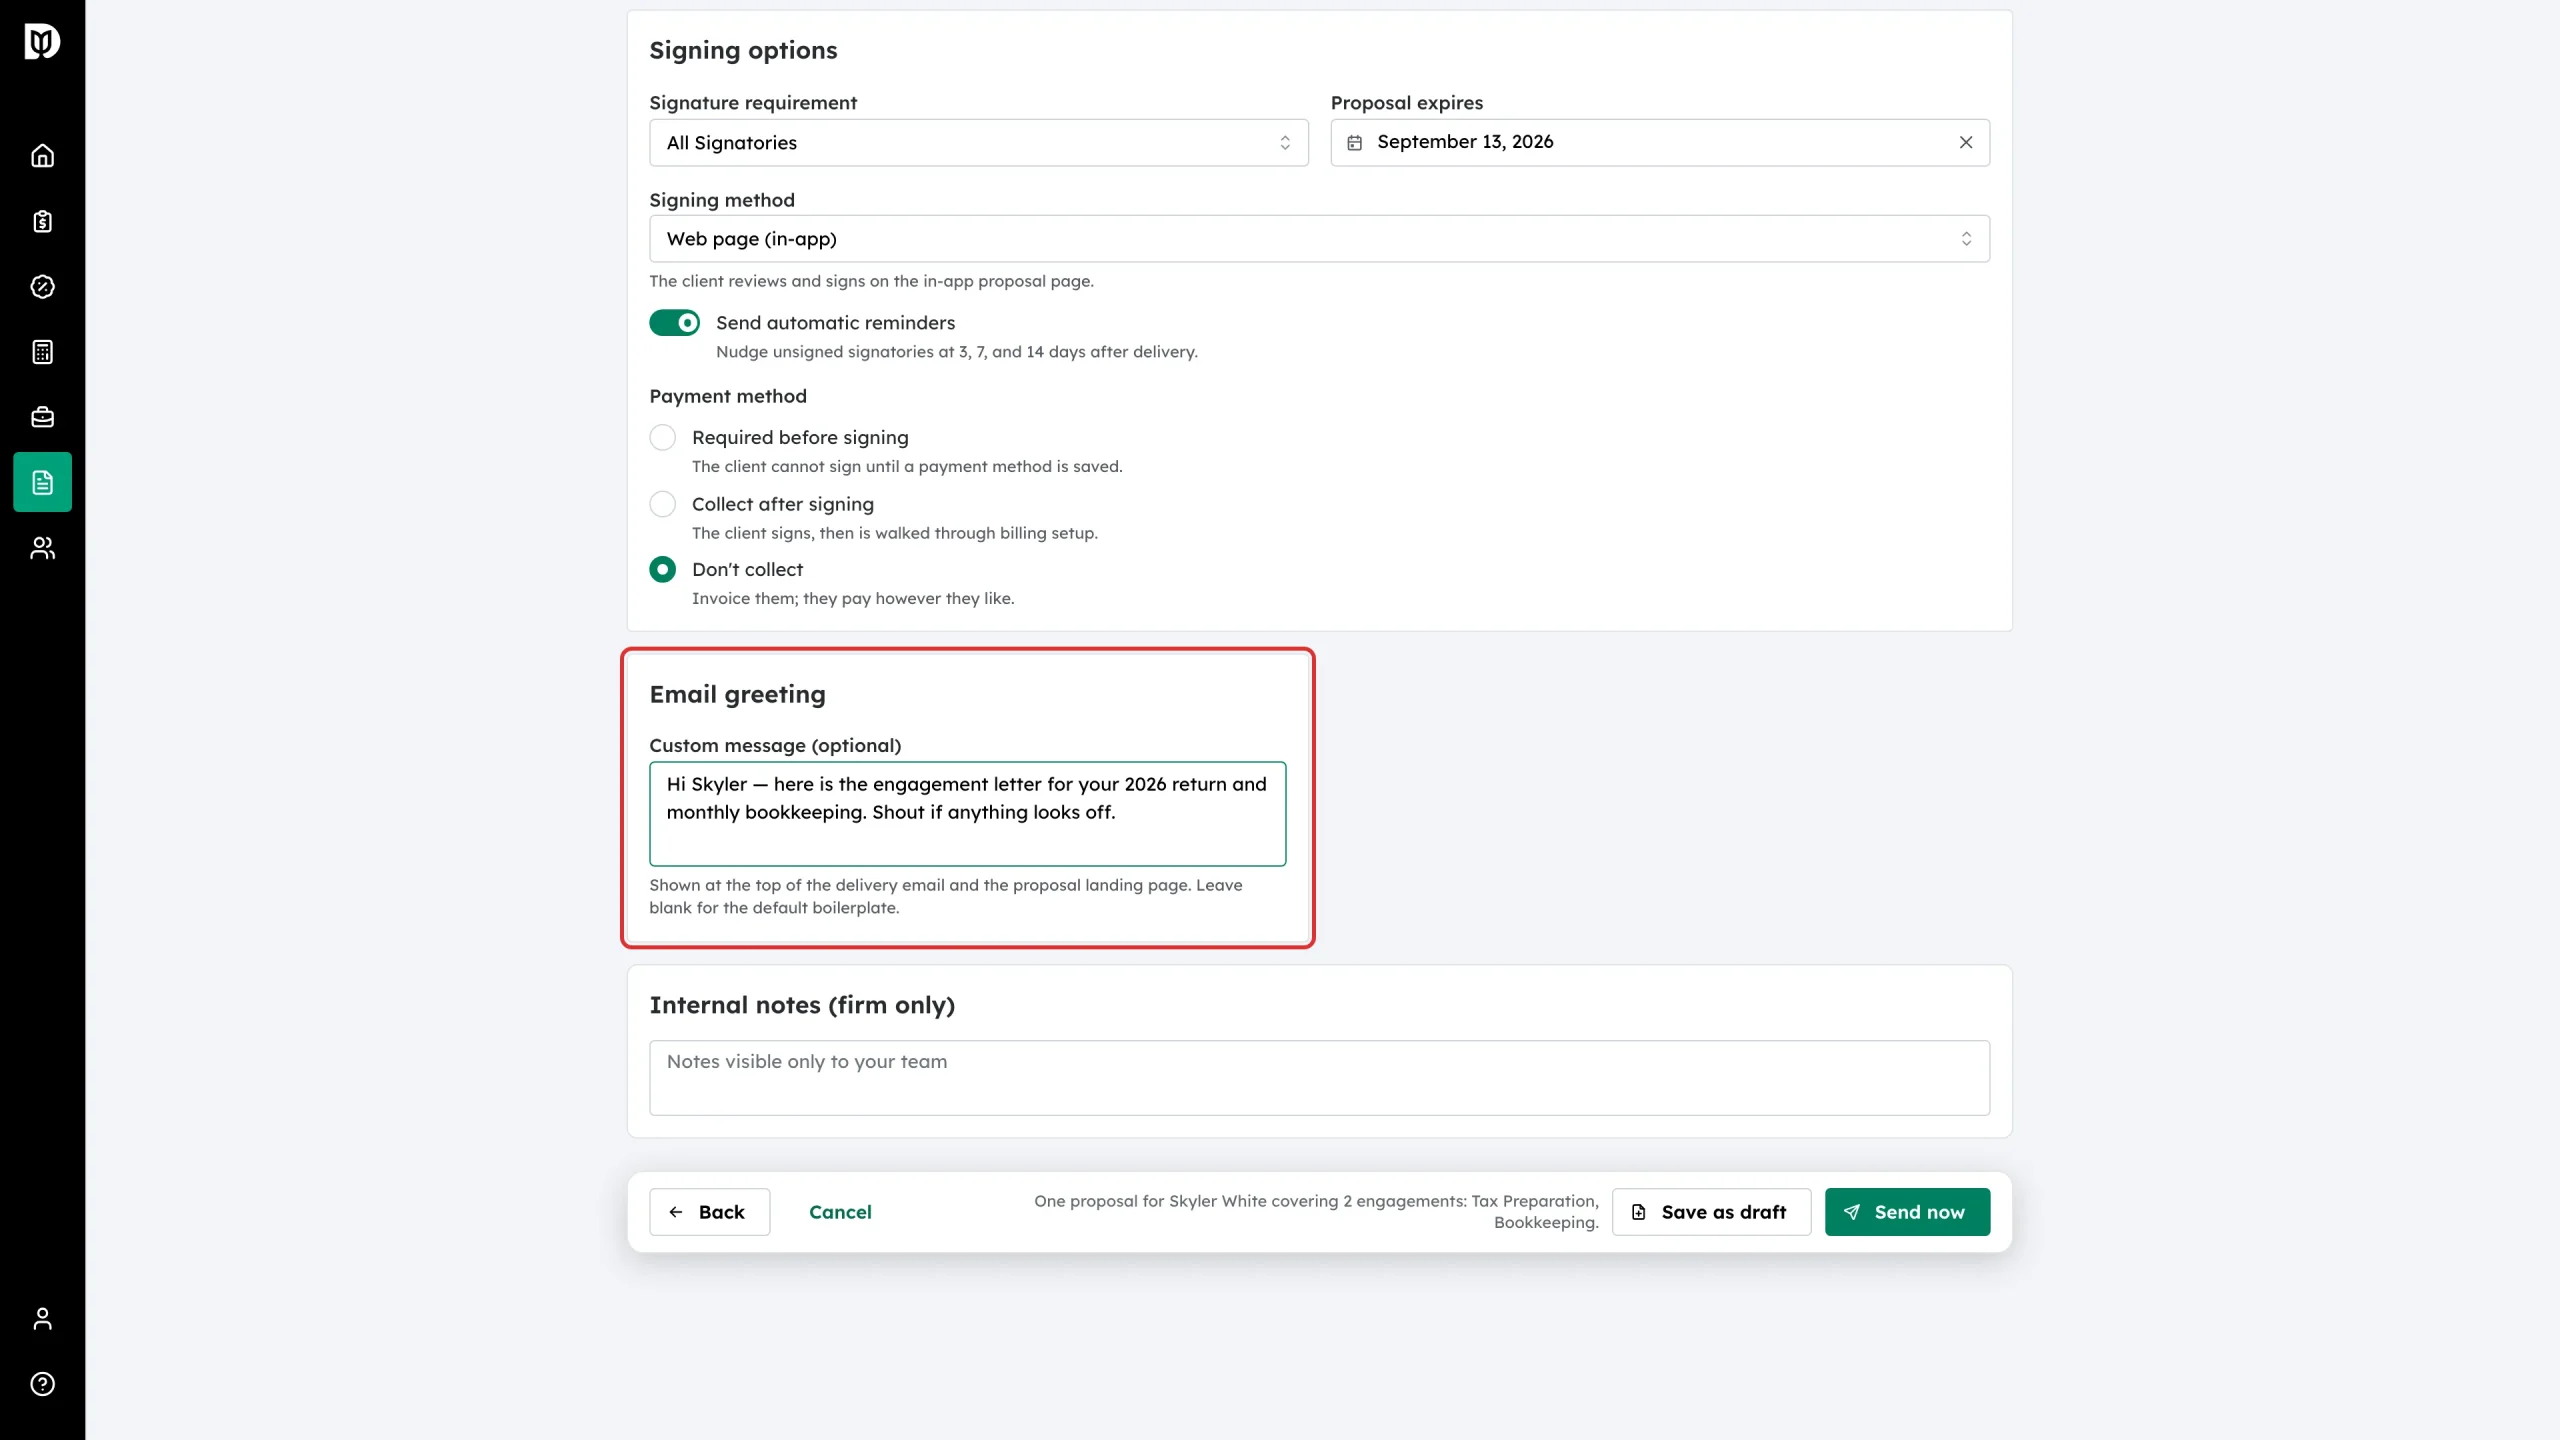
Type a short note in Custom message (optional). It appears at the top of the delivery email and on the client’s proposal page. Leave it blank to use the default wording. Internal notes (firm only) below it are never shown to the client.
Step 13: Send it
Click Send now. Use Save as draft instead if you want a colleague to look first — drafts stay editable, sent proposals do not.
Step 14: Track the proposal
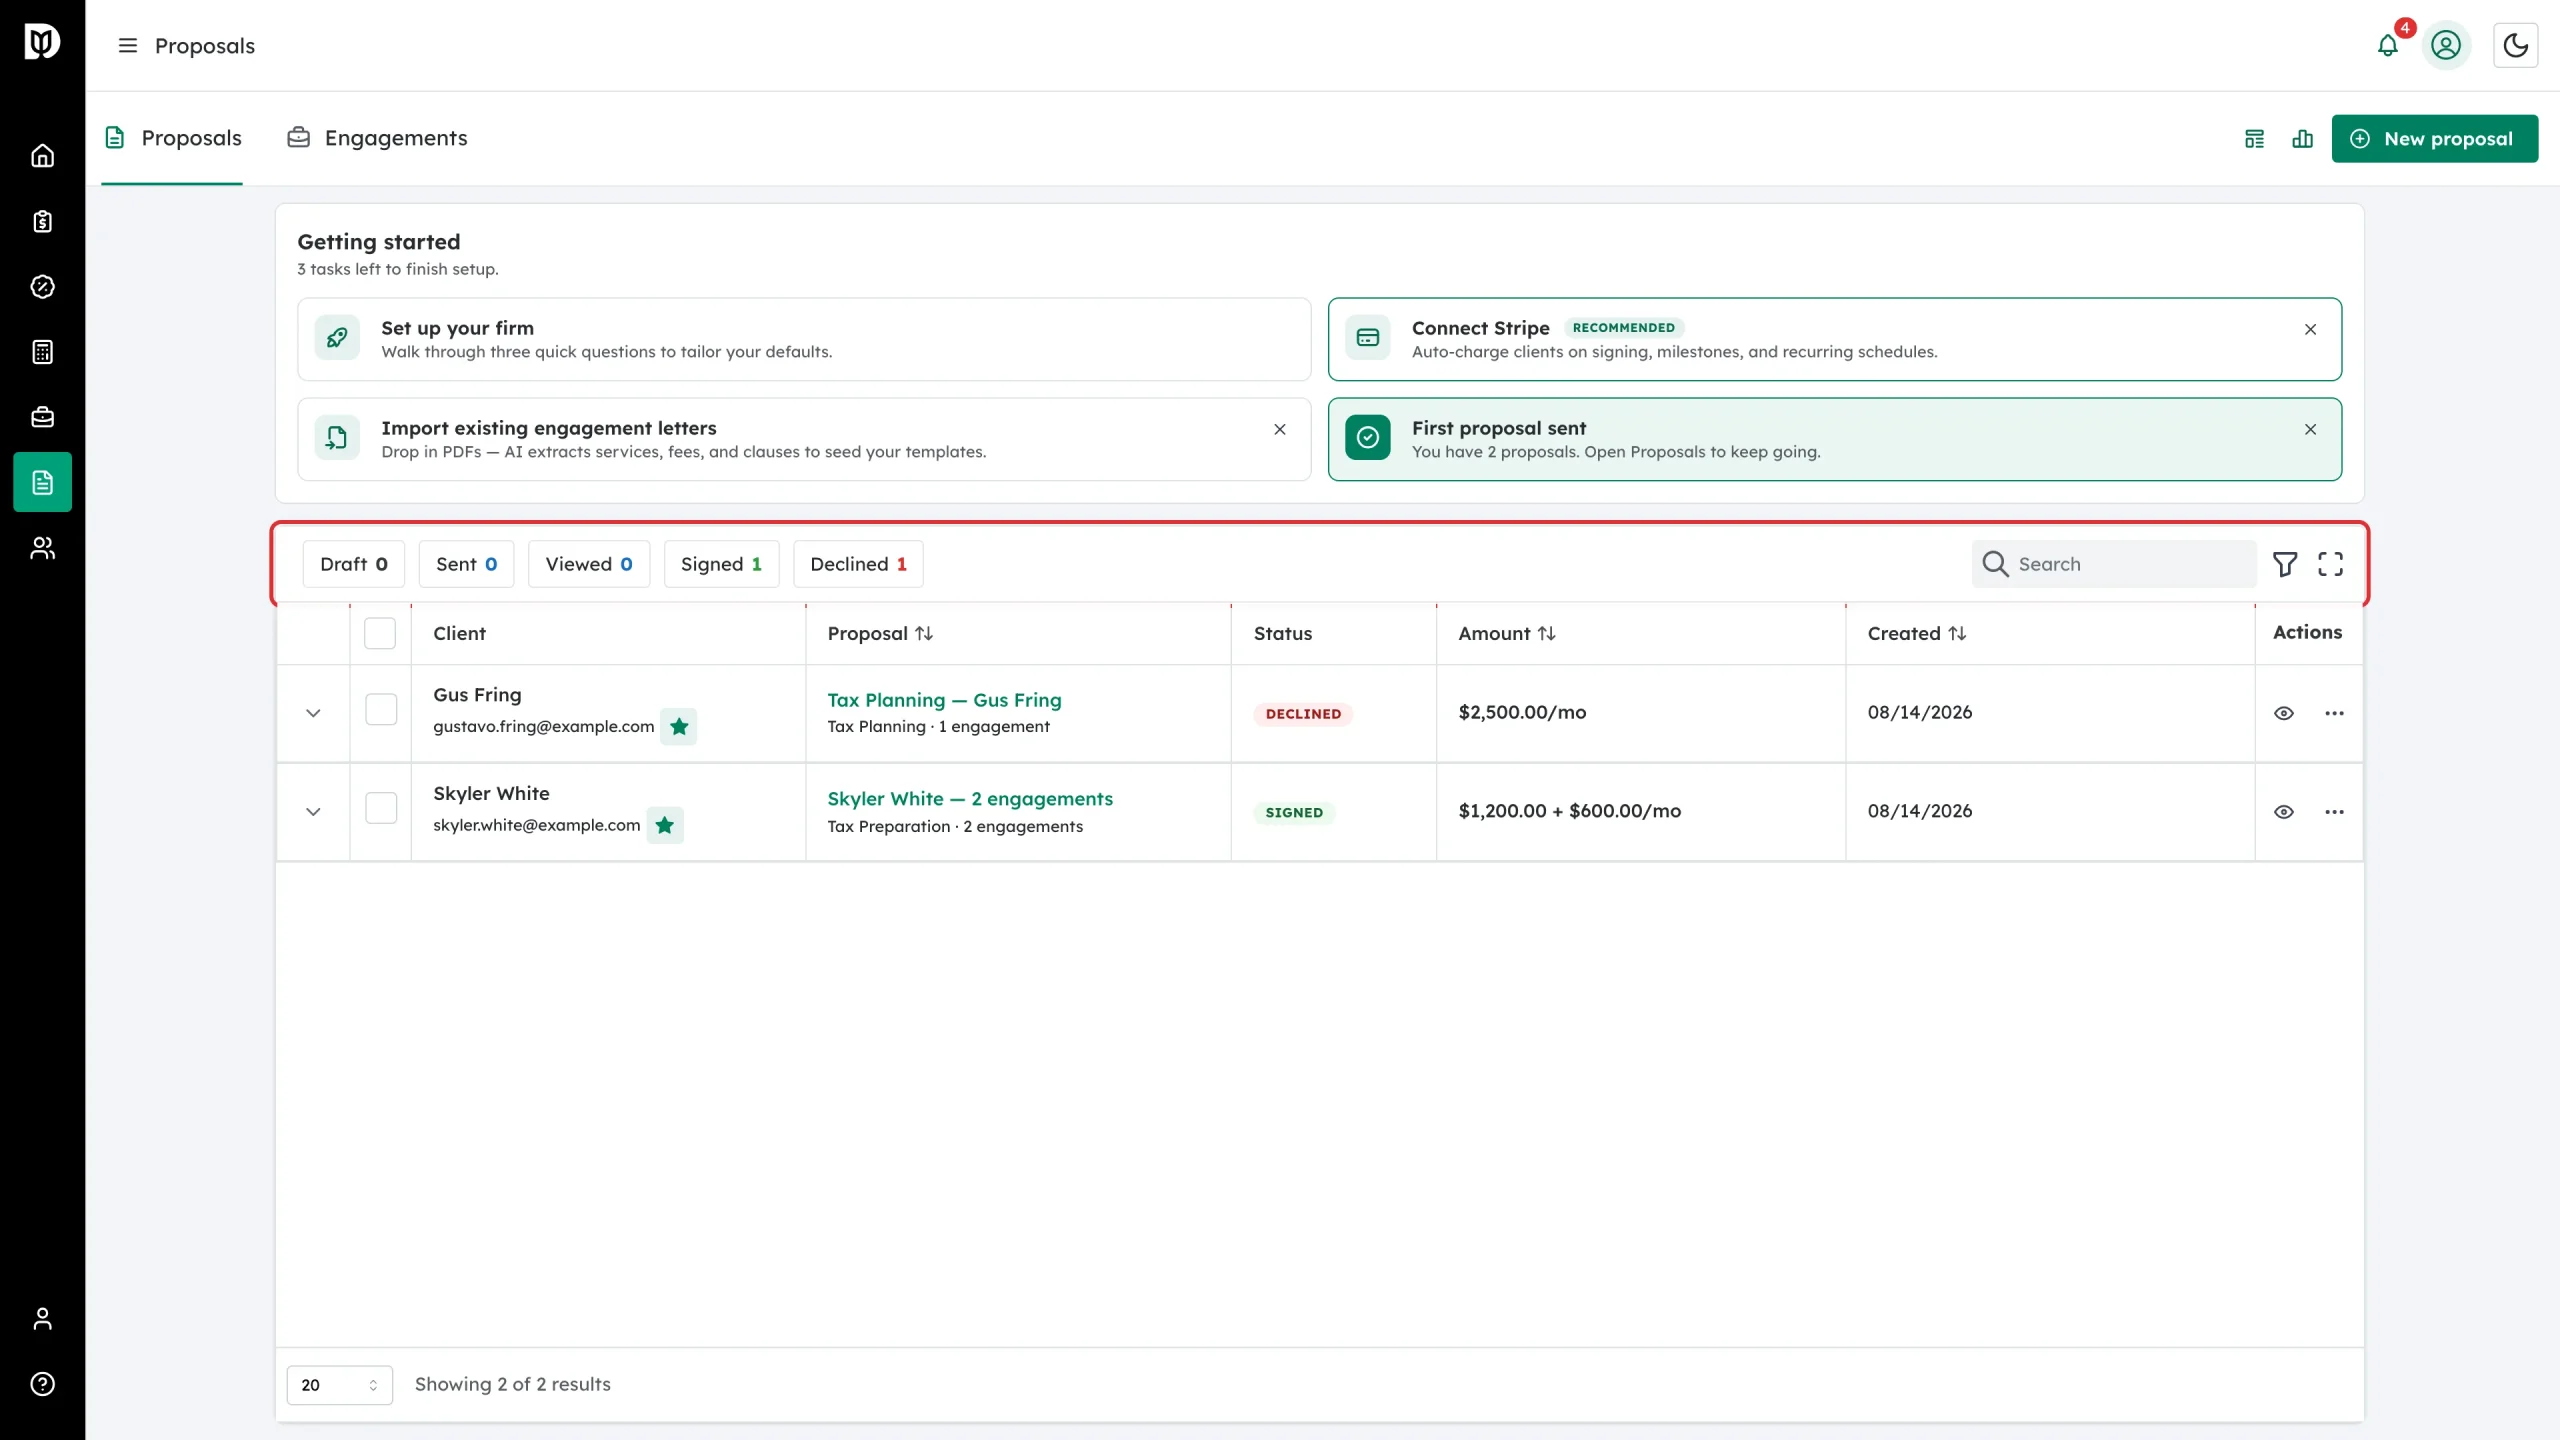
You land on the proposal’s own page. Back on the list, the status chips show where everything sits: Draft, Sent, Viewed, Signed, Declined. The status updates on its own as the client opens and signs.
Step 15: Re-share the client link
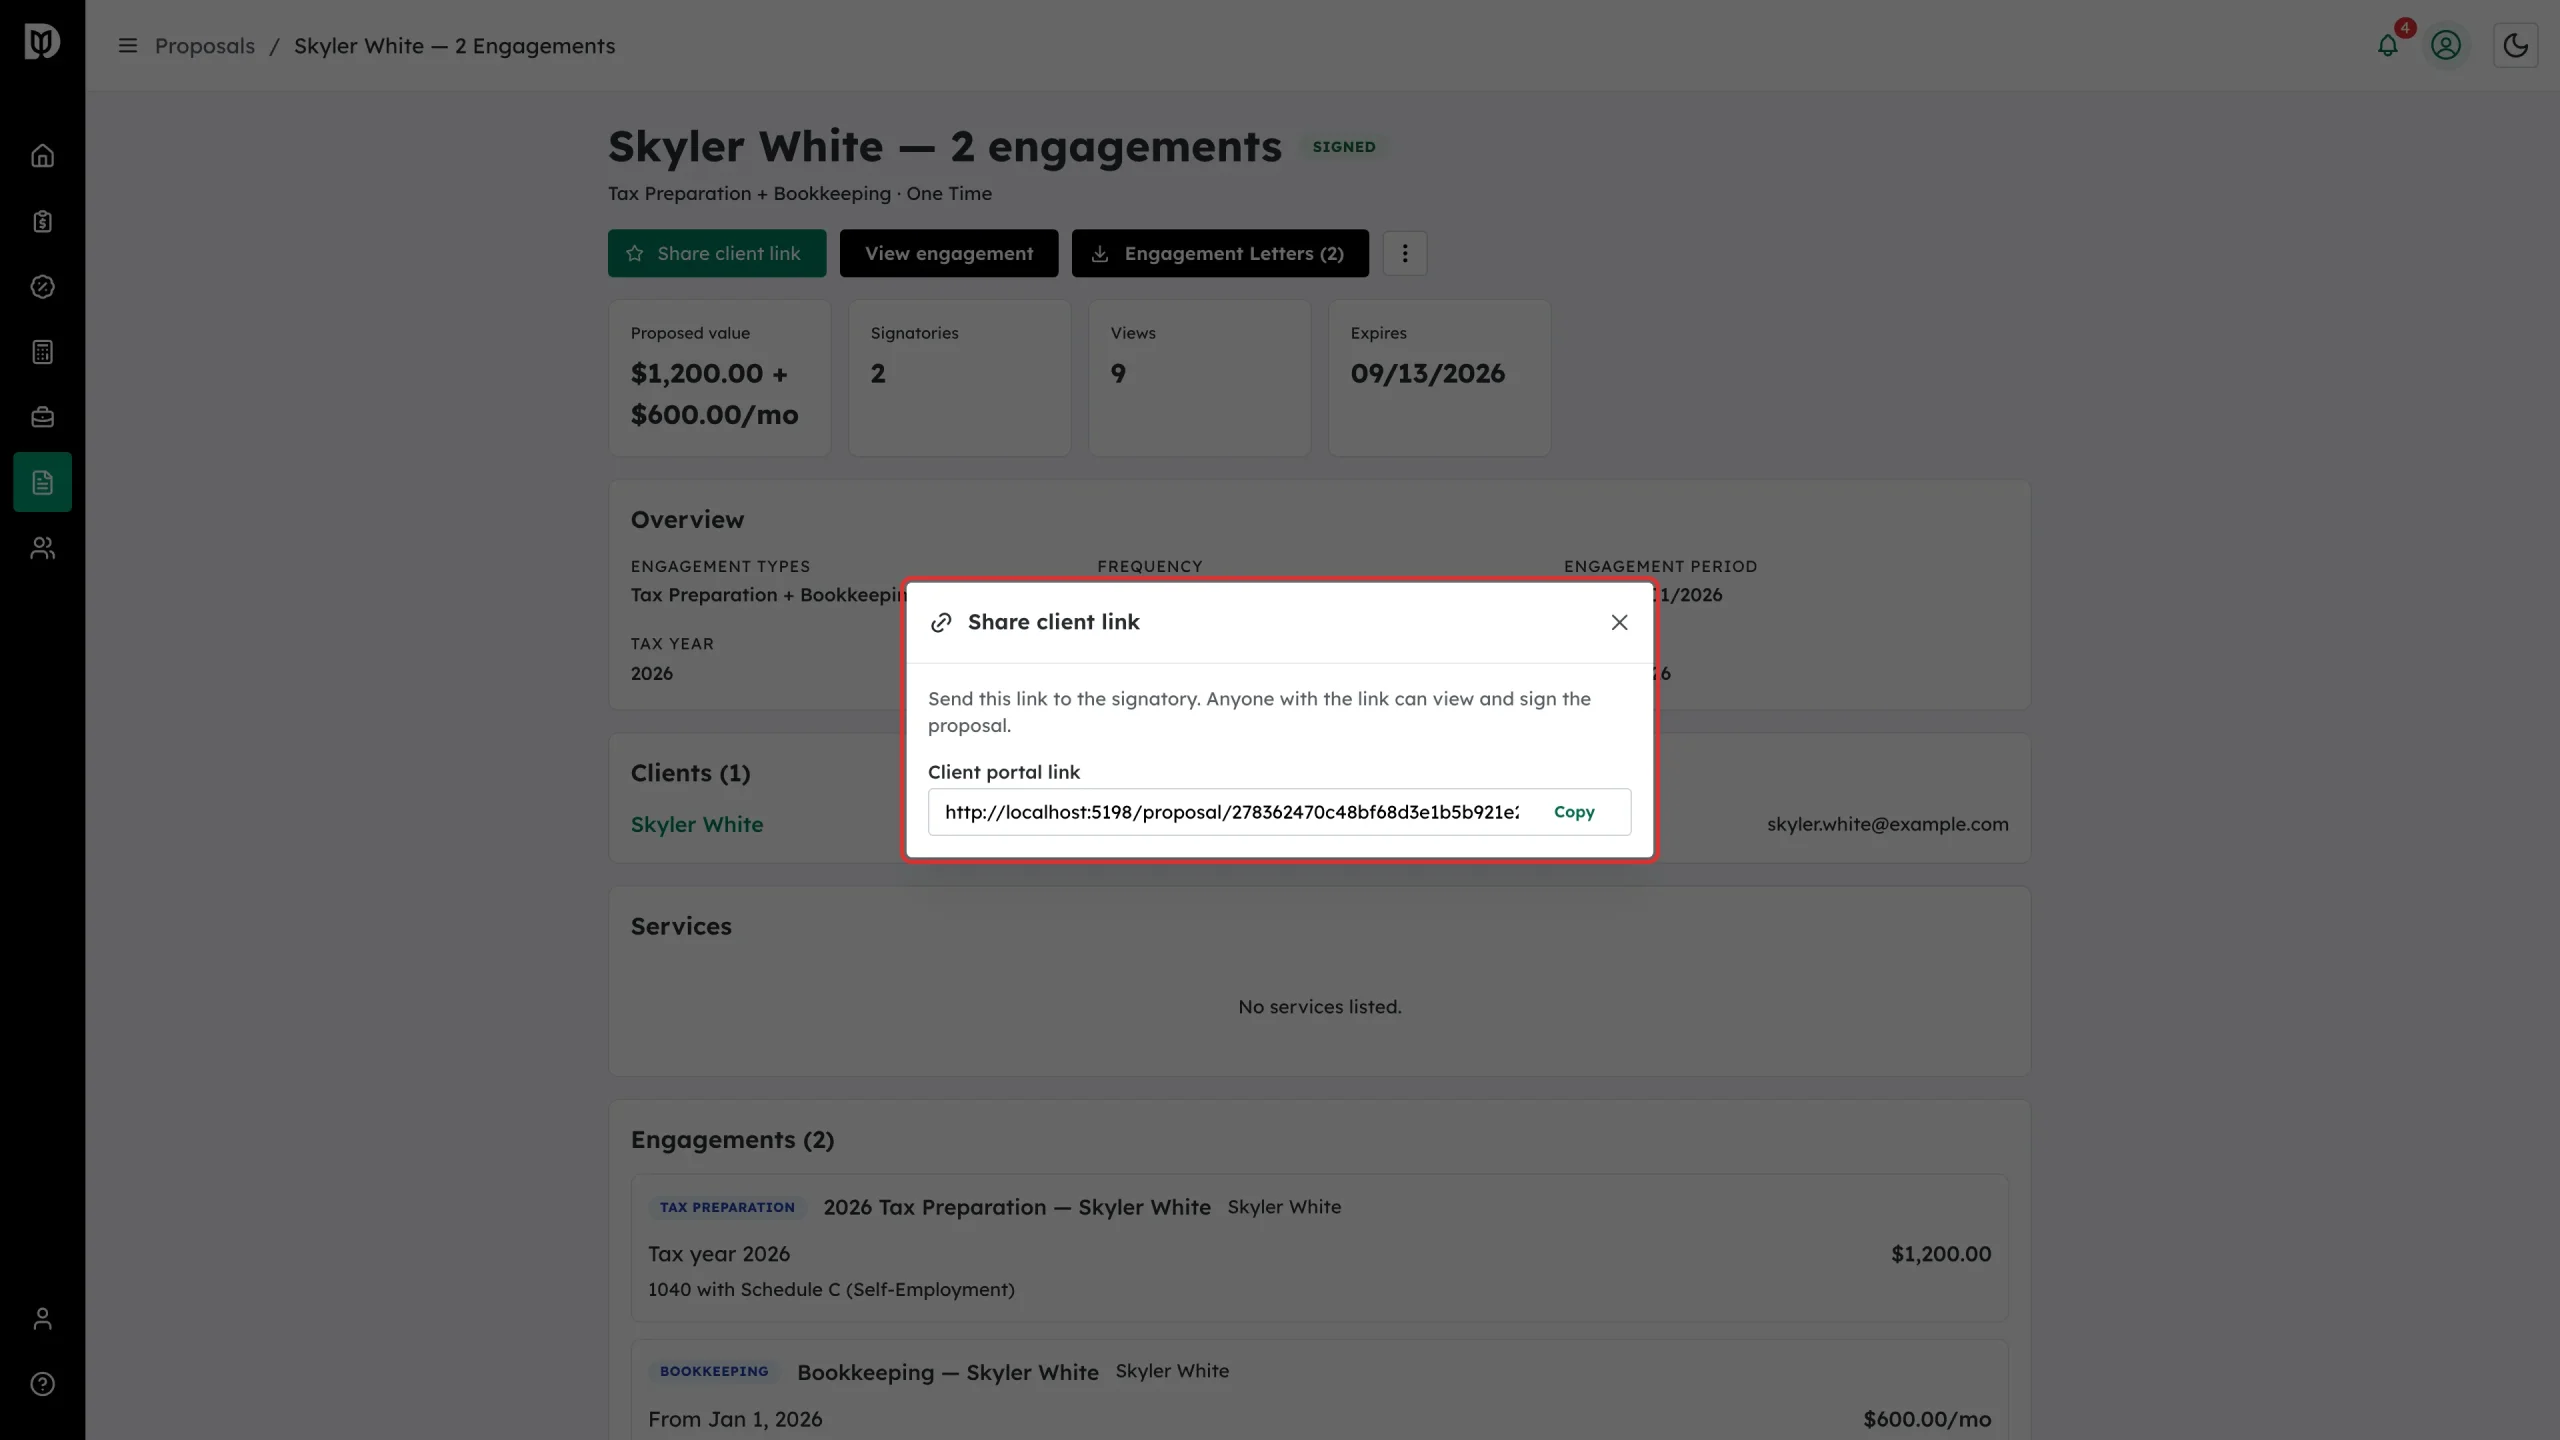
Open the proposal and click Share client link to copy the client portal link, for example if the email went astray. This link opens the proposal for reading. It does not sign it — signing stays tied to each person’s own emailed link, and every signatory row on the shared link offers Email me my signing link instead. Send the link only to the client.
What happens next
Each signatory gets their own emailed signing link. You get a notification when the proposal is opened, when each person signs, and again when the last one signs. When every required signature is in, the proposal turns Signed, the engagements are created, an engagement letter PDF is produced for each one, upfront amounts are invoiced, and the client is invited to set up their Debits account.
Troubleshooting
- “This proposal can no longer be edited.” Only drafts are editable. Cancel the proposal and build a new one if the price has to change.
- The client and signers are greyed out when editing. They are fixed when the proposal is created and cannot be changed afterwards.
- A PDF engagement letter won’t send. A PDF cannot carry a tick box, so it cannot include an optional engagement. Either mark every engagement as Required or switch the signing method back to the web page.
- The client says they can’t sign from the link you shared. The Share client link is read-only. Signing is bound to each person’s own emailed link — on the proposal page they can click Email me my signing link next to their name.