Who this is for: Firm owners and admins setting up proposals for the first time.
What you’ll learn: What the Proposals module does, where everything lives, and the setup to finish before you quote your first client.
Before you begin
- You need an accountant login with the owner or admin role. Staff roles see the proposal list but not the setup checklist or Analytics.
- Have at least one contact in your firm. You can also type a brand-new prospect straight into the proposal wizard.
- Stripe Connect is optional. You only need it if you want to require or collect a payment method at signing.
What the module covers
A proposal is the quote your client reads and signs. It carries one or more engagements — one per service you are quoting, each with its own period, price and billing cadence. When every required signatory signs, Debits creates the engagements, generates a signed engagement letter for each one, and starts billing.
The engagement letter is a real e-signature document. Clients sign on the web page or on a PDF, and the finished status is Signed.
Step-by-step instructions
Step 1: Open Proposals
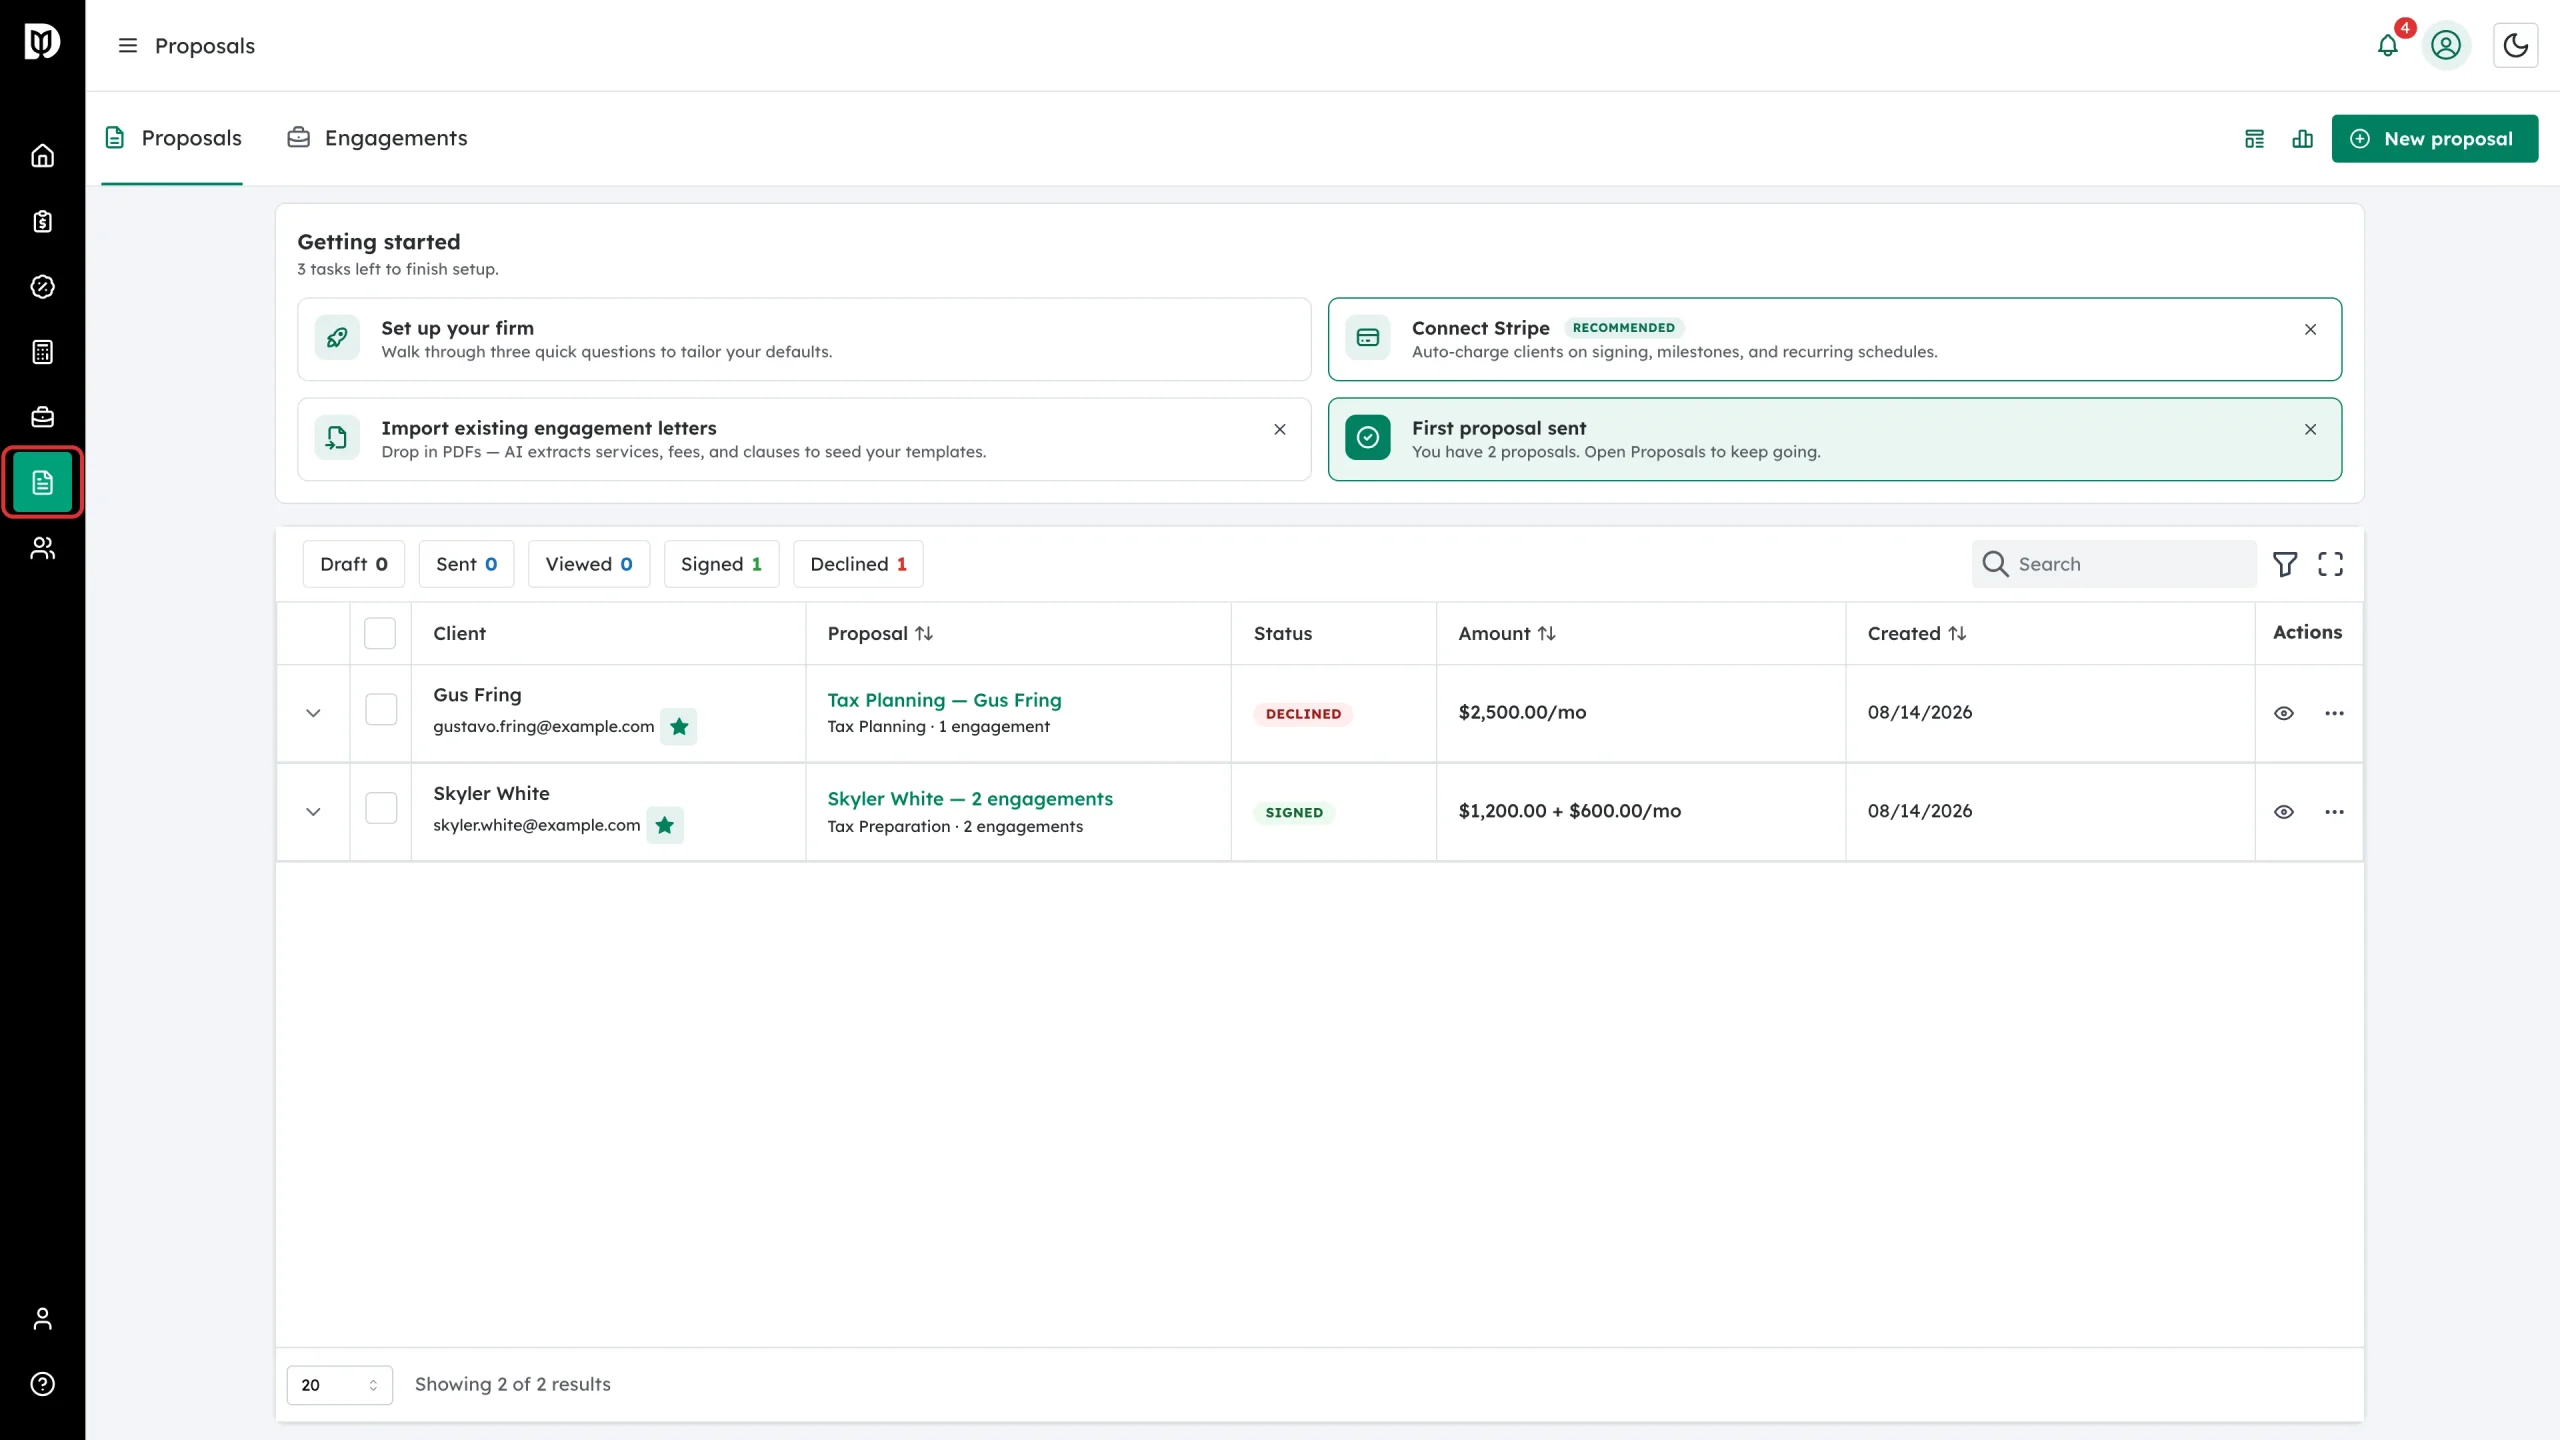
Click Proposals in the left sidebar. The page opens on the Proposals tab.
Step 2: Work through the Getting started checklist
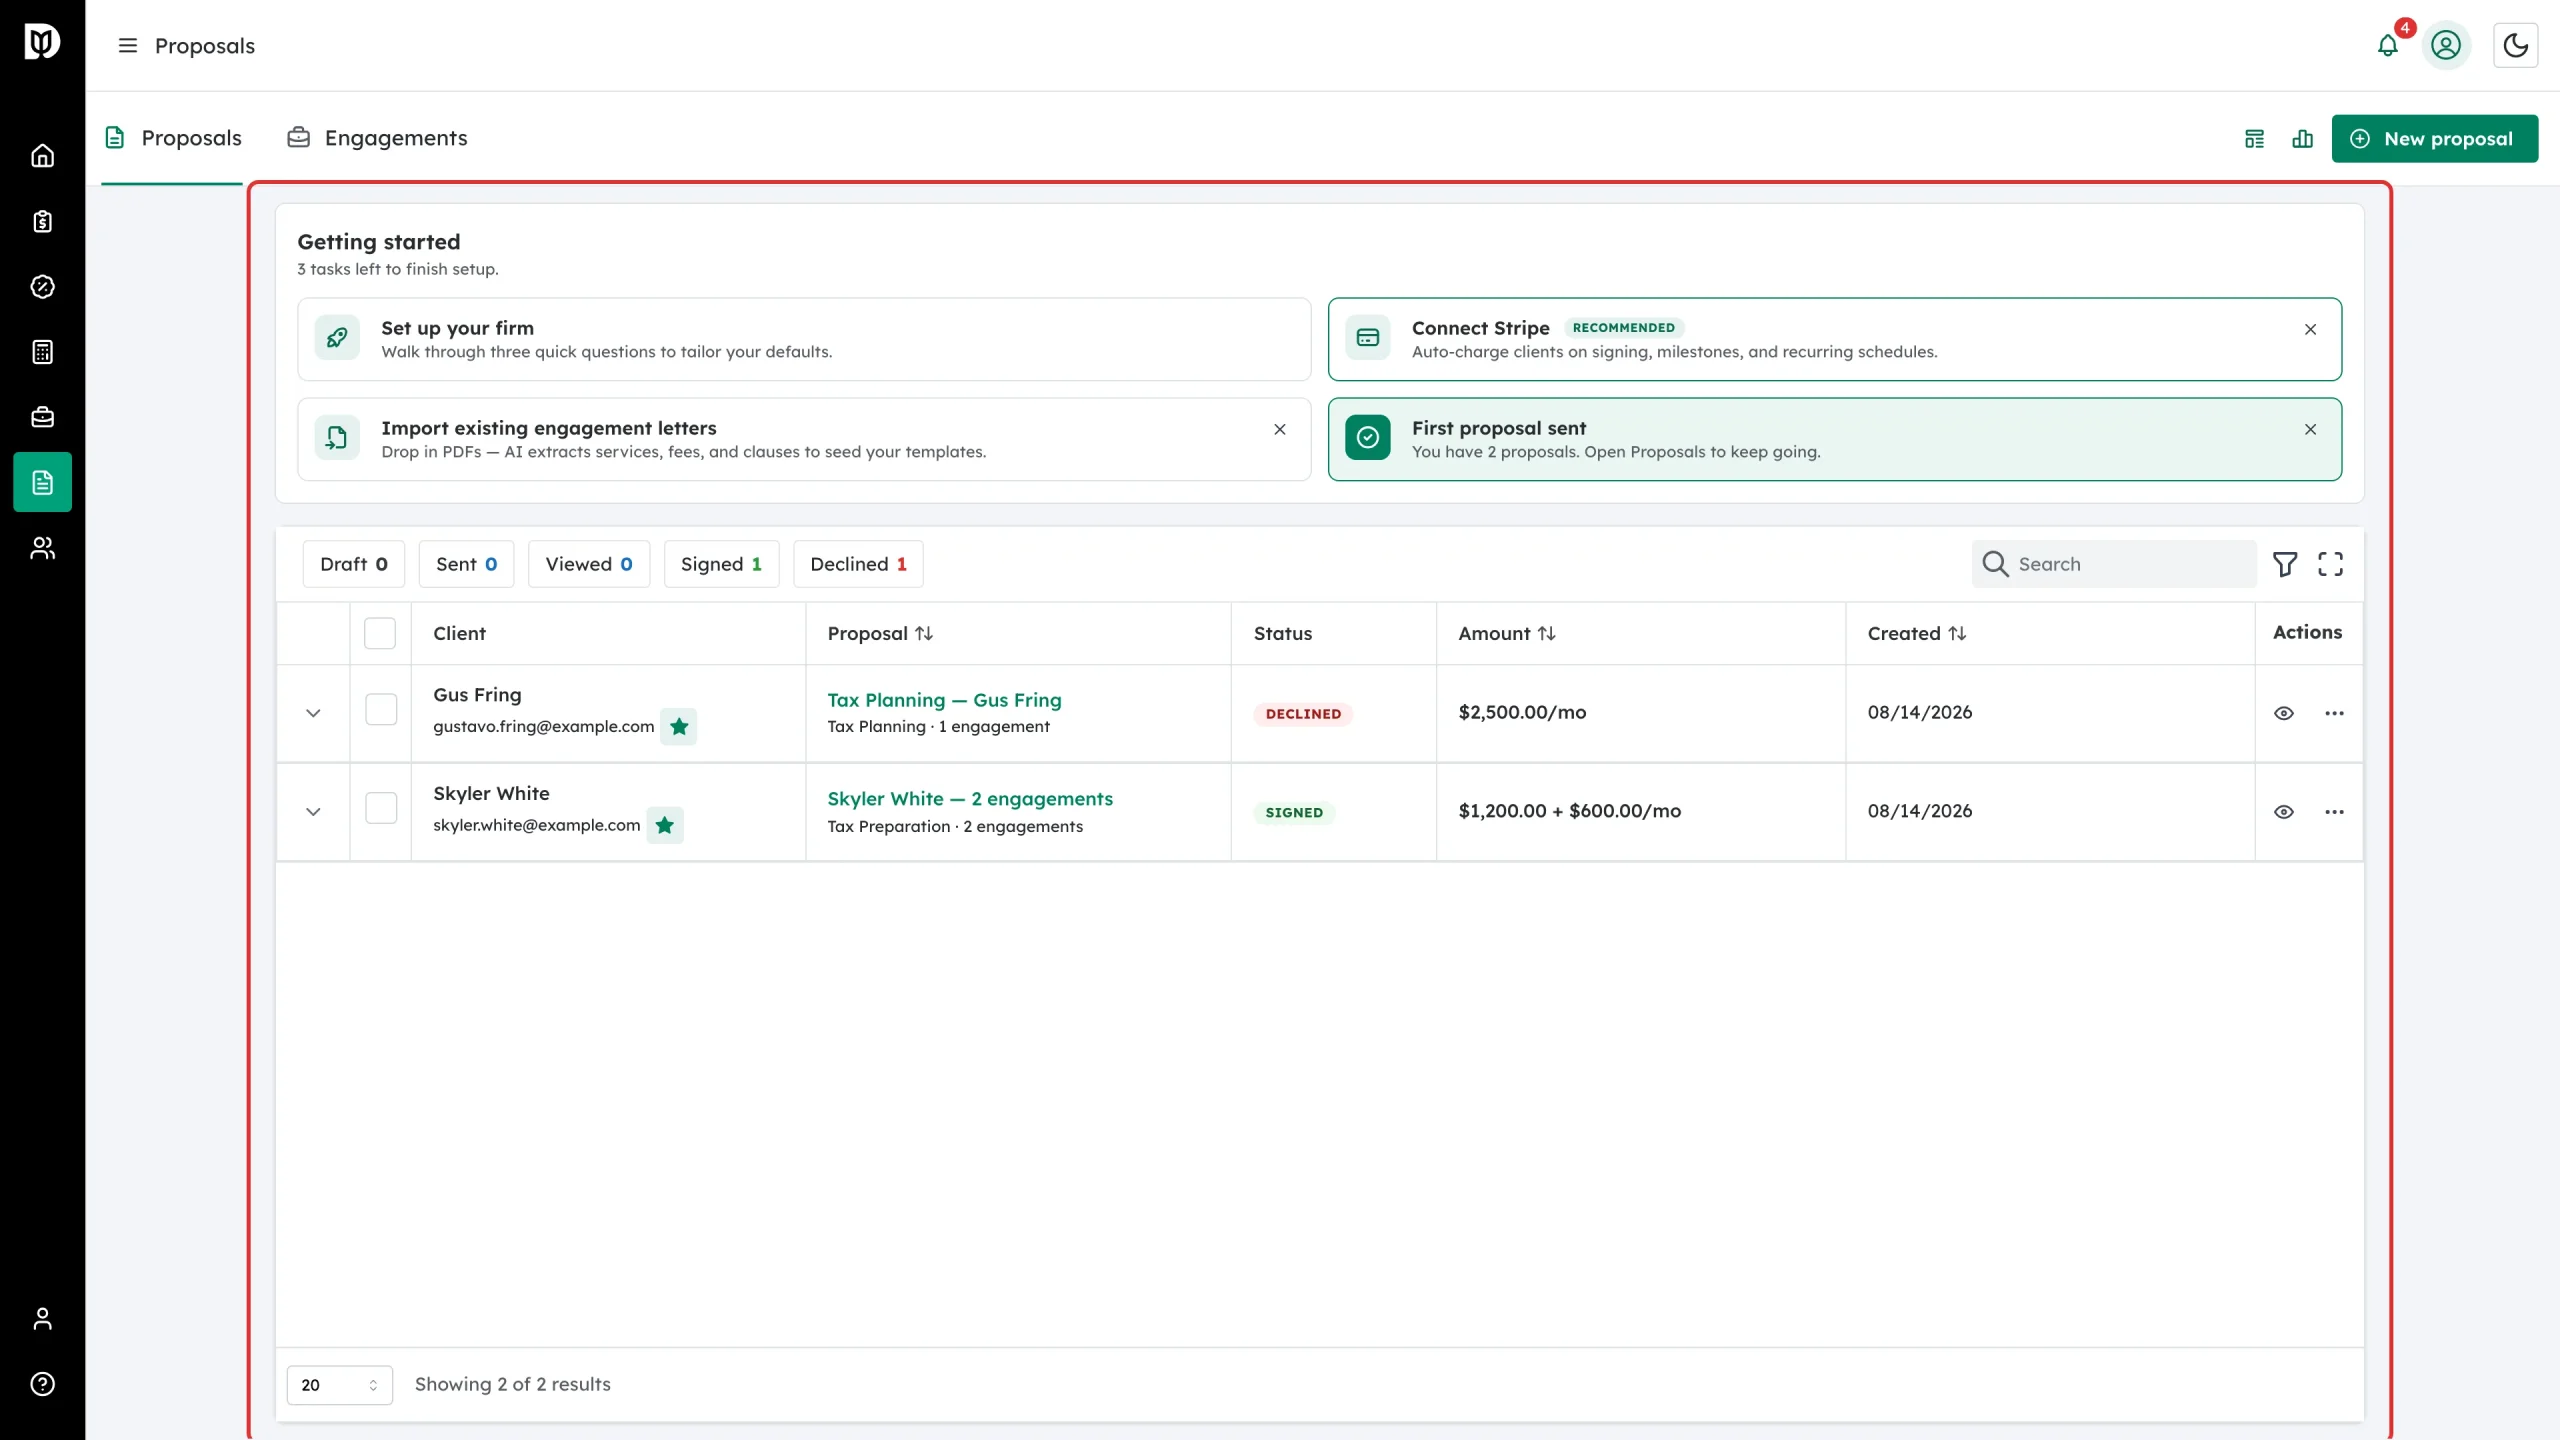
The Getting started panel sits above the proposal list and counts down the tasks left. Each tile is clickable, and each can be dismissed with the small X if it does not apply to your firm.
Step 3: Answer the three setup questions
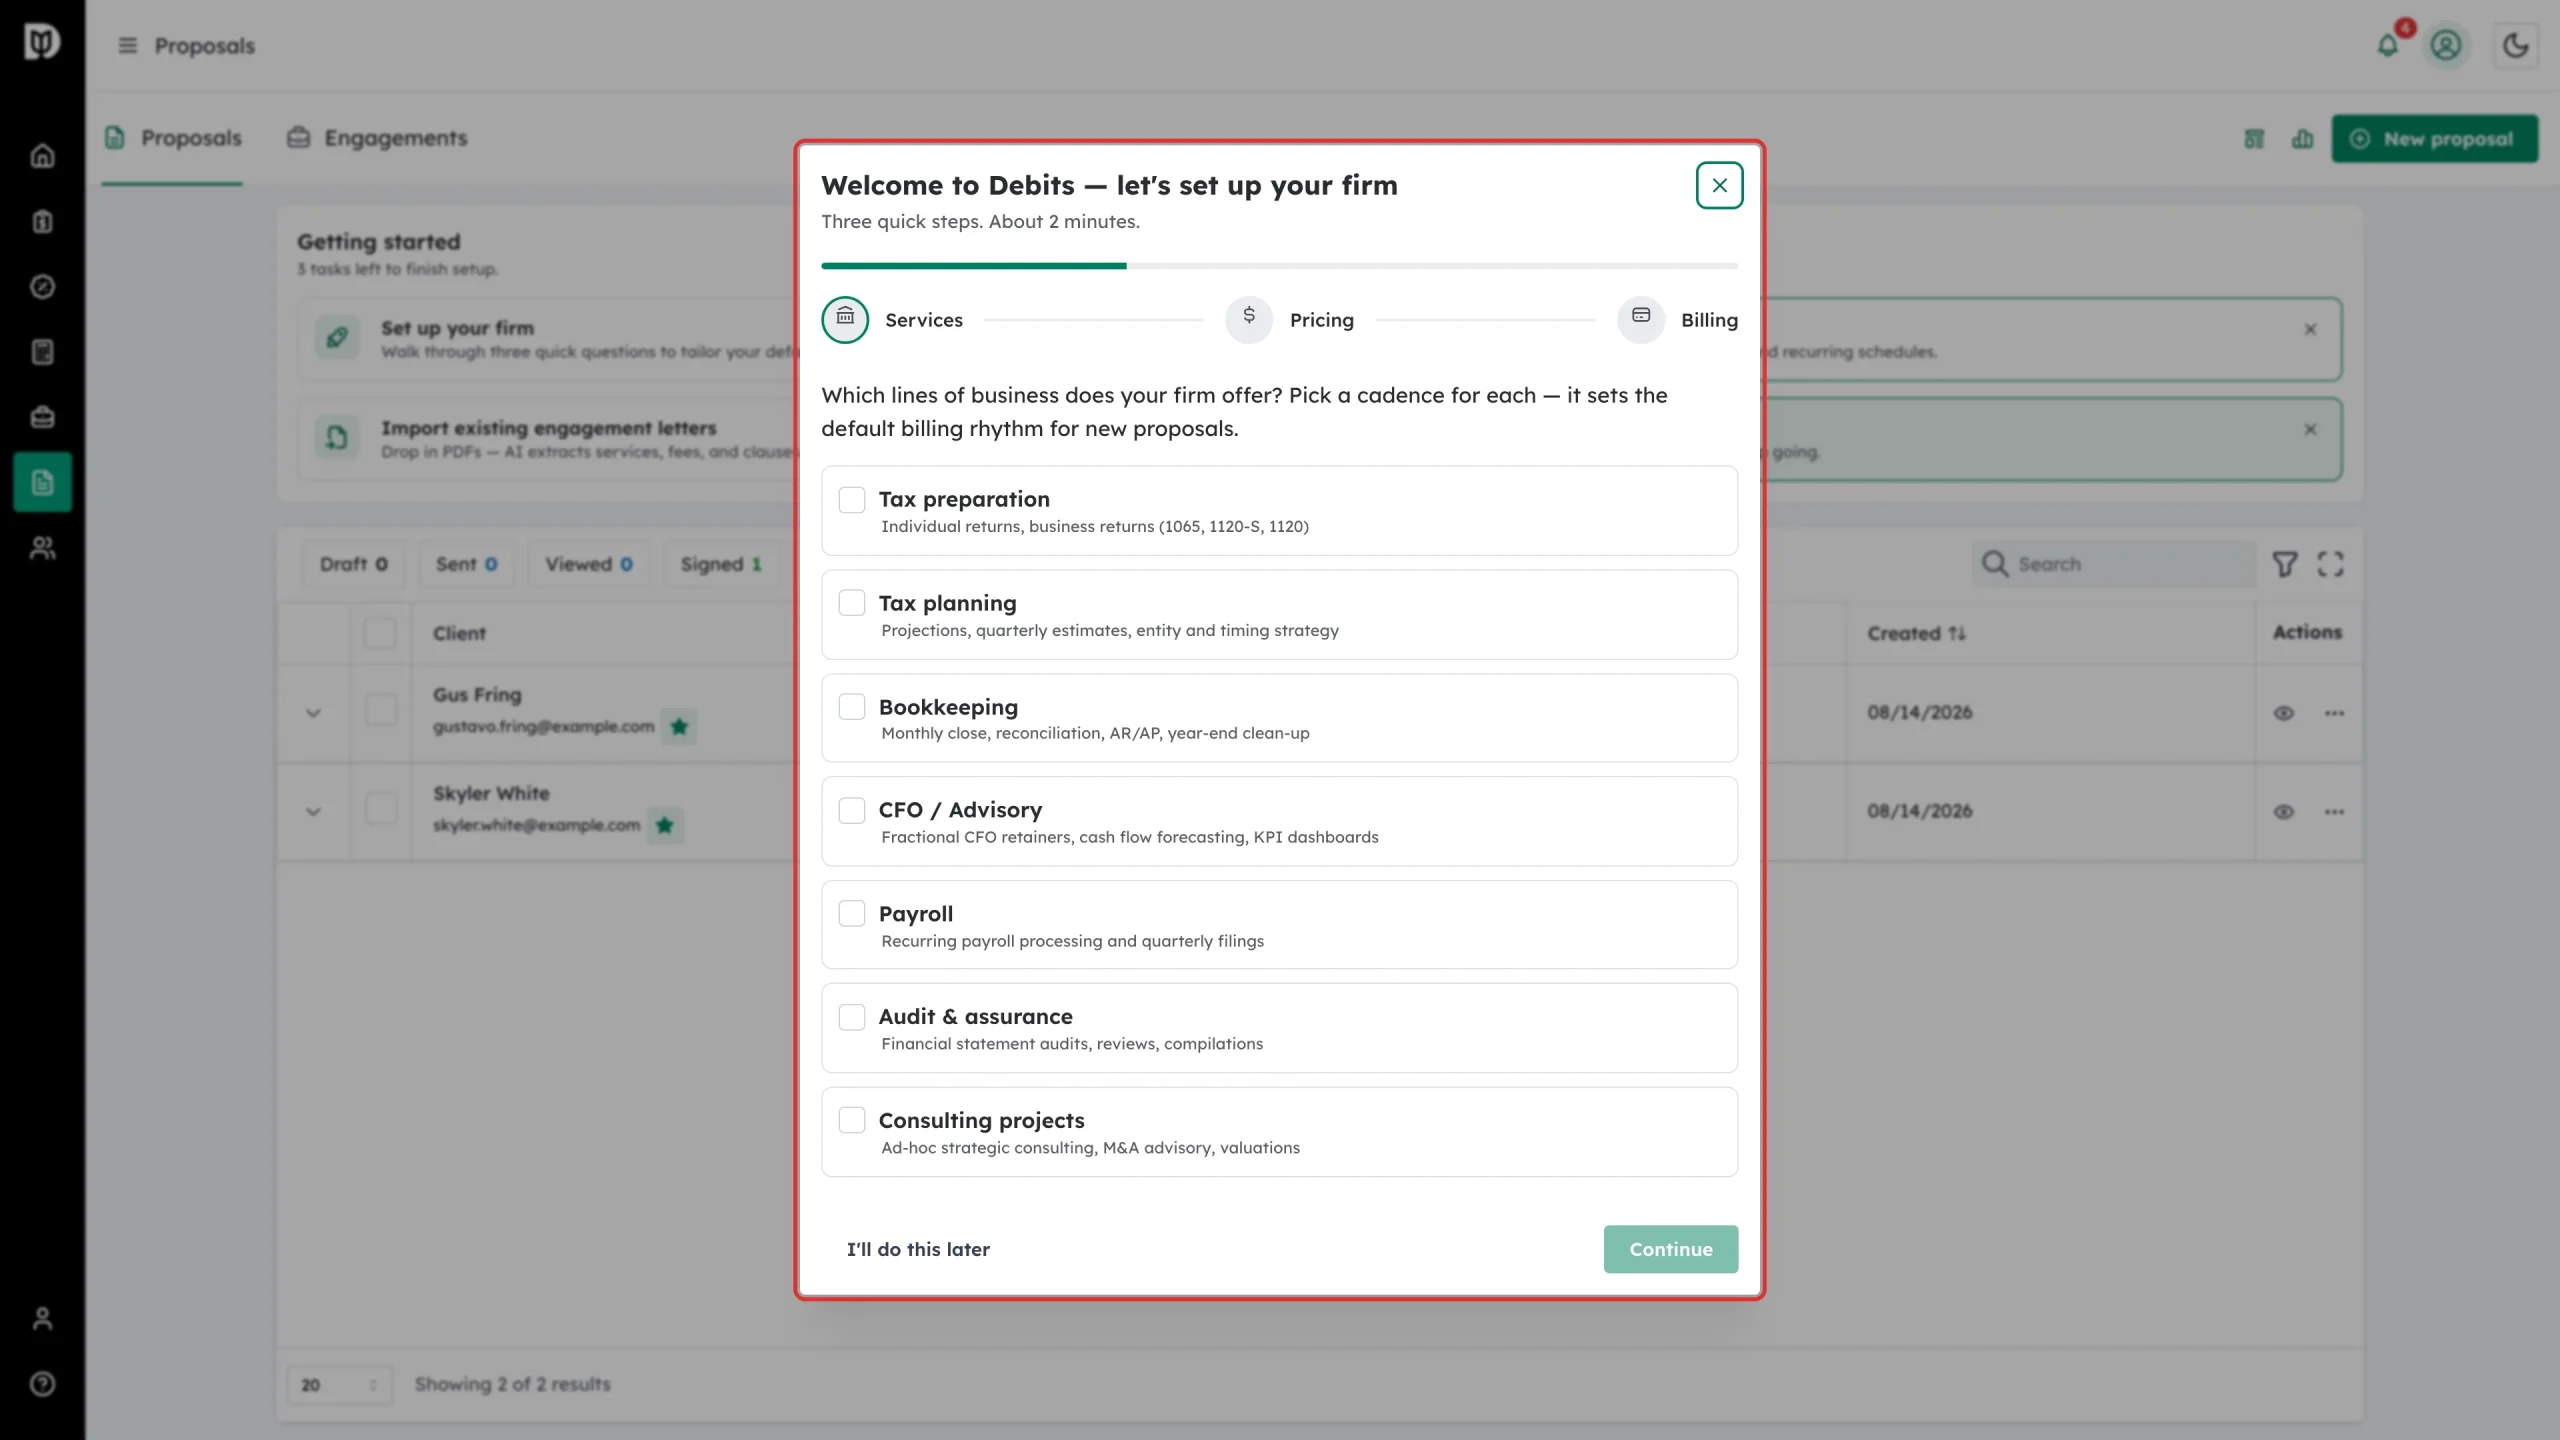
Click Set up your firm. The setup wizard asks which lines of business you offer, how you like to price, and how you bill. Your answers set the defaults for new proposals and draft a starter template for each service line. Click Continue through the three steps, or I’ll do this later to close it — it reopens next time you sign in until you finish it.
Step 4: Track quotes on the Proposals tab
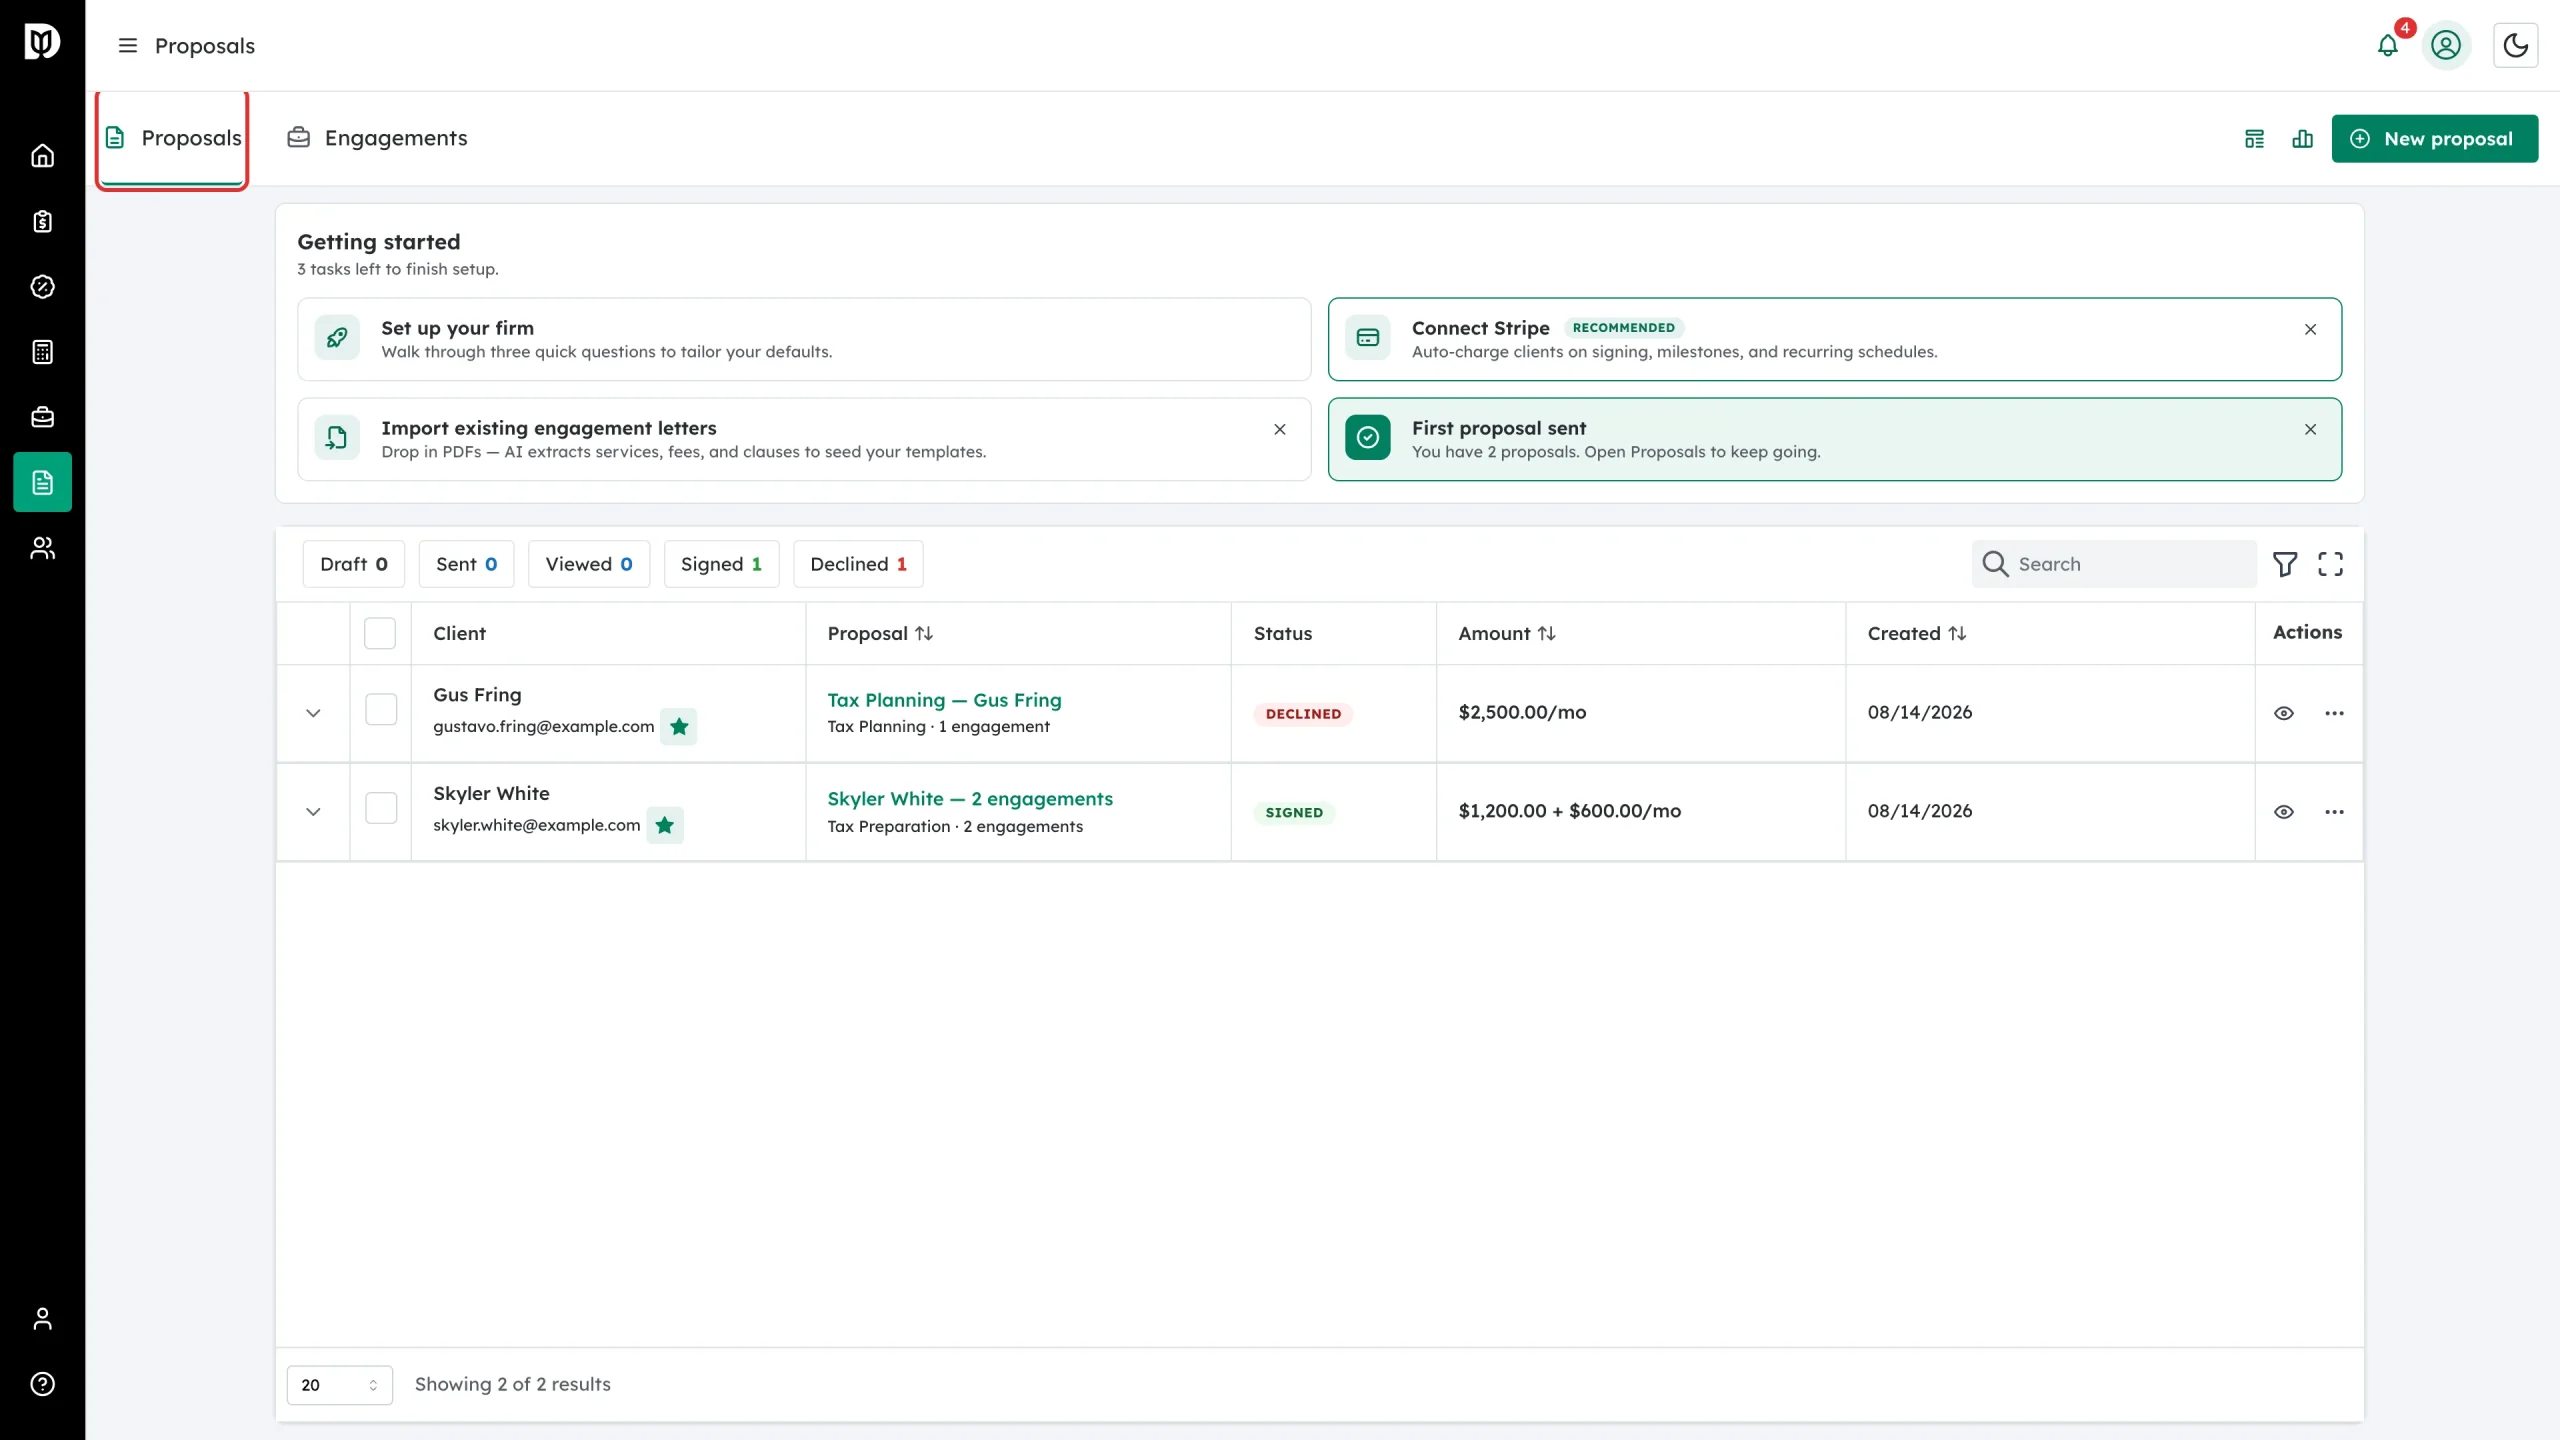
The Proposals tab lists everything you have quoted. The chips above the table filter by status: Draft, Sent, Viewed, Signed and Declined. The Amount column shows the split total — a one-off fee and a recurring fee are shown separately, never added together.
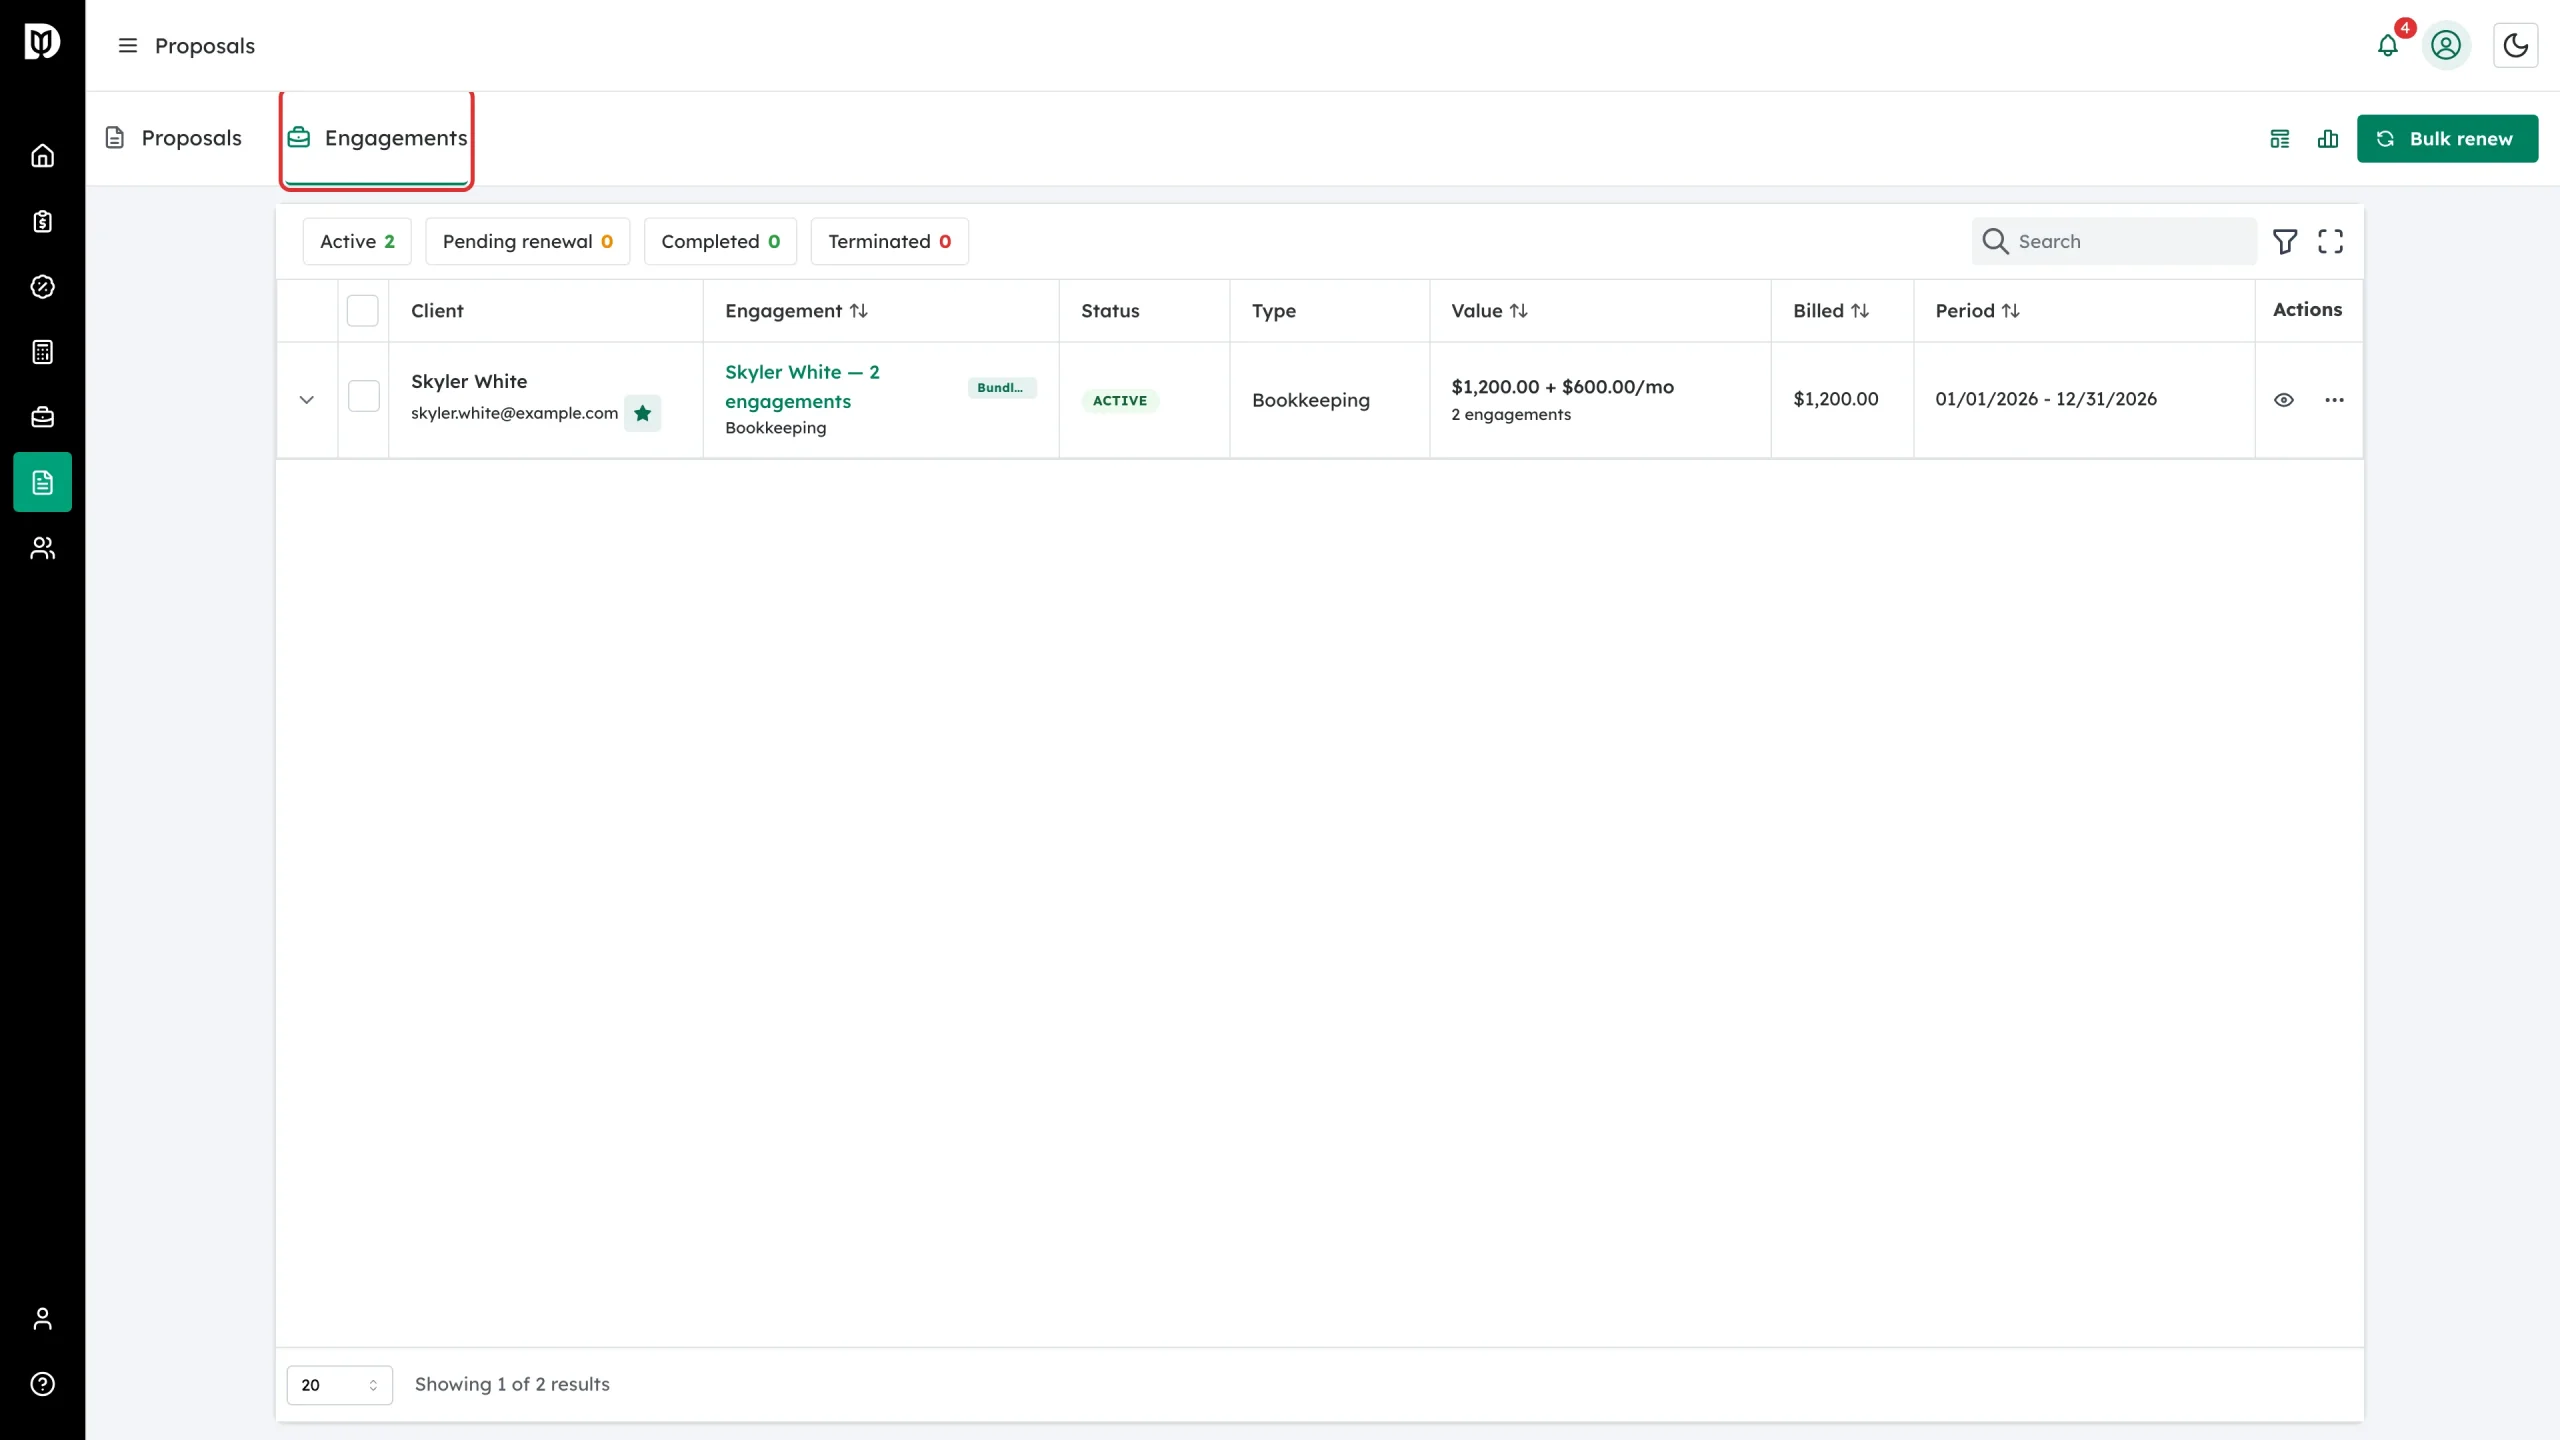
Step 5: Track signed work on the Engagements tab
The Engagements tab lists the work created by signed proposals. Its chips are Active, Pending renewal, Completed and Terminated. All the engagements from one proposal appear as a single row you can expand.
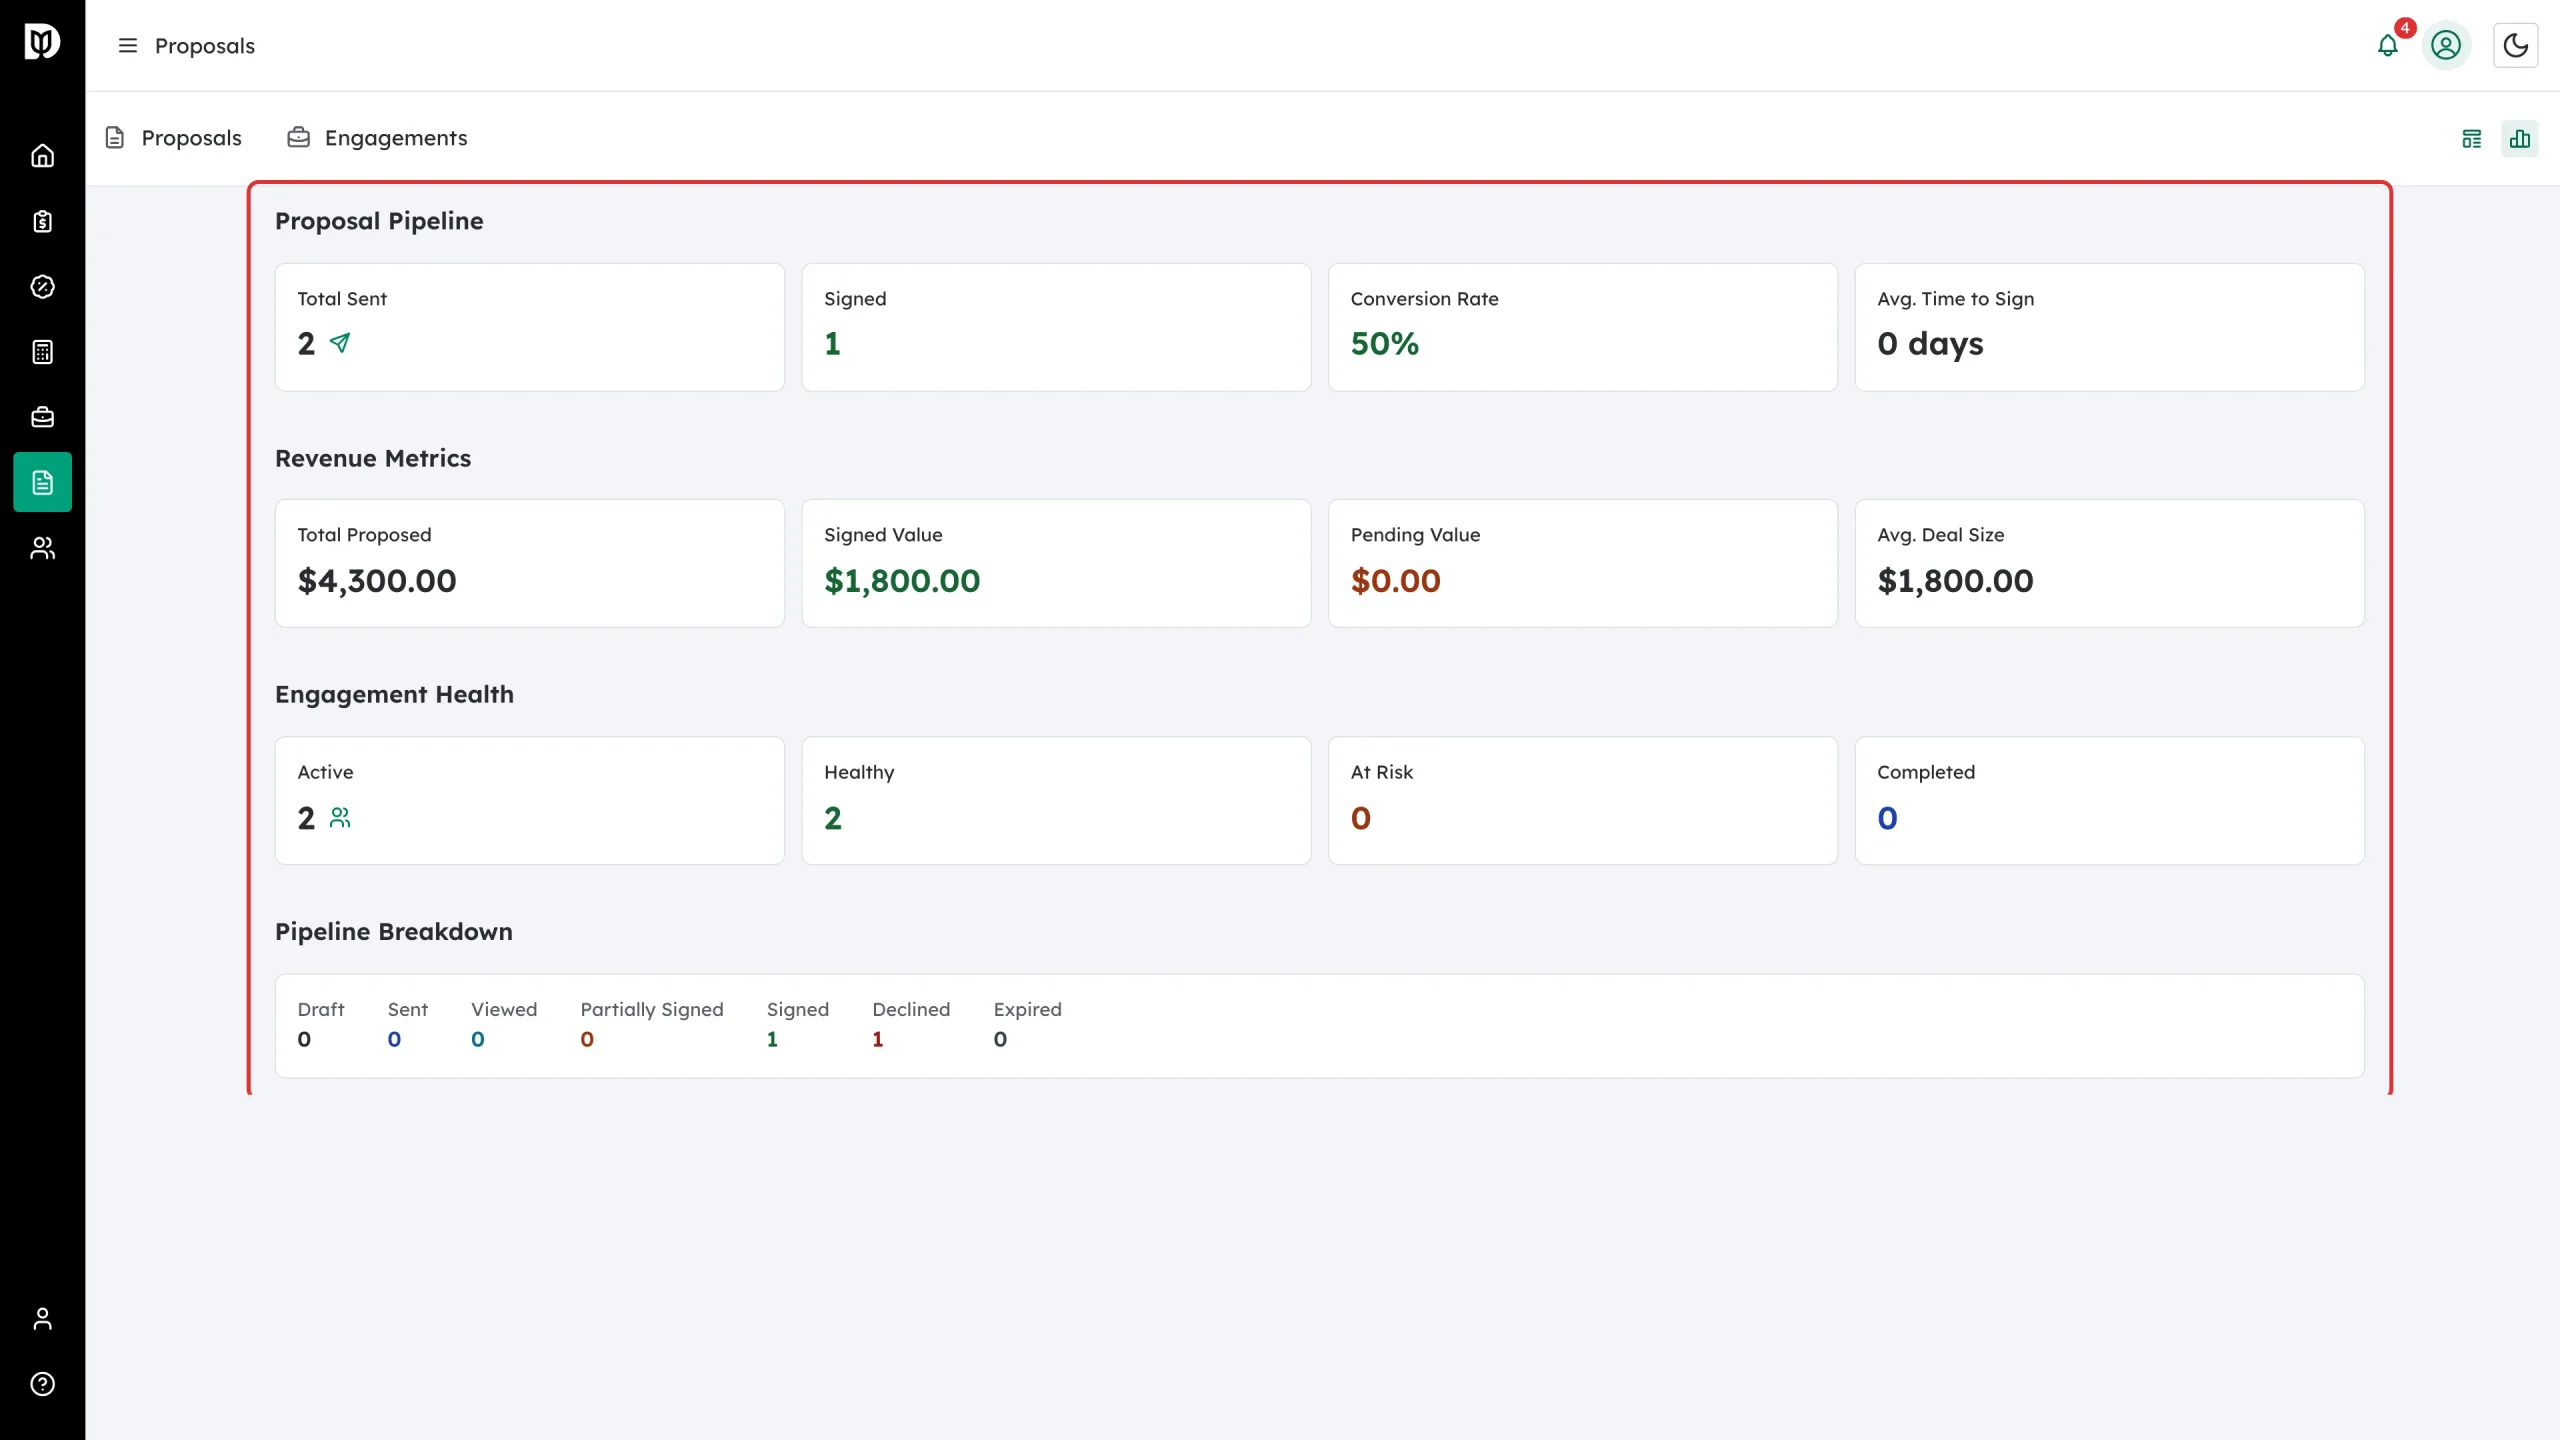
Step 6: Check the pipeline in Analytics
Click the bar-chart icon at the top right for Analytics: proposals sent, signed, conversion rate, average time to sign, proposed and signed value, and engagement health.
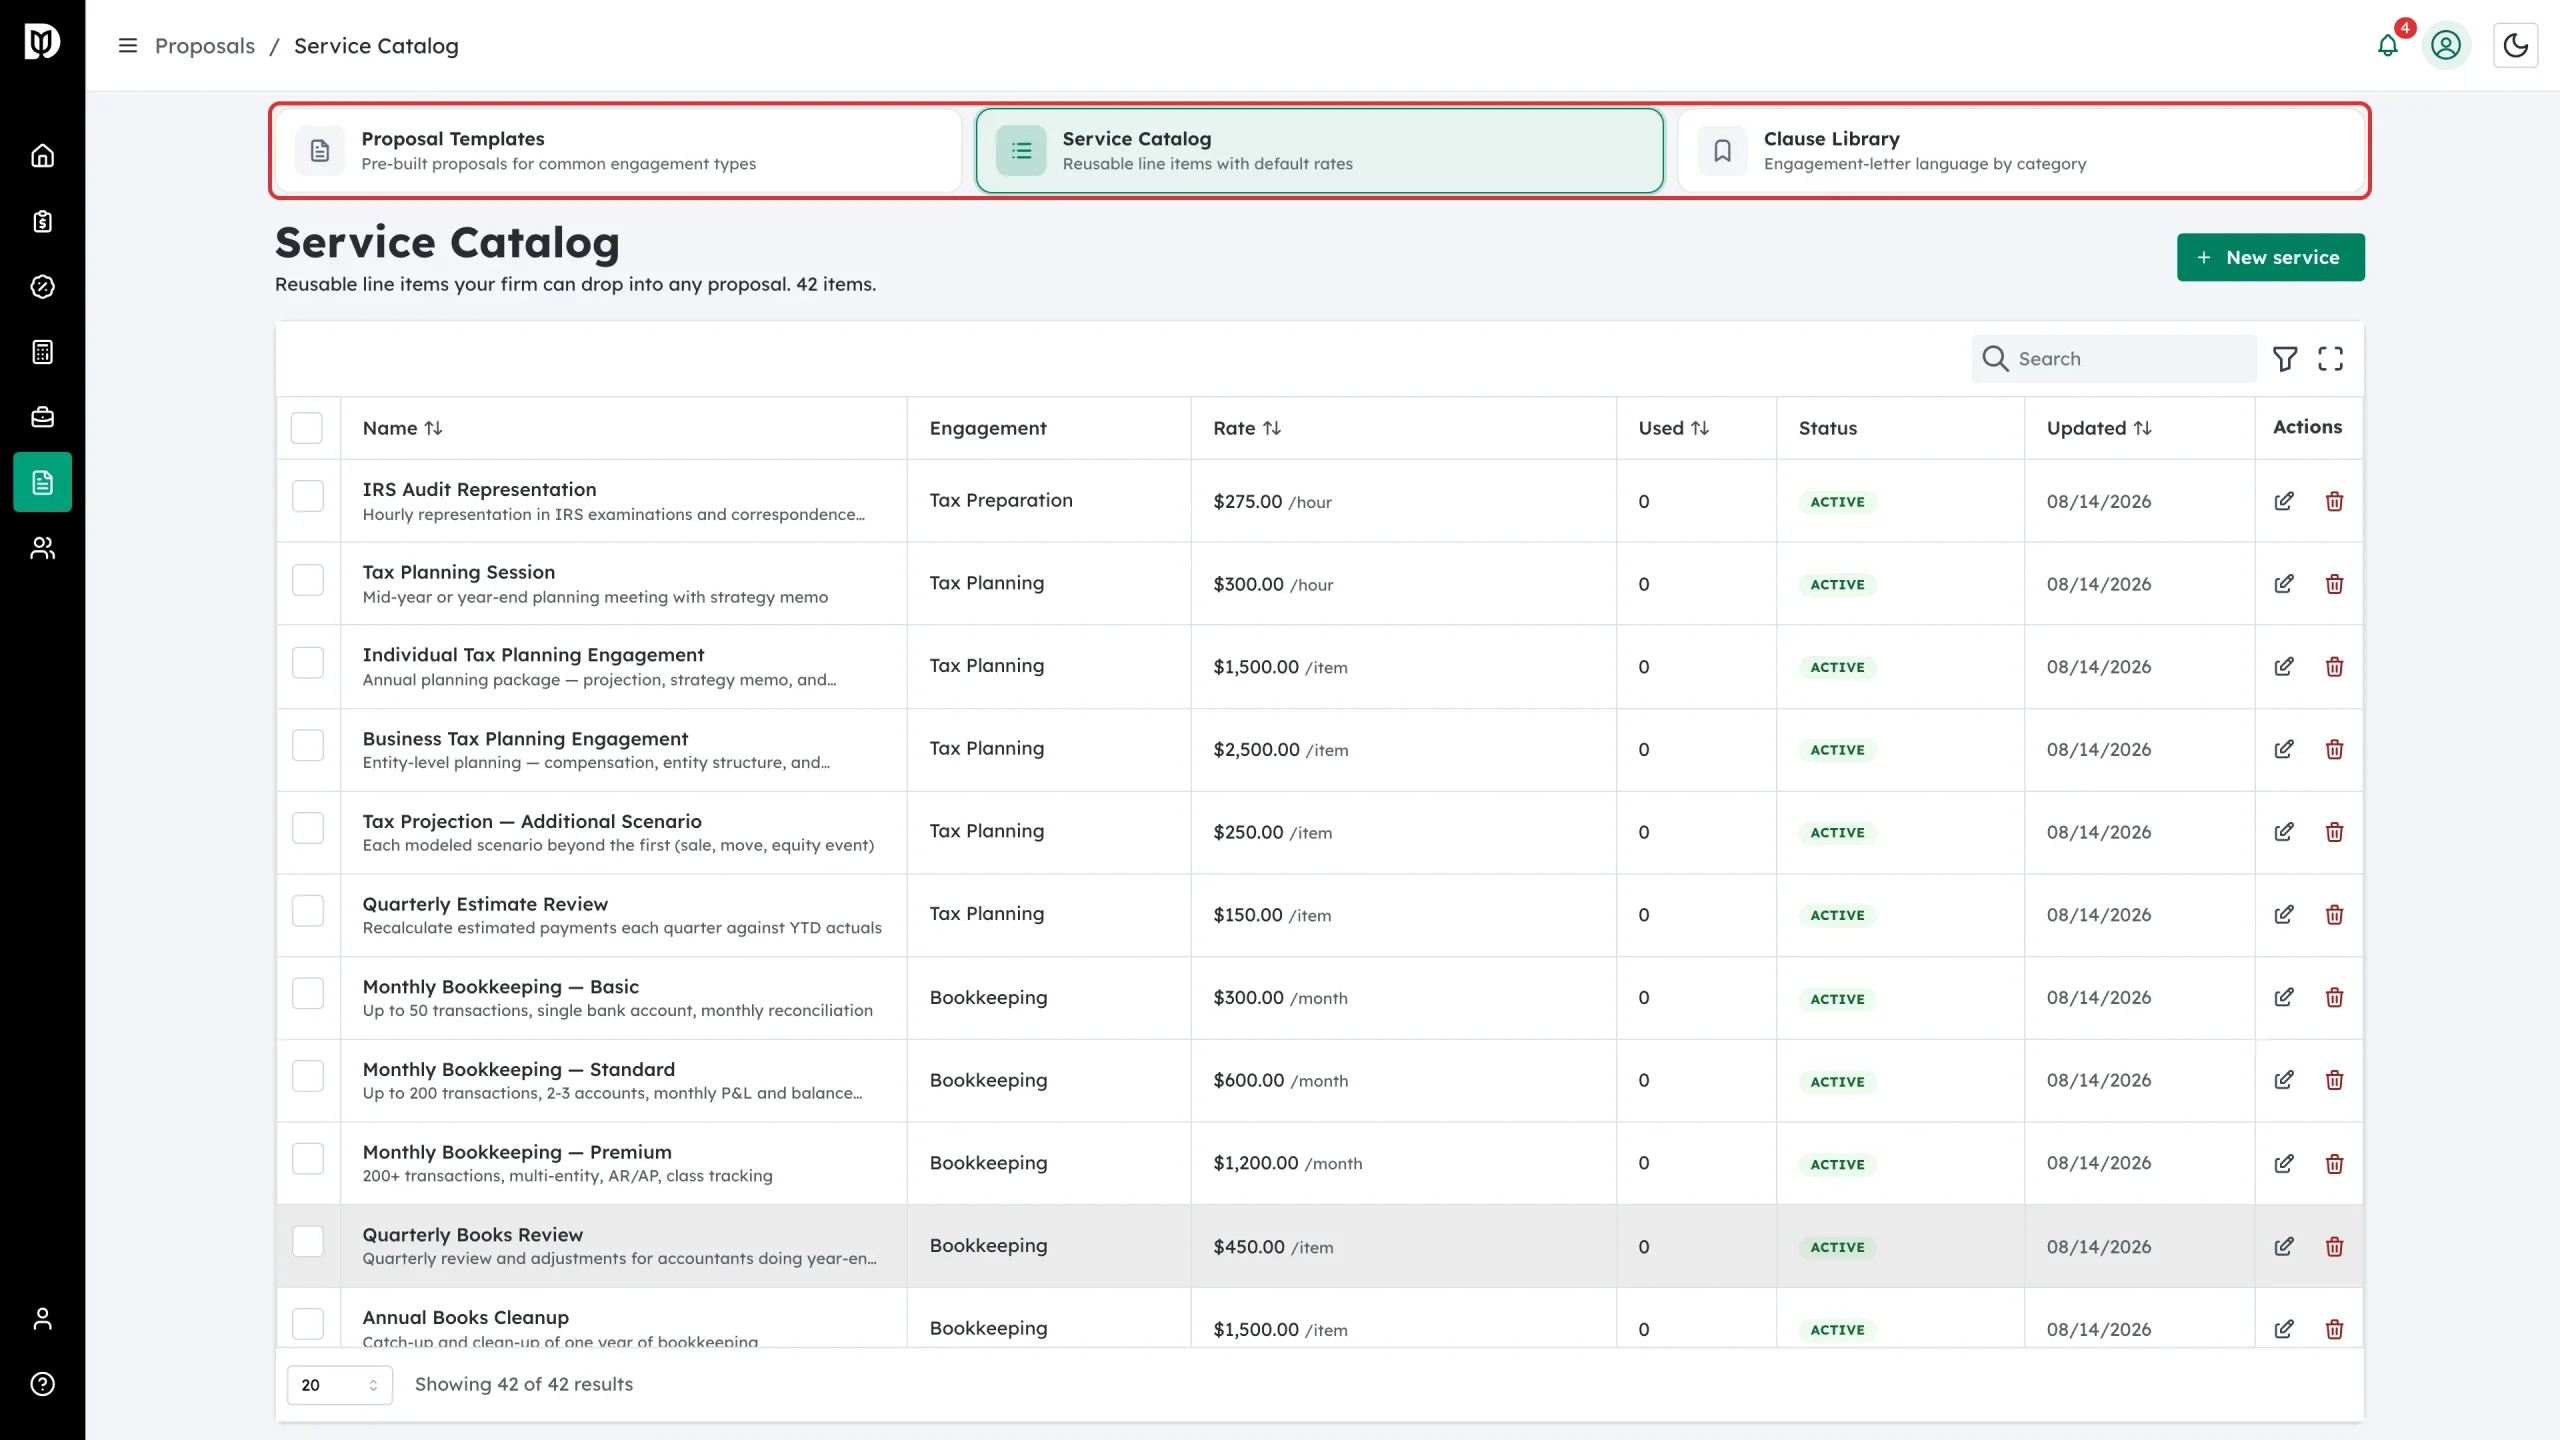
Step 7: Set up your three libraries
Everything reusable lives in three linked libraries: Proposal Templates, Service Catalog and Clause Library. The strip at the top of each one switches between them.
What happens next
Once setup is done you can build a proposal in four steps: pick the client, add an engagement for each service, set up the client (lead accountant, tags and the documents to request), then review and send. When the client signs, the engagements appear on the Engagements tab with their signed letters attached.
Troubleshooting
- The setup wizard keeps reappearing. Clicking “I’ll do this later” only hides it for the current session. It stops appearing once you click Finish setup on the last step.
- I can’t see Analytics or the Getting started checklist. Both are limited to owners and admins, and Analytics also needs permission to view engagement financials.
- The Connect Stripe tile is missing. It hides once your Stripe Connect account is connected and able to take charges, and it does not appear at all if the billing module is switched off for your firm.