Who this is for: Firm owners and admins who want automatic reminder emails sent to clients.
What you’ll learn: How to set up bookkeeping reminders, tax organizer reminders, and W-9 request reminders for your whole firm.
Before you begin
- You need owner or admin access to your Debits account.
- These settings apply to every contact unless you set a per-contact override (see the related article below).
- Reminders are sent by email only.
Step-by-step instructions
Step 1: Open Reminders settings
Go to Account and click the Reminders card.
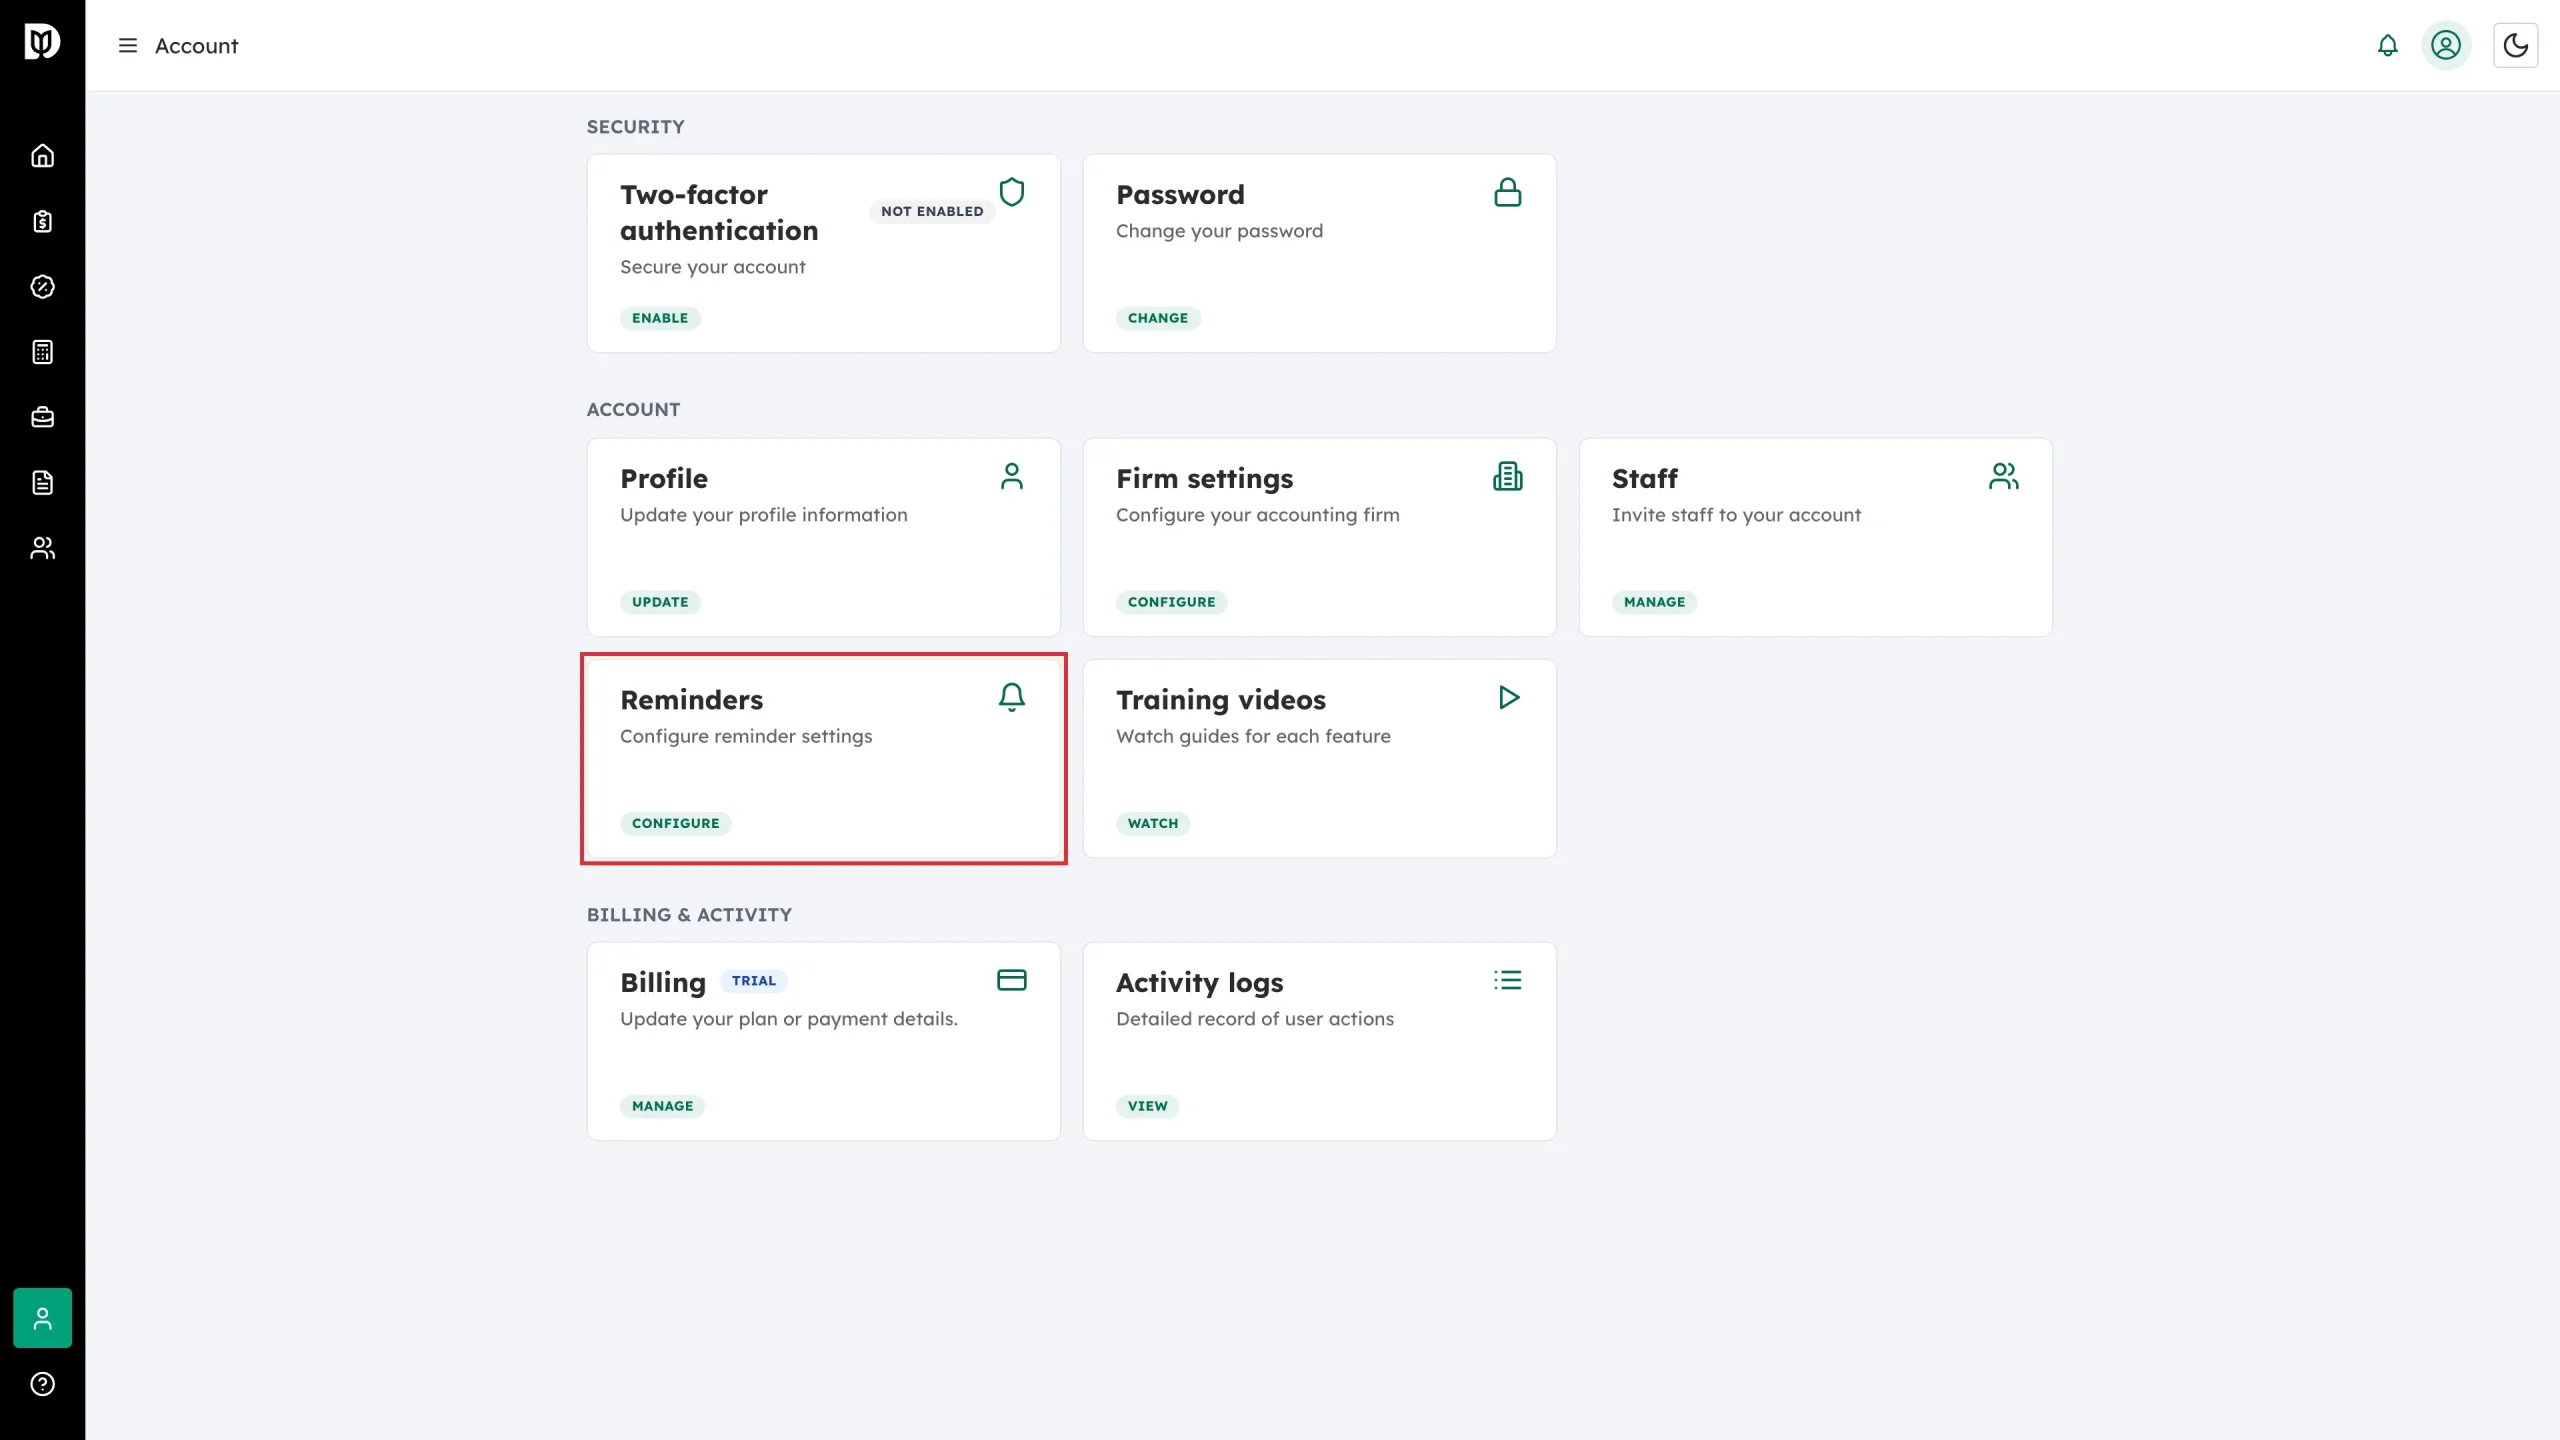
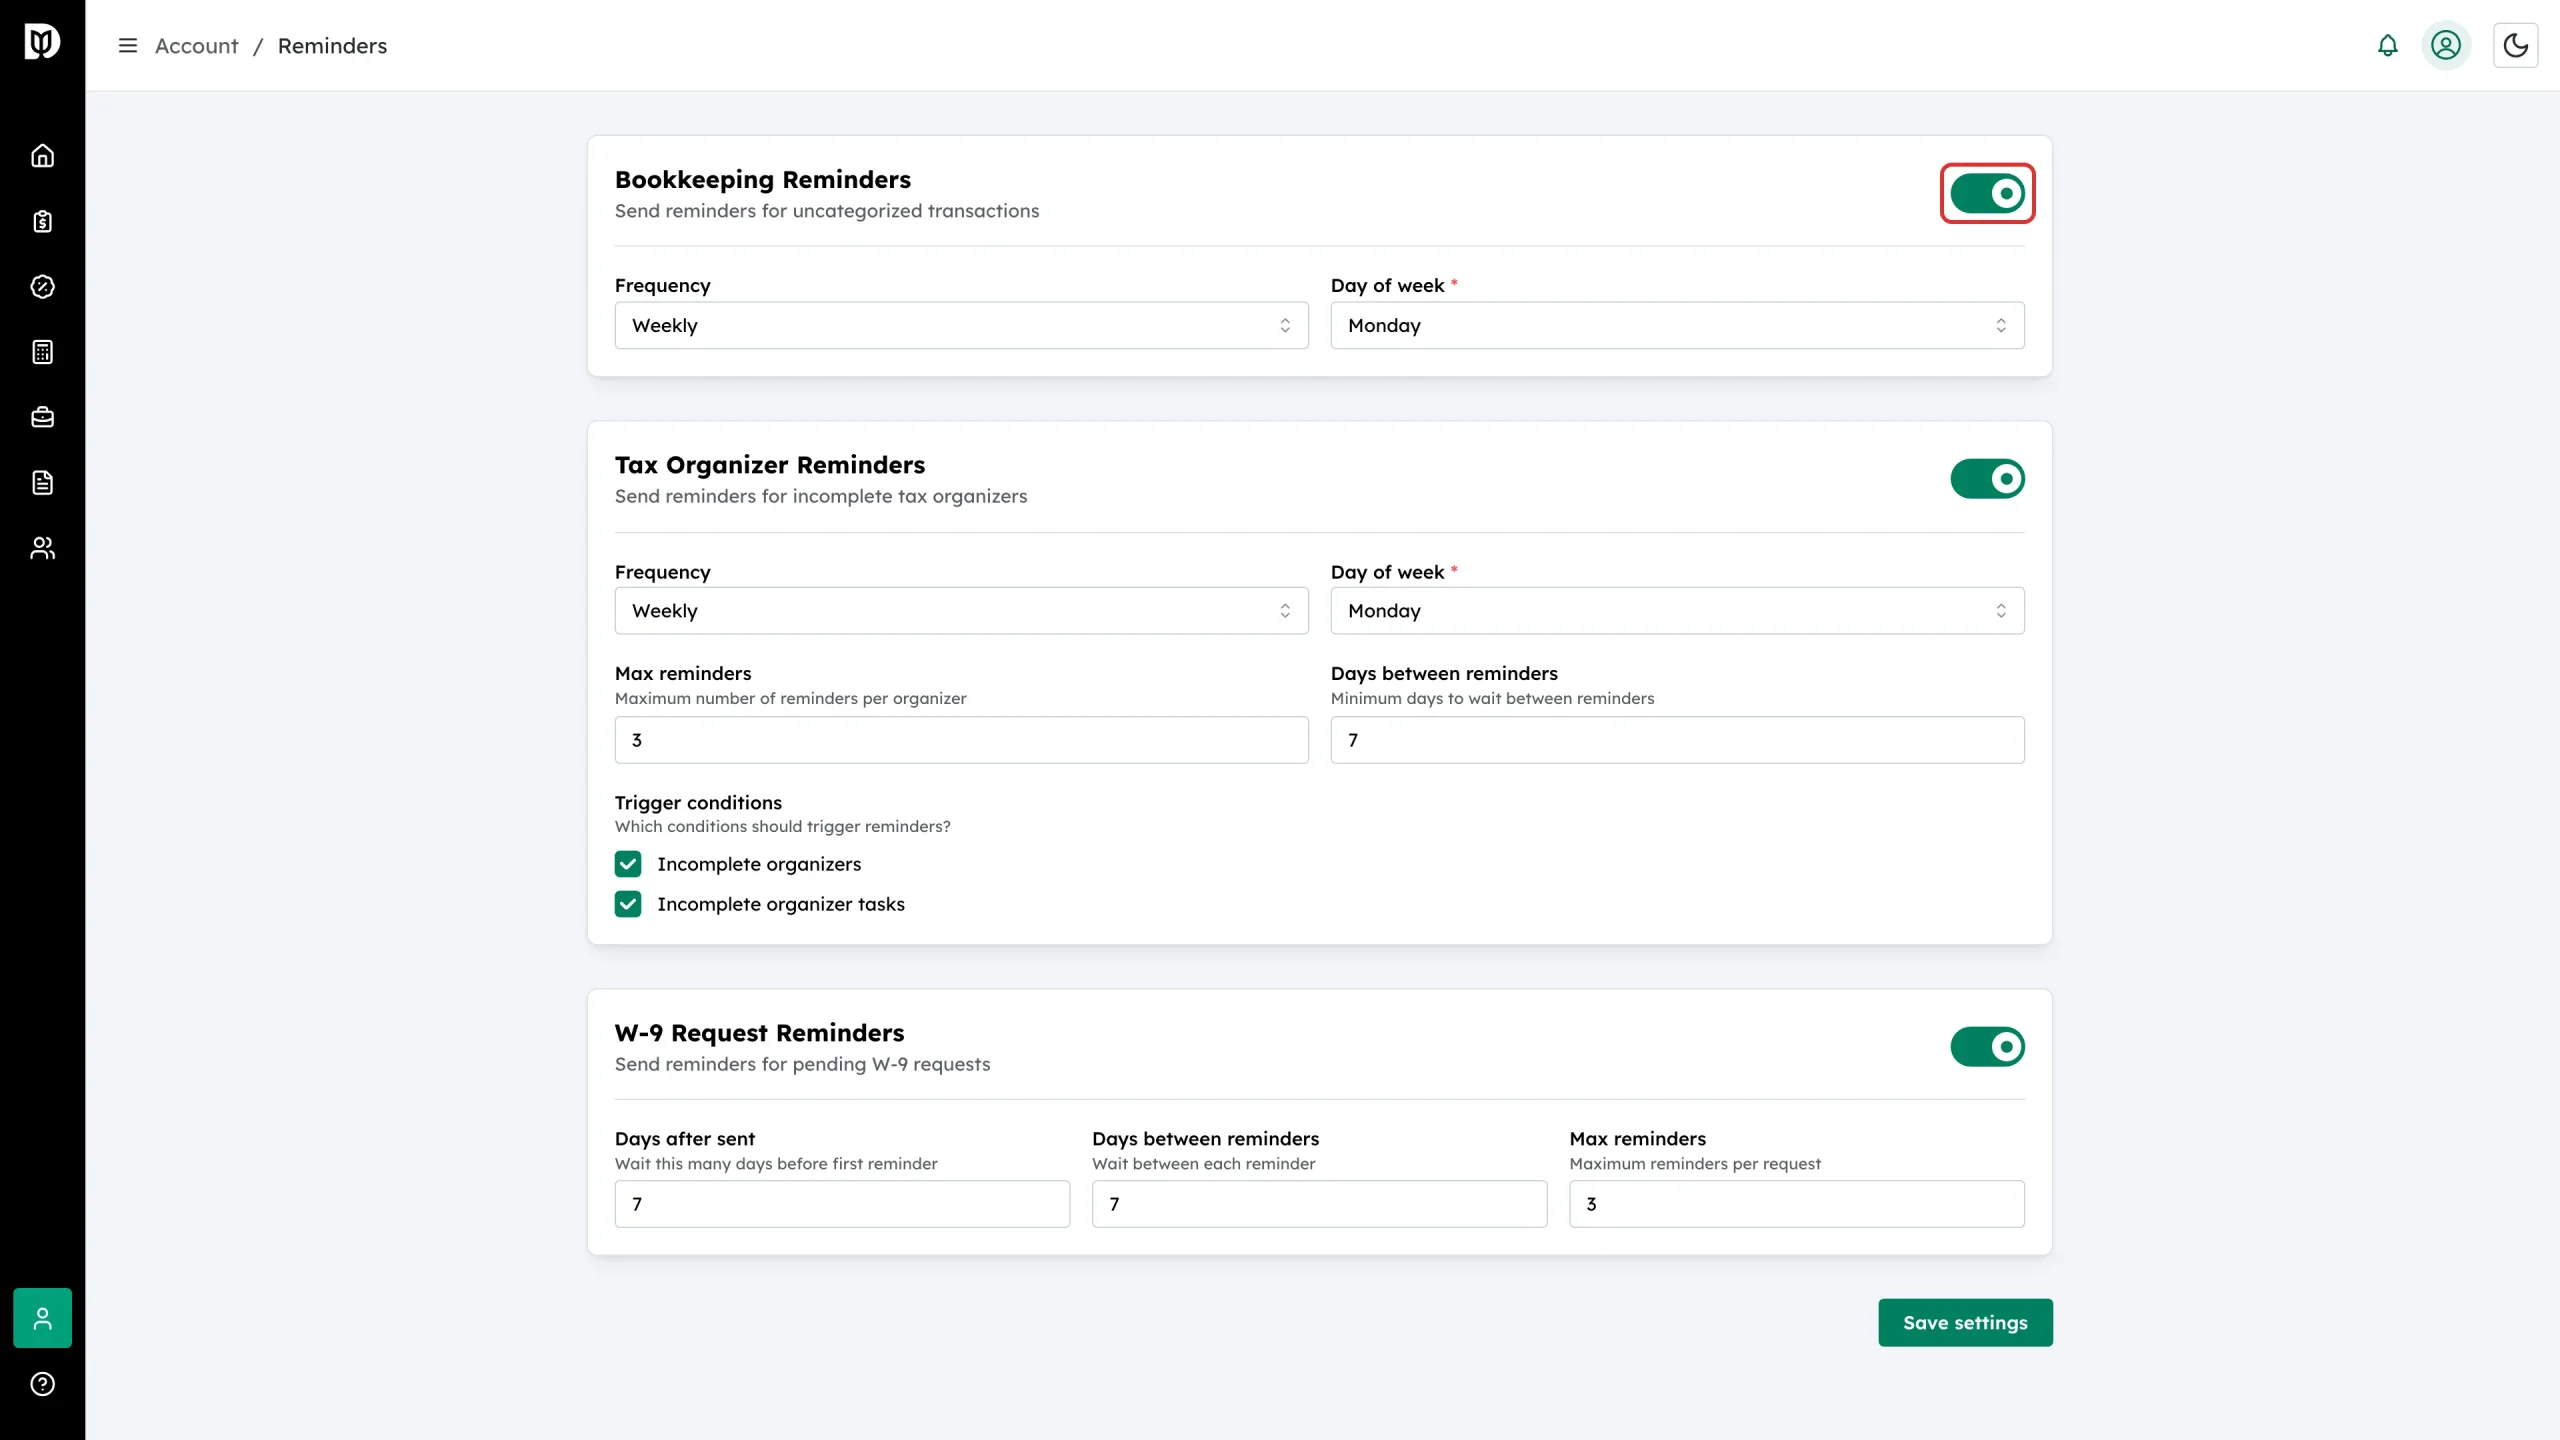
Step 2: Turn on Bookkeeping Reminders
Use the switch on the Bookkeeping Reminders card. These remind clients when they have uncategorized transactions.
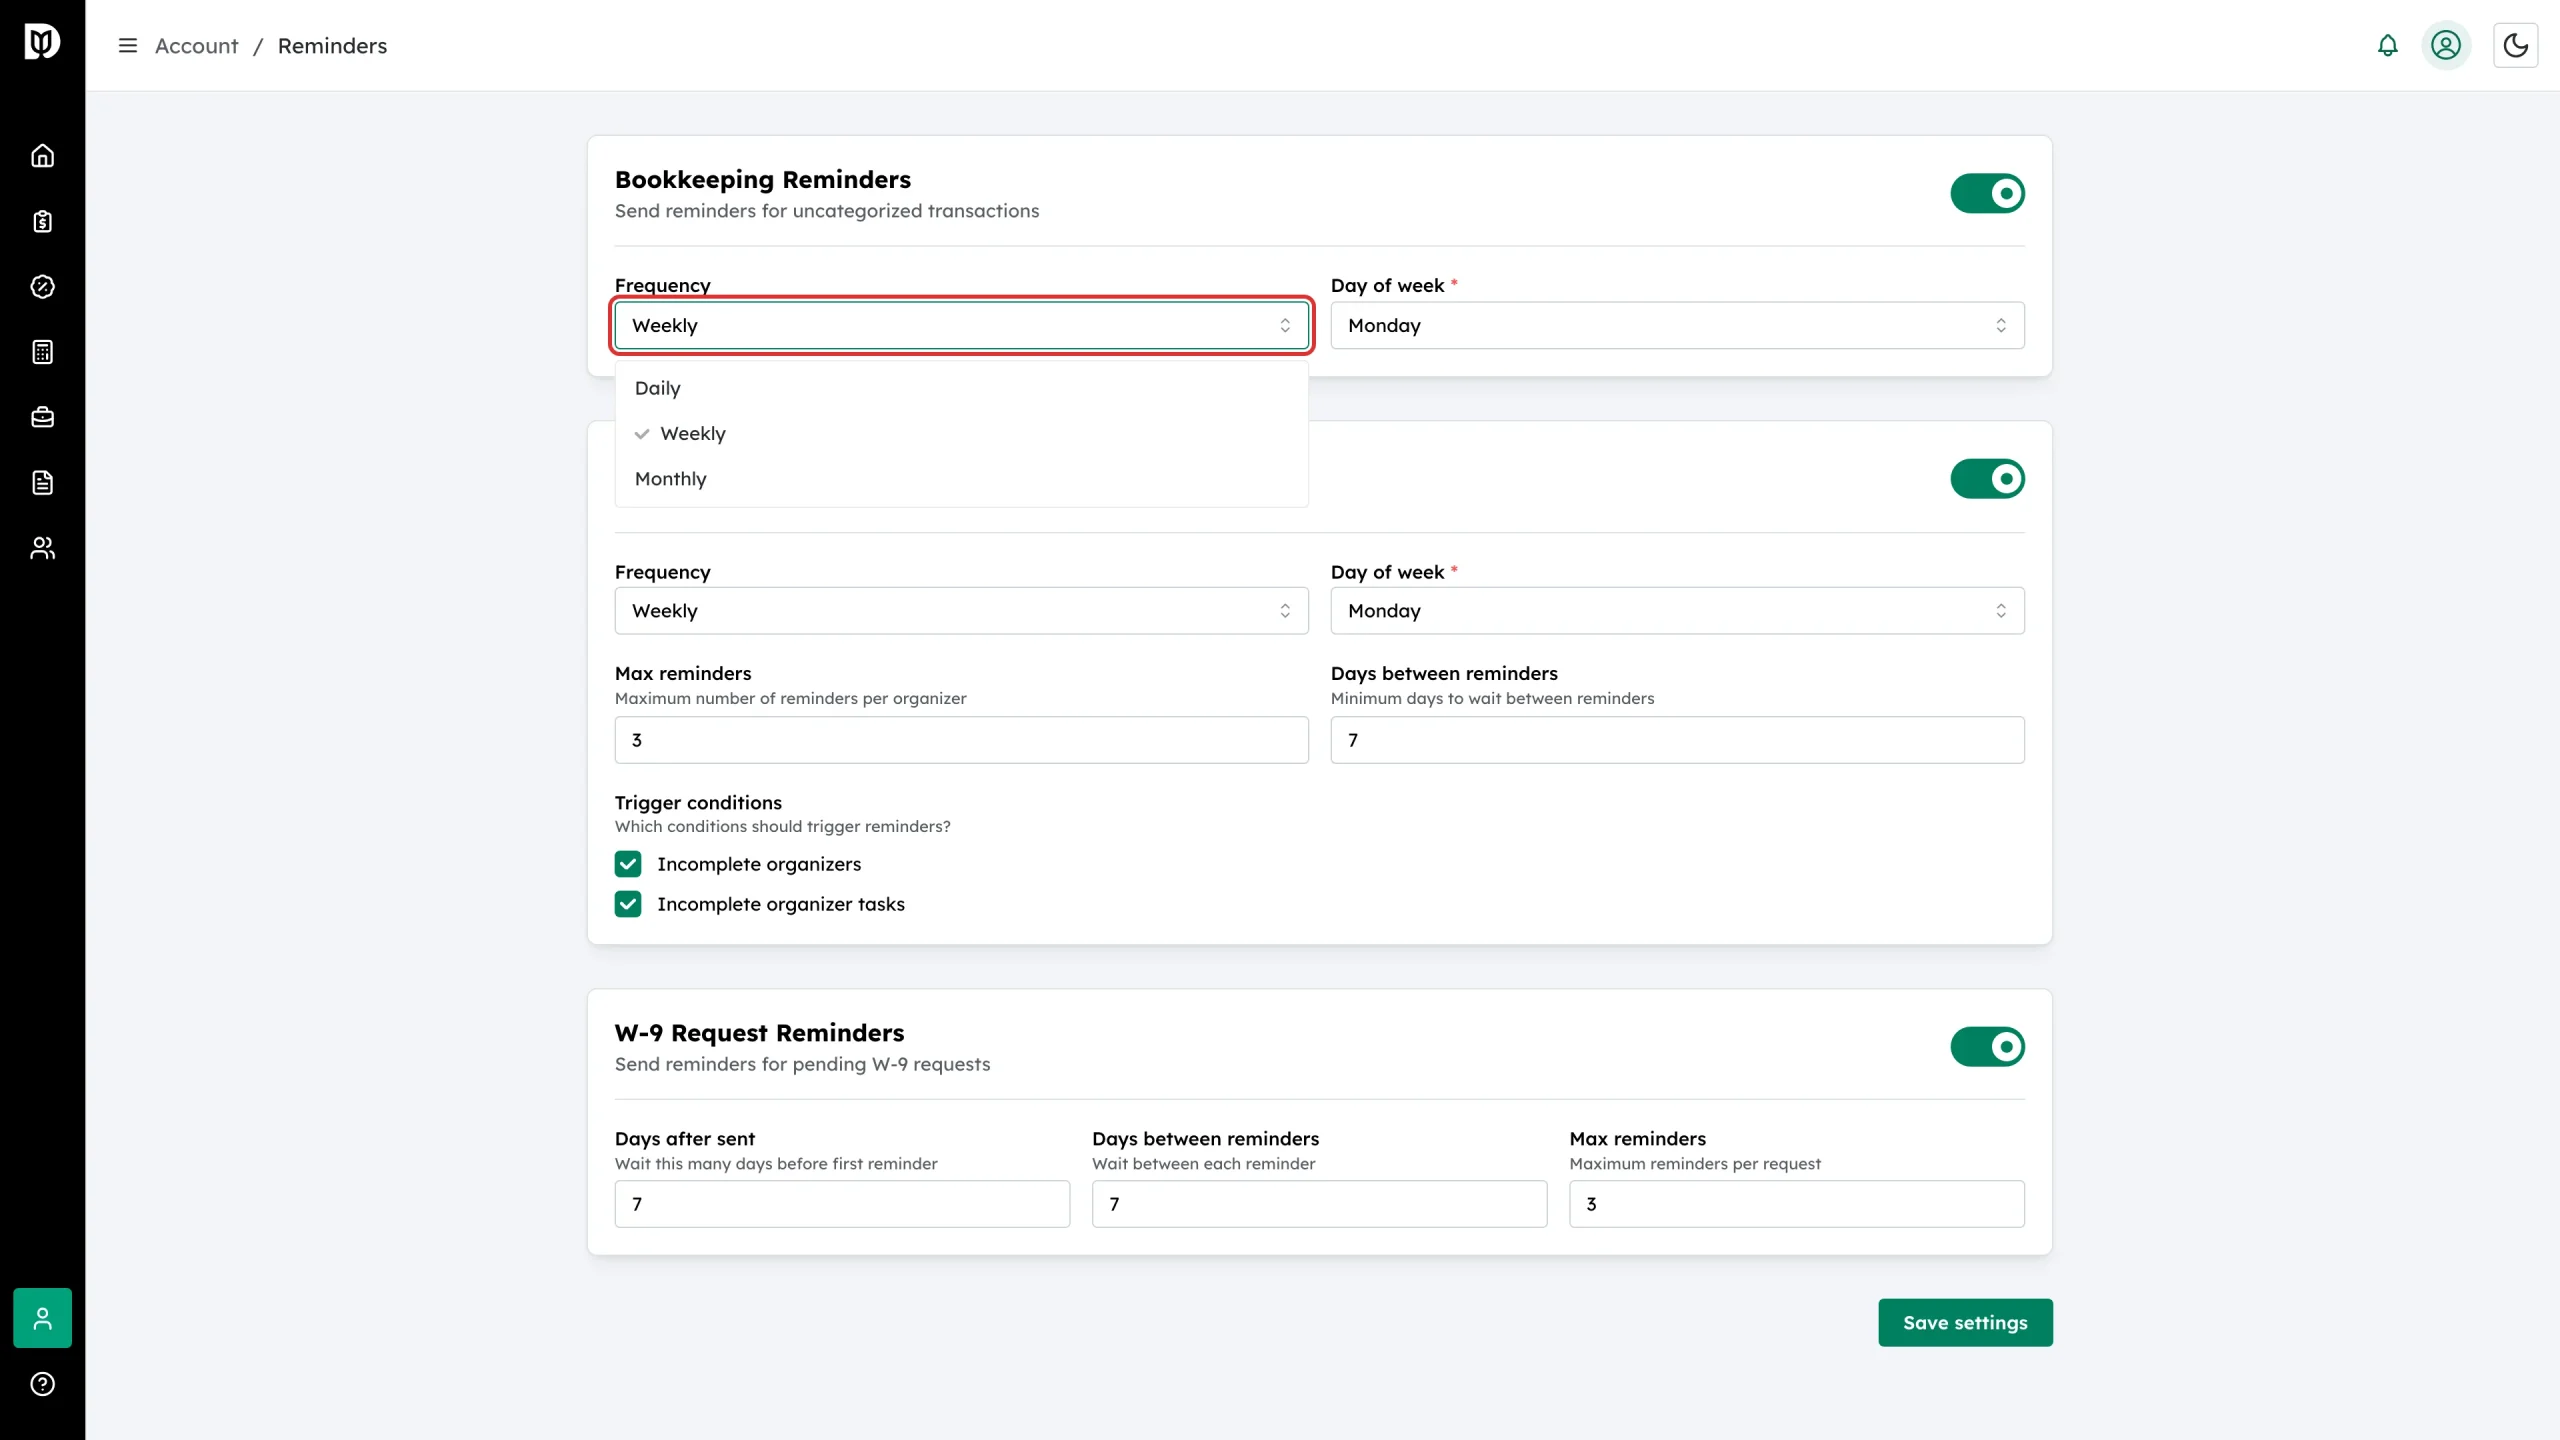
Step 3: Pick a frequency
Choose how often the reminder goes out:
- Daily — every day
- Weekly — on a day of the week you pick
- Monthly — on a day of the month you pick (1–28)
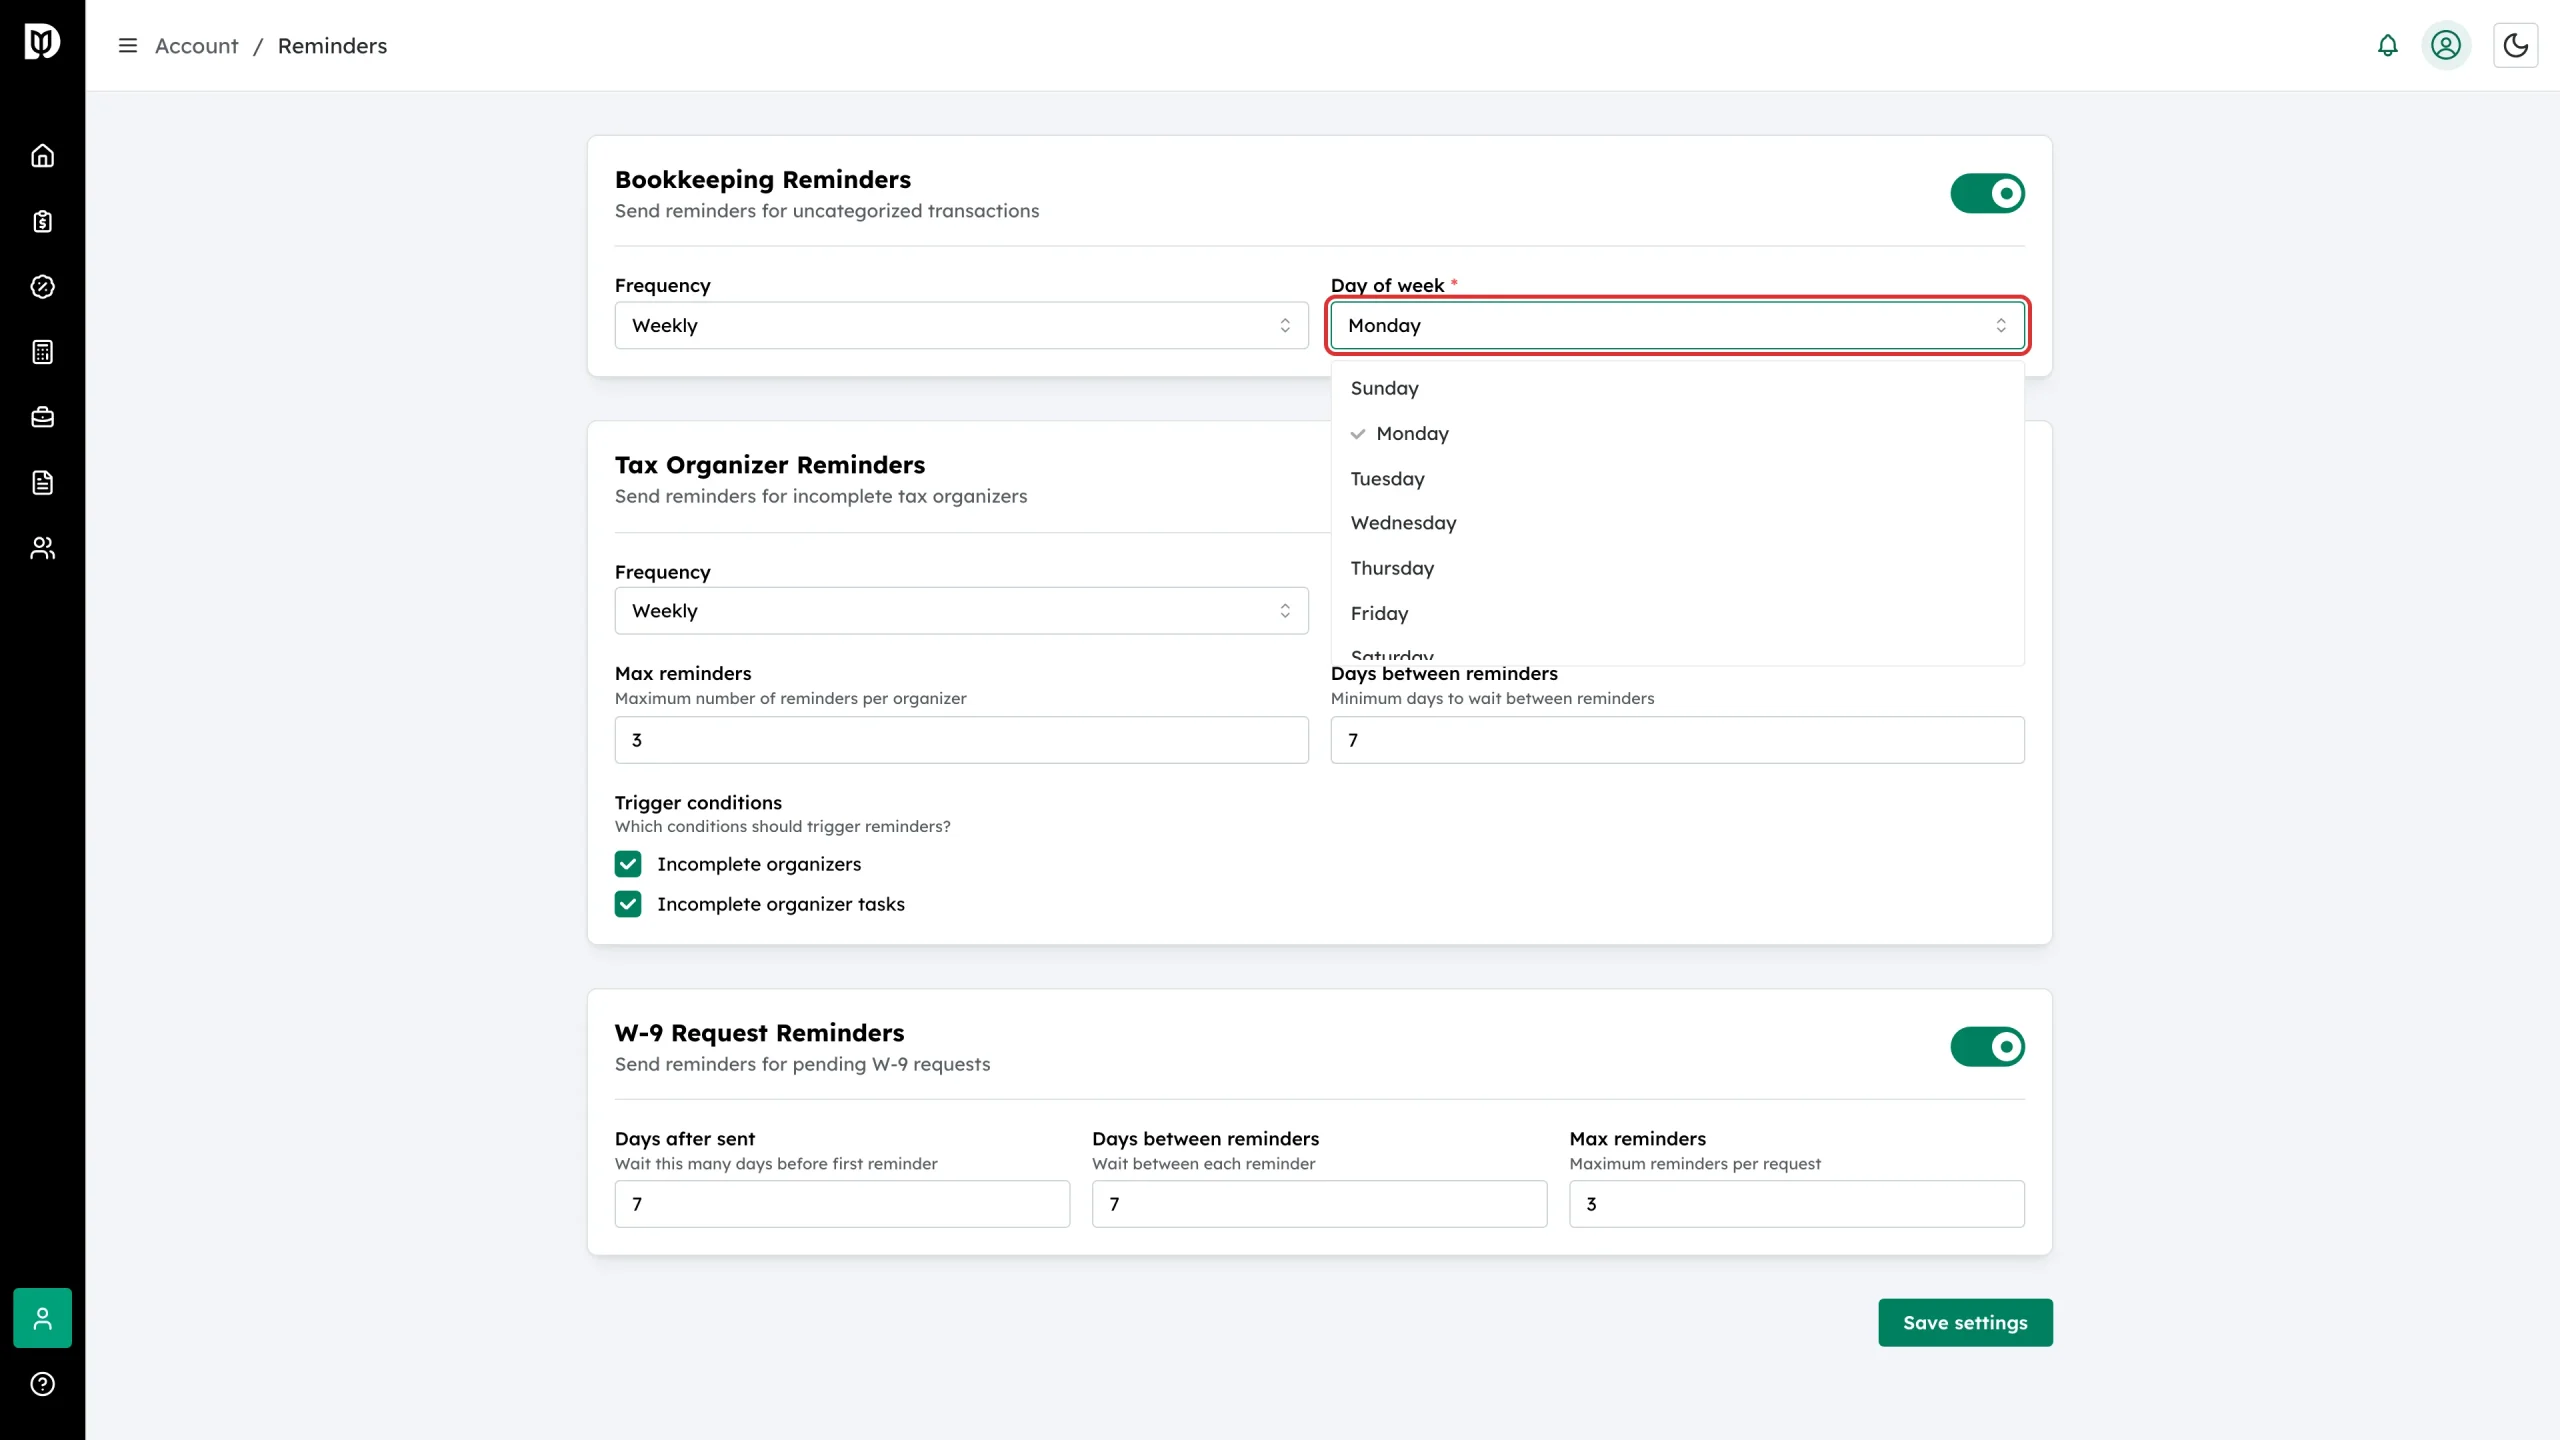
Step 4: Pick the day
For Weekly, choose a day of the week (Sunday–Saturday). For Monthly, choose a day of the month (1–28).
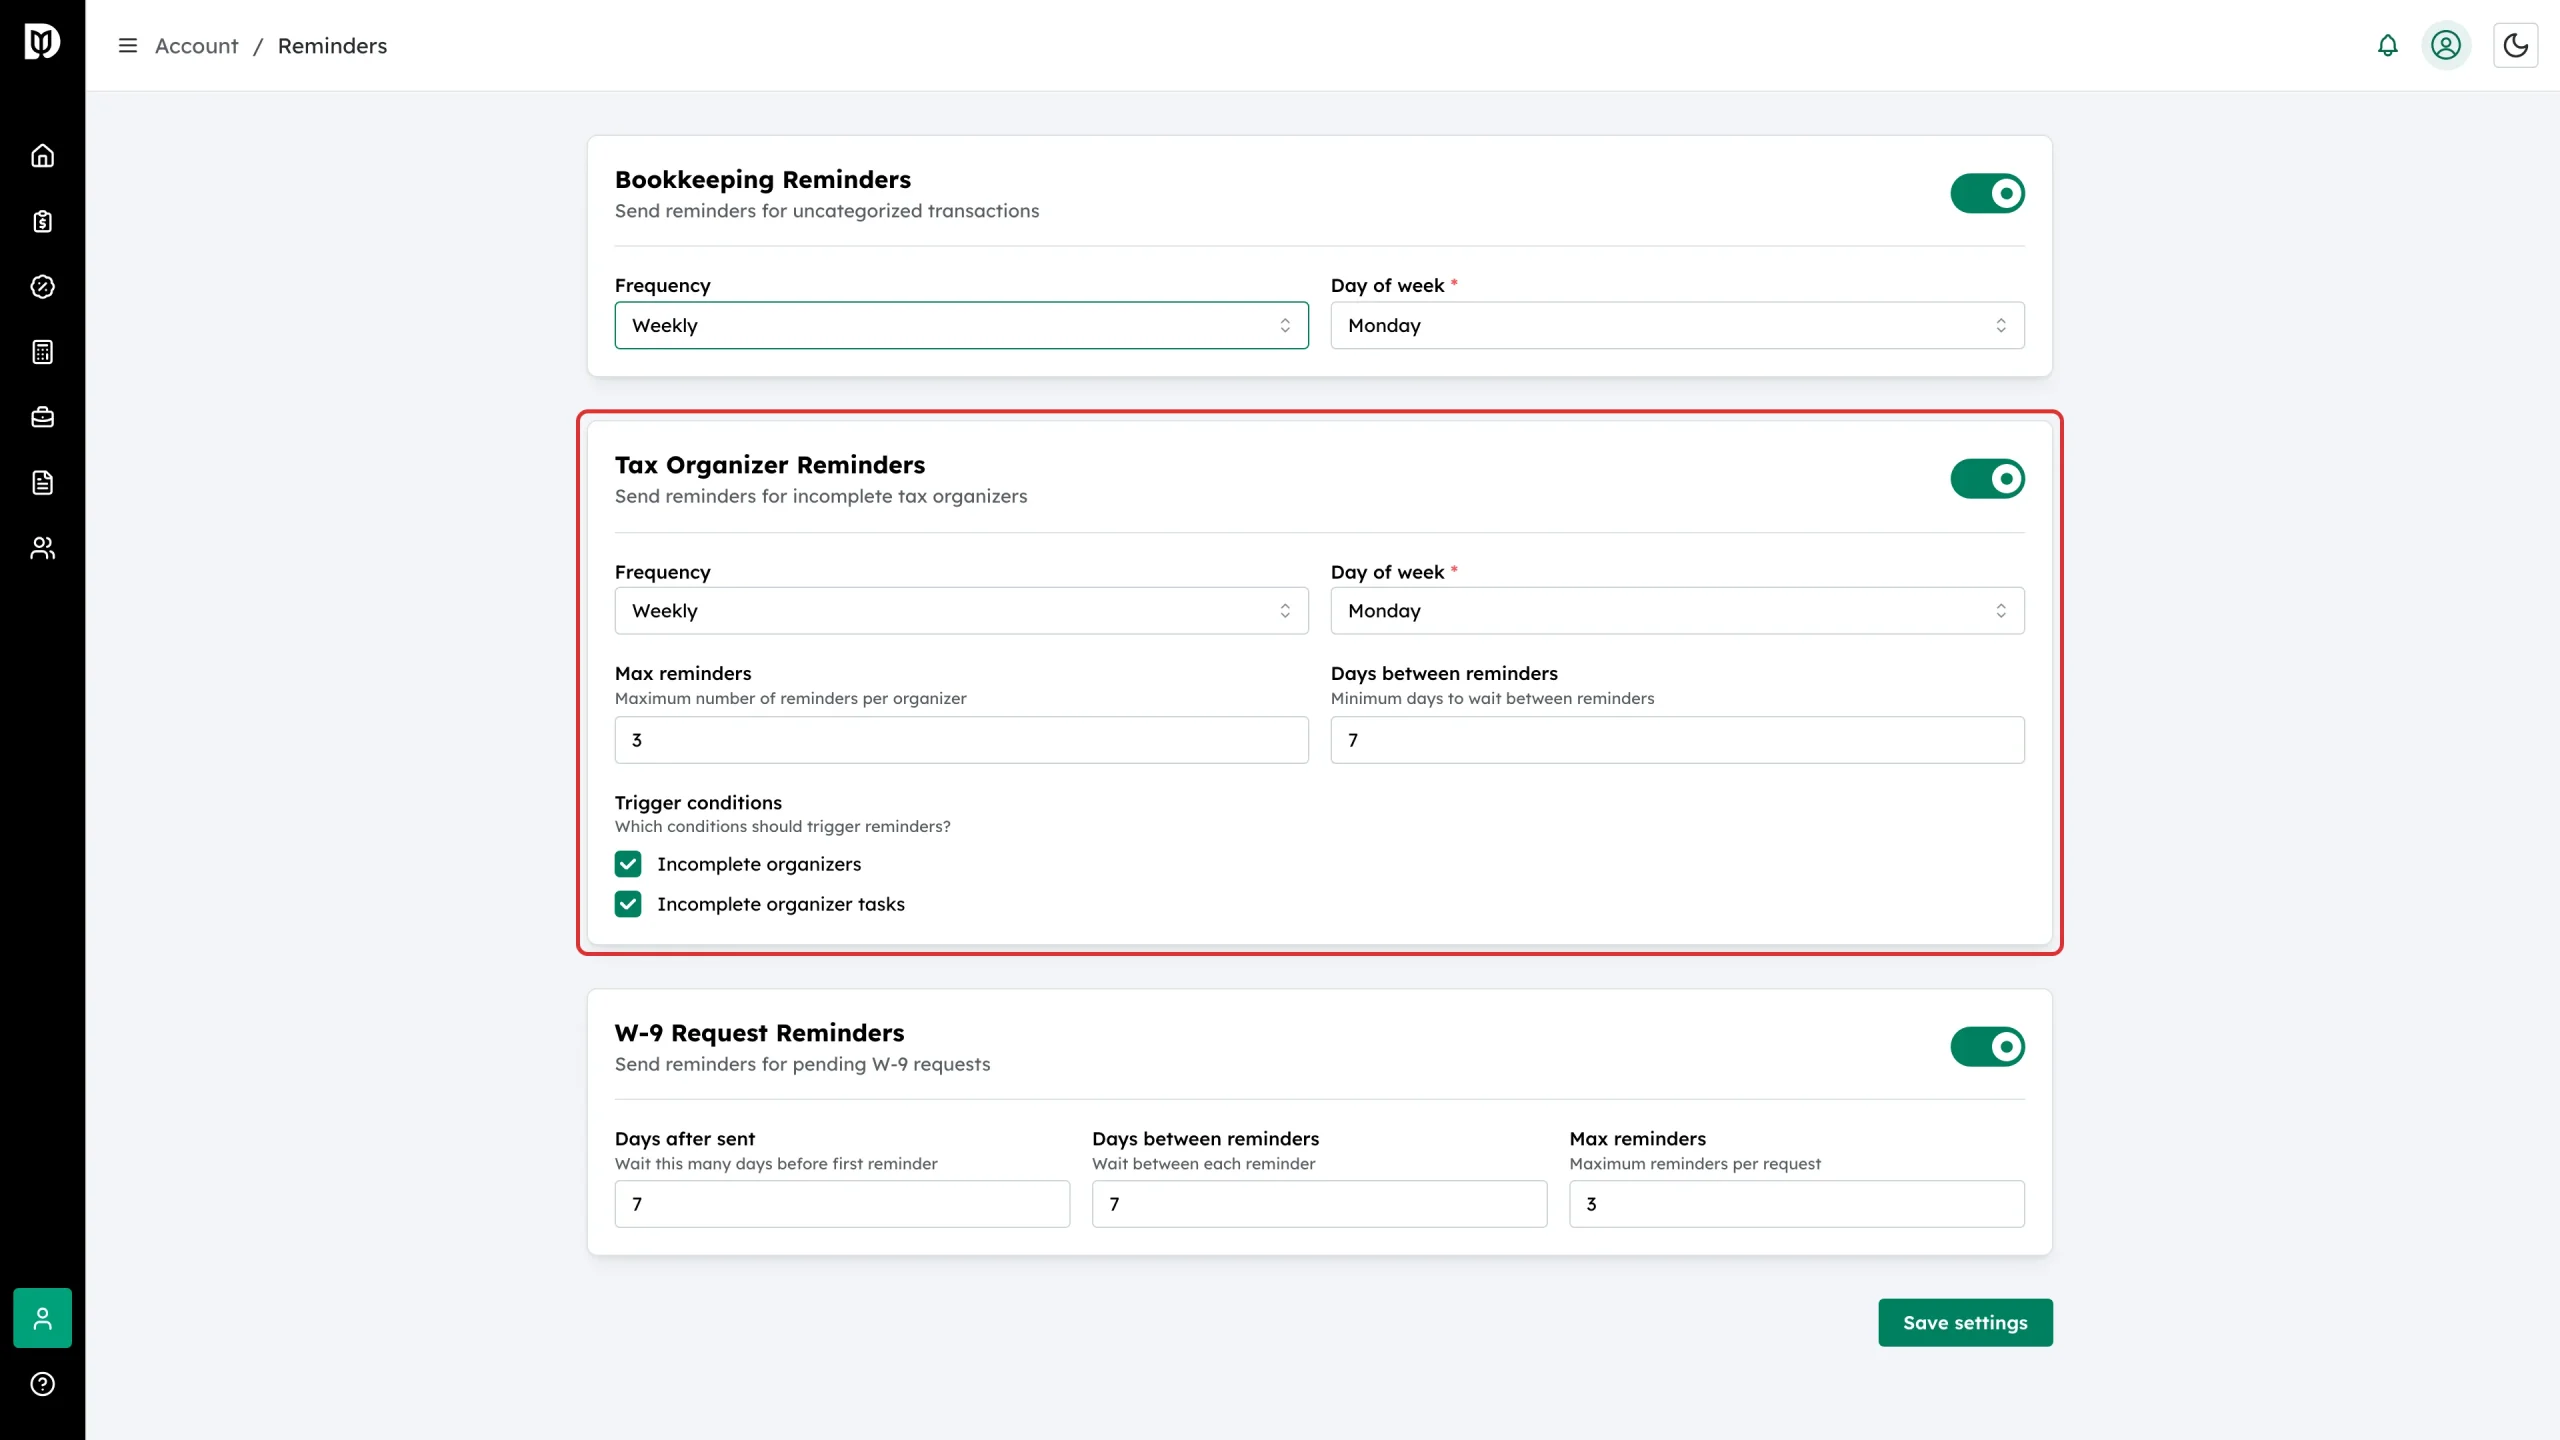
Step 5: Set up Tax Organizer Reminders
Turn on the Tax Organizer Reminders card and set:
- Frequency and Day of week/month — when reminders go out
- Max reminders — the most reminders one organizer can get (1–10)
- Days between reminders — the minimum wait between them (1–30)
Step 6: Choose trigger conditions
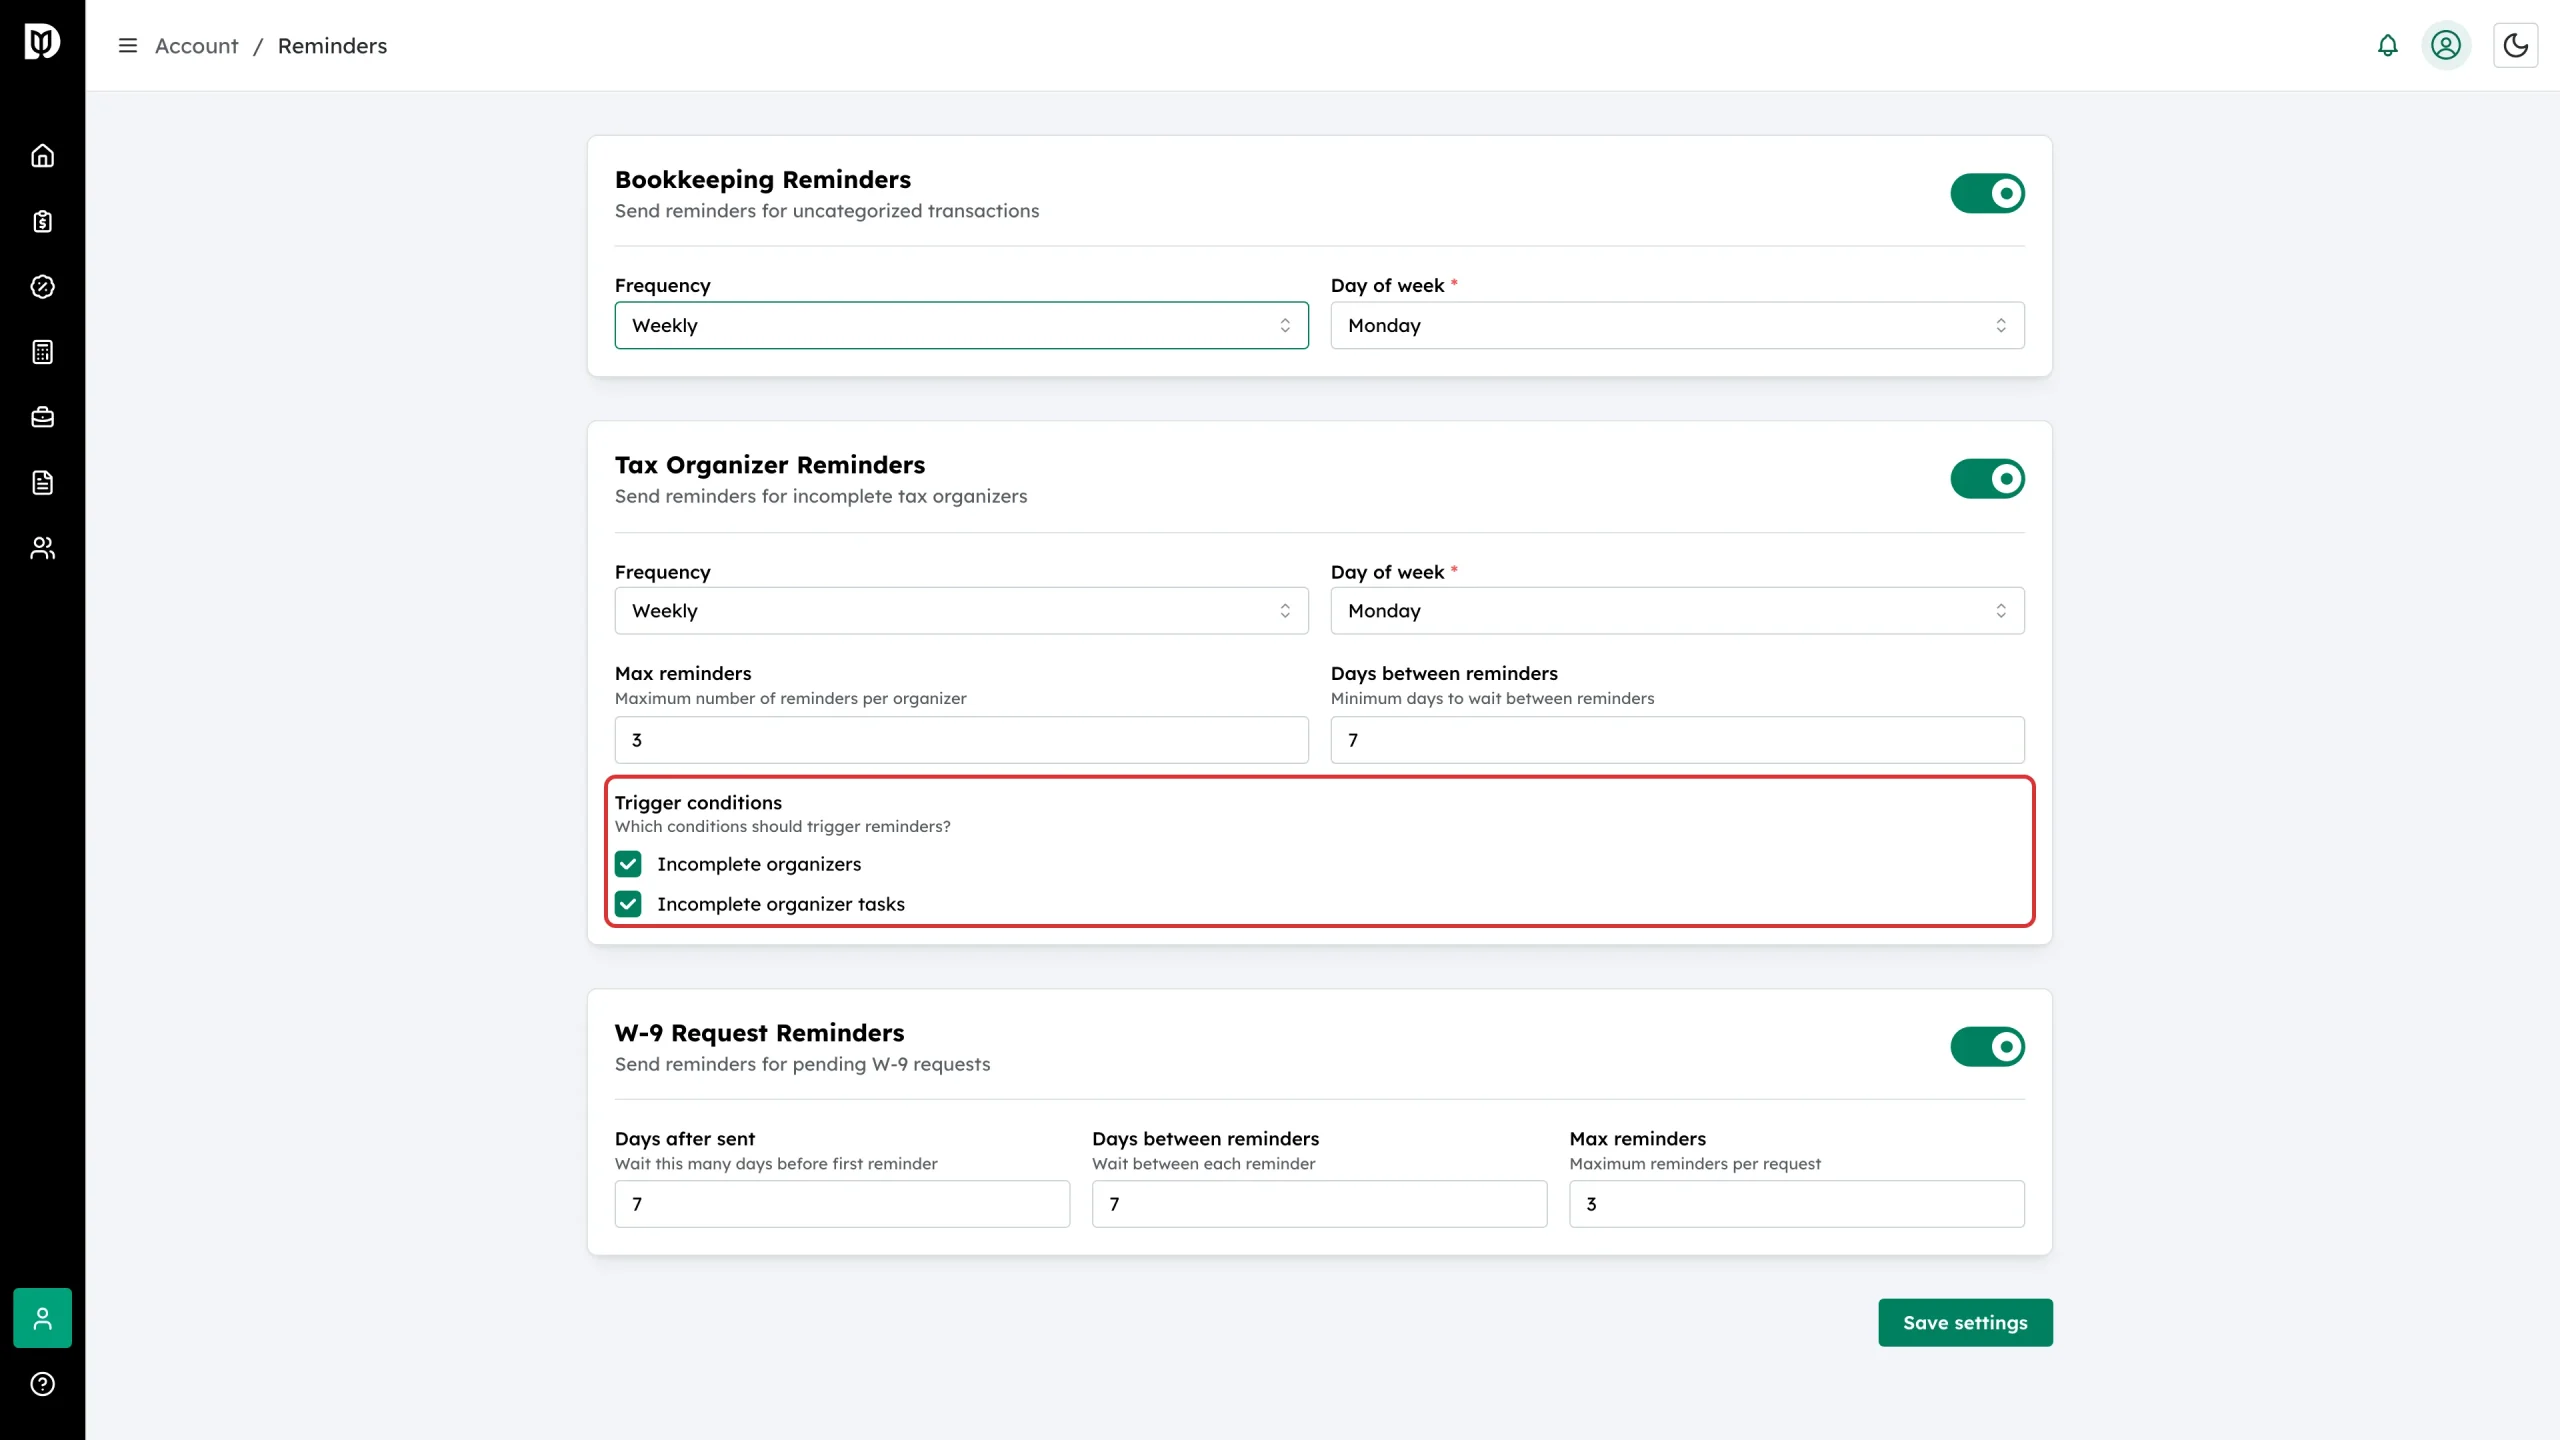
Tick which situations should trigger a reminder. You can select both:
- Incomplete organizers — the organizer as a whole isn’t finished
- Incomplete organizer tasks — specific items inside it are still open
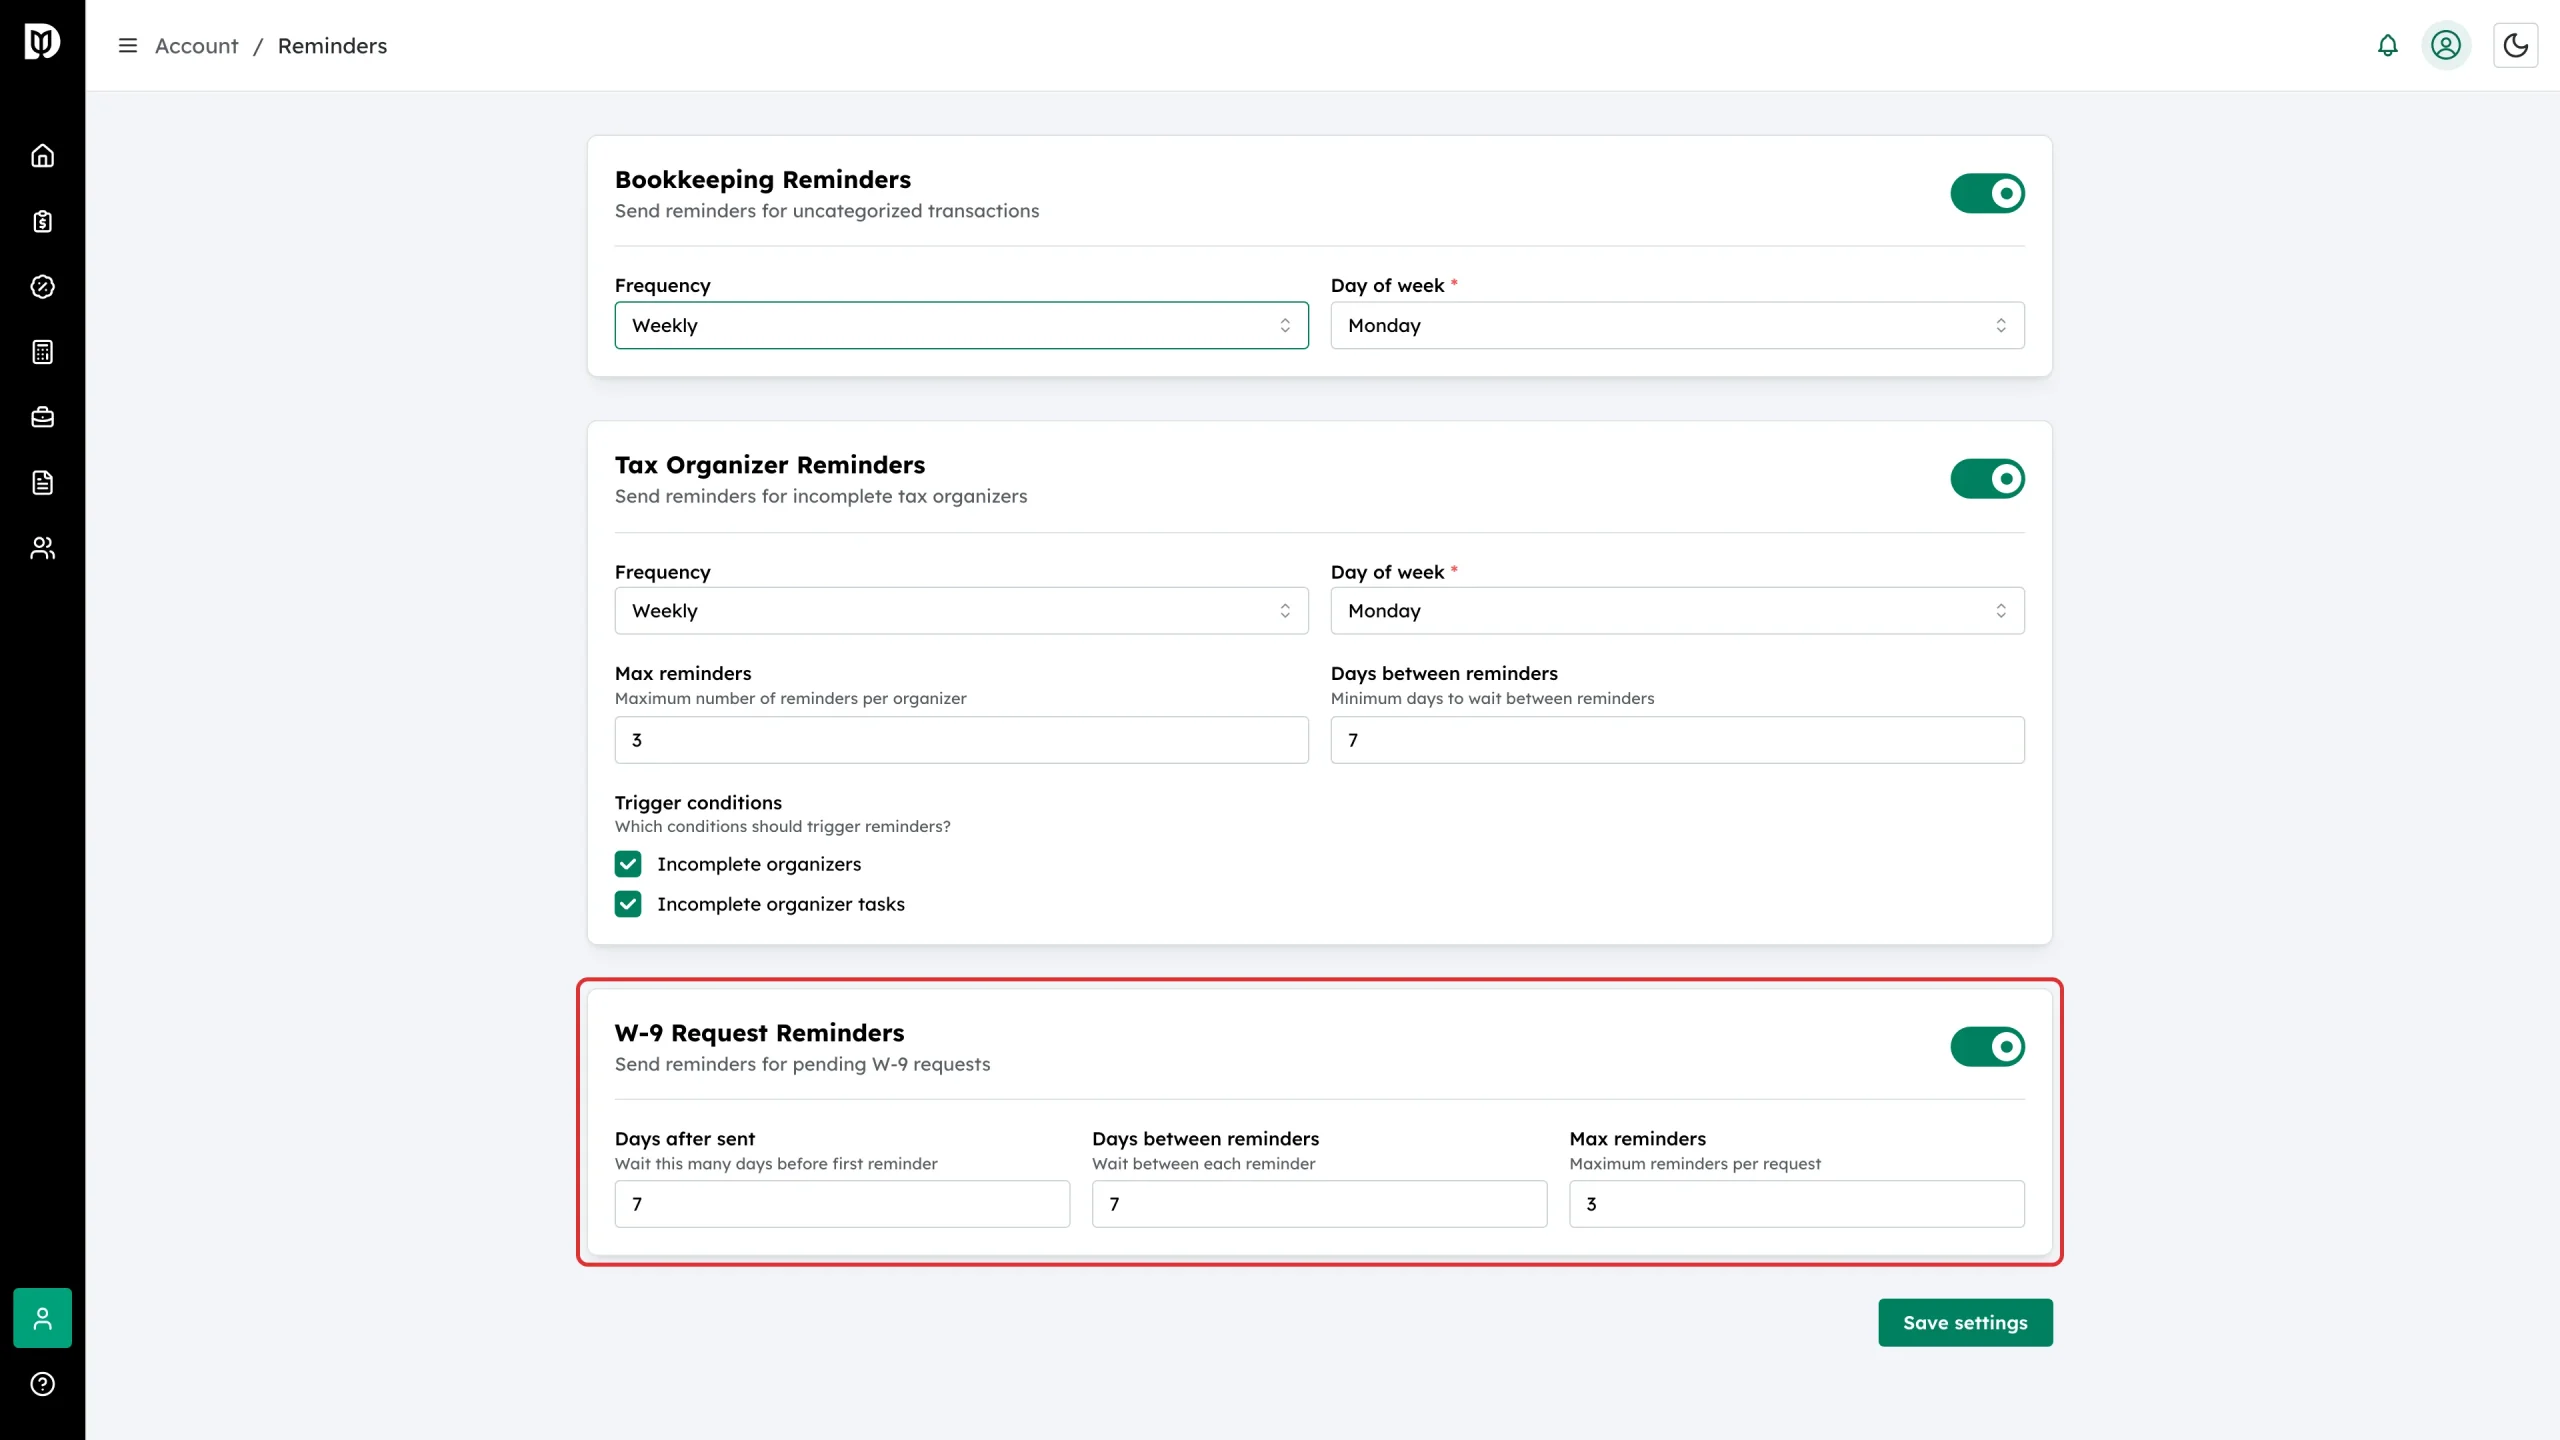
Step 7: Set up W-9 Request Reminders
Turn on the W-9 Request Reminders card and set:
- Days after sent — how long to wait after the first request before reminding (1–30)
- Days between reminders — the wait between each reminder (1–30)
- Max reminders — the most reminders per request (1–10)
Step 8: Save
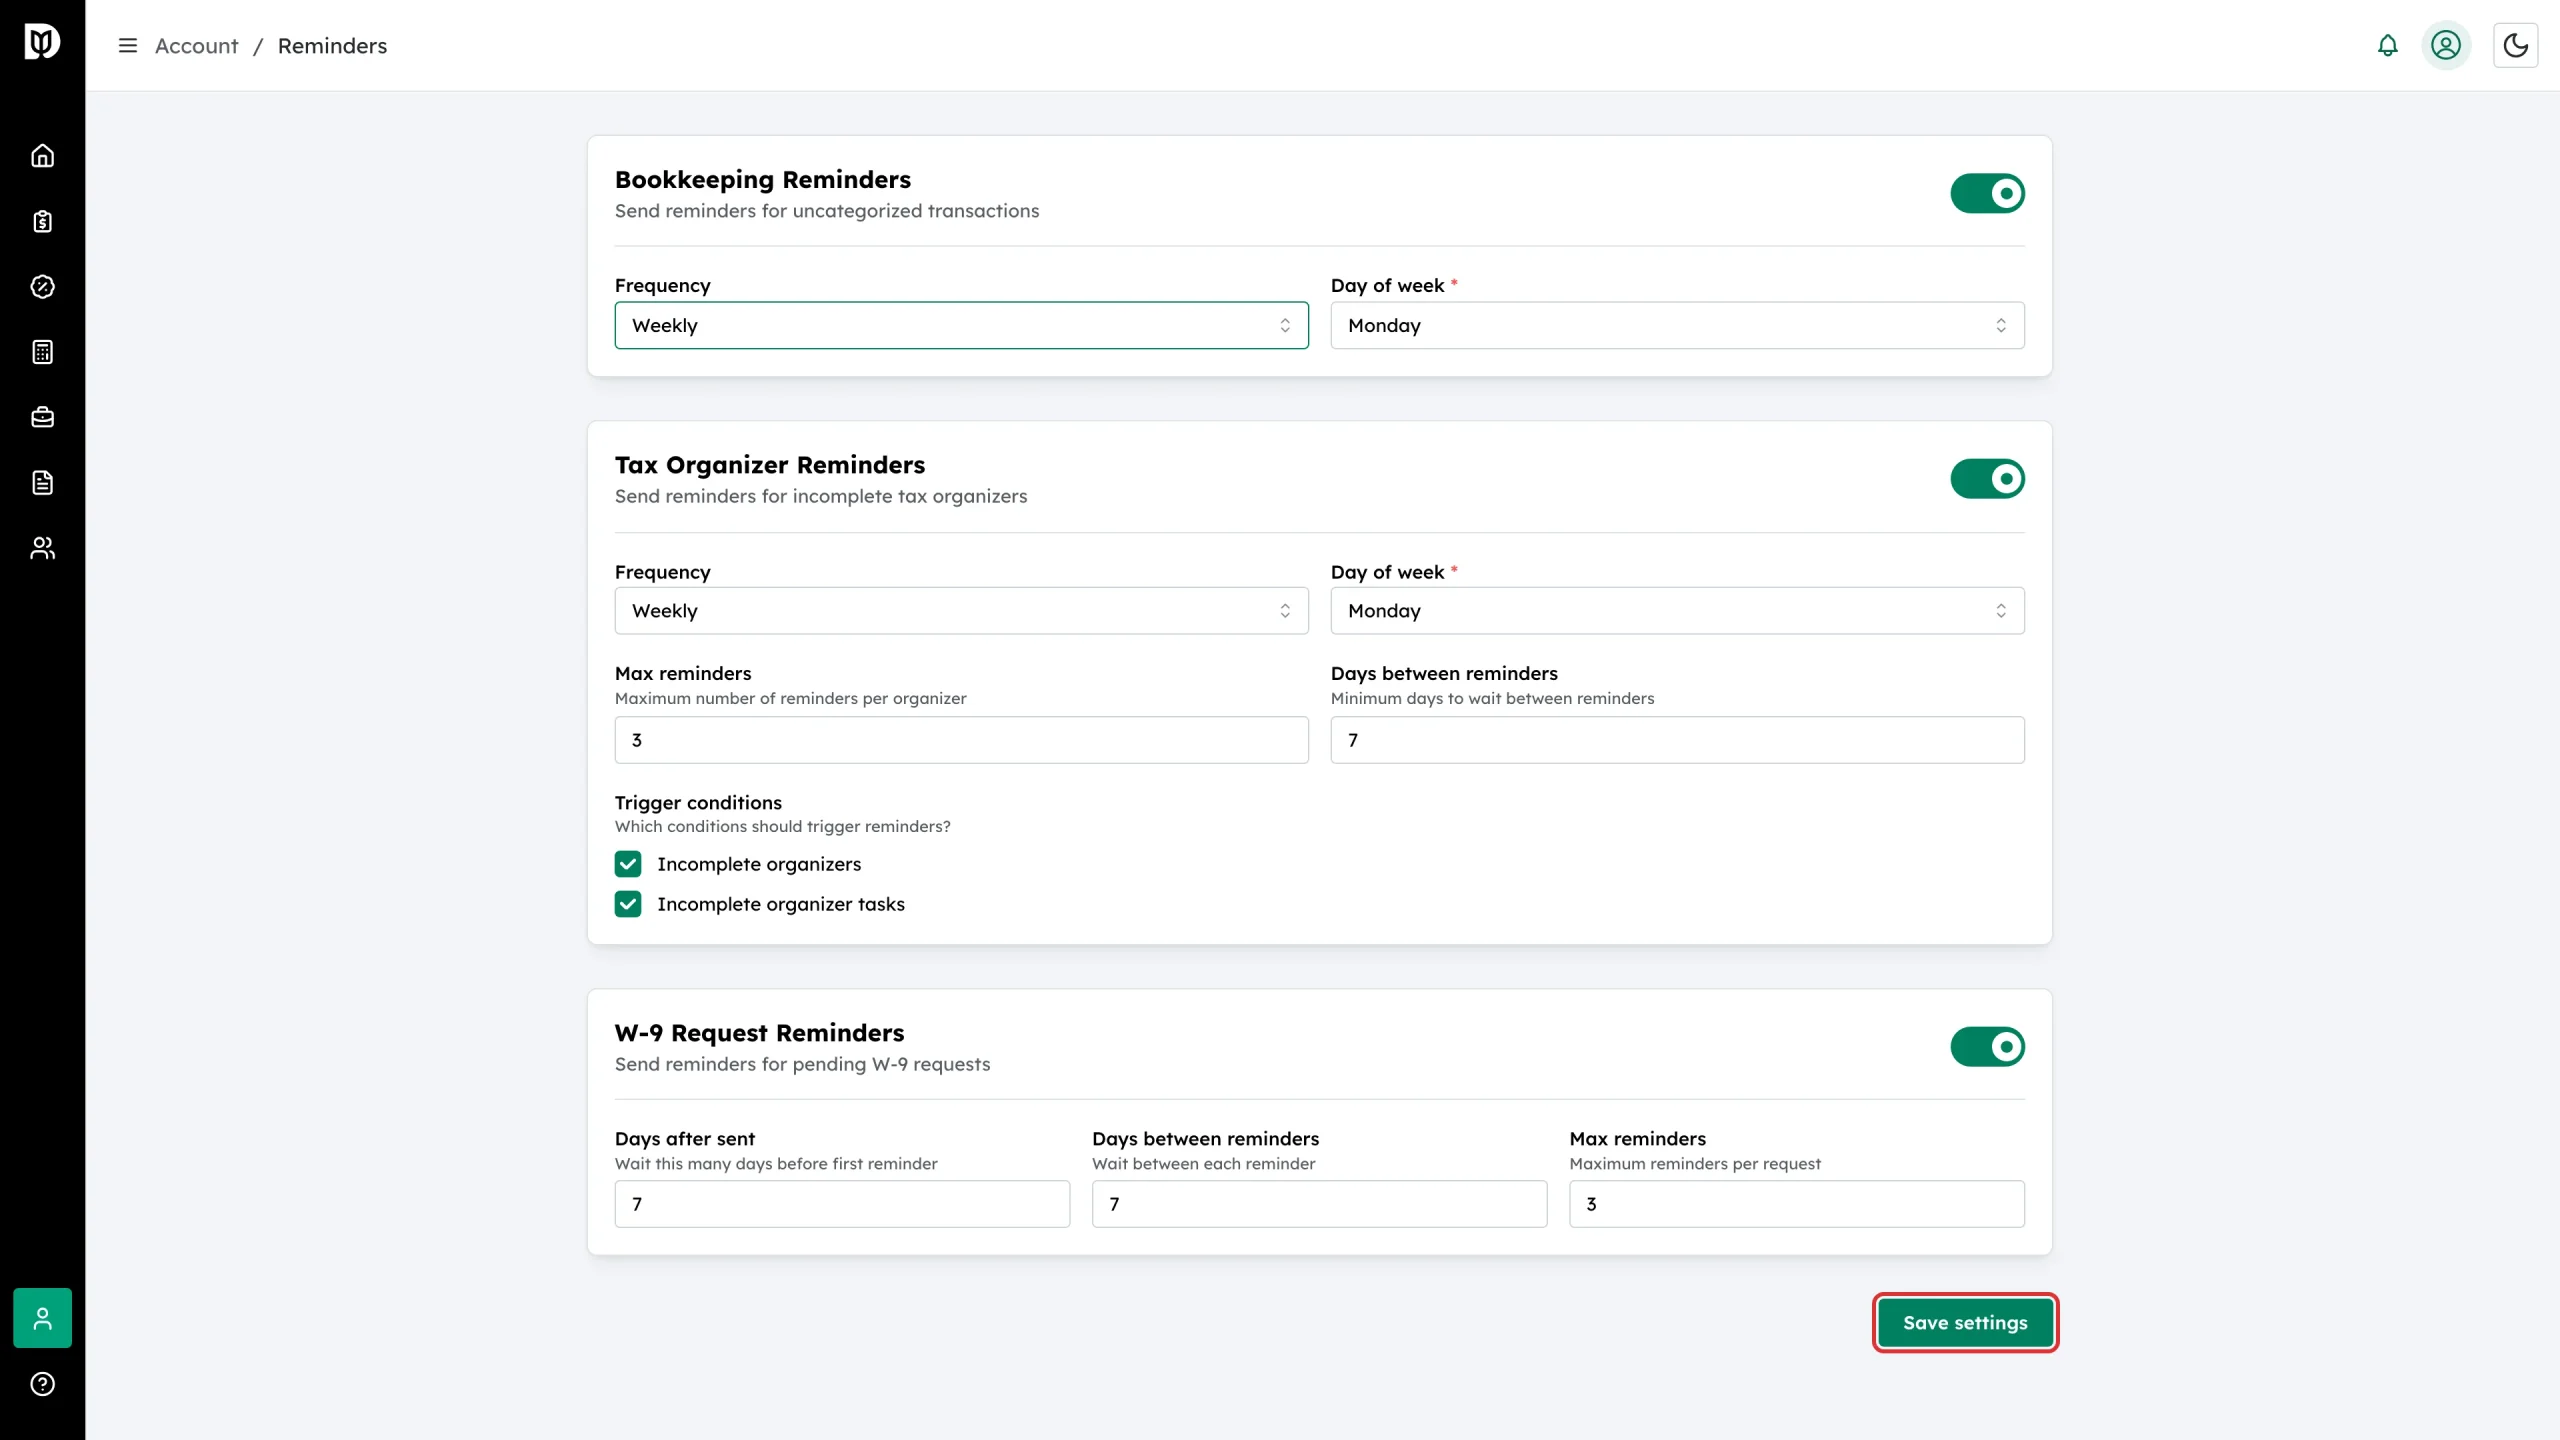
Click Save settings at the bottom of the page.
What happens next
Your settings apply to all contacts, and reminders go out automatically on your schedule. You can override or pause reminders for a single contact from their profile’s Reminders tab.
Troubleshooting
- Settings won’t save: Day of week is required for Weekly, and Day of month for Monthly. Fill those in first.
- Reminders aren’t going out: Check the card’s switch is on and the contact has an email address on file.
- Clients get too many reminders: Lower Max reminders or raise Days between reminders.
- One client shouldn’t get reminders: Use their per-contact override instead of turning the firm-wide setting off.