Who this is for: Firm owners, admins and managers who decide which staff work with which clients.
What you’ll learn: How to invite staff, assign them to contacts when you create the contact, set a lead accountant, and understand automatic “all clients” access.
Before you begin
- You need owner, admin or manager access. Managers can invite and edit the Staff role only.
- Staff must accept their invite before they appear with their name in assignment lists.
Invite your staff first
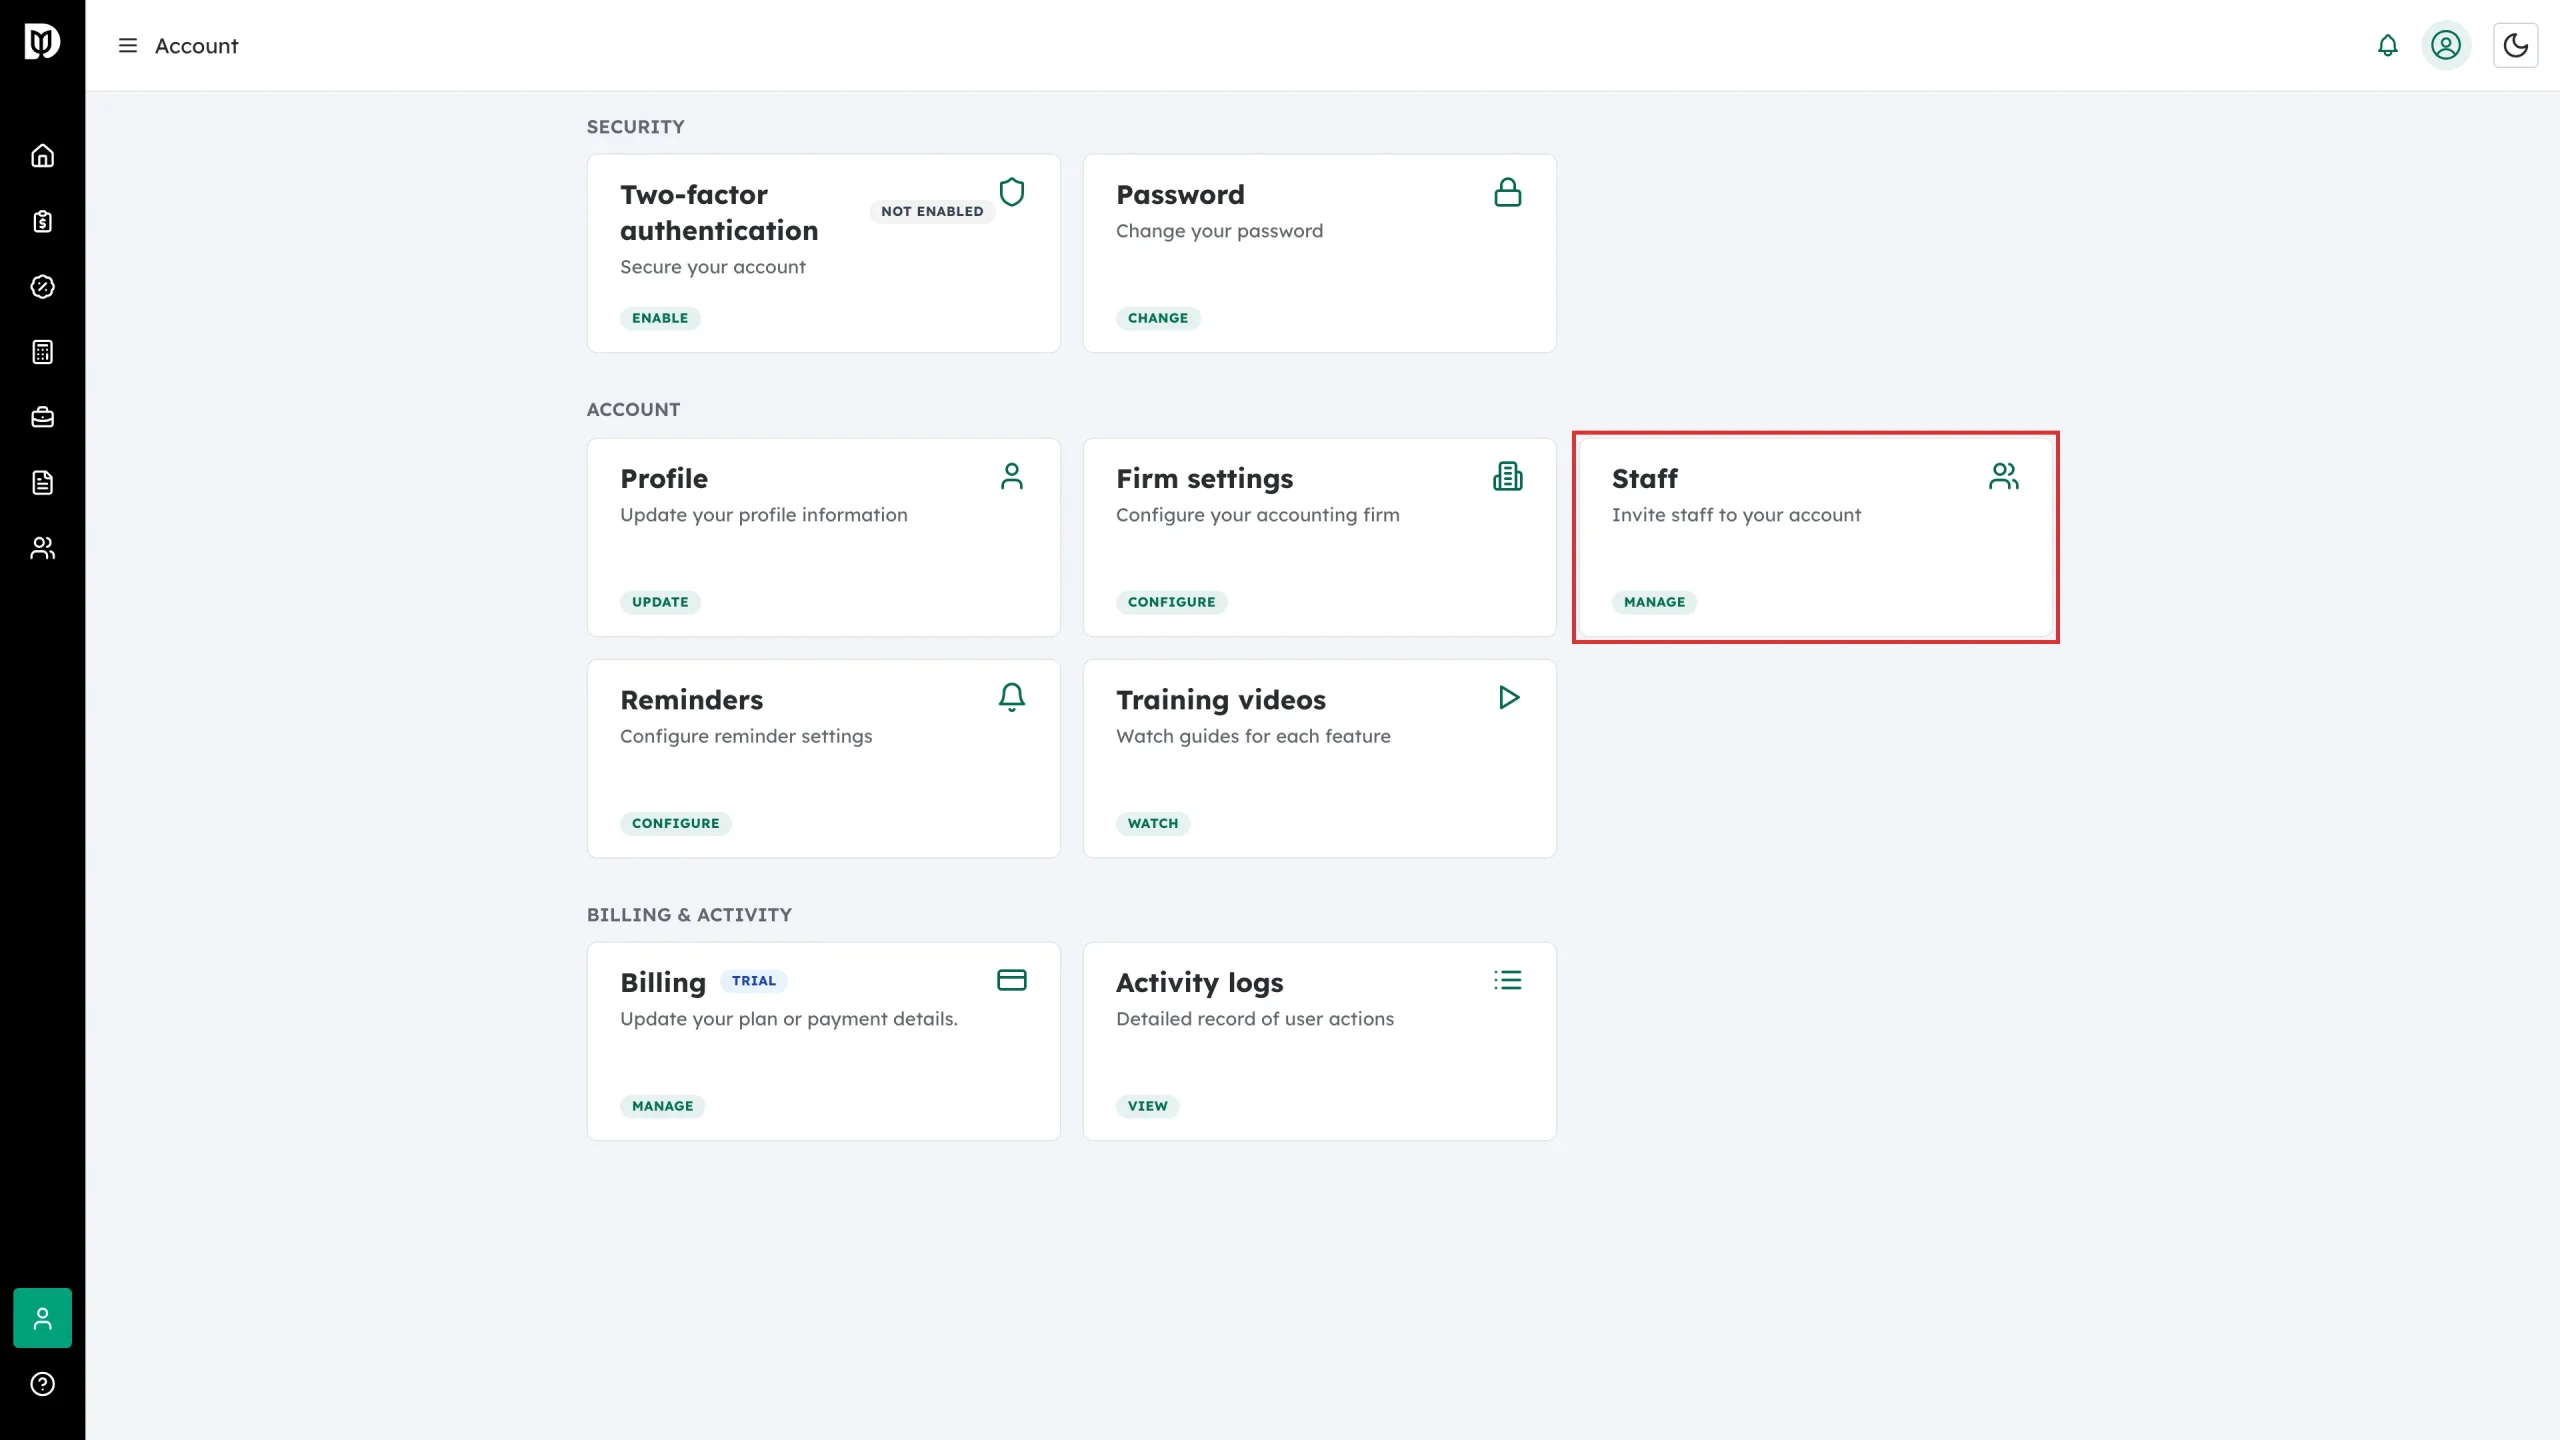
Step 1: Open Staff
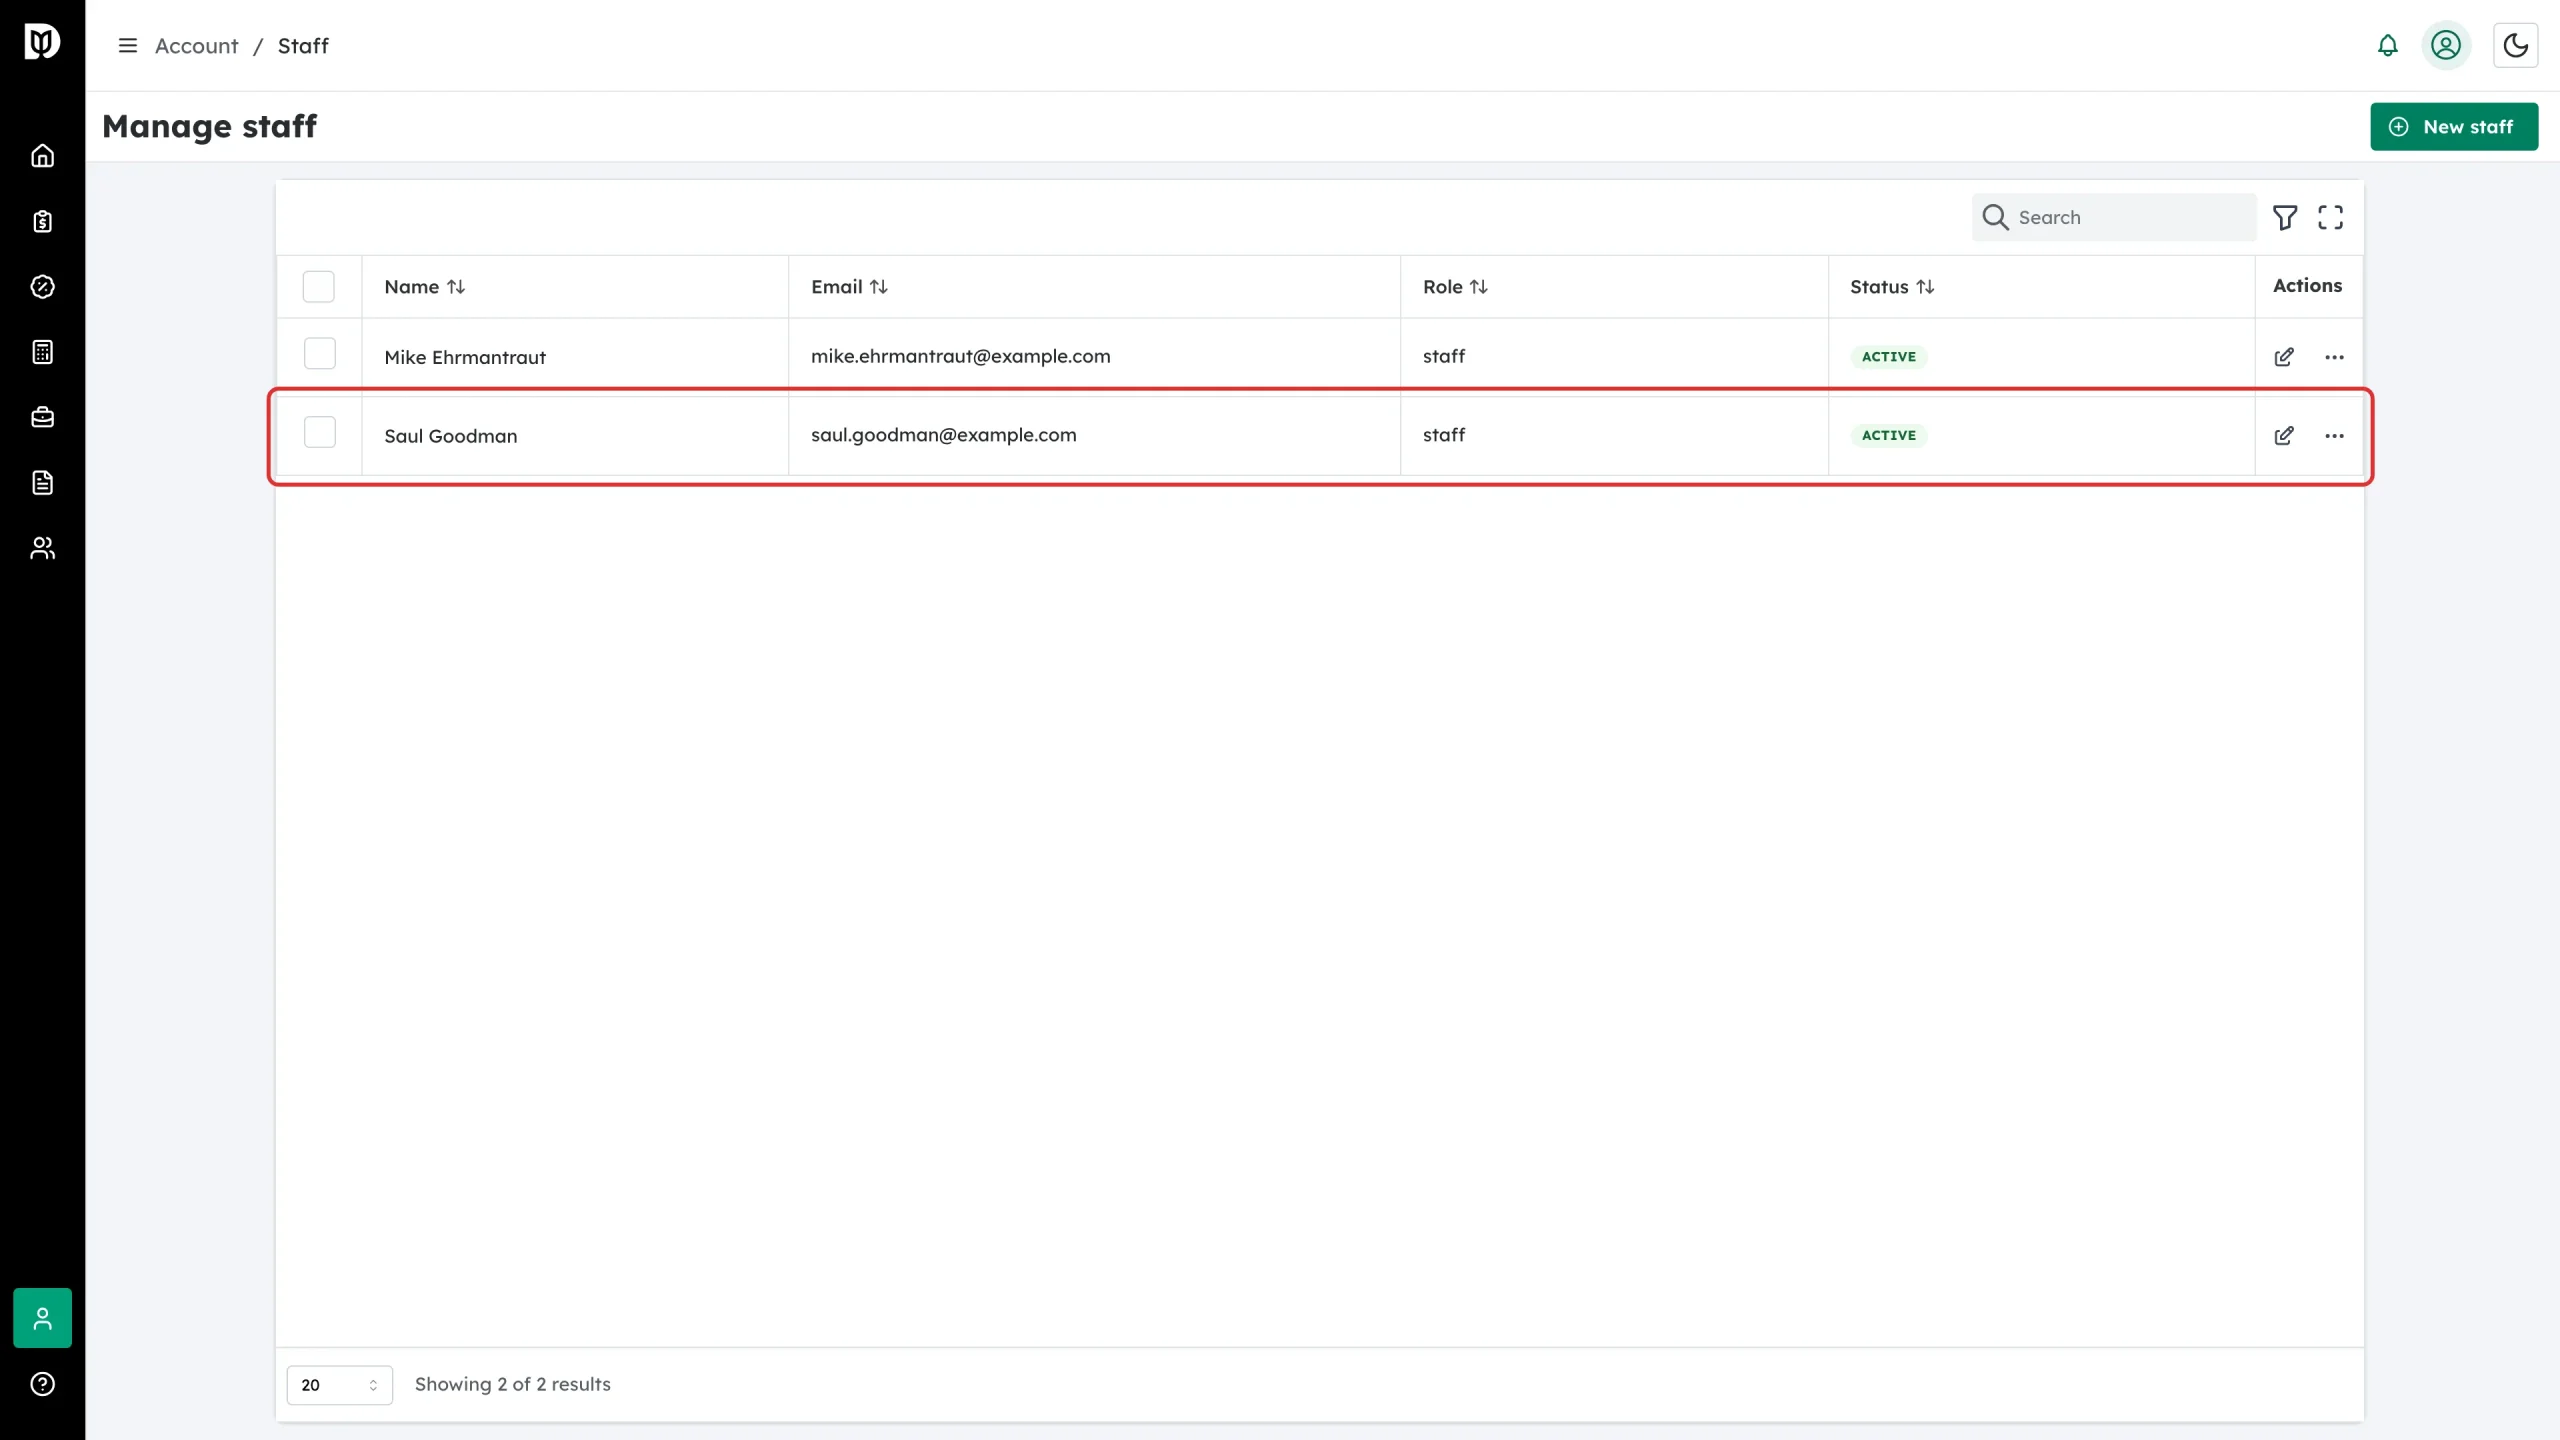
Go to Account and click the Staff card.
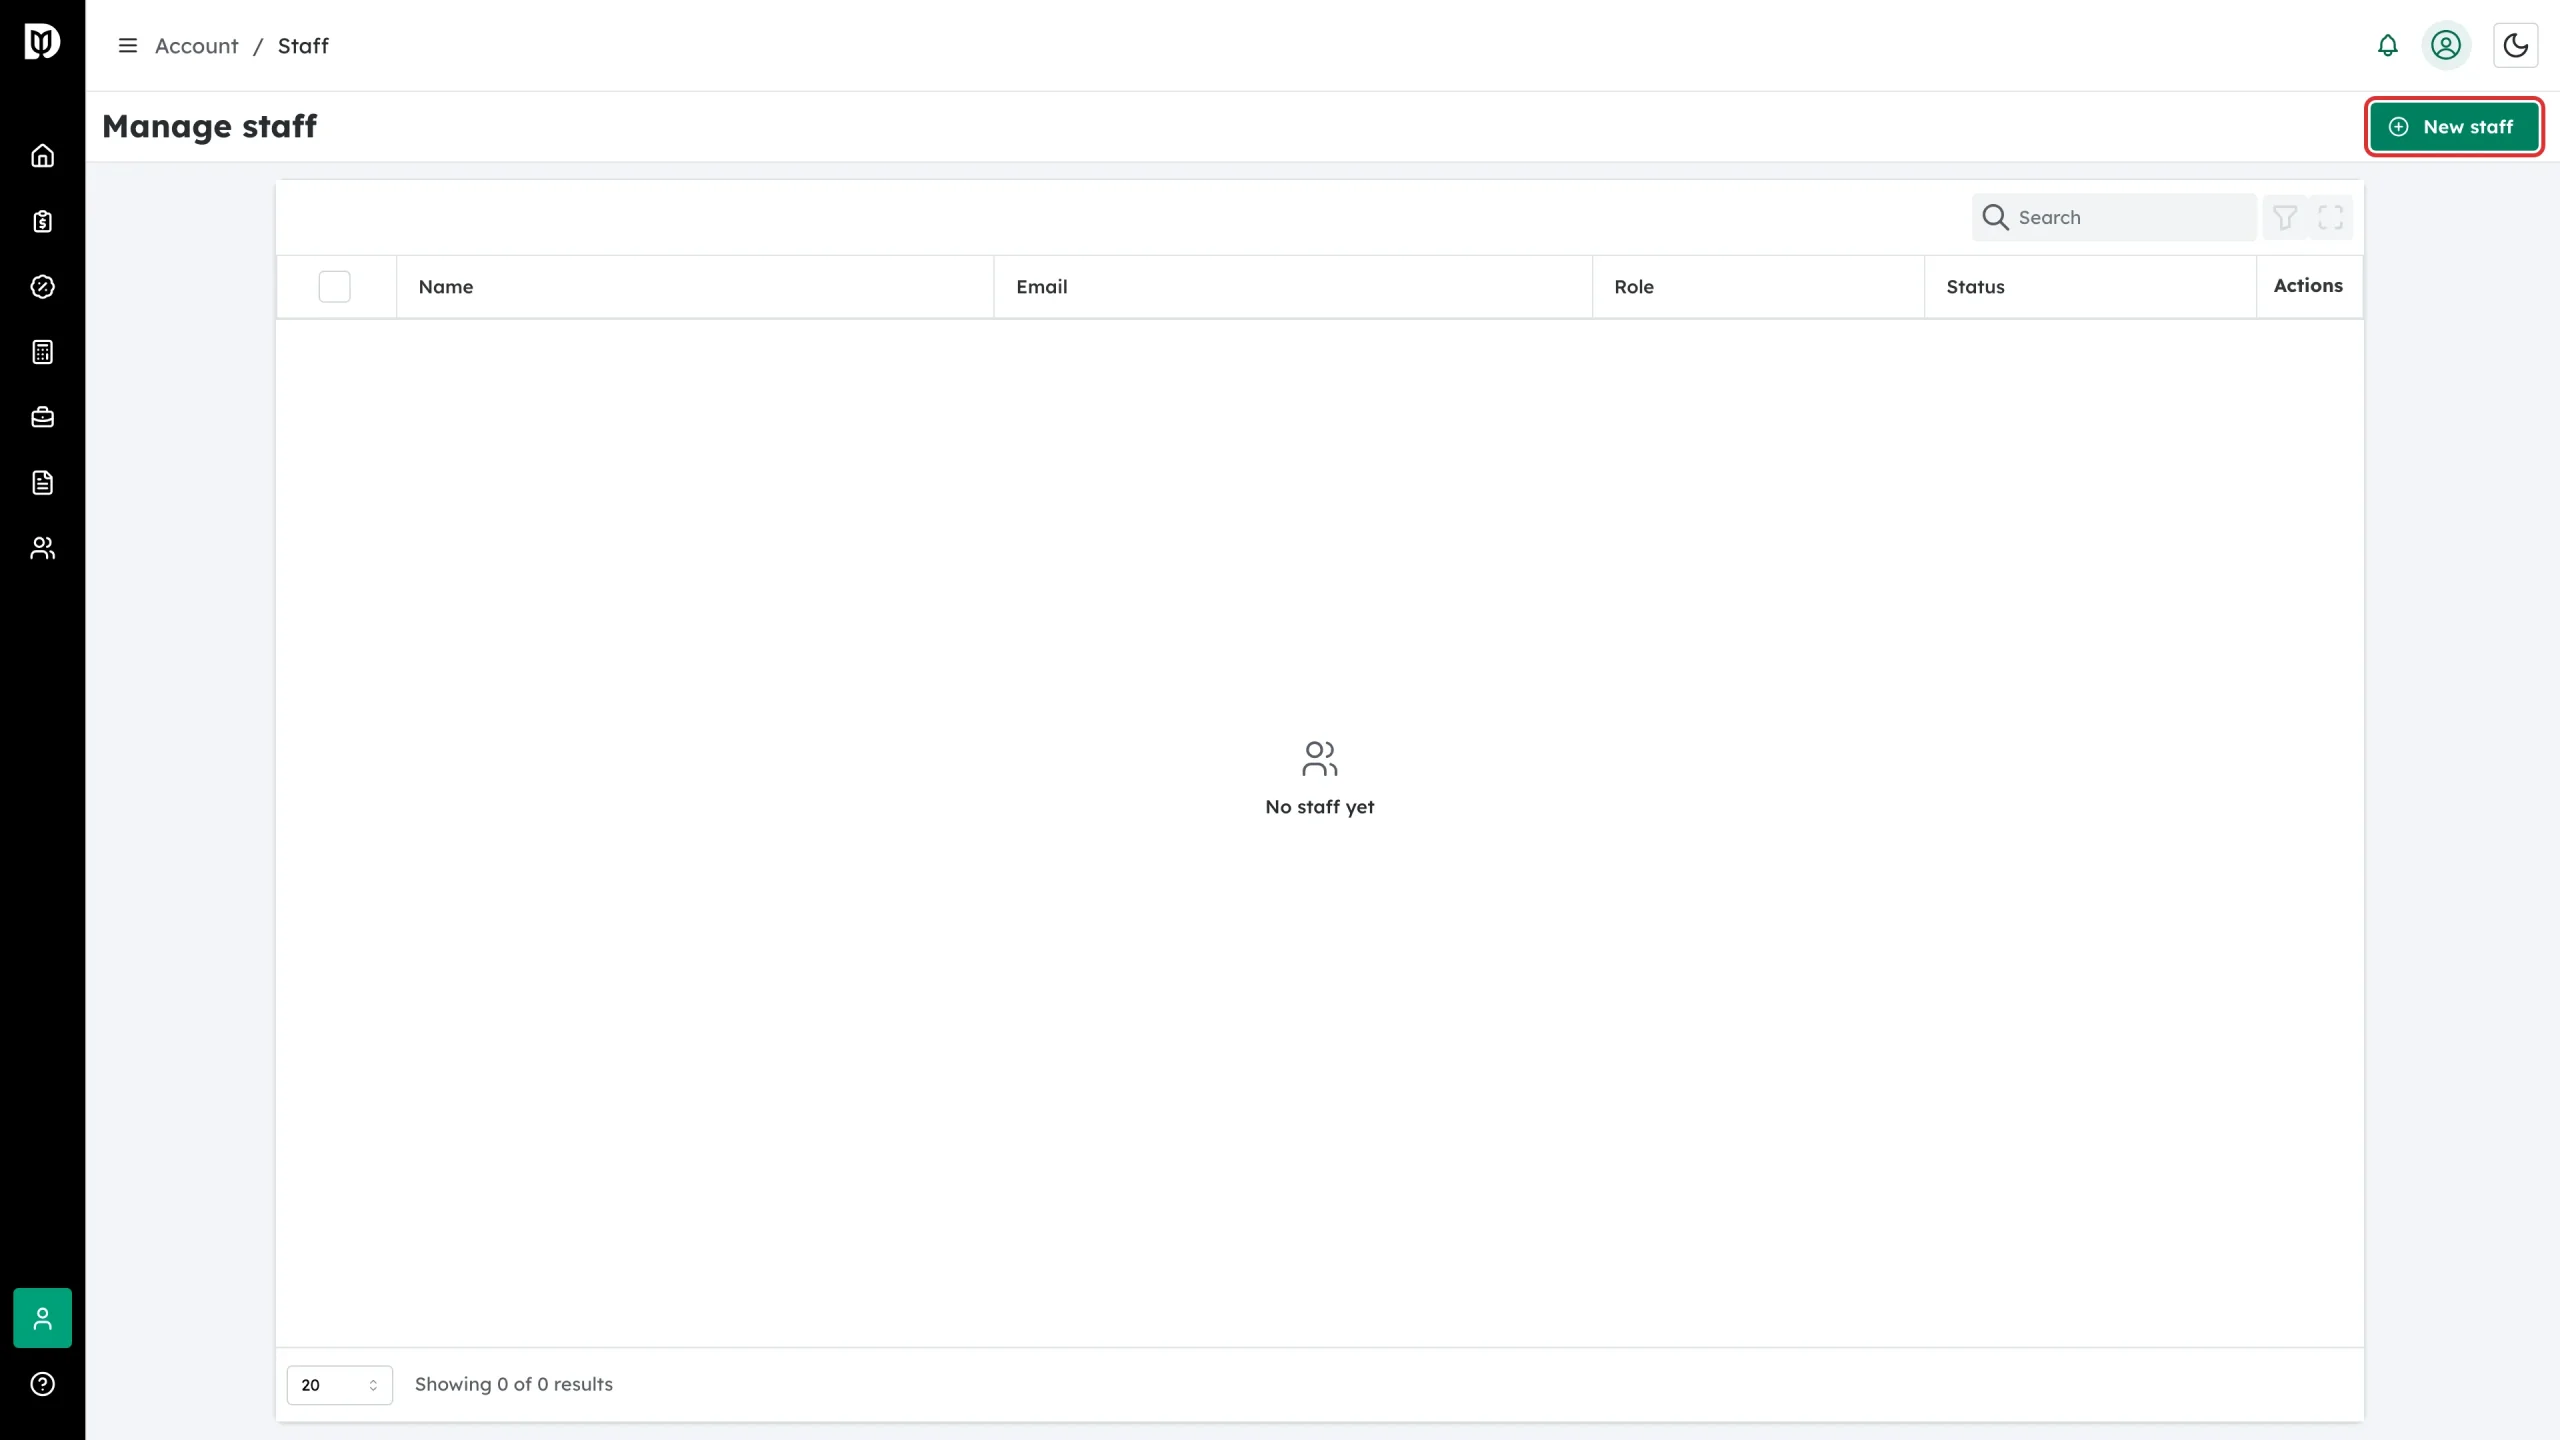
Step 2: Click New staff
Click New staff in the top-right corner.
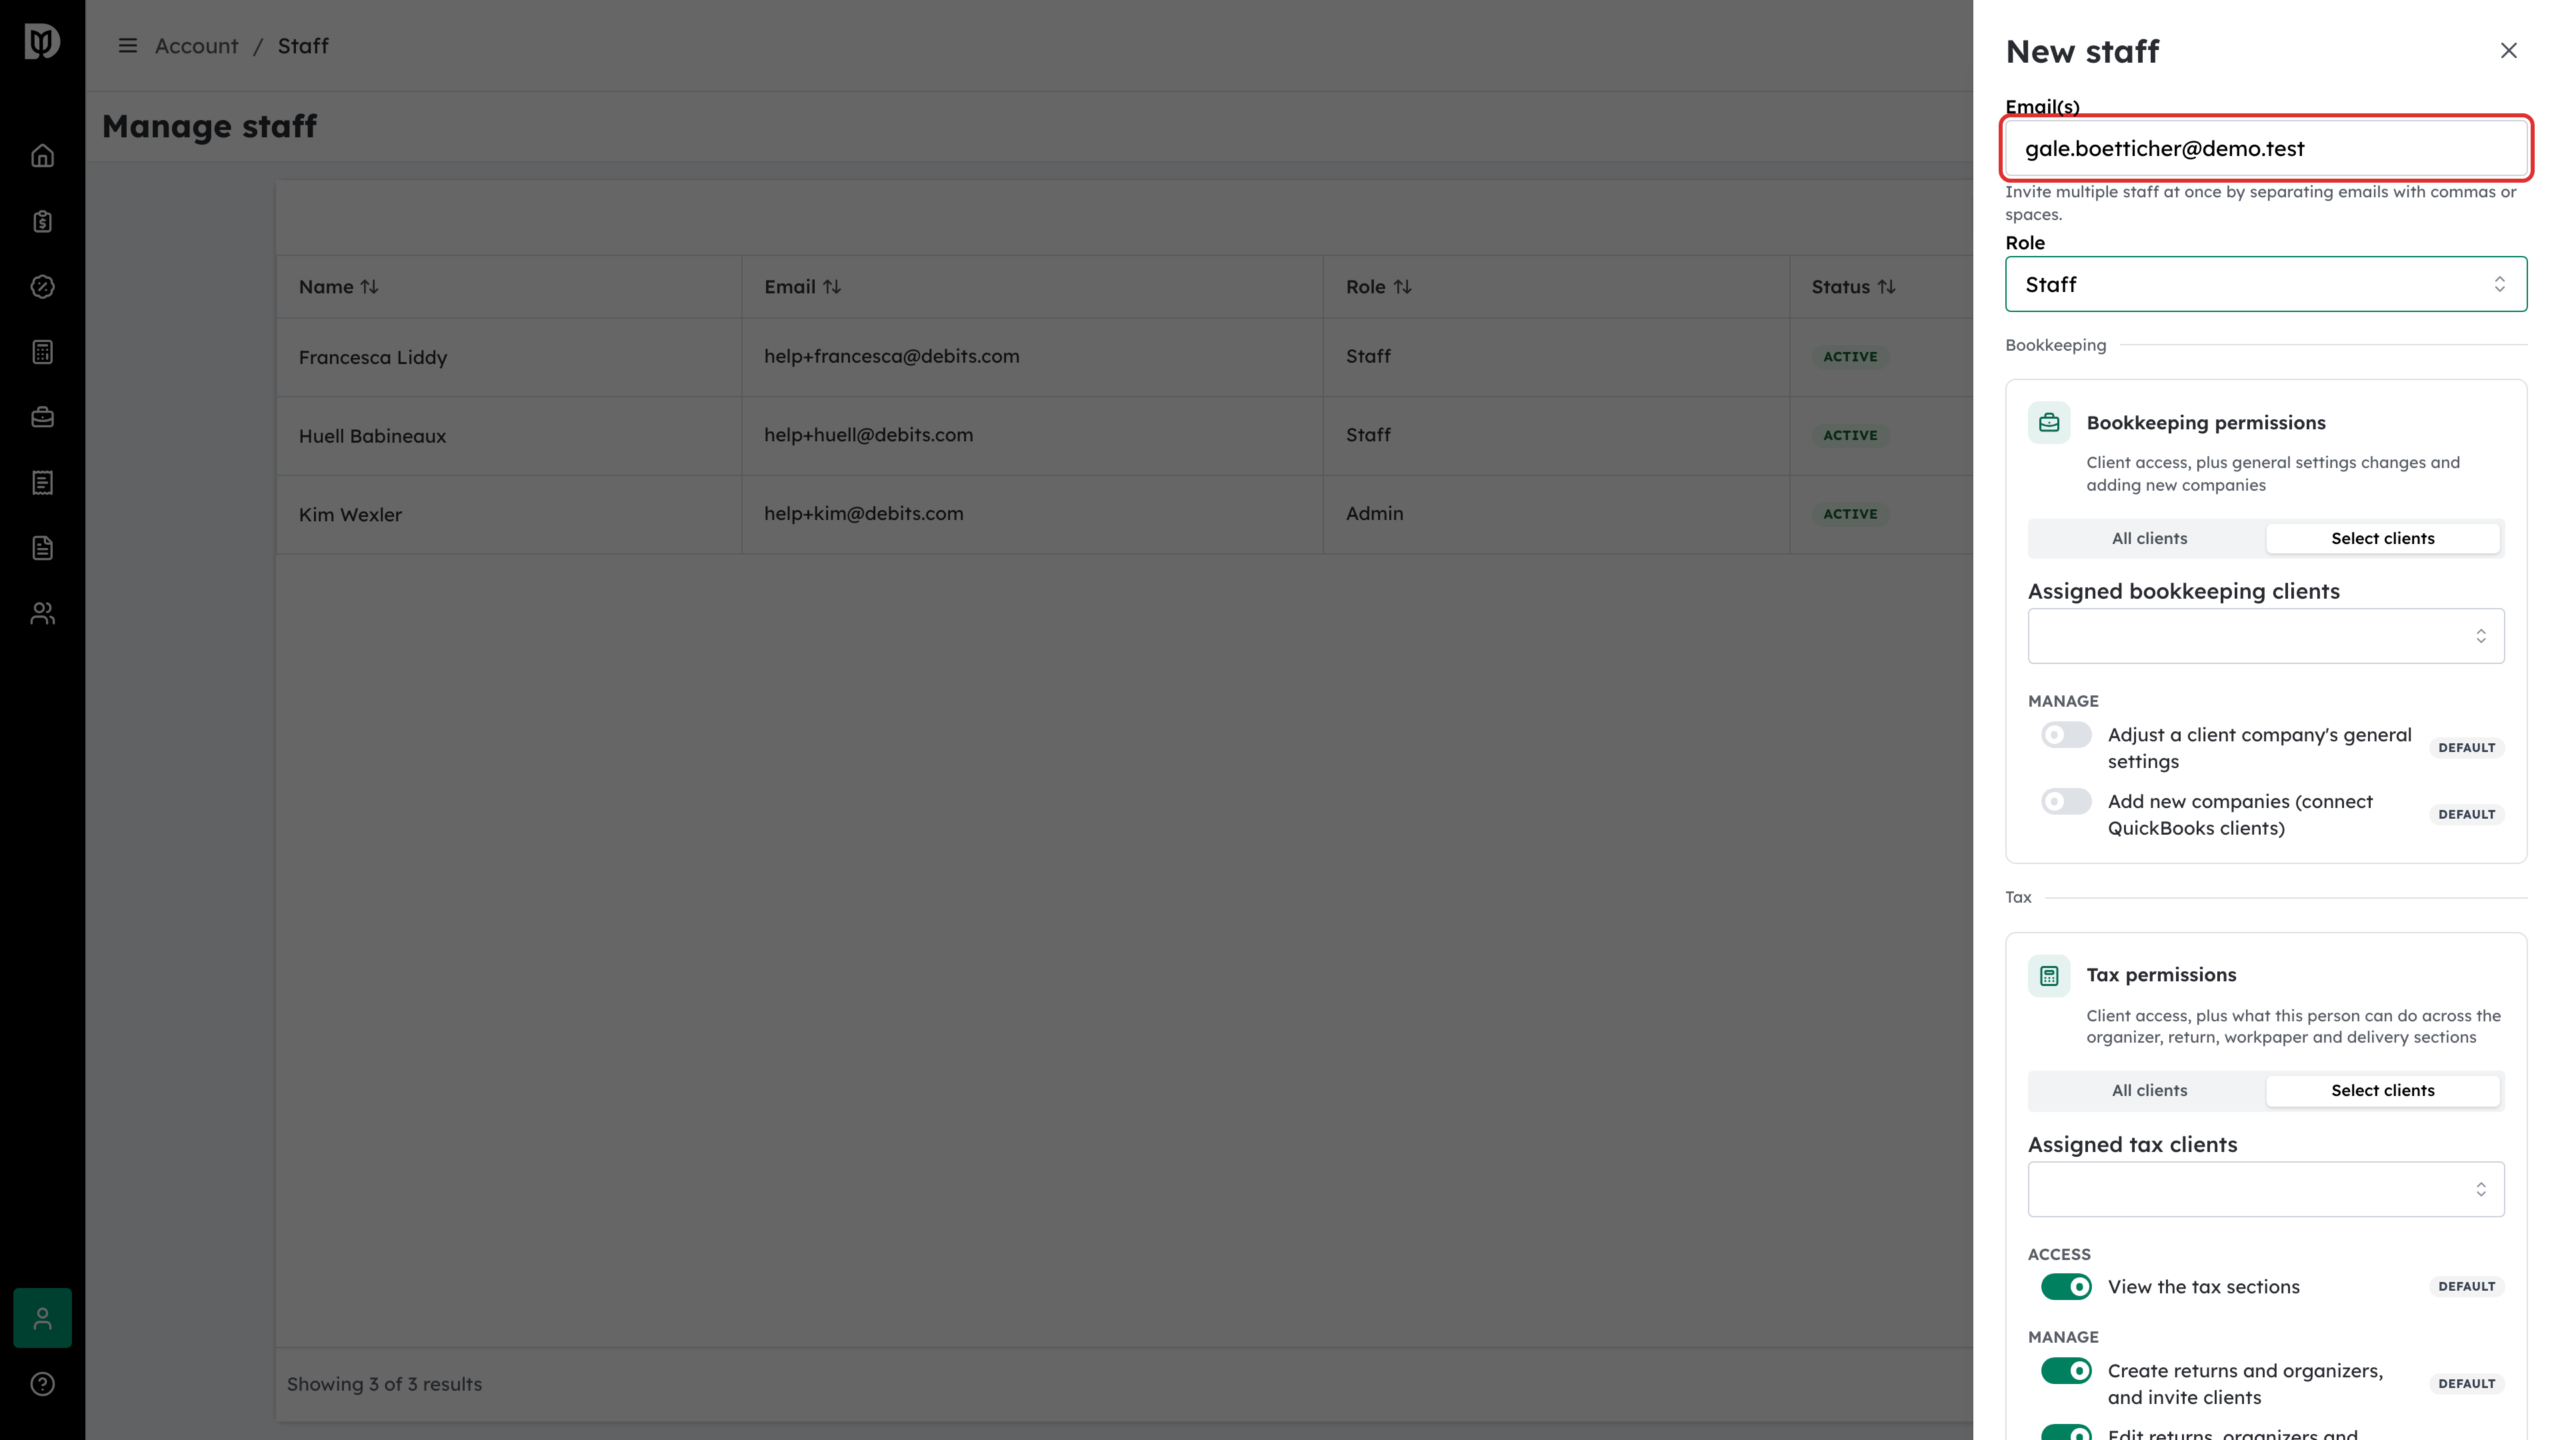
Step 3: Fill in the invite
In the drawer:
- Email(s) — invite several people at once by separating addresses with commas or spaces.
- Role — Admin or Manager (access to all bookkeeping and tax clients automatically) or Staff (scoped access).
- For staff, the Bookkeeping permissions and Tax permissions cards each let you choose All clients or Select clients, so bookkeeping and tax are set separately. Each permission switch starts at the role’s default, and you can change any of them — see “Invite Staff to Your Firm”.
Click Invite.
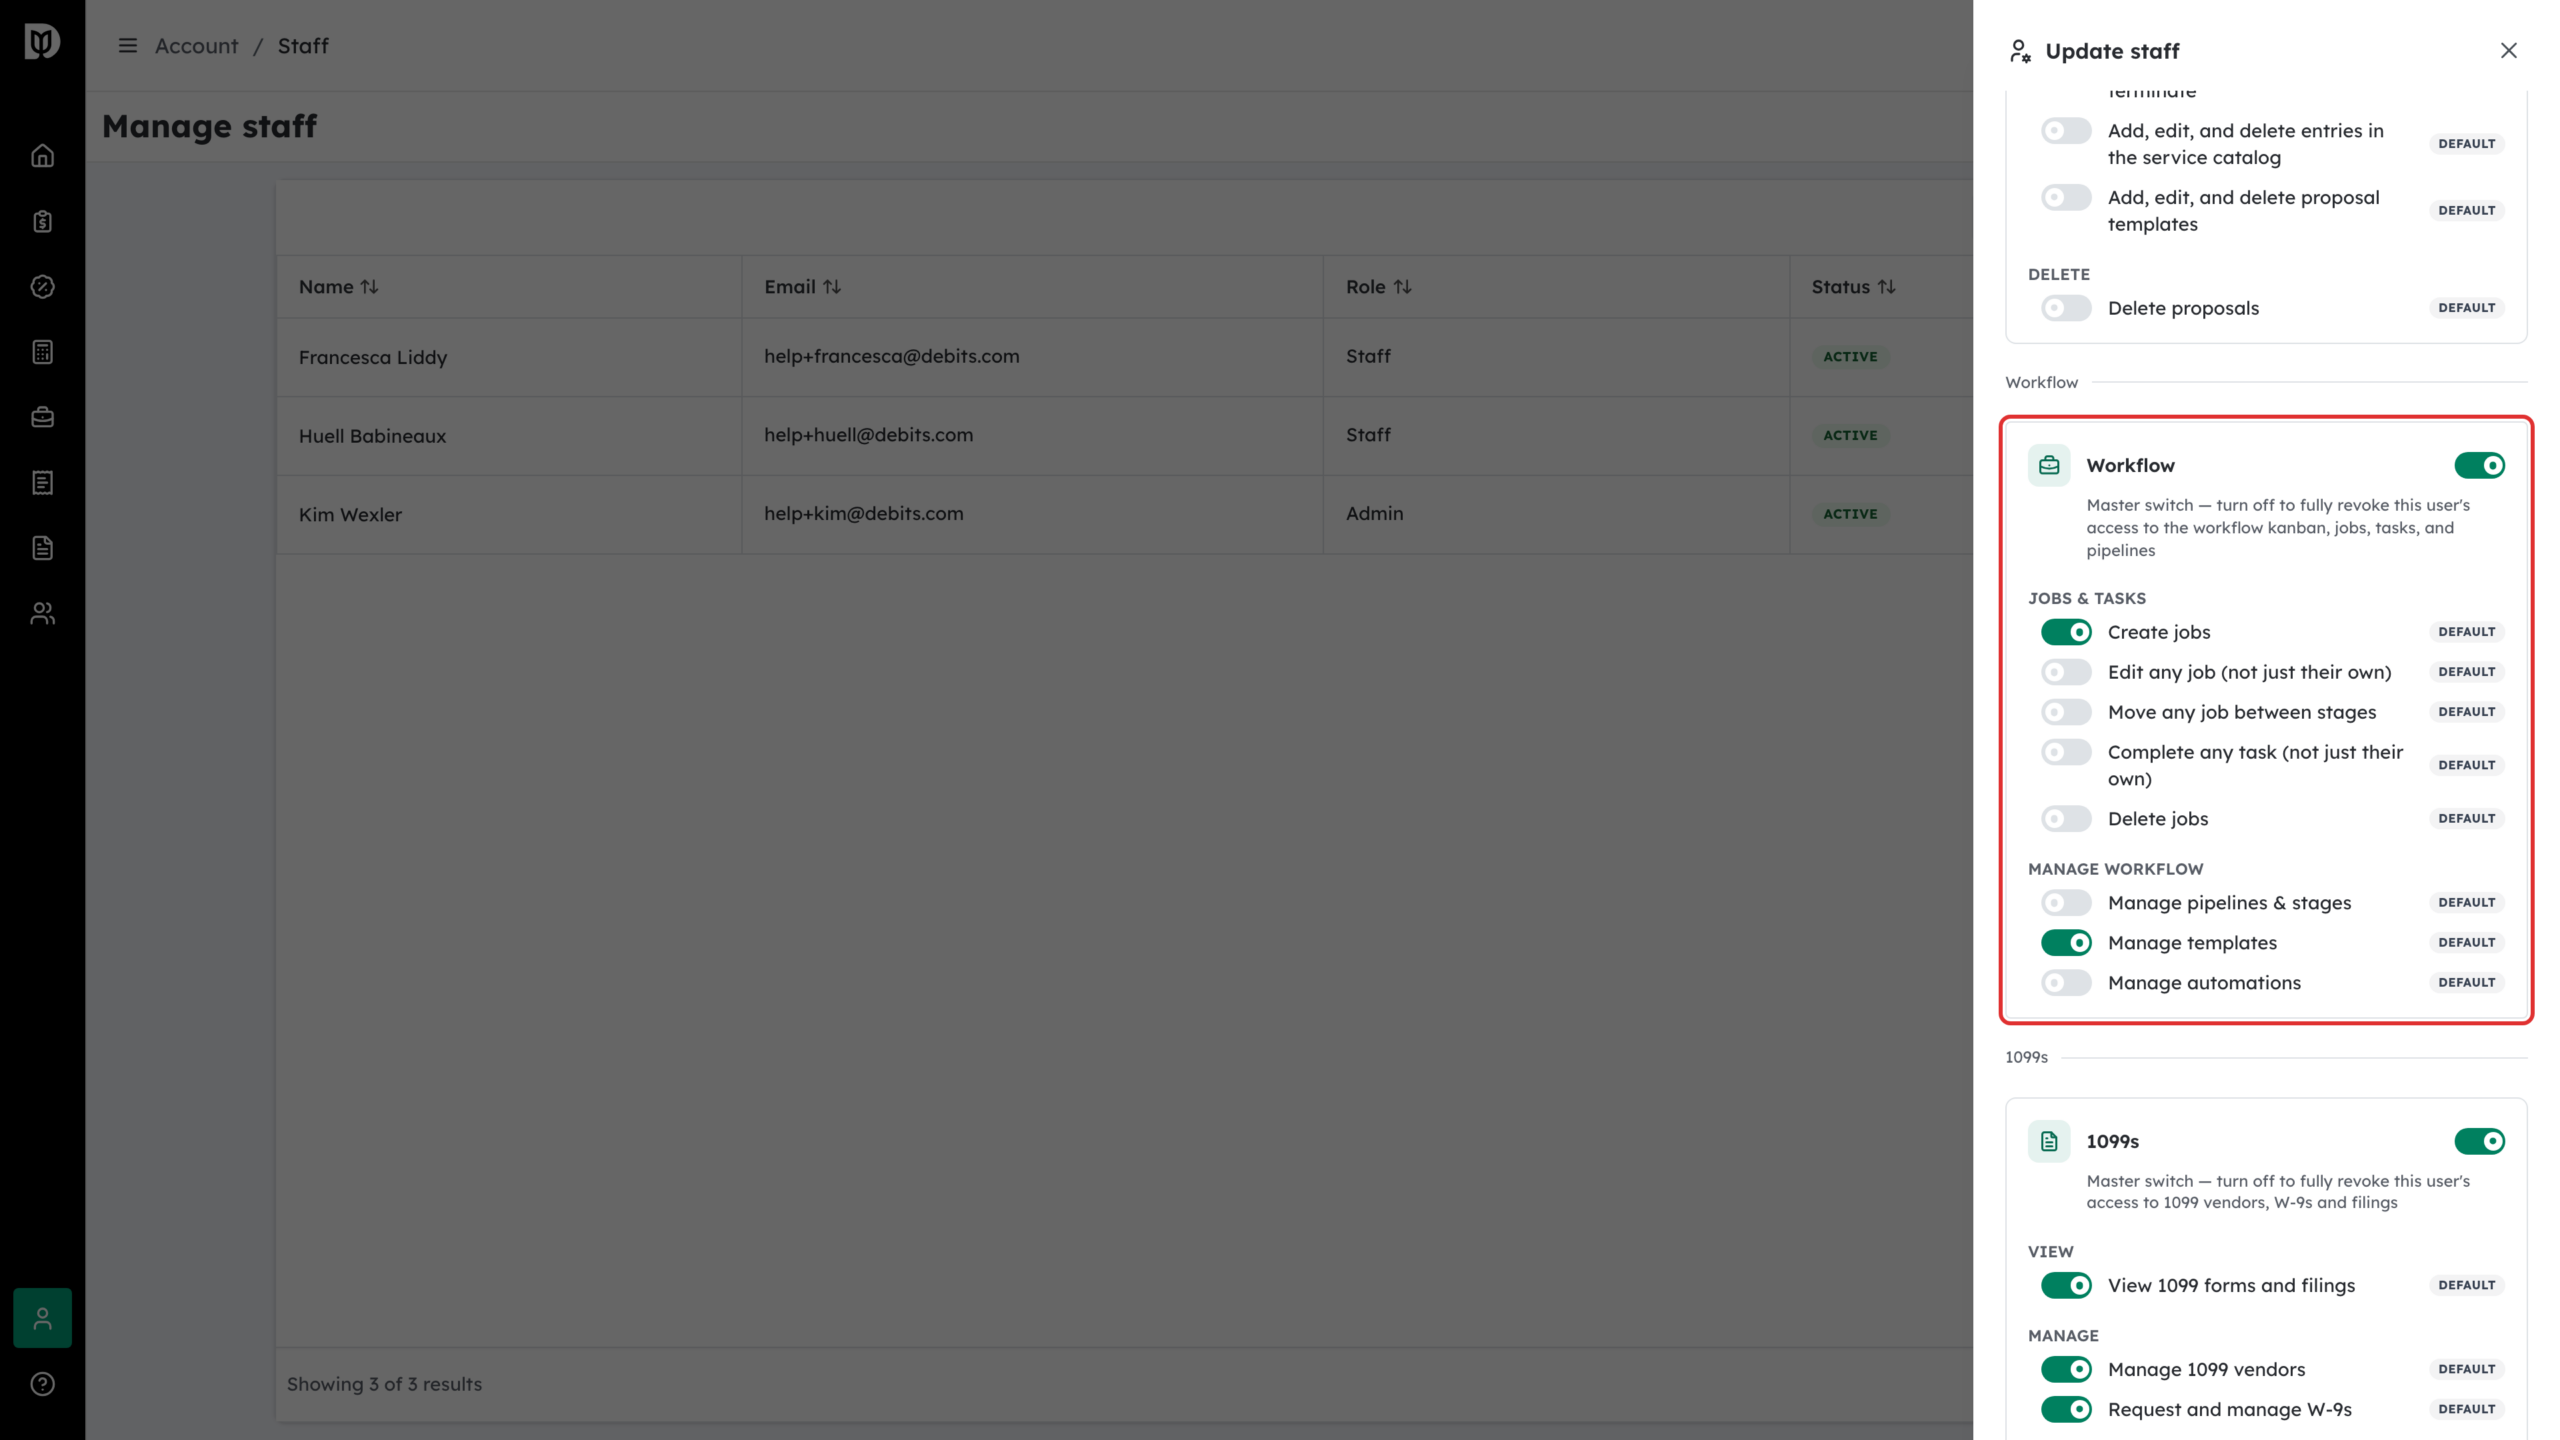
Step 4 (optional): Adjust workflow permissions
Workflow permissions are set for each person, not in bulk. Click the pencil (Edit) on a staff member’s row and use the Workflow card in the drawer — for example to let senior staff move jobs out of review stages.
Step 5: Wait for the invite to be accepted
Invited members show an Invited badge. Once they open the email and create their account, the badge turns Active and their name appears.
Assign staff when you create a contact
Step 6: Use the Assigned accountants field
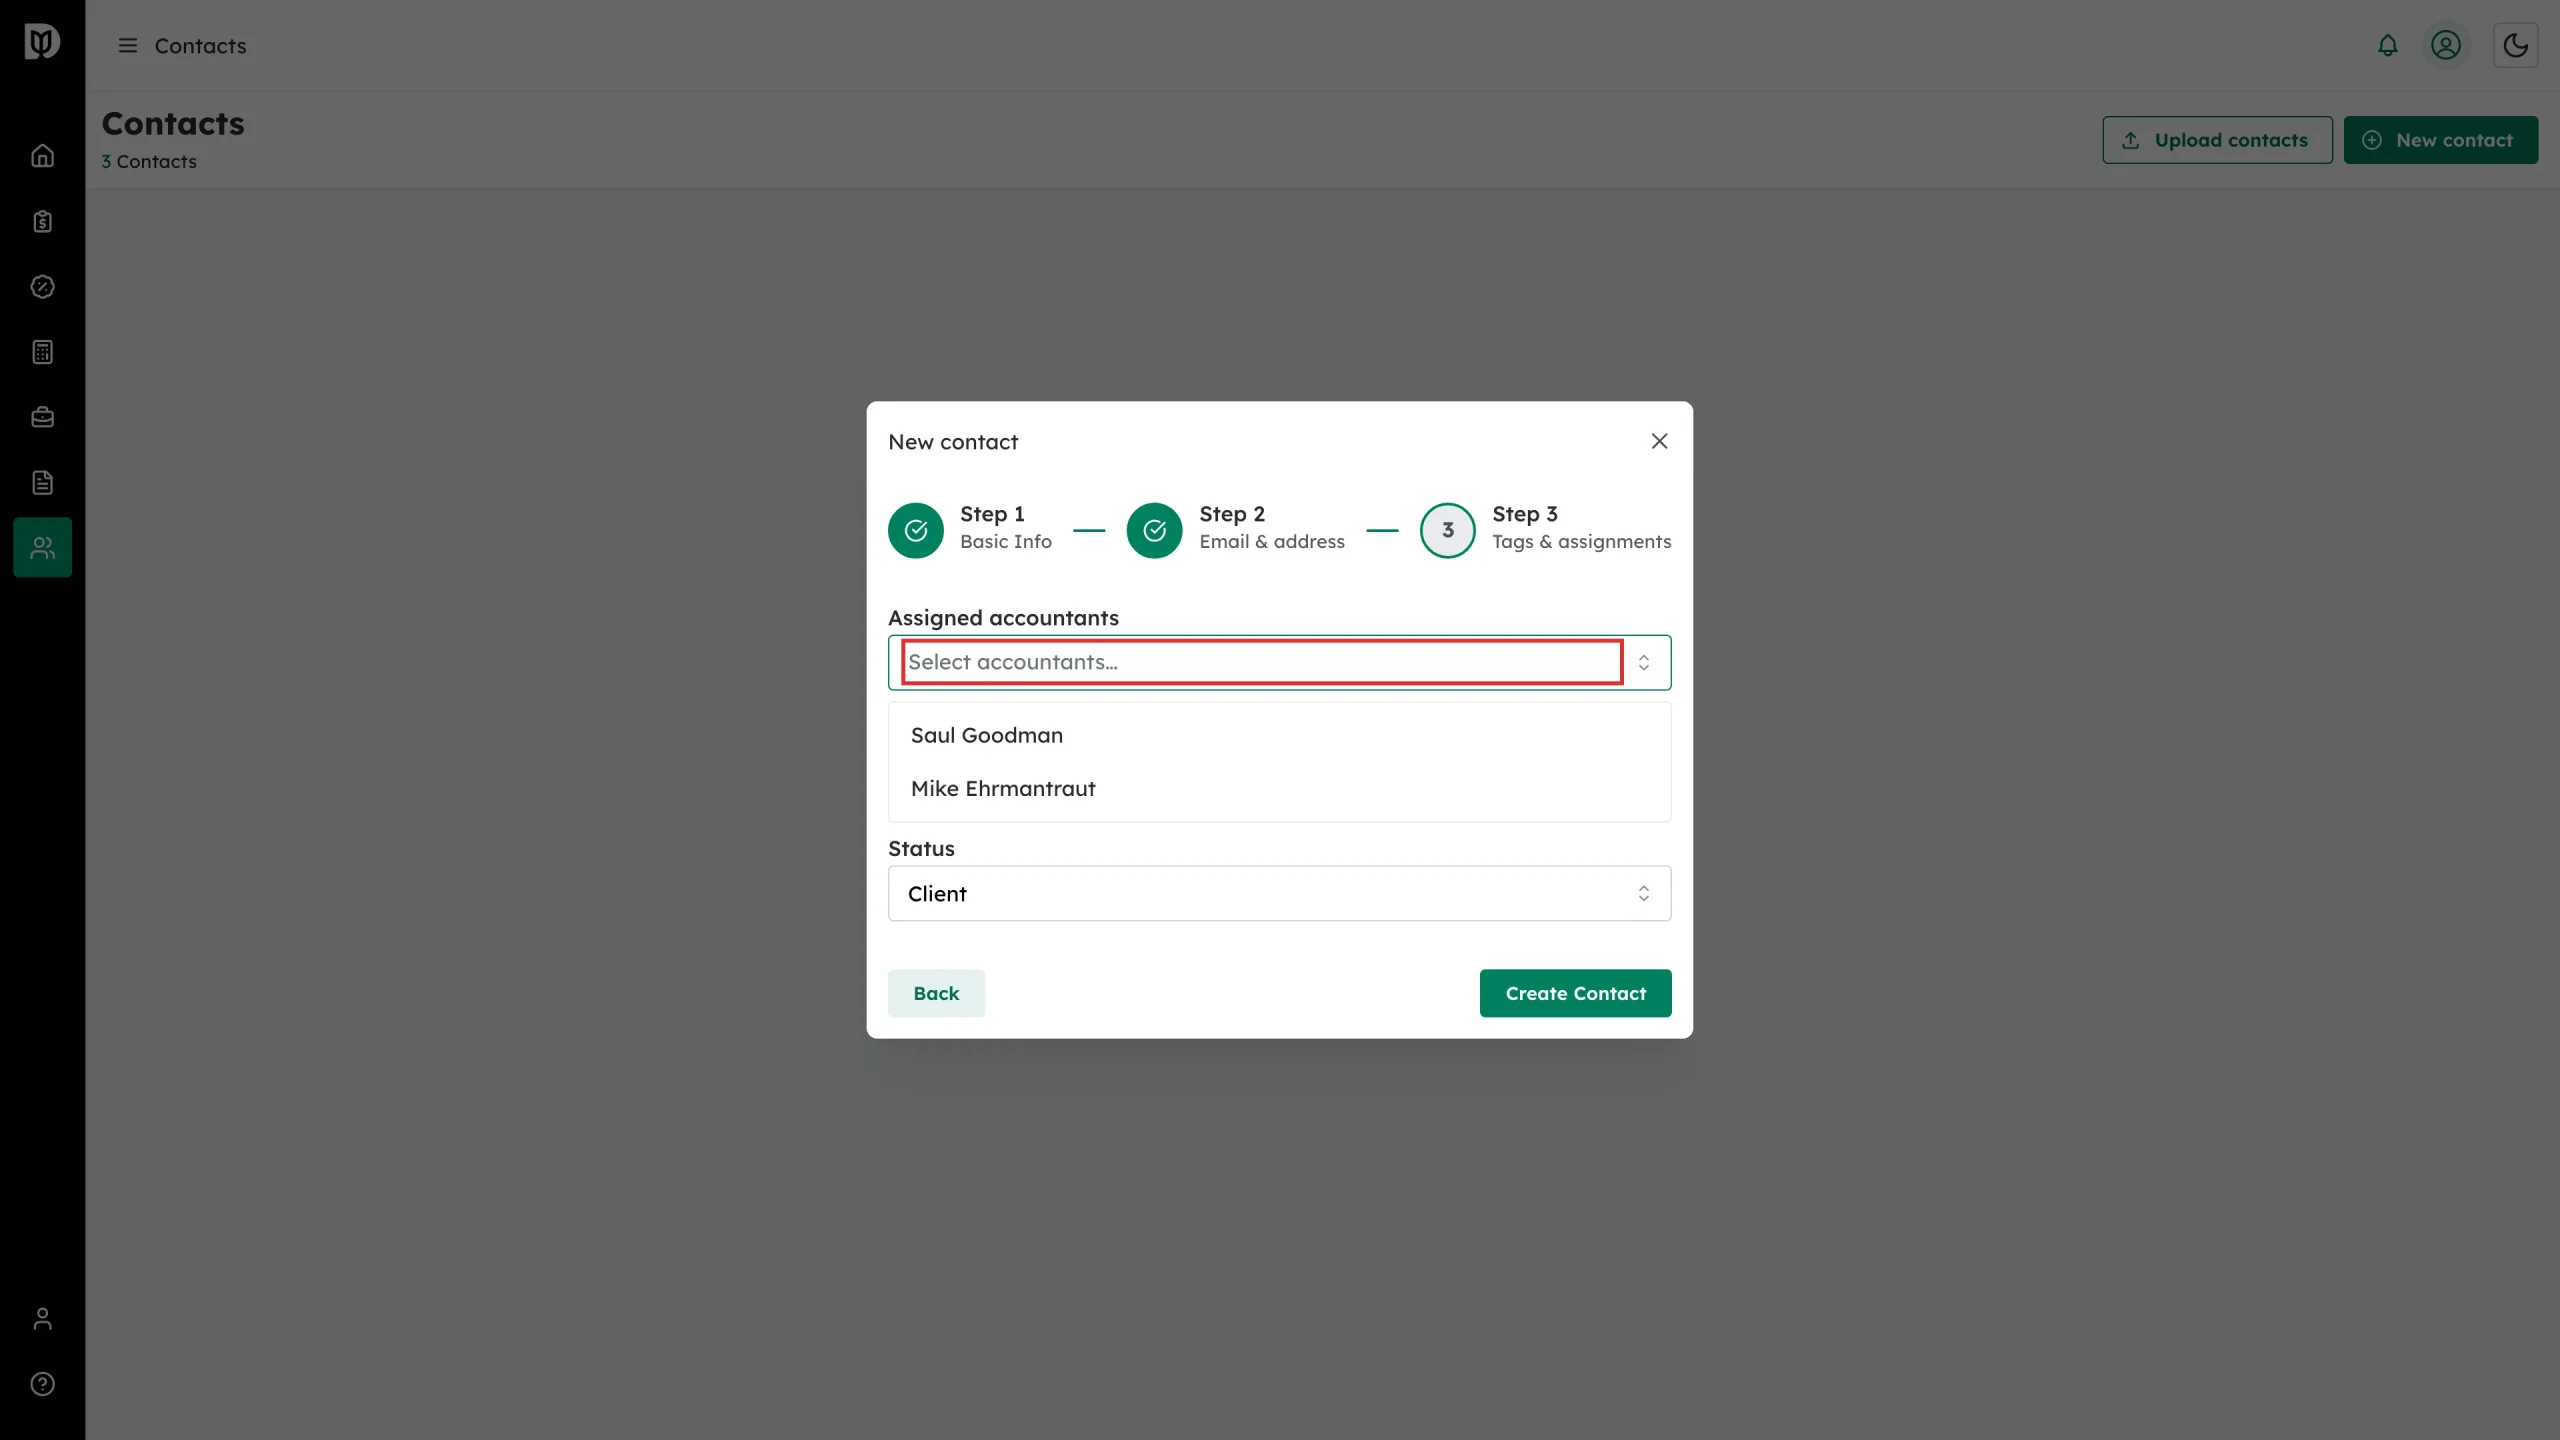
On Step 3: Tags & assignments of the New contact wizard, open Assigned accountants and pick one or more staff members, then click Create Contact.
Set a lead accountant on an existing contact
Step 7: Open the contact’s staff controls
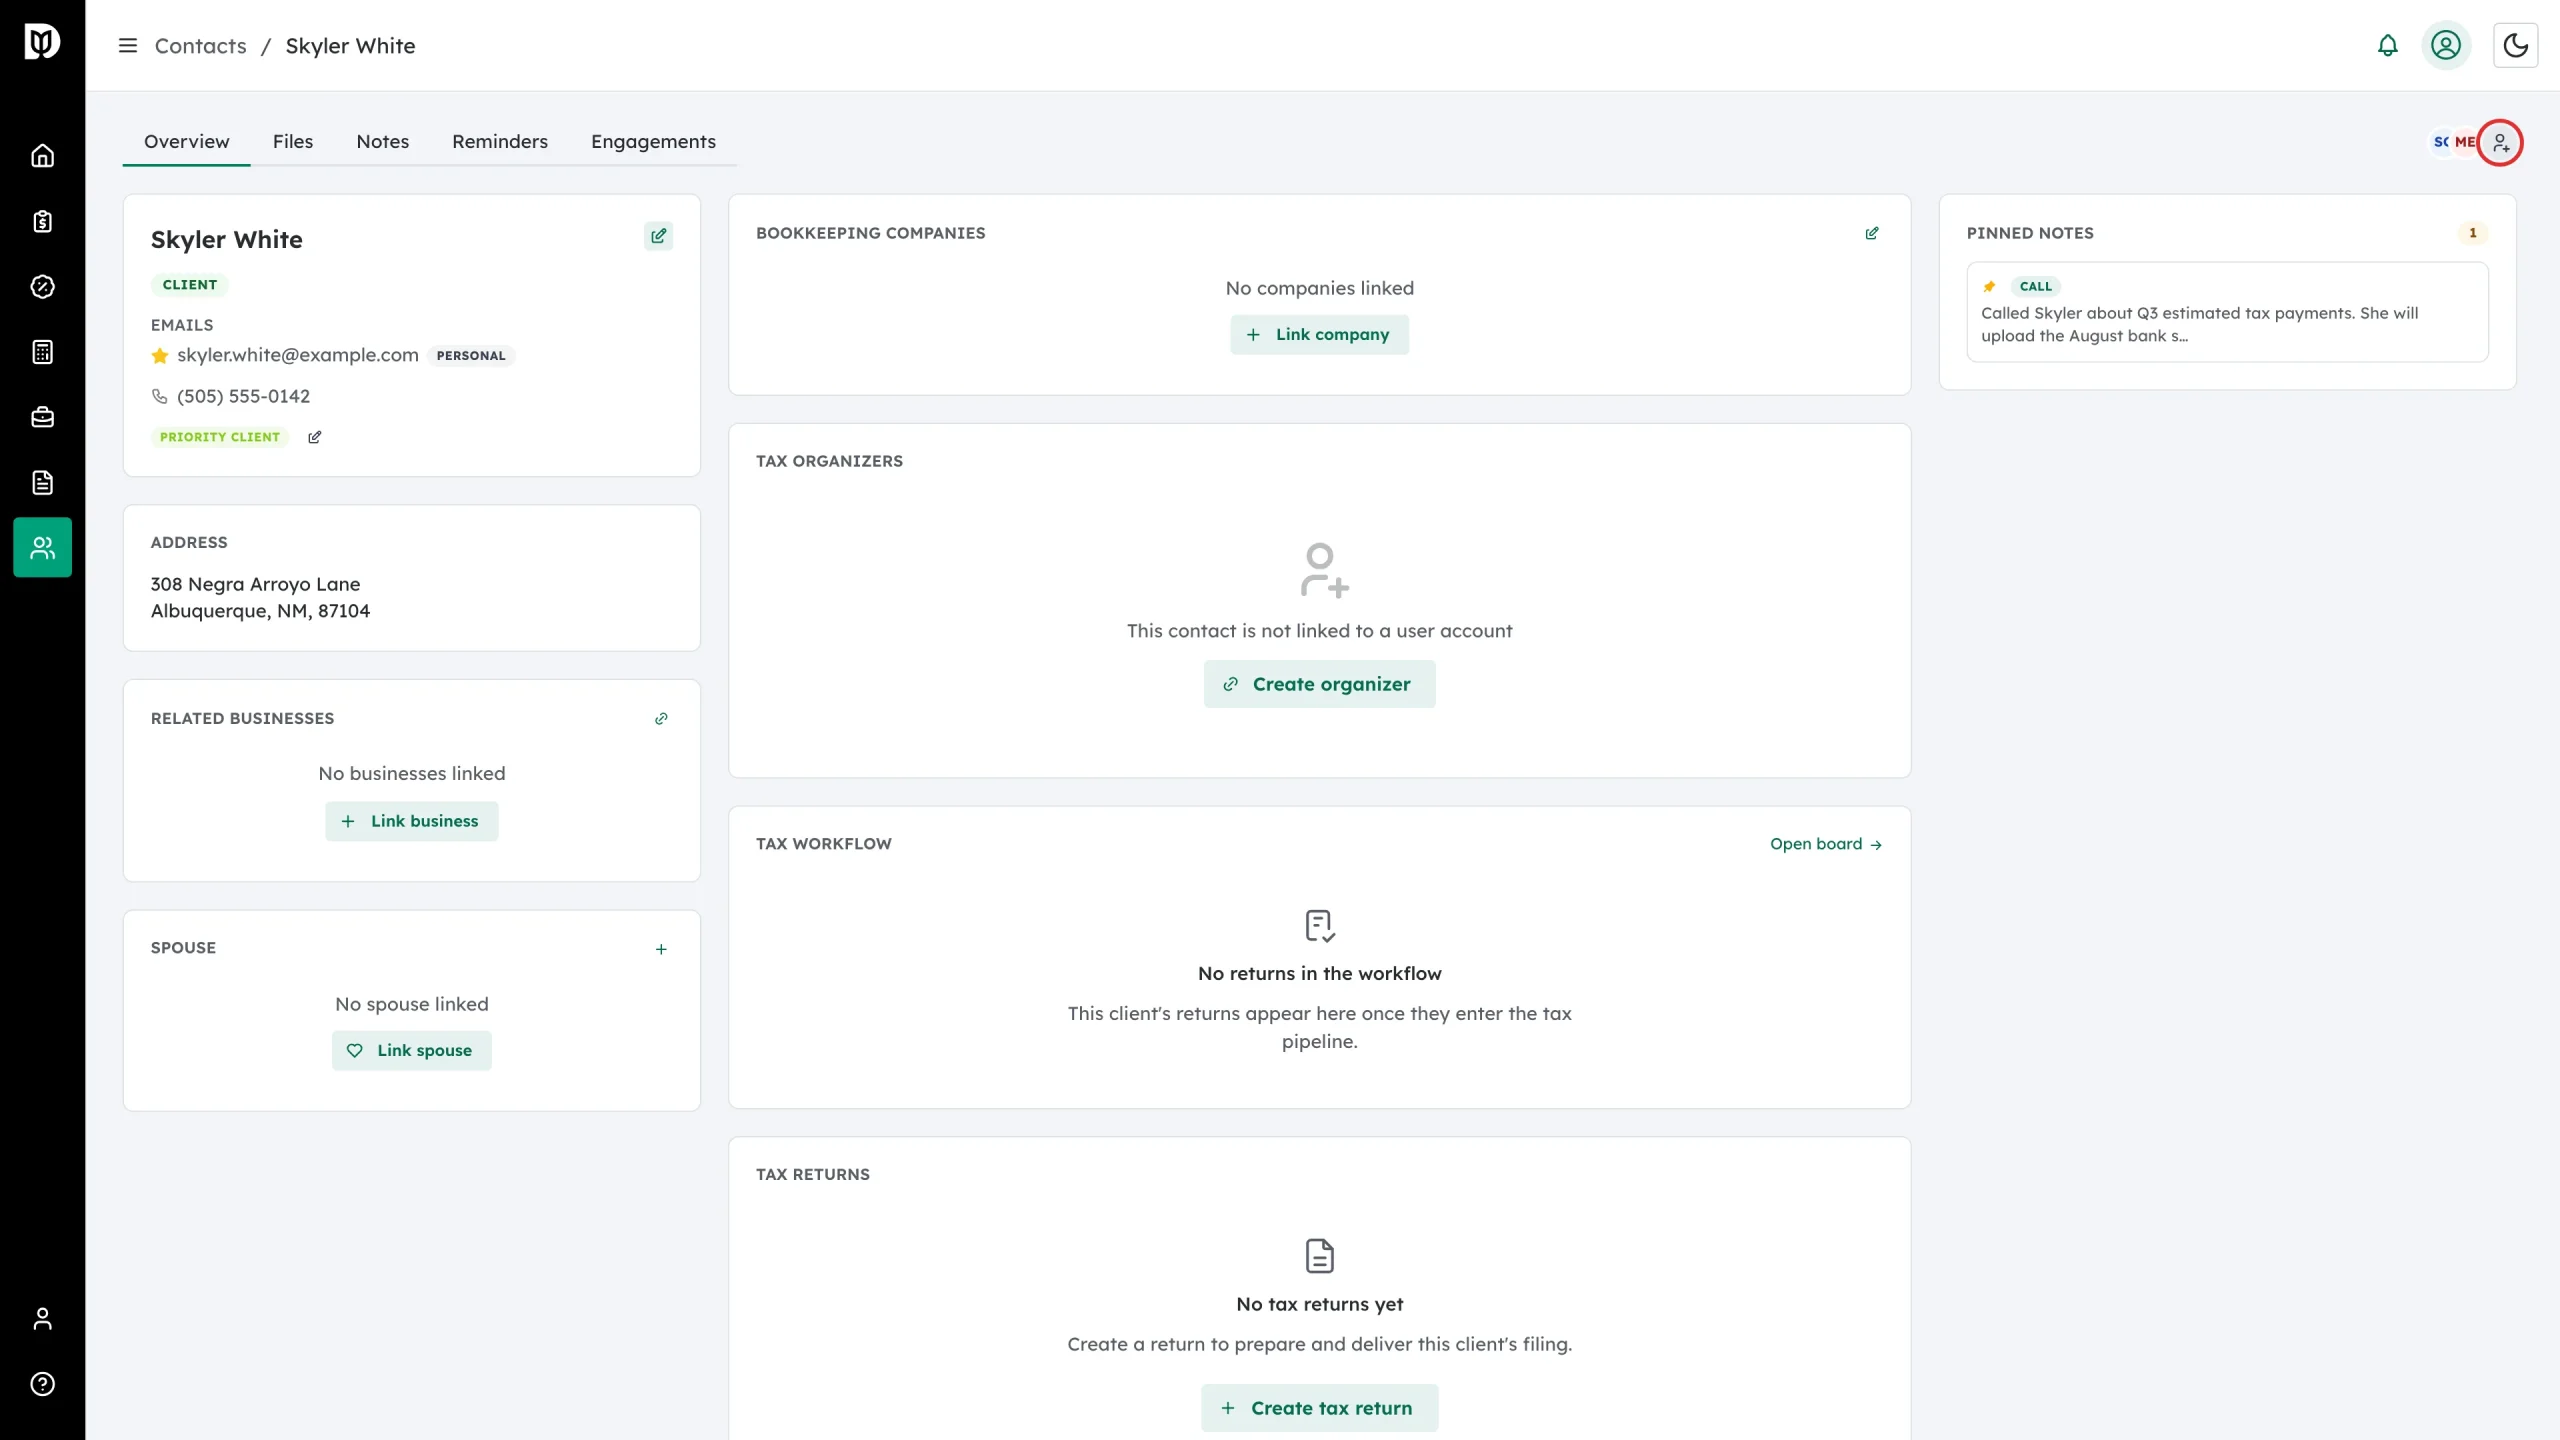
Open the contact. Their assigned staff appear as avatar circles at the top right — hover to see names. Click the add-person icon next to the avatars (labeled Manage staff).
Step 8: Pick the lead
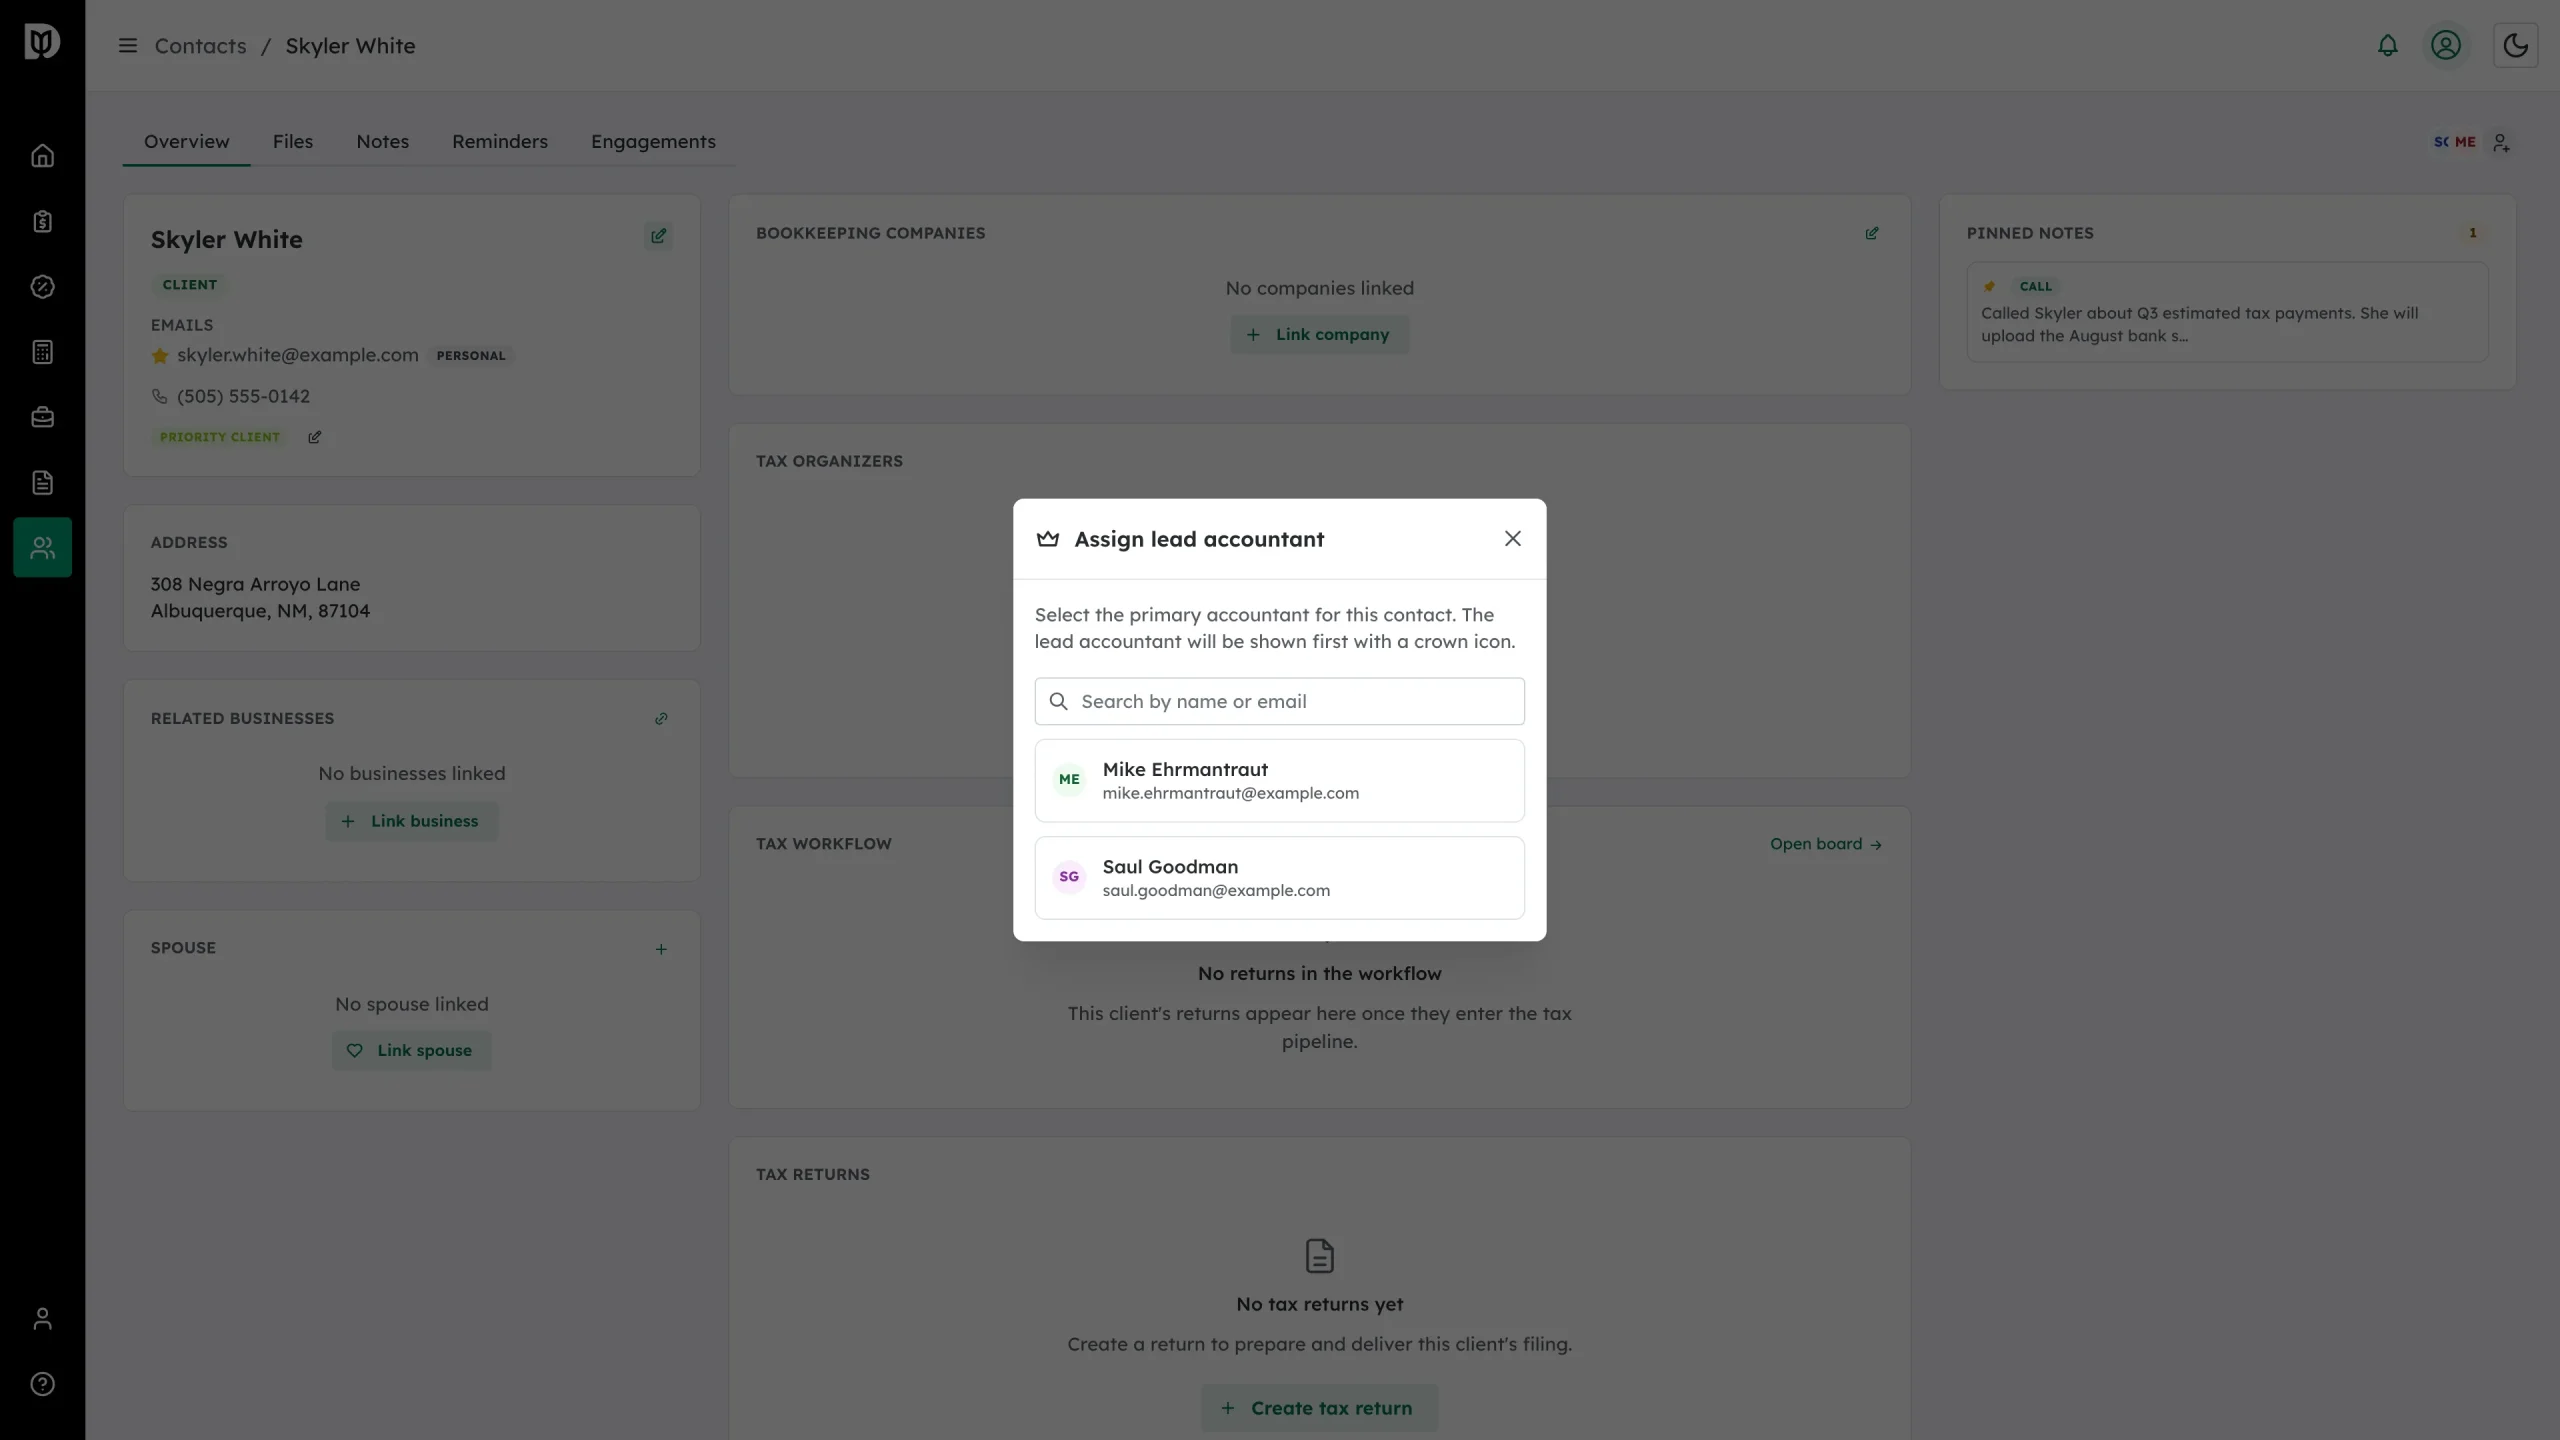
The Assign lead accountant modal lists everyone with access to this contact. Search by name or email and click a person to make them the lead — they show first in the stack with a crown icon. Click the current lead again to remove the lead role.
Change a staff member’s client list
To widen or narrow which contacts a staff member can see, edit the staff member rather than the contact: go to Account → Staff, click the pencil (Edit) on their row, and adjust client access — All clients or Select clients on the Bookkeeping permissions and Tax permissions cards. Save with Save changes.
Assign in bulk when importing
The Upload contacts import wizard includes an Assign accountants to contacts step — a checkbox grid of imported contacts by staff — so you can assign a whole spreadsheet of clients in one pass.
Understanding access
- Explicit assignment — staff picked on the contact (wizard Step 3 or import).
- All-clients access — staff whose bookkeeping or tax client access is set to “All clients” (and all admins and managers) automatically appear on every contact’s avatar stack.
What happens next
Assigned staff can open the contact’s profile, notes, organizers, and bookkeeping work according to their role and permissions. Staff without access won’t see the contact in their lists.
Troubleshooting
- A staff member isn’t in the Assigned accountants list: Check they’ve accepted their invite (Active status on Account → Staff).
- Someone sees contacts they weren’t assigned: They’re an admin or have “All clients” access — edit them under Account → Staff.
- No bulk assign option on the contacts list: That’s expected — bulk assignment only exists in the Upload contacts import wizard. For existing contacts, edit the staff member’s client access instead.