

Who this is for: Accountants preparing a draft report before finalizing it.
What you’ll learn: How to use the report workspace — the live preview, the Included Sections list, and the PDF preview.
Before you begin #
- Create a draft report first (see the related article on creating a report).
- Only draft reports can be customized. Finalized reports are locked.
Step-by-step instructions #
Step 1: Open the report workspace #
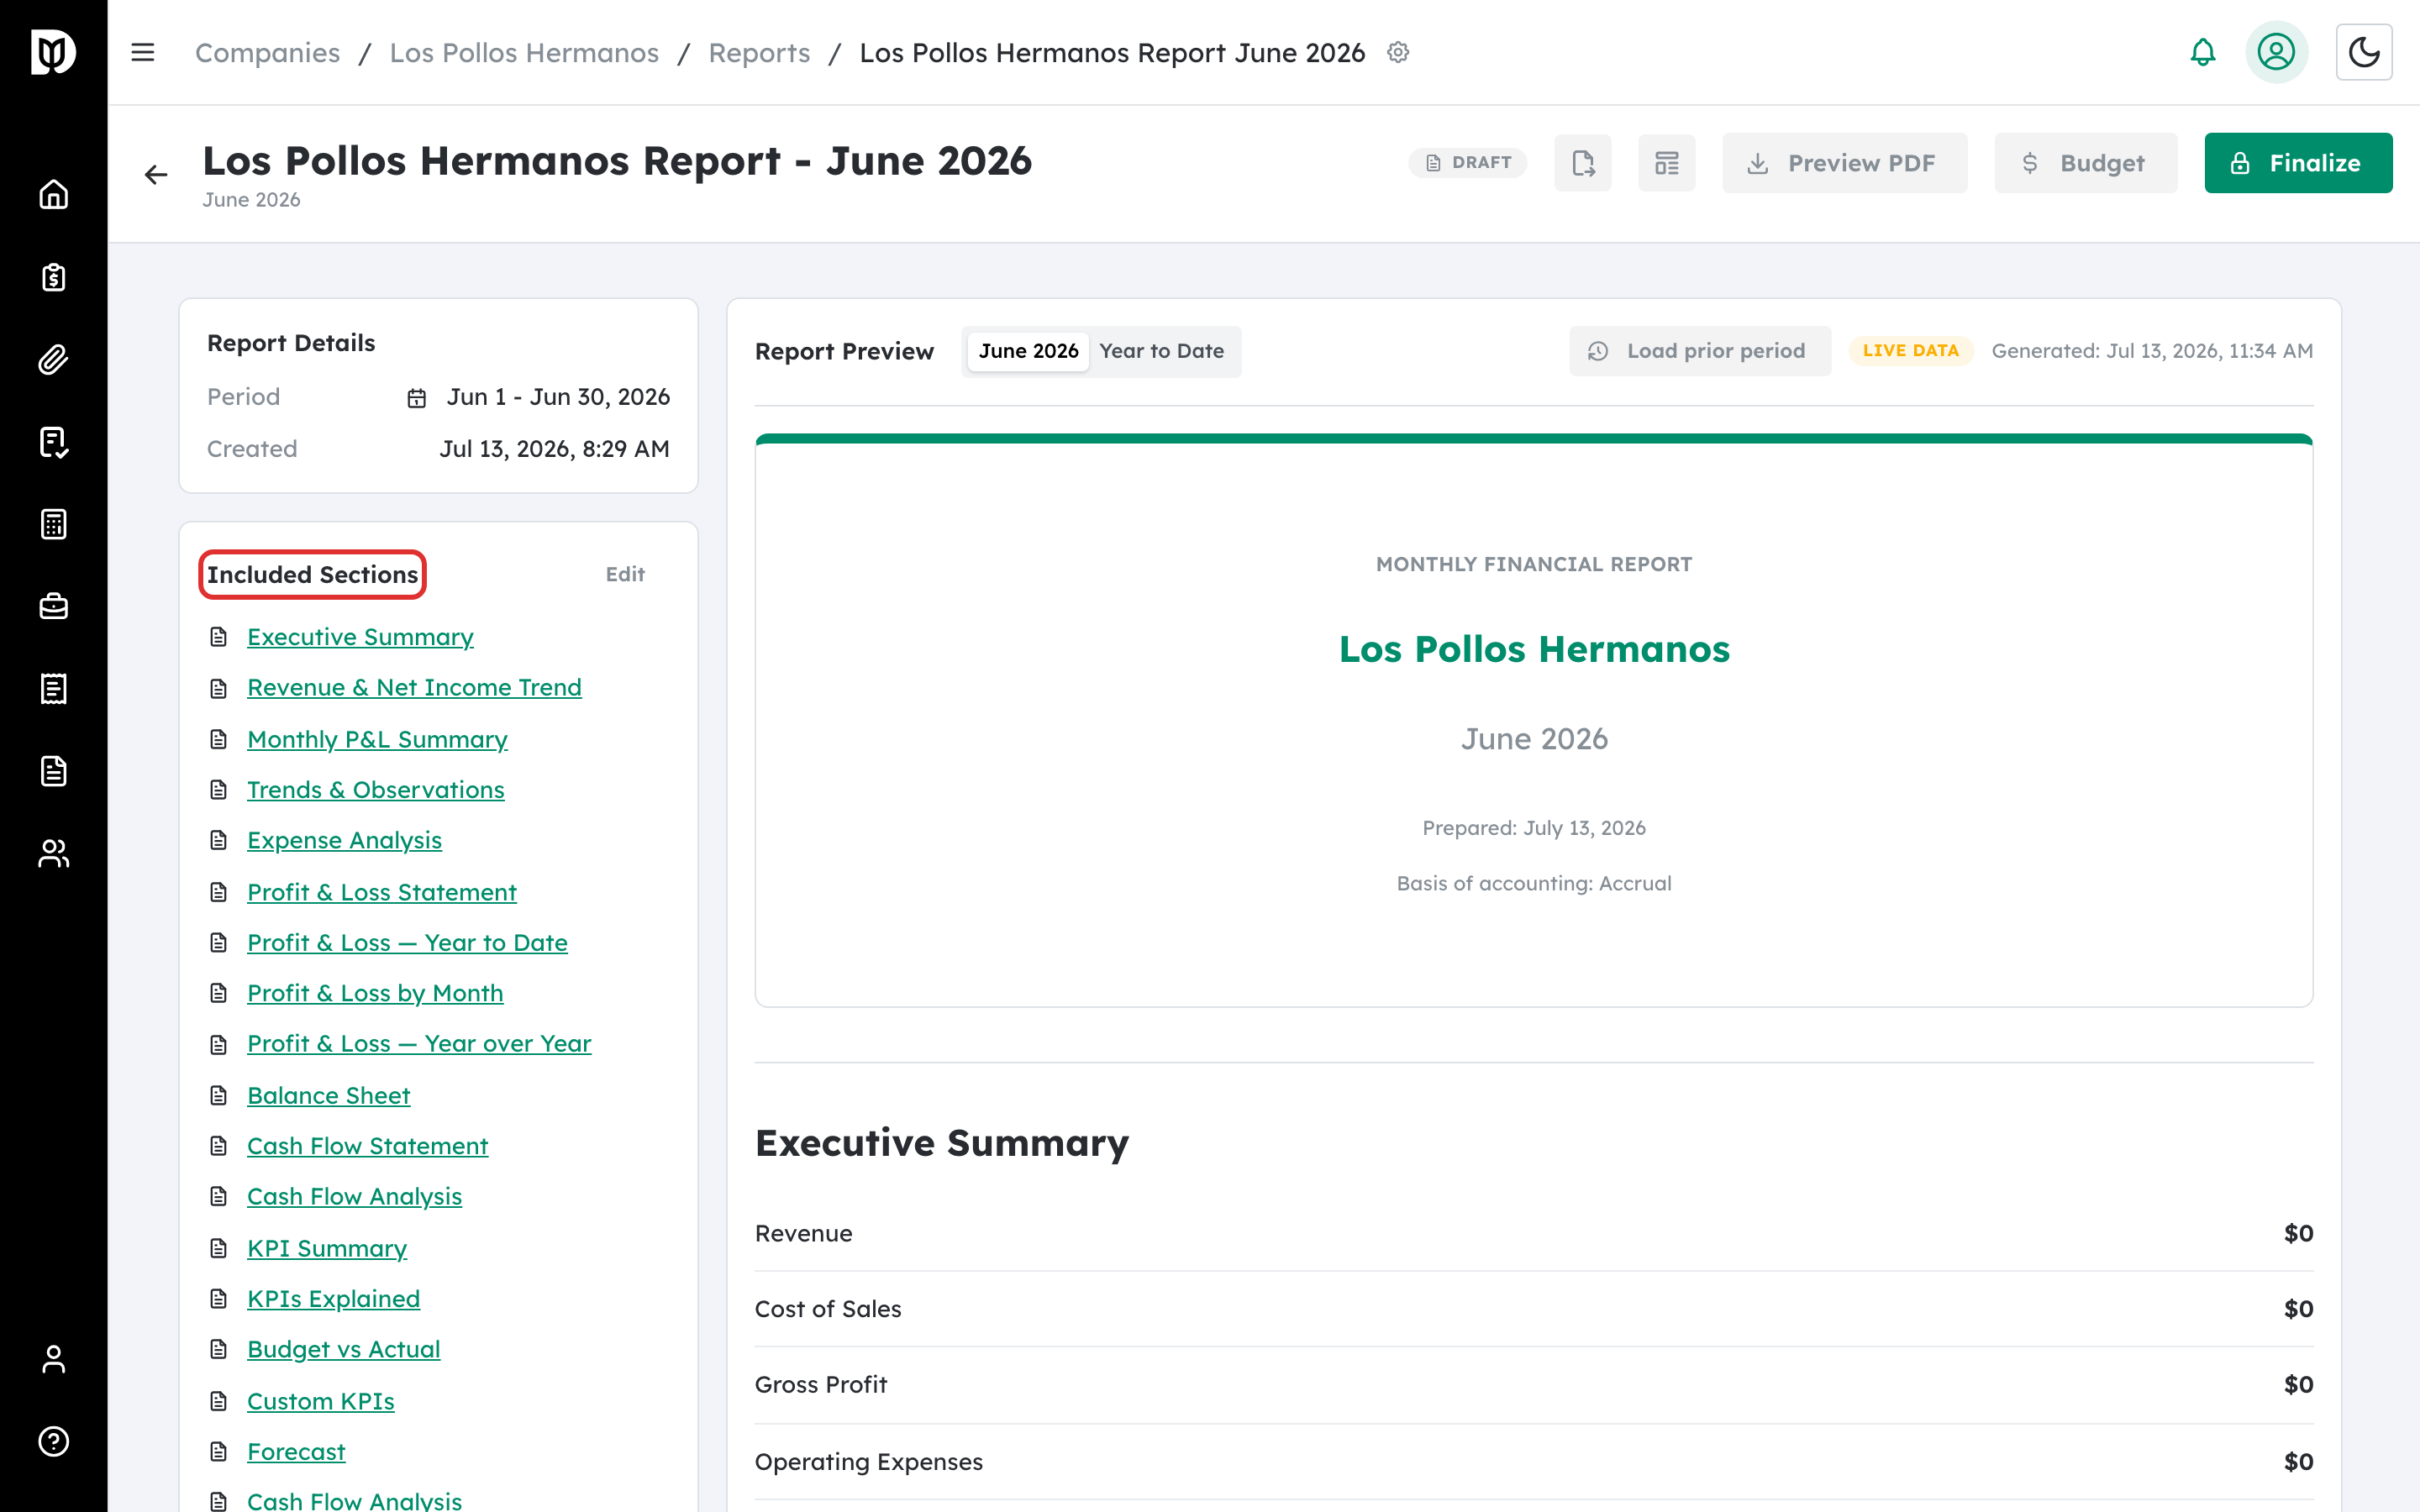
Open a draft report from the Reports list. The workspace has a Report Details panel, an Included Sections list, and a Report Preview.
Step 2: Review the live preview #
For a draft, the preview reads the company’s current QuickBooks figures and shows a Live Data badge. Use Year to Date or Load prior period to compare periods. The preview updates as you change sections and commentary.
Step 3: Jump to any section #
Select a section name in Included Sections to jump straight to it in the preview. This mirrors the order sections will appear in the finished report.
Step 4: Preview the PDF #
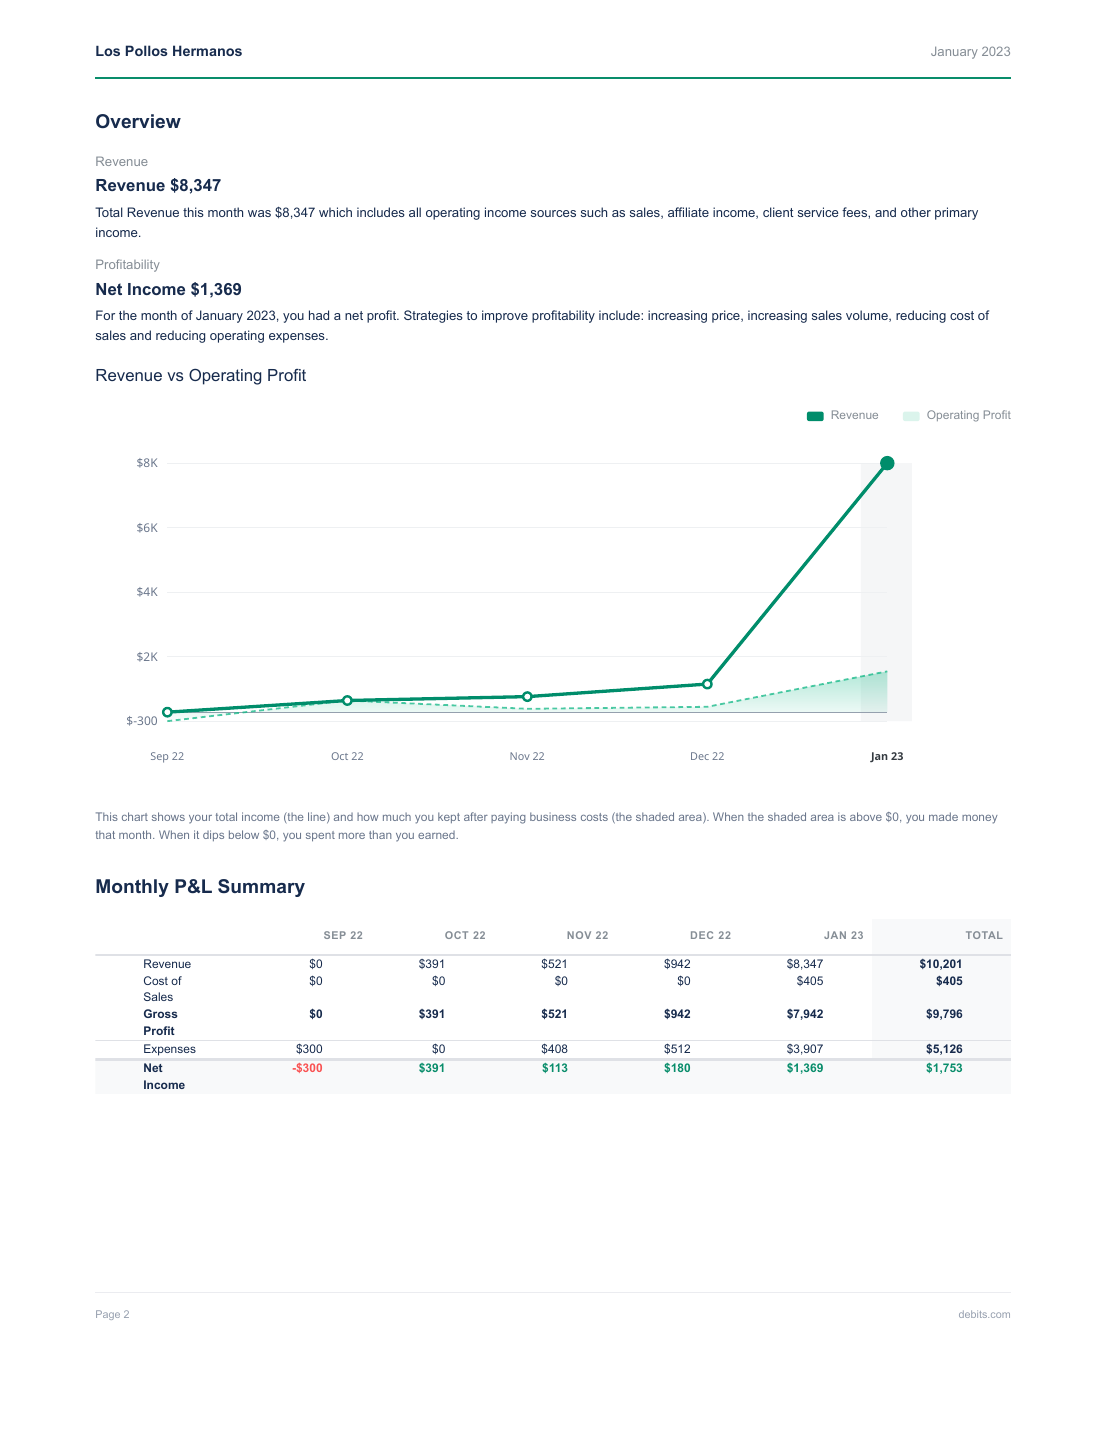
Select Preview PDF to generate the polished, print-ready PDF exactly as your client will receive it — branded cover, charts, and all enabled sections.
What happens next #
When the report looks right, finalize it to lock the numbers into a permanent snapshot, then deliver it to your client.
Troubleshooting #
- Problem: A section is missing from the preview. Open Edit next to Included Sections and confirm the section is turned on.
- Problem: Preview PDF is disabled. The report needs live data or a finalized snapshot; confirm the QuickBooks connection and period.


