

Who this is for: Firm owners and admins who want a consistent close checklist across periods and clients.
What you’ll learn: How to apply a checklist template to a period and save the current checklist as a reusable template.
Before you begin #
- Open a client’s Month End tab and select the Bookkeeping Checklist tab.
- Applying and creating templates is available to accountant roles; deleting a template requires an owner or admin role.
Step-by-step instructions #
Step 1: Open Checklist Templates #
Select Templates below the checklist to open the Checklist Templates window.
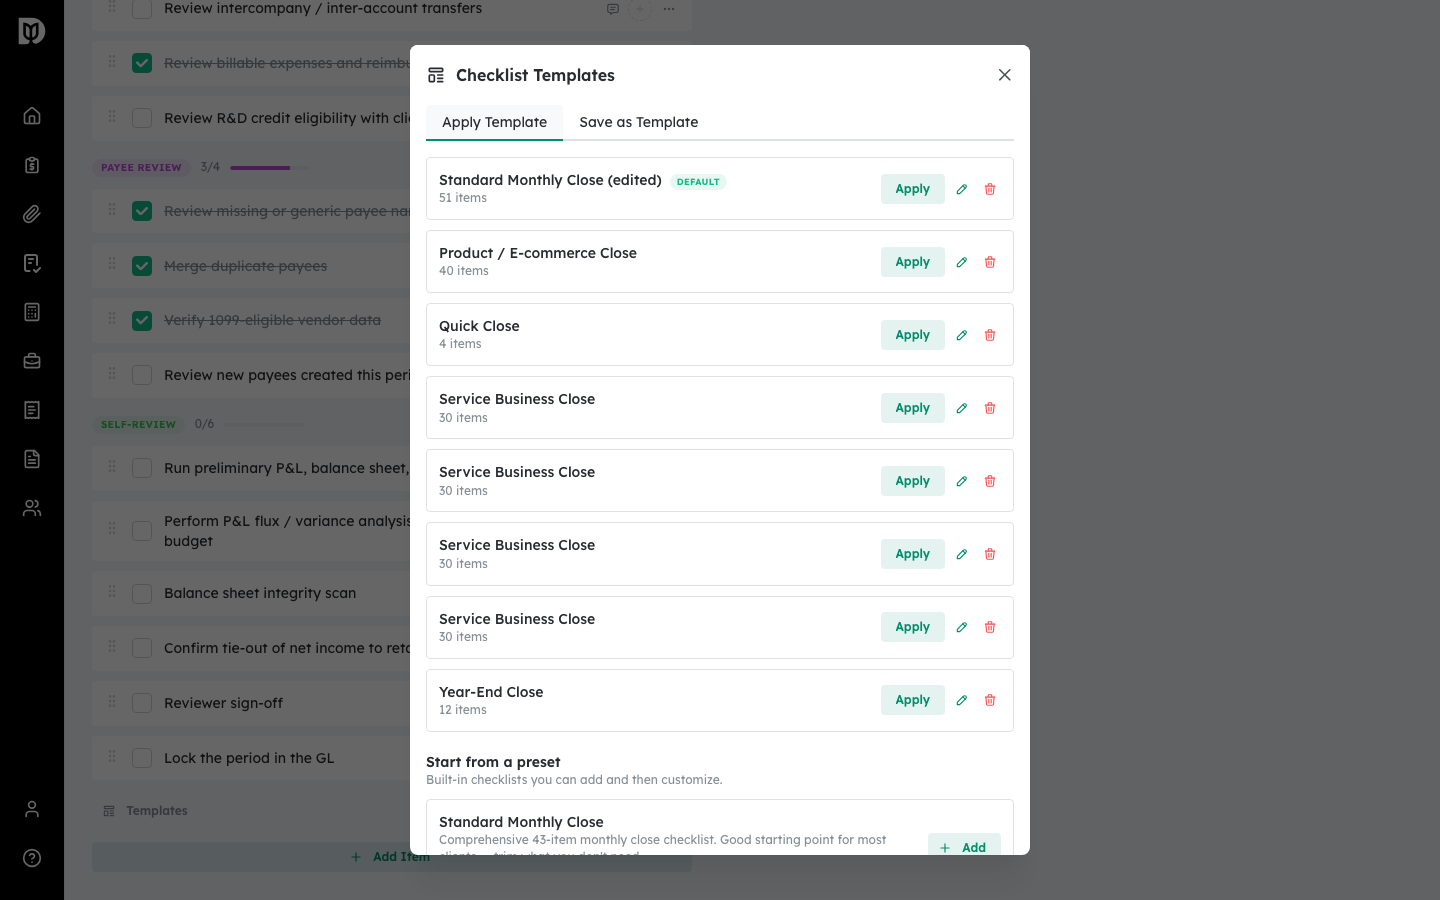
Step 2: Apply a template #
On the Apply Template tab, find the template you want and select Apply. Its tasks are added to the current period’s checklist.
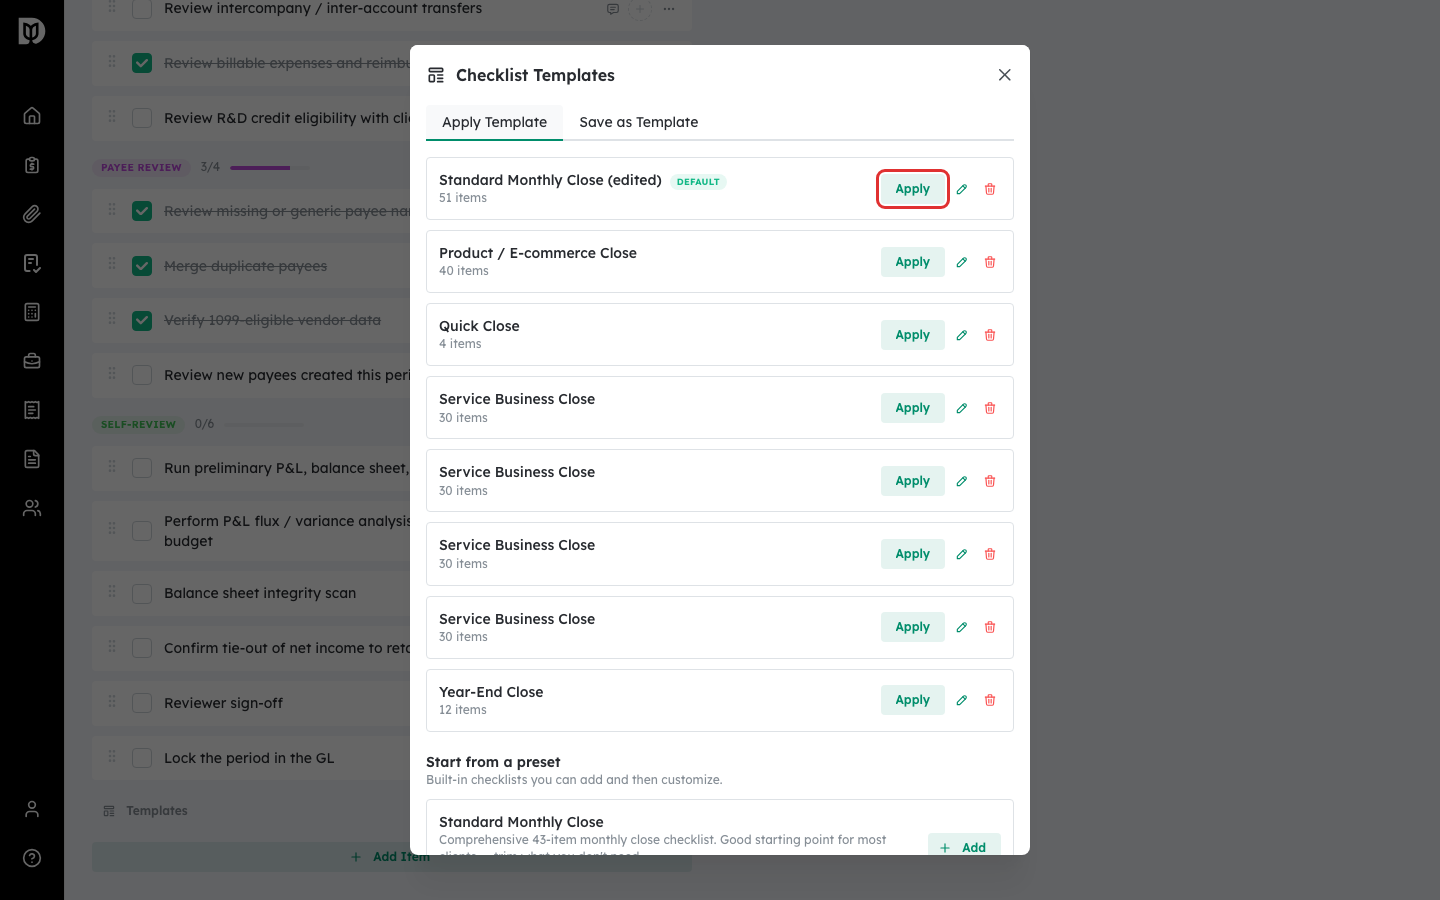
Step 3: Save the current checklist as a template #
Select the Save as Template tab, enter a Template name, and choose whether to set it as the client’s default checklist for future periods. Select Save.
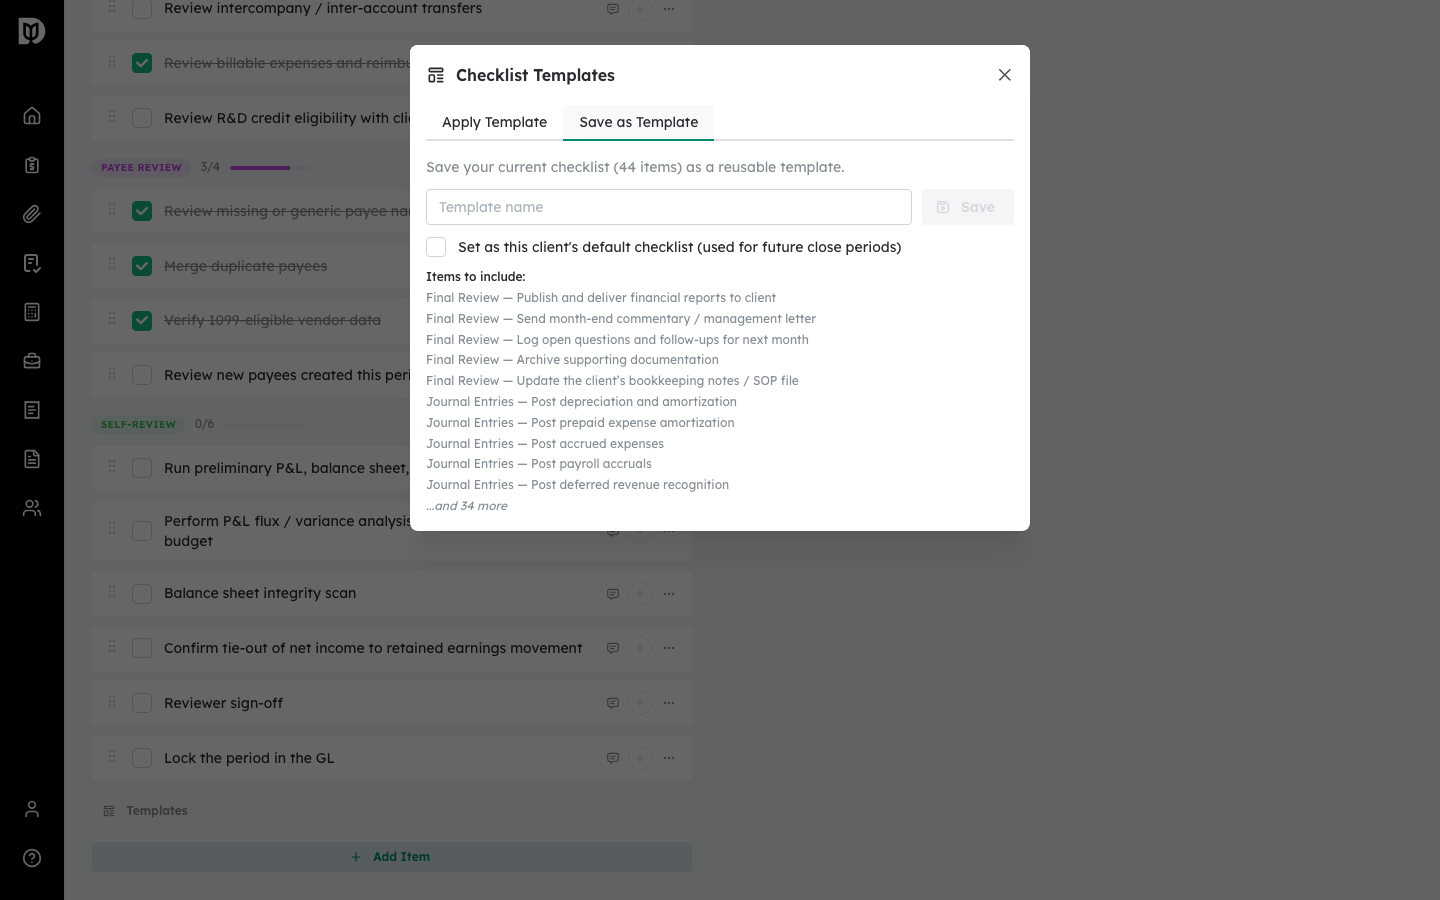
What happens next #
Applied tasks appear immediately in the checklist. A template marked Default is used automatically when you create the next close period for that client. You can also start from a built-in preset from the templates list.
Troubleshooting #
- Problem: You cannot delete a template. Only owners and admins can delete templates. Ask a firm admin to remove it.
- Problem: Applying a template created duplicate tasks. Remove the extra tasks from the checklist; deleted tasks are banked and can be re-added if needed.


