Who this is for: Anyone tracking people your firm is talking to but has not signed yet.
What you’ll learn: How to record someone as a prospect, find your prospects, and move them to client when they sign.
Before you begin
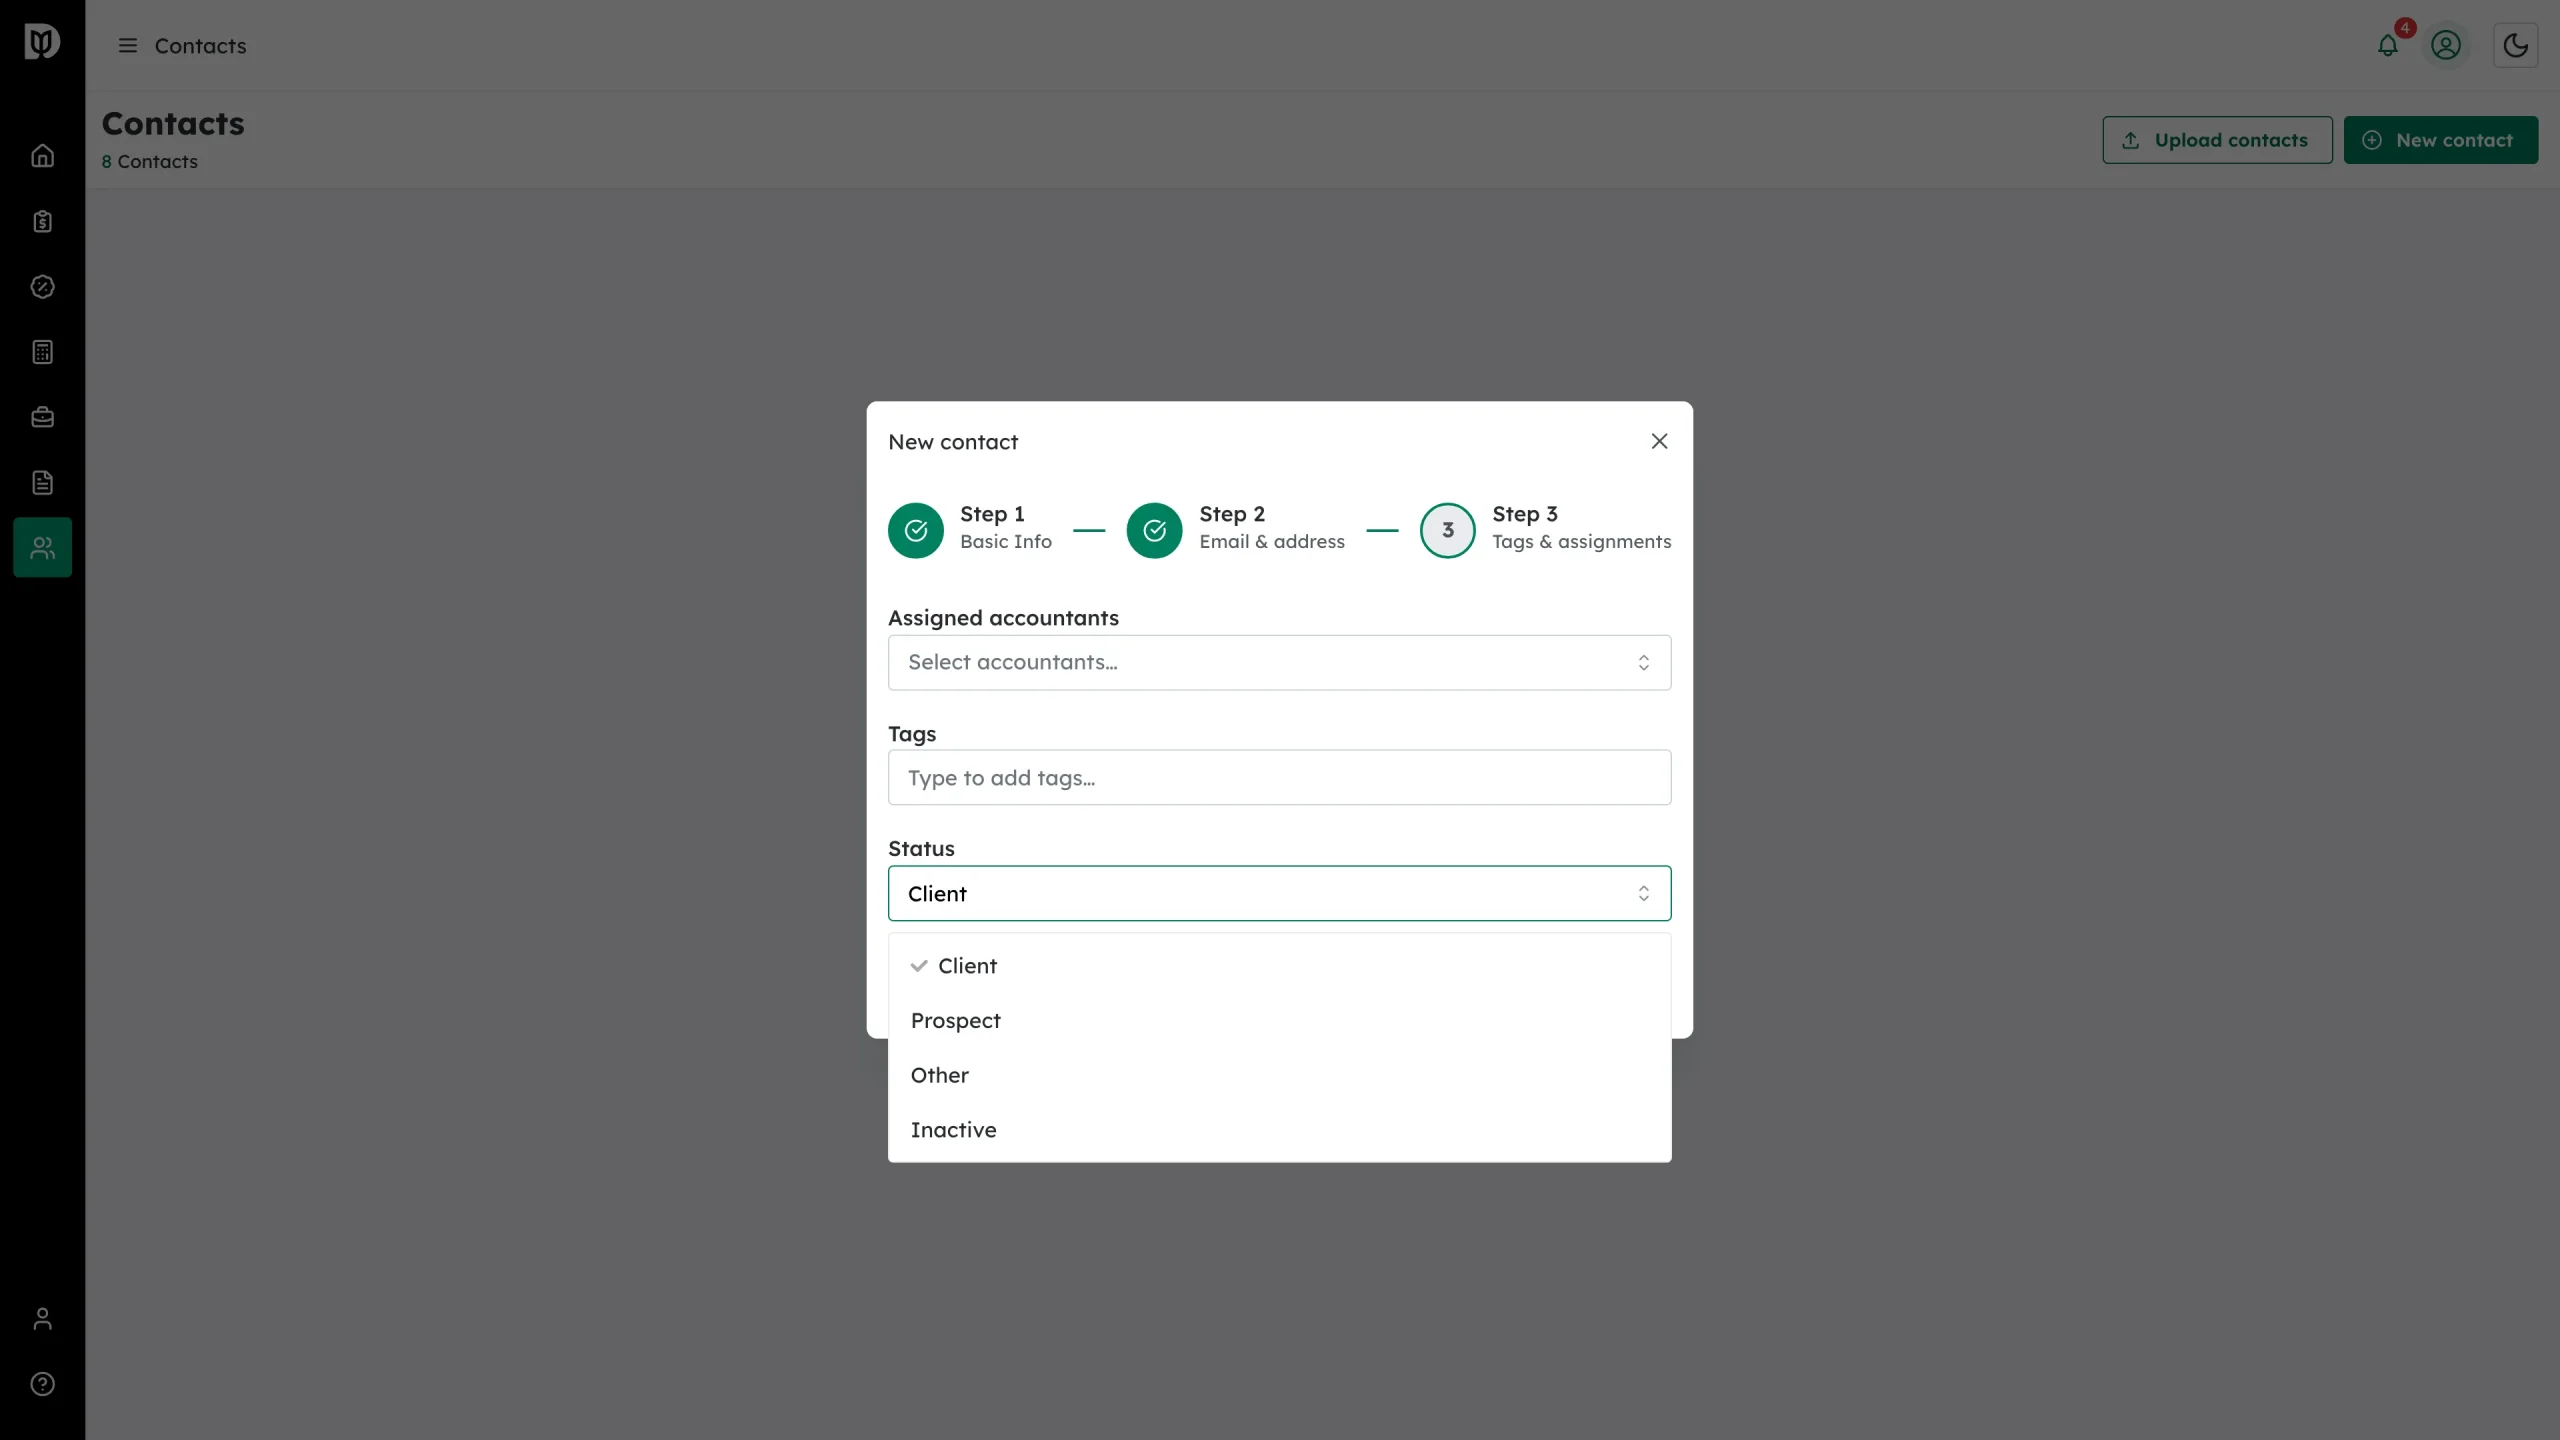
- A contact’s status is one of Client, Prospect, Other or Inactive. New contacts default to Client, so set it deliberately when you add a prospect.
- Status is a label for your firm. It does not send anything to the contact or change what they can see.
- Moving a contact to Inactive is a separate, heavier action — see How to Deactivate and Reactivate a Contact.
Step-by-step instructions
Step 1: Add the prospect
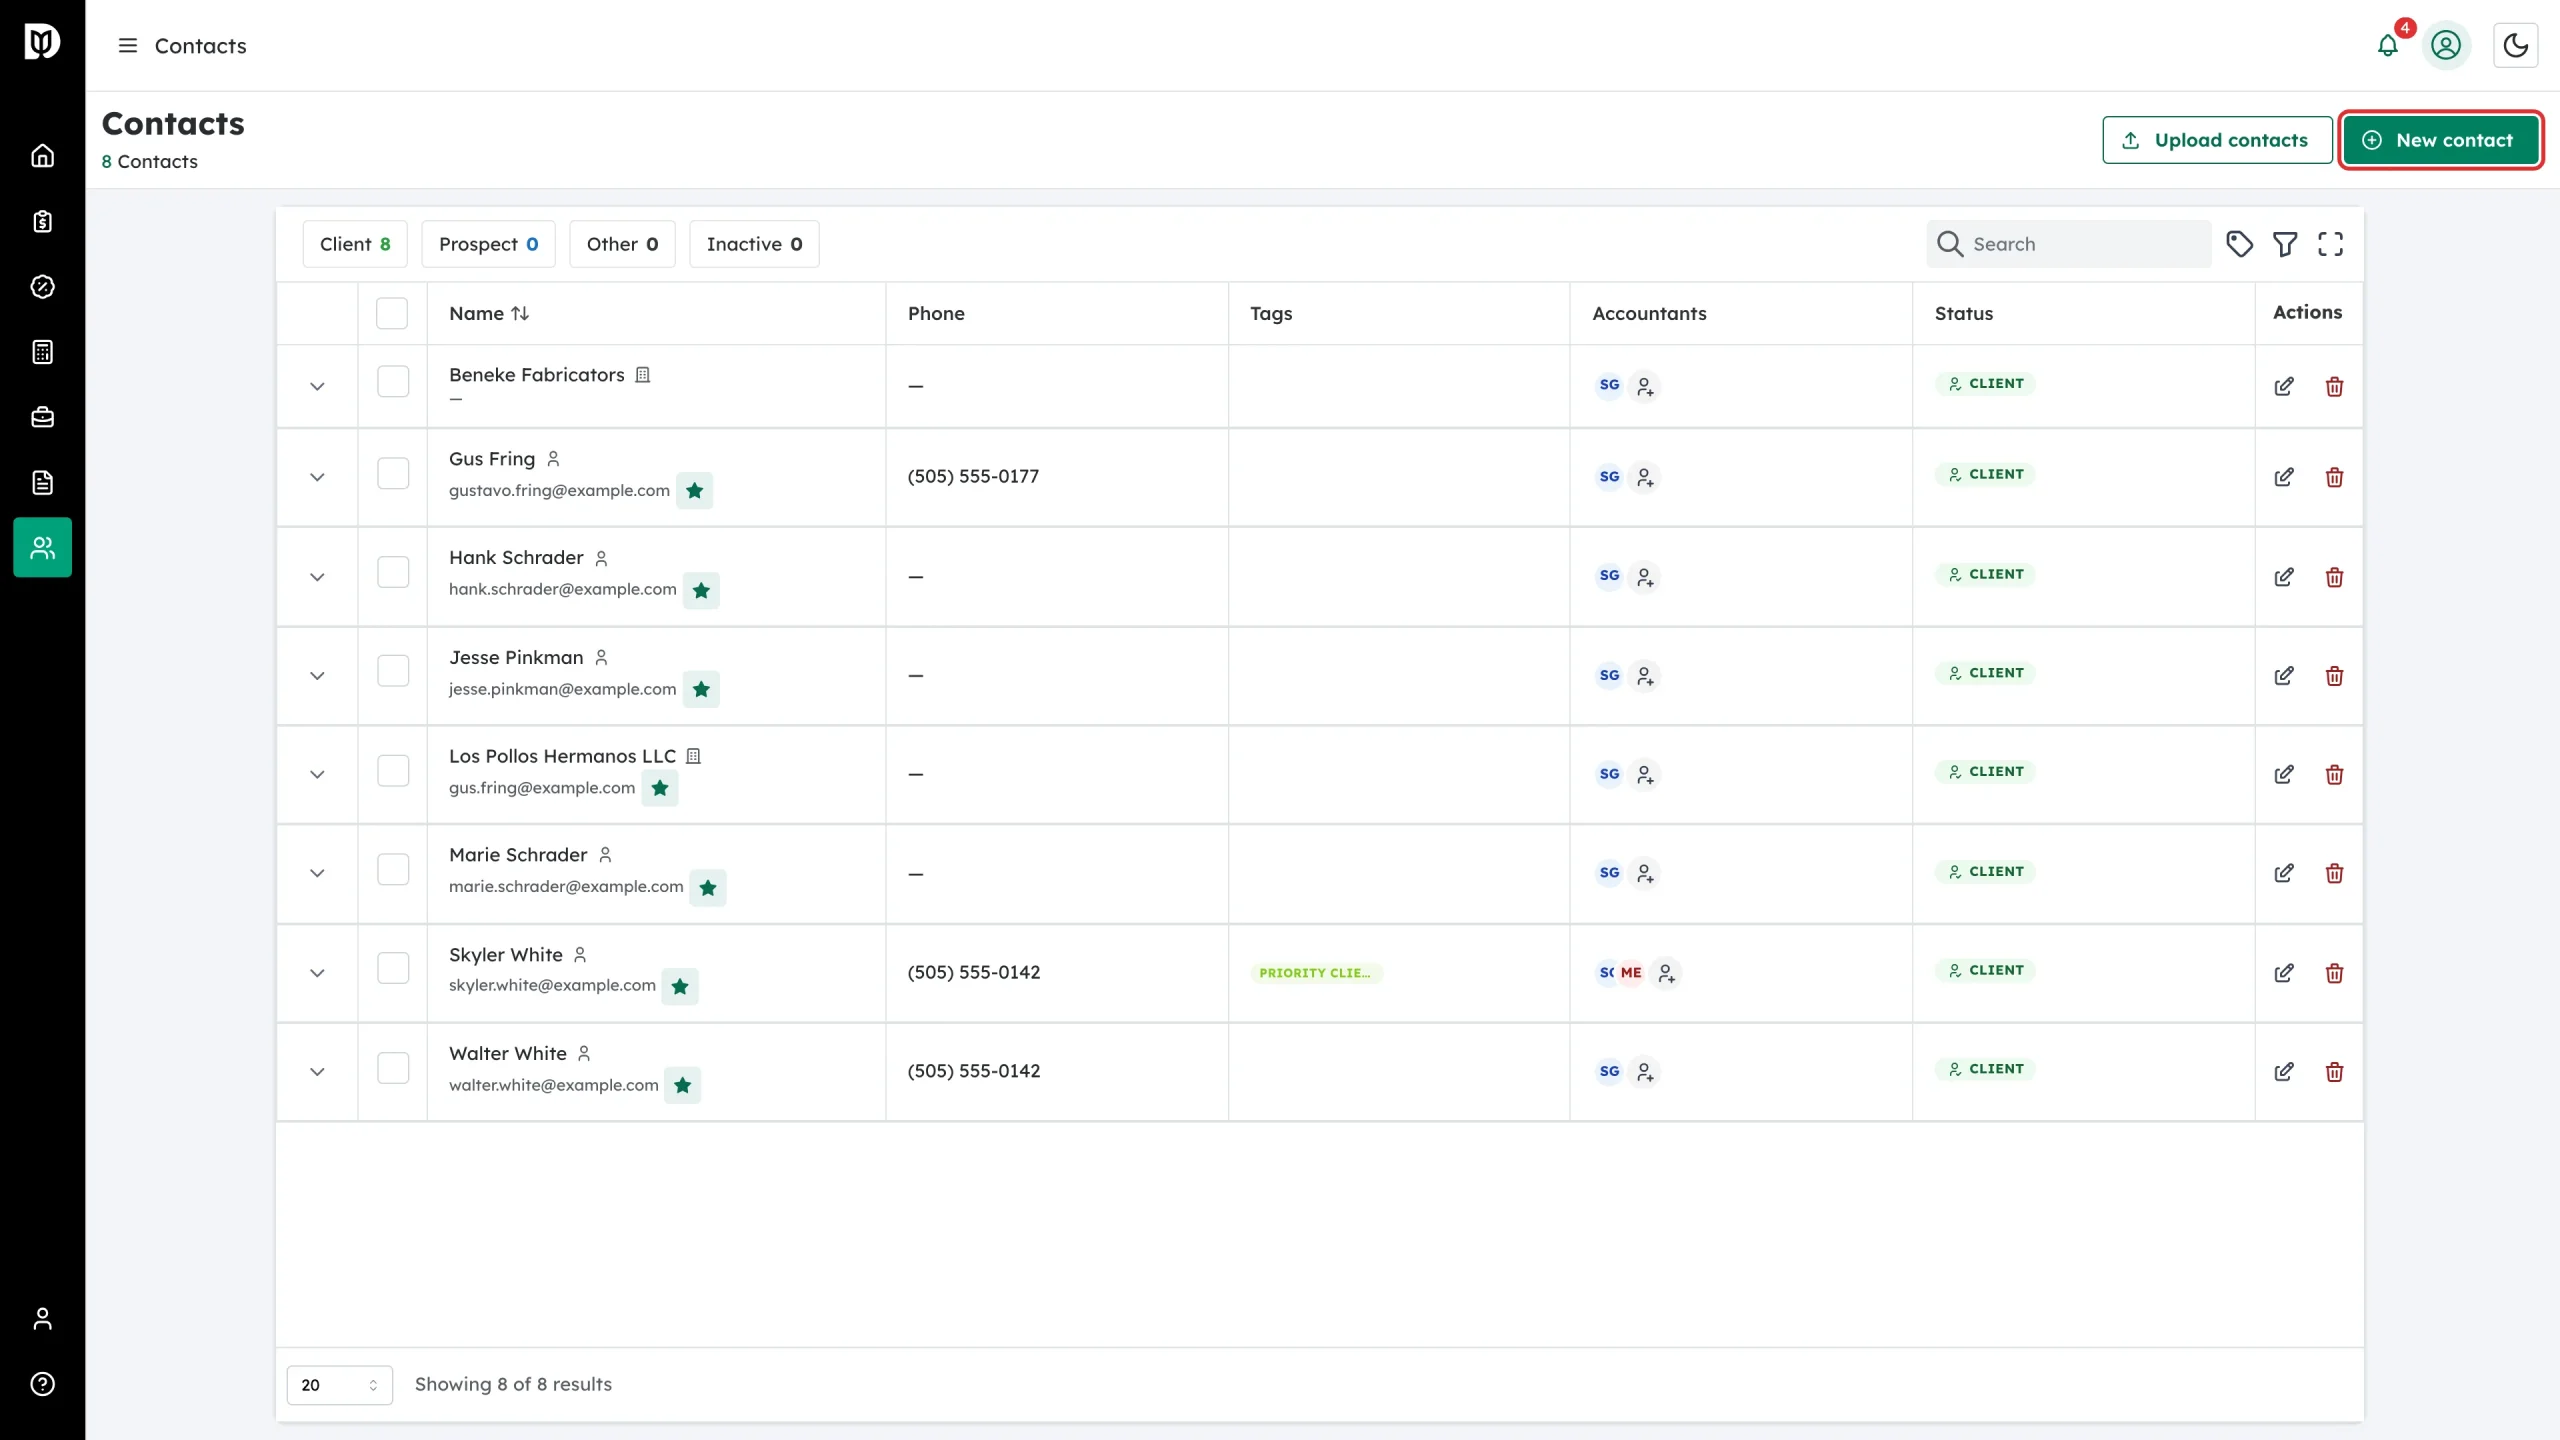
On Contacts, select New contact.
Step 2: Describe the entity
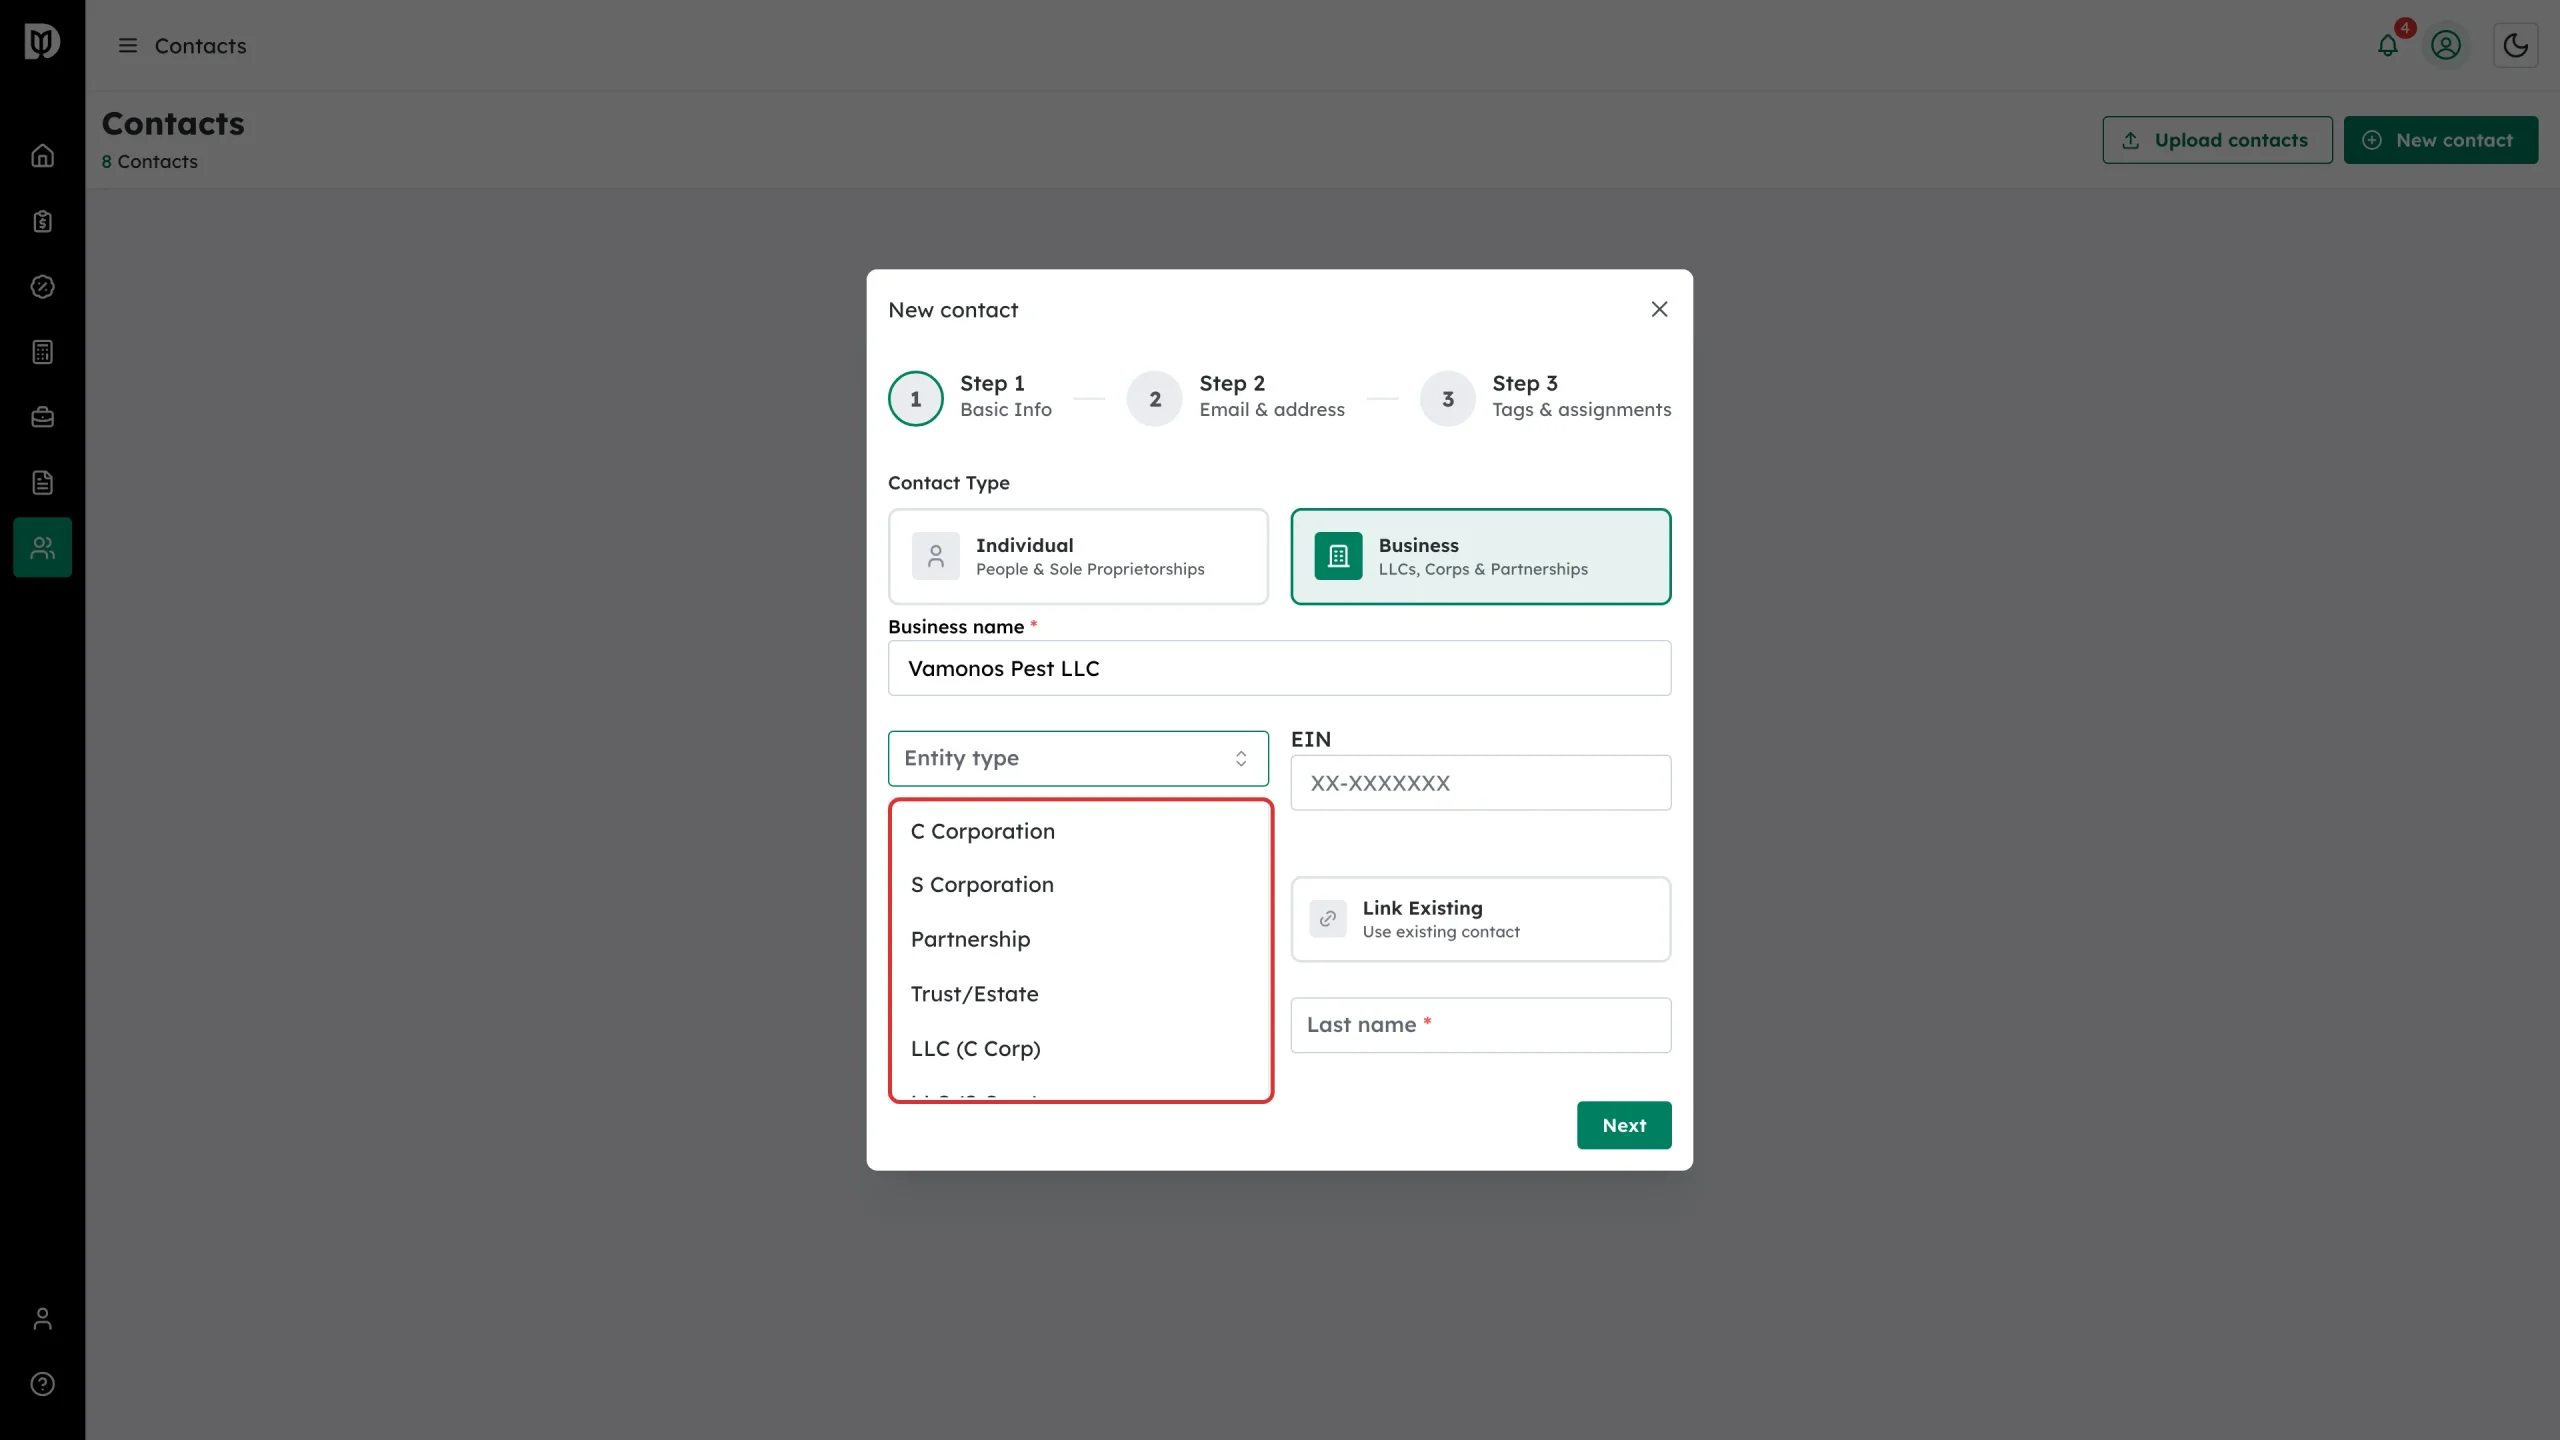
Choose Individual or Business. For a business, enter the business name and pick the Entity type — C Corporation, S Corporation, Partnership, Trust/Estate, LLC (C Corp), LLC (S Corp), LLC (Partnership) or Other — and add the EIN if you have it. Name the primary contact person, or link an existing contact as that person.
Step 3: Set the status to Prospect
Work through to Step 3: Tags & assignments and set Status to Prospect, then create the contact.
Step 4: Find your prospects
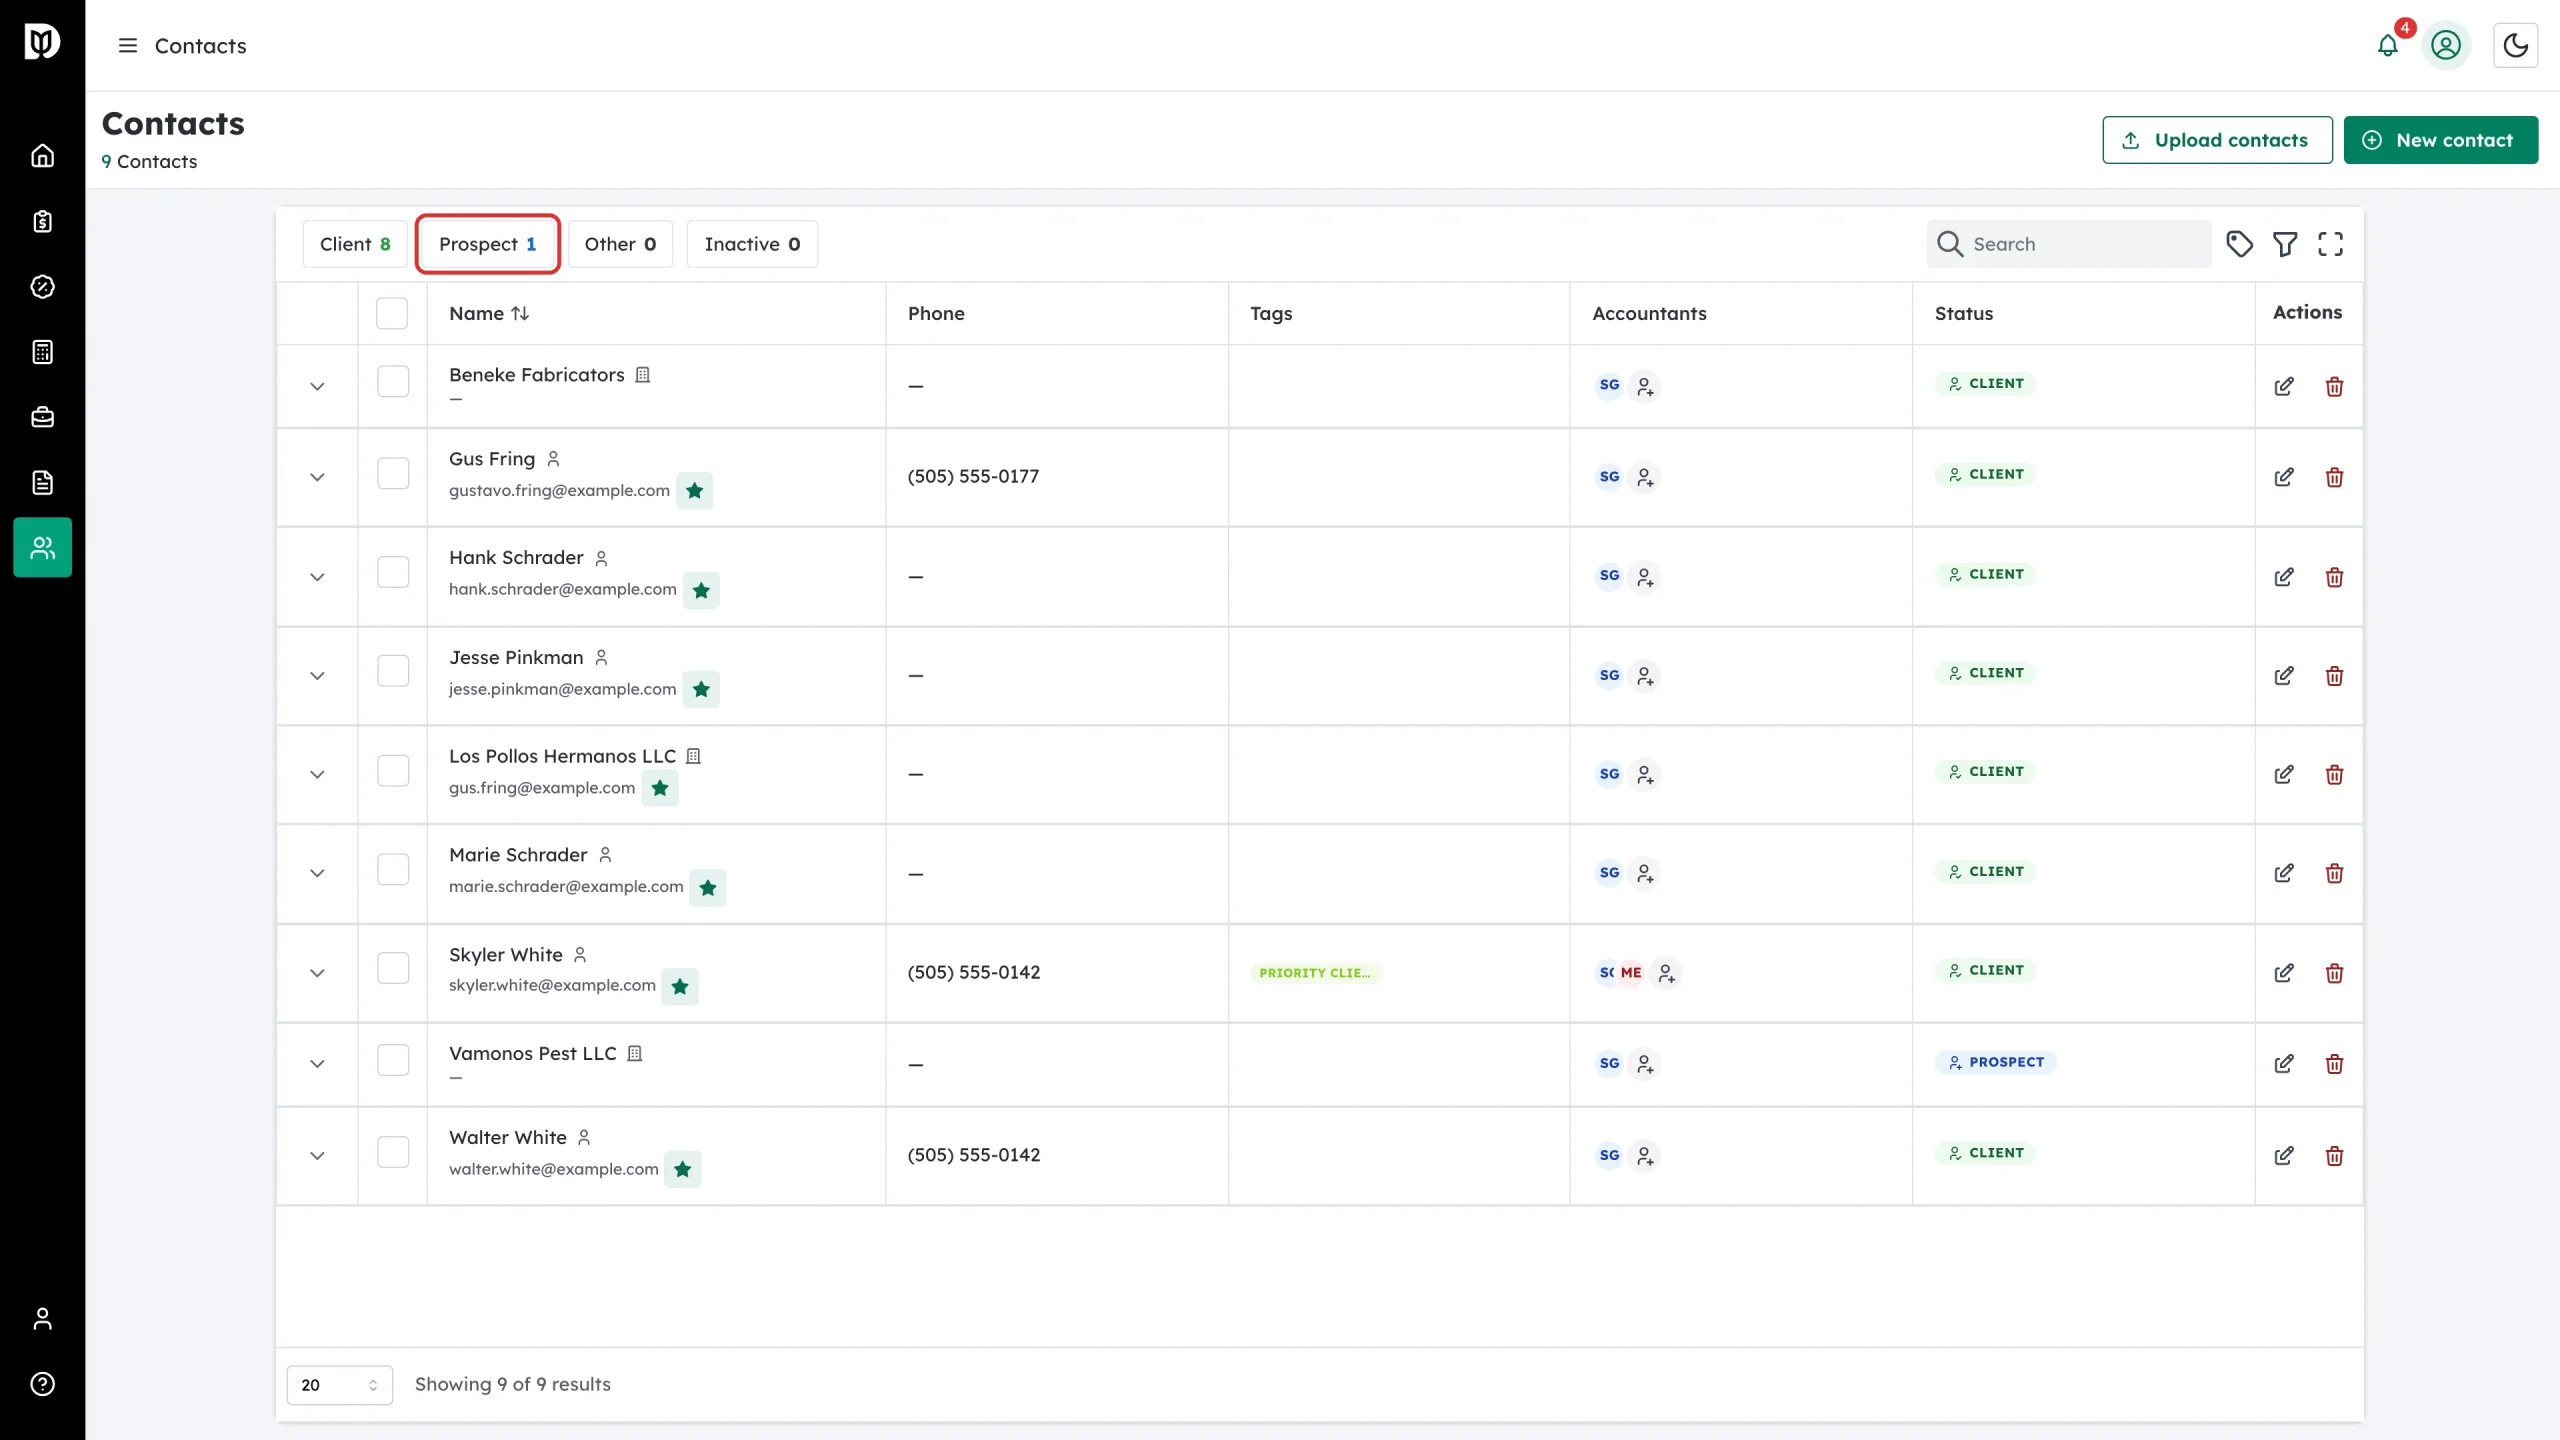
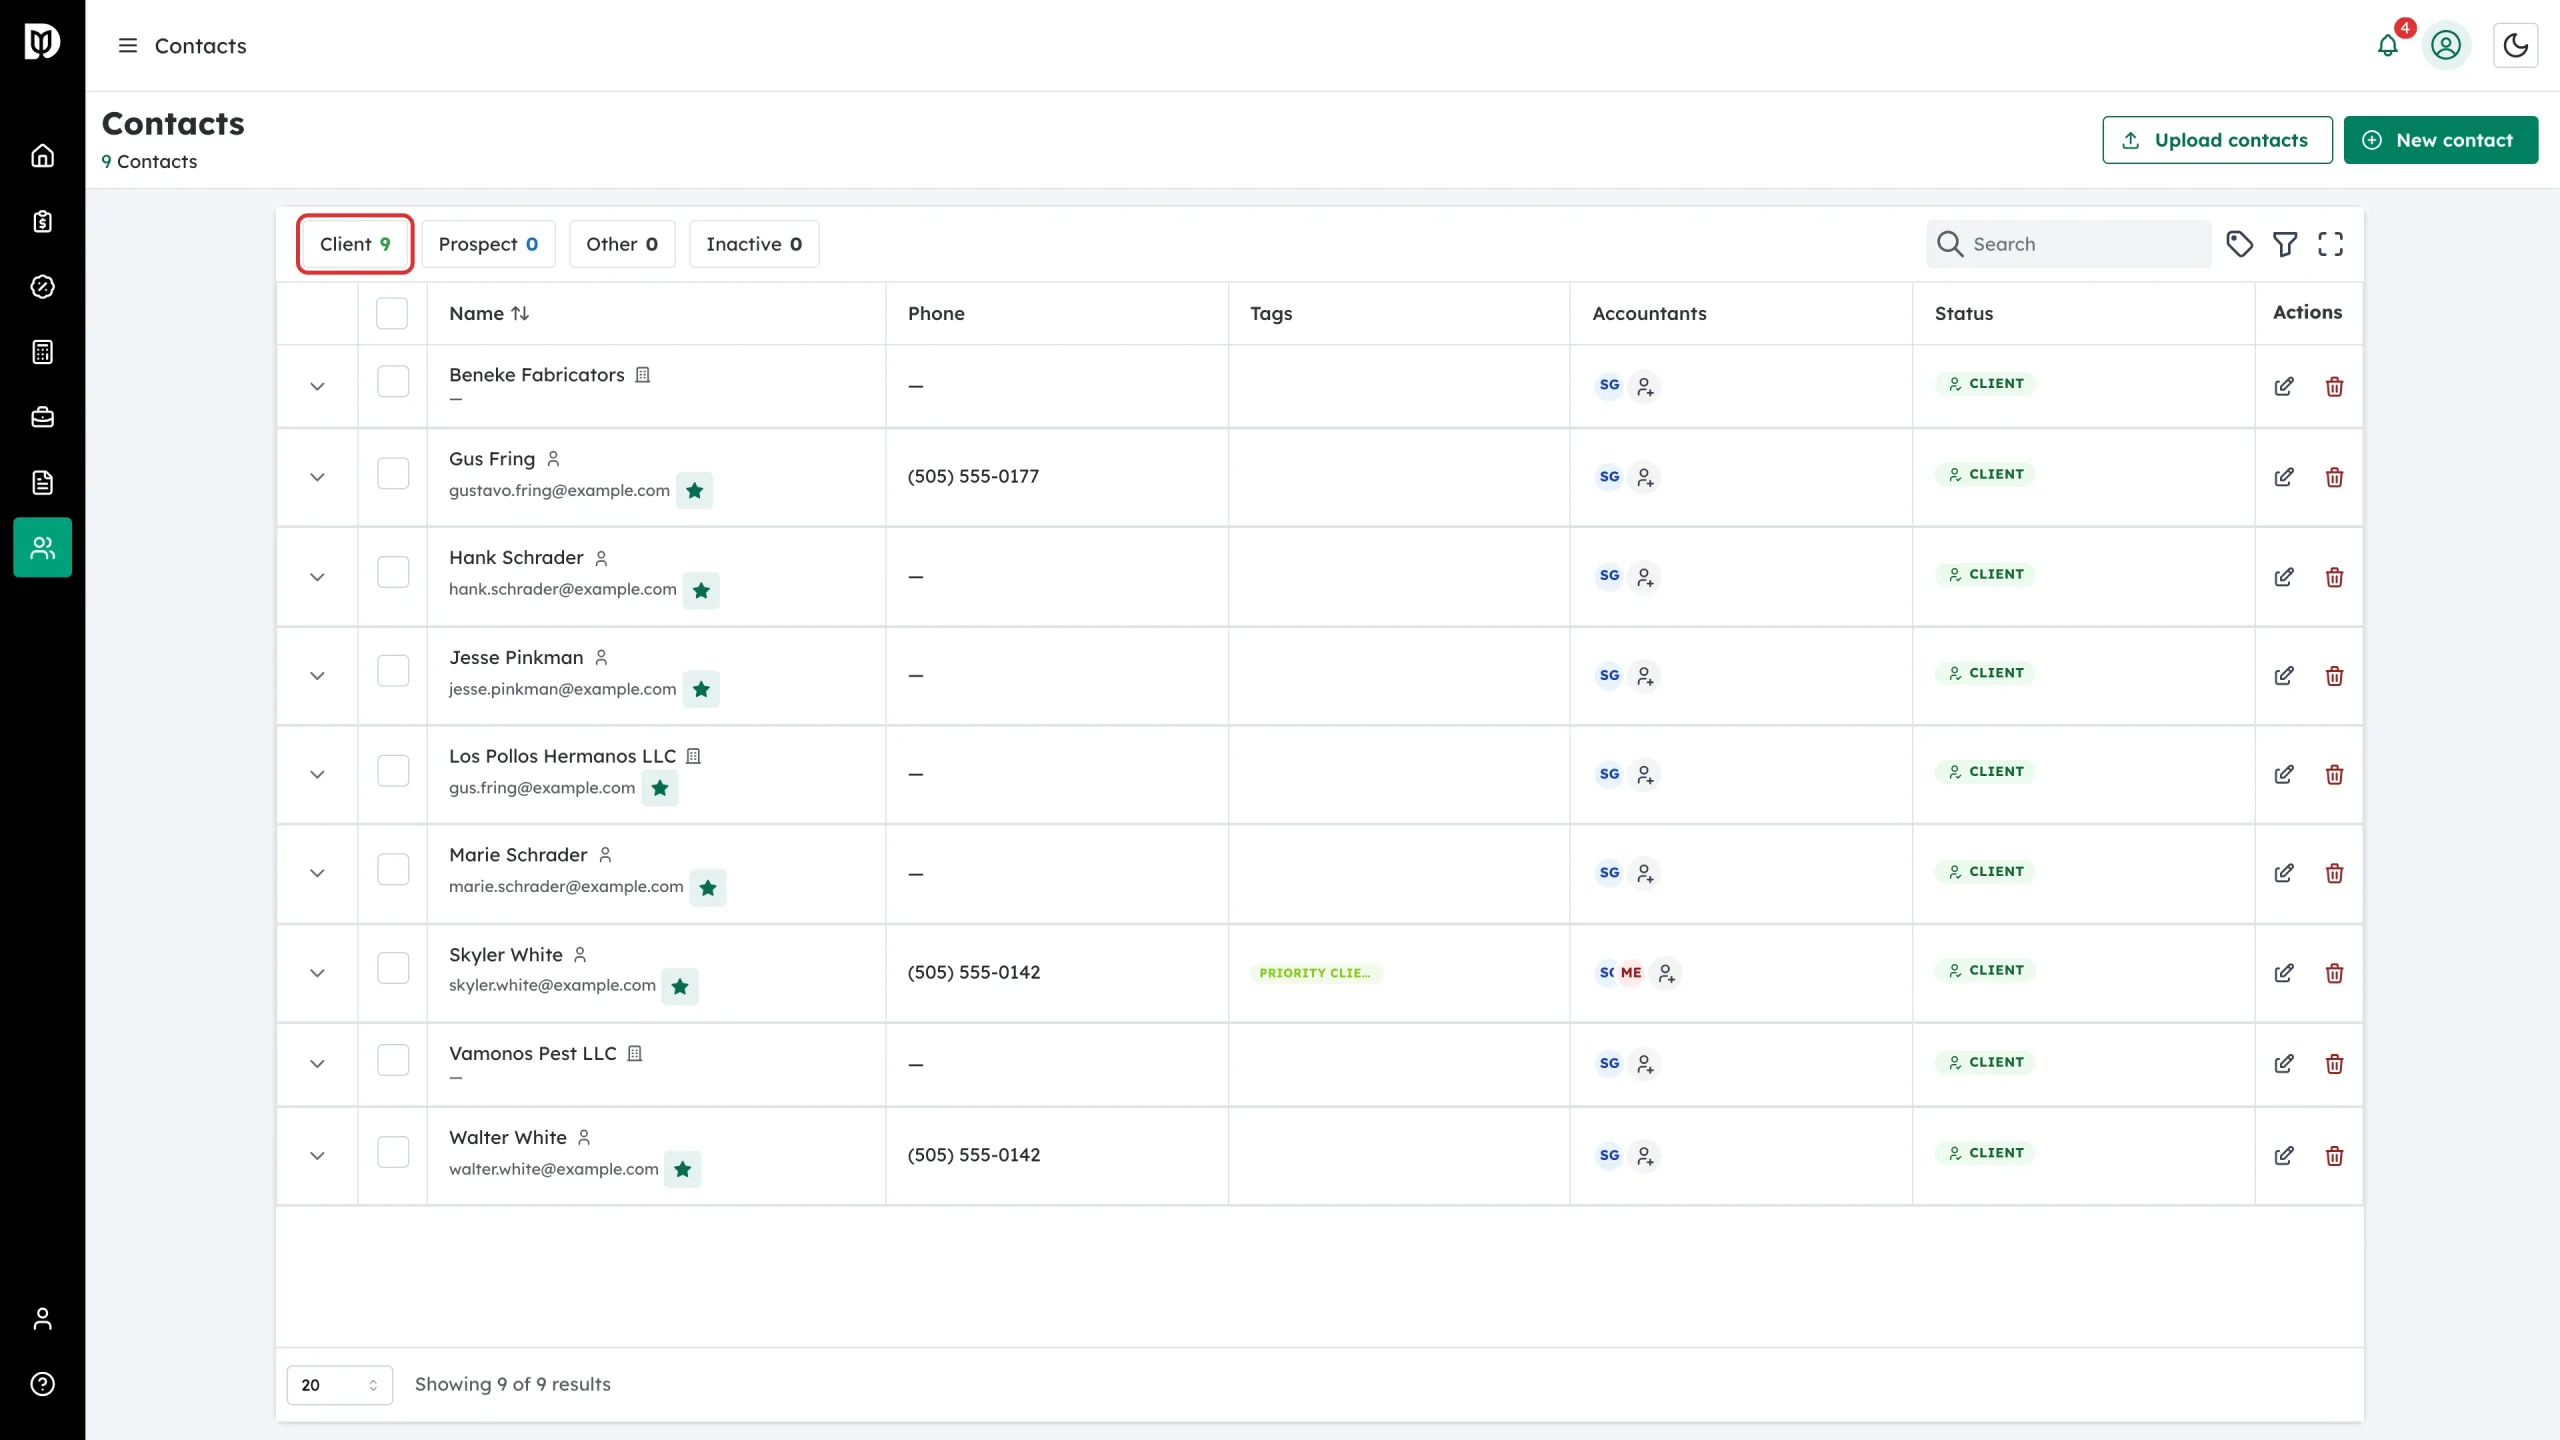
Back on the list, the Prospect chip now counts them. Select it to show only prospects.
Step 5: Read the status on the row
The Status column carries the same label on every row, so you can tell prospects from clients at a glance in an unfiltered list.
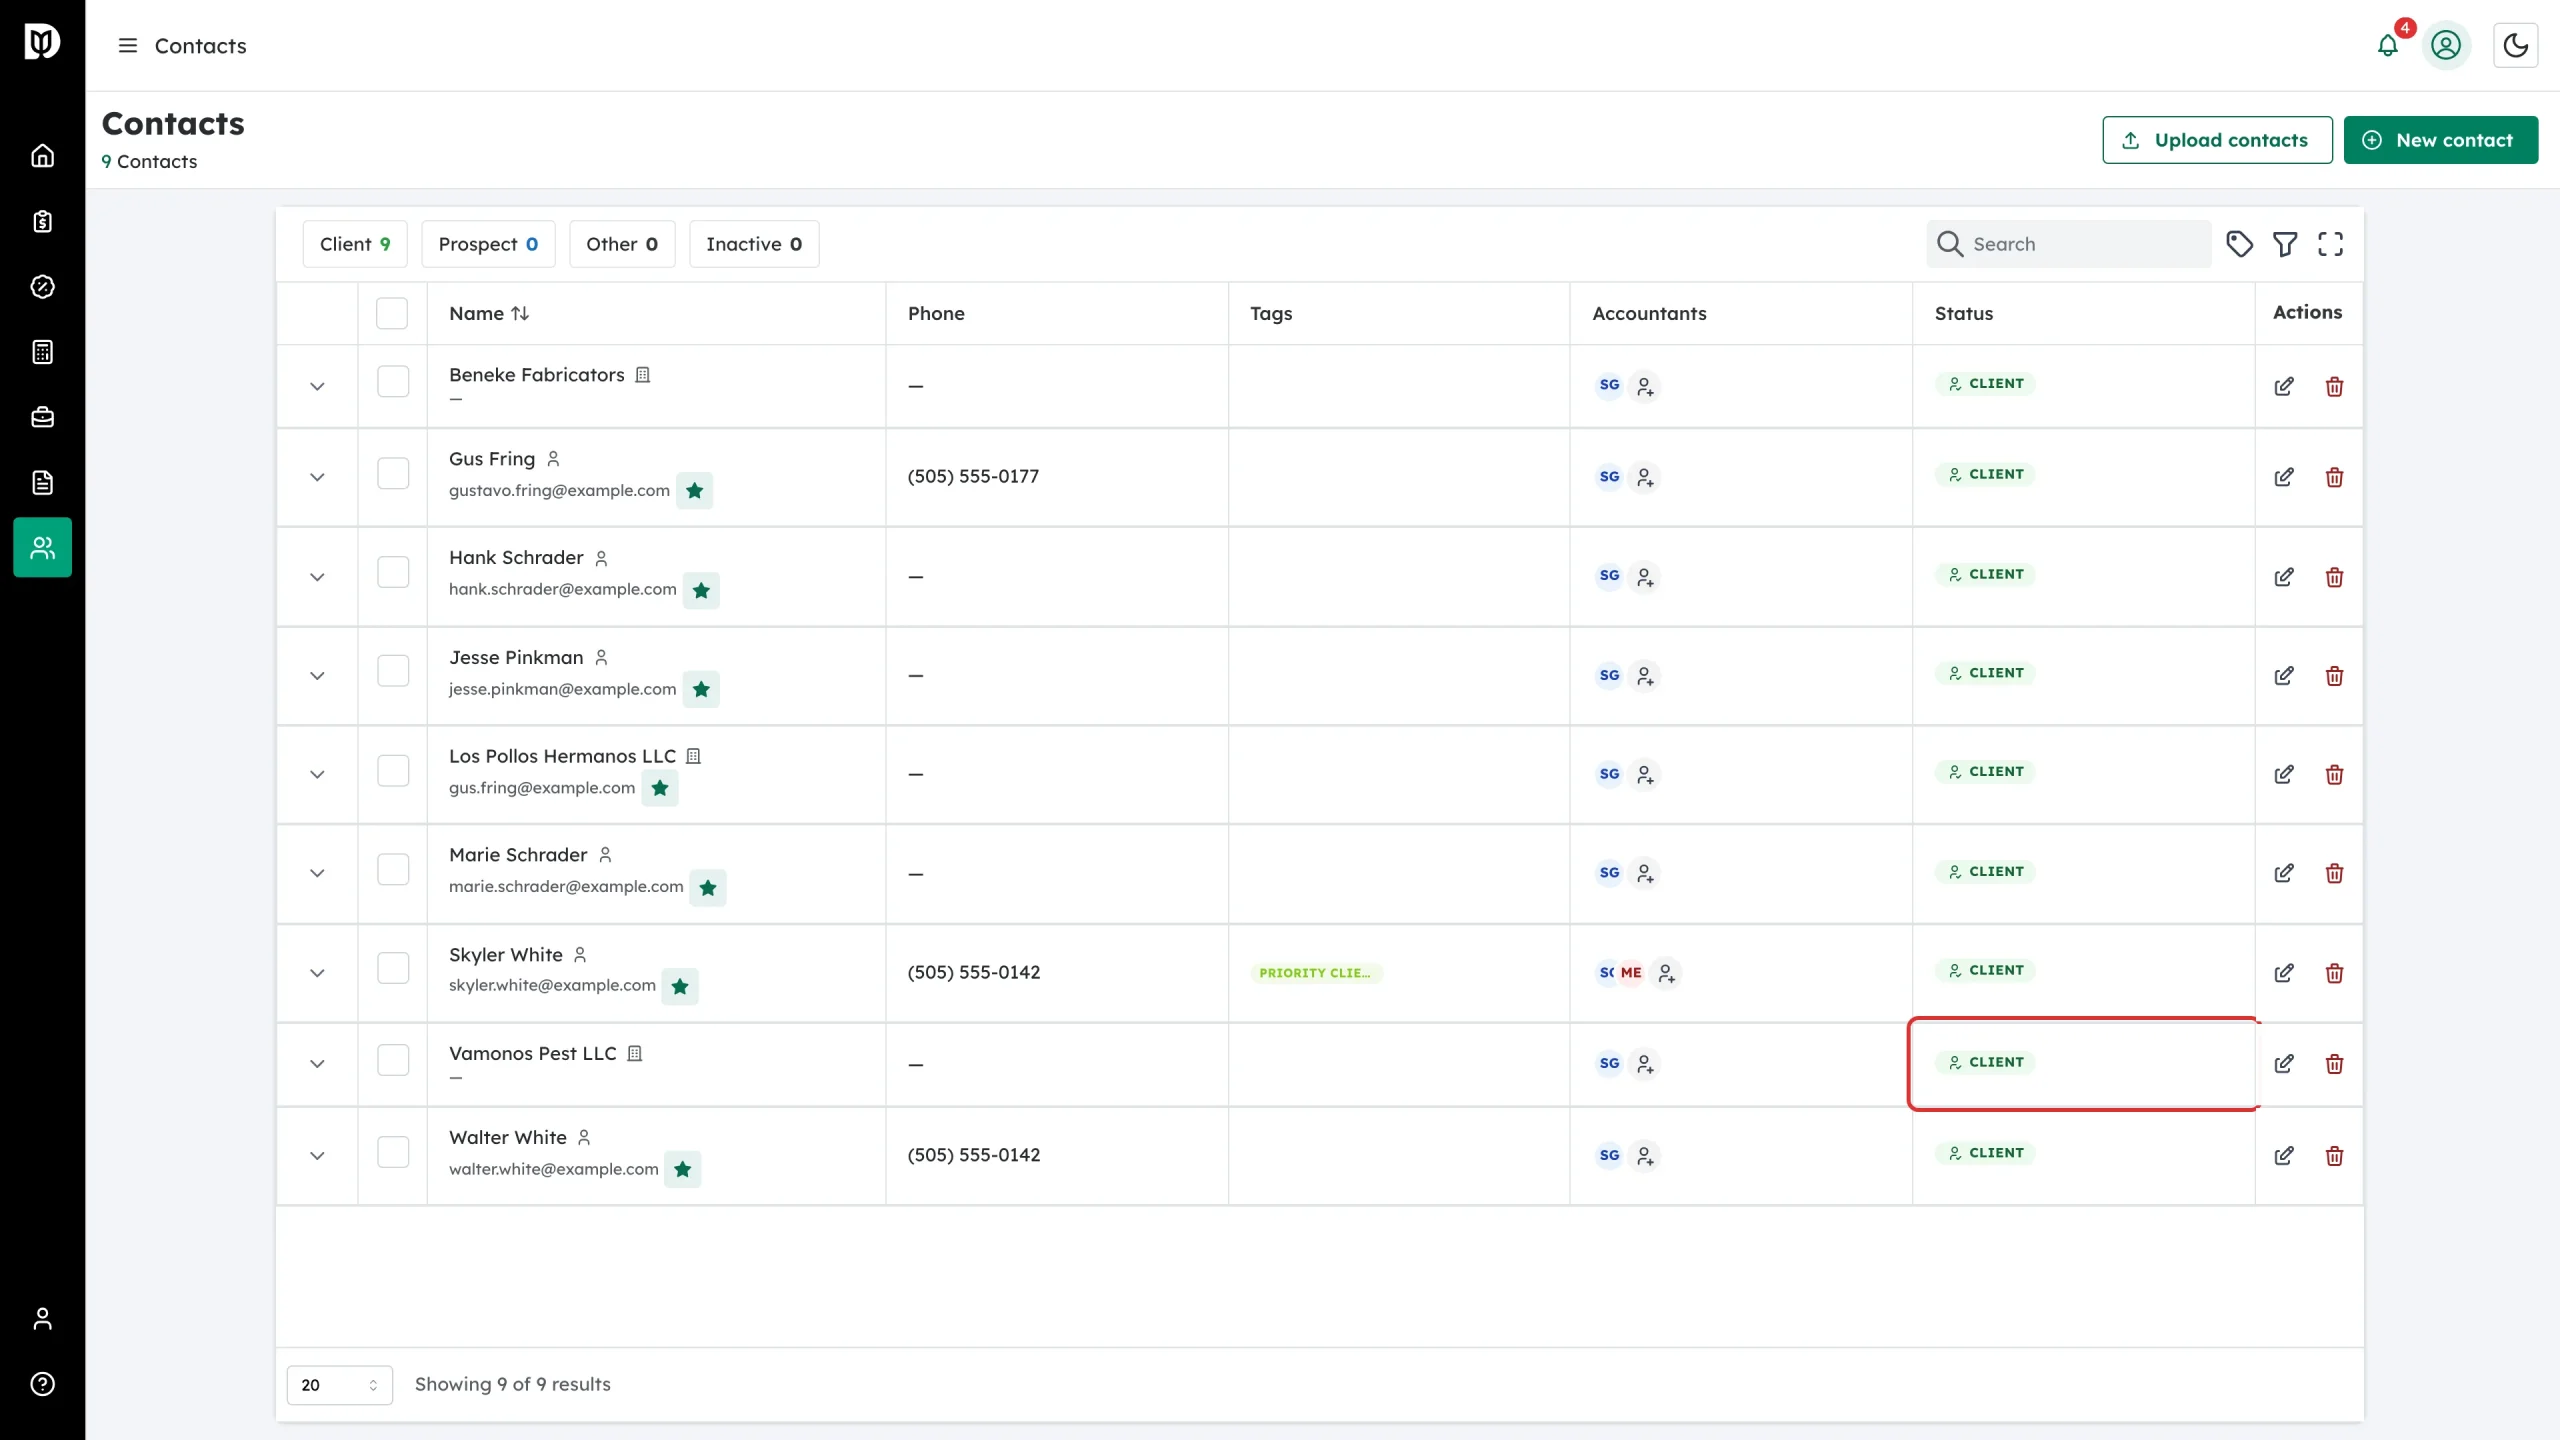
Step 6: Open the contact to convert it
When the prospect signs, open them and select the edit icon on the profile card.
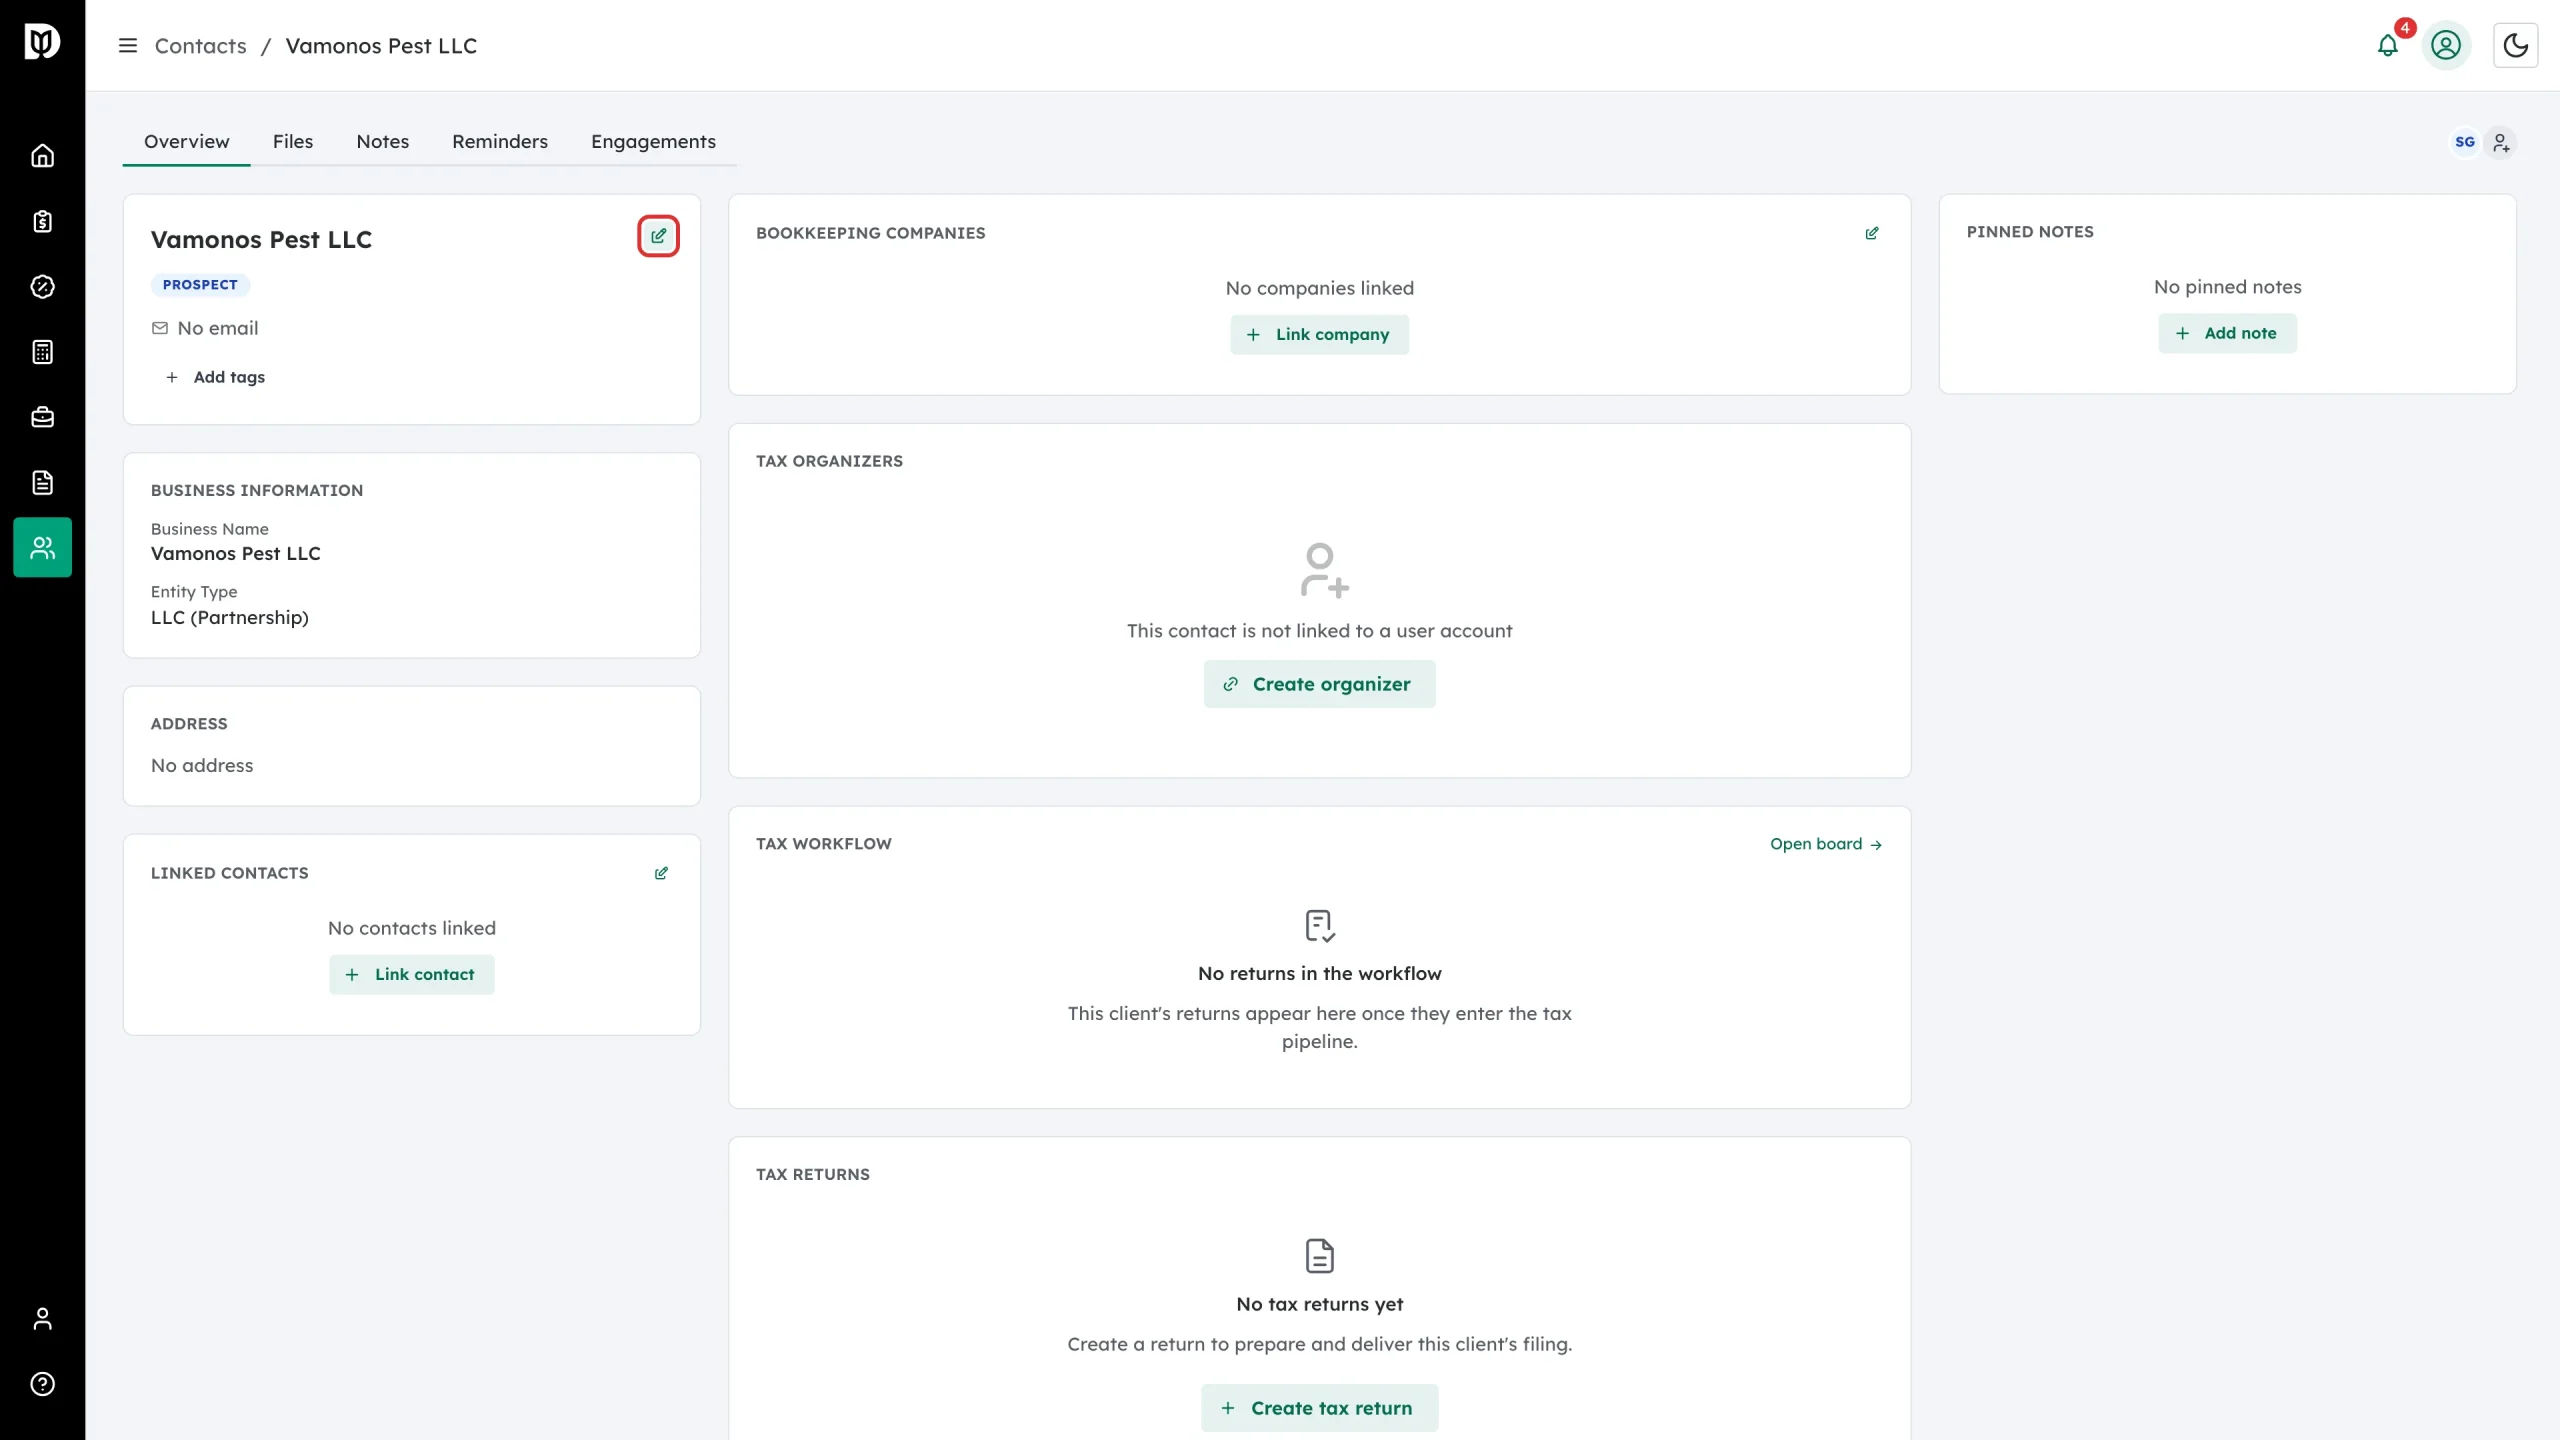
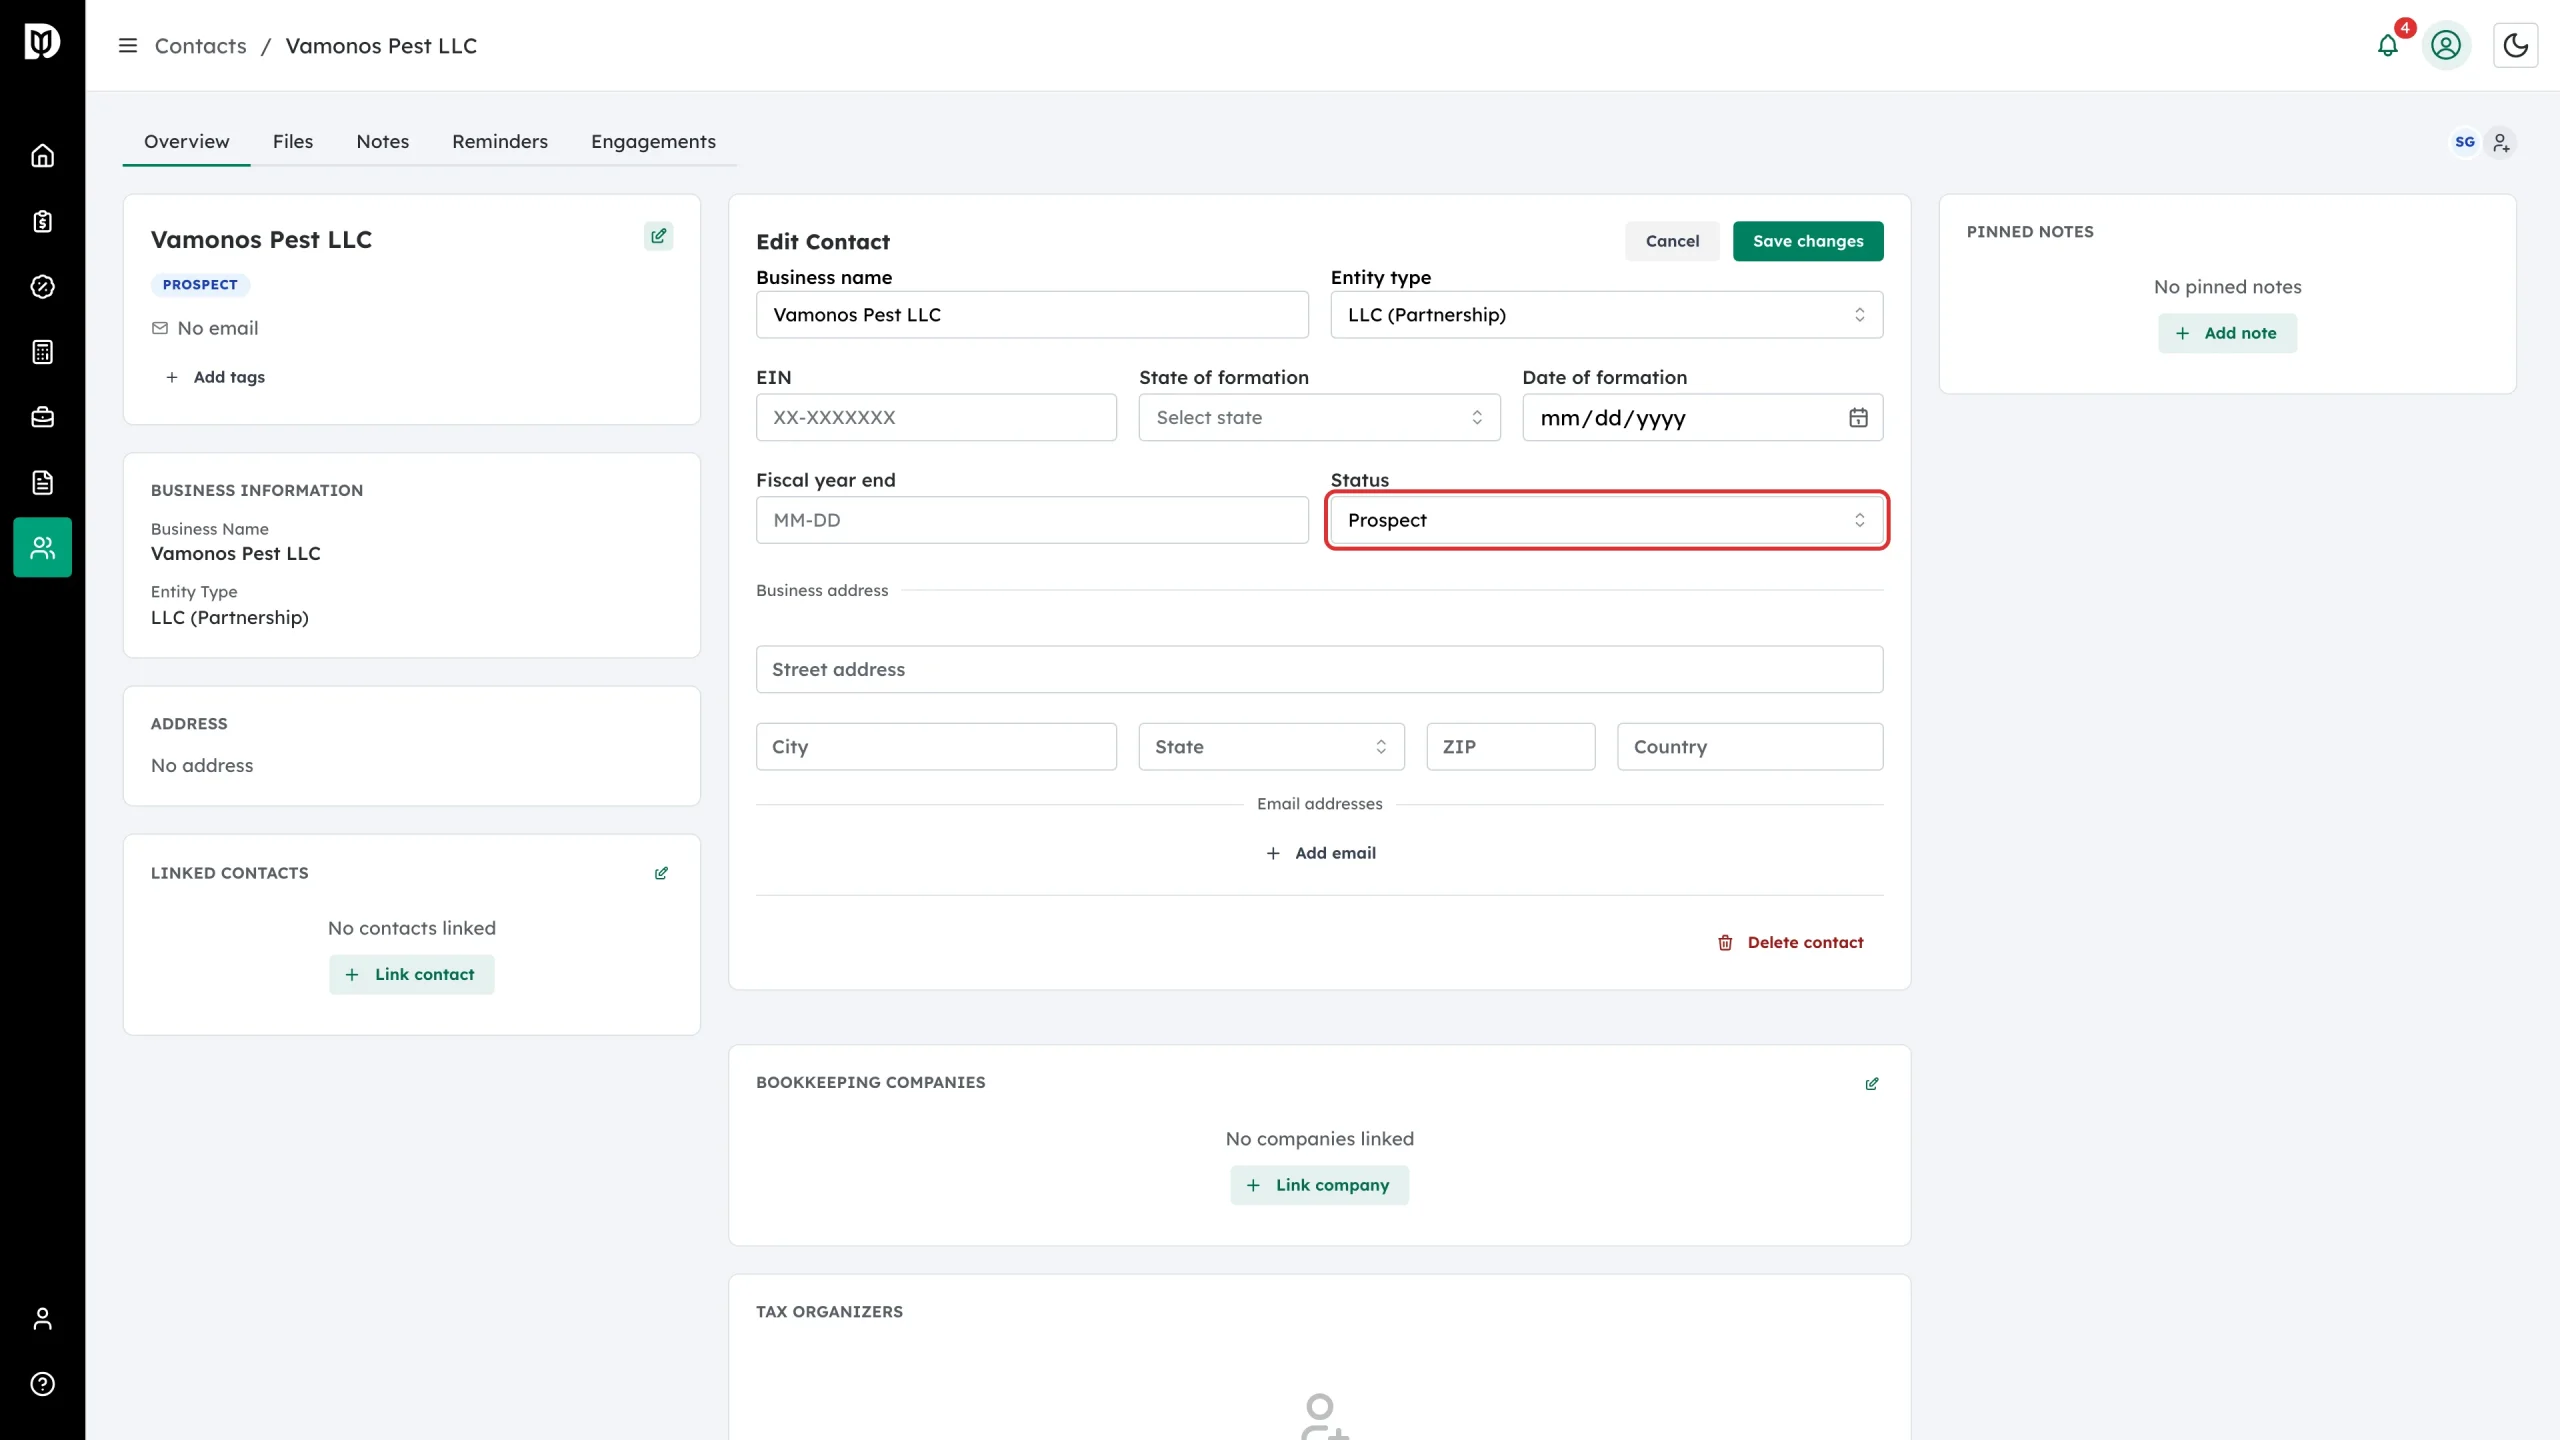
Step 7: Change the status
In Edit Contact, set Status to Client.
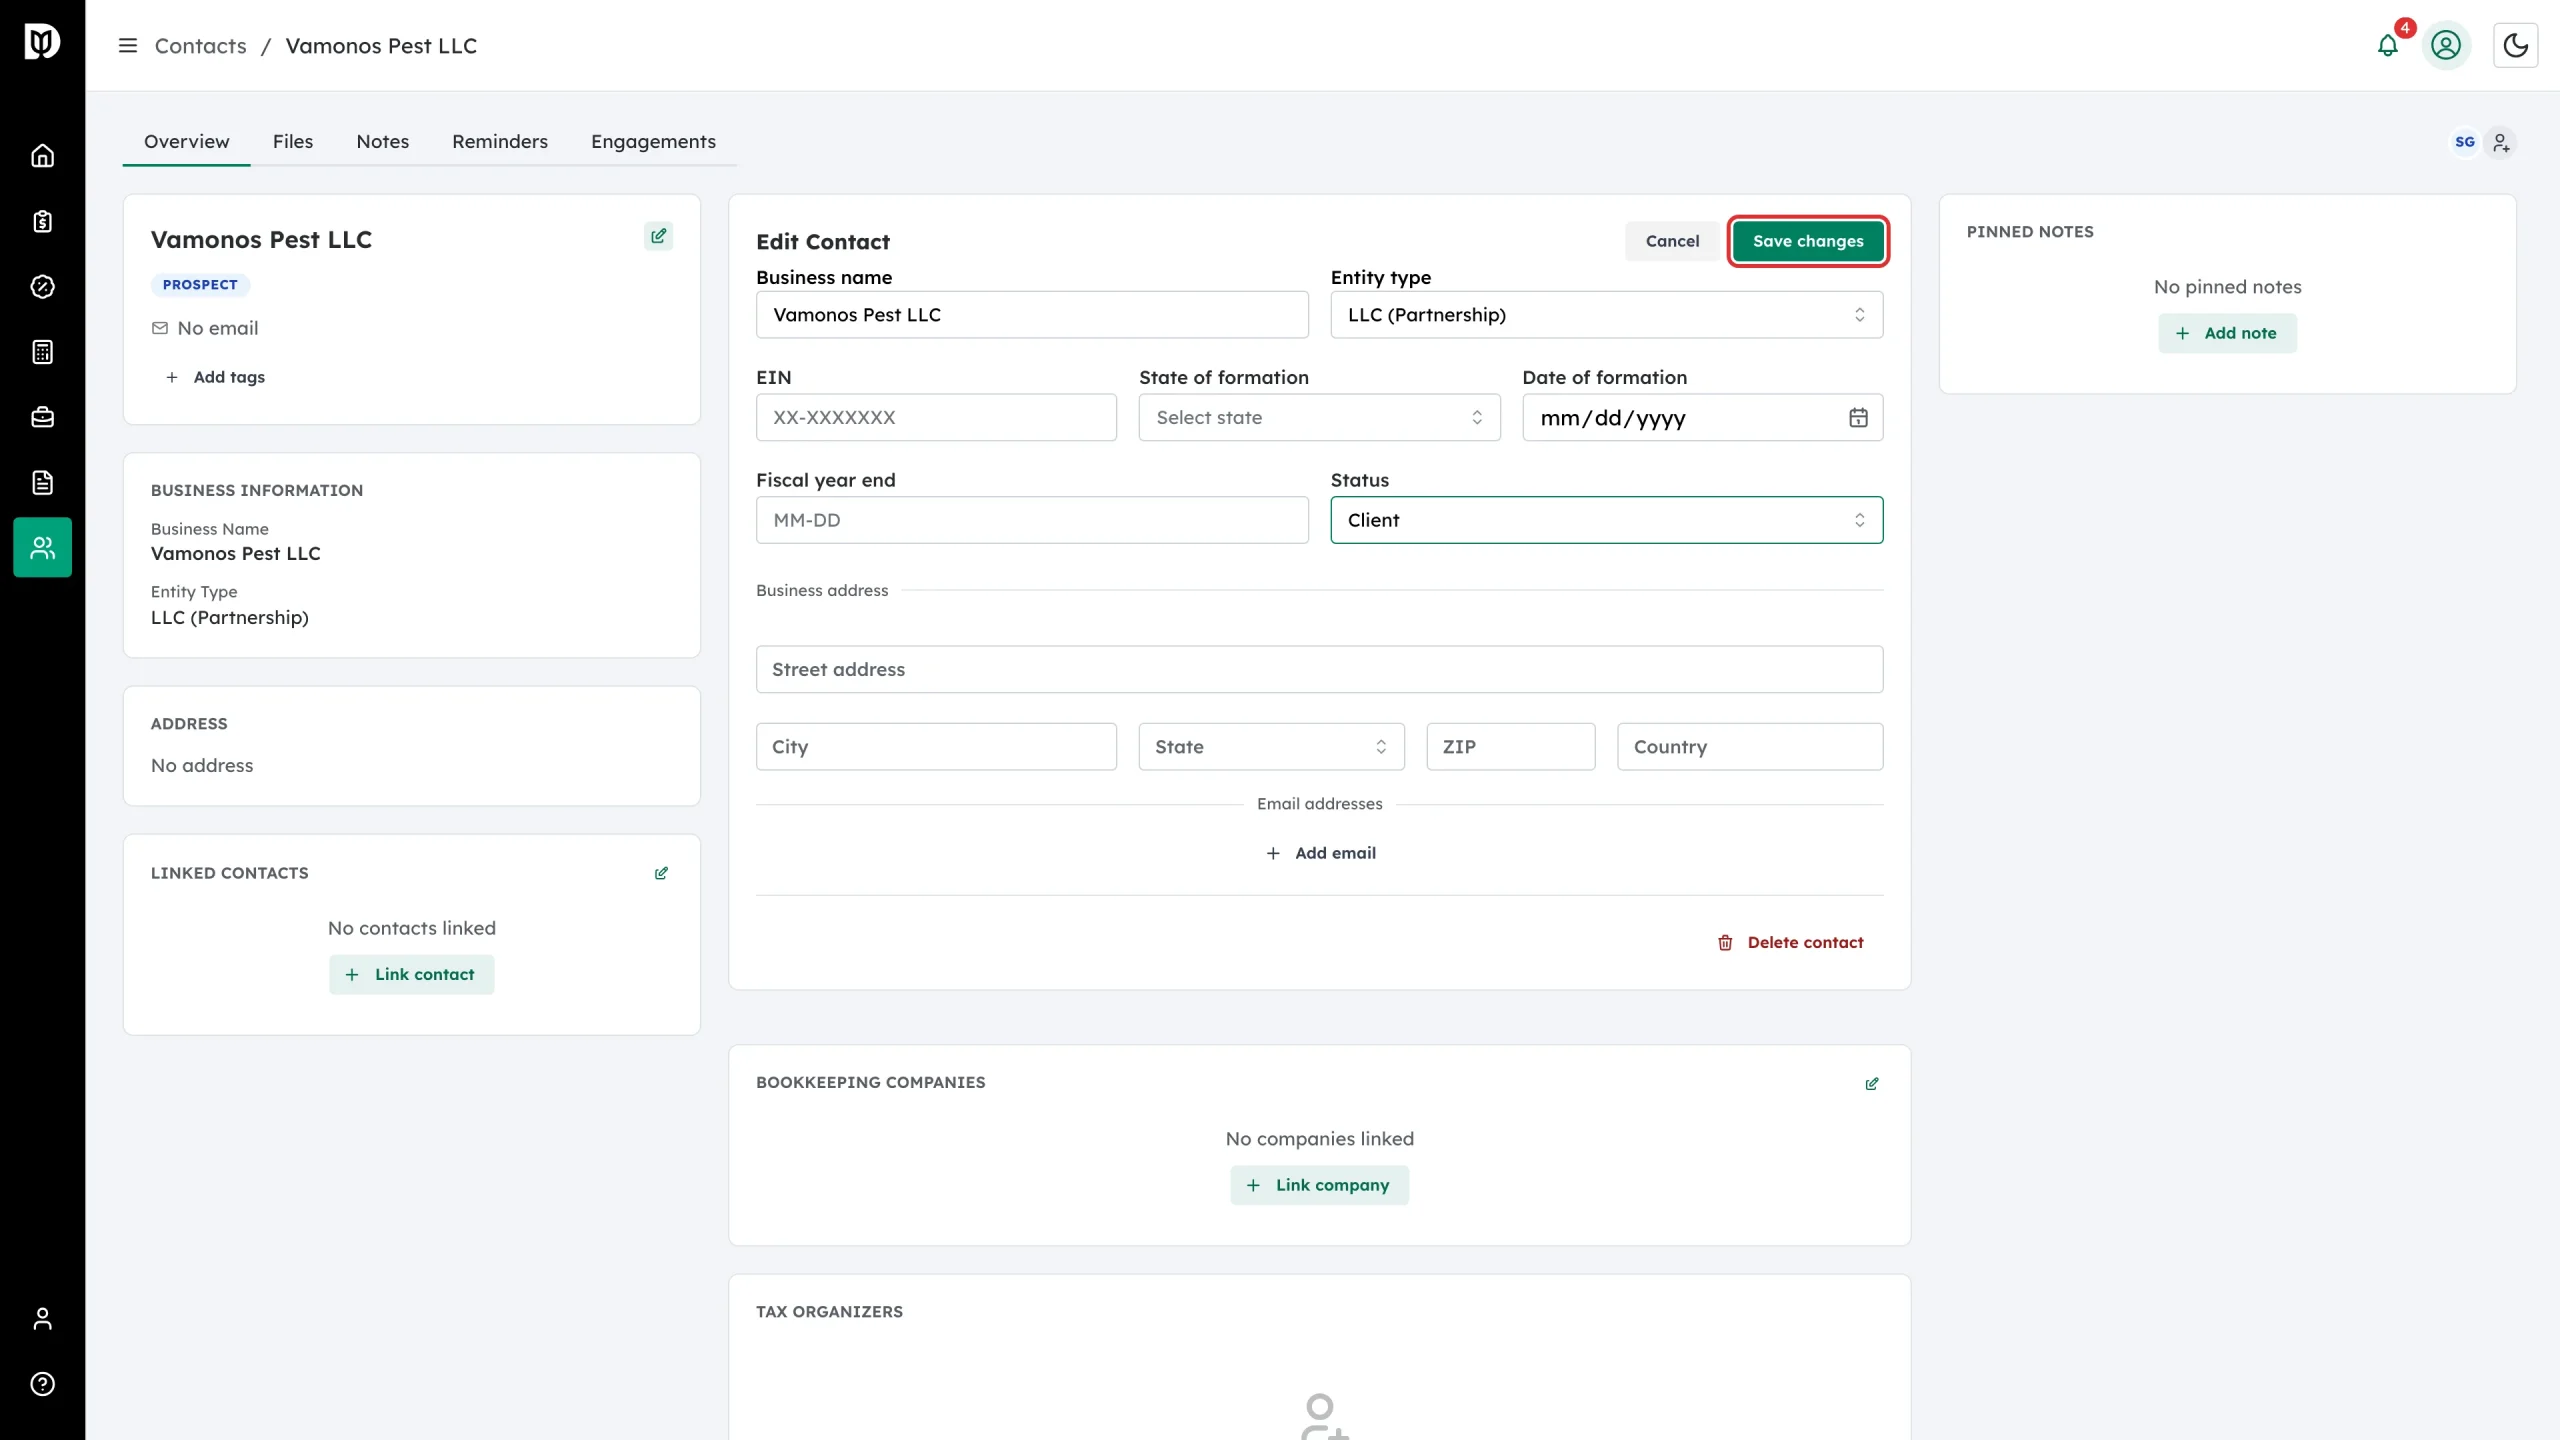
Step 8: Save
Select Save changes.
Step 9: Convert several at once
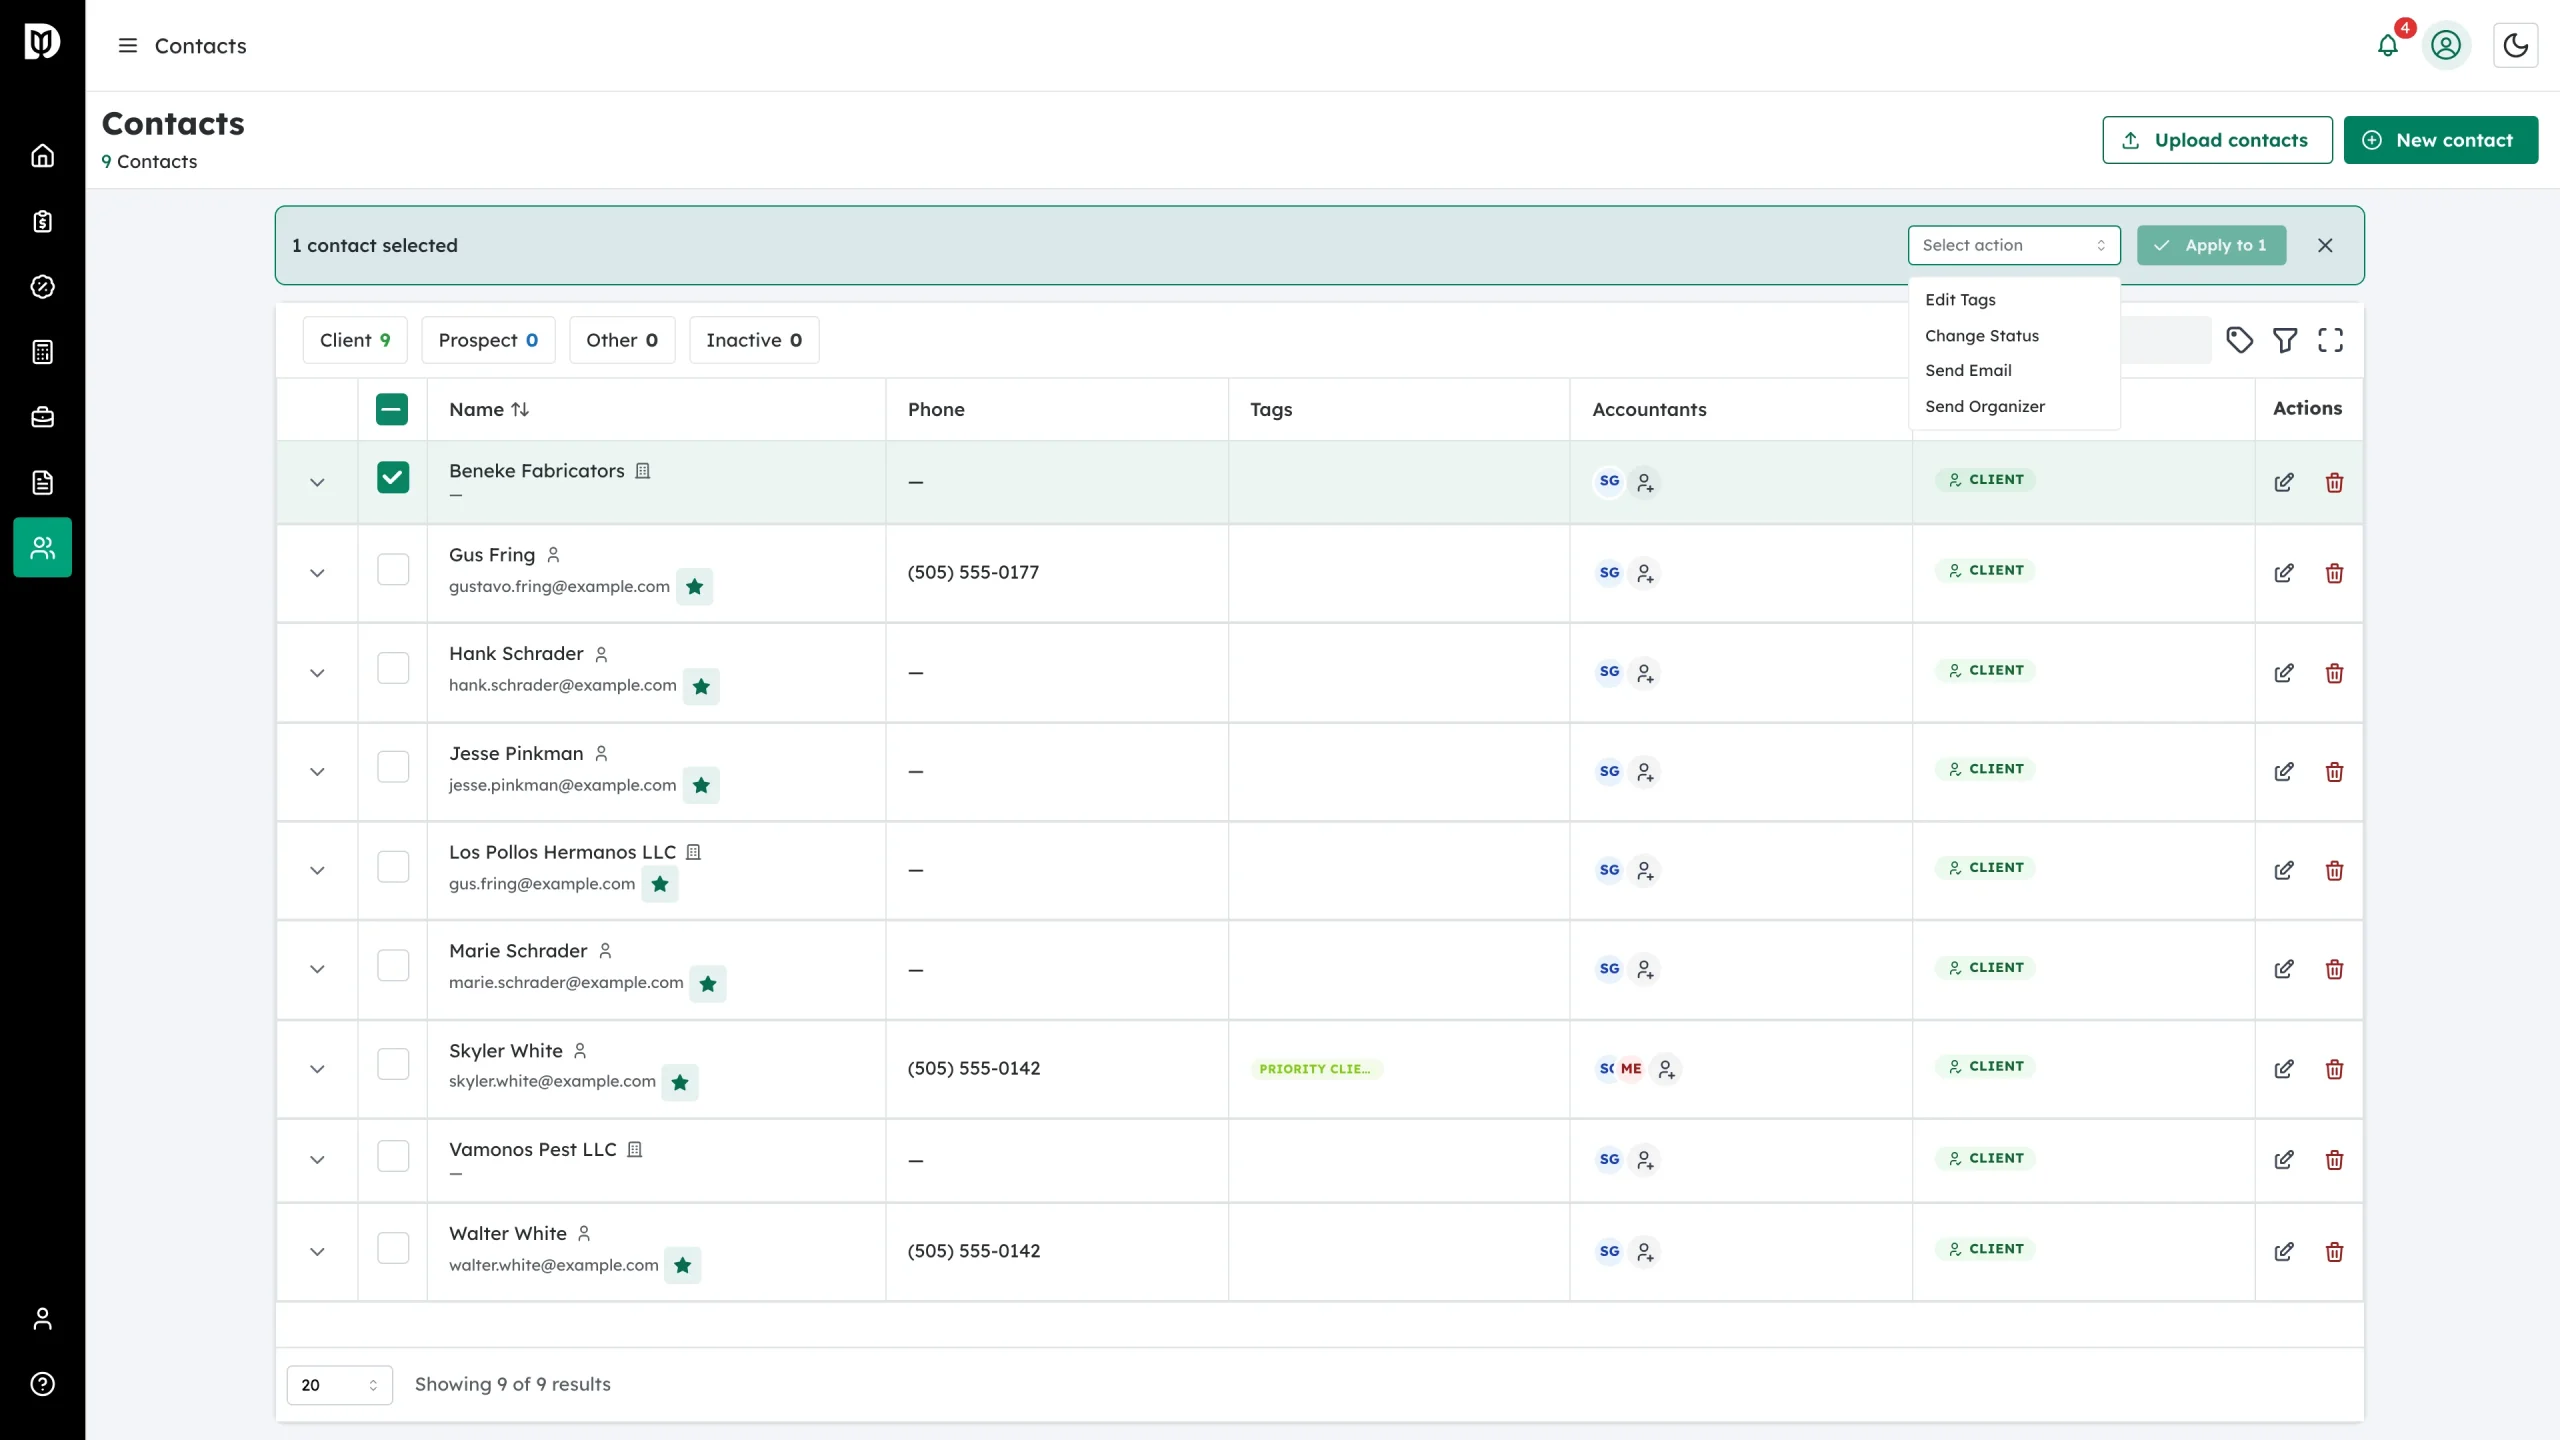
To move a group, tick their rows on the list, choose Change Status under Select action, pick the new status and apply it. The same bar can also edit tags, send an email or send an organizer.
Step 10: Check the counts
The chips re-count as soon as the change saves.
What happens next
The contact keeps everything it already had — emails, tags, assigned accountants, notes and files — and simply reads as a client from now on. Anything you build for them next, such as a proposal, an engagement or a job card on the workflow board, attaches to the same record.
Troubleshooting
- New contacts keep coming out as clients. Client is the default on step 3 of the wizard. Change it there when you are adding a prospect.
- The list is empty after selecting a chip. The chip is a filter. Select it again, or use Clear in the banner, to go back to the full list.
- Change Status is missing from the bulk bar. Tick at least one row first — the bar only appears with a selection.