Every company in Debits has five switches that decide whether your client may add brand-new list values while they answer their transactions.
With a switch off, the client can still pick any vendor, customer, category, class or location that already exists. With it on, they can also type a new one, and Debits creates it in QuickBooks Online when you approve the transaction.
The five switches
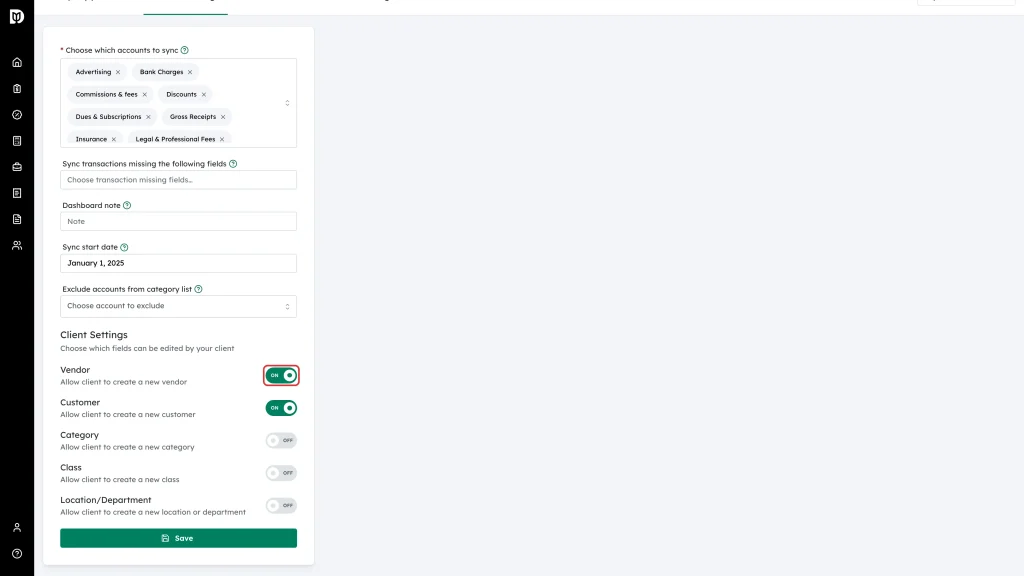
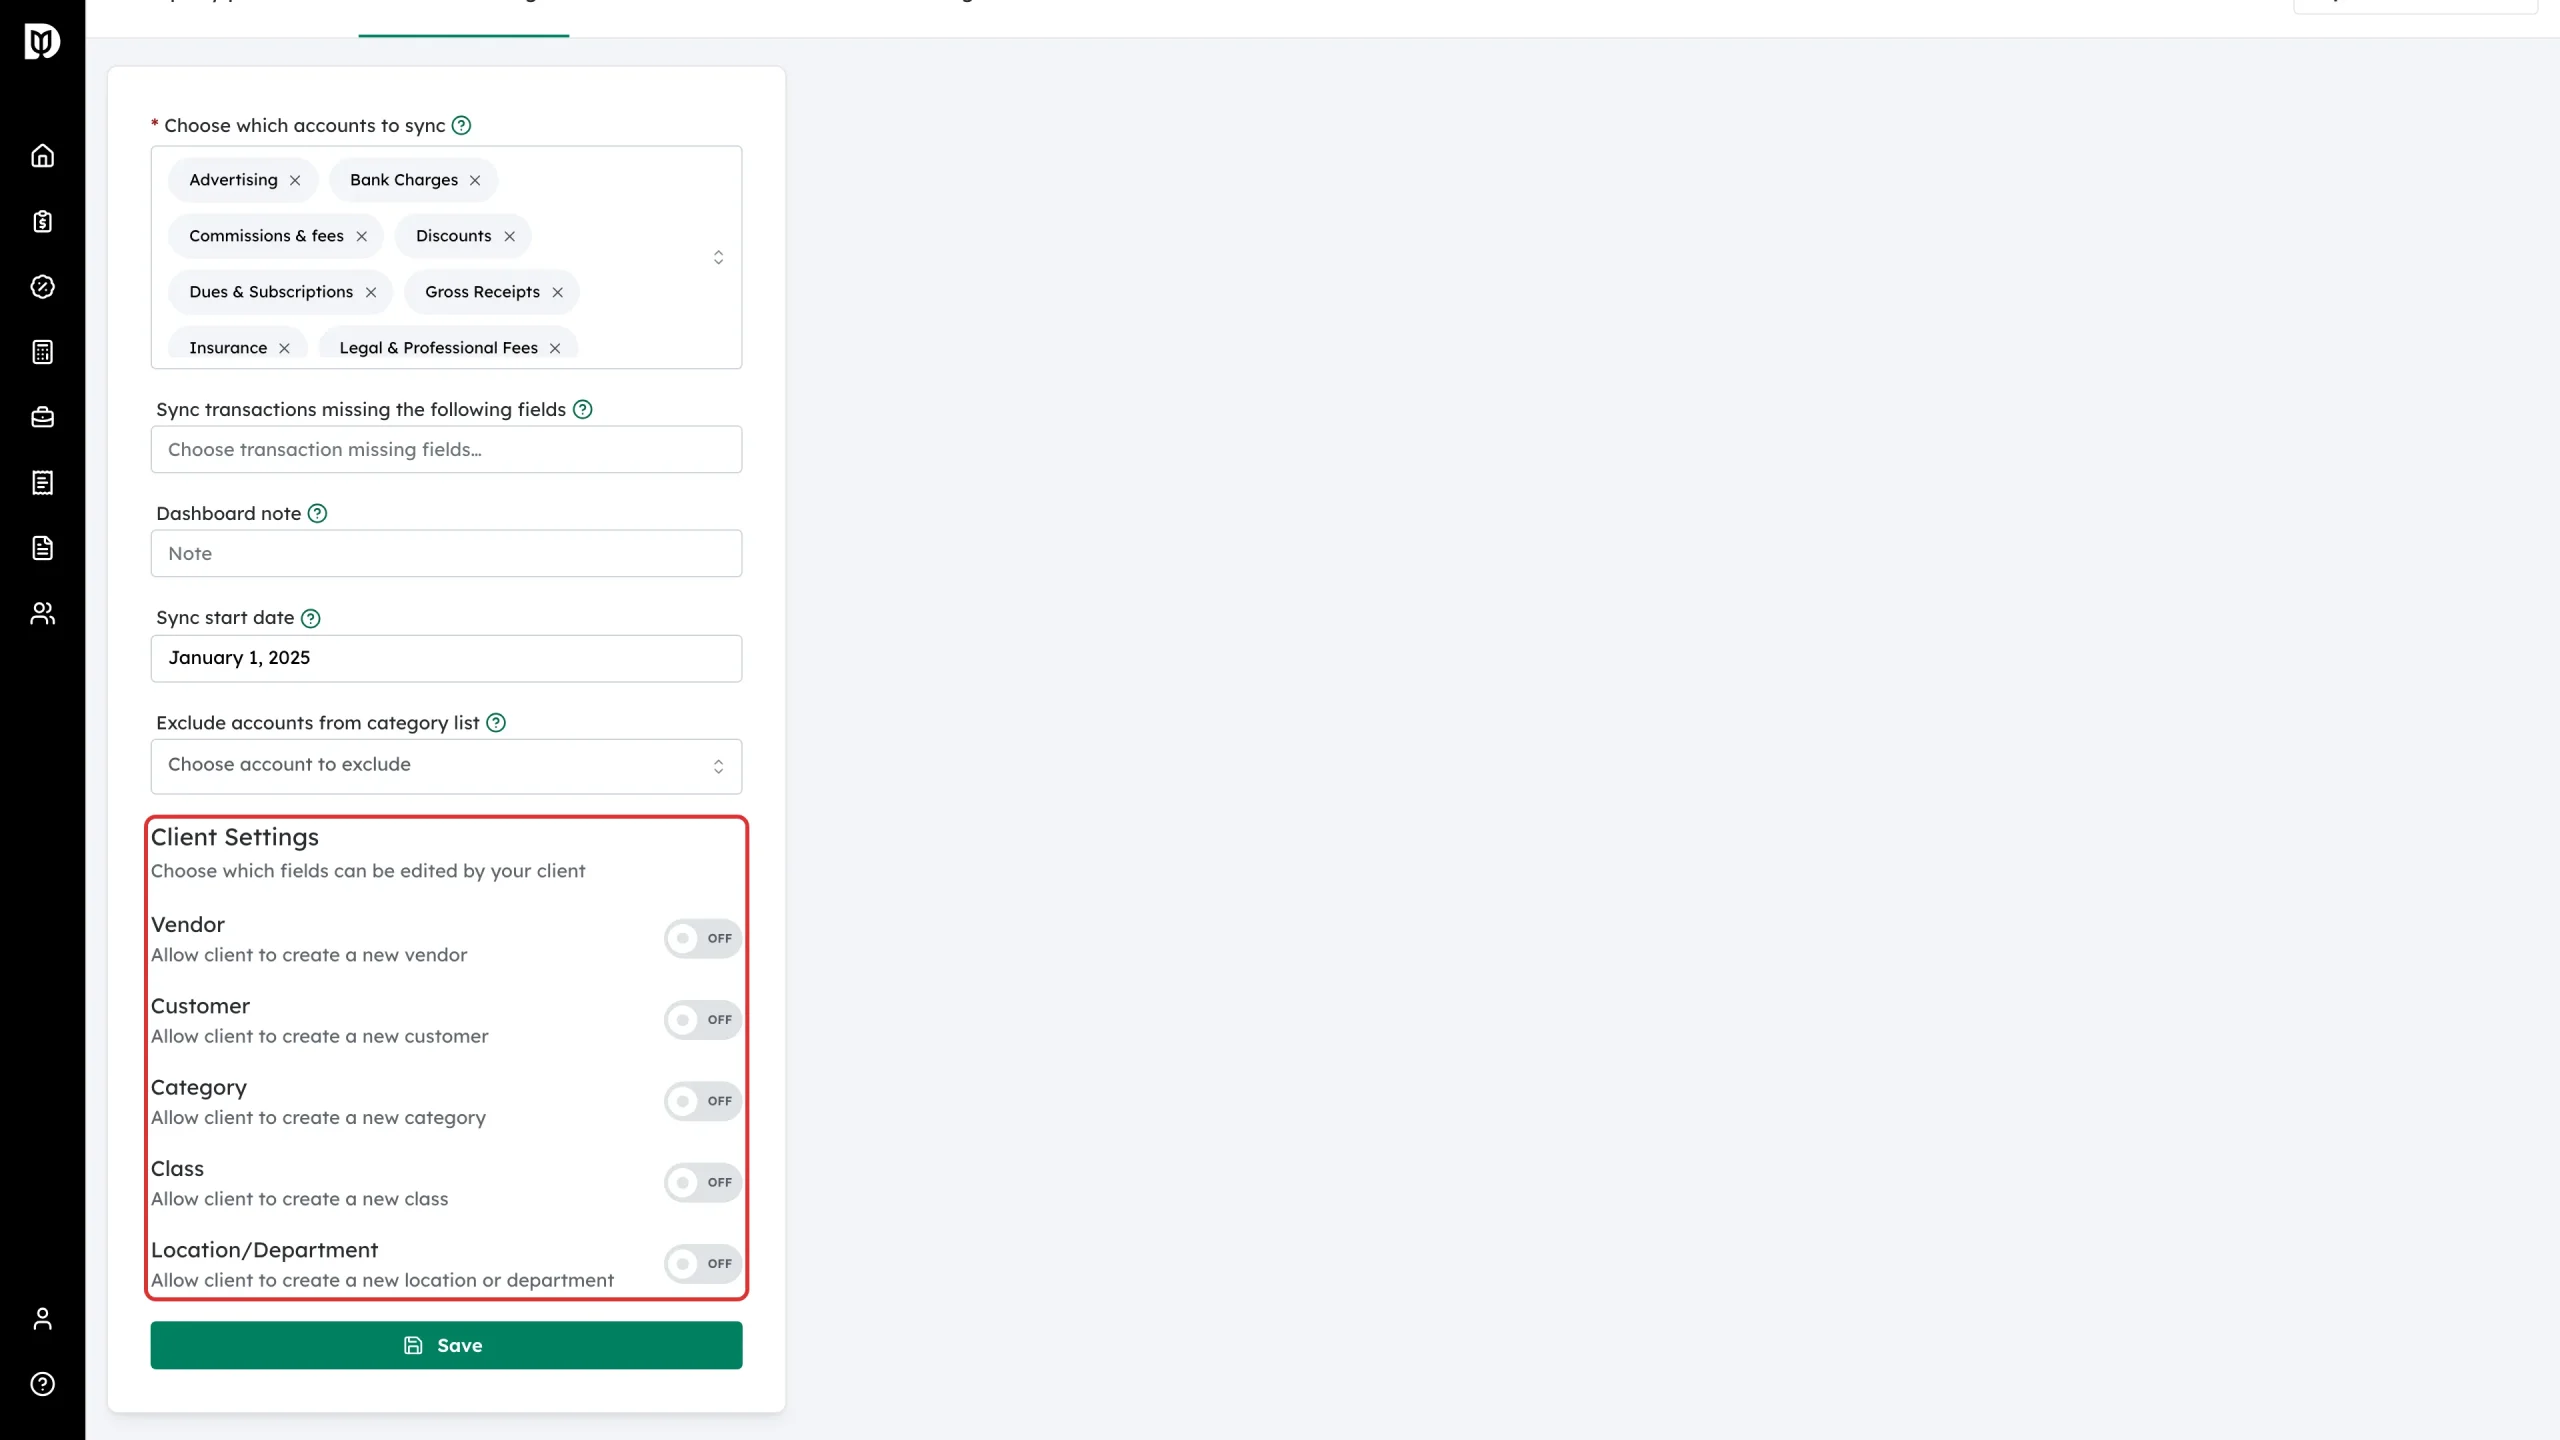
- Vendor — allow the client to create a new vendor.
- Customer — allow the client to create a new customer.
- Category — allow the client to create a new category (a chart-of-accounts entry).
- Class — allow the client to create a new class.
- Location/Department — allow the client to create a new location or department.
All five are off on a new company.
Before you start
- The company must be connected to QuickBooks Online, or Save stays greyed out.
- You need the Adjust a client company’s general settings permission, or the General settings tab is hidden.
Change the switches
-
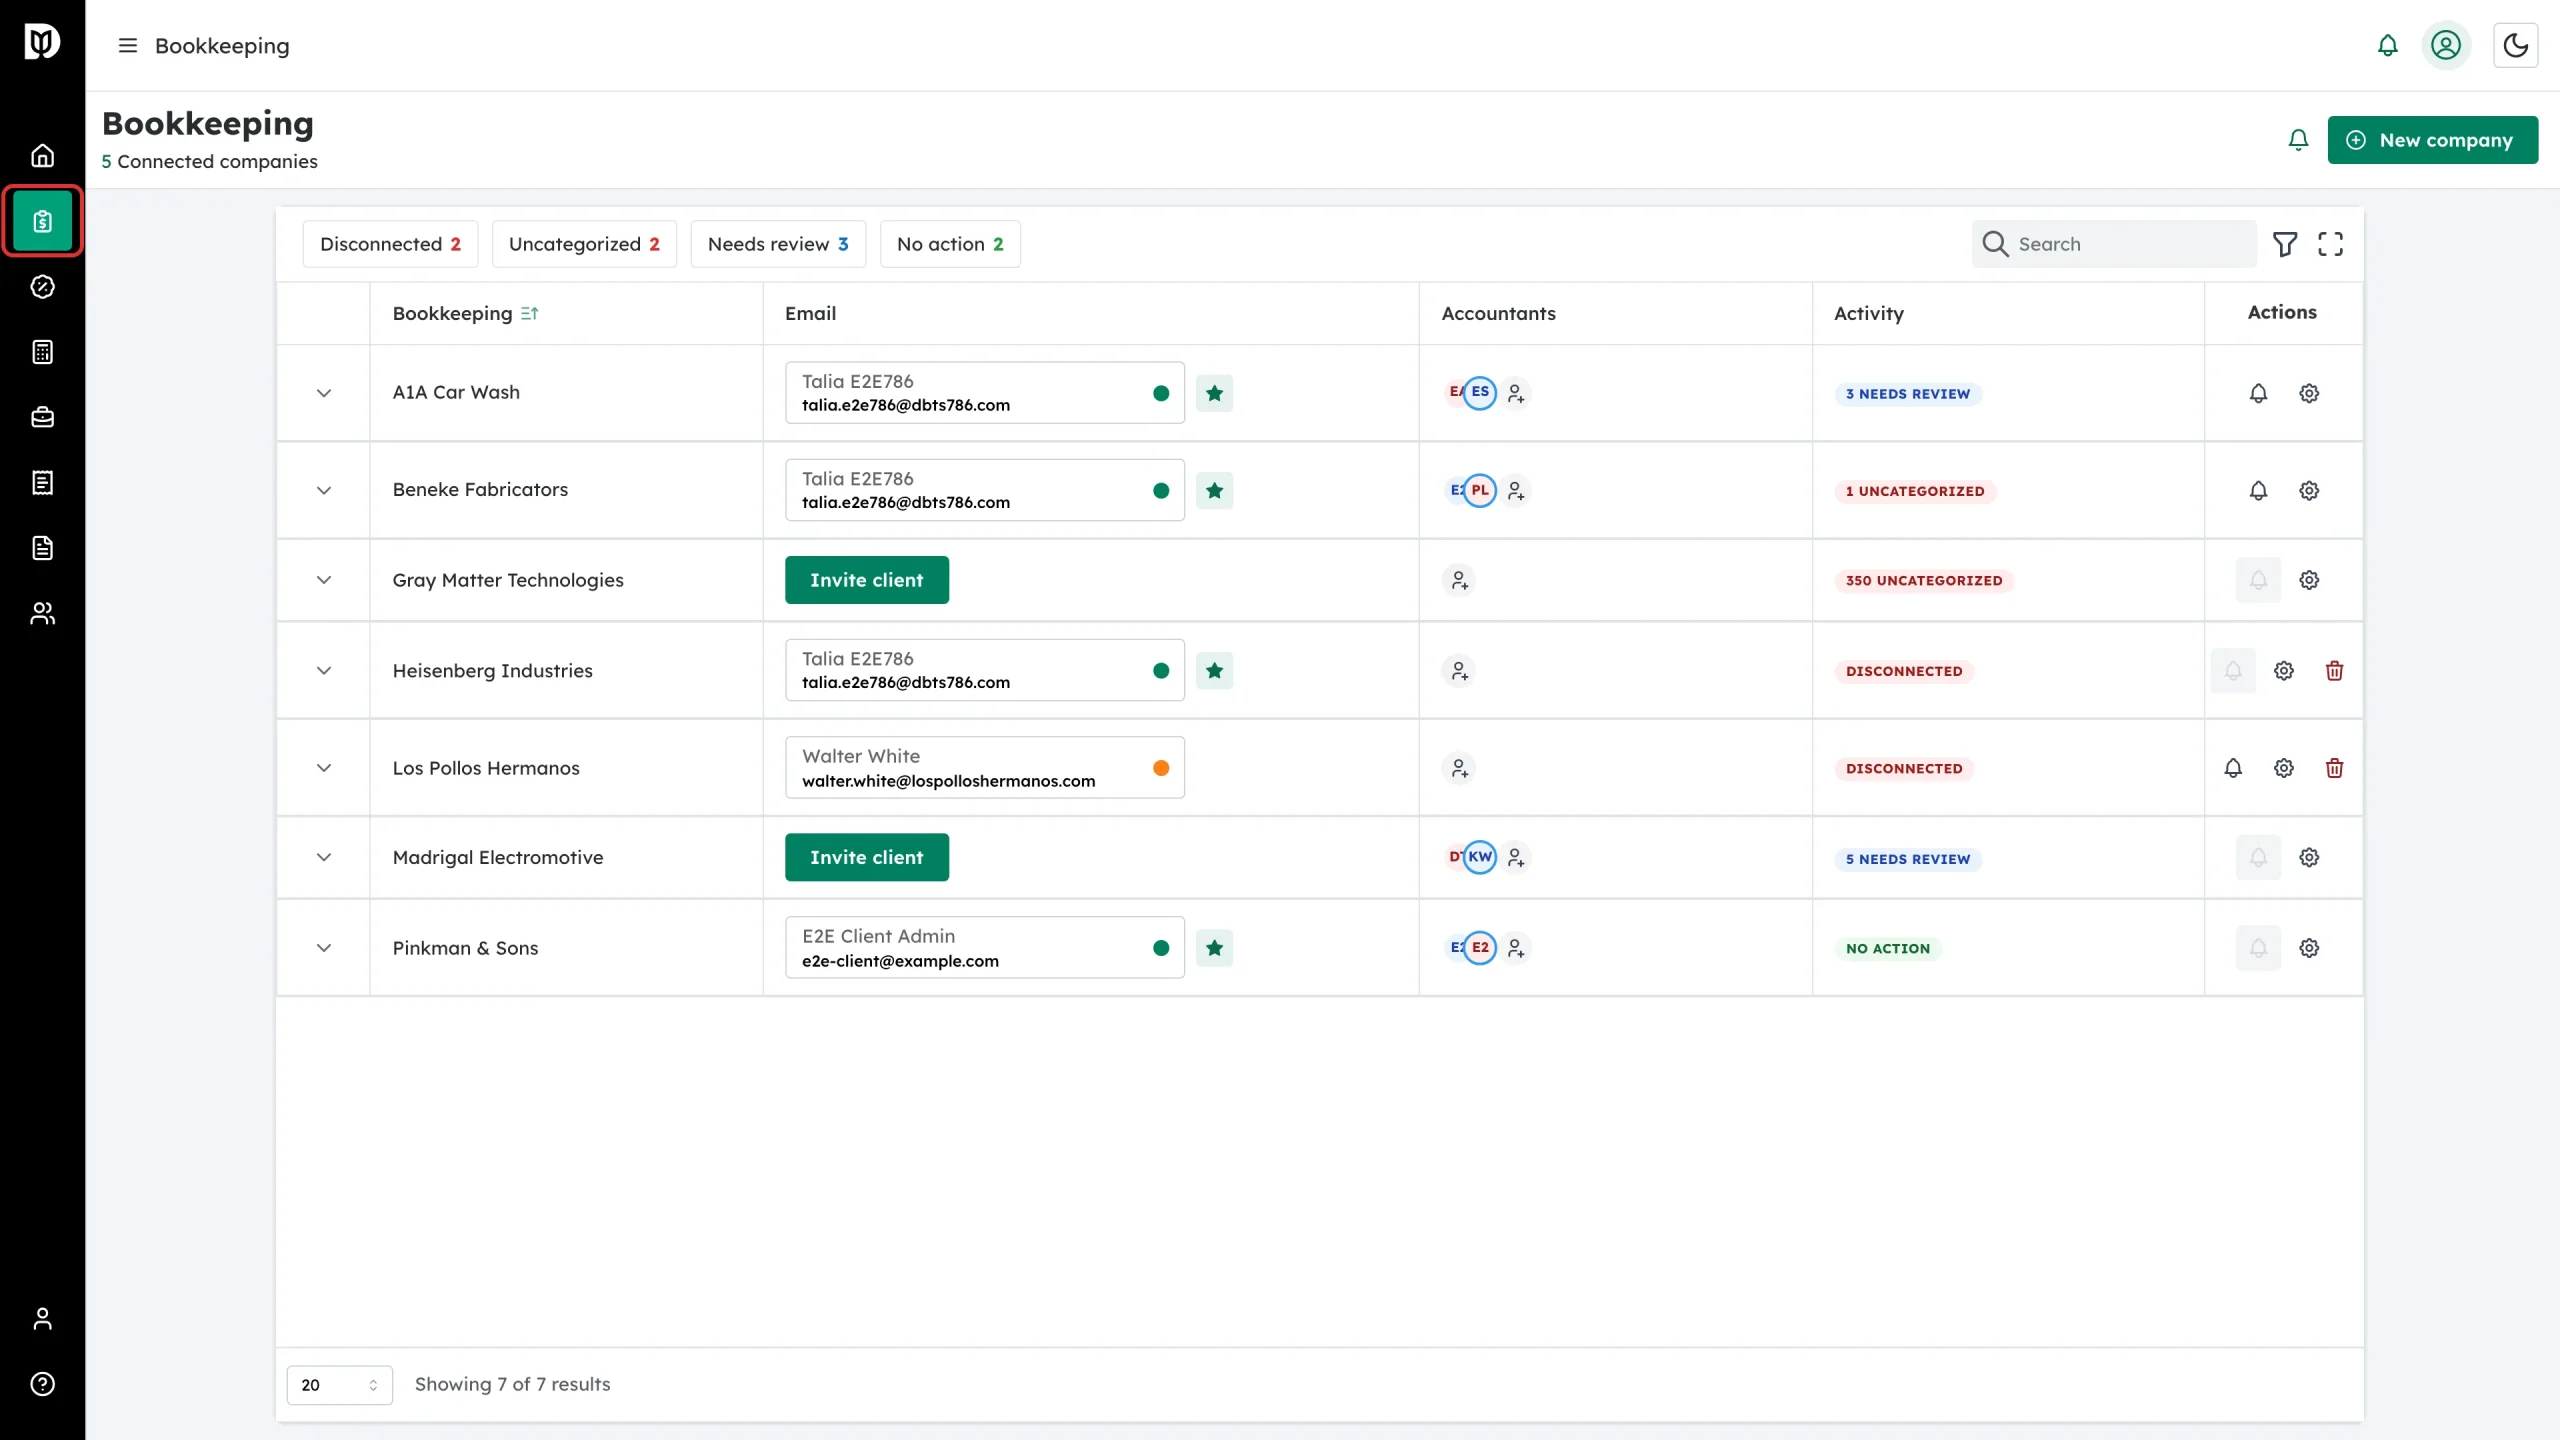
Click Bookkeeping in the left sidebar.
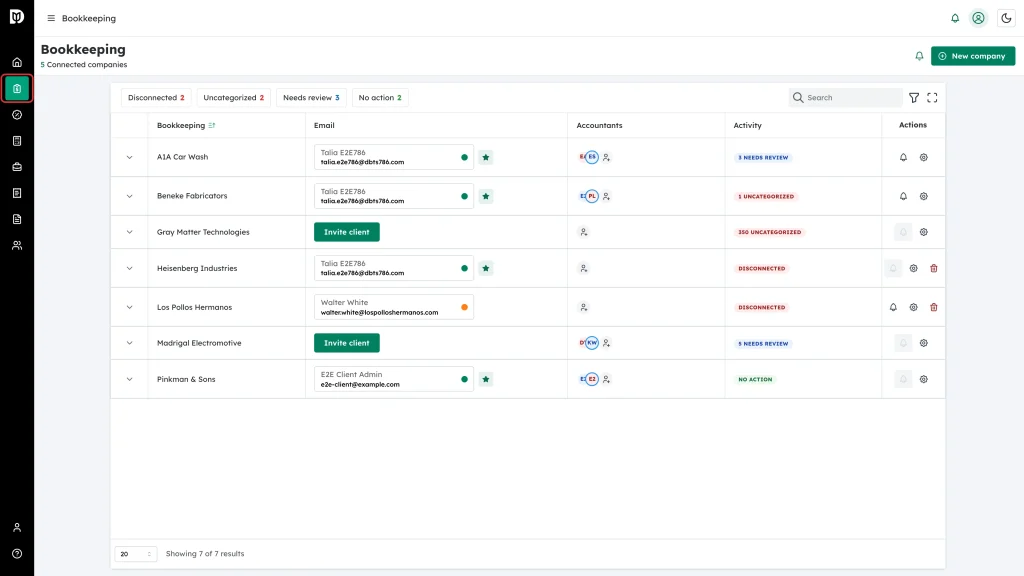
-
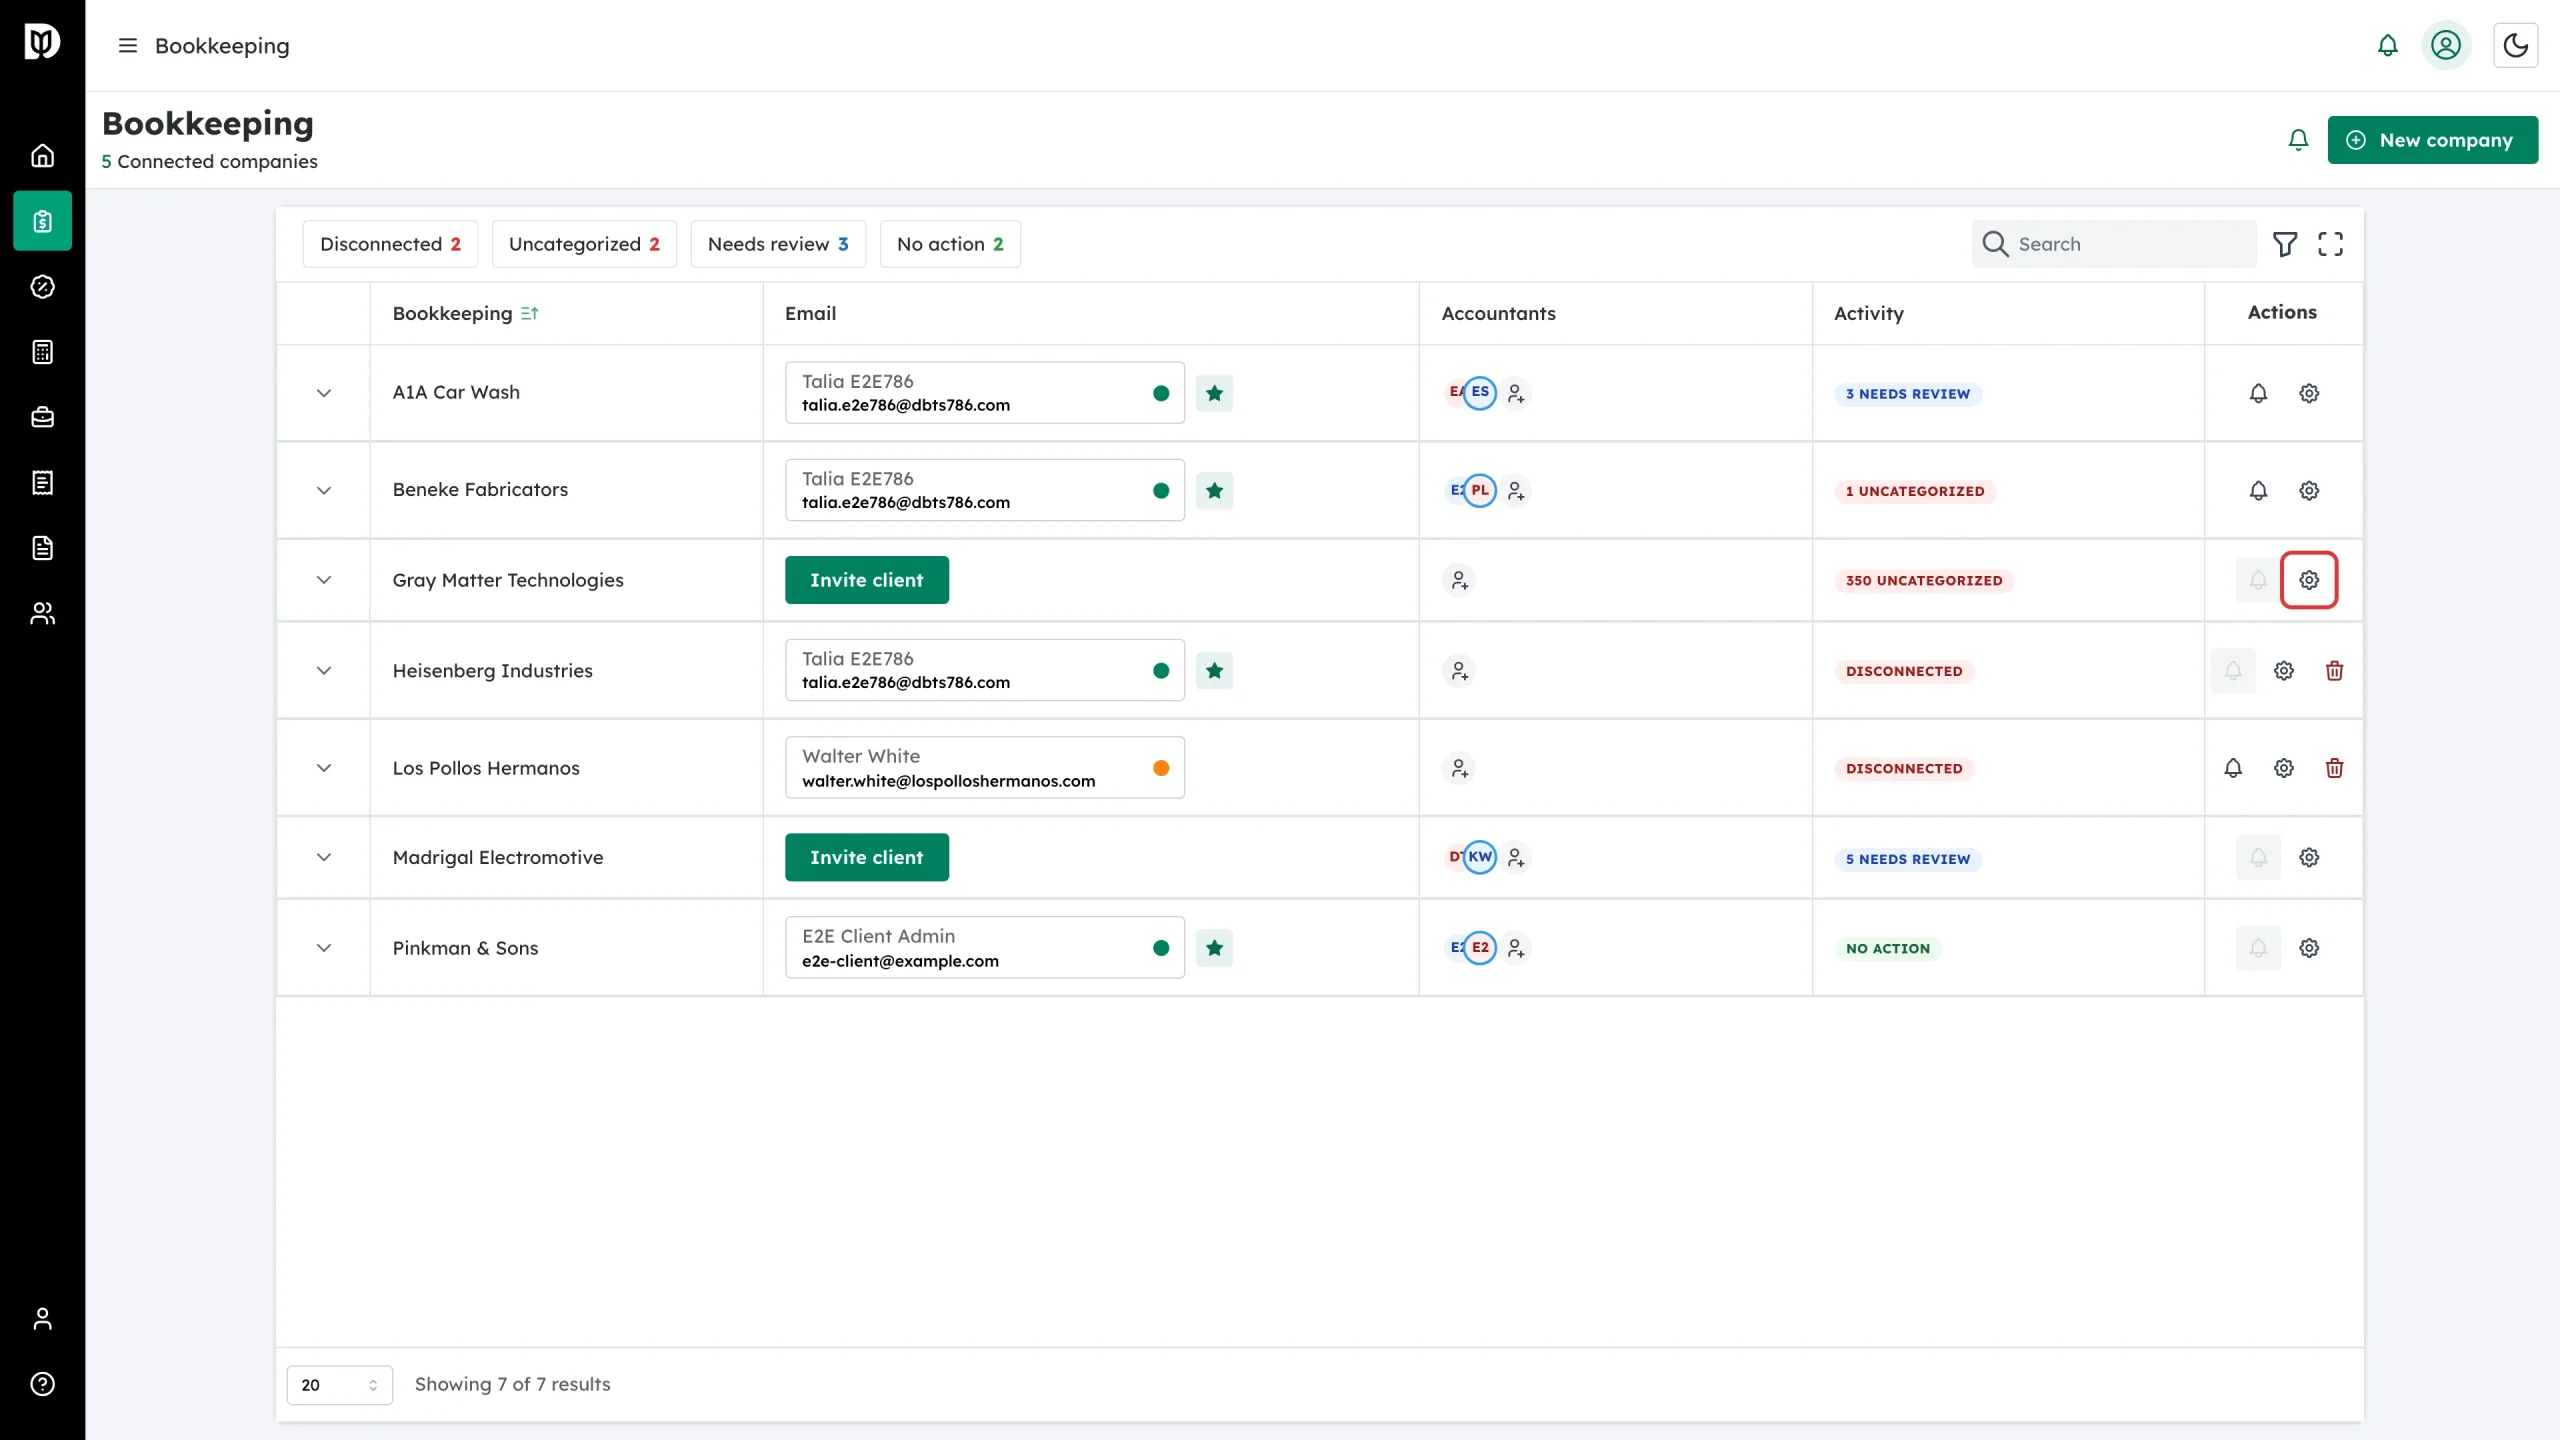
Find the company and click the gear icon in its Actions column.
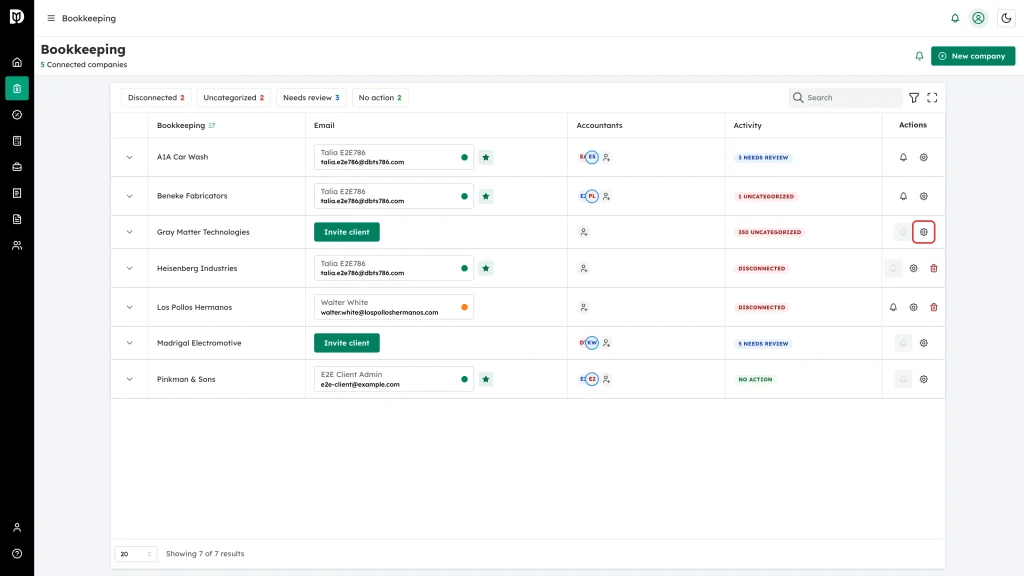
-
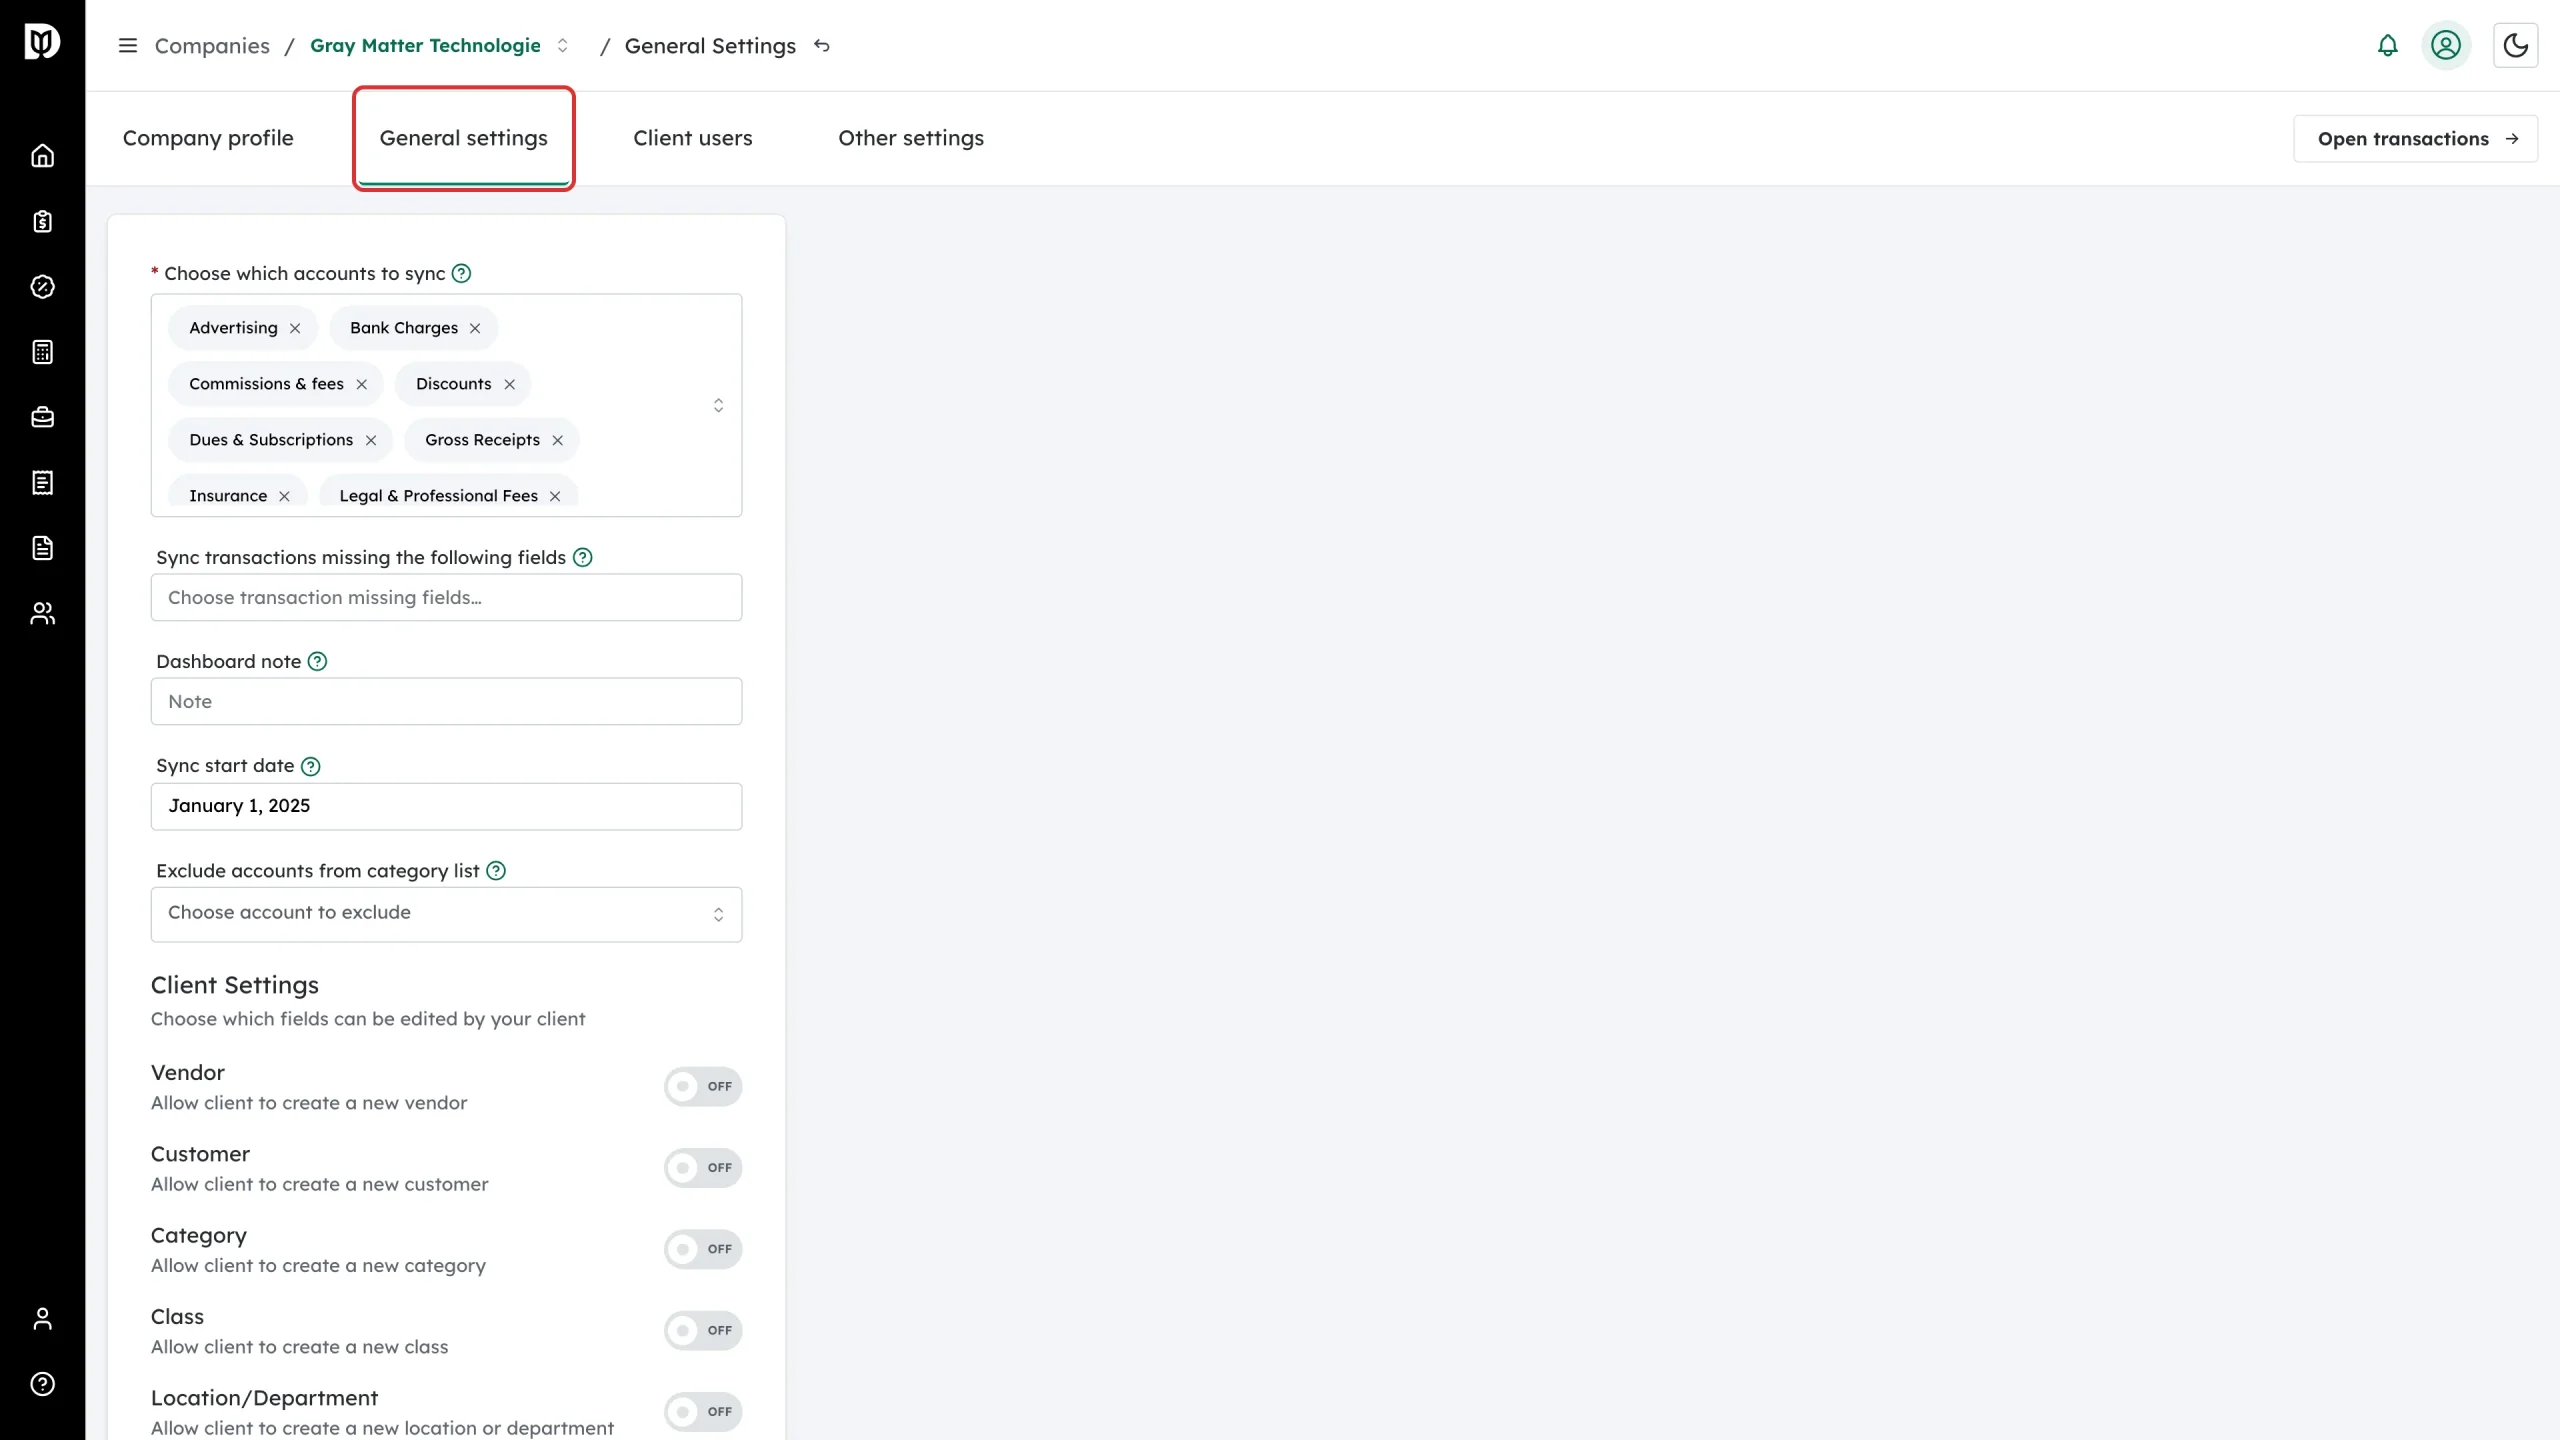
Open the General settings tab.
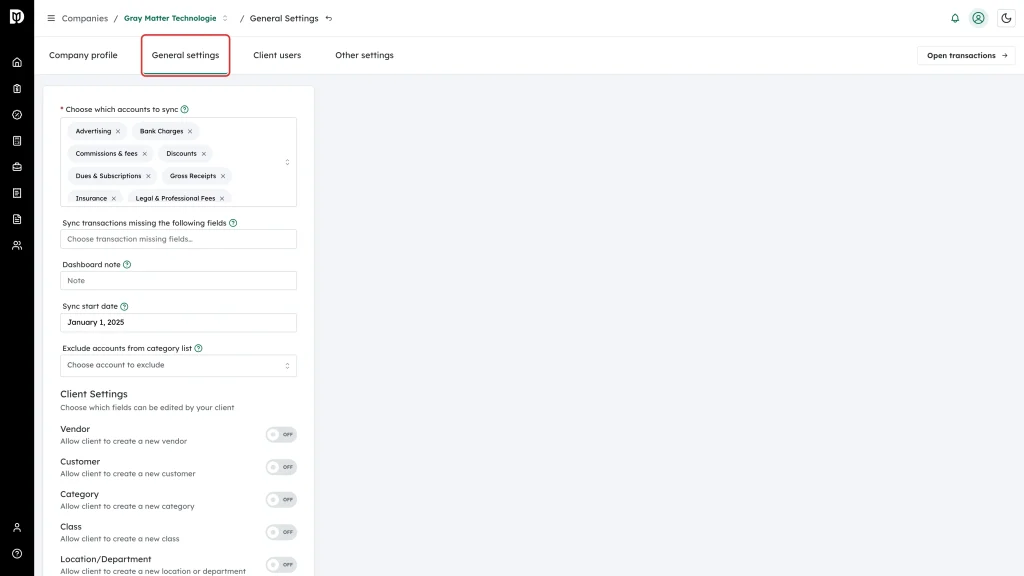
-
Scroll to Client Settings near the bottom of the form. Each row shows the list name and what the switch allows.
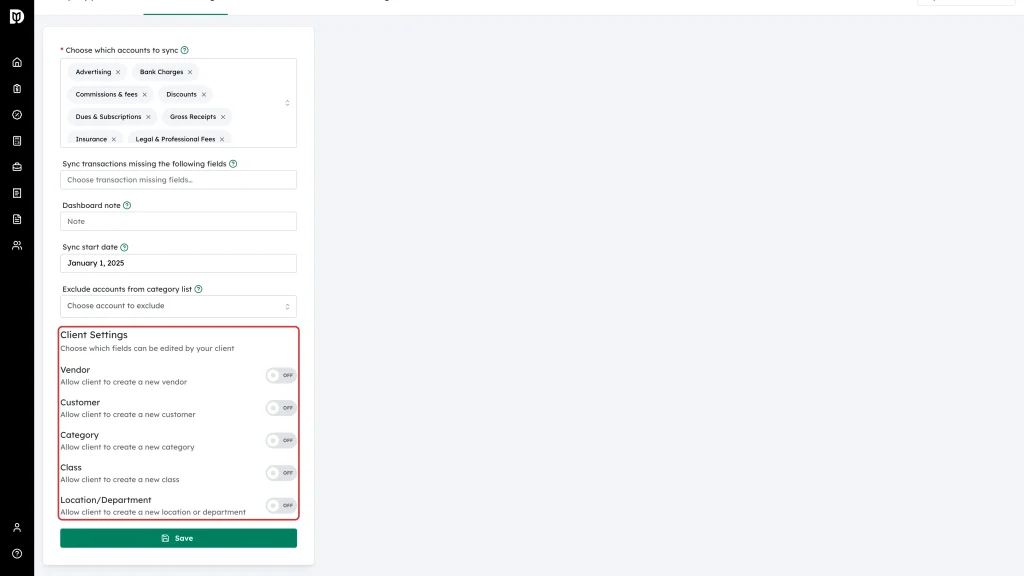
-
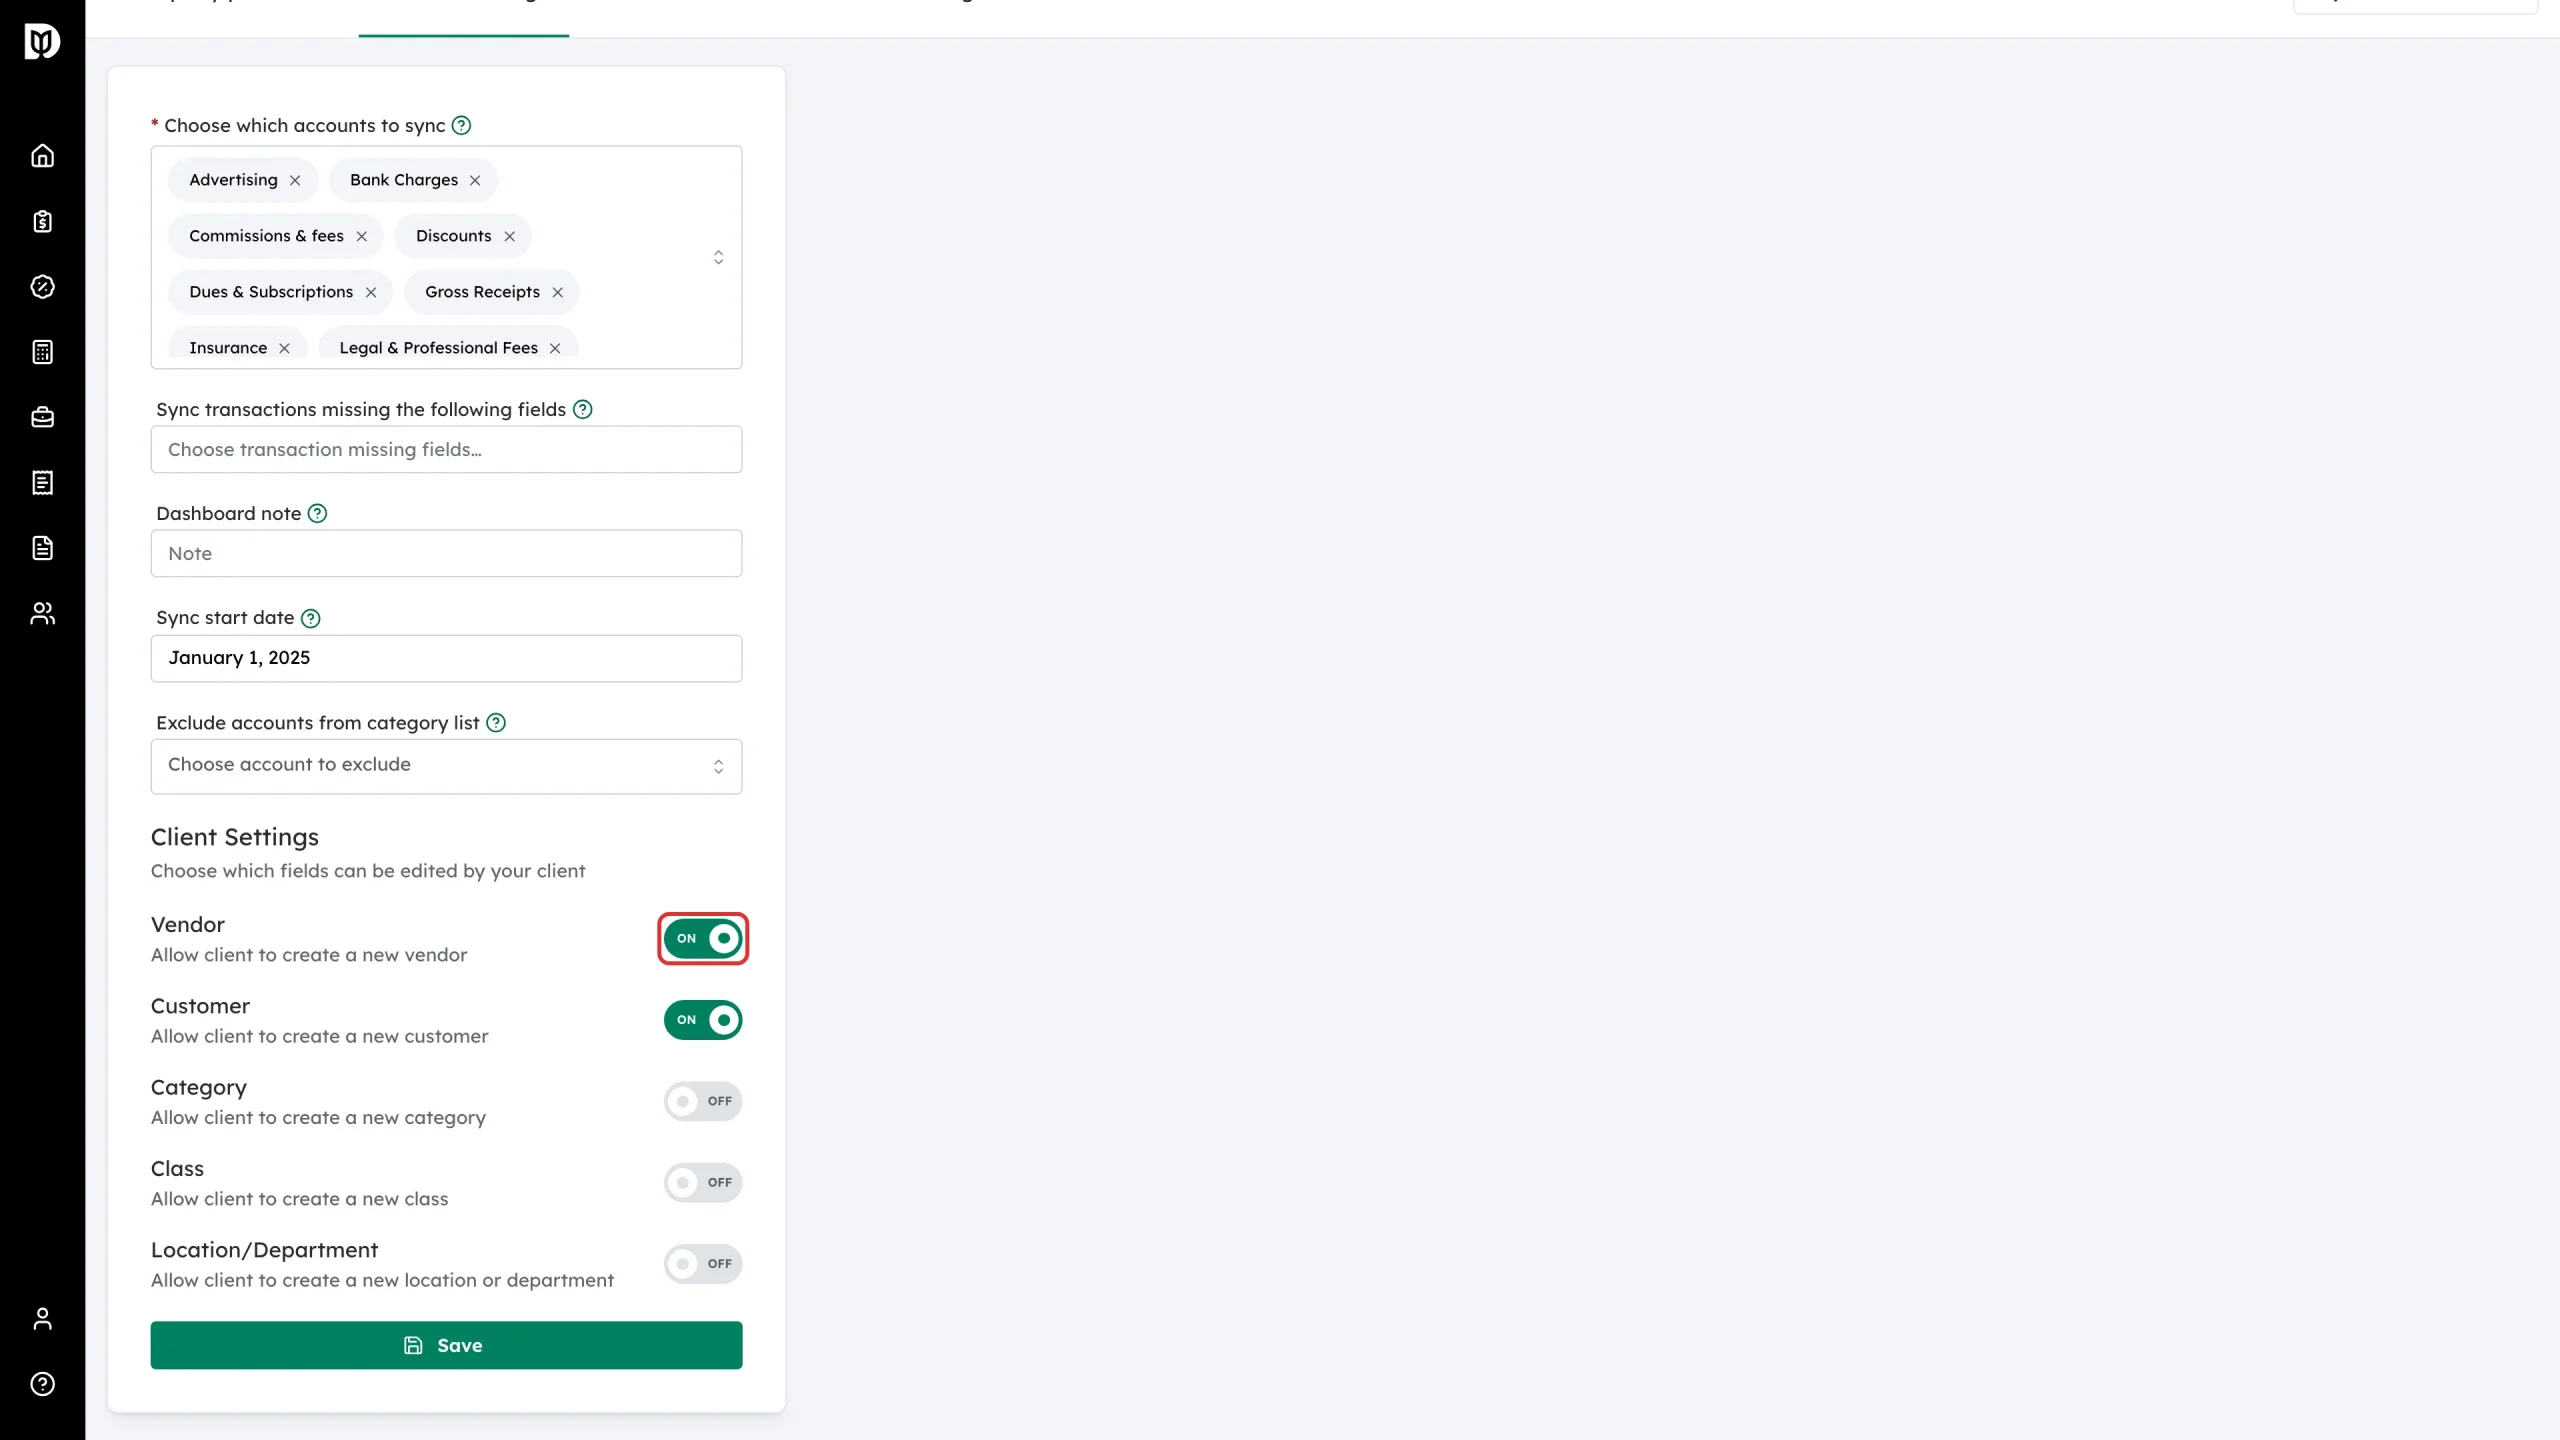
Click a switch to turn it ON or OFF. The label next to it changes as you click.
-
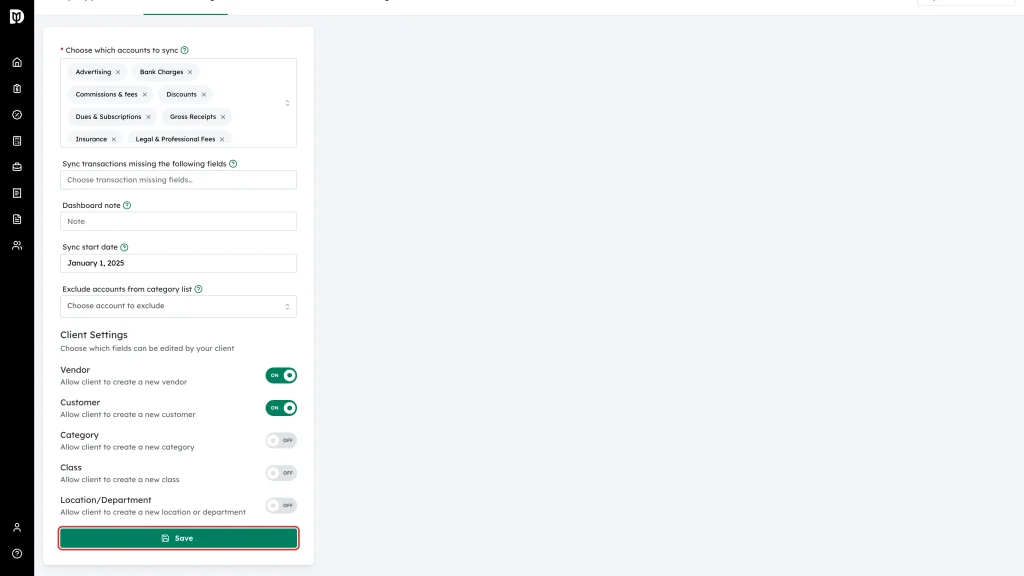
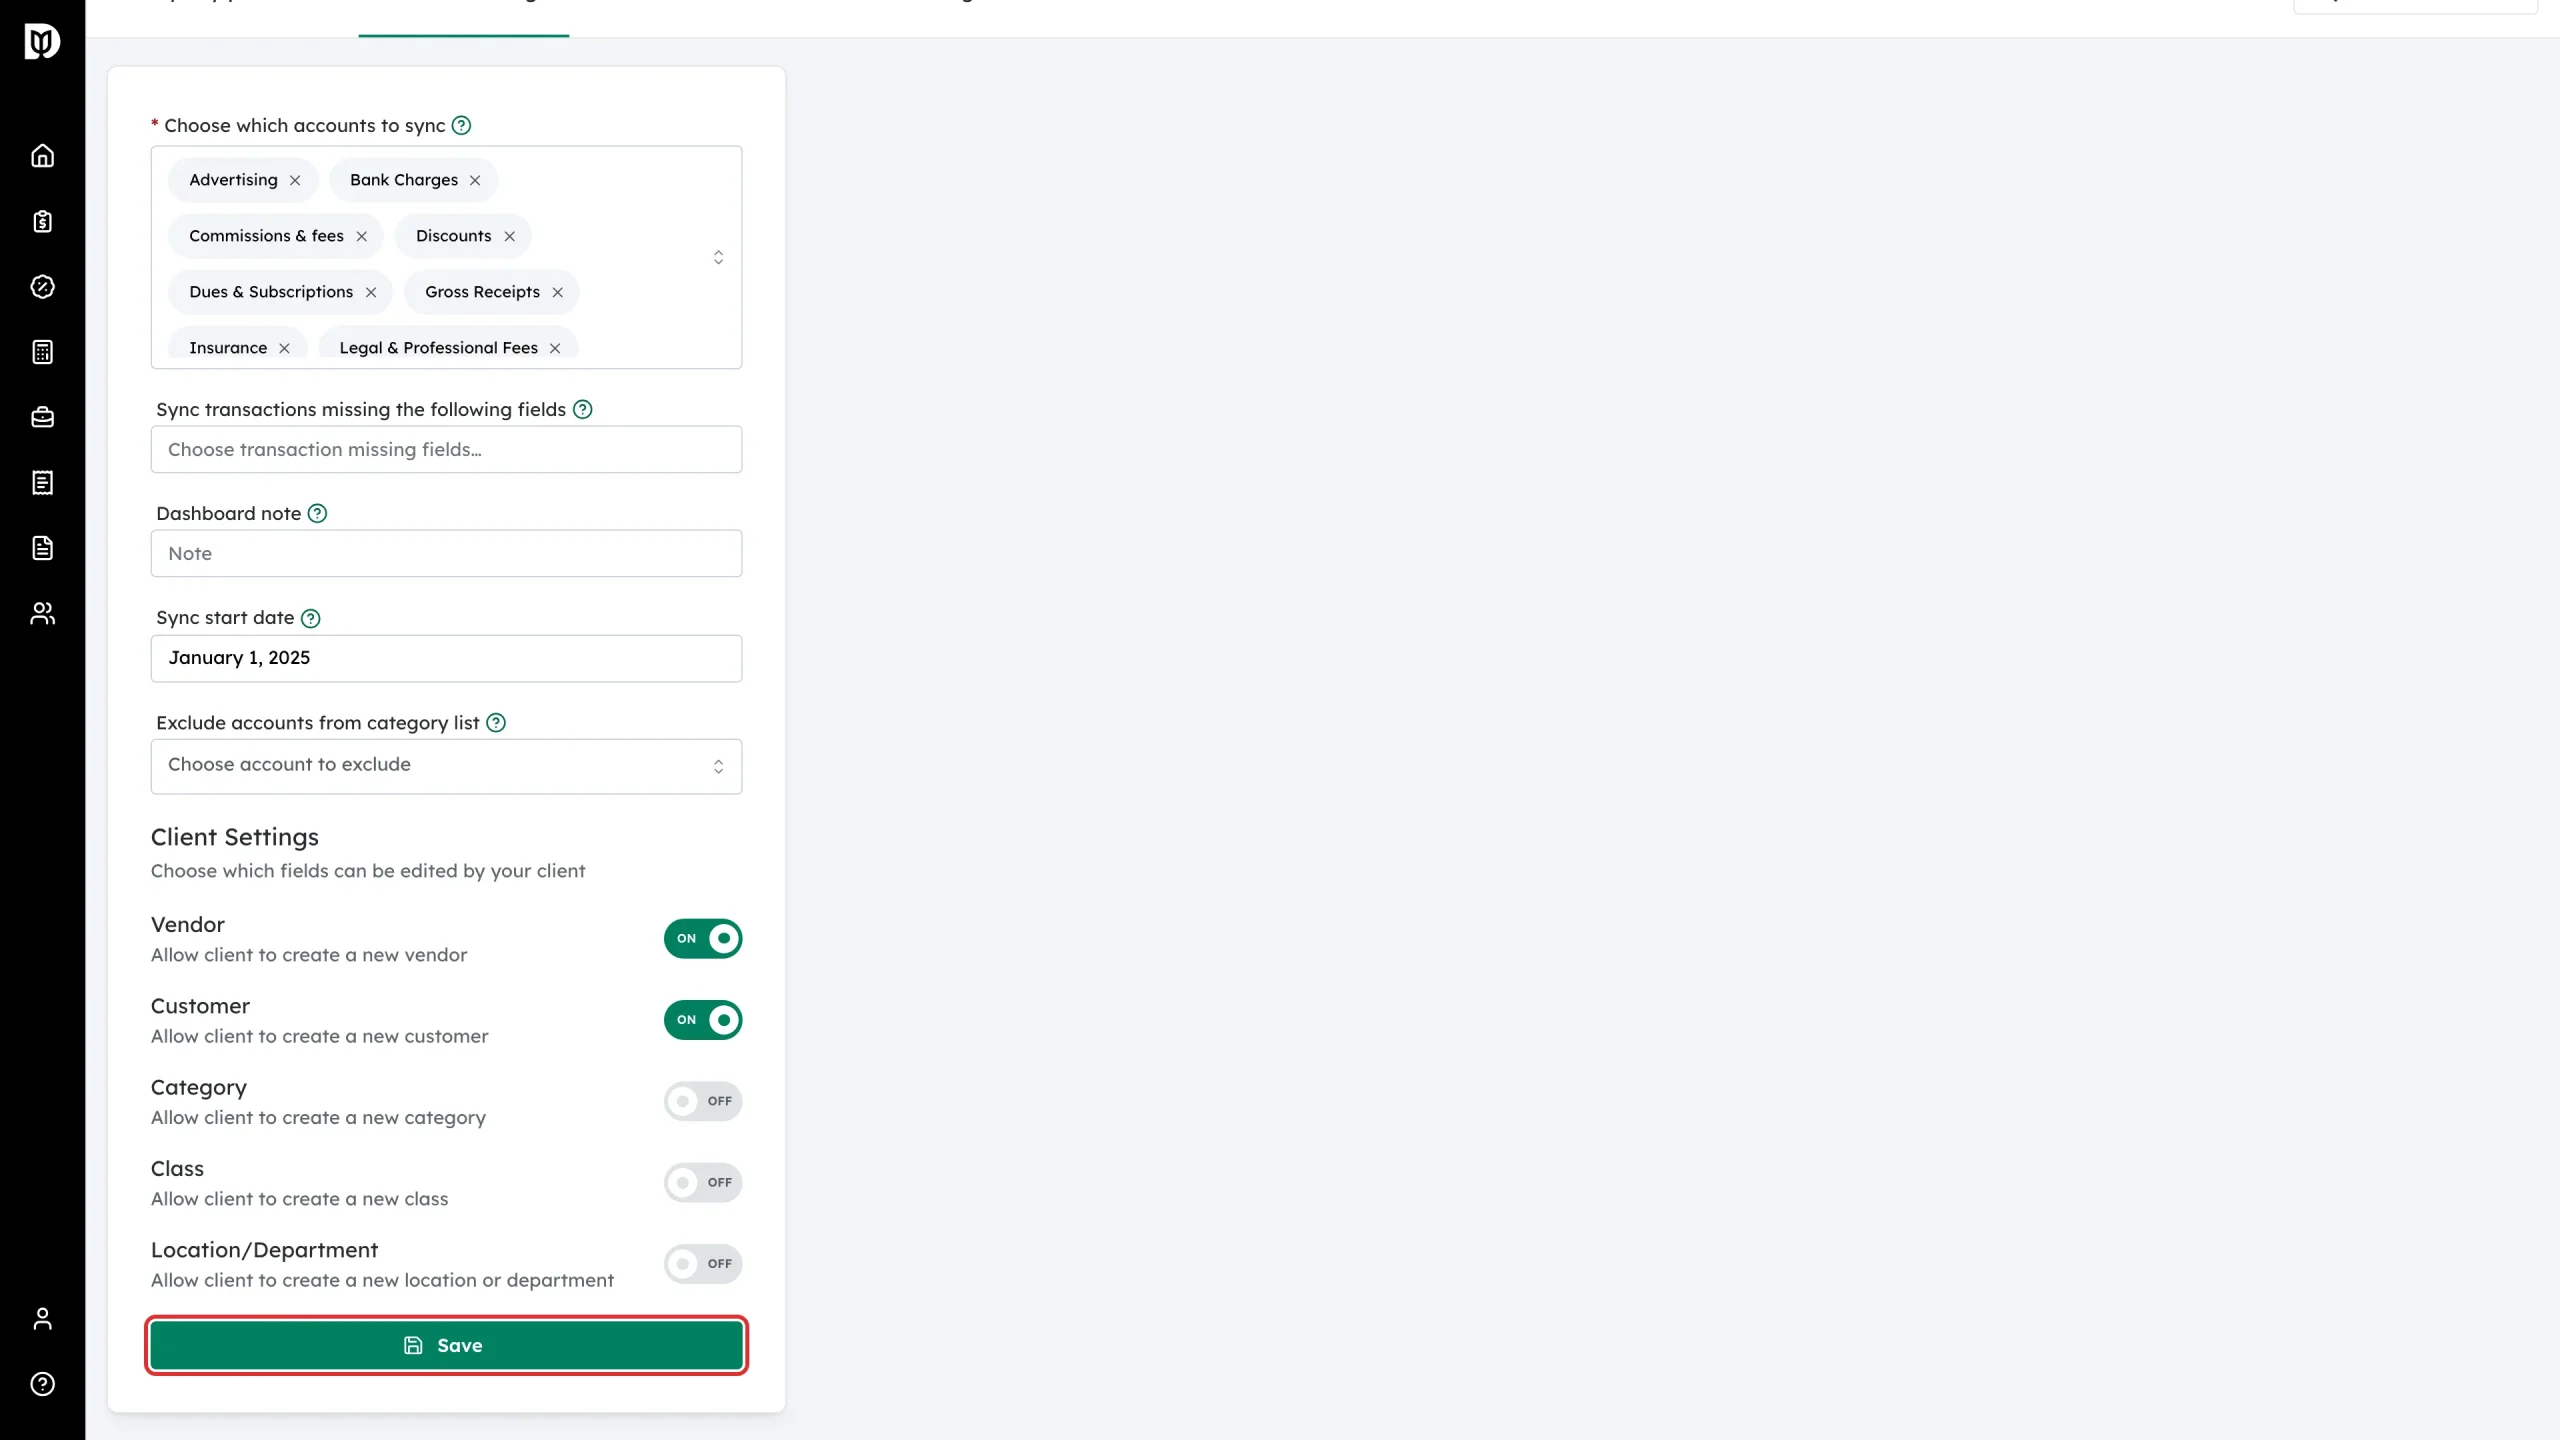
Click Save.
How to decide
- Most firms start with everything off, then turn on Vendor once the client is used to answering transactions. New vendors are the most common gap, and a wrong vendor is easy to fix.
- Leave Category off unless you want the client adding accounts to the chart of accounts.
- Only turn on Class and Location/Department if you rely on them for reporting and the client understands your scheme.
Good to know
These switches do not stop a client from choosing an existing value, and they do not hide any field. Nothing the client enters reaches QuickBooks until an accountant approves the transaction.