Who this is for: Accountants and admins who group contacts with tags.
What you’ll learn: How to create color-coded tags, put them on contacts, filter the contact list by tag, and tag many contacts at once.
Before you begin
- You need access to the Contacts area.
- Tags are shared firm-wide — a tag you create is available on every contact.
Create a tag
Step 1: Open Manage tags
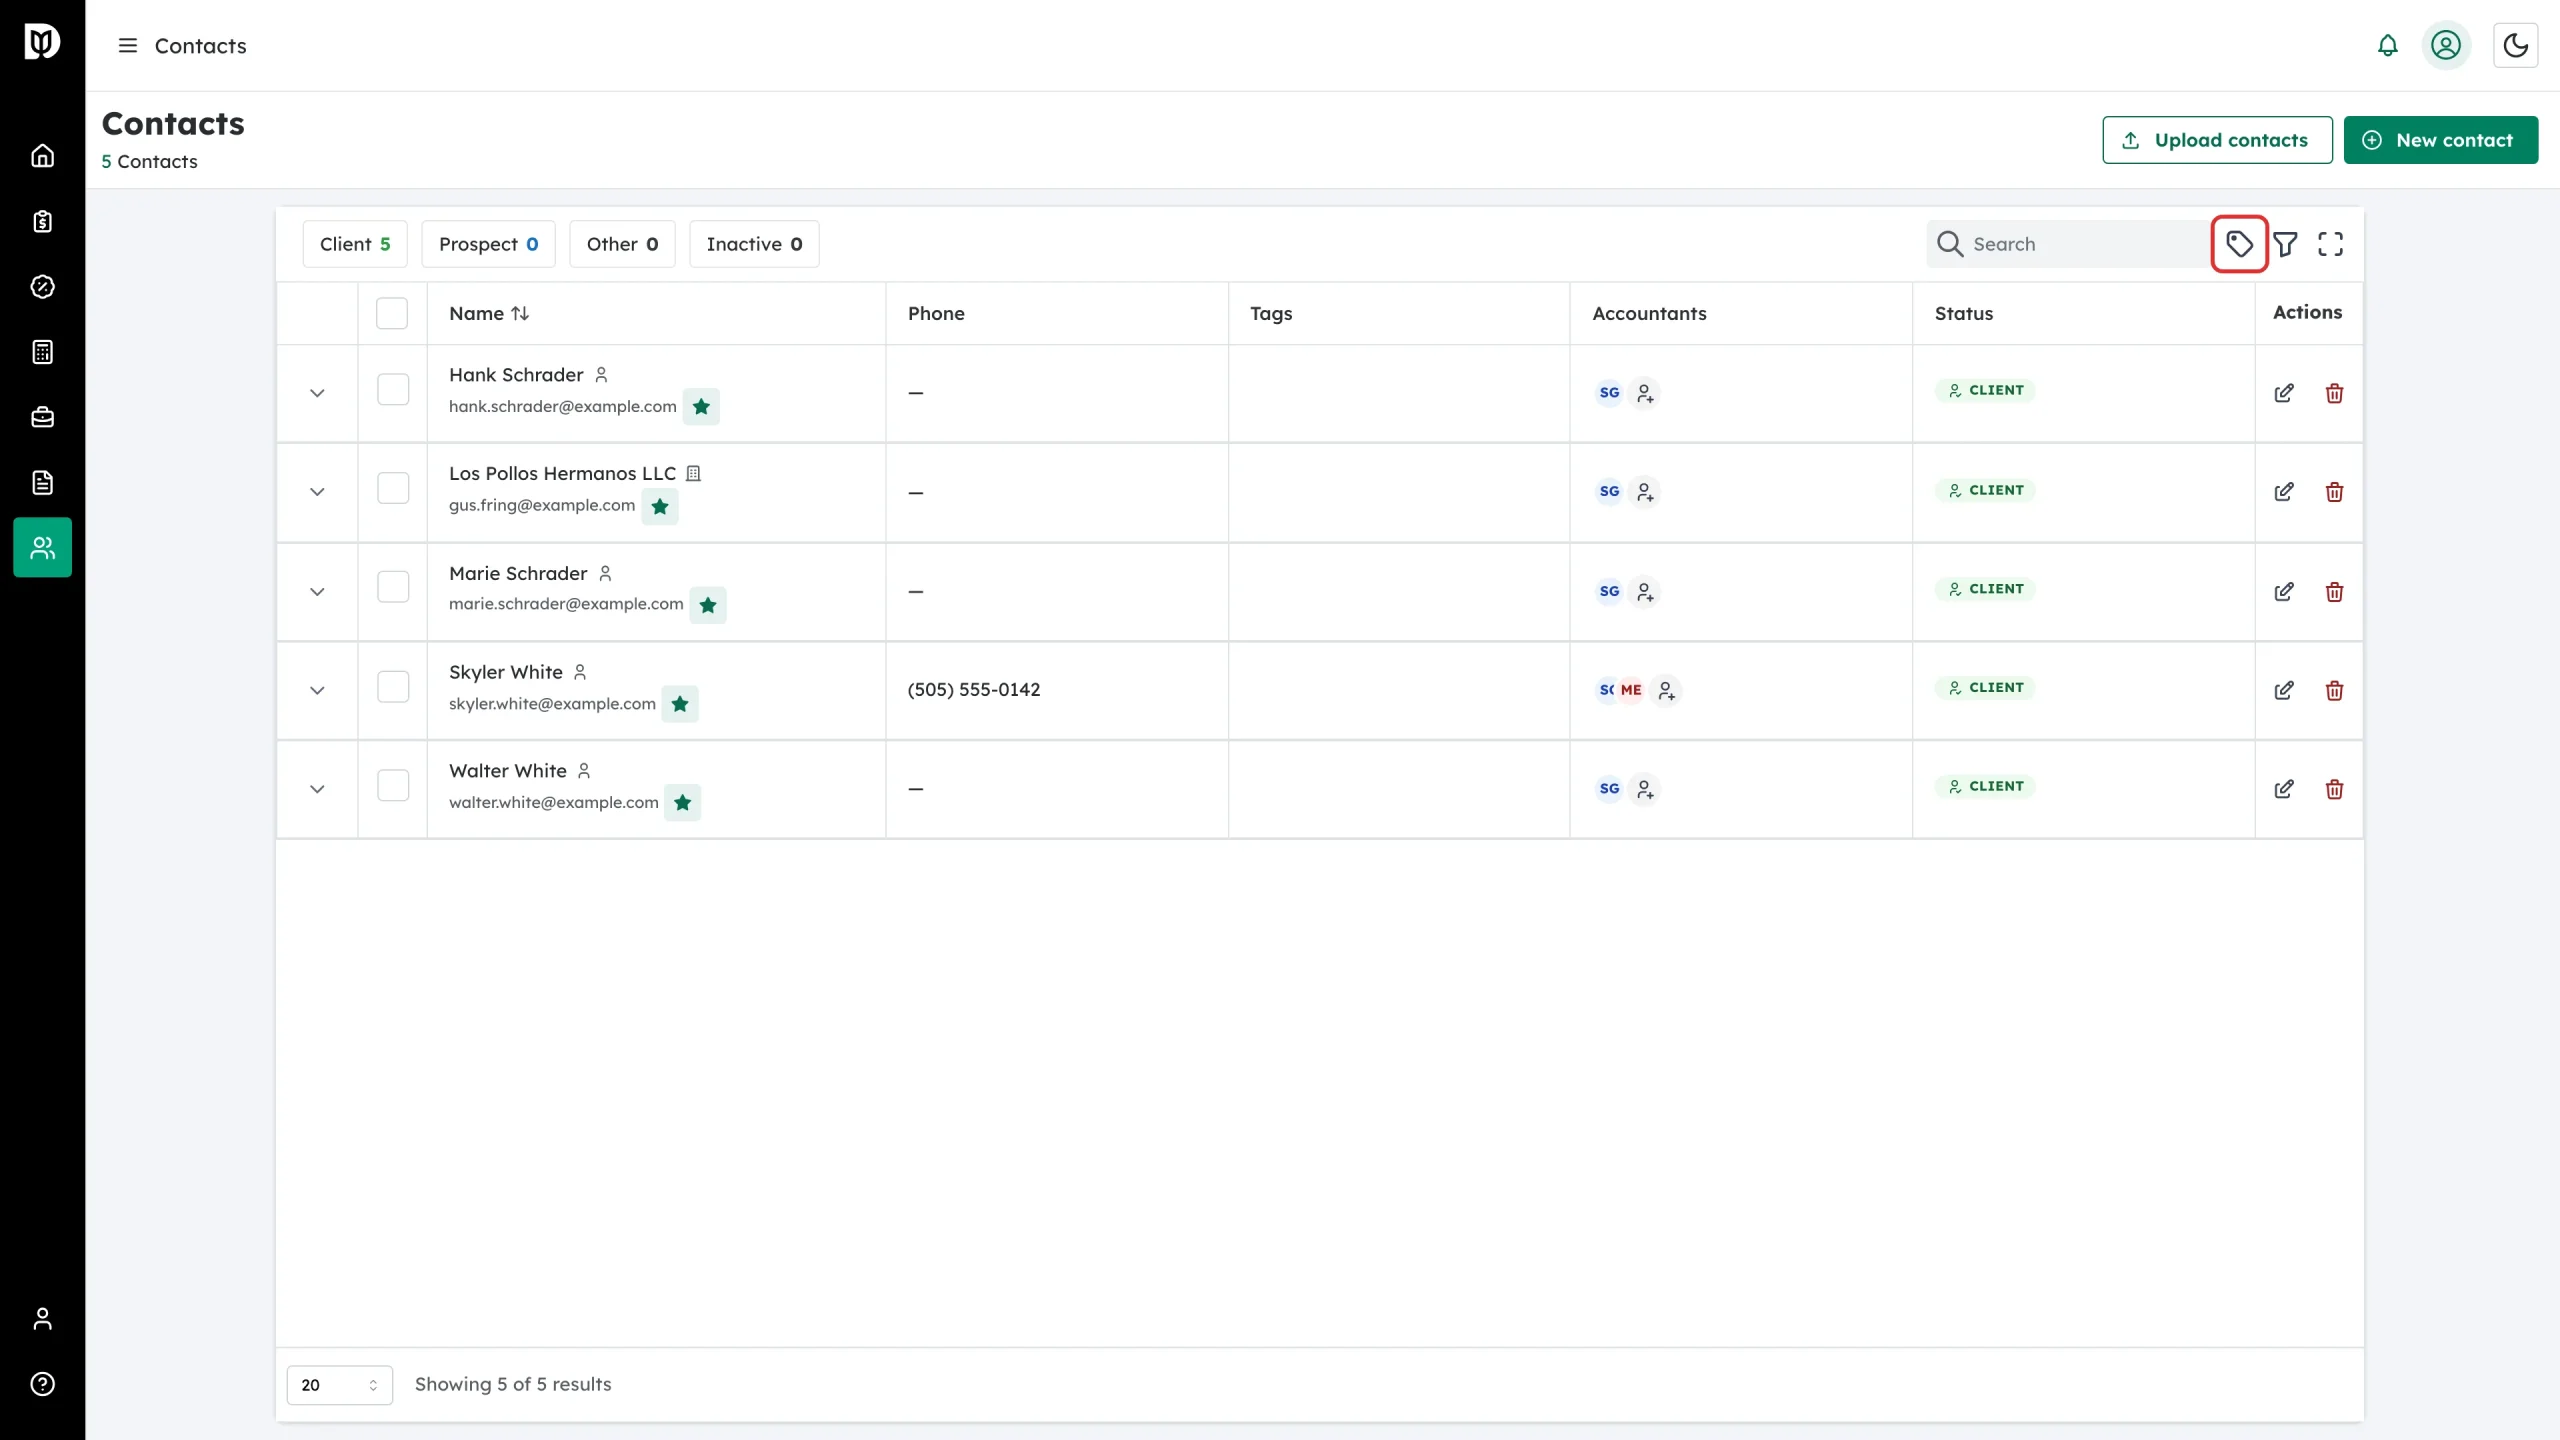
On the Contacts page, click the tag icon in the table toolbar (tooltip: Manage tags).
Step 2: Click Create new tag
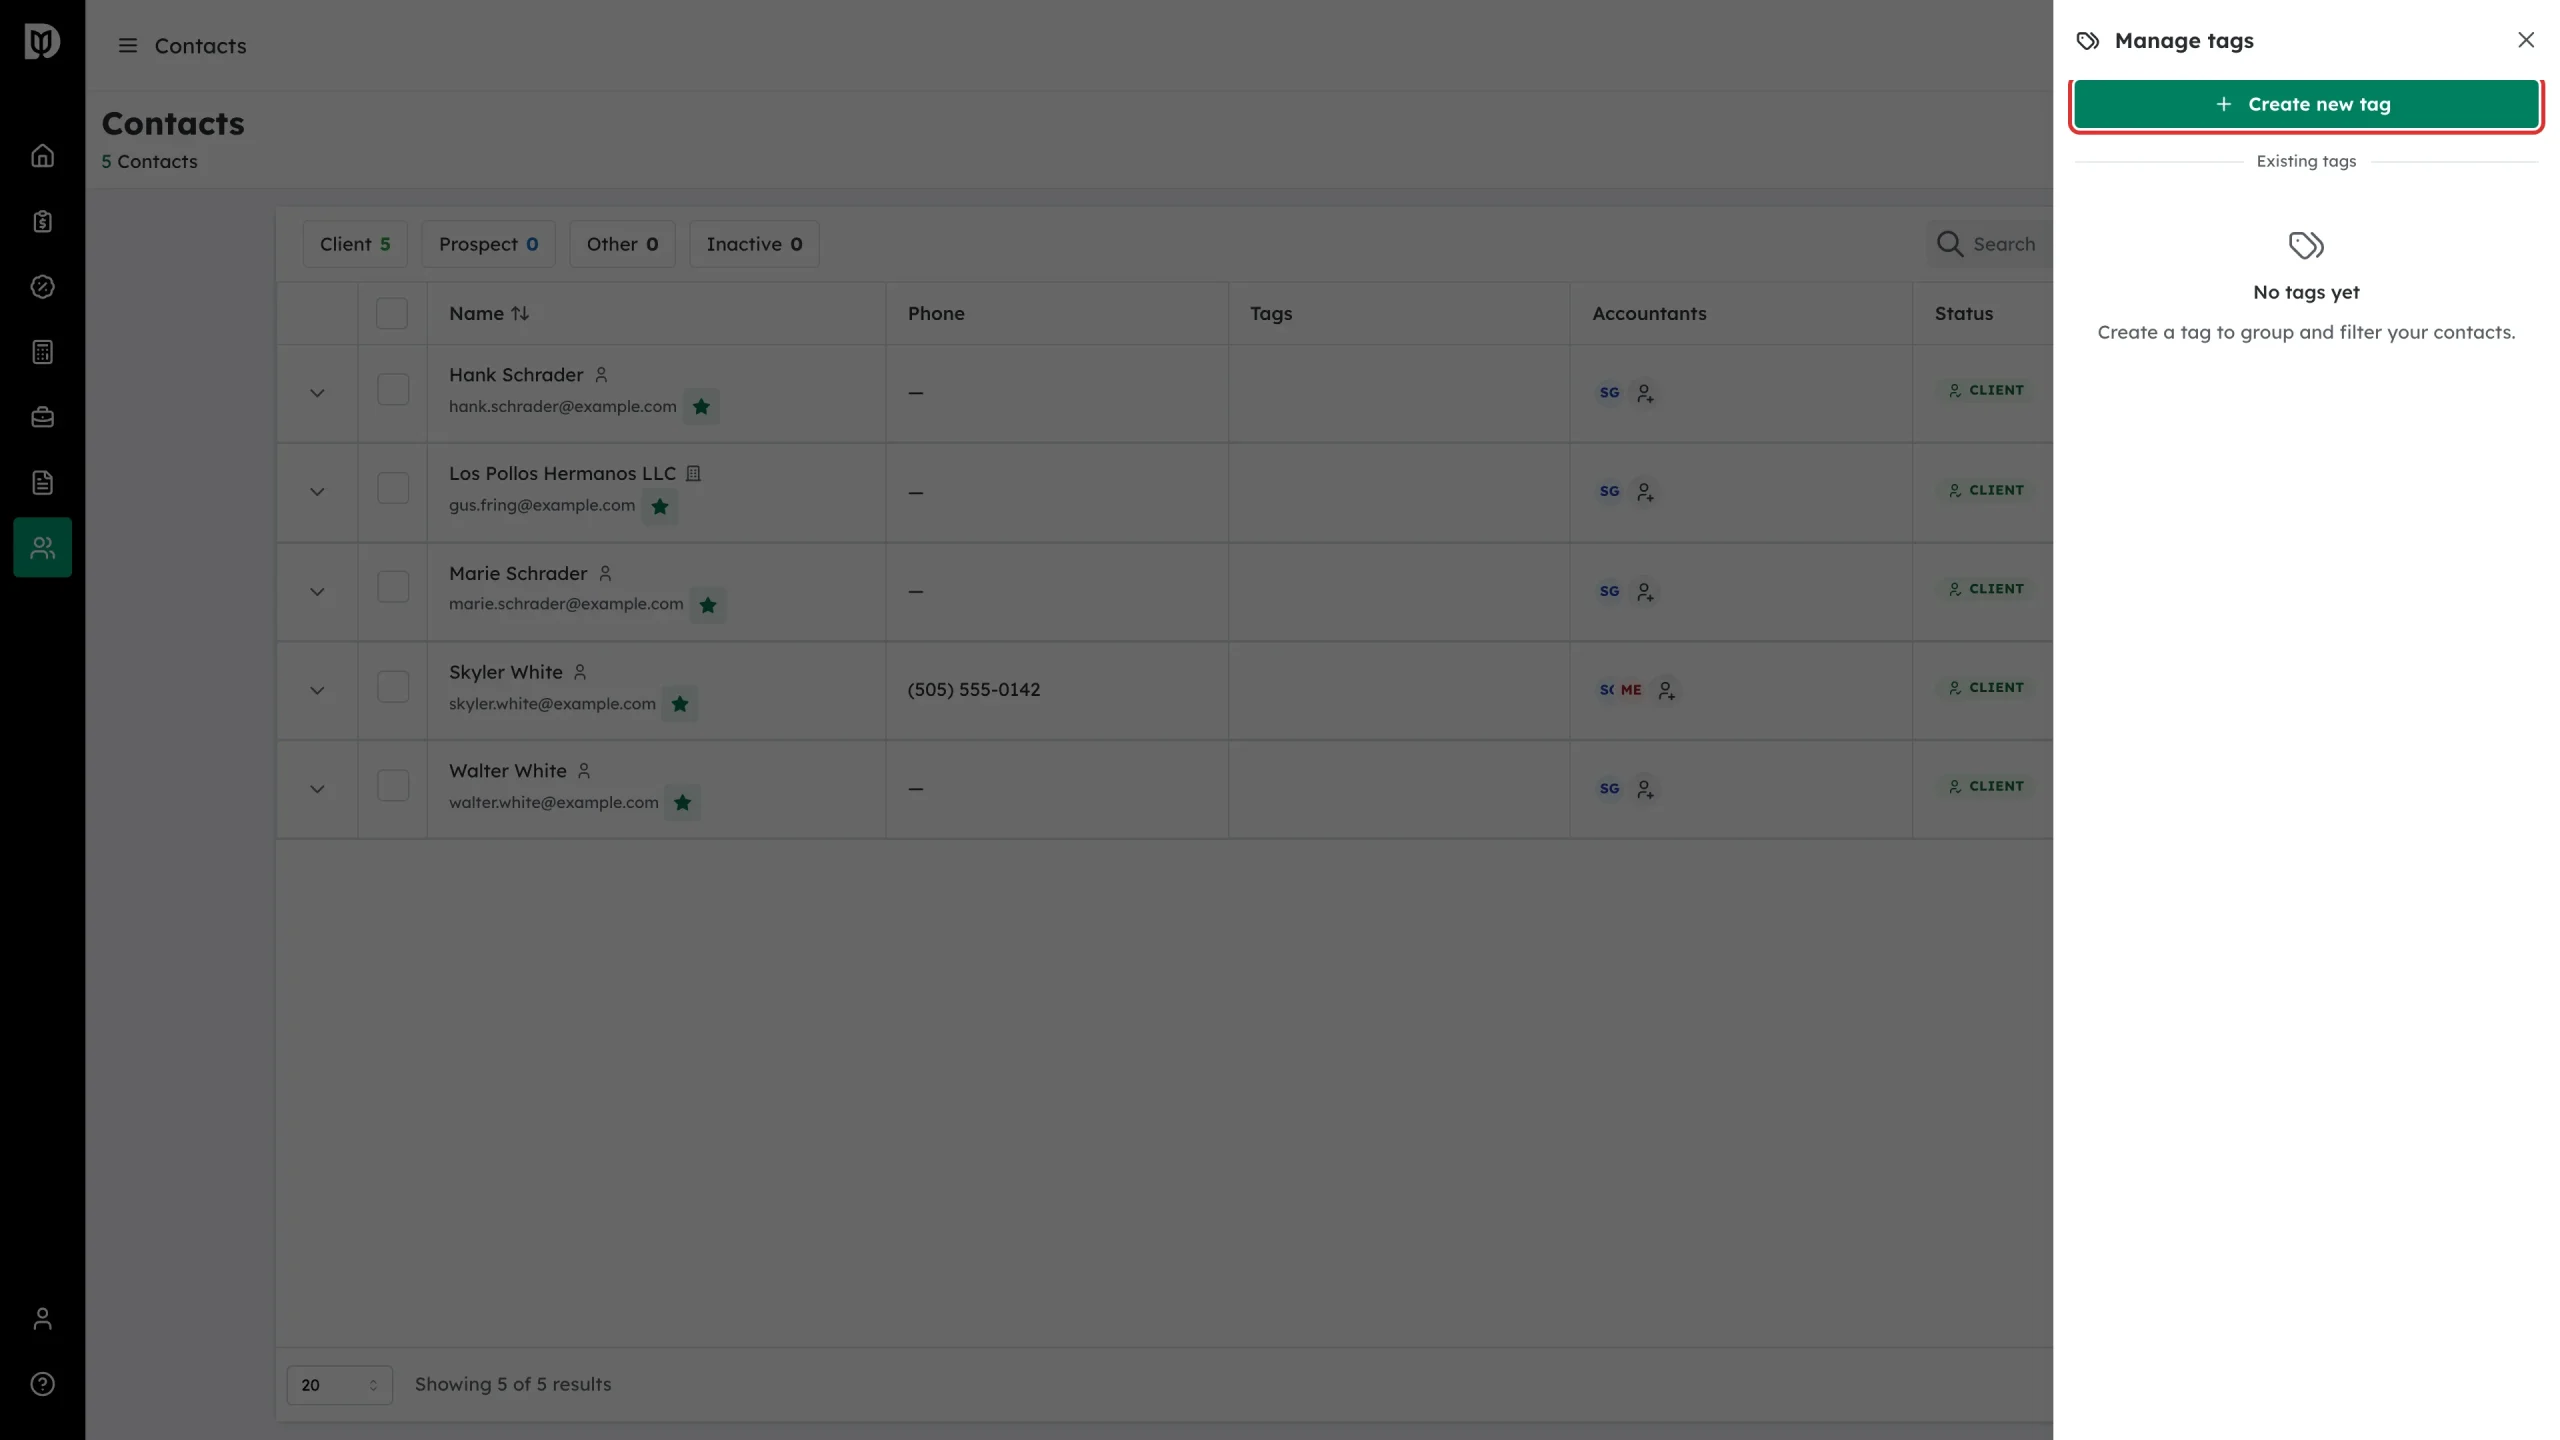
The Manage tags drawer lists your existing tags. Click Create new tag.
Step 3: Name it, pick a color, create
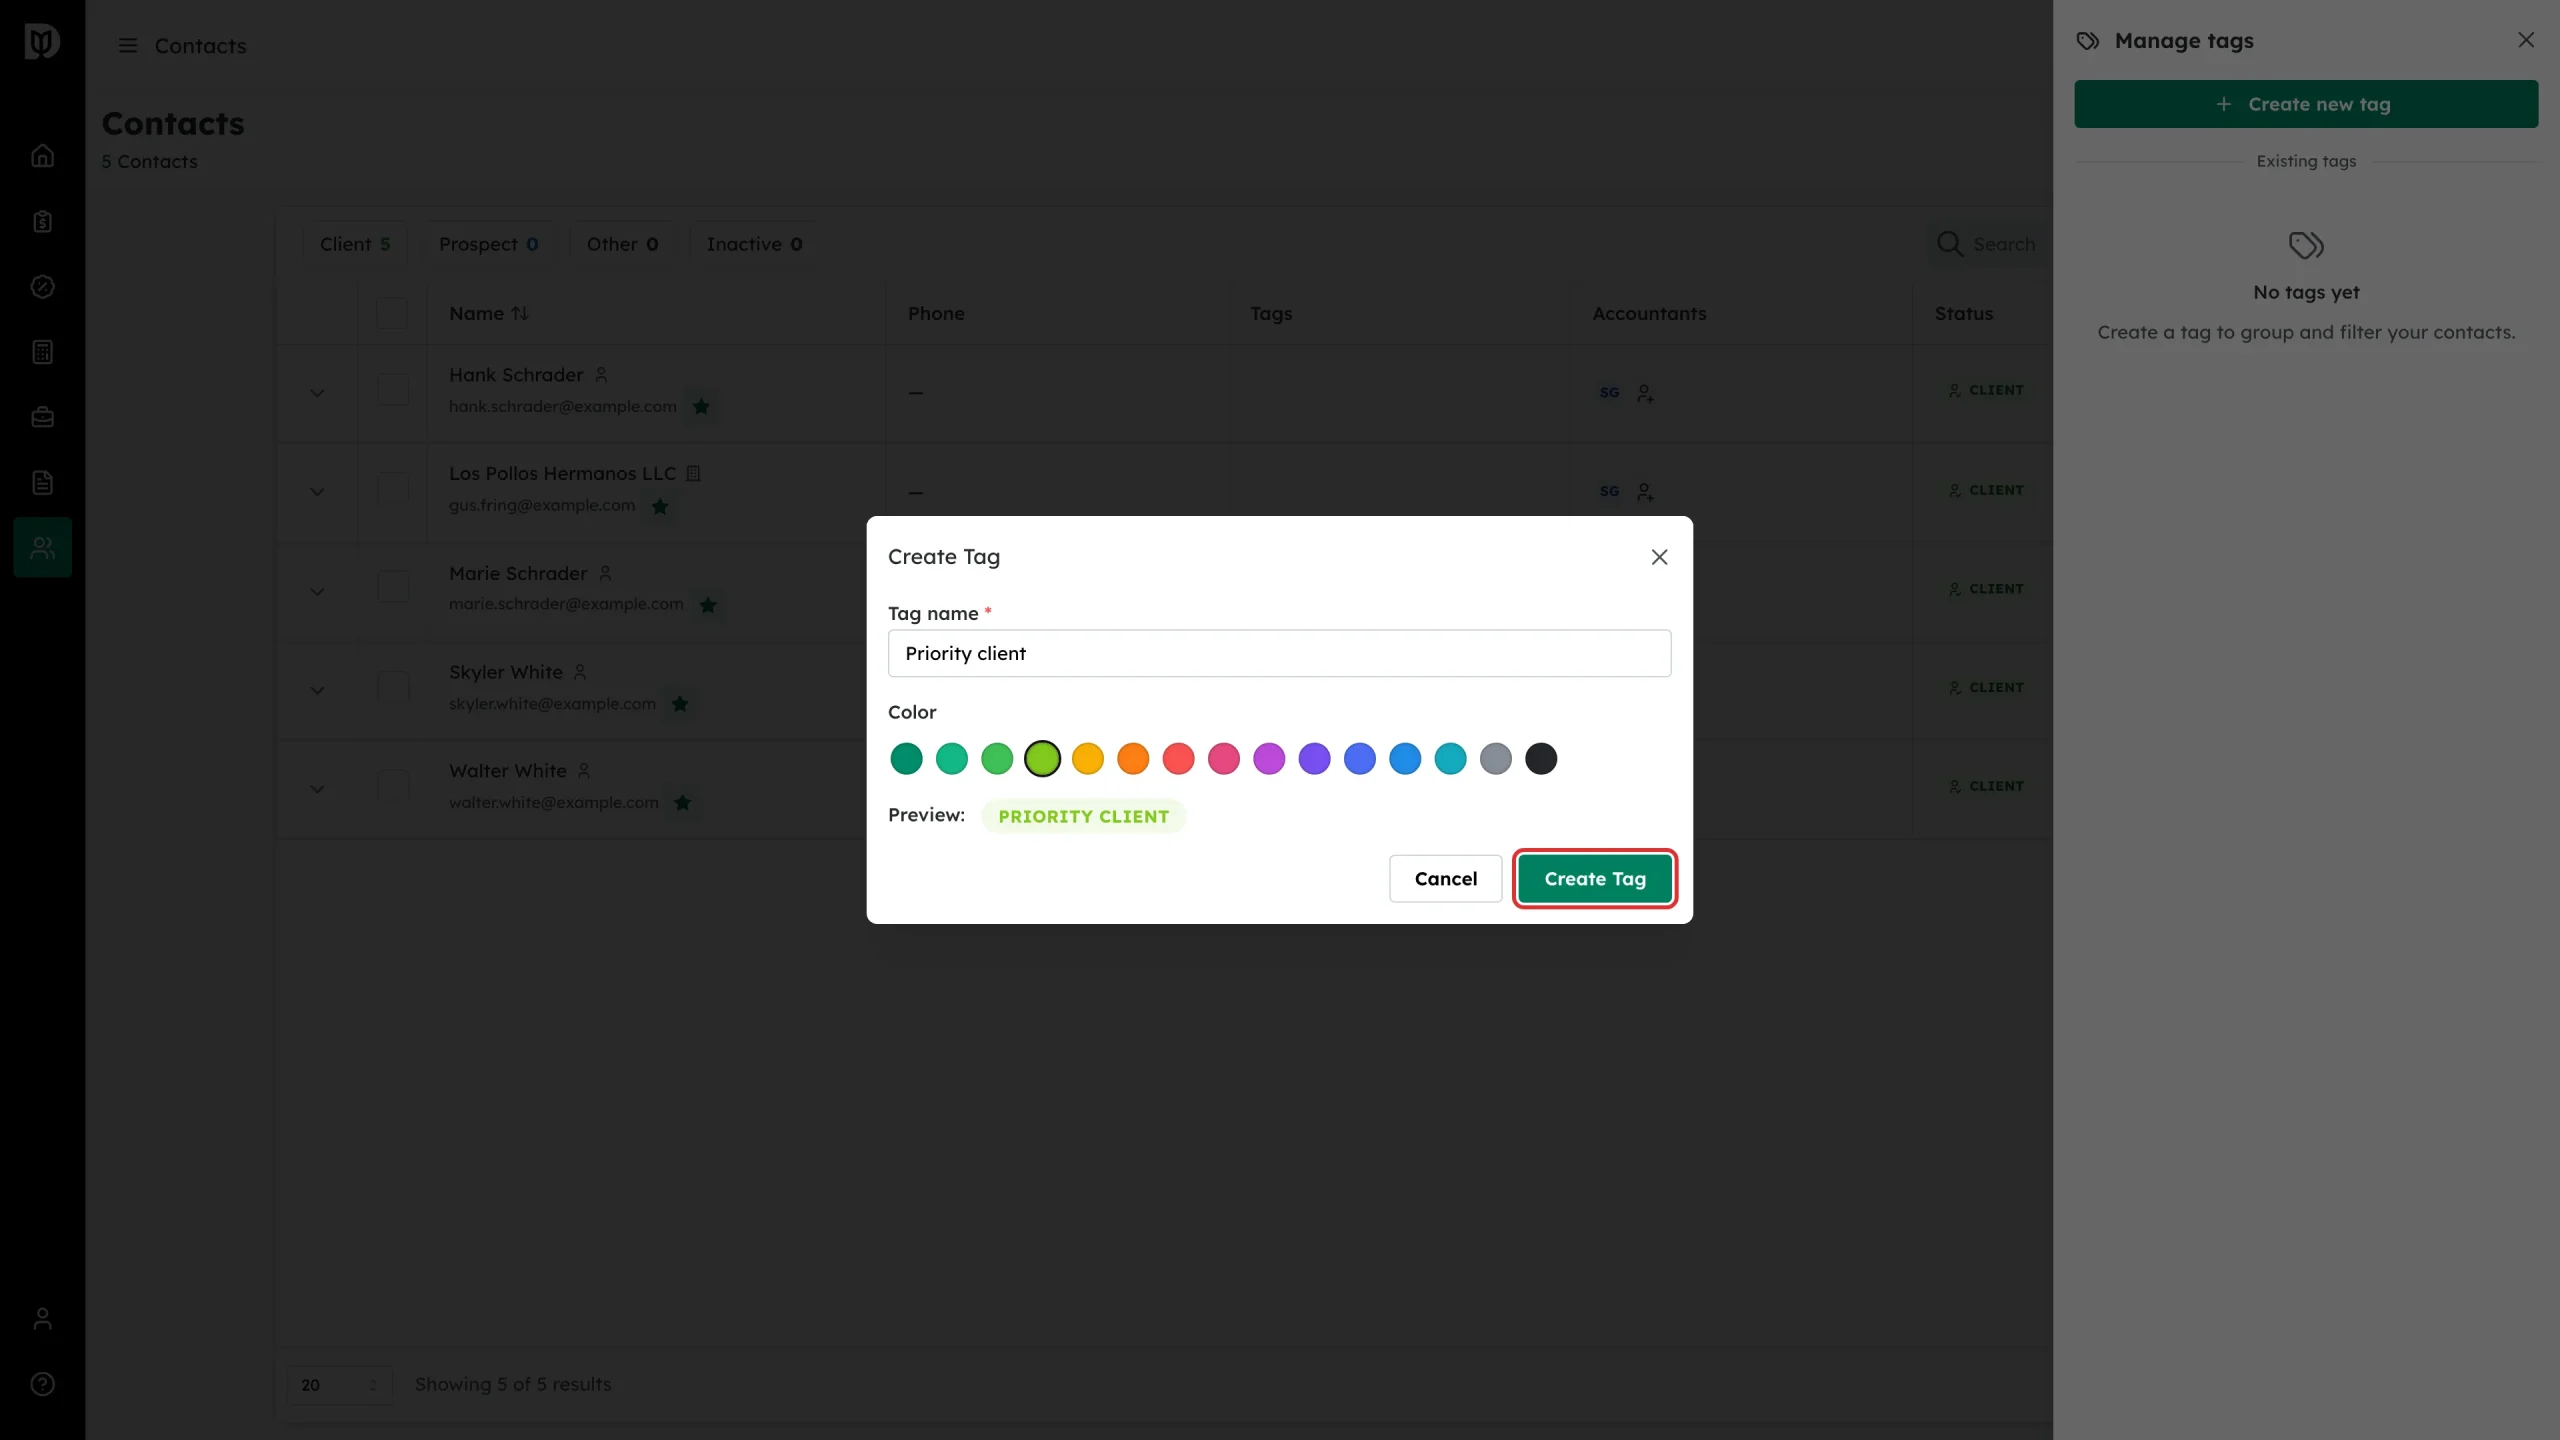
In the Create Tag window, enter a Tag name, click a color swatch, and check the Preview badge. Then click Create Tag.
Put a tag on a contact
Step 4: Open the contact and click Add tags
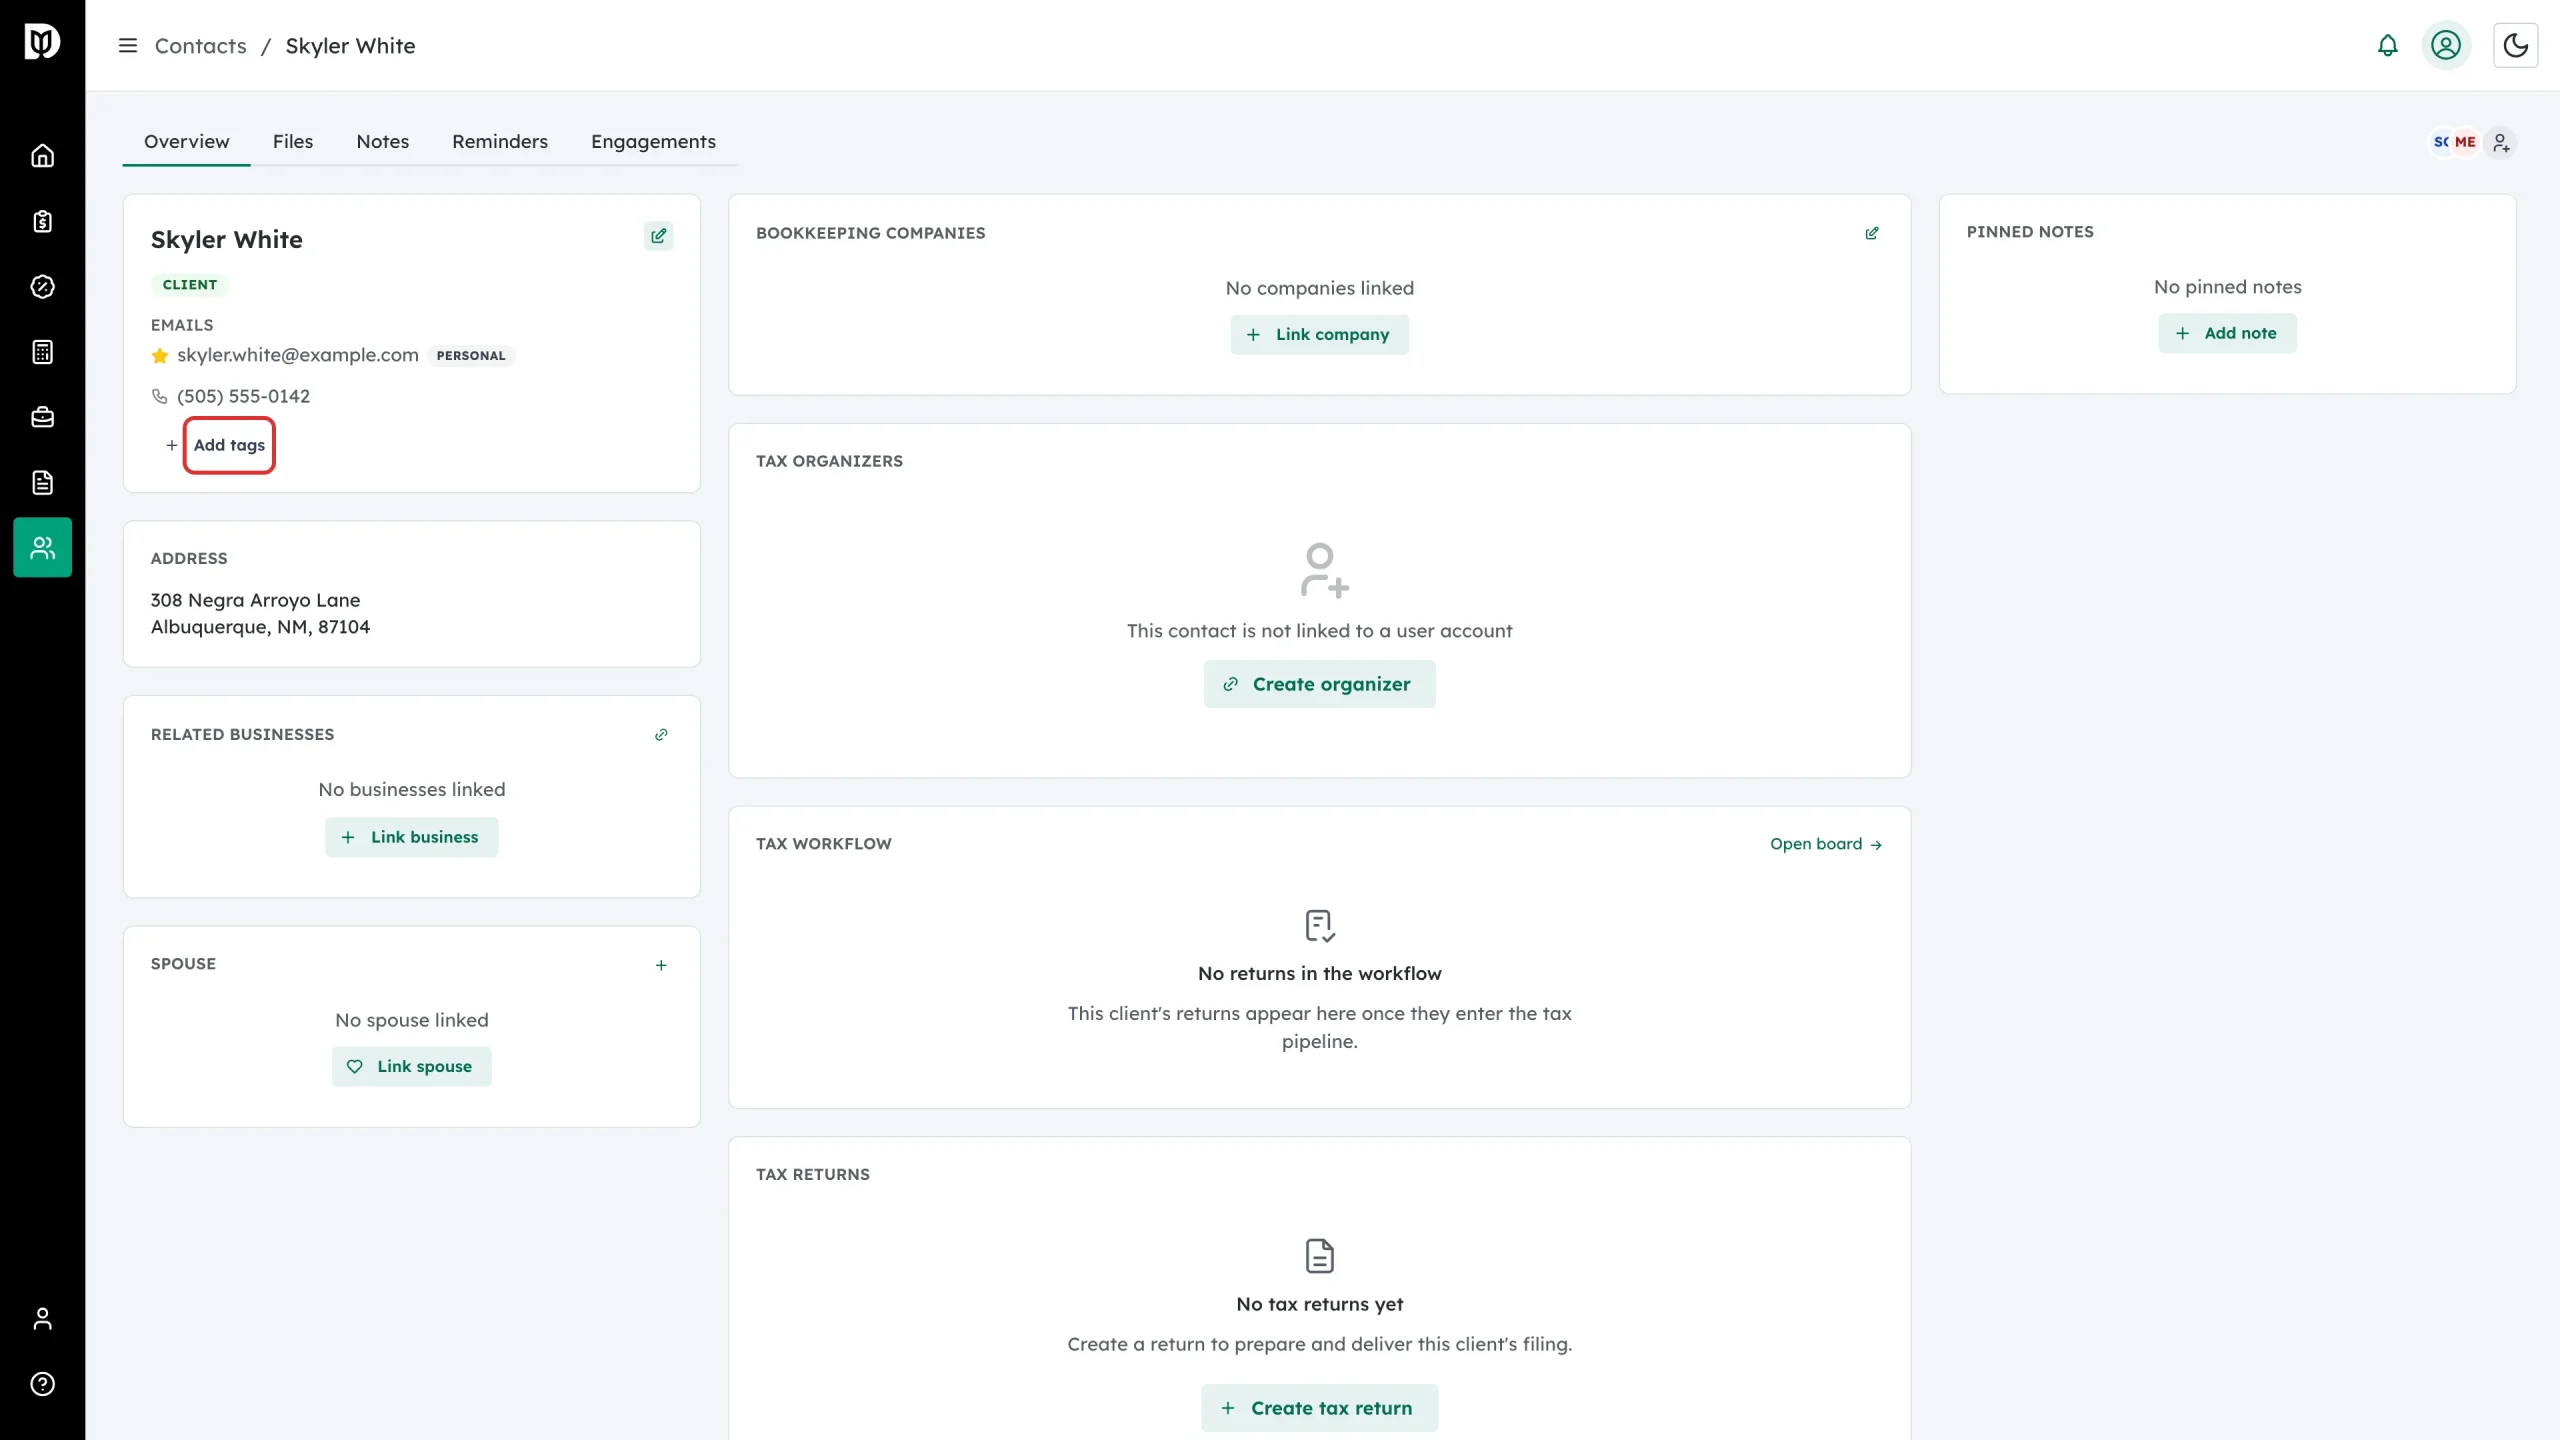
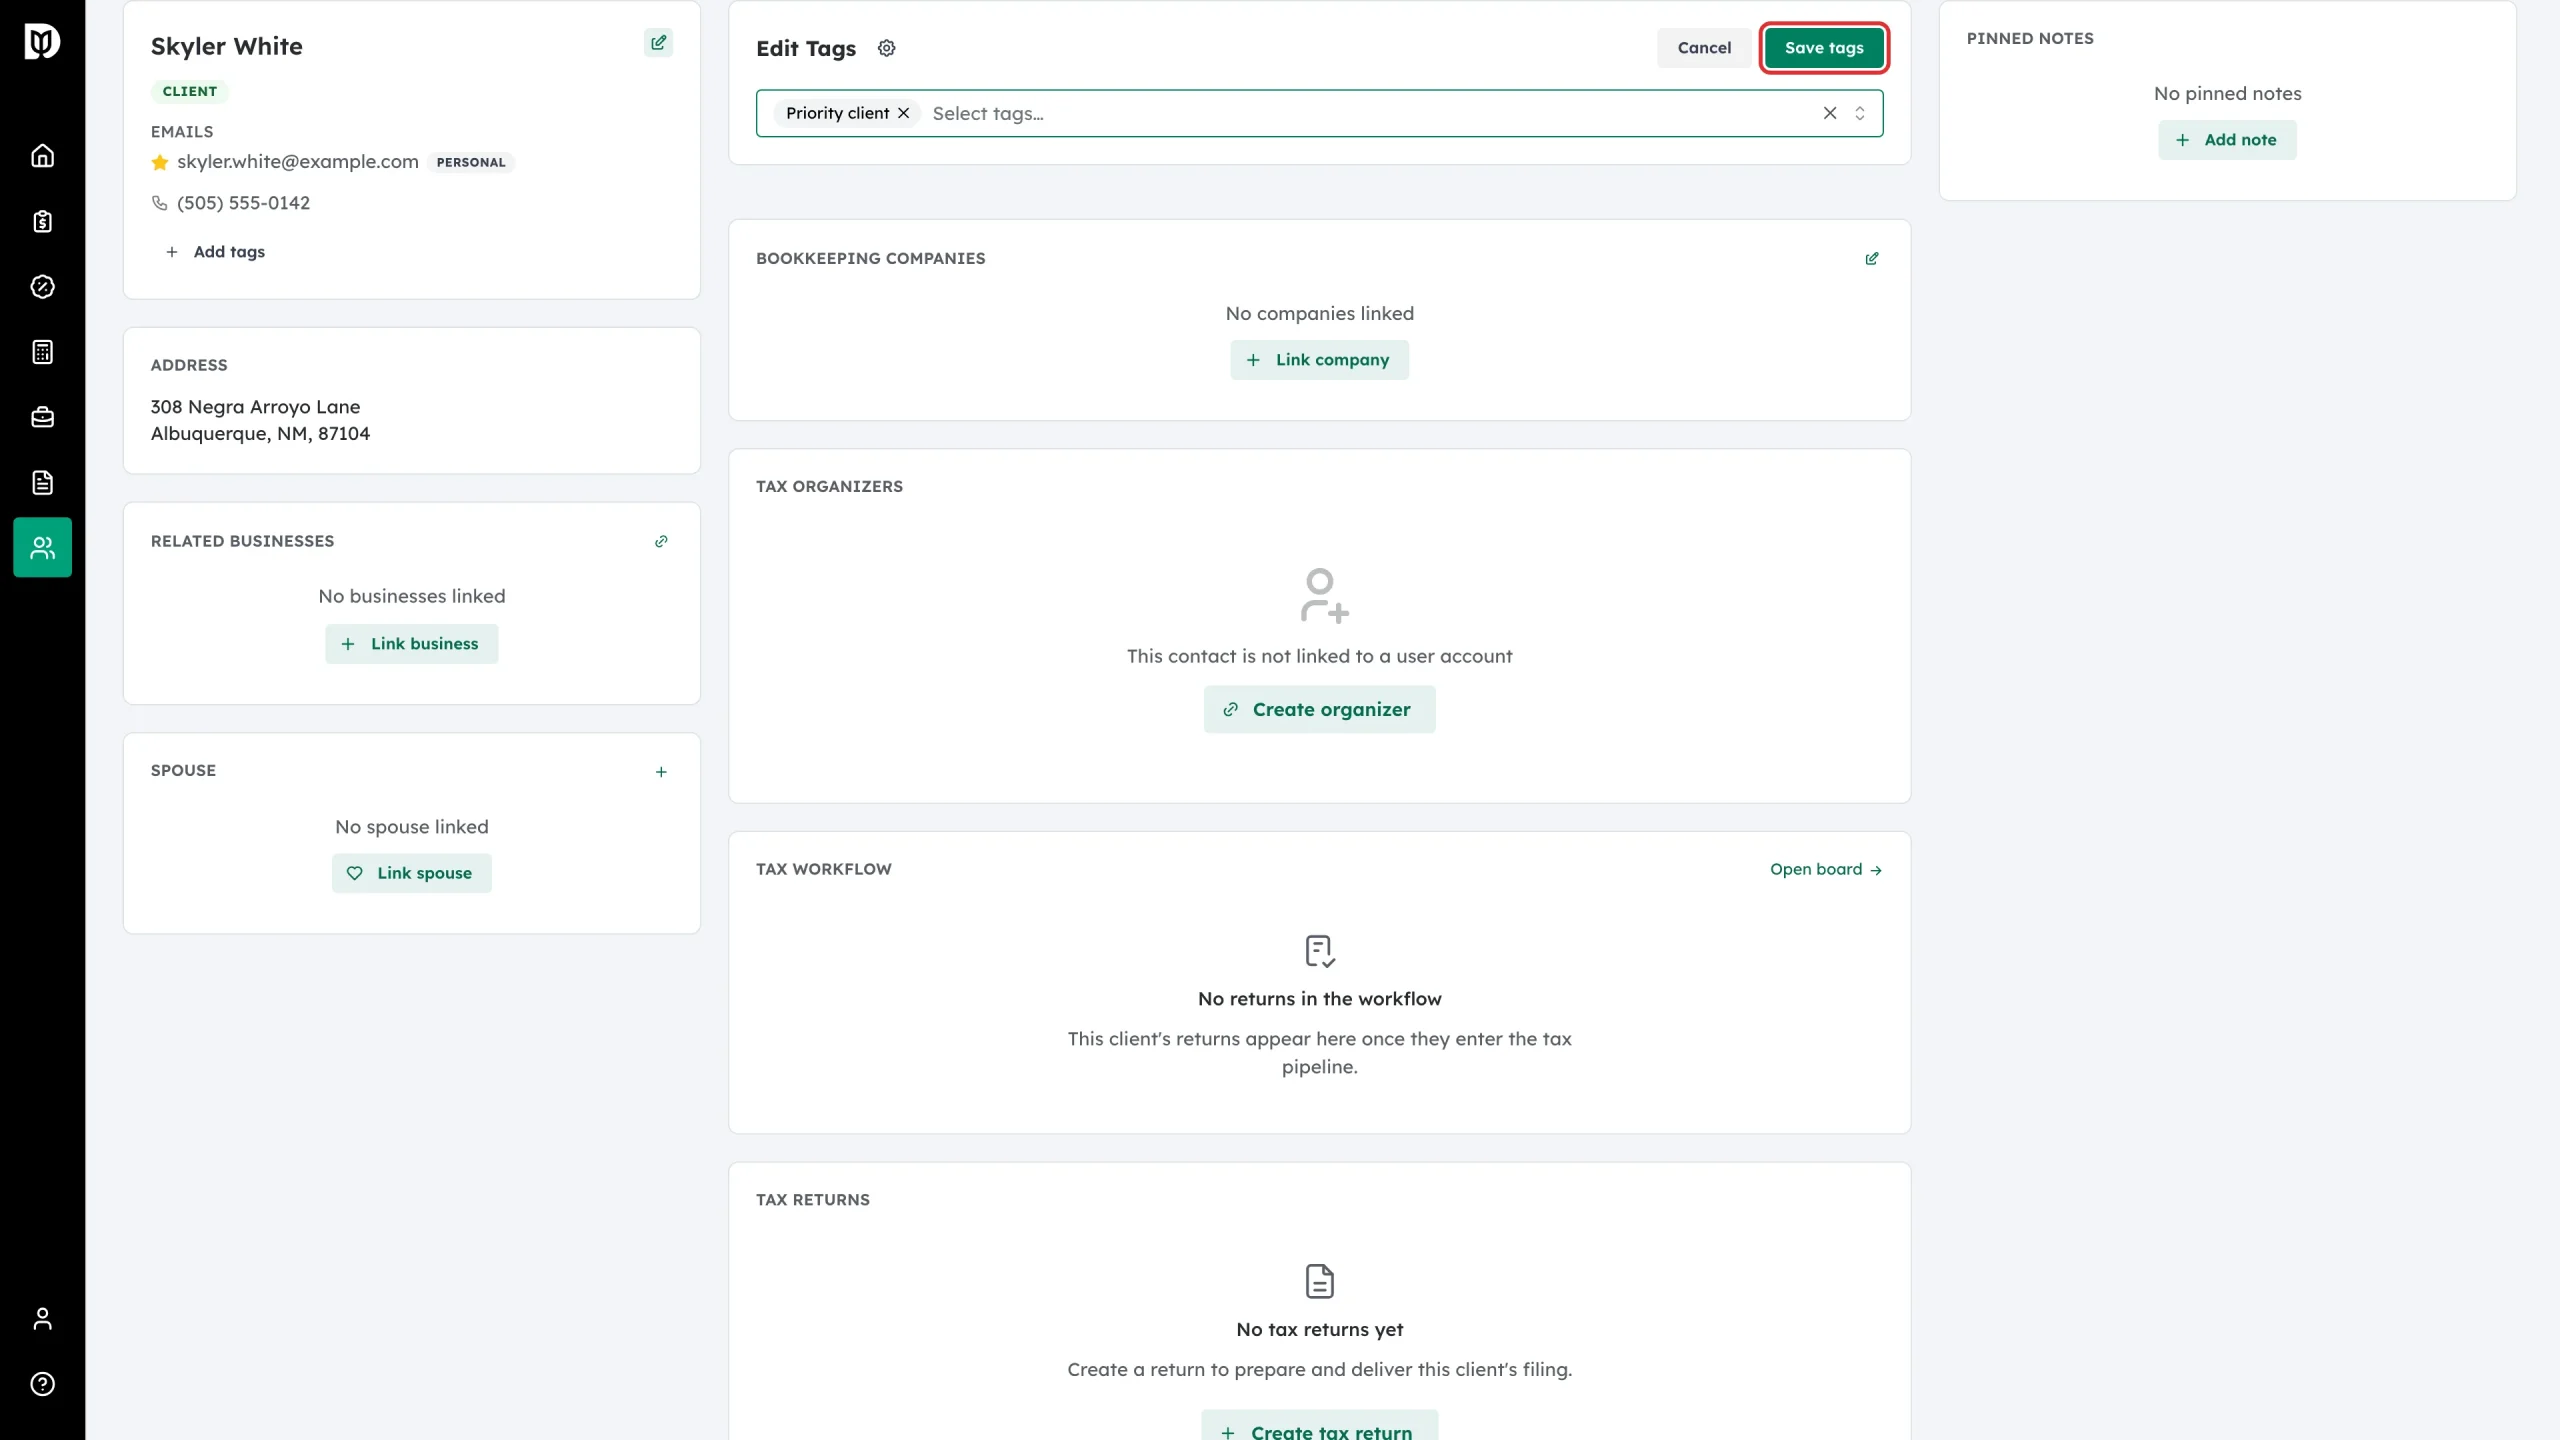
On the contact’s profile card, click + Add tags (or the pencil next to the existing tags).
Step 5: Select tags and save
The Edit Tags panel opens. Pick tags in the Select tags… field and click Save tags. The tags appear as colored badges on the profile and in the contact list. (The gear icon next to the panel title opens tag management.)
You can also type tags straight into the Tags field on Step 3 of the New contact wizard.
Filter contacts by tag
Step 6: Use the Tags column filter
Click the funnel icon in the toolbar to show the filter row, then pick a tag in the Tags column filter. The list narrows to matching contacts; clear the filter with its ×.

Tag many contacts at once
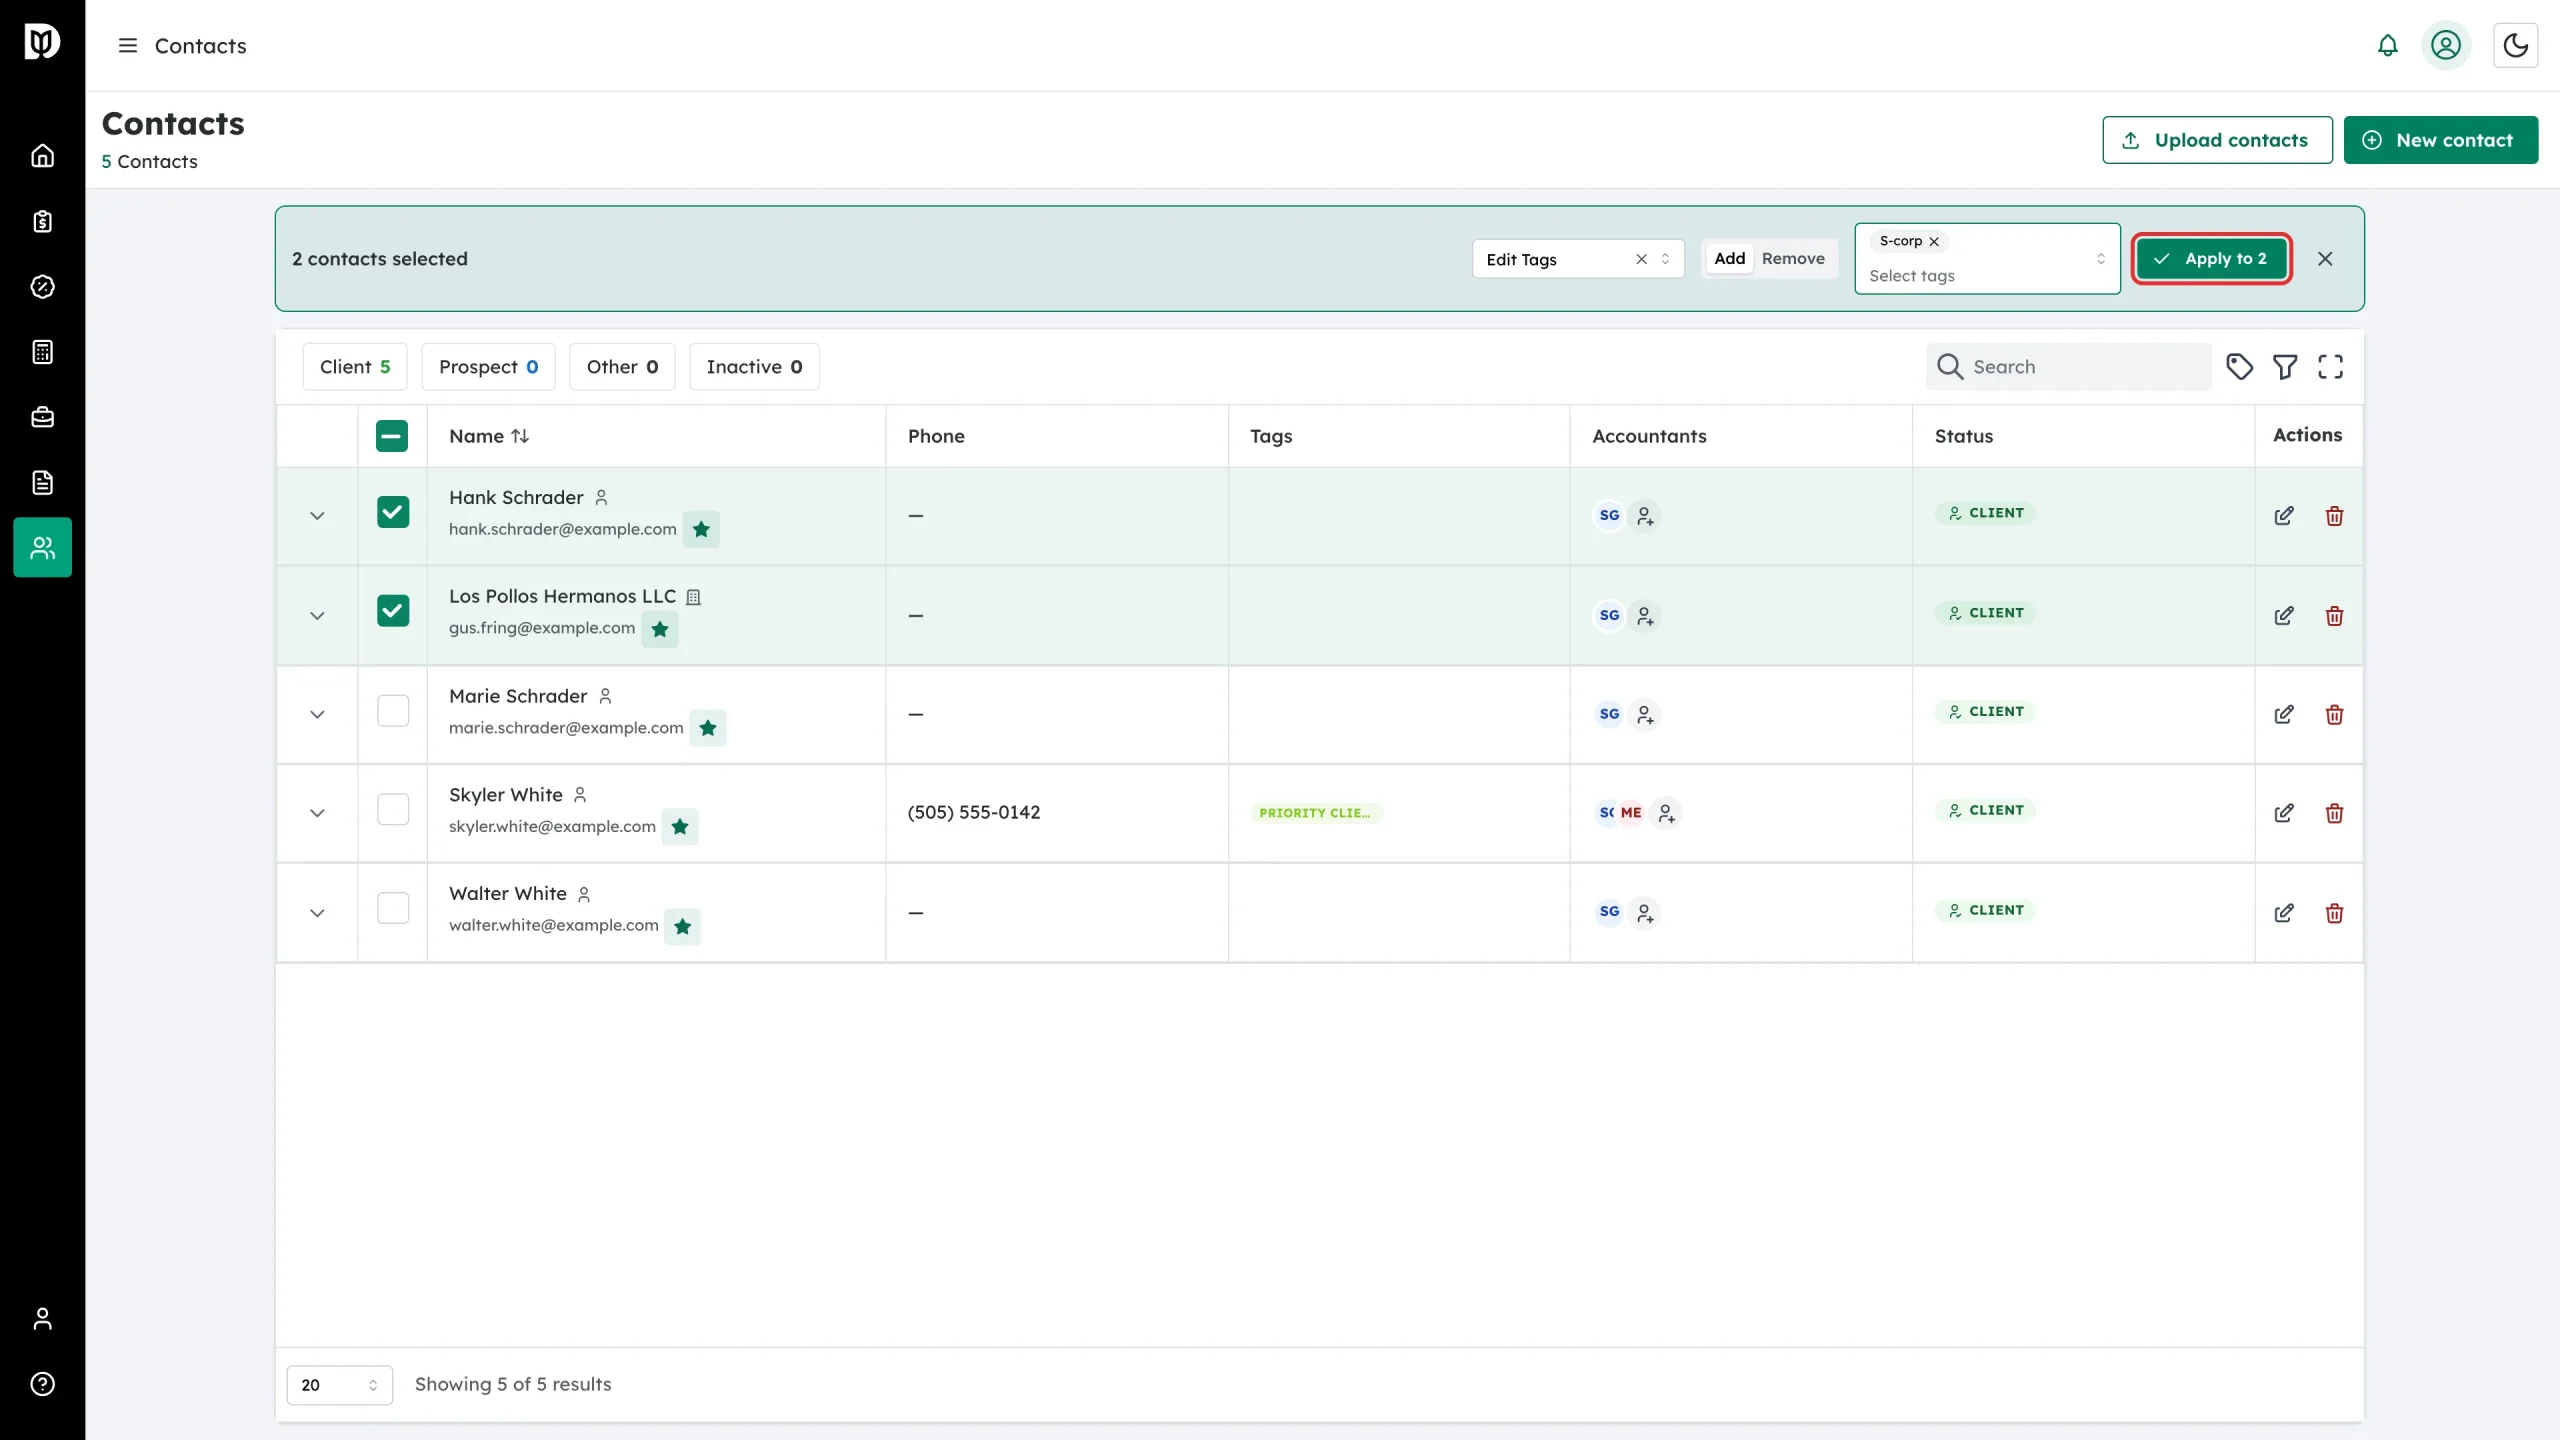
Step 7: Bulk edit tags
- Tick the checkboxes for the contacts you want to change.
- In the bulk bar, choose Edit Tags from the action dropdown.
- Pick Add or Remove, select the tags, and click Apply to N.
Editing or deleting a tag
- Open Manage tags from the toolbar and click a tag (or its pencil icon).
- Change the name or color and click Save Changes.
- To remove it everywhere, use Delete tag and confirm — the tag disappears from every contact that had it.
What happens next
Tags show as colored badges in the Tags column and on each profile. Combine them with the status chips and column filters to build working lists — for example, every S-corp client with a priority tag.
Troubleshooting
- A tag isn’t showing on the contact: Make sure you clicked Save tags in the Edit Tags panel.
- The filter shows nothing: The status chips filter at the same time — check you’re not limited to one status.
- Deleted a tag by mistake: Deletion removes it from all contacts and can’t be undone; recreate the tag and re-apply it (bulk Edit Tags makes this fast).