Debits gets your 1099 data filing-ready and hands it to the service that does the filing. It does not e-file. Export the year, upload the file to Track1099 or Tax1099 (or open the CSV in anything else), and file there.
What gets exported
Only vendors whose status is Ready to File — the ones with a taxpayer ID and an address on file. Vendors that still need a W-9, foreign vendors, excluded vendors and vendors already marked Filed are all left out. If none are ready, Debits tells you so instead of downloading an empty file.
Export the data
-
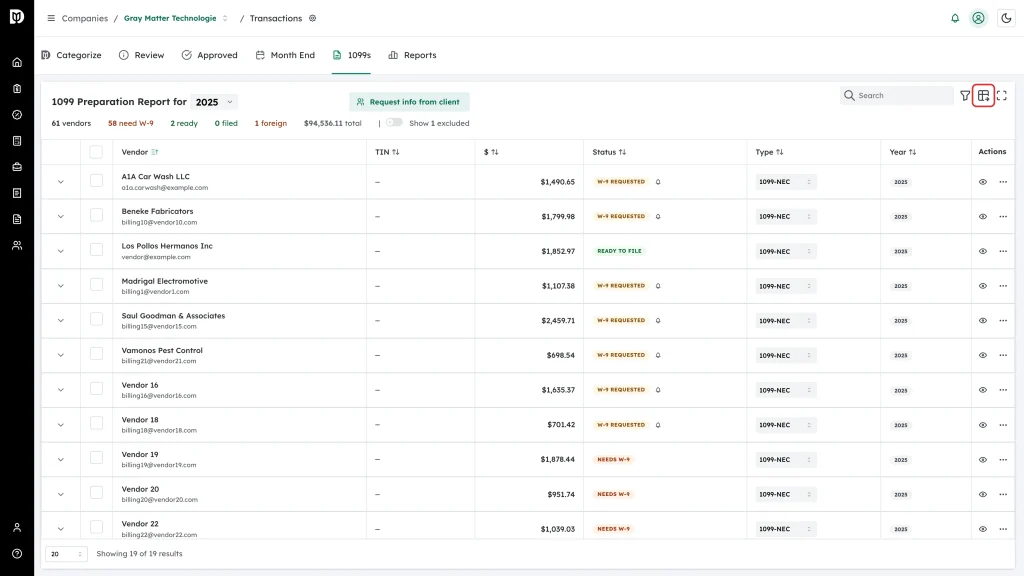
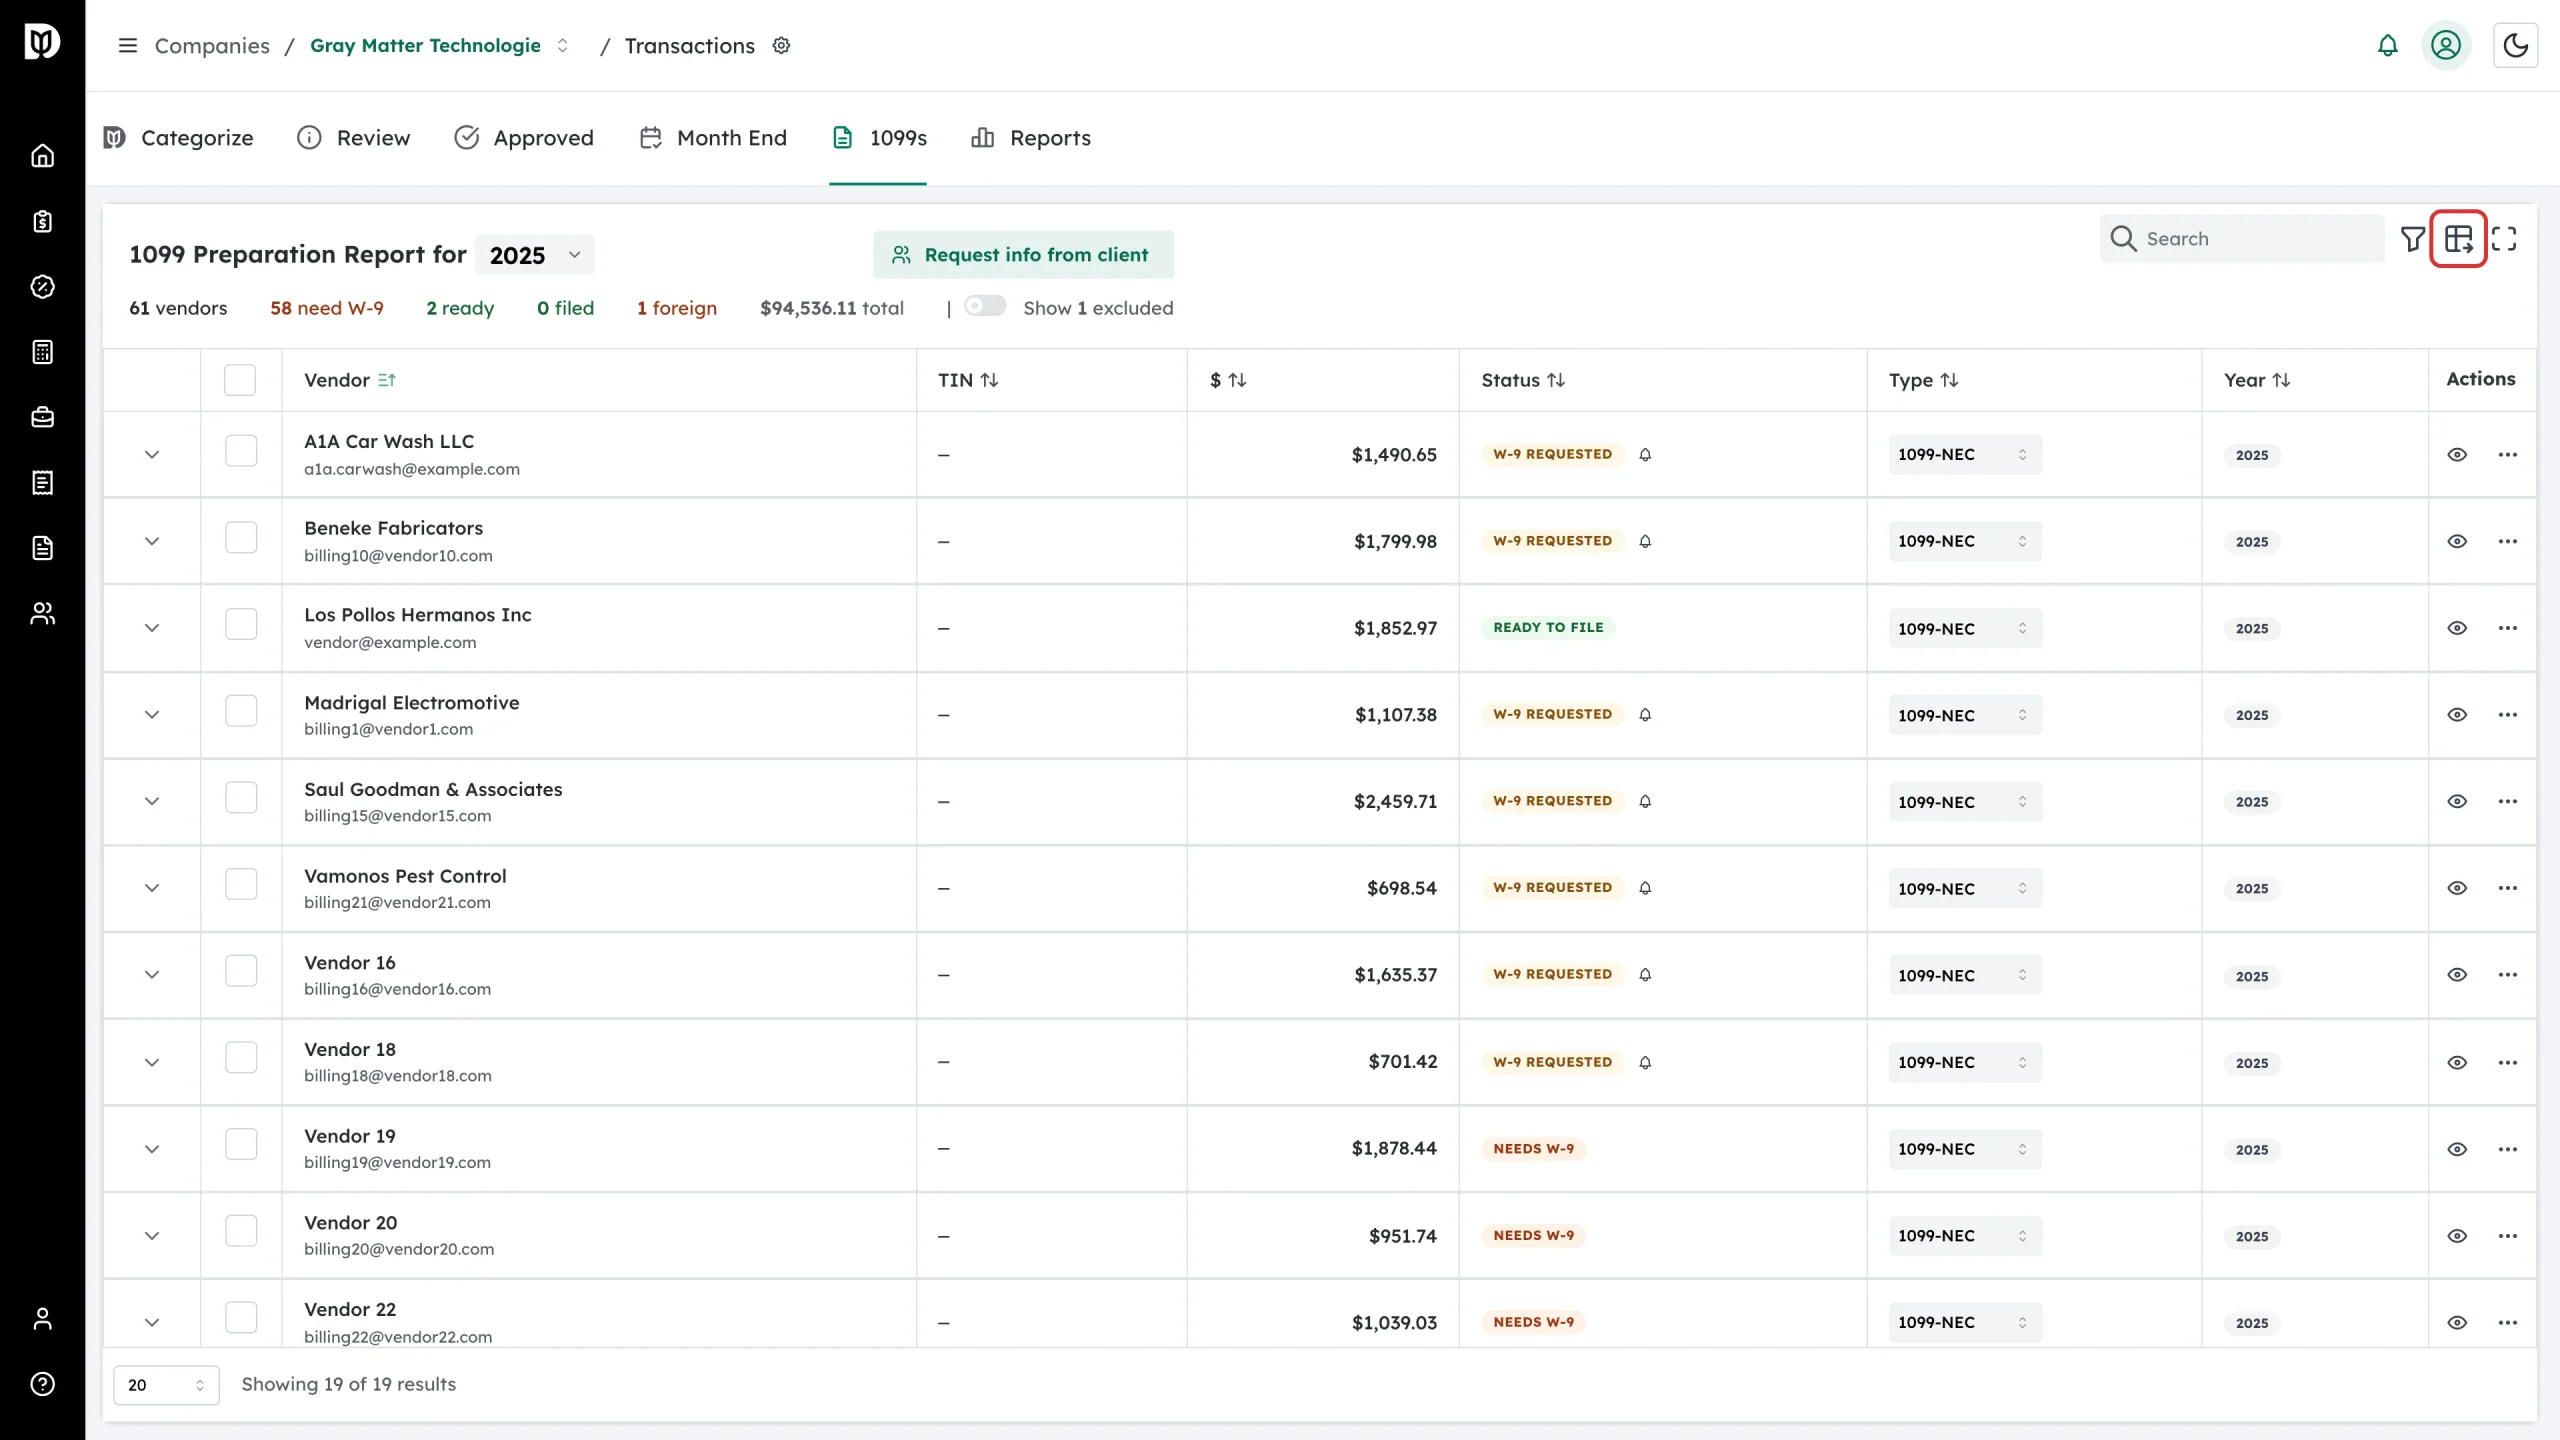
On the 1099s tab, check the year in the report title, then click the export icon at the top right of the table.
-
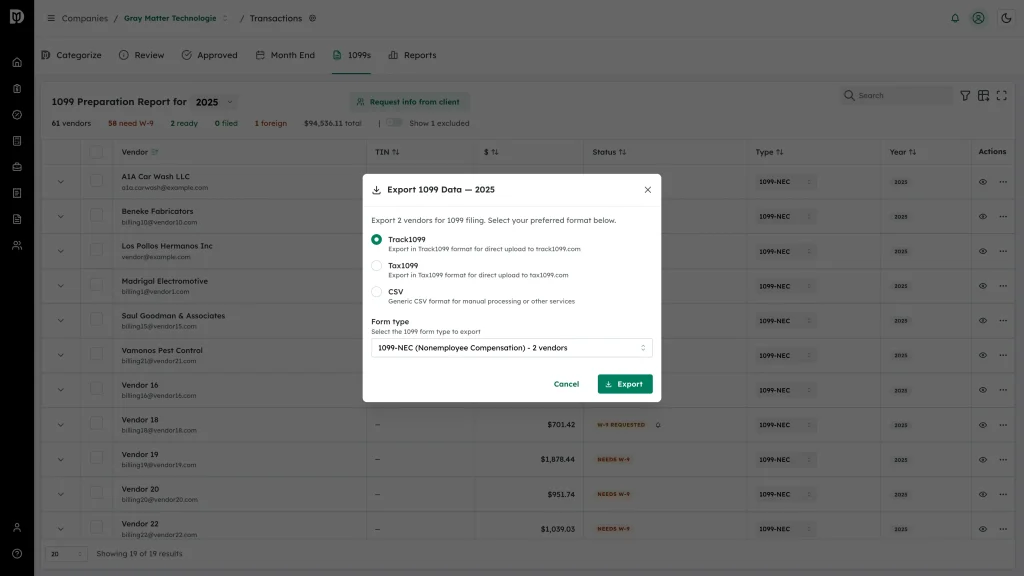
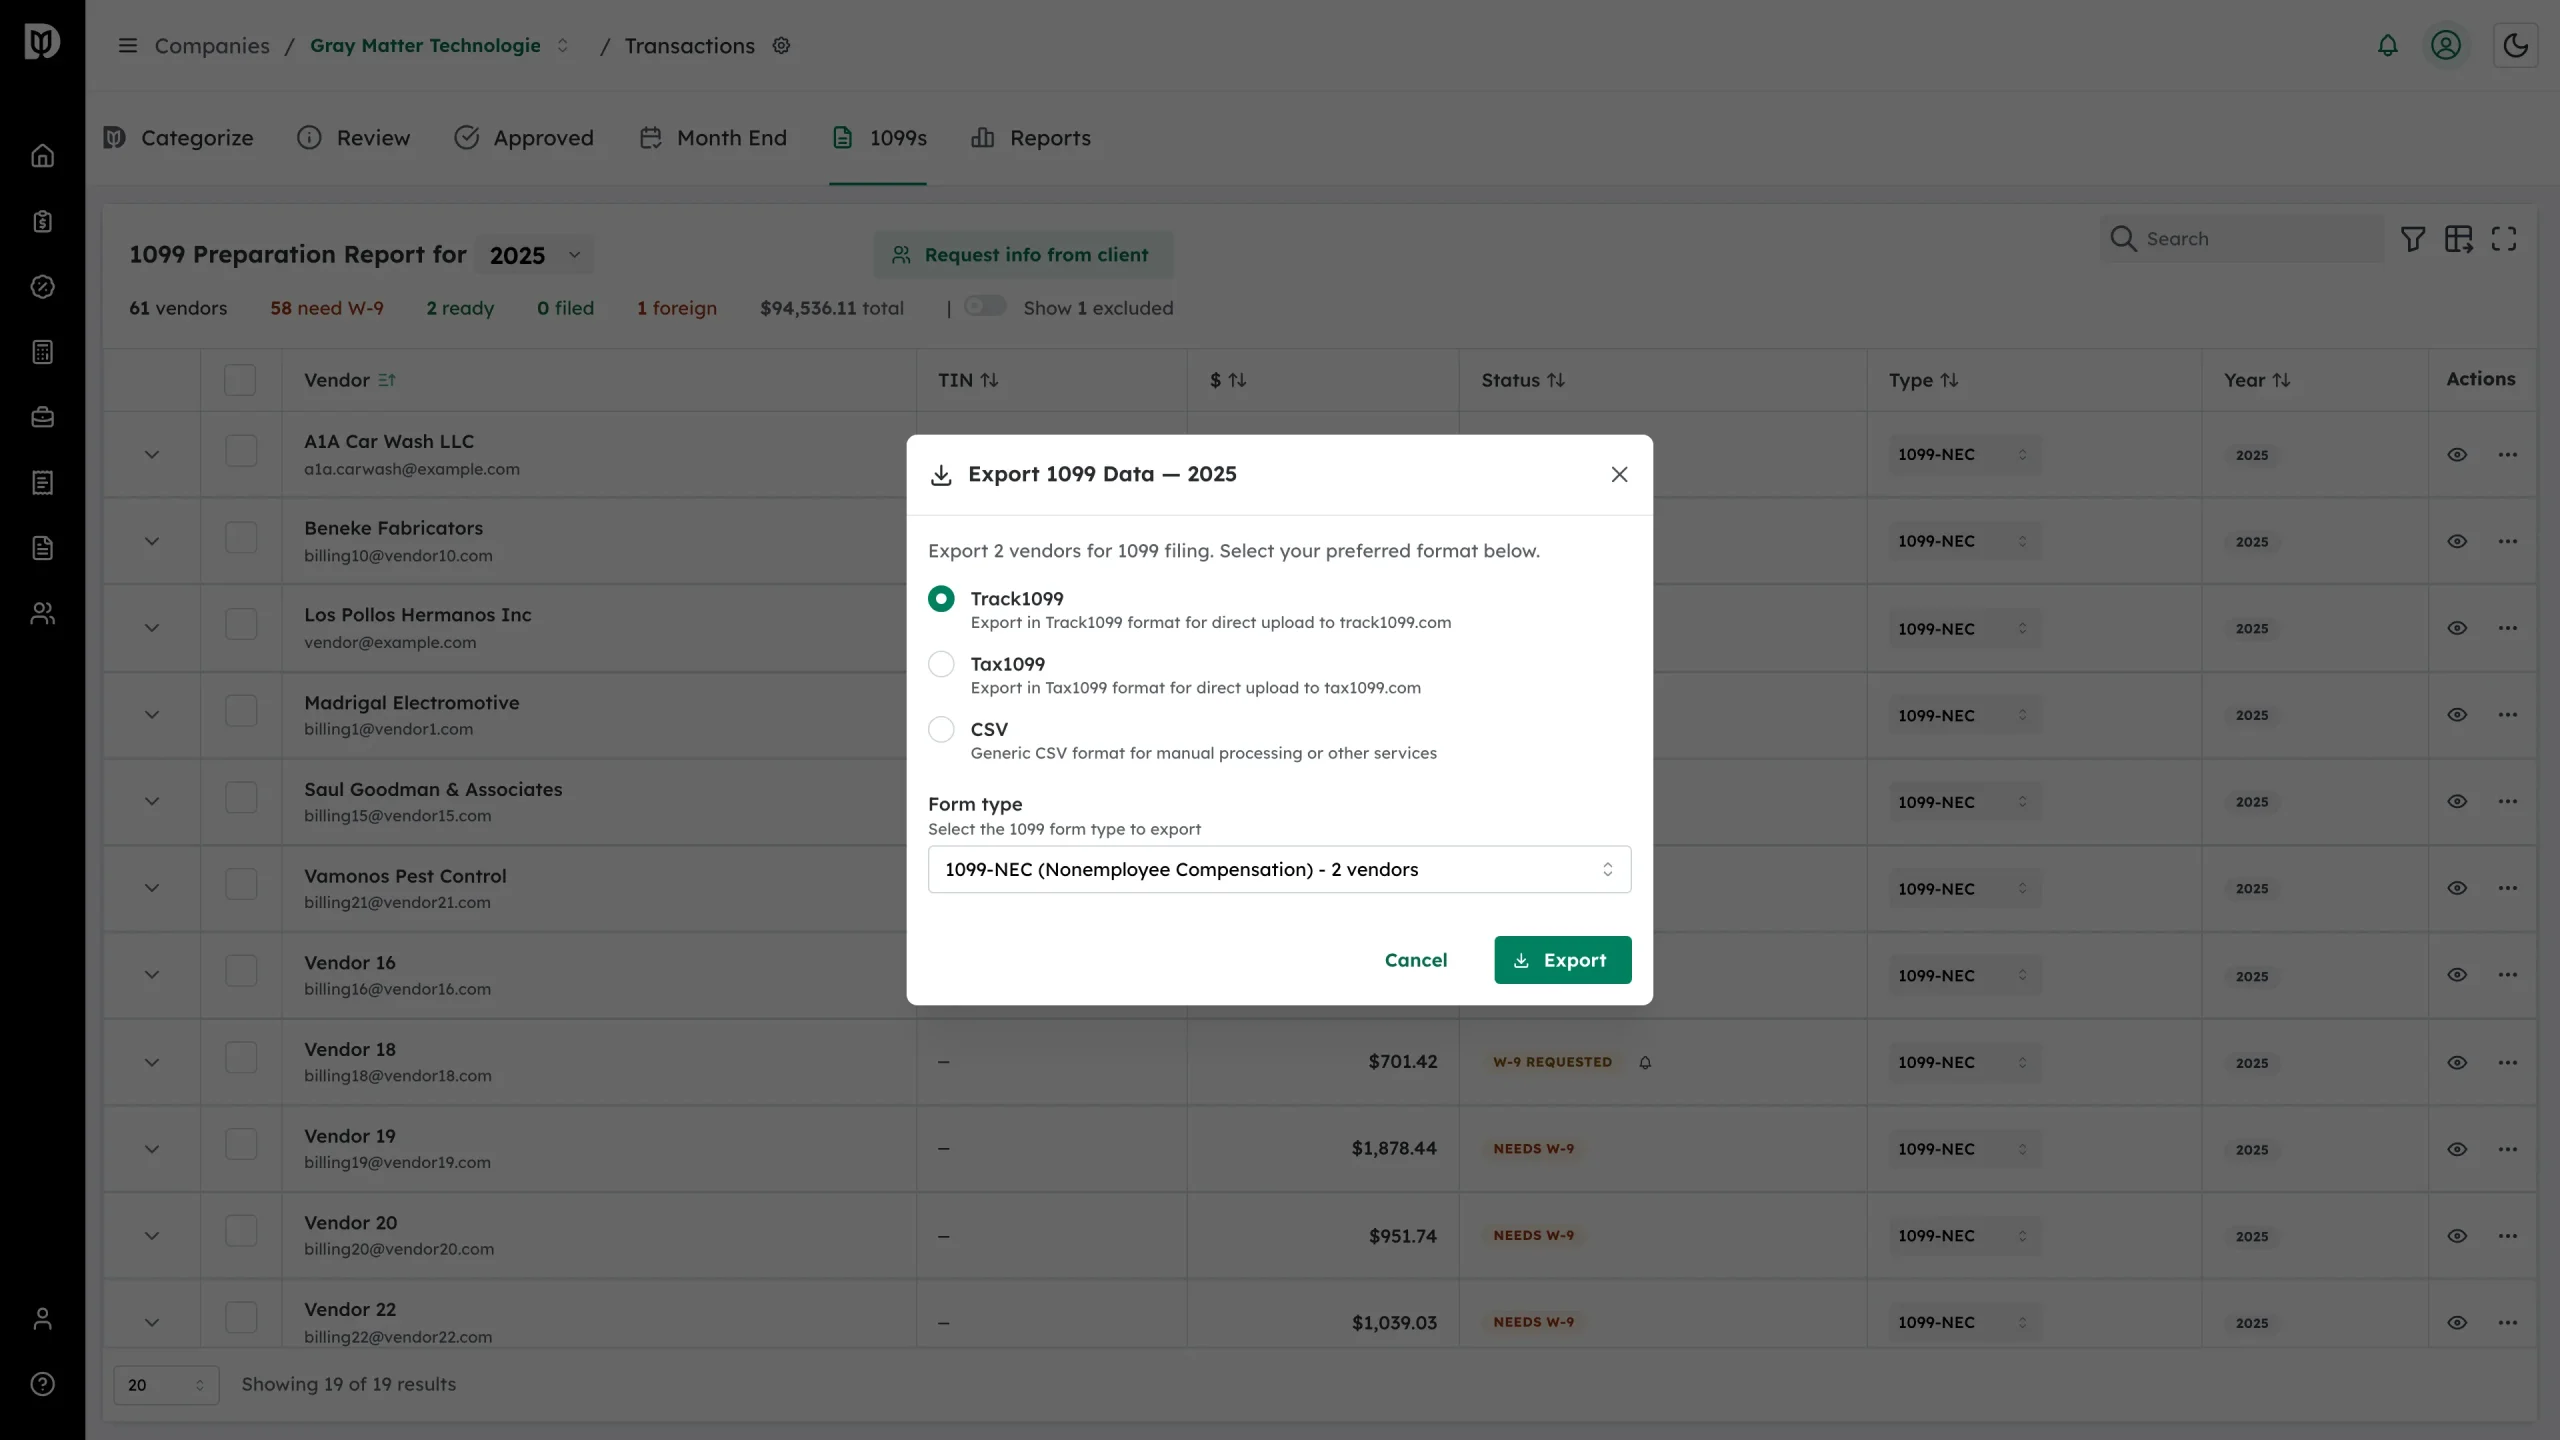
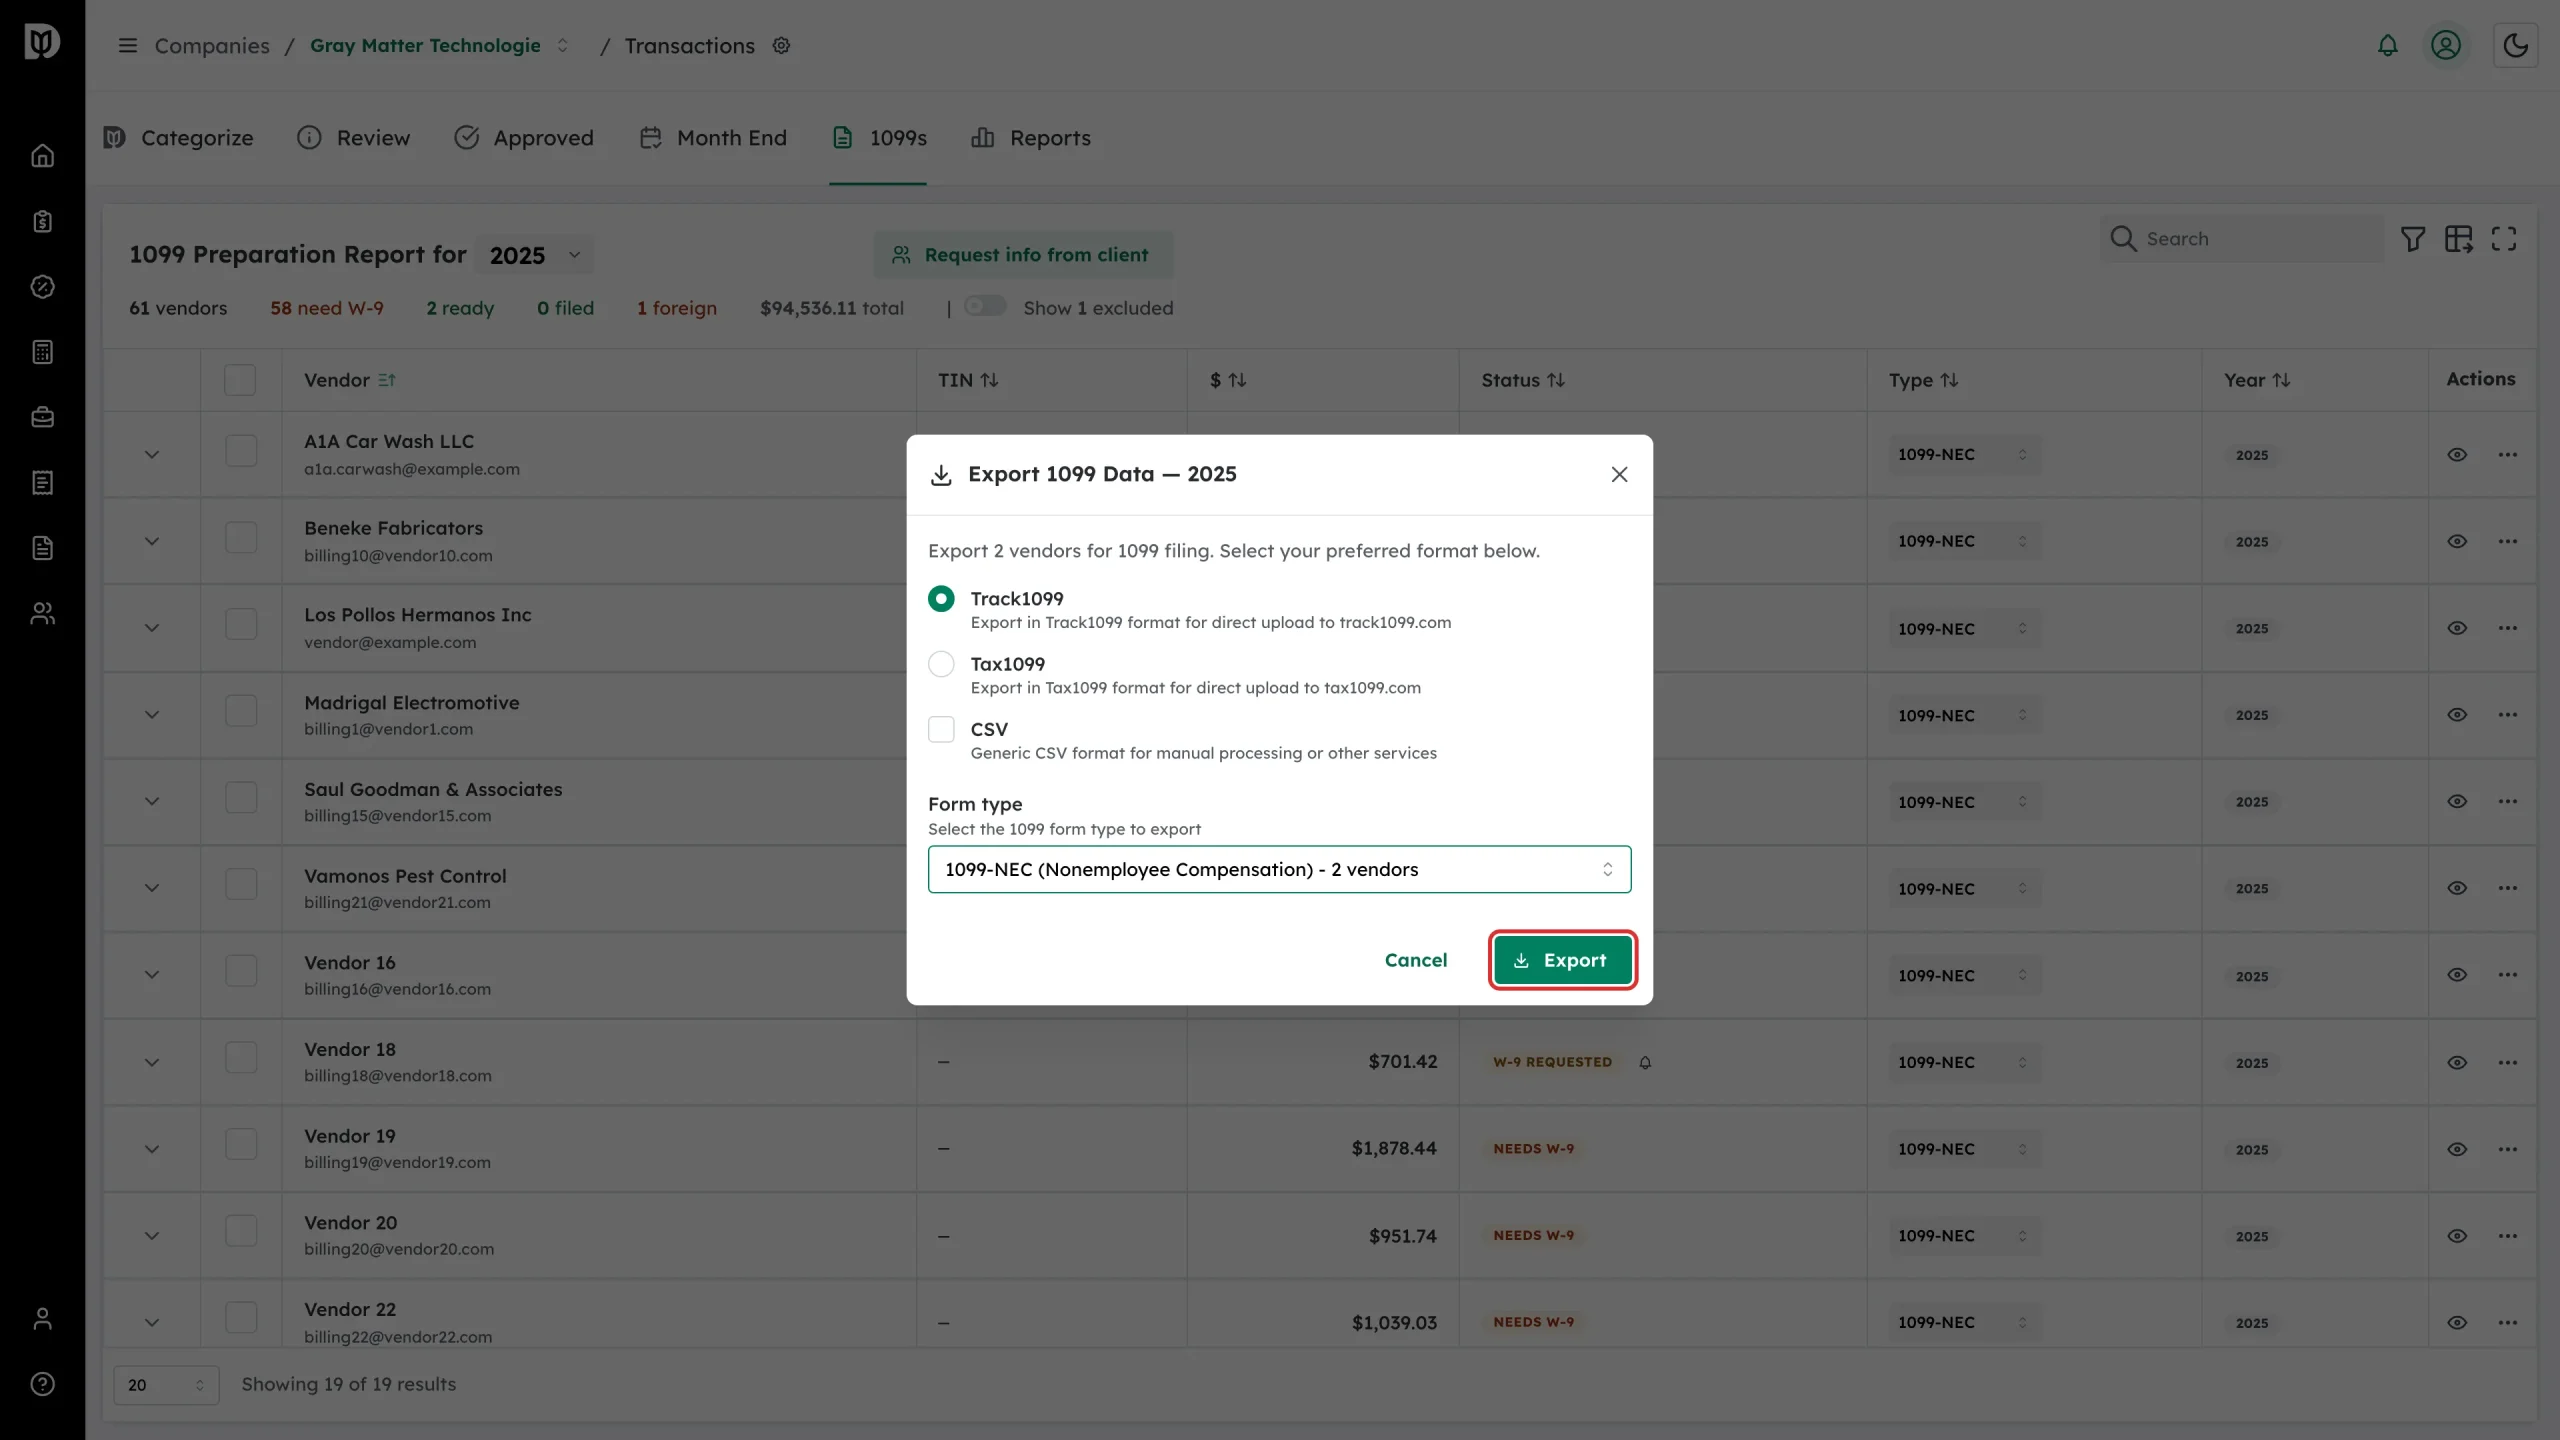
The Export 1099 Data window opens and tells you how many vendors the file will contain.
-
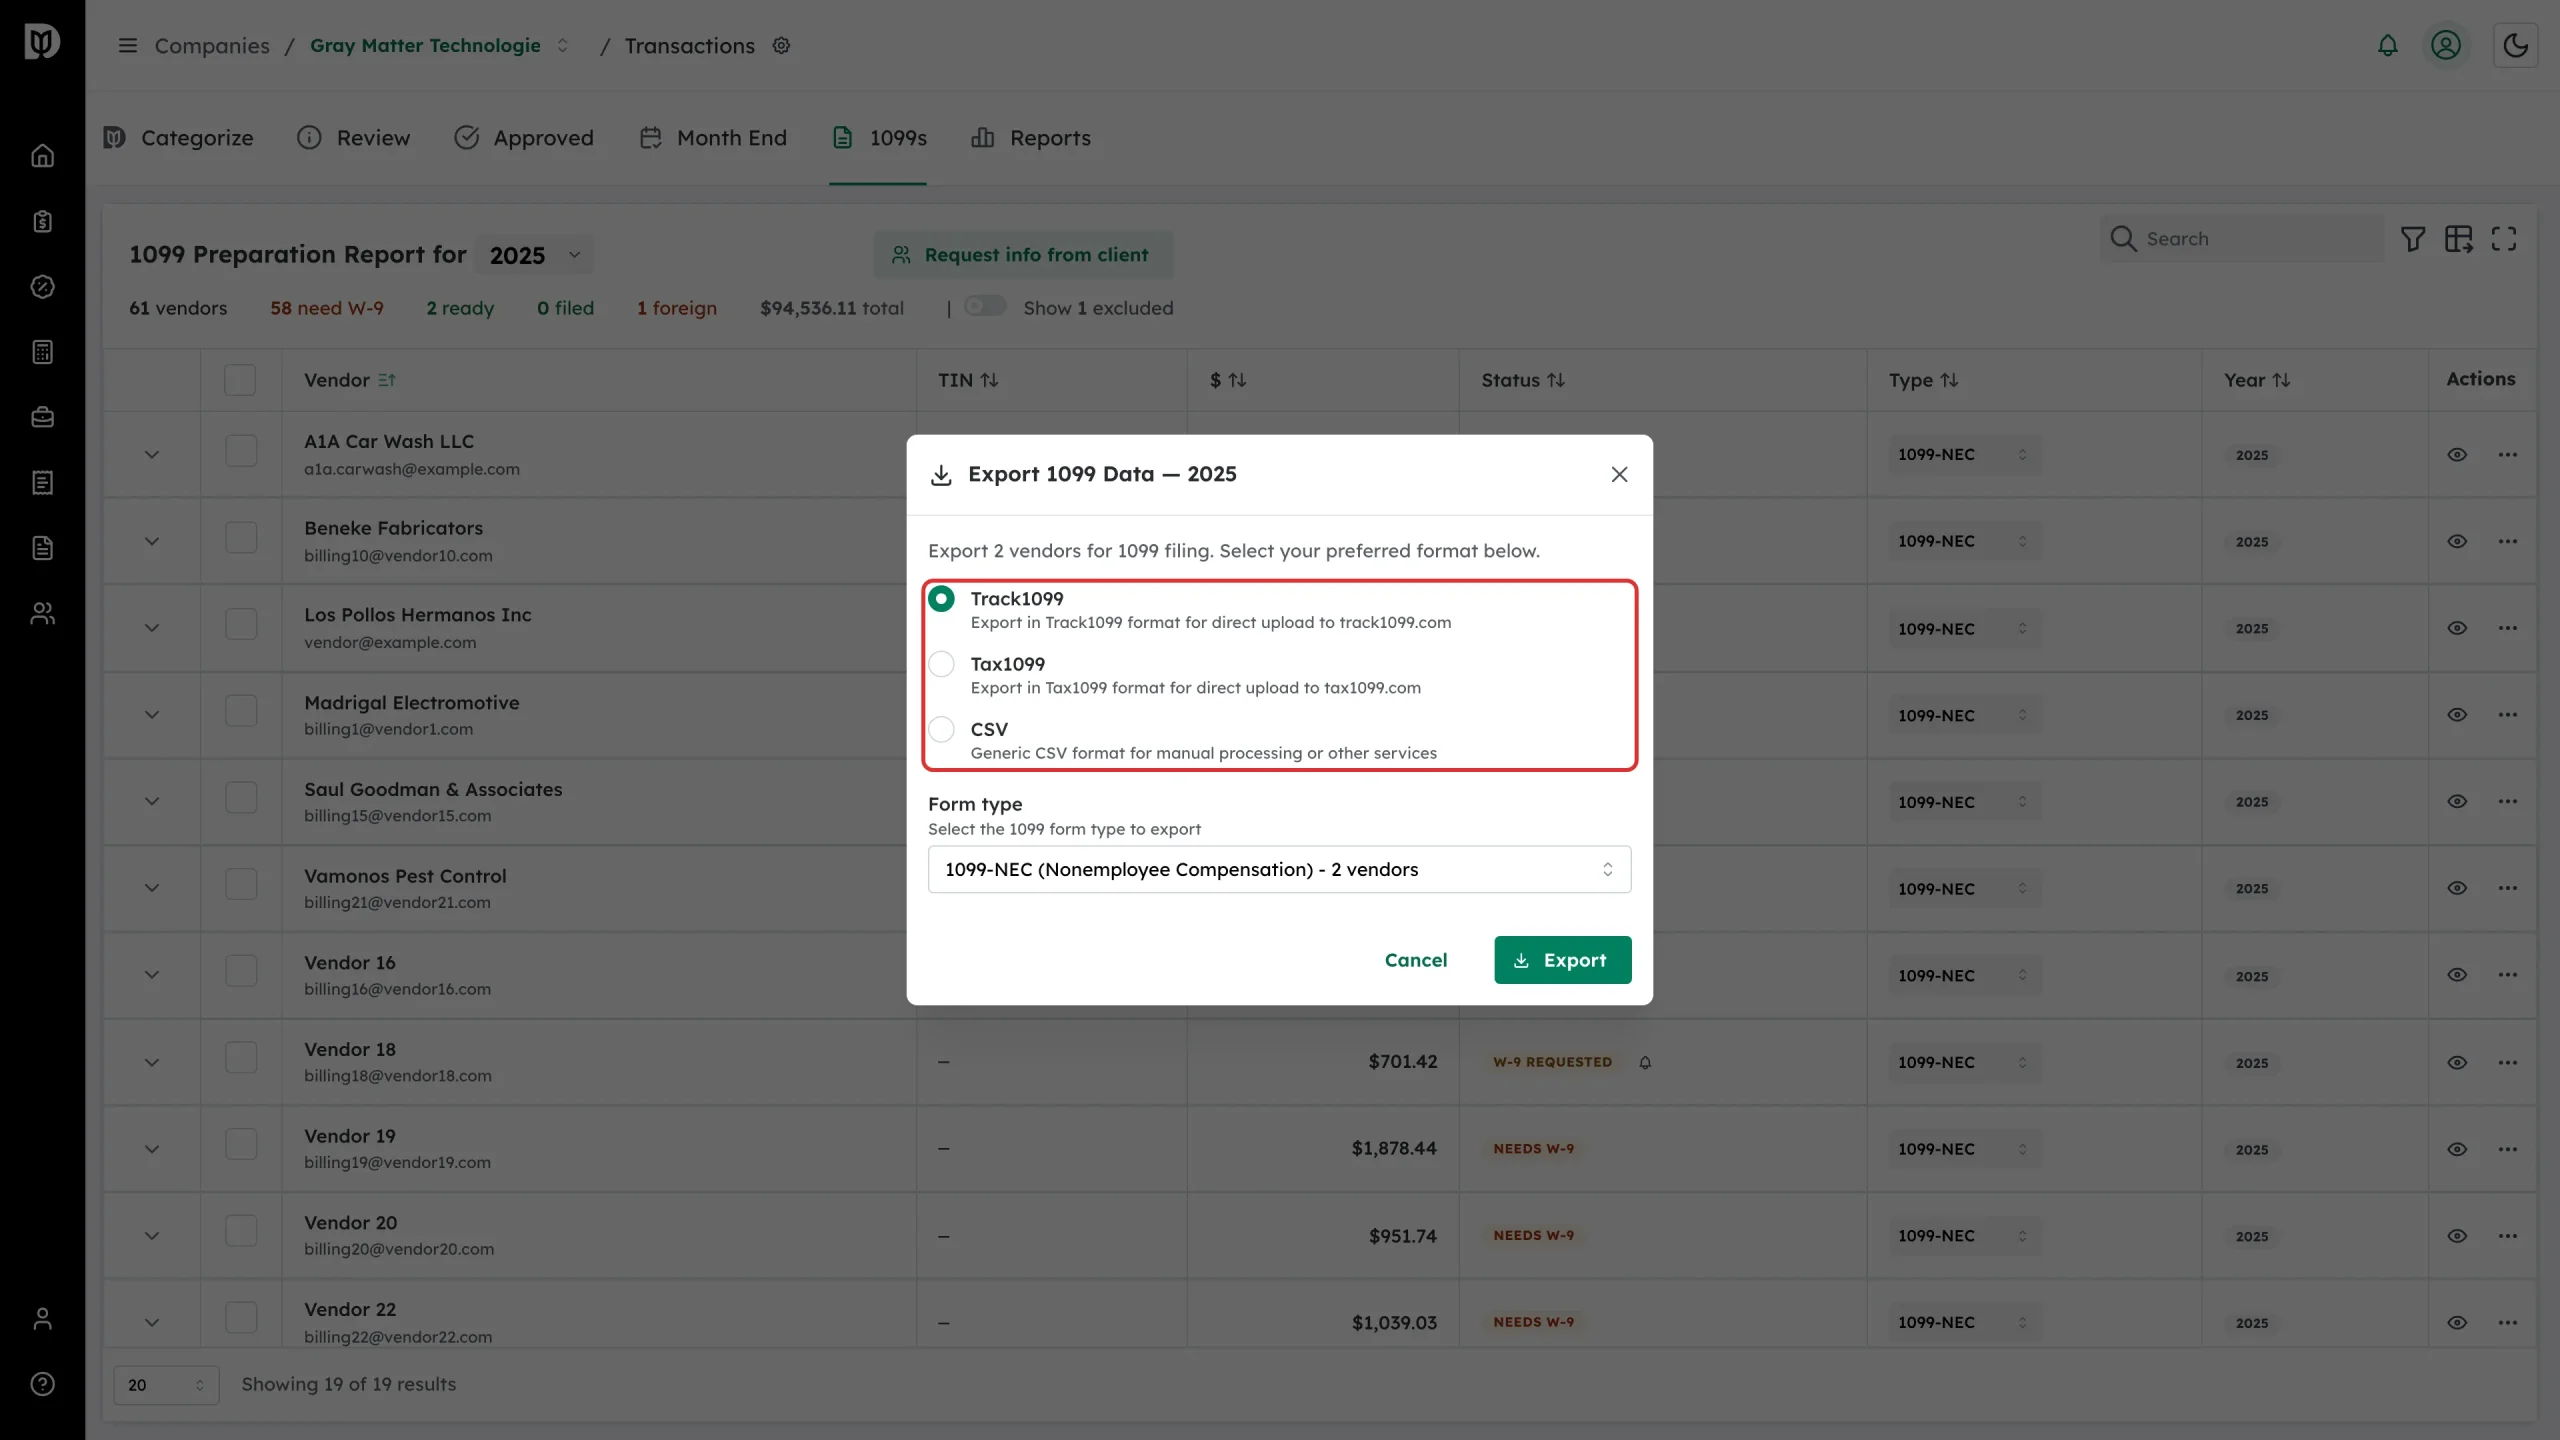
Choose a format.
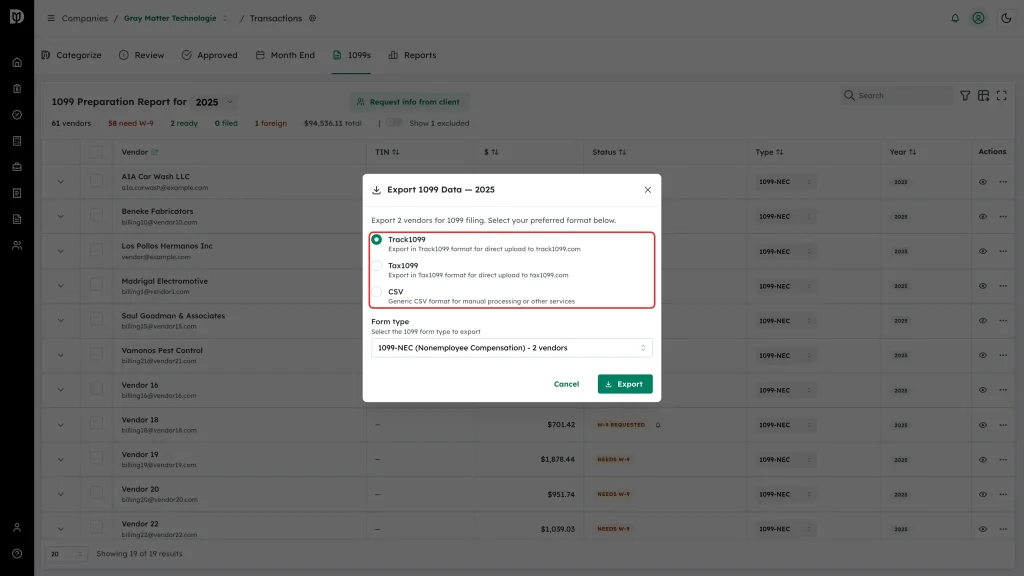
- Track1099 — the upload template for track1099.com.
- Tax1099 — the upload template for tax1099.com.
- CSV — a plain file for a spreadsheet or any other software.
-
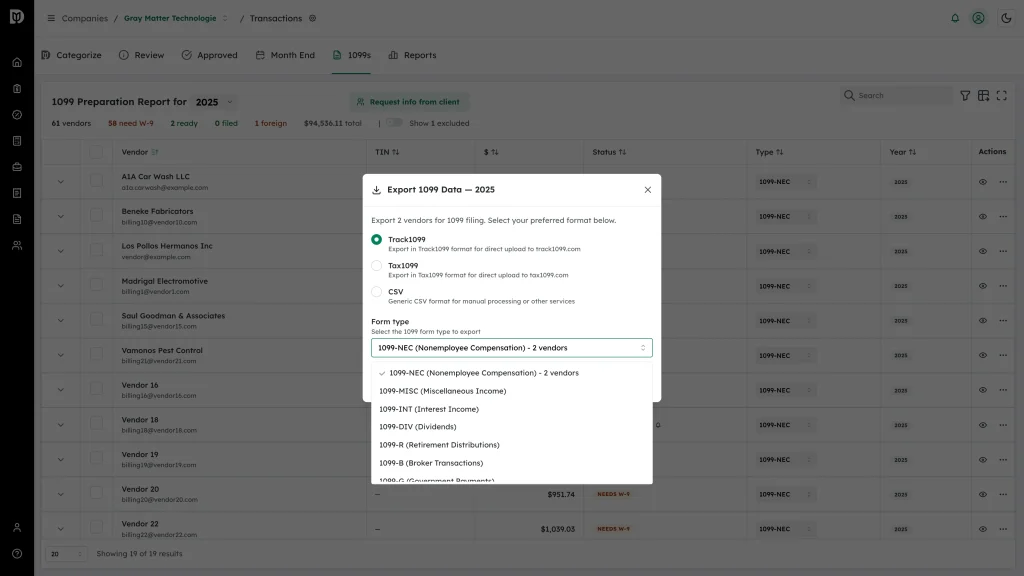
For Track1099 and Tax1099, pick the Form type. Each file covers one form type, and the list shows how many of your vendors fall under each — for example “1099-NEC (Nonemployee Compensation) — 2 vendors”. Run the export again for a second form type. CSV has no form type picker; it takes every exportable vendor.
-
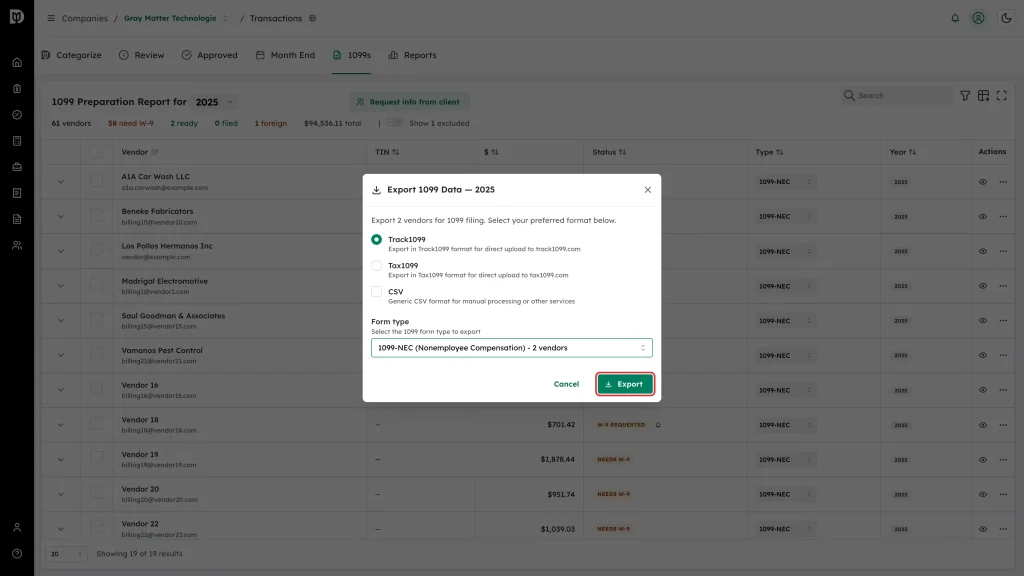
Click Export. The file downloads straight away.
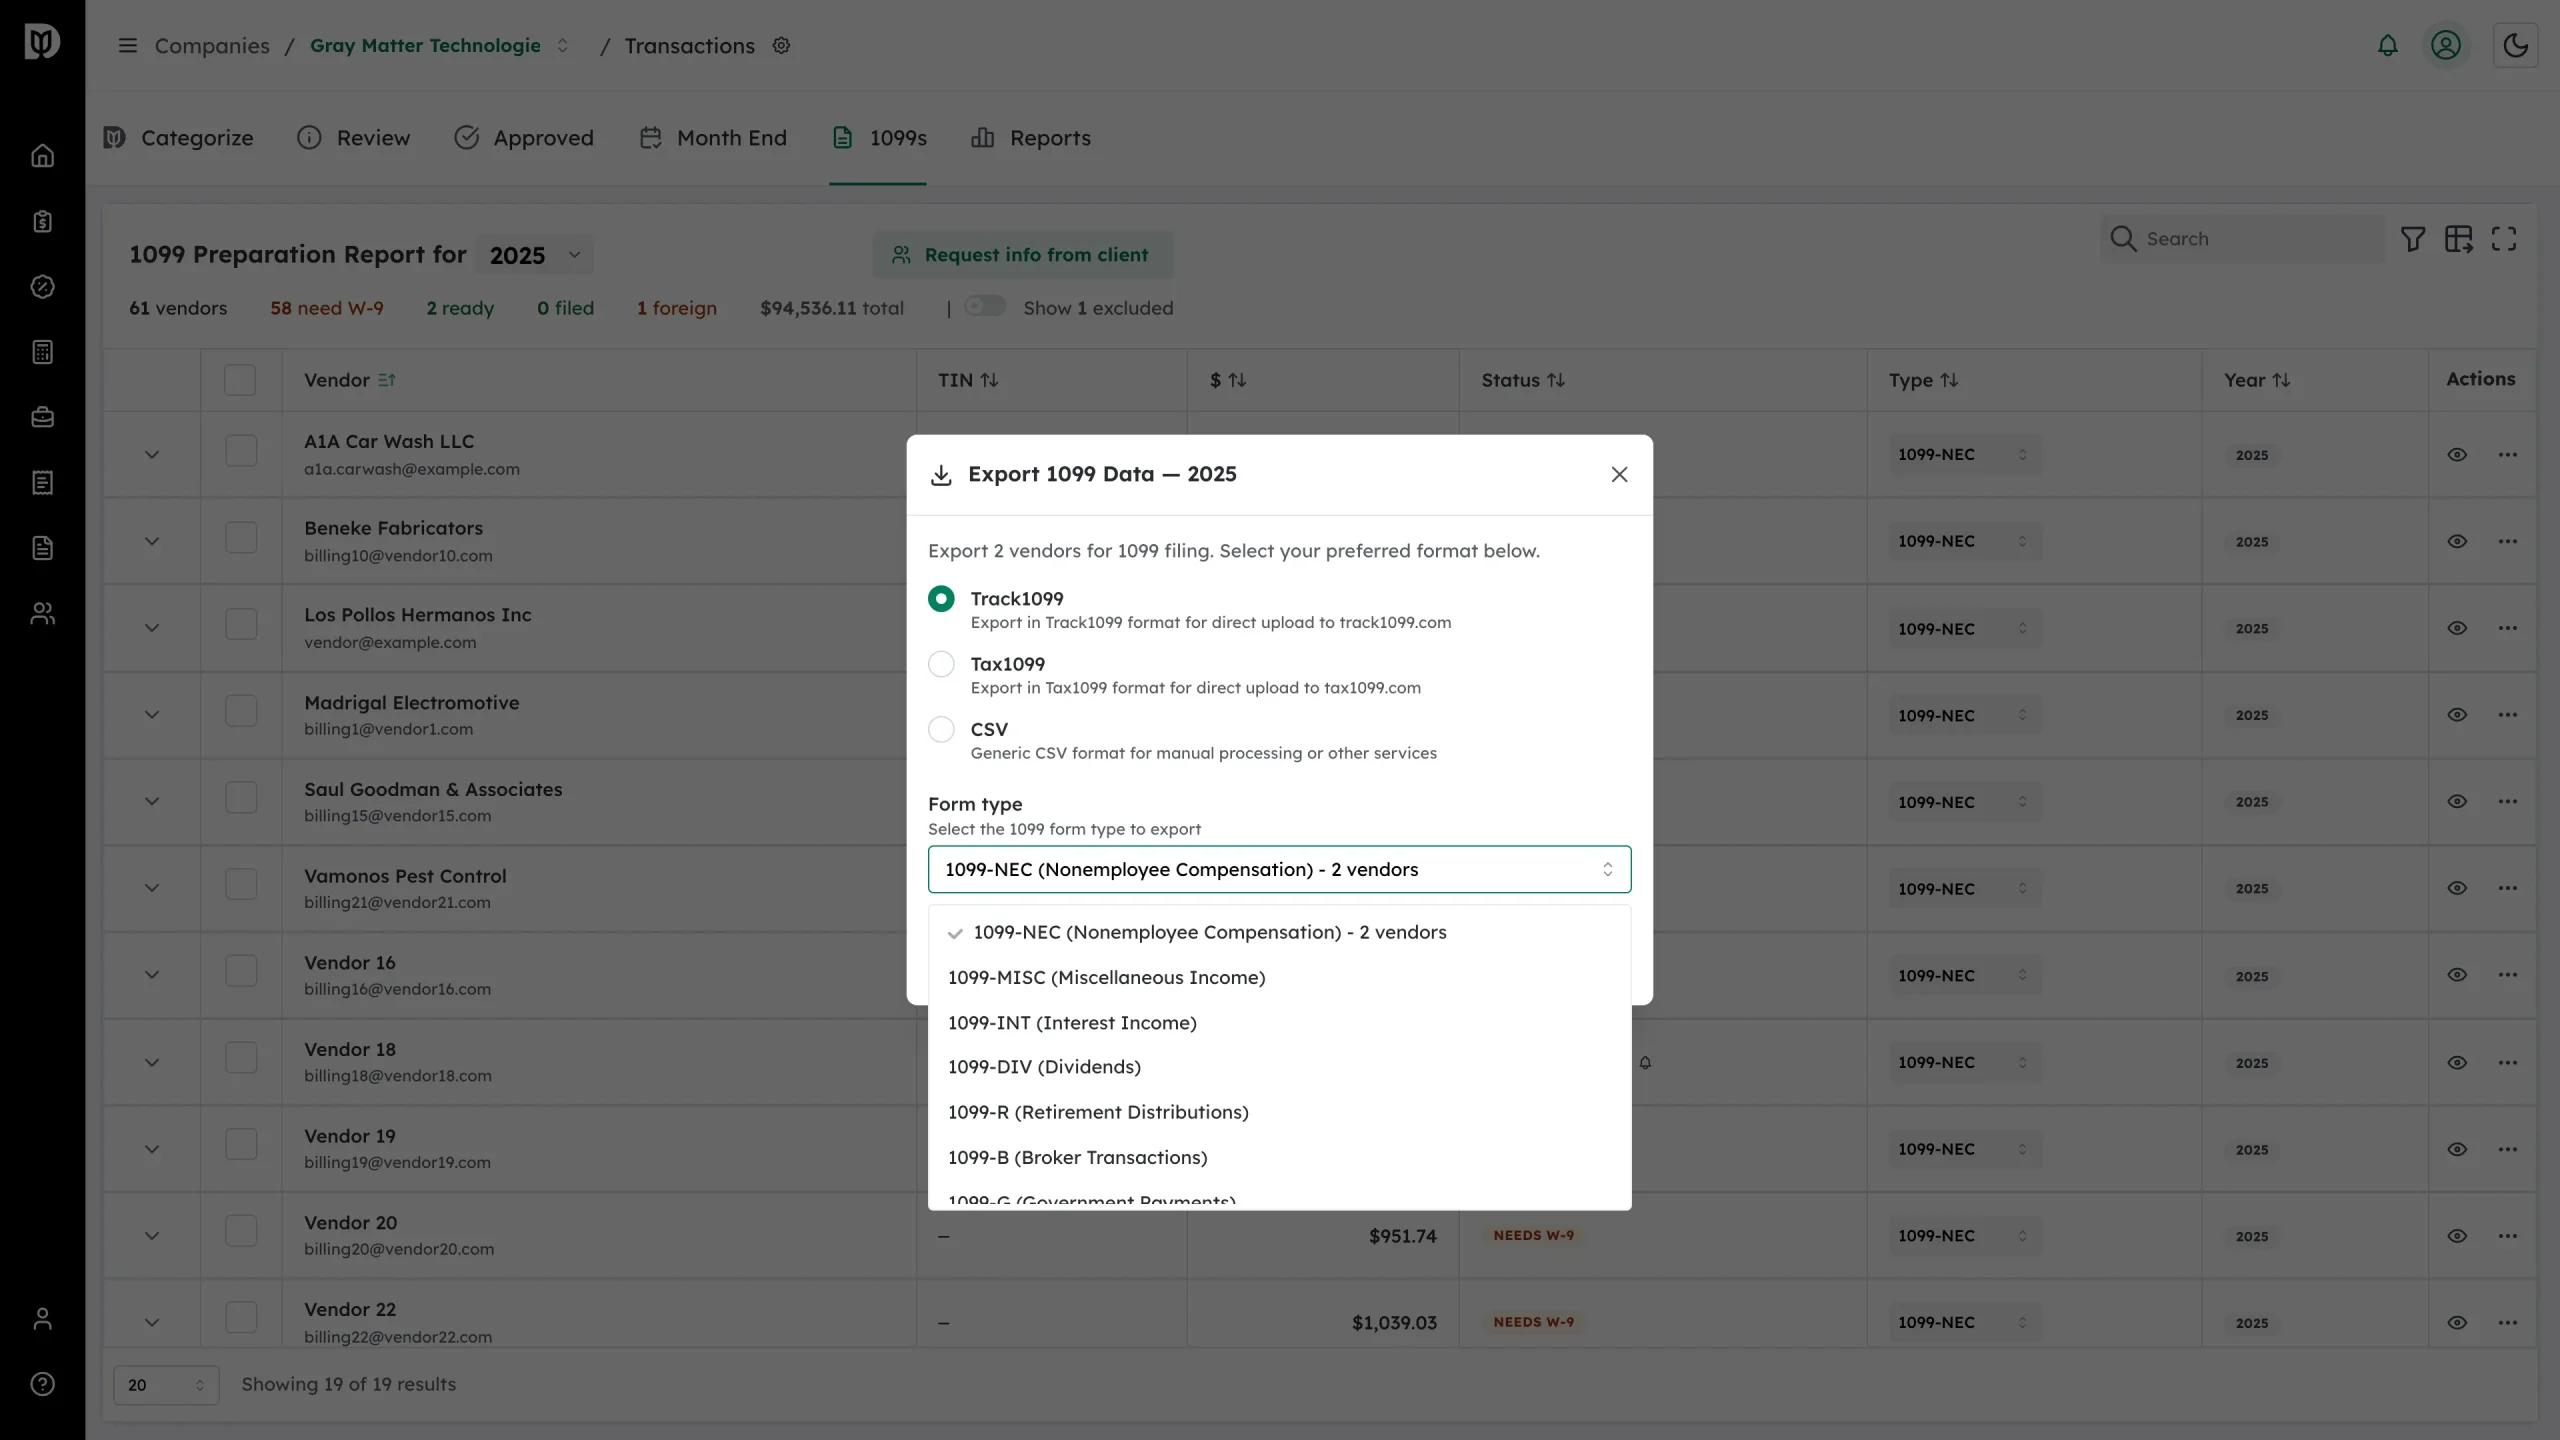
File names carry the format, form type and year, so a set of exports stays sorted: 1099_track1099_nec_2025.csv, 1099_tax1099_nec_2025.csv, 1099_export_2025.csv.
What is in the CSV
Vendor name, business name, TIN type, TIN, street address, city, state, ZIP code, total payments for the year and form type. The Track1099 and Tax1099 files use those services’ own column layouts, including the box amounts for the form type you chose.
The taxpayer ID comes from the W-9 on file. Where Debits only has the number QuickBooks holds, the export carries it in the masked form QuickBooks returns — another reason to collect a real W-9 before filing.
After the export
- Sign in to Track1099 or Tax1099 and upload the file in their bulk import.
- Review what they read in, and file.
- Come back to Debits and mark those vendors as filed.
Before you export, check
- The tax year in the report title is the one you mean to file.
- Every vendor you expect to see is Ready to File, not still Needs W-9.
- The form type on each row is right — 1099-NEC for contractor work, 1099-MISC for rent and similar.
- Corporations are either excluded or ticked as attorney / medical providers.