Create a location or department while you are coding a transaction. It is added to QuickBooks Online and selected on that transaction.
Before you start
- Location or department tracking must be turned on for that company in QuickBooks Online. If it is not, the plus button is greyed out and its tooltip reads Department disabled.
- Client users only see the plus button if the accountant turns on Client Settings → Location/Department on the company’s General settings tab.
Steps
-
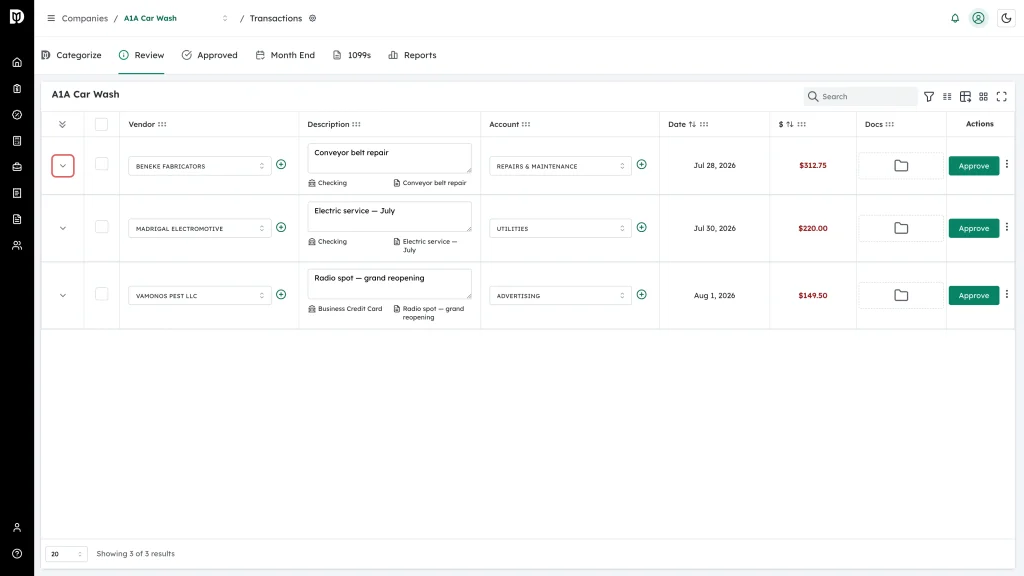
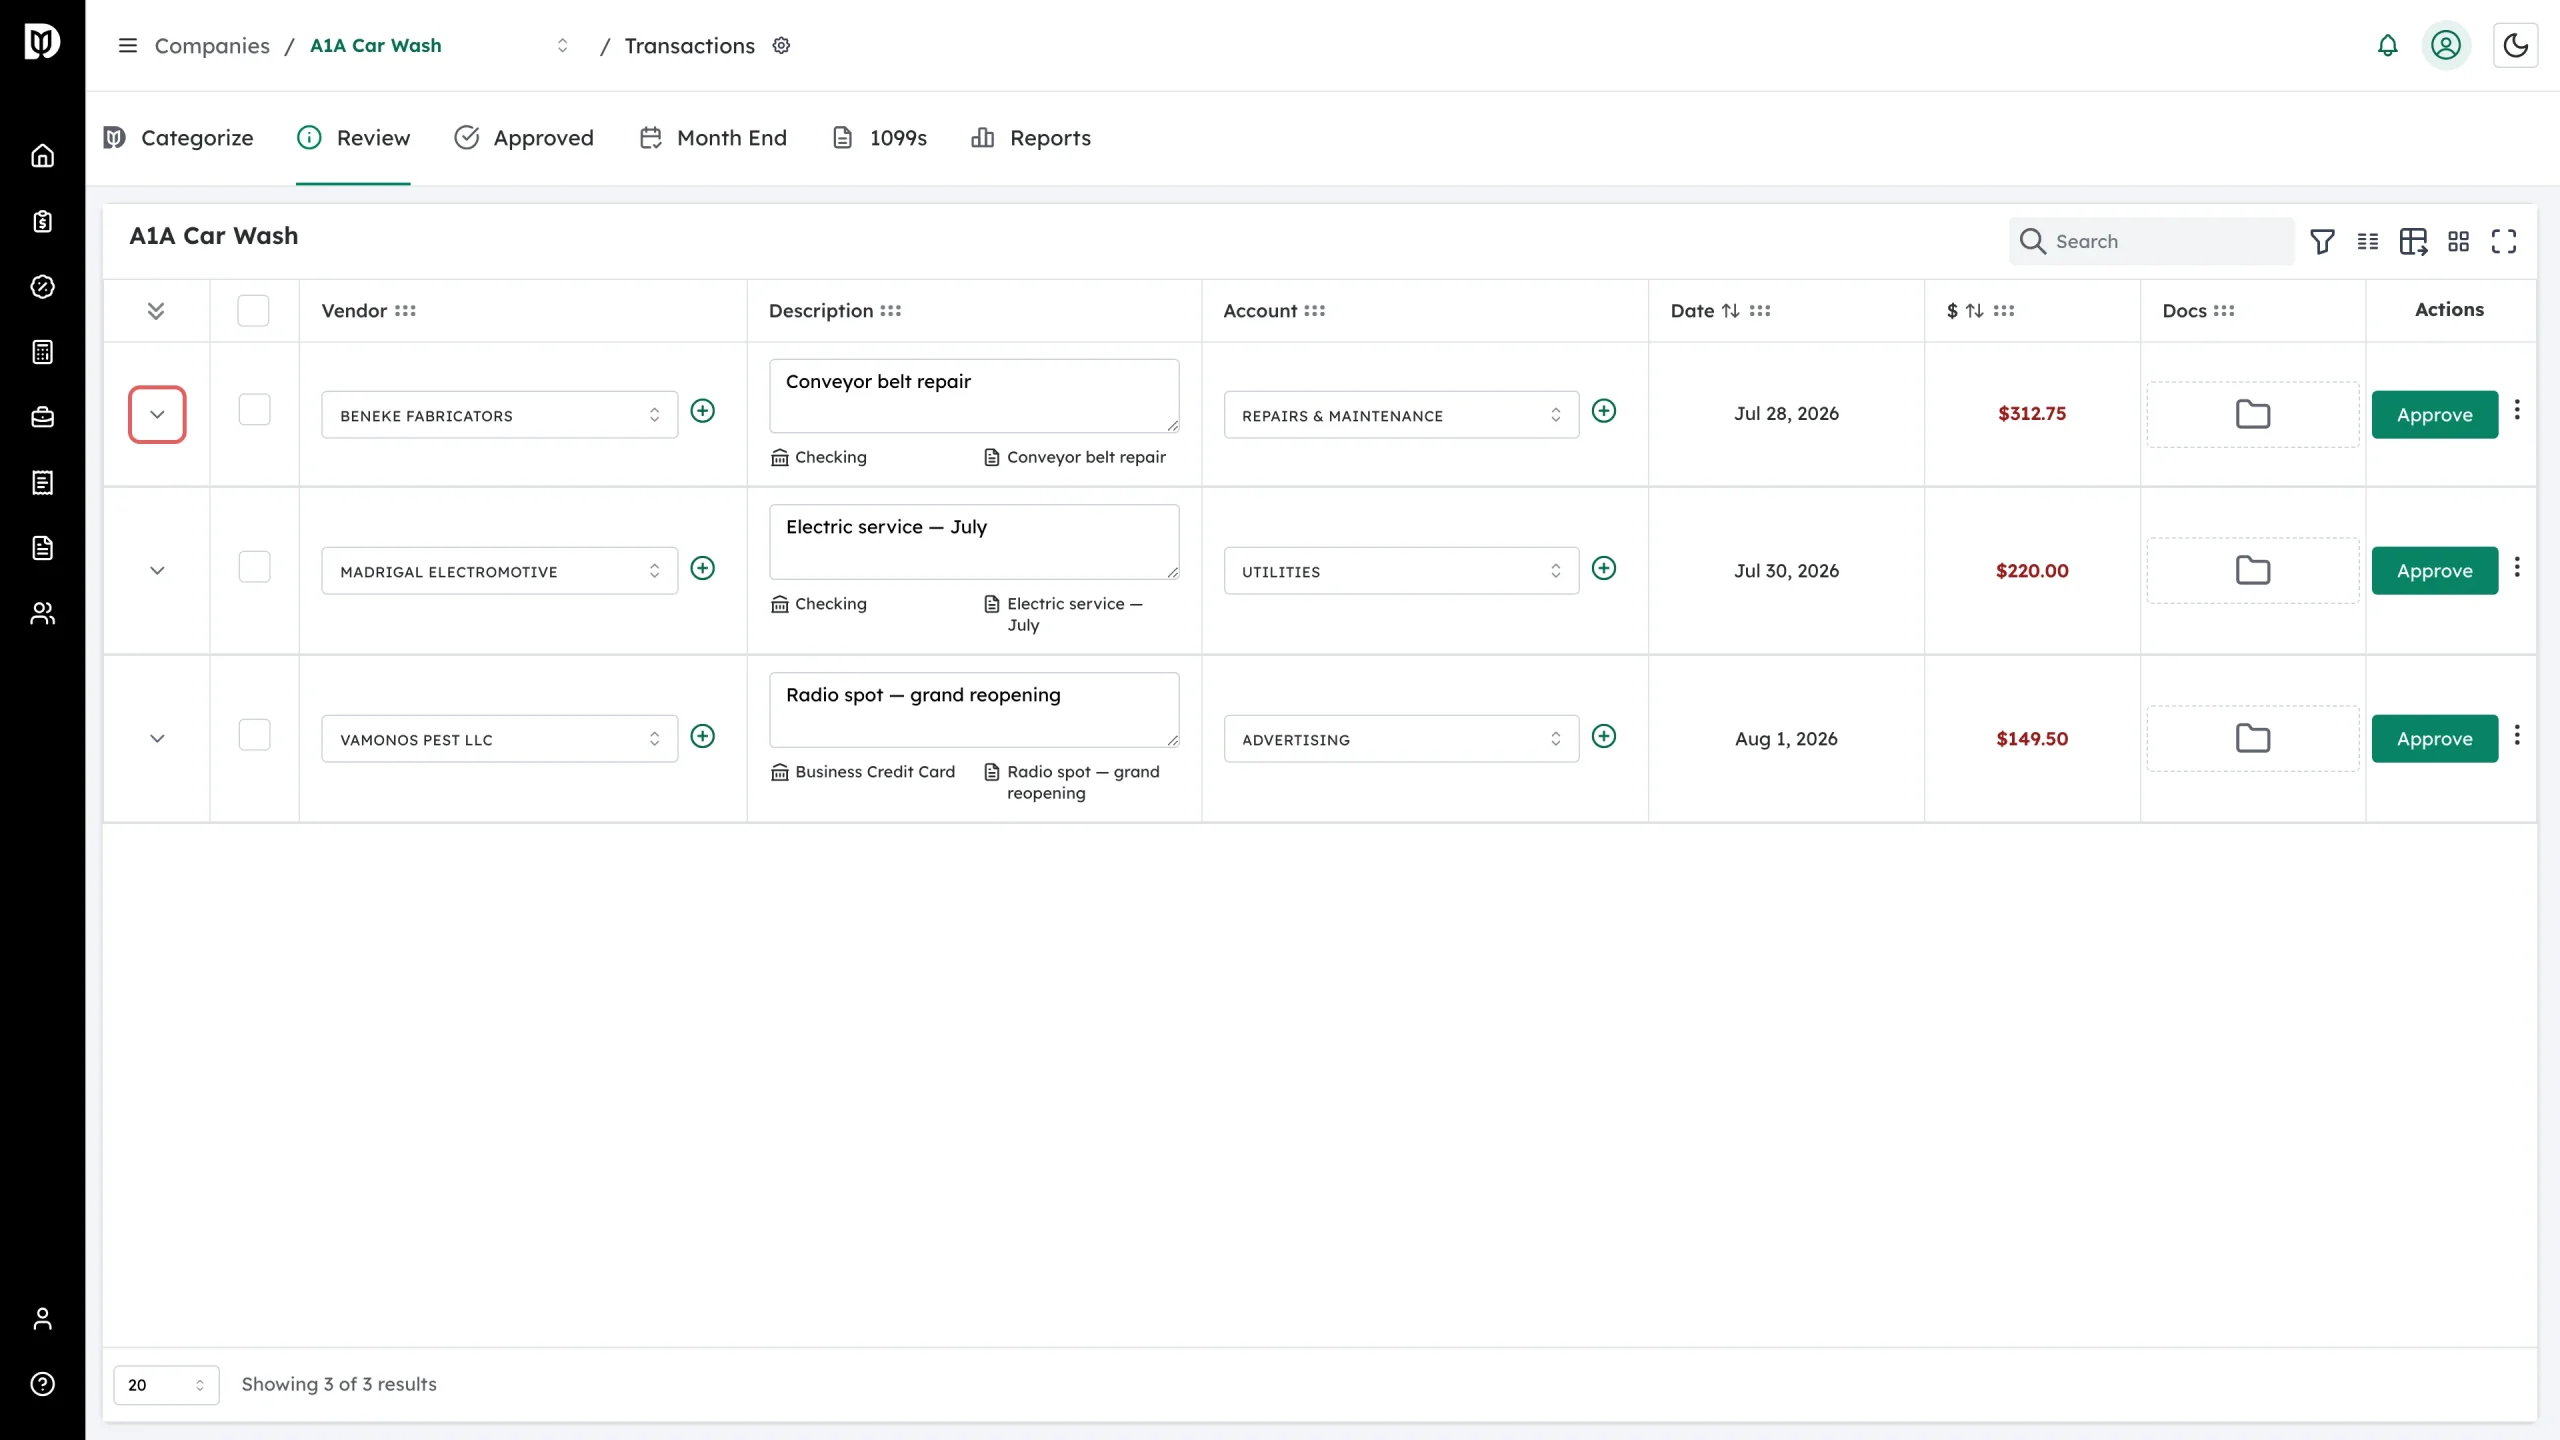
Open the company’s transactions, find the transaction, and click the chevron at the far left of the row to expand it.
-
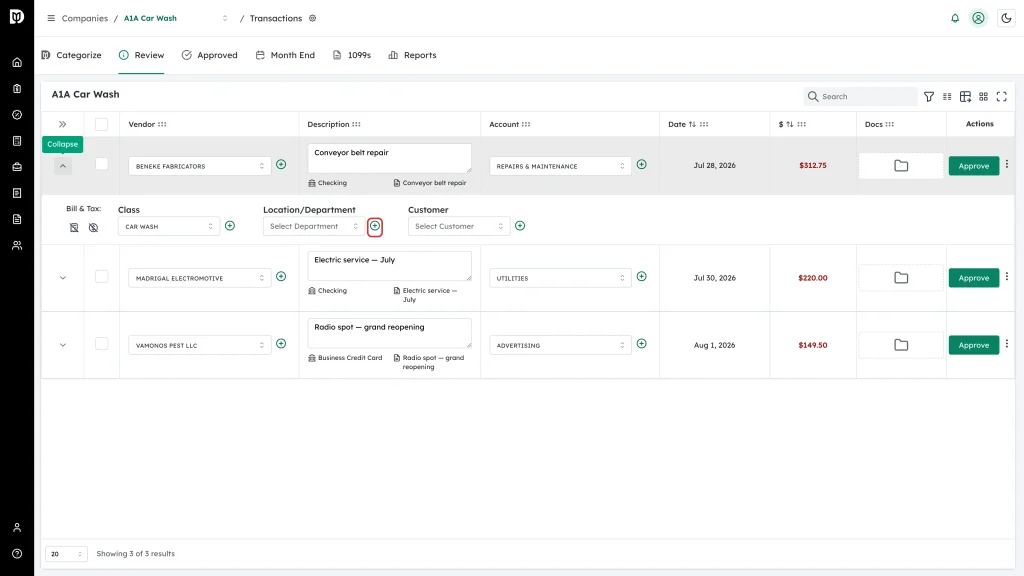
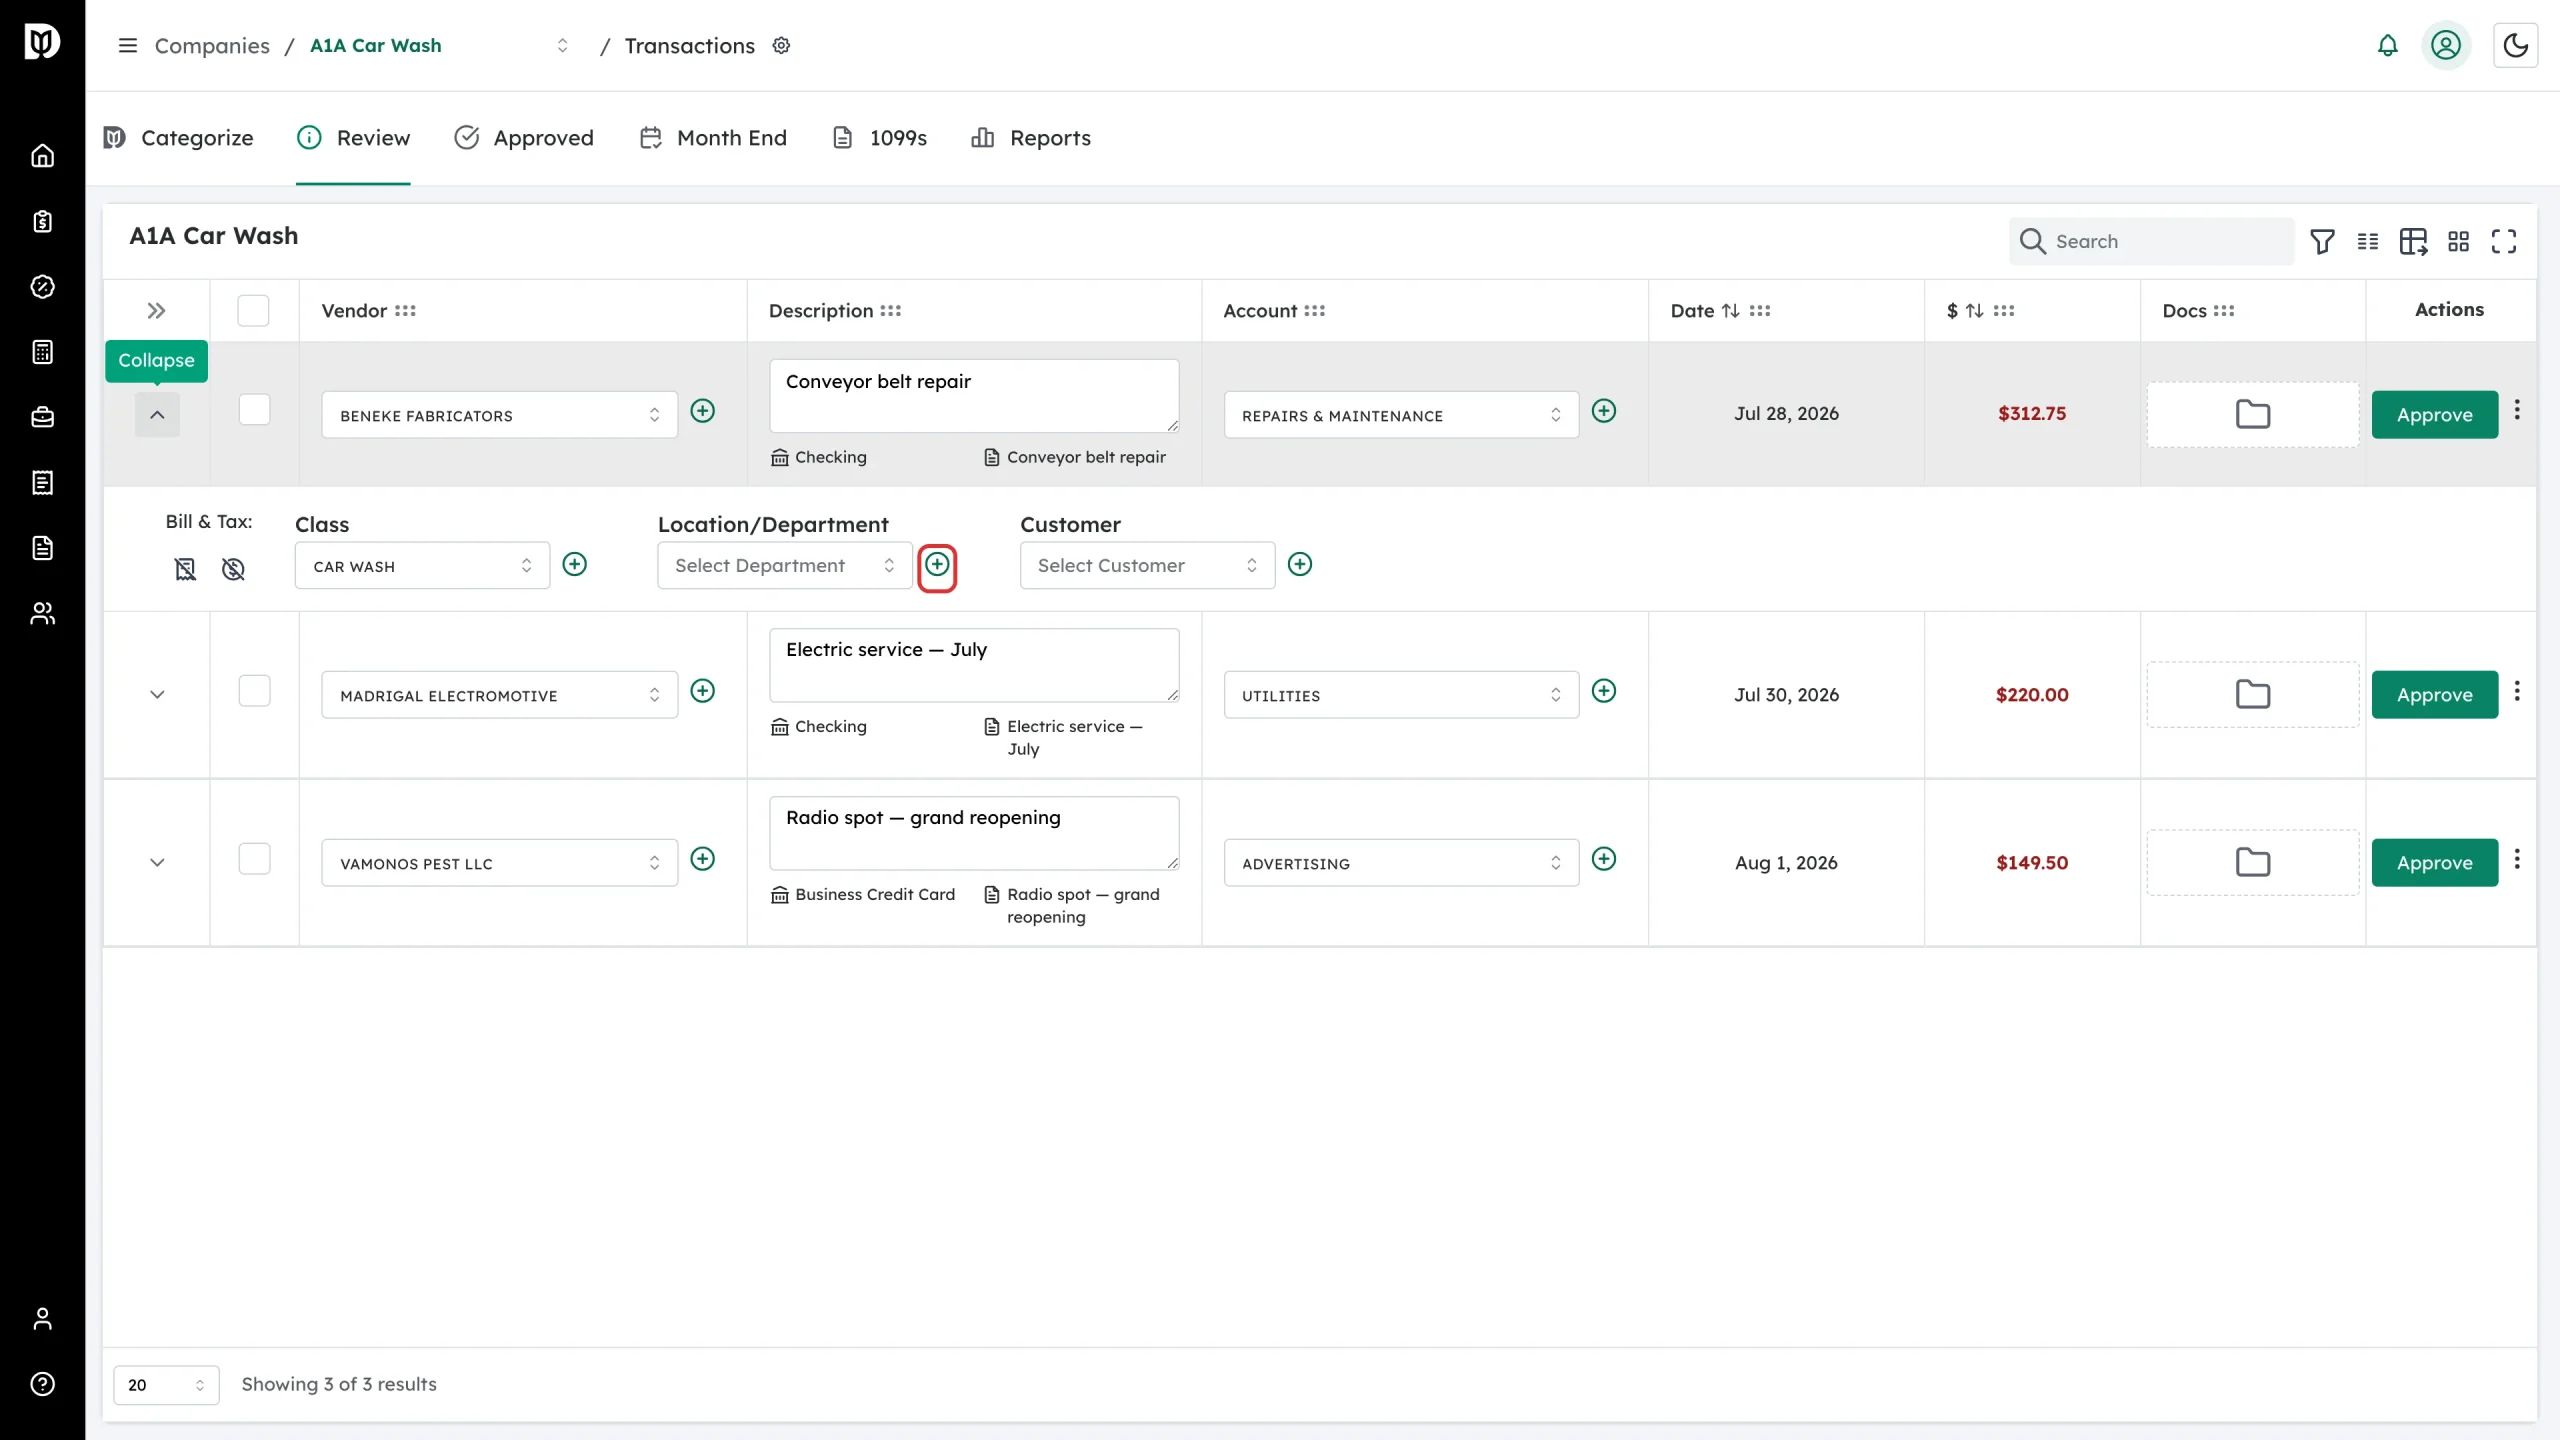
In the expanded panel, click the green + next to Location/Department.
-
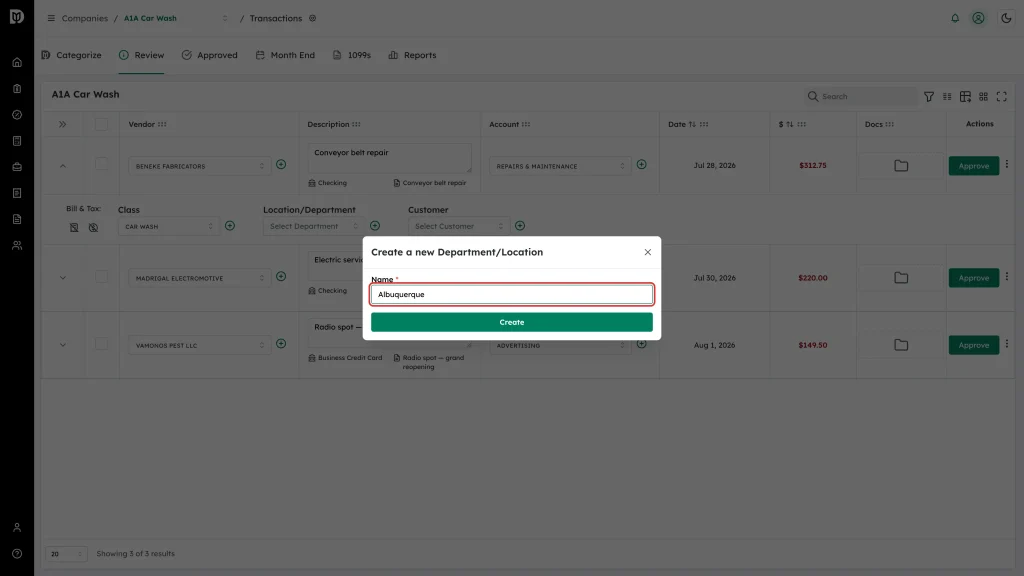
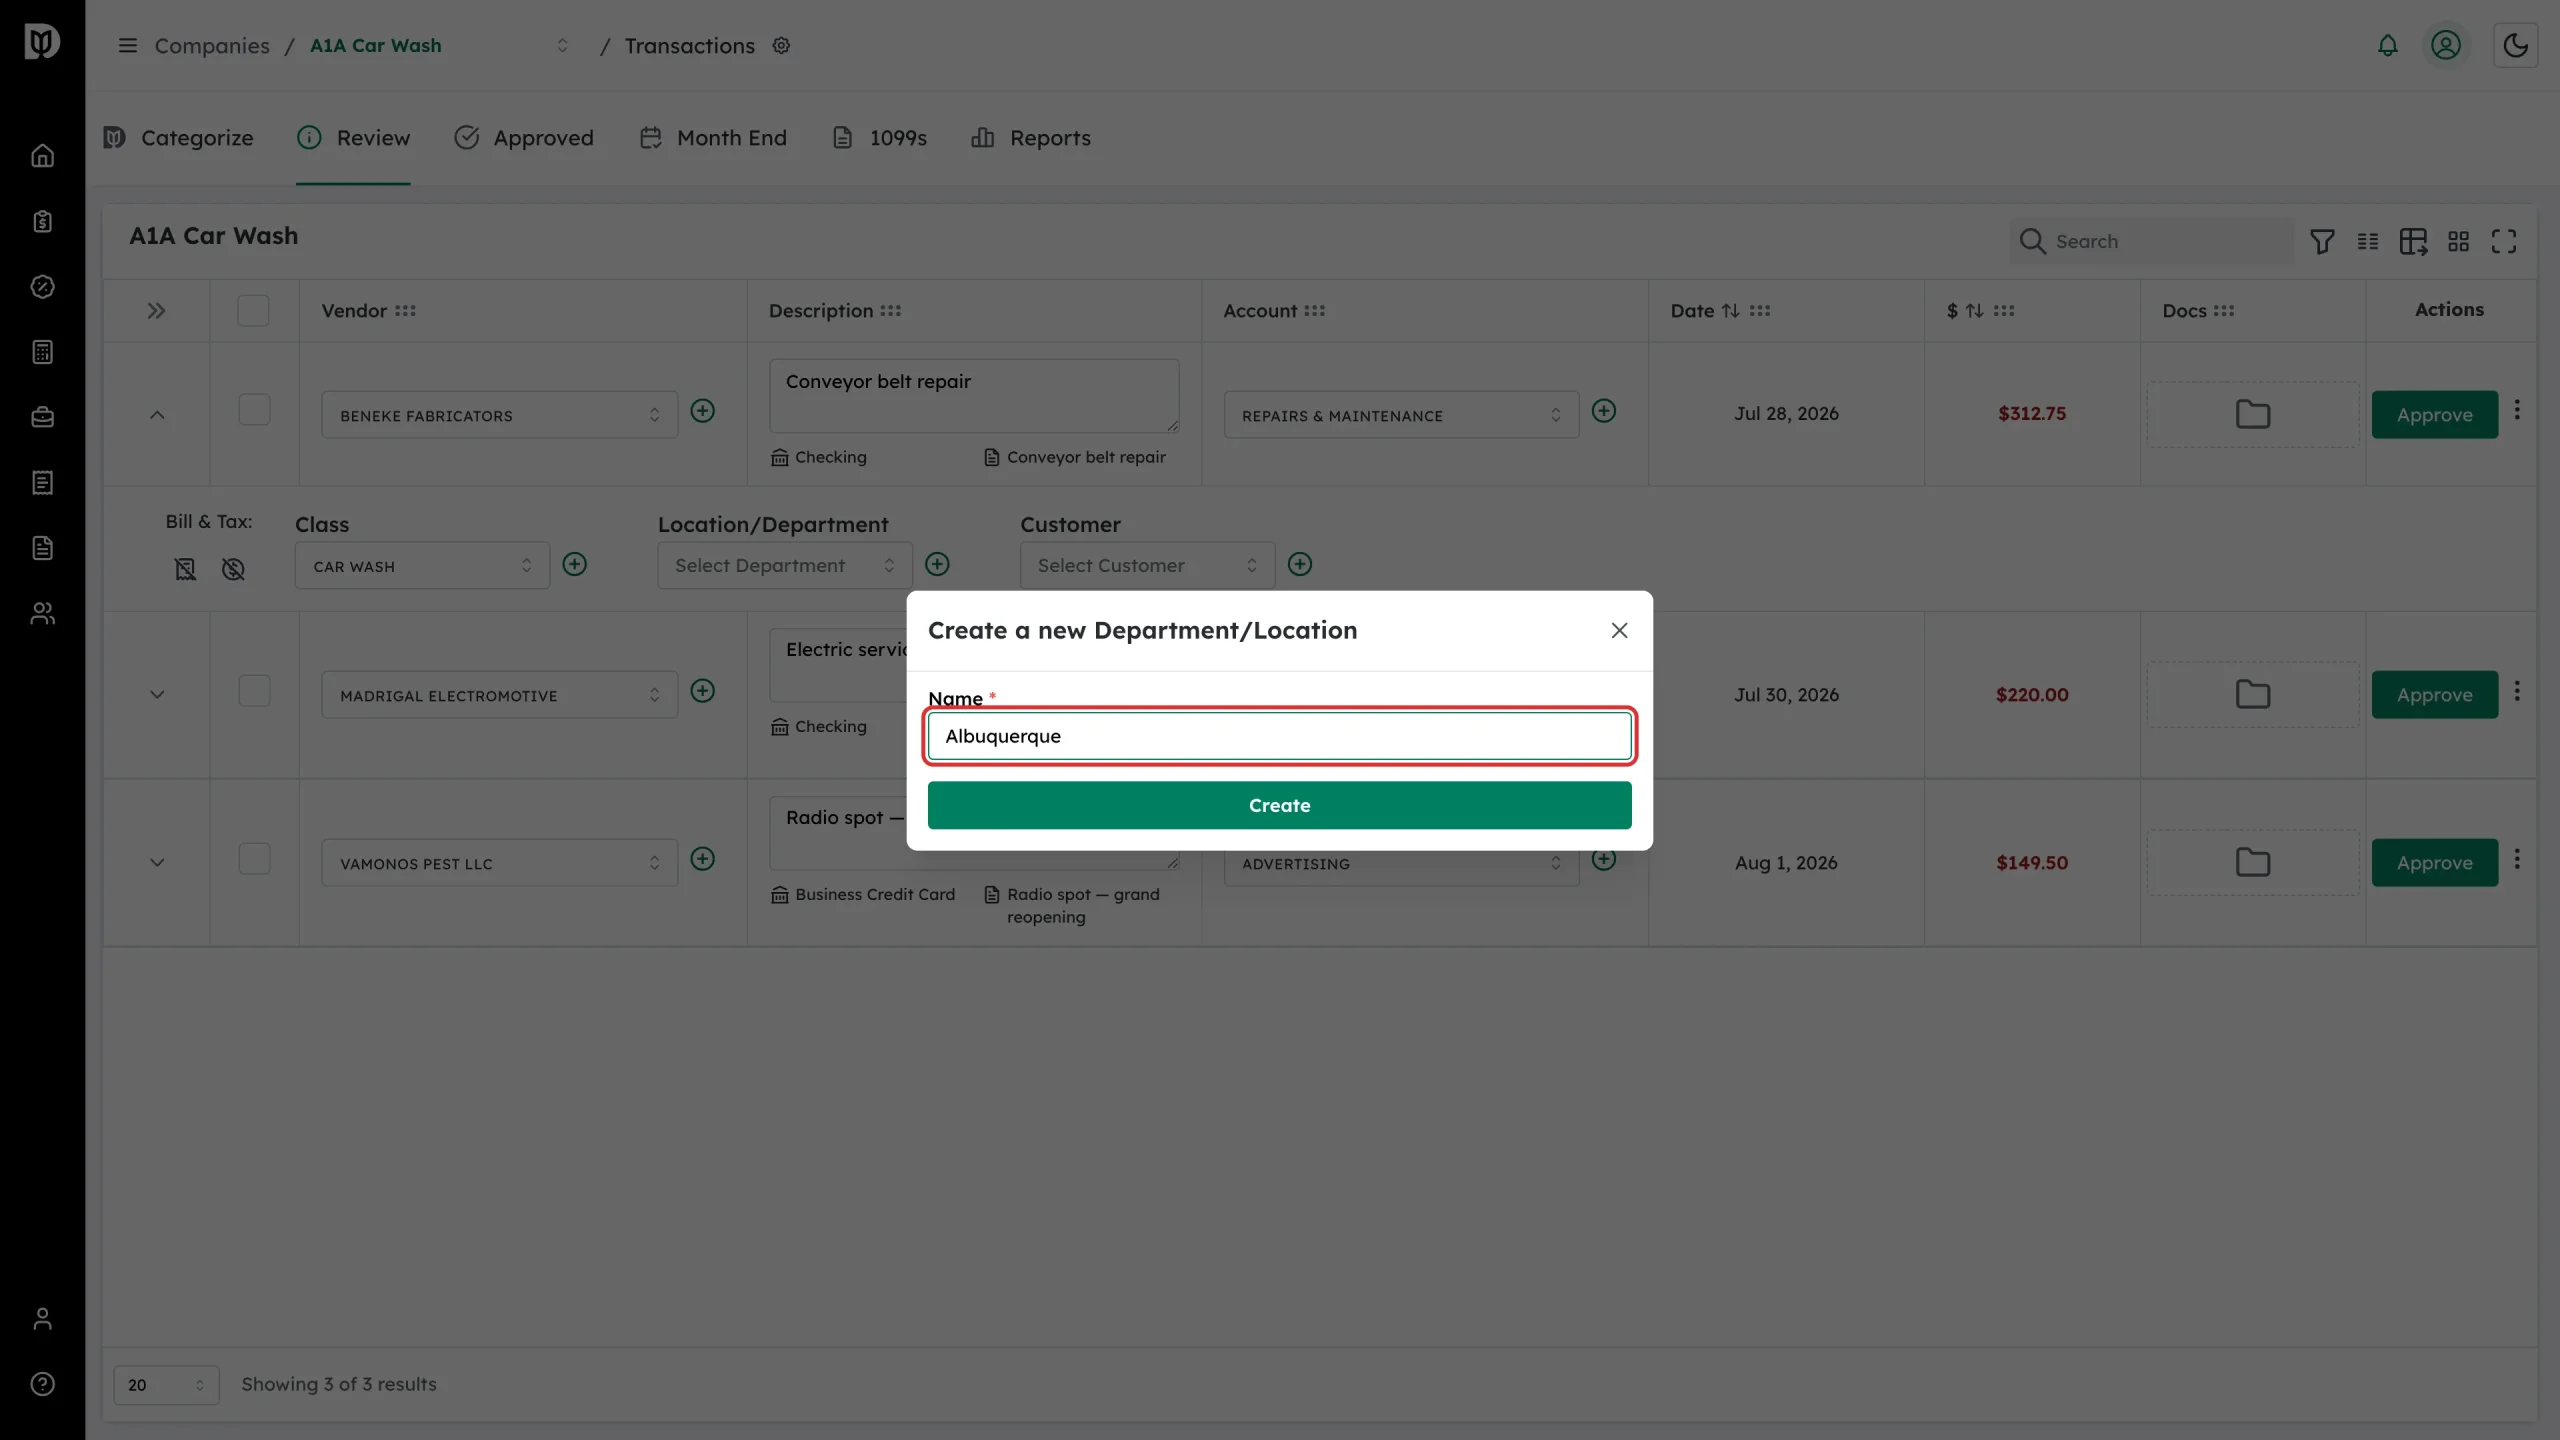
Type the name in Name in the Create a new Department/Location window.
-
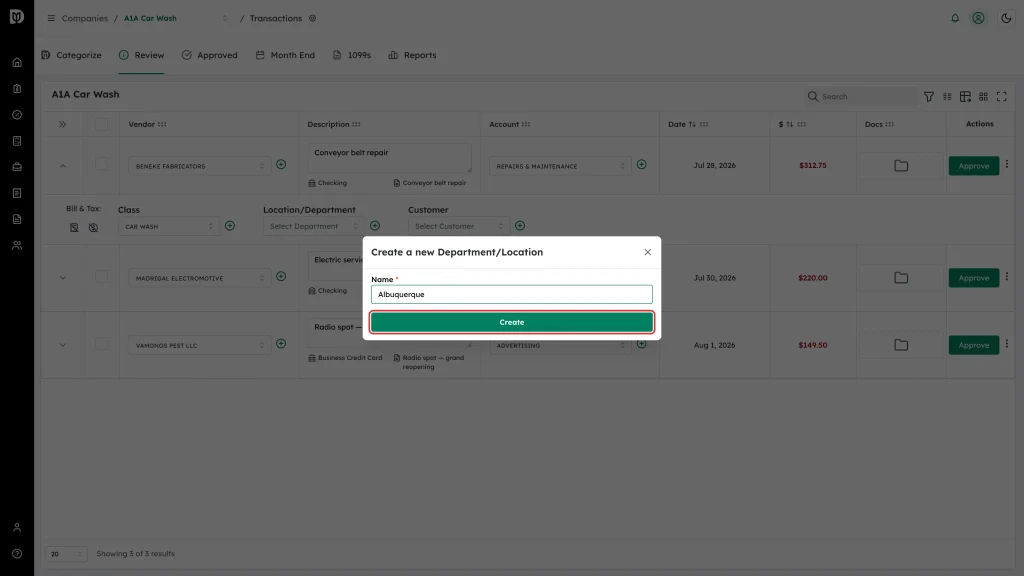
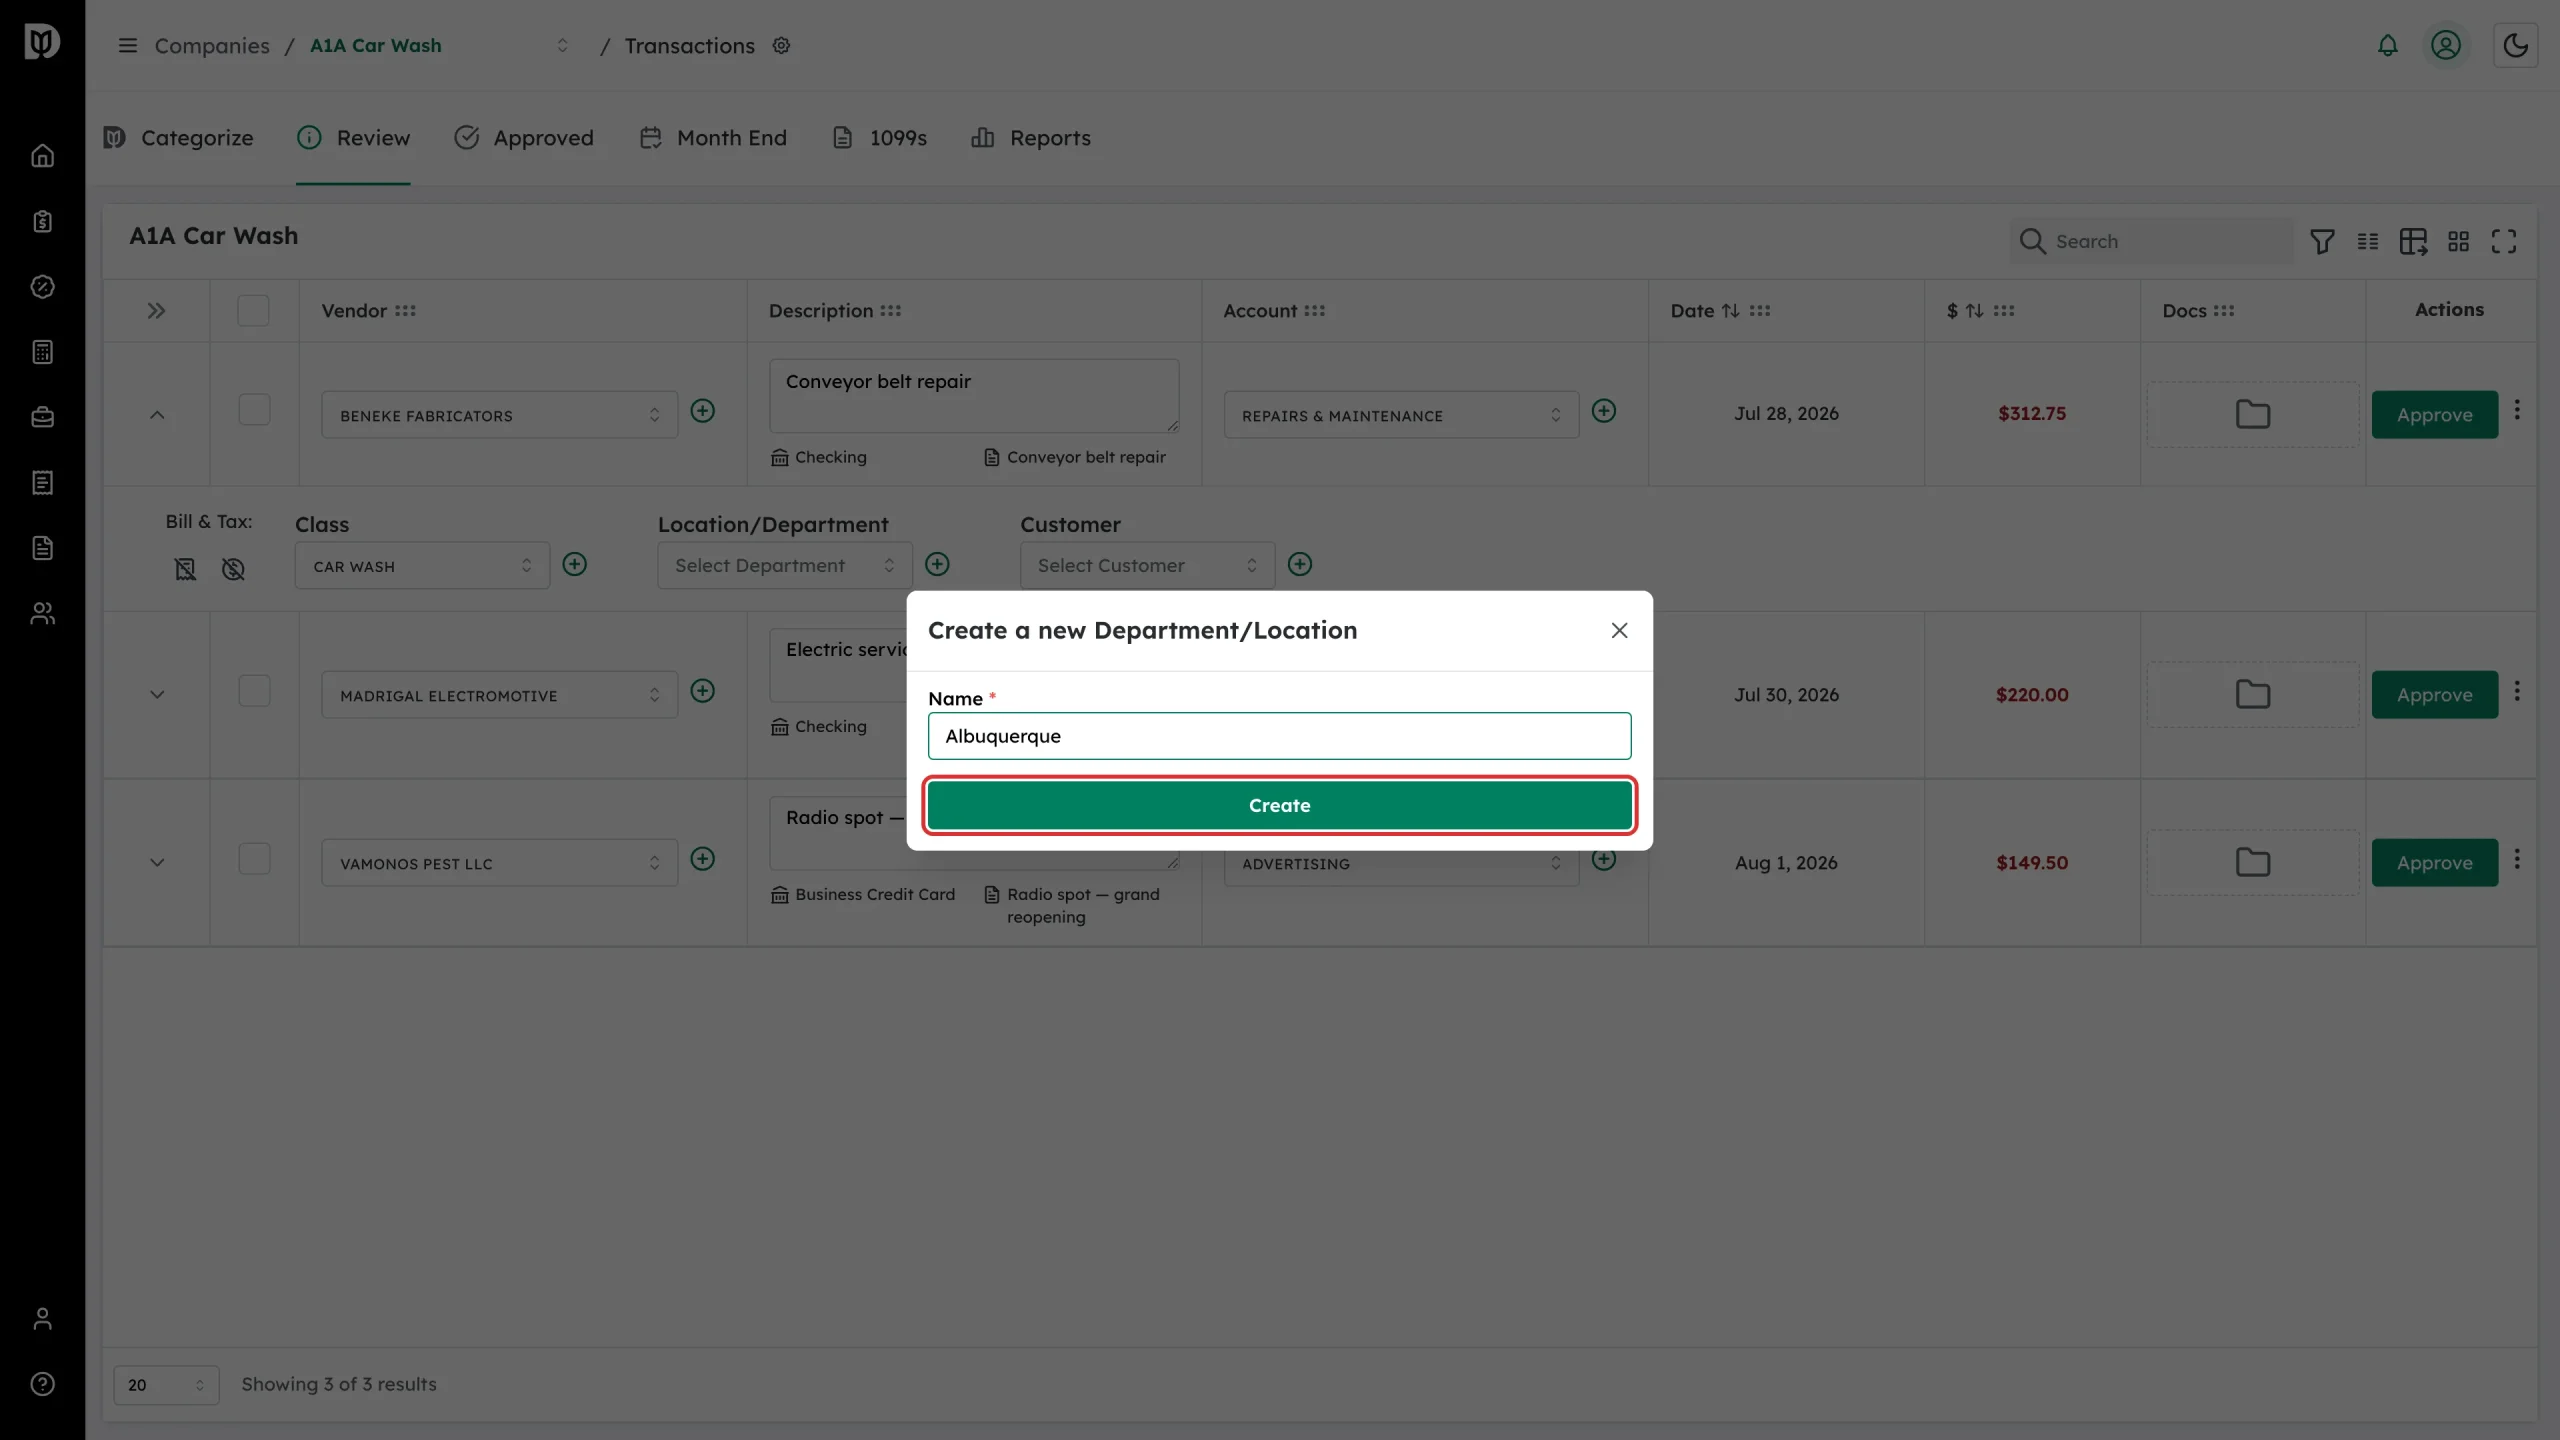
Click Create, then click Approve or Save on the transaction row to send the change to QuickBooks Online.
What happens next
- A New Department Created message confirms it was written to QuickBooks Online.
- It is selected on the transaction and available in the Location column for that company from then on.
Notes
- Location and department are the same field. QuickBooks Online lets each company choose the label it prefers, which is why you see both words in Debits.