If the account you need is missing while you are coding a transaction, create it from the transaction row. The account is added to the client’s chart of accounts in QuickBooks Online.
Before you start
- Accountants can always do this. Client users only see the plus button if the accountant turns on Client Settings → Category on the company’s General settings tab.
- Accounts you have hidden with Exclude accounts from category list will not appear in the picker even after they exist.
Steps
-
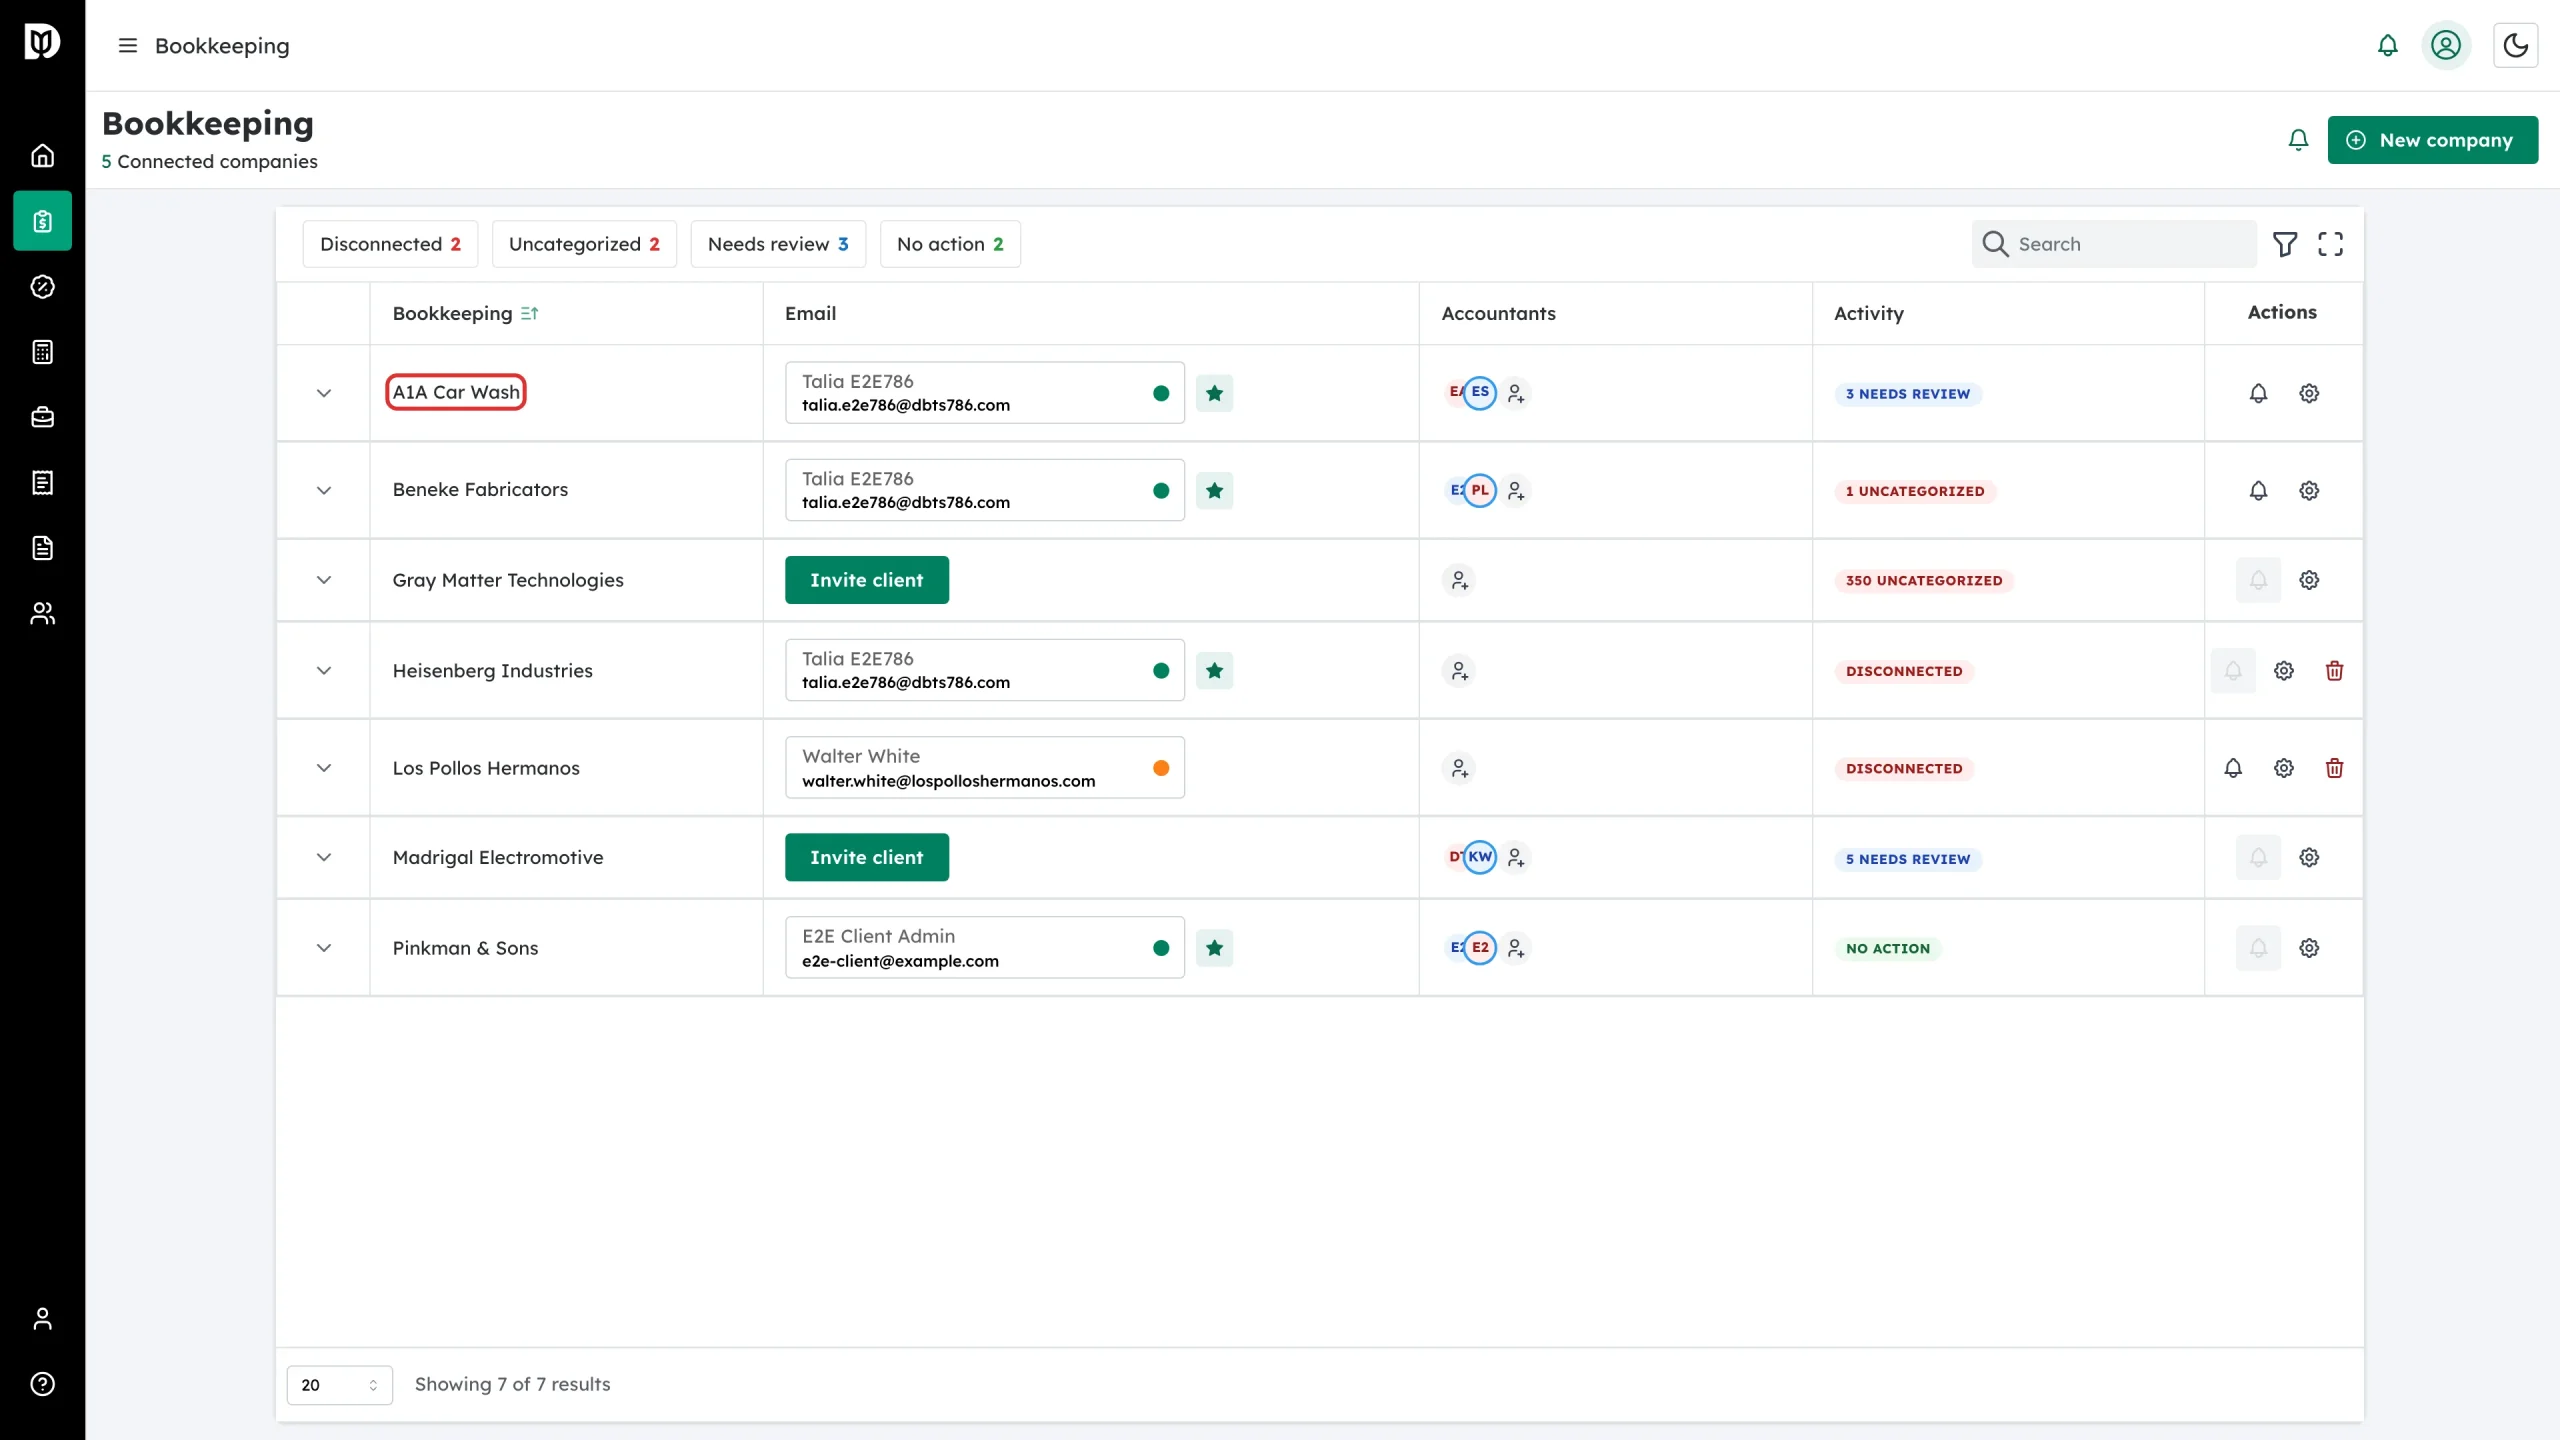
In the left sidebar, open Bookkeeping and click the company name to open its transactions.
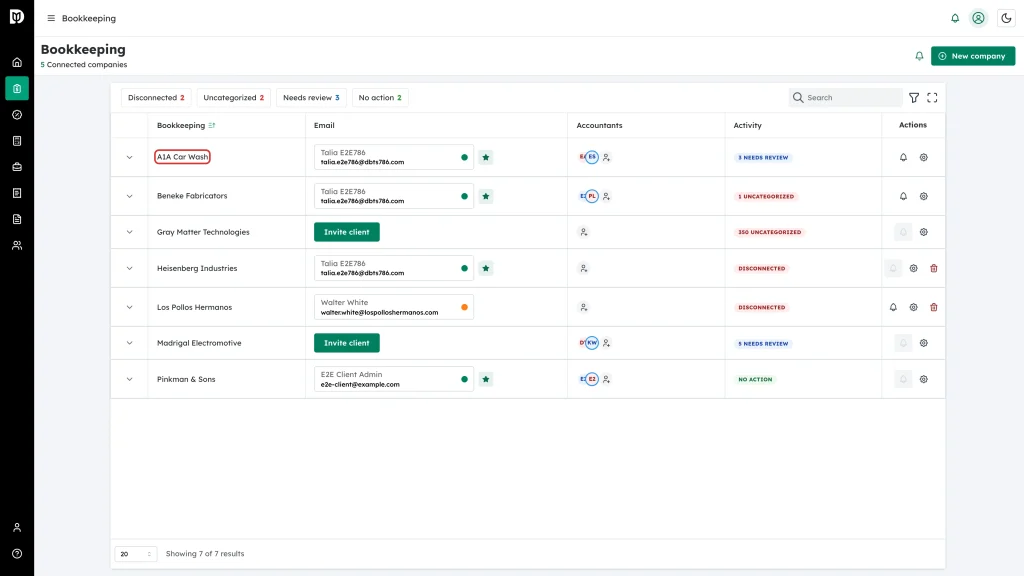
-
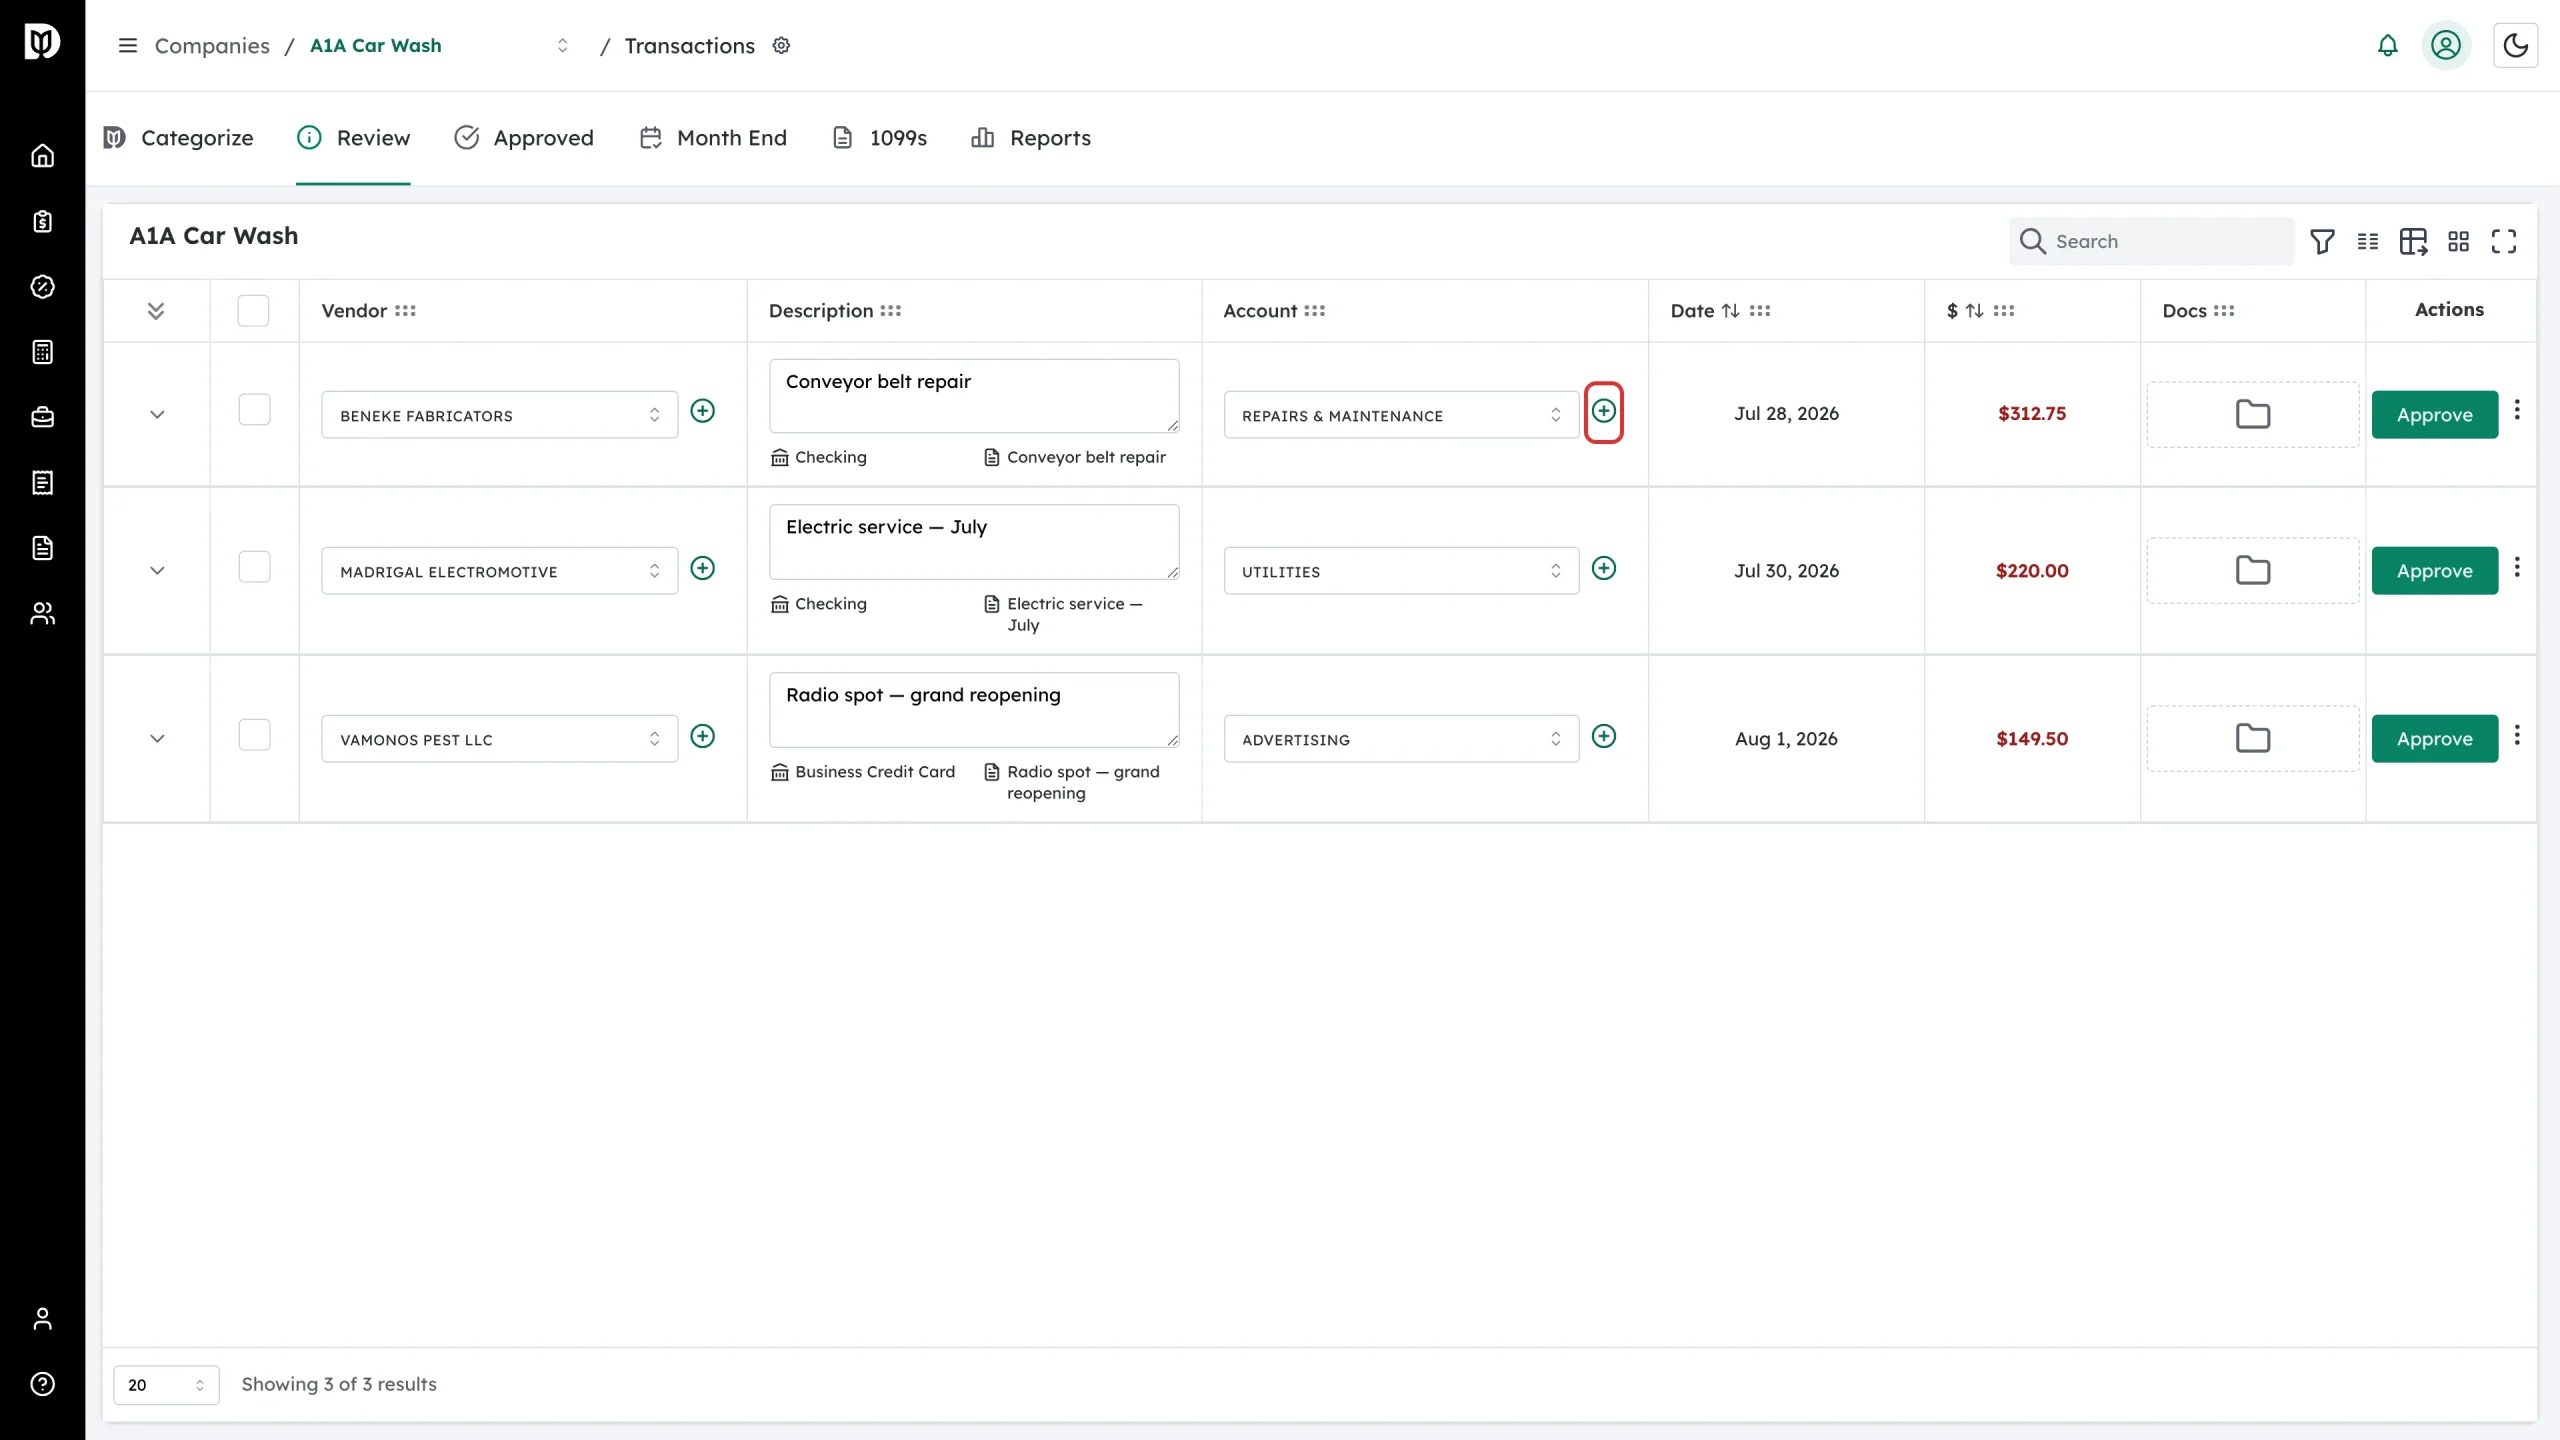
Find the transaction and click the green + next to the Account picker.
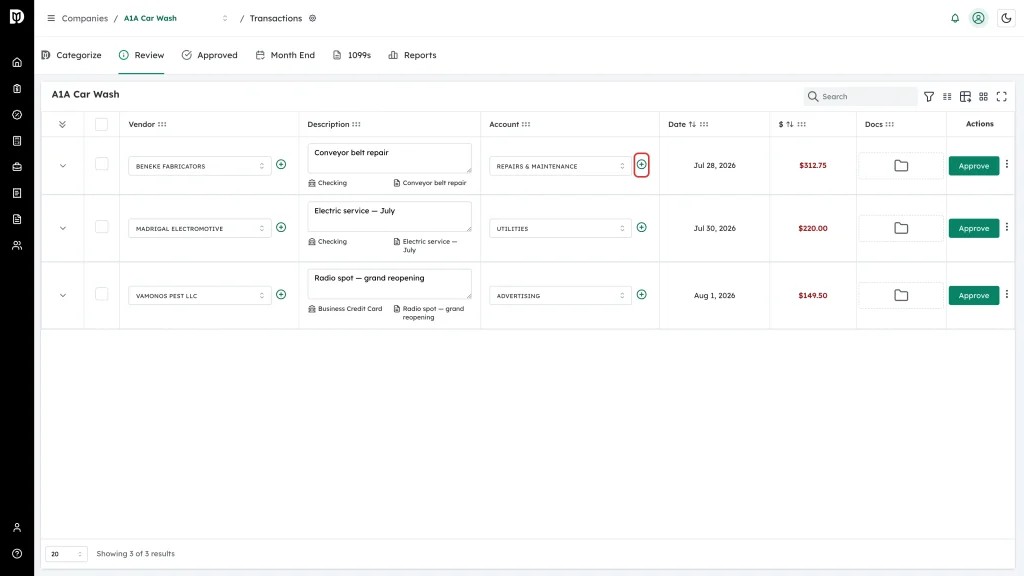
-
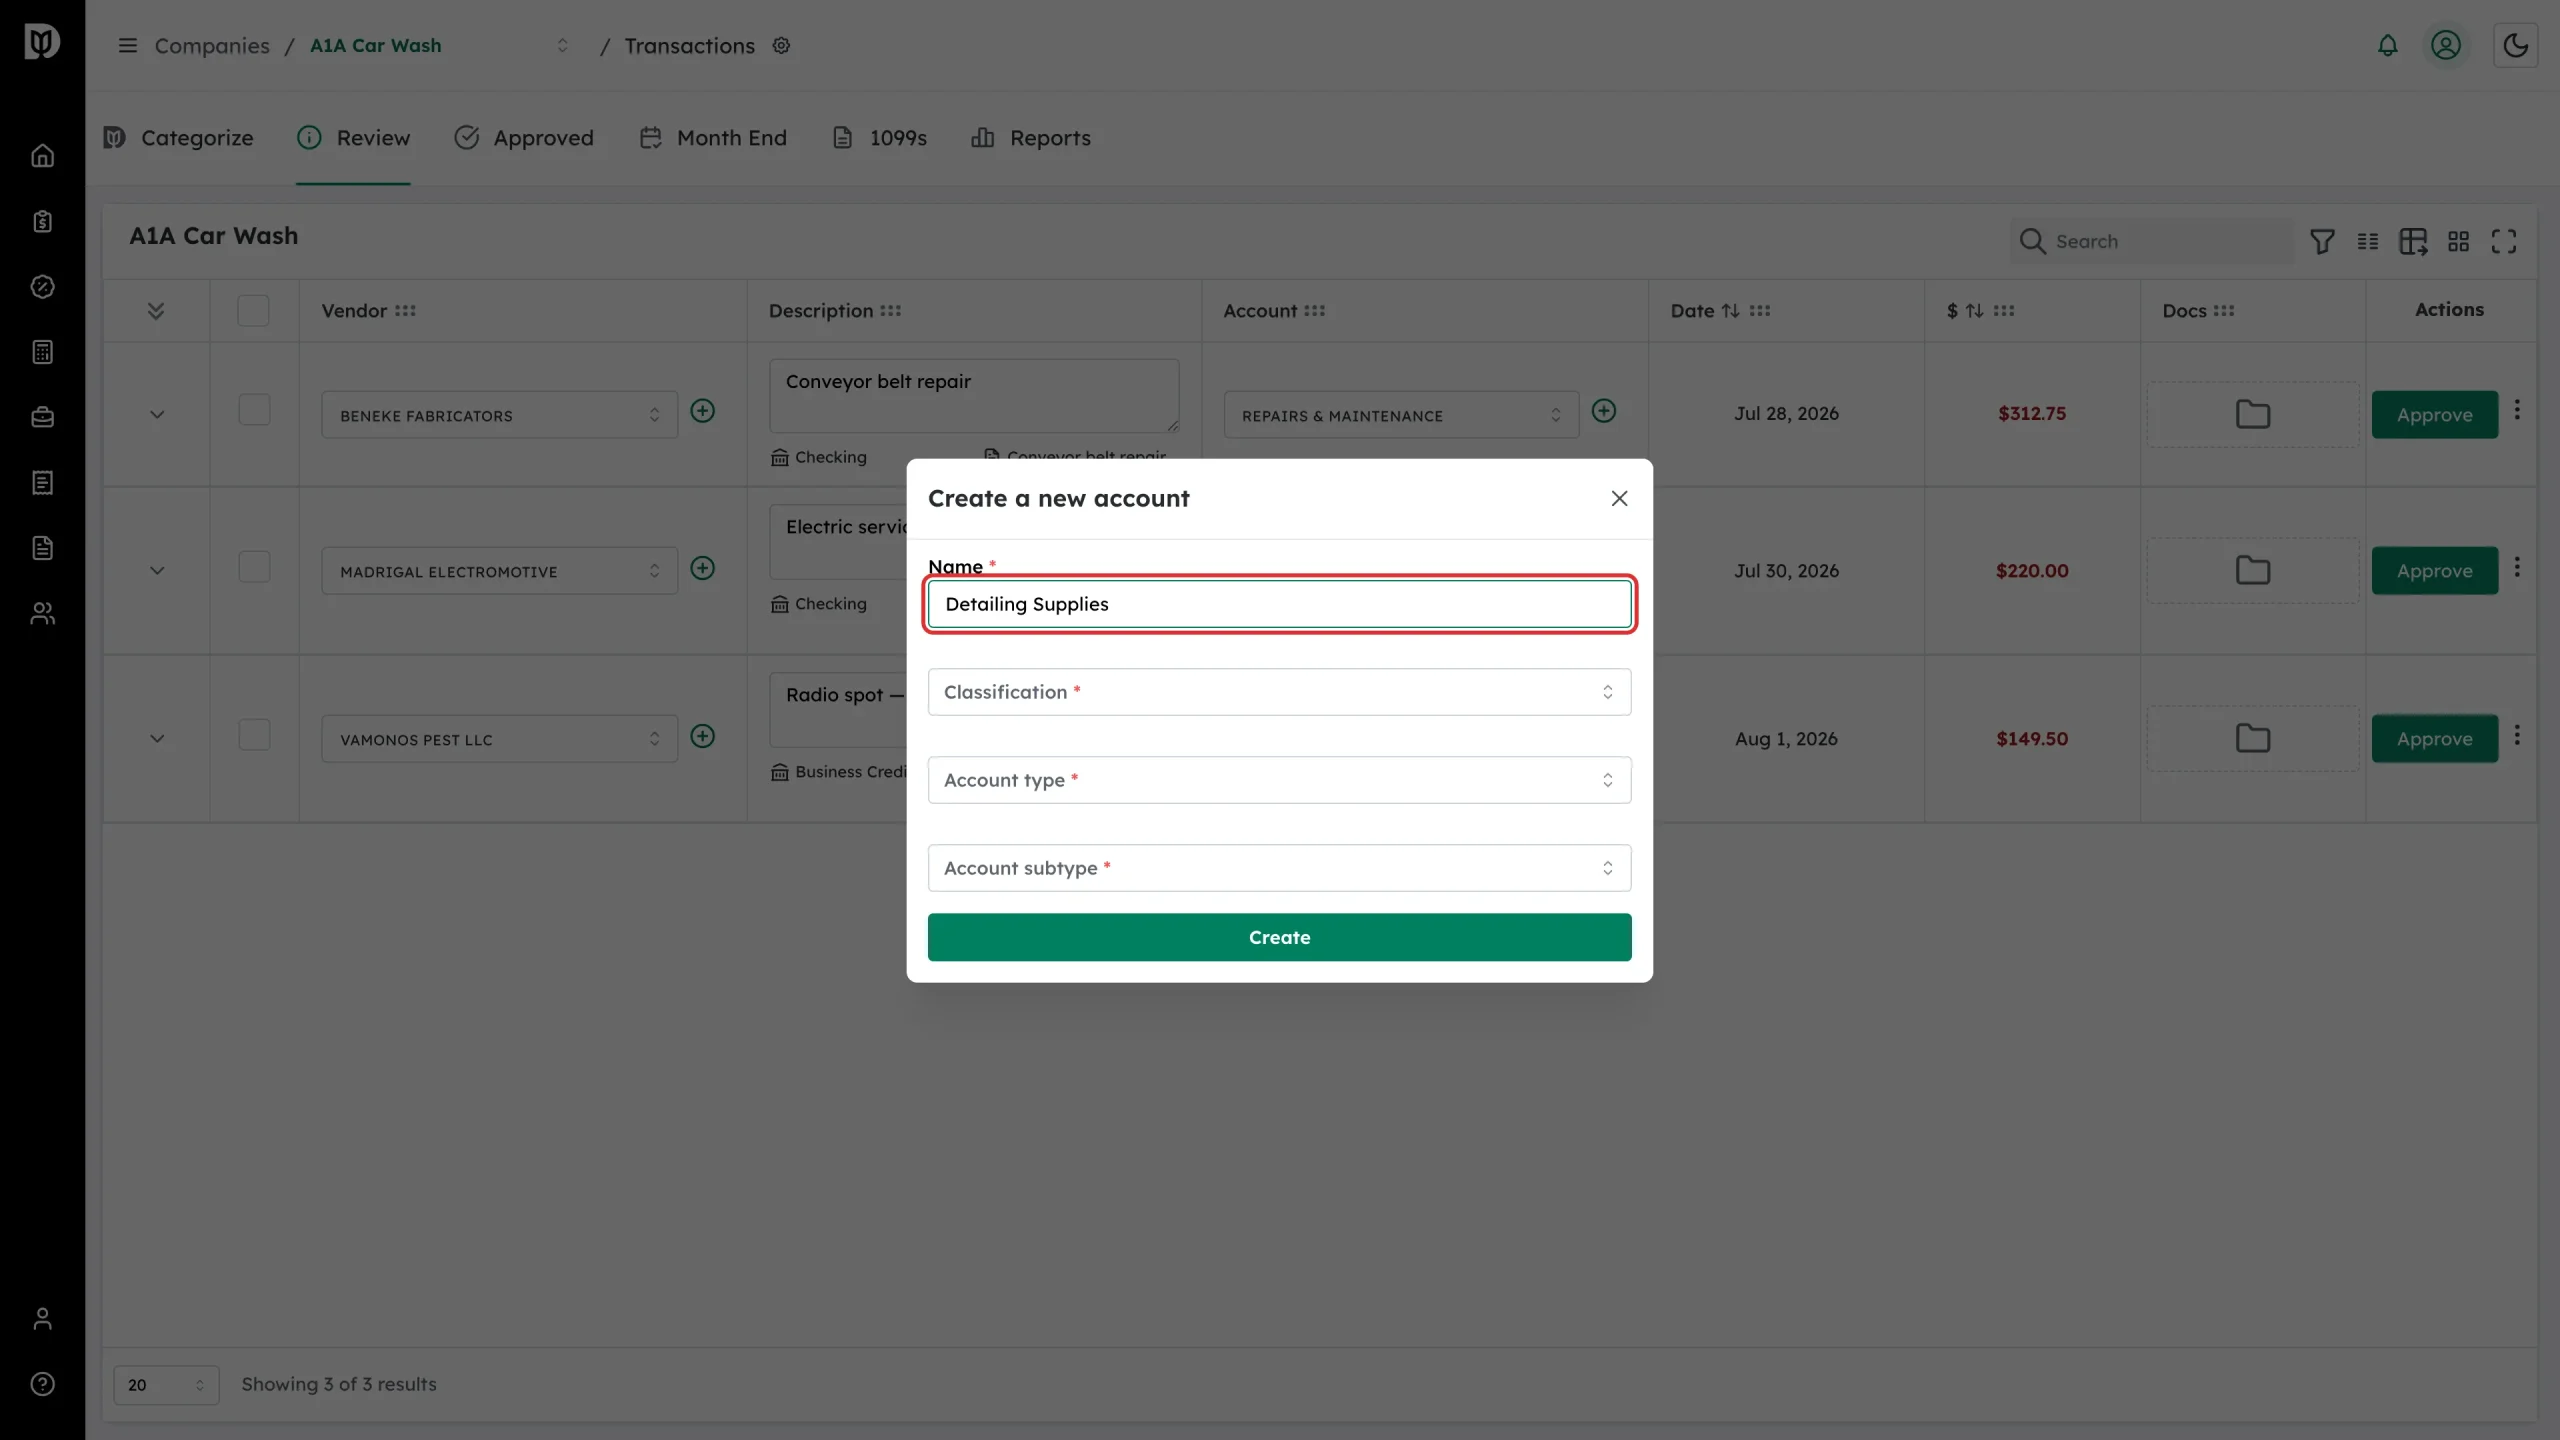
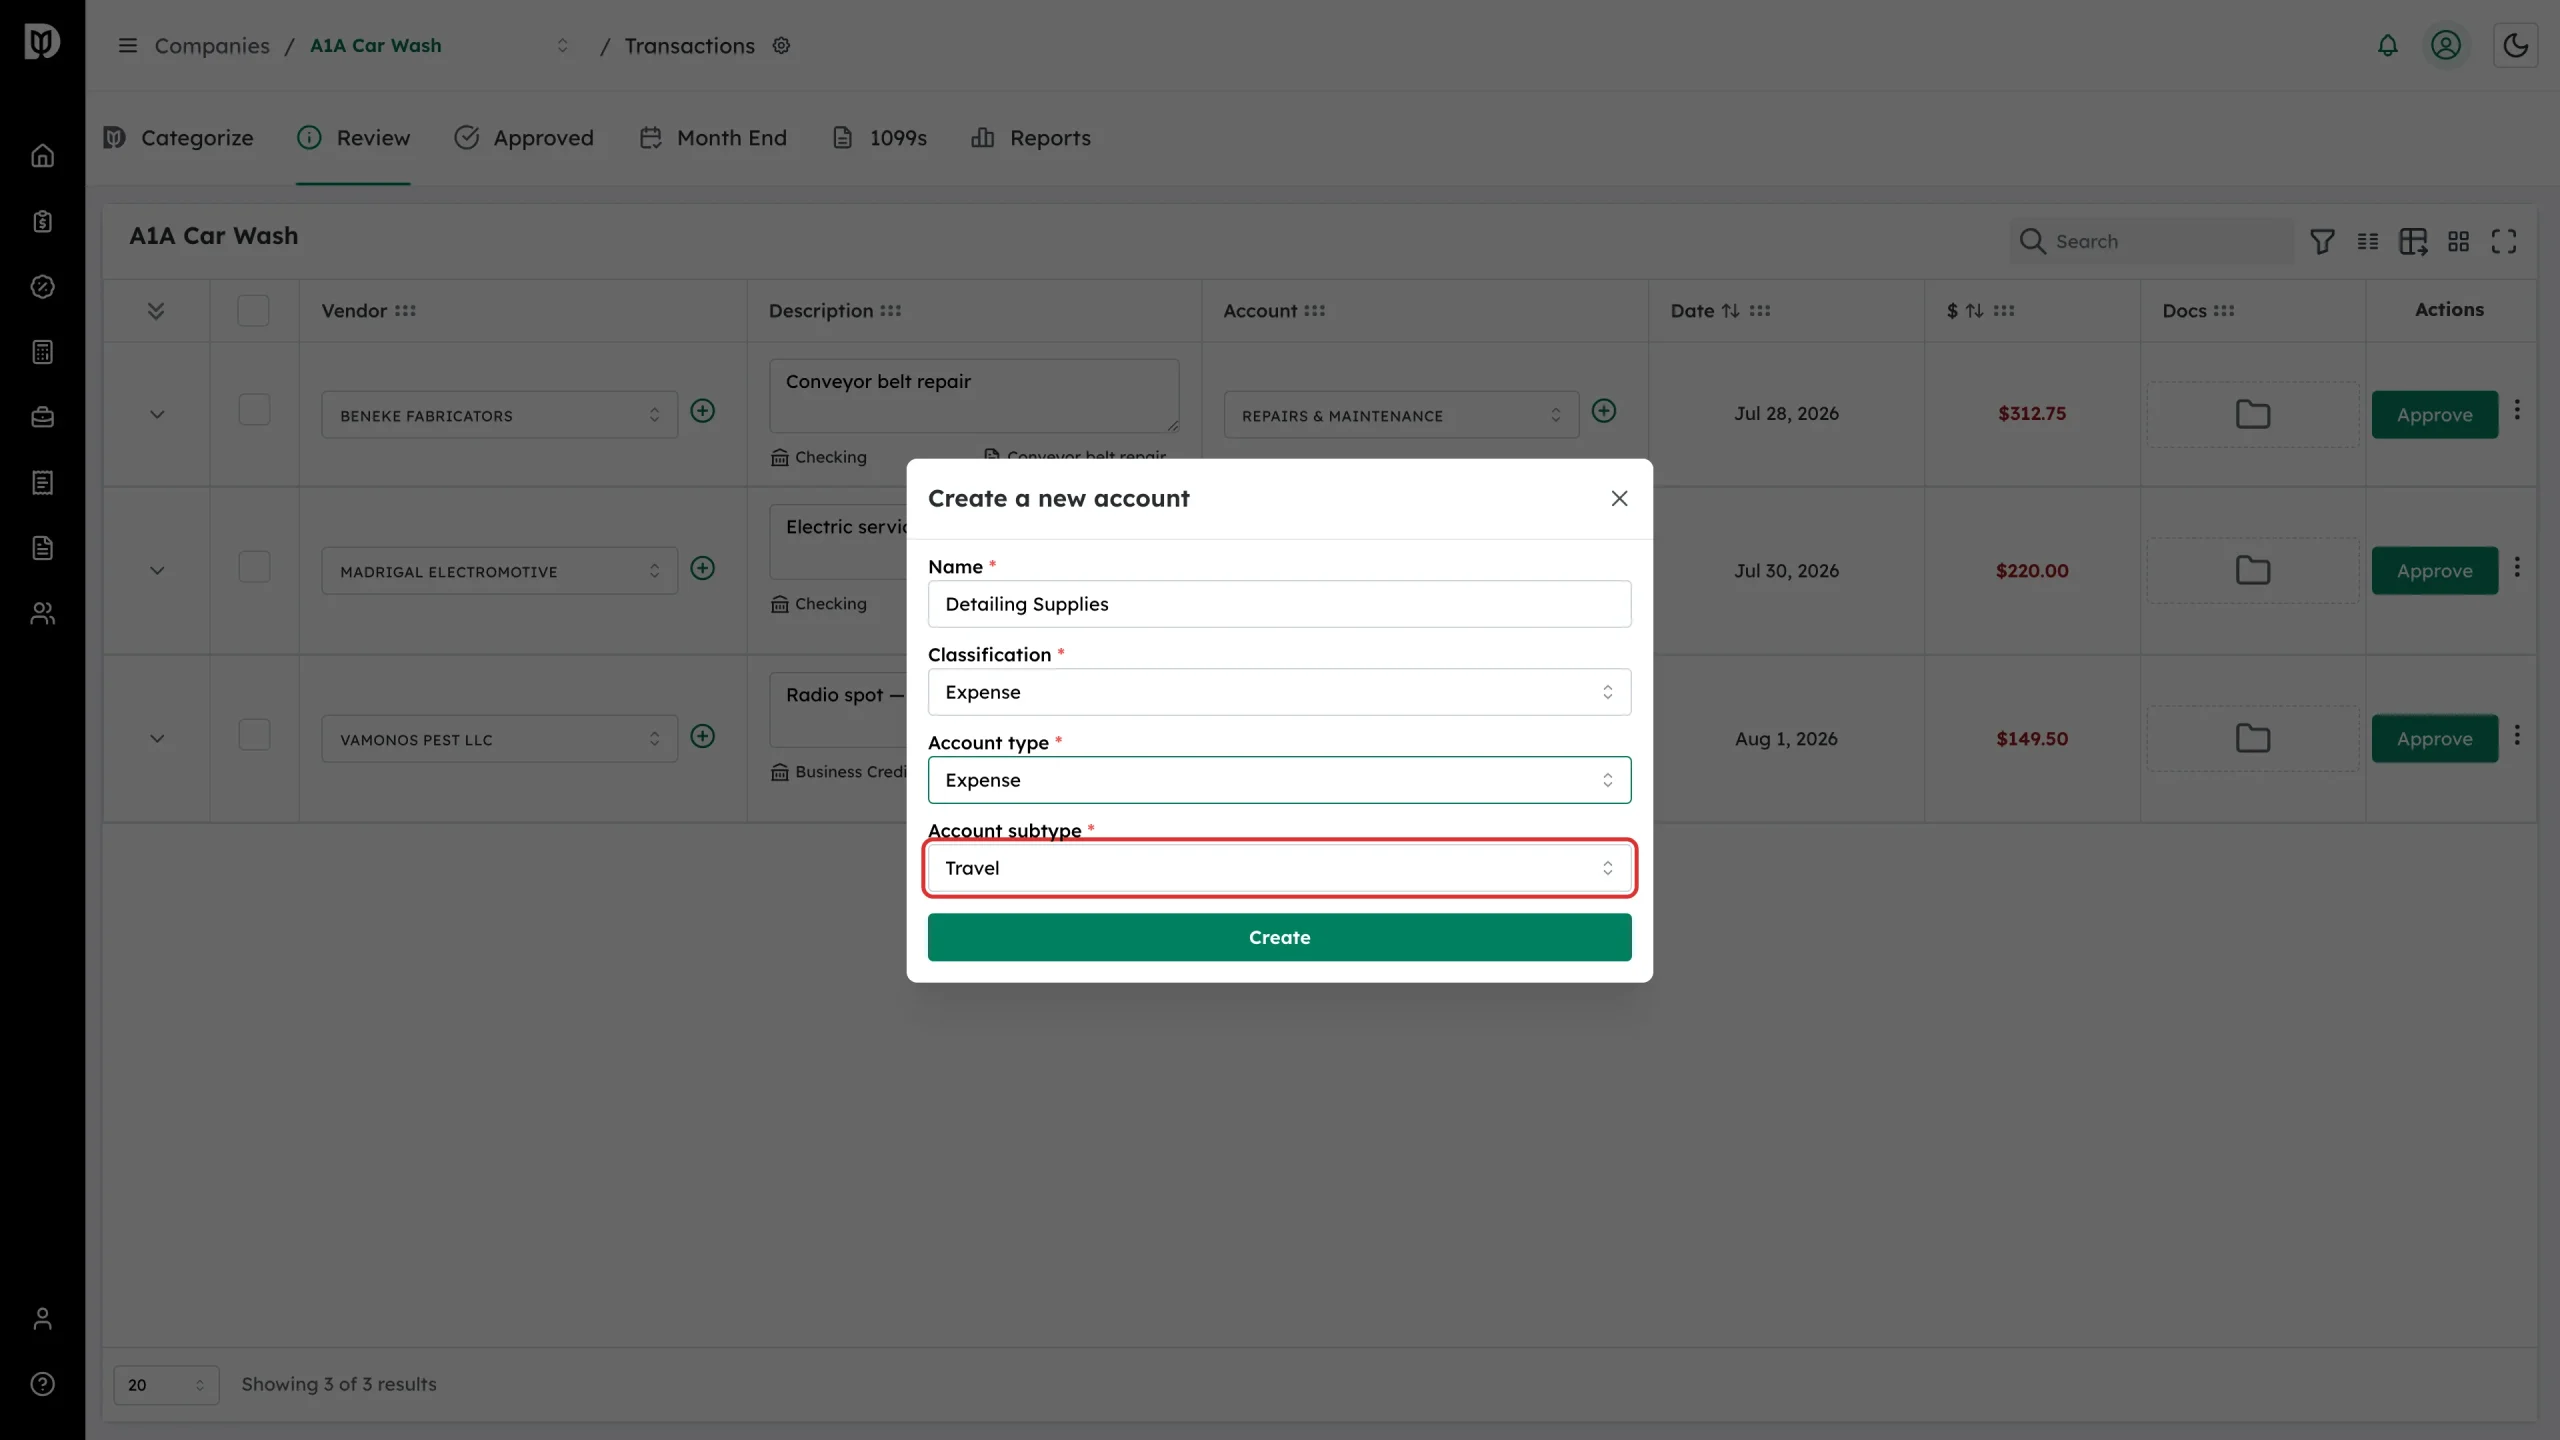
Type a clear name in Name, for example Detailing Supplies.
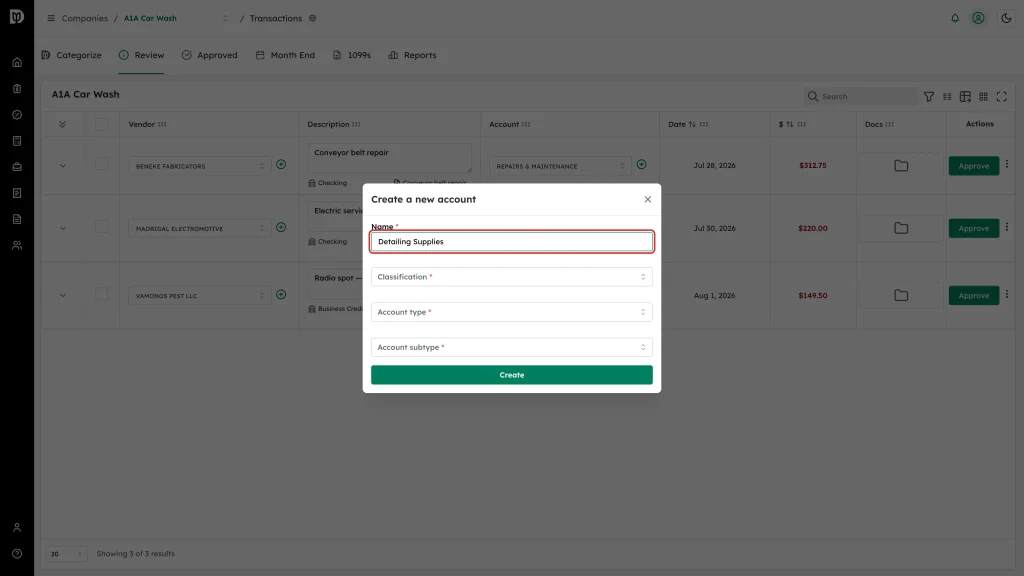
-
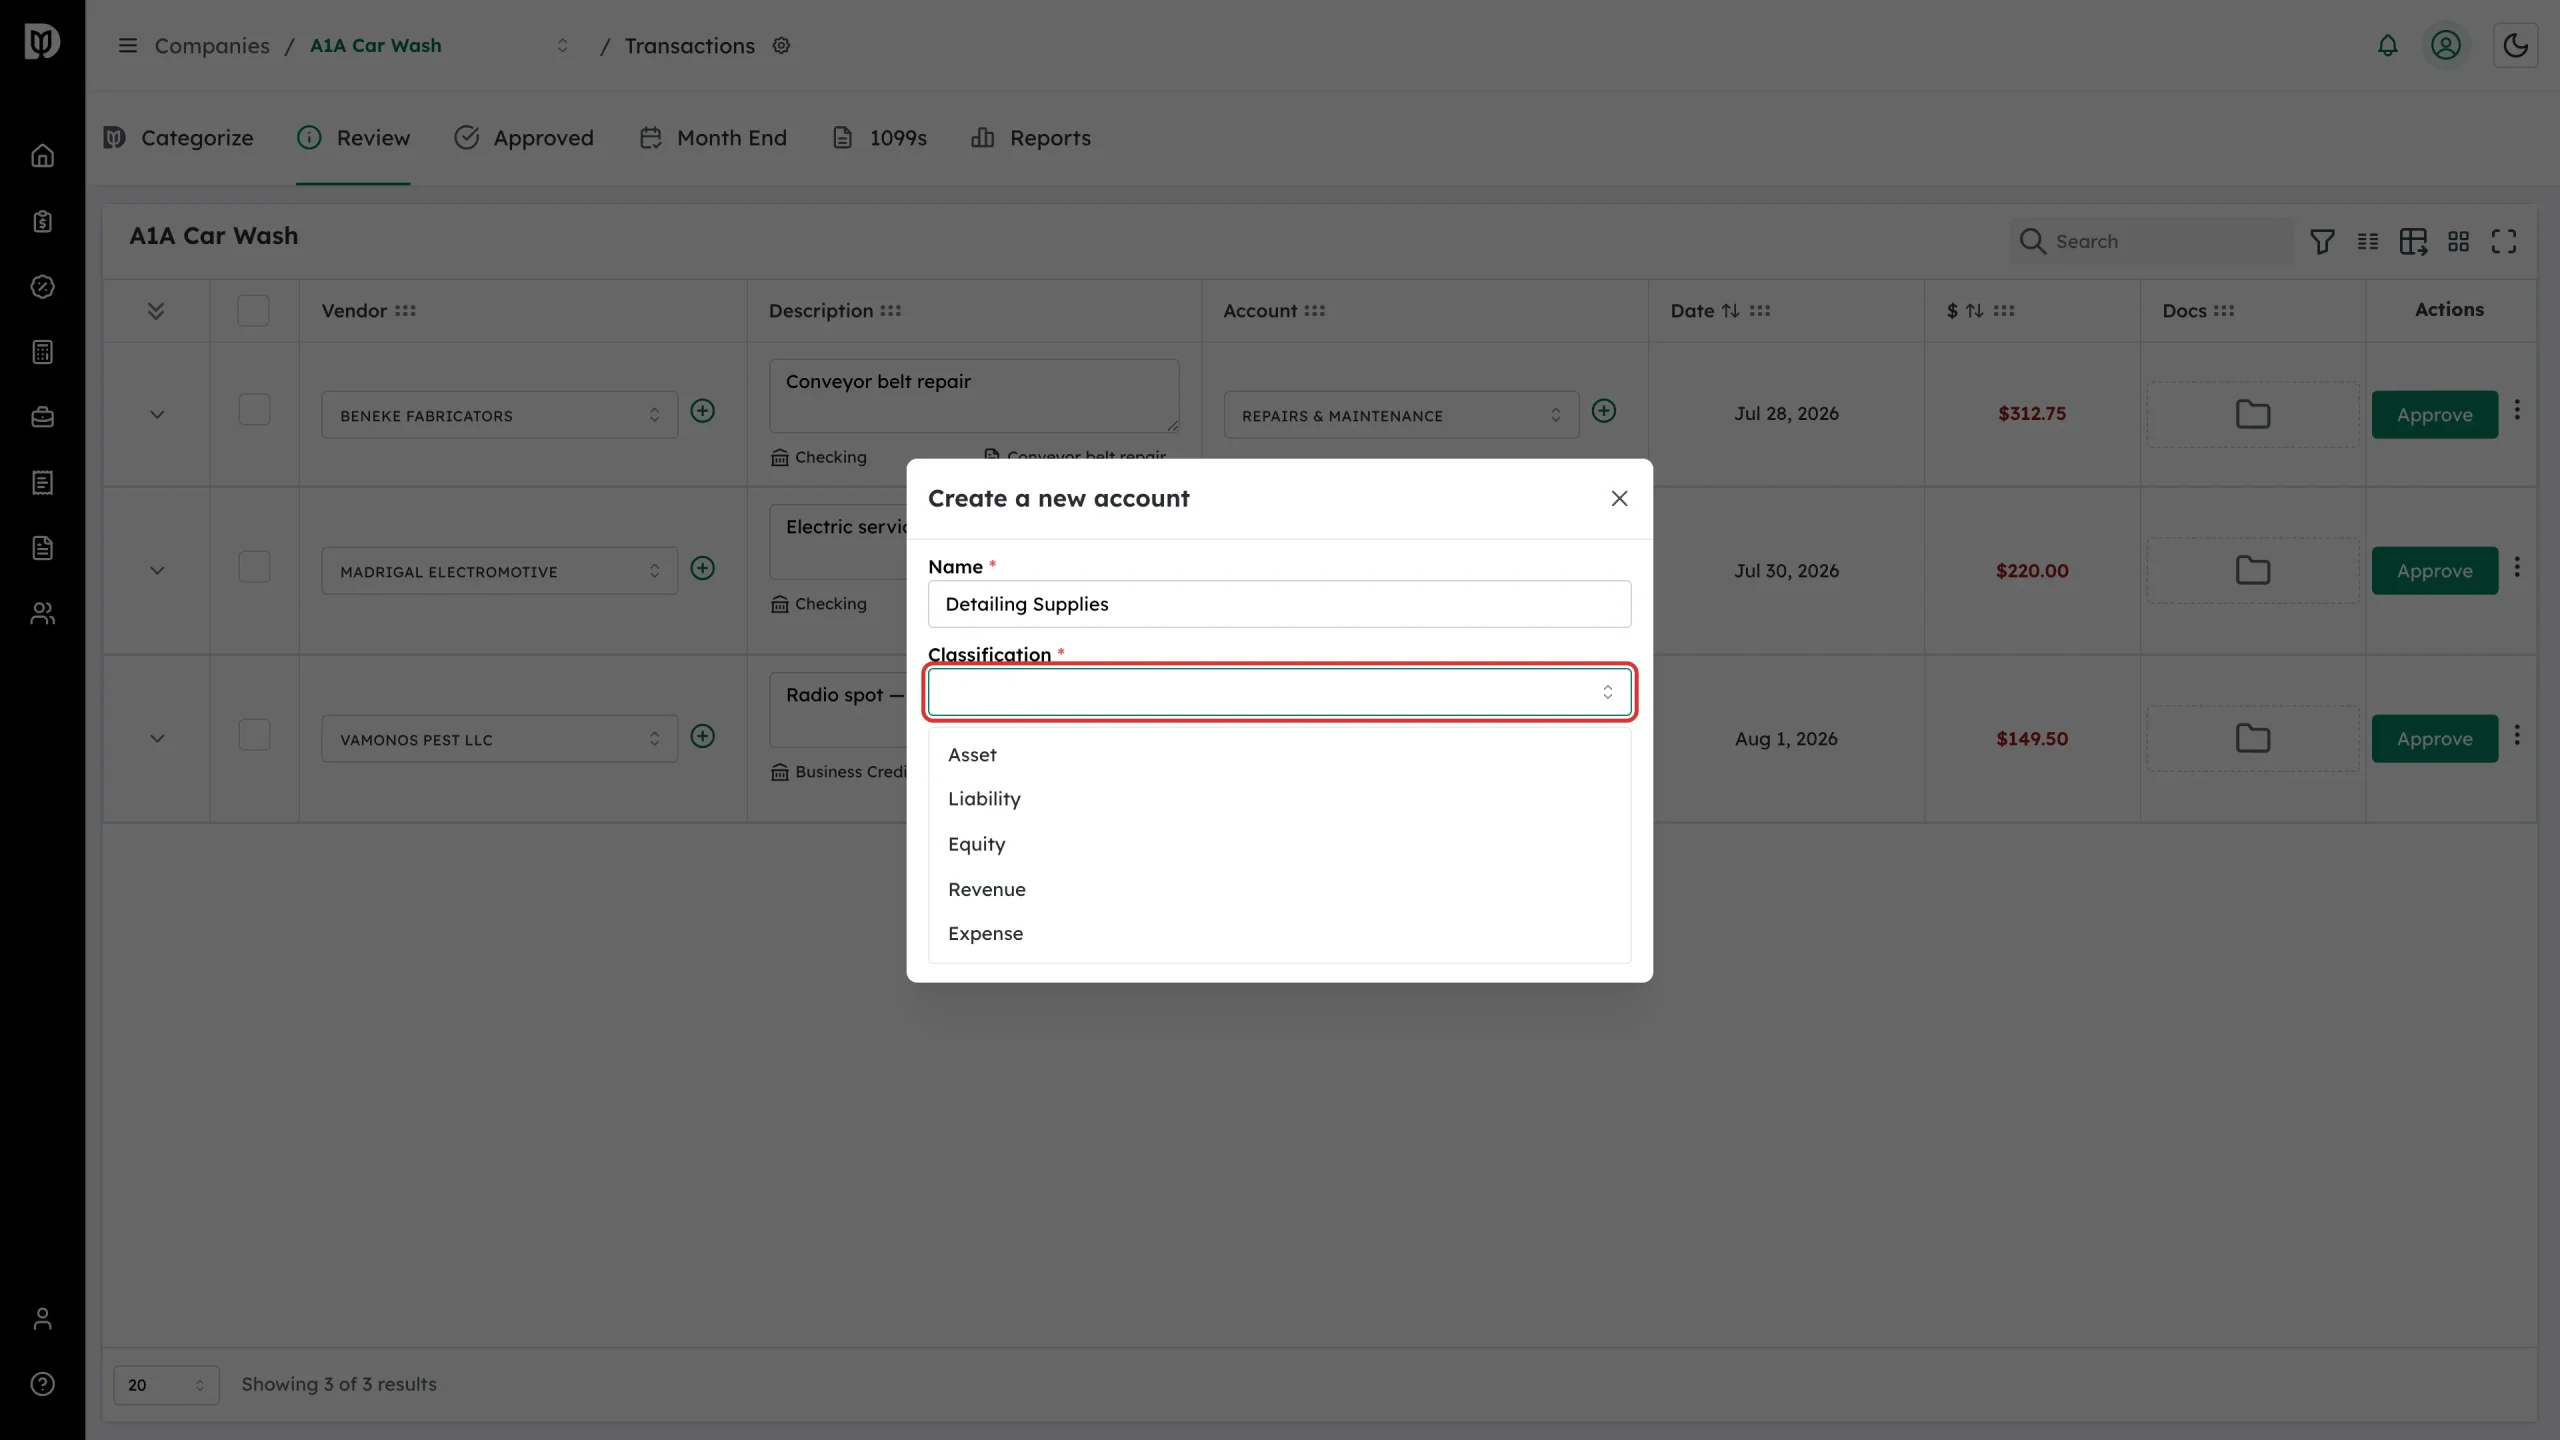
Choose a Classification: Asset, Liability, Equity, Revenue or Expense.
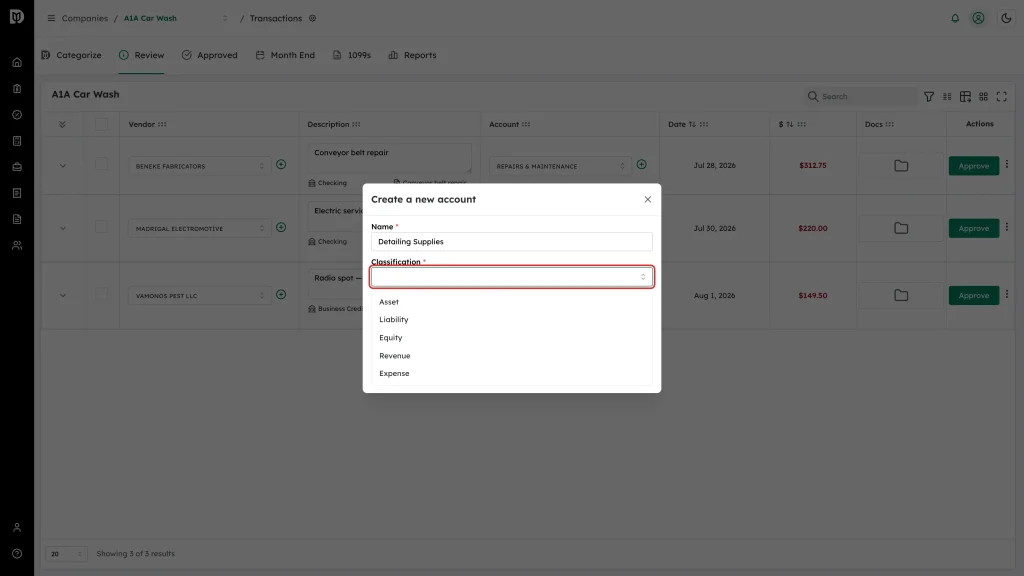
-
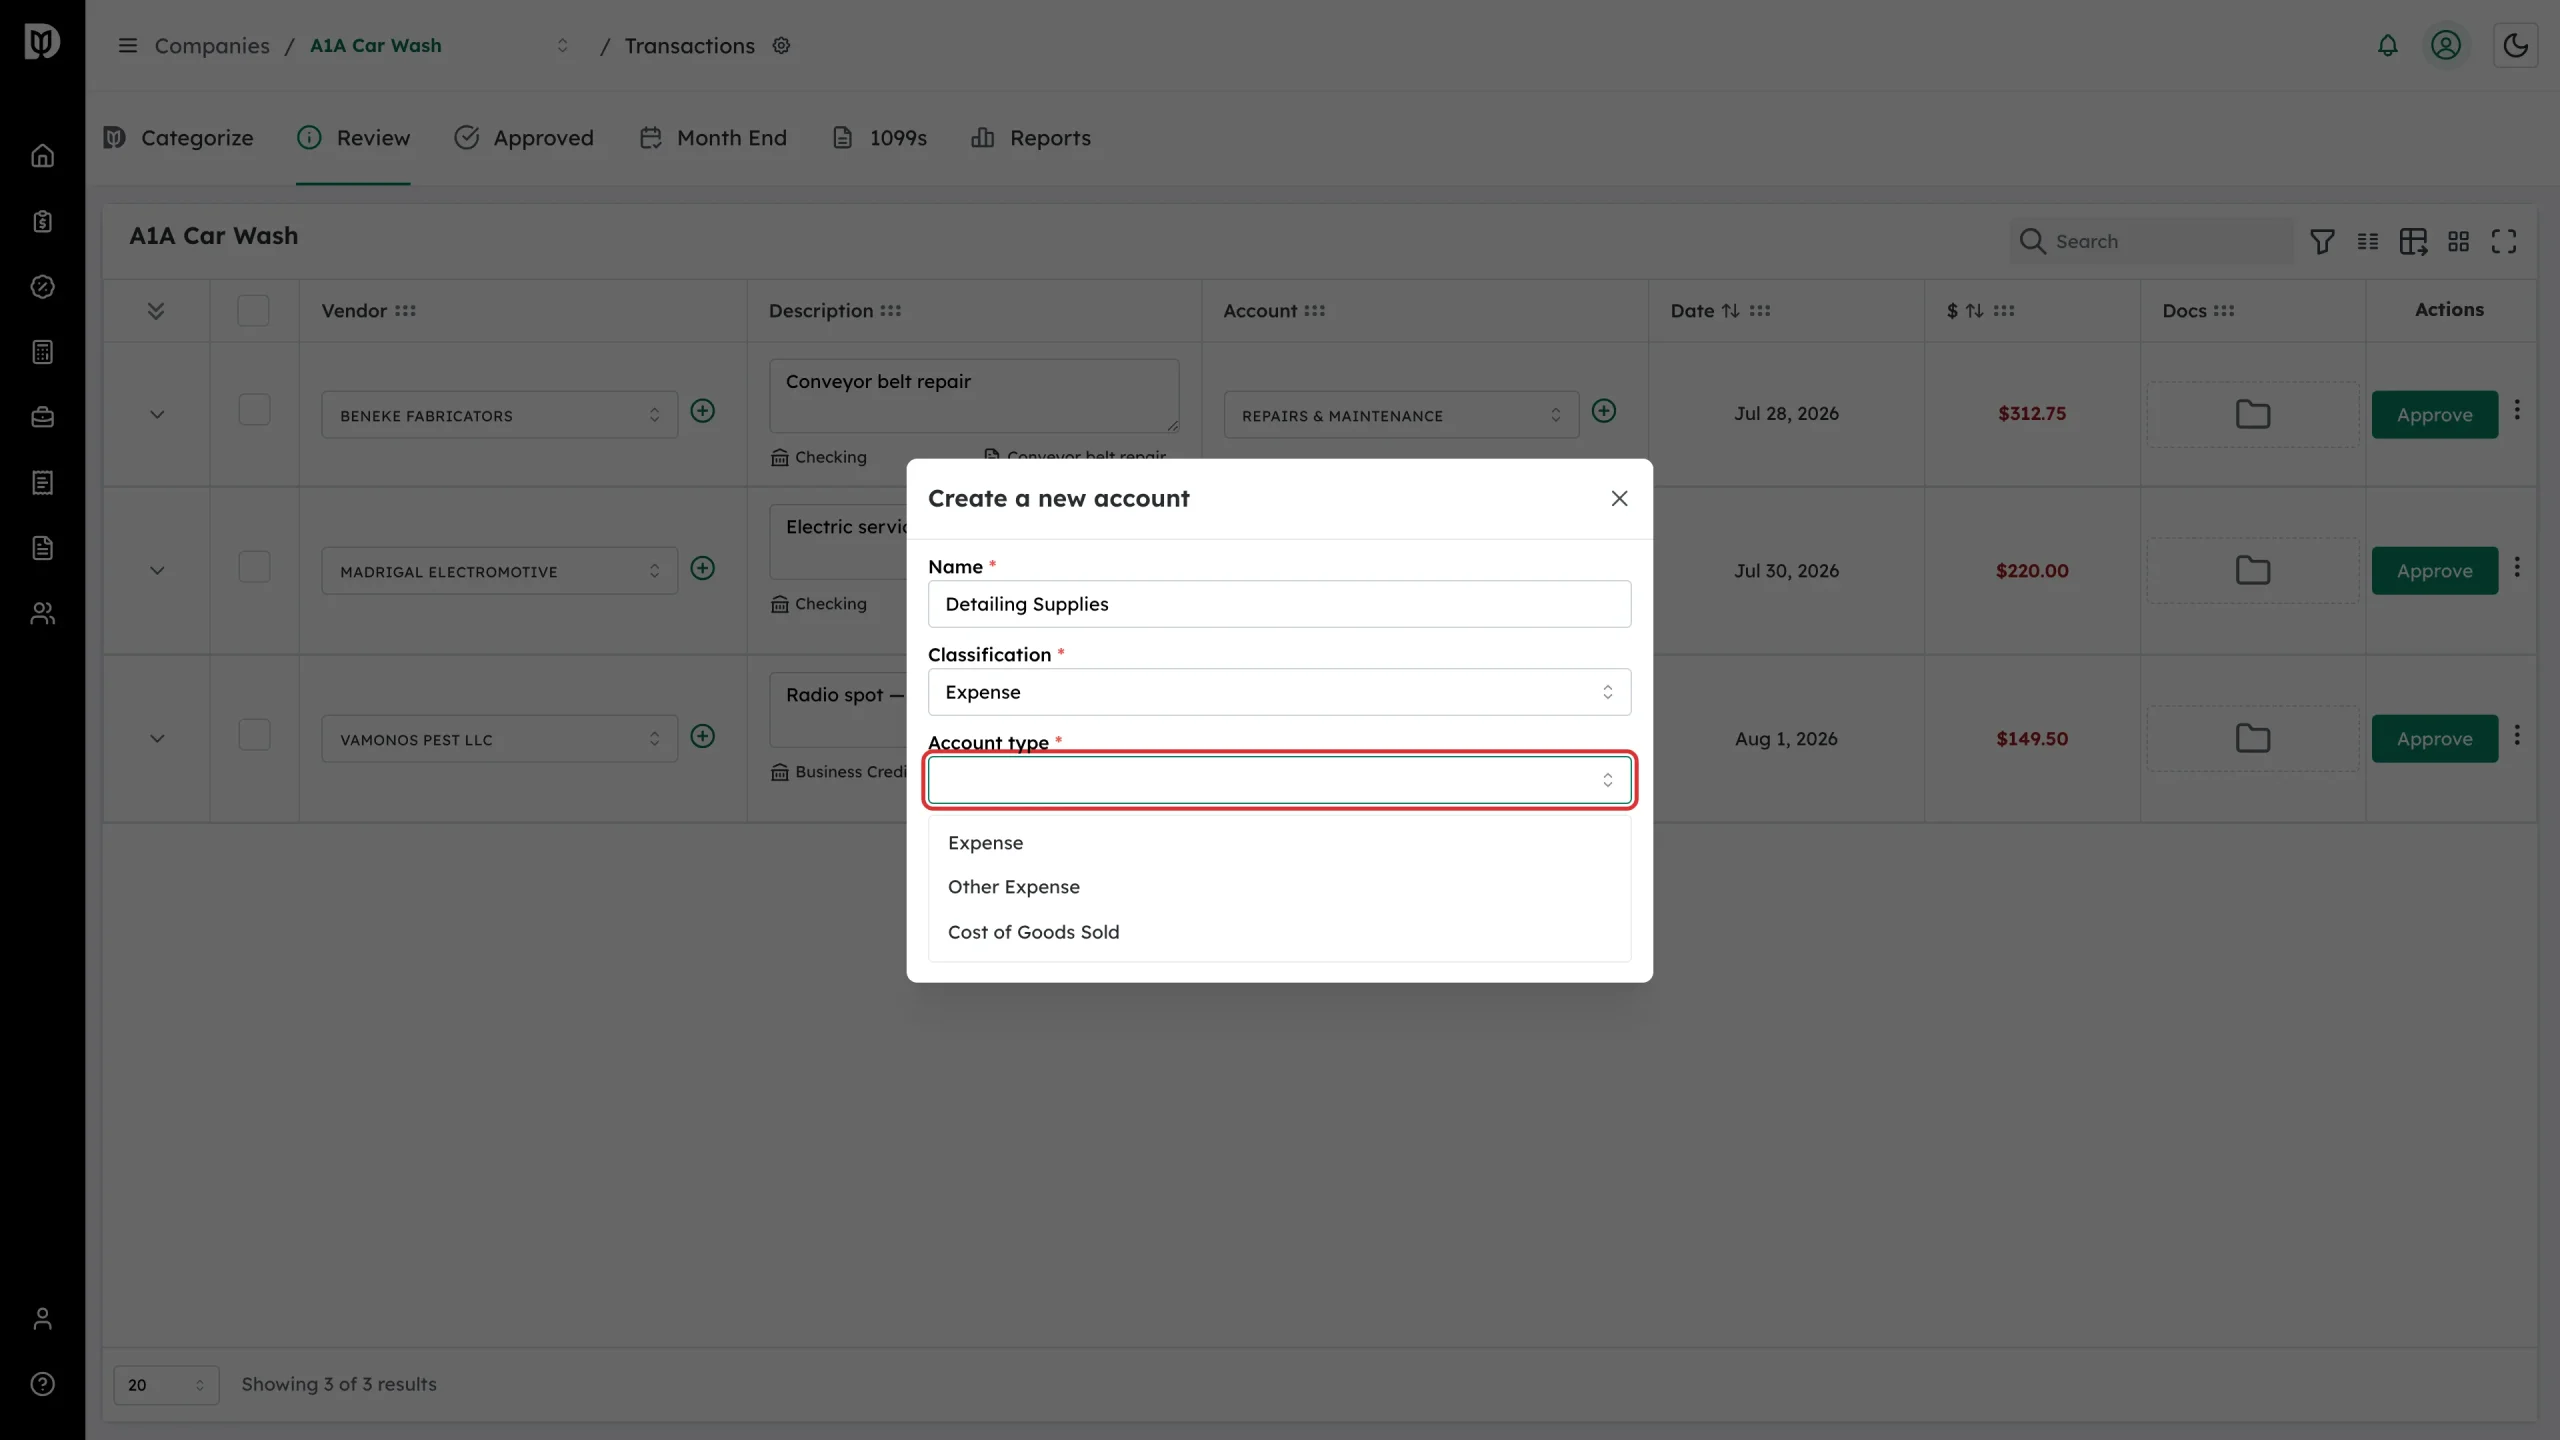
Choose an Account type. The choices depend on the classification you picked — an Expense account offers Expense, Other Expense and Cost of Goods Sold.
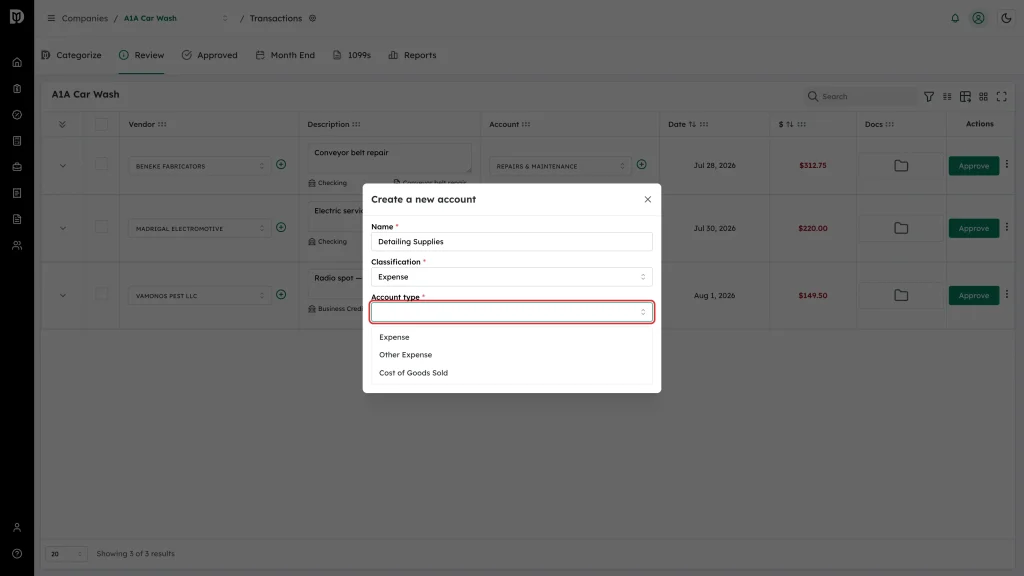
-
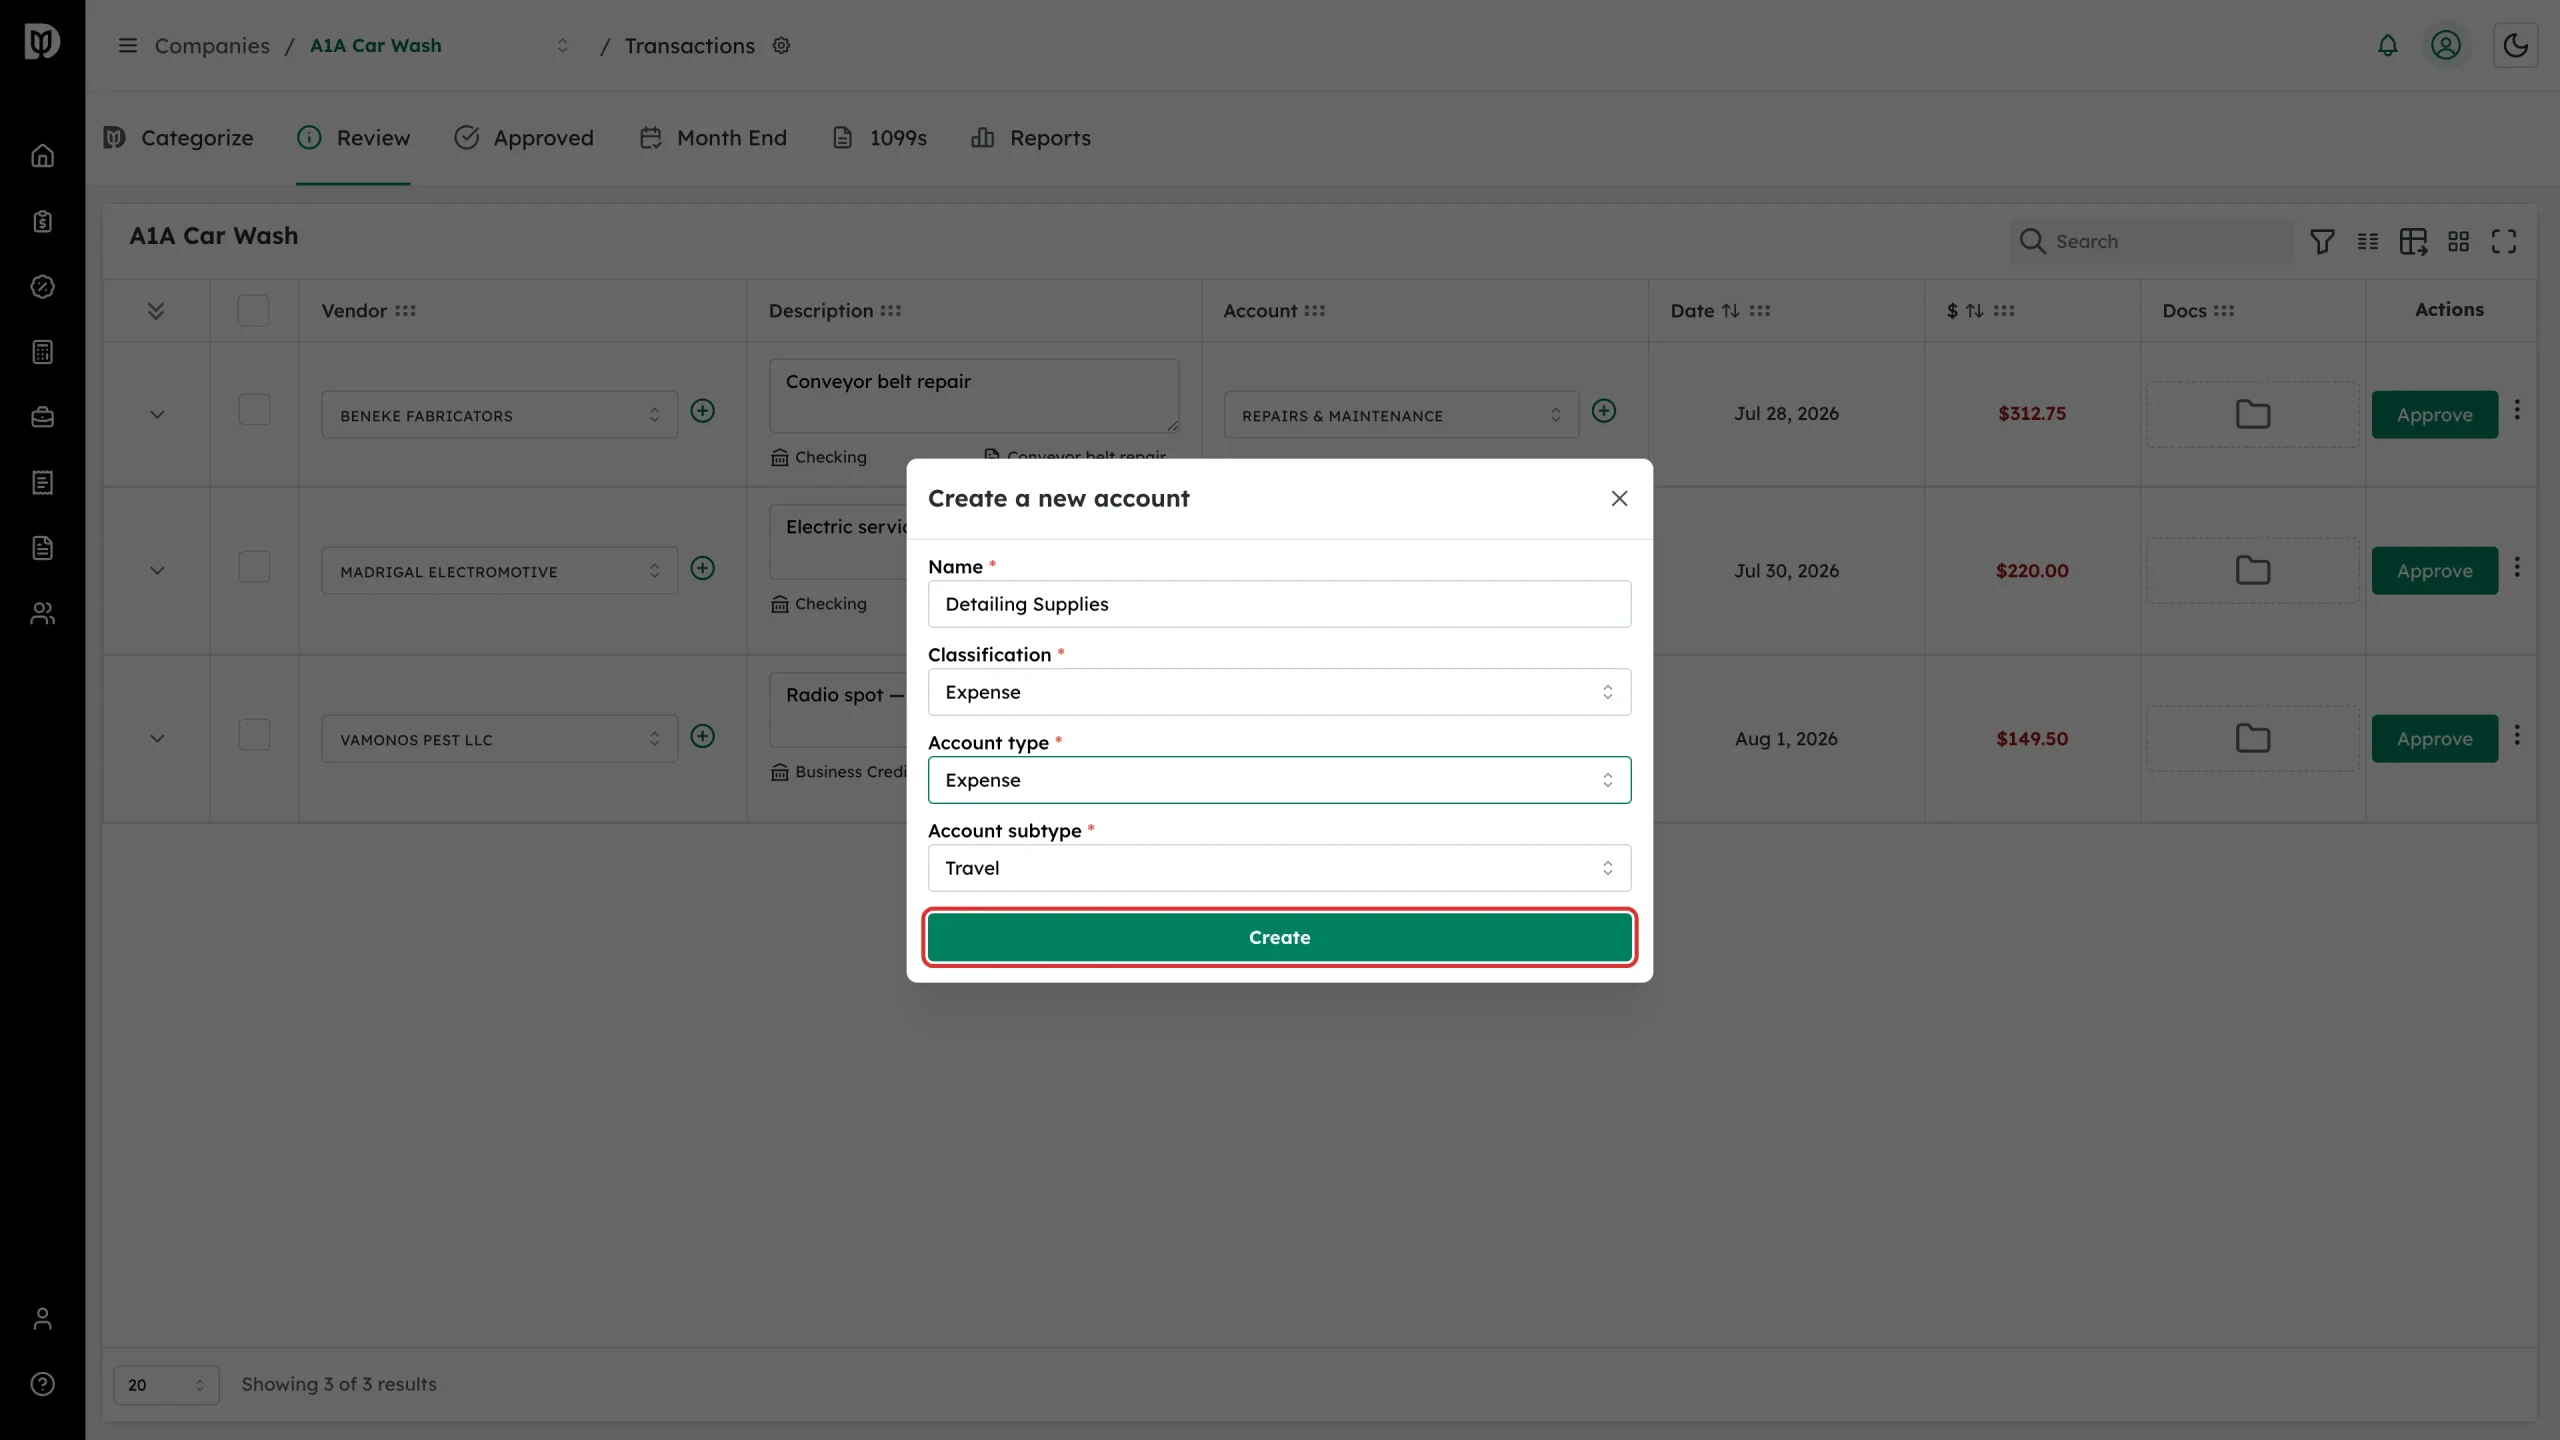
Check the Account subtype. Debits fills in the QuickBooks default for the type you chose; change it if it is not right.
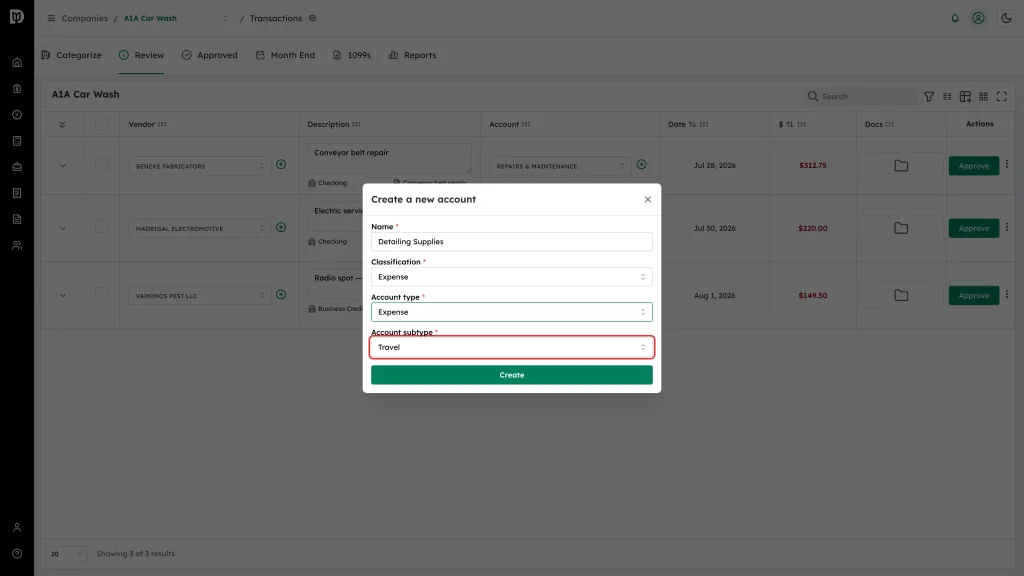
-
Click Create, then click Approve or Save on the transaction row to send the change to QuickBooks Online.
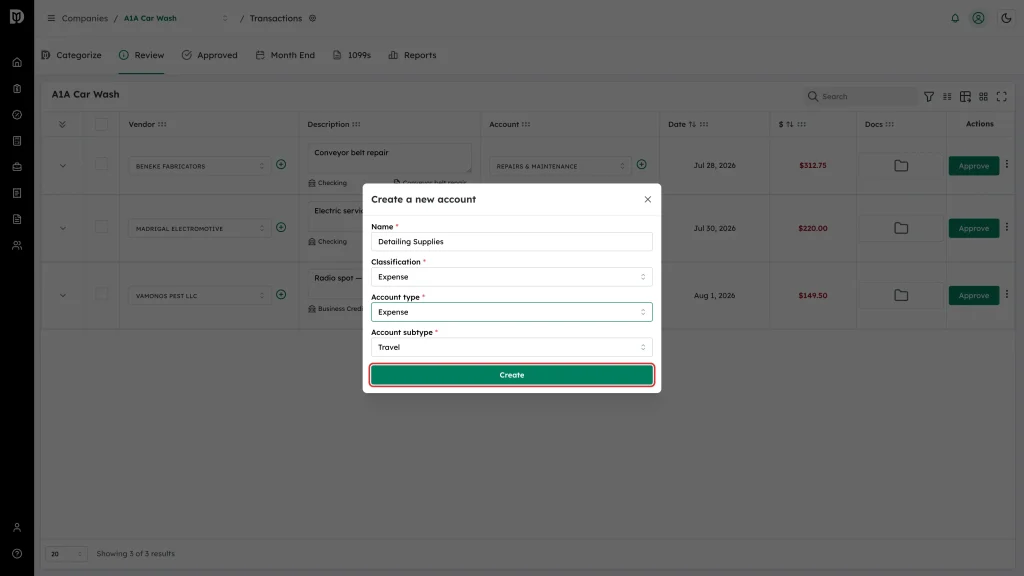
What happens next
- A New Account Created message confirms the account was written to QuickBooks Online.
- The new account is selected on the transaction and is available in the Account picker for that company from then on.
Troubleshooting
- The account does not show up in the picker afterwards. Check that it is not on the company’s Exclude accounts from category list.
- Create is greyed out. Name, Classification, Account type and Account subtype are all required.