If a vendor is missing from the list while you are coding a transaction, you can create it without leaving Debits. The vendor is created in QuickBooks Online straight away.
Before you start
- Accountants can always do this. Client users only see the plus button if the accountant turns on Client Settings → Vendor on the company’s General settings tab.
- The plus button is hidden on the Approved tab, because approved transactions are read-only.
Steps
-
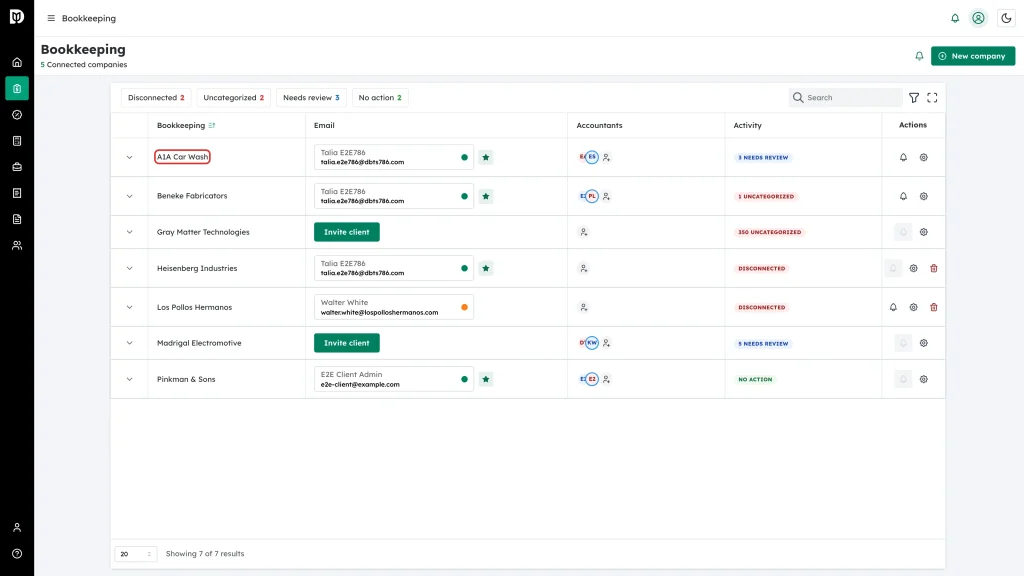
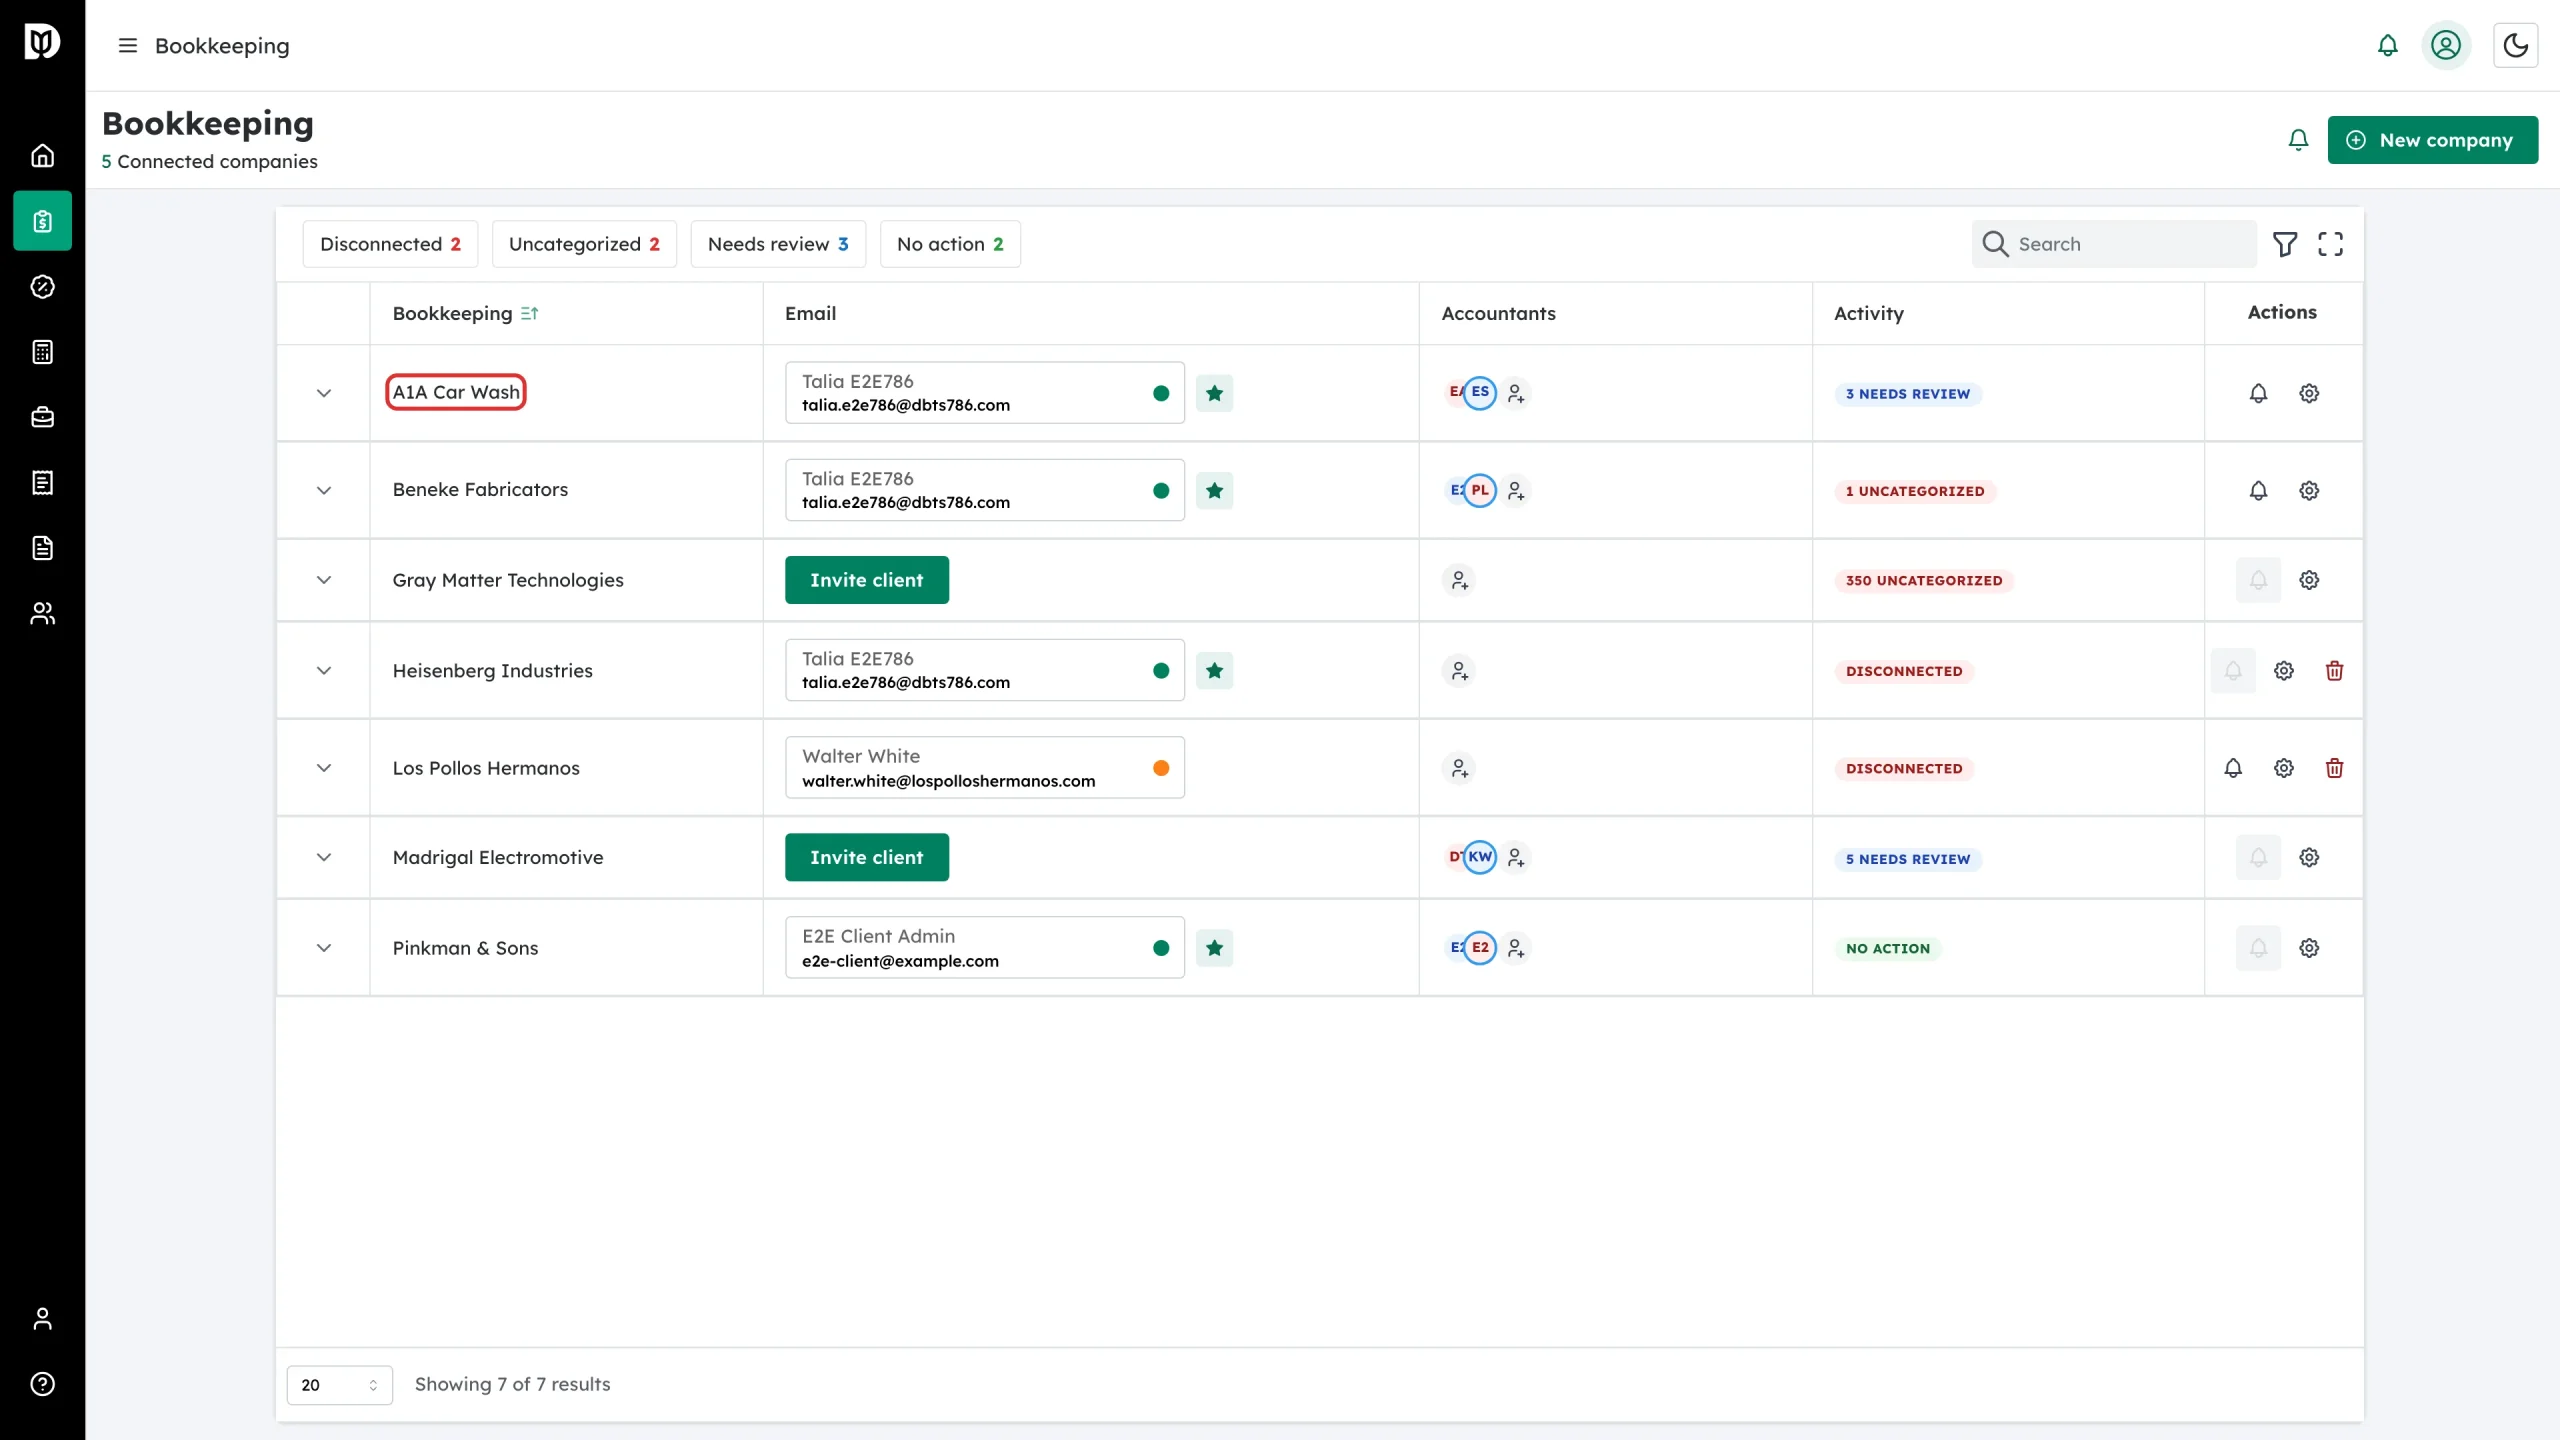
In the left sidebar, open Bookkeeping and click the company name to open its transactions.
-
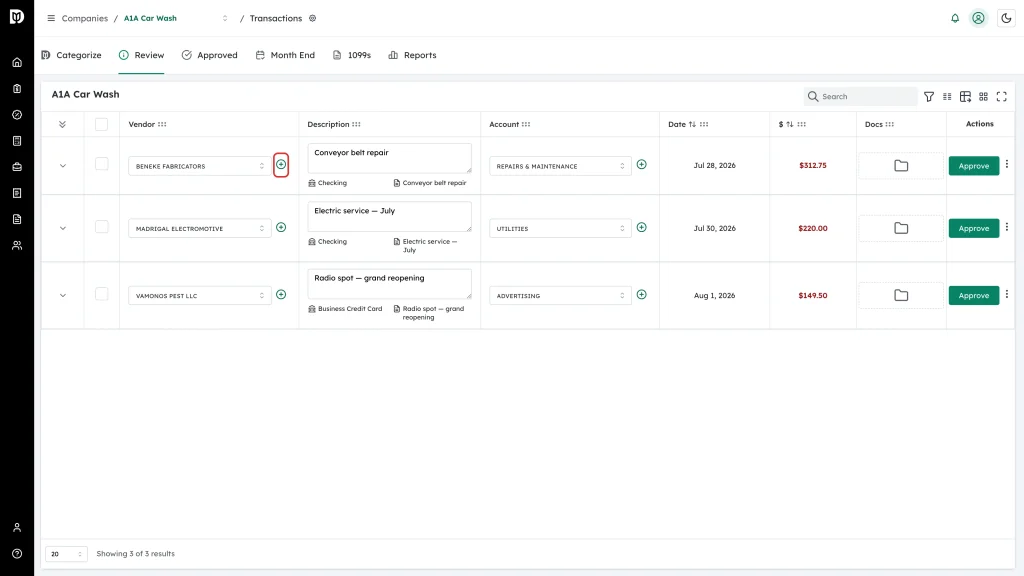
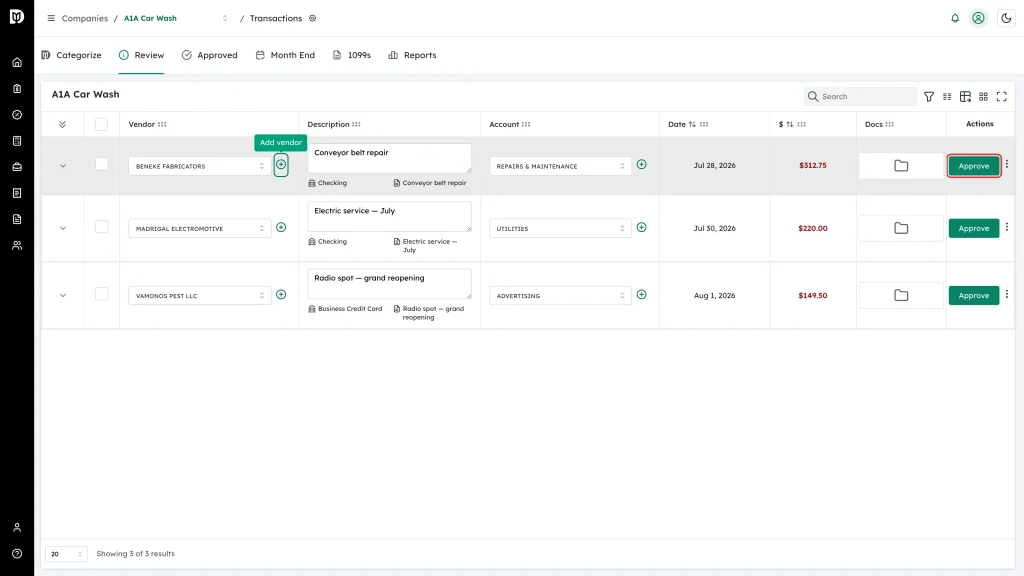
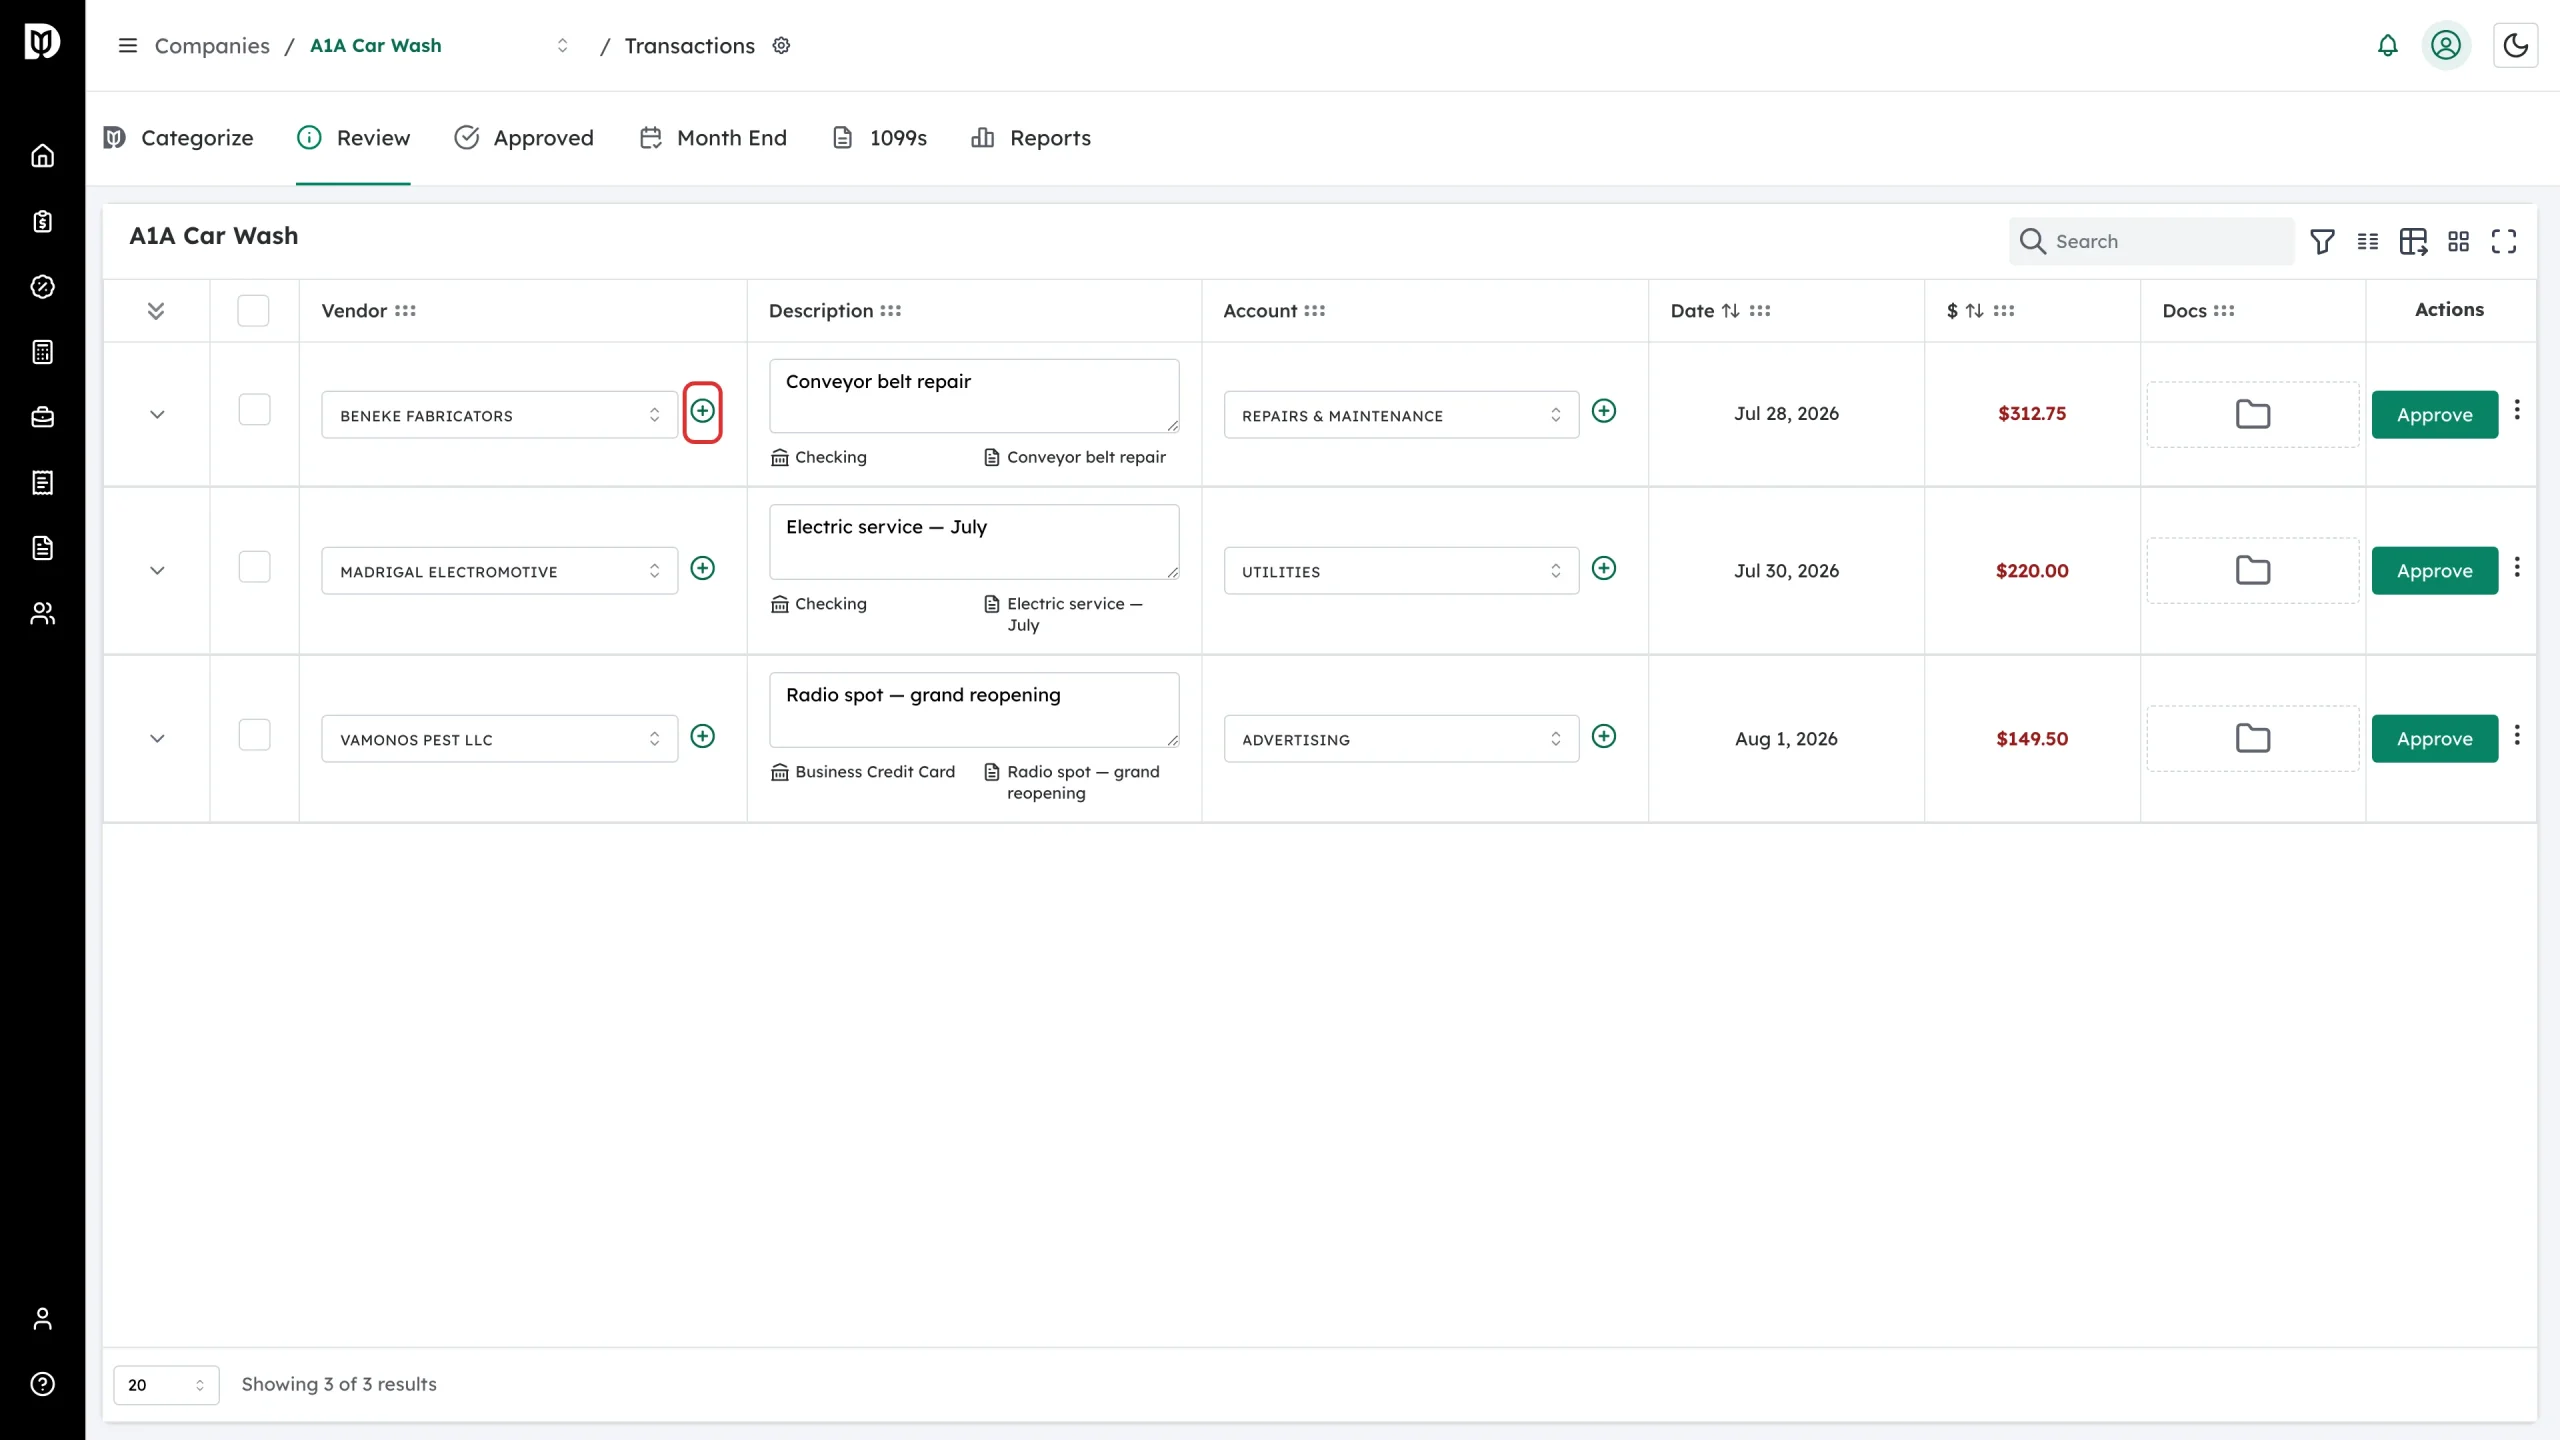
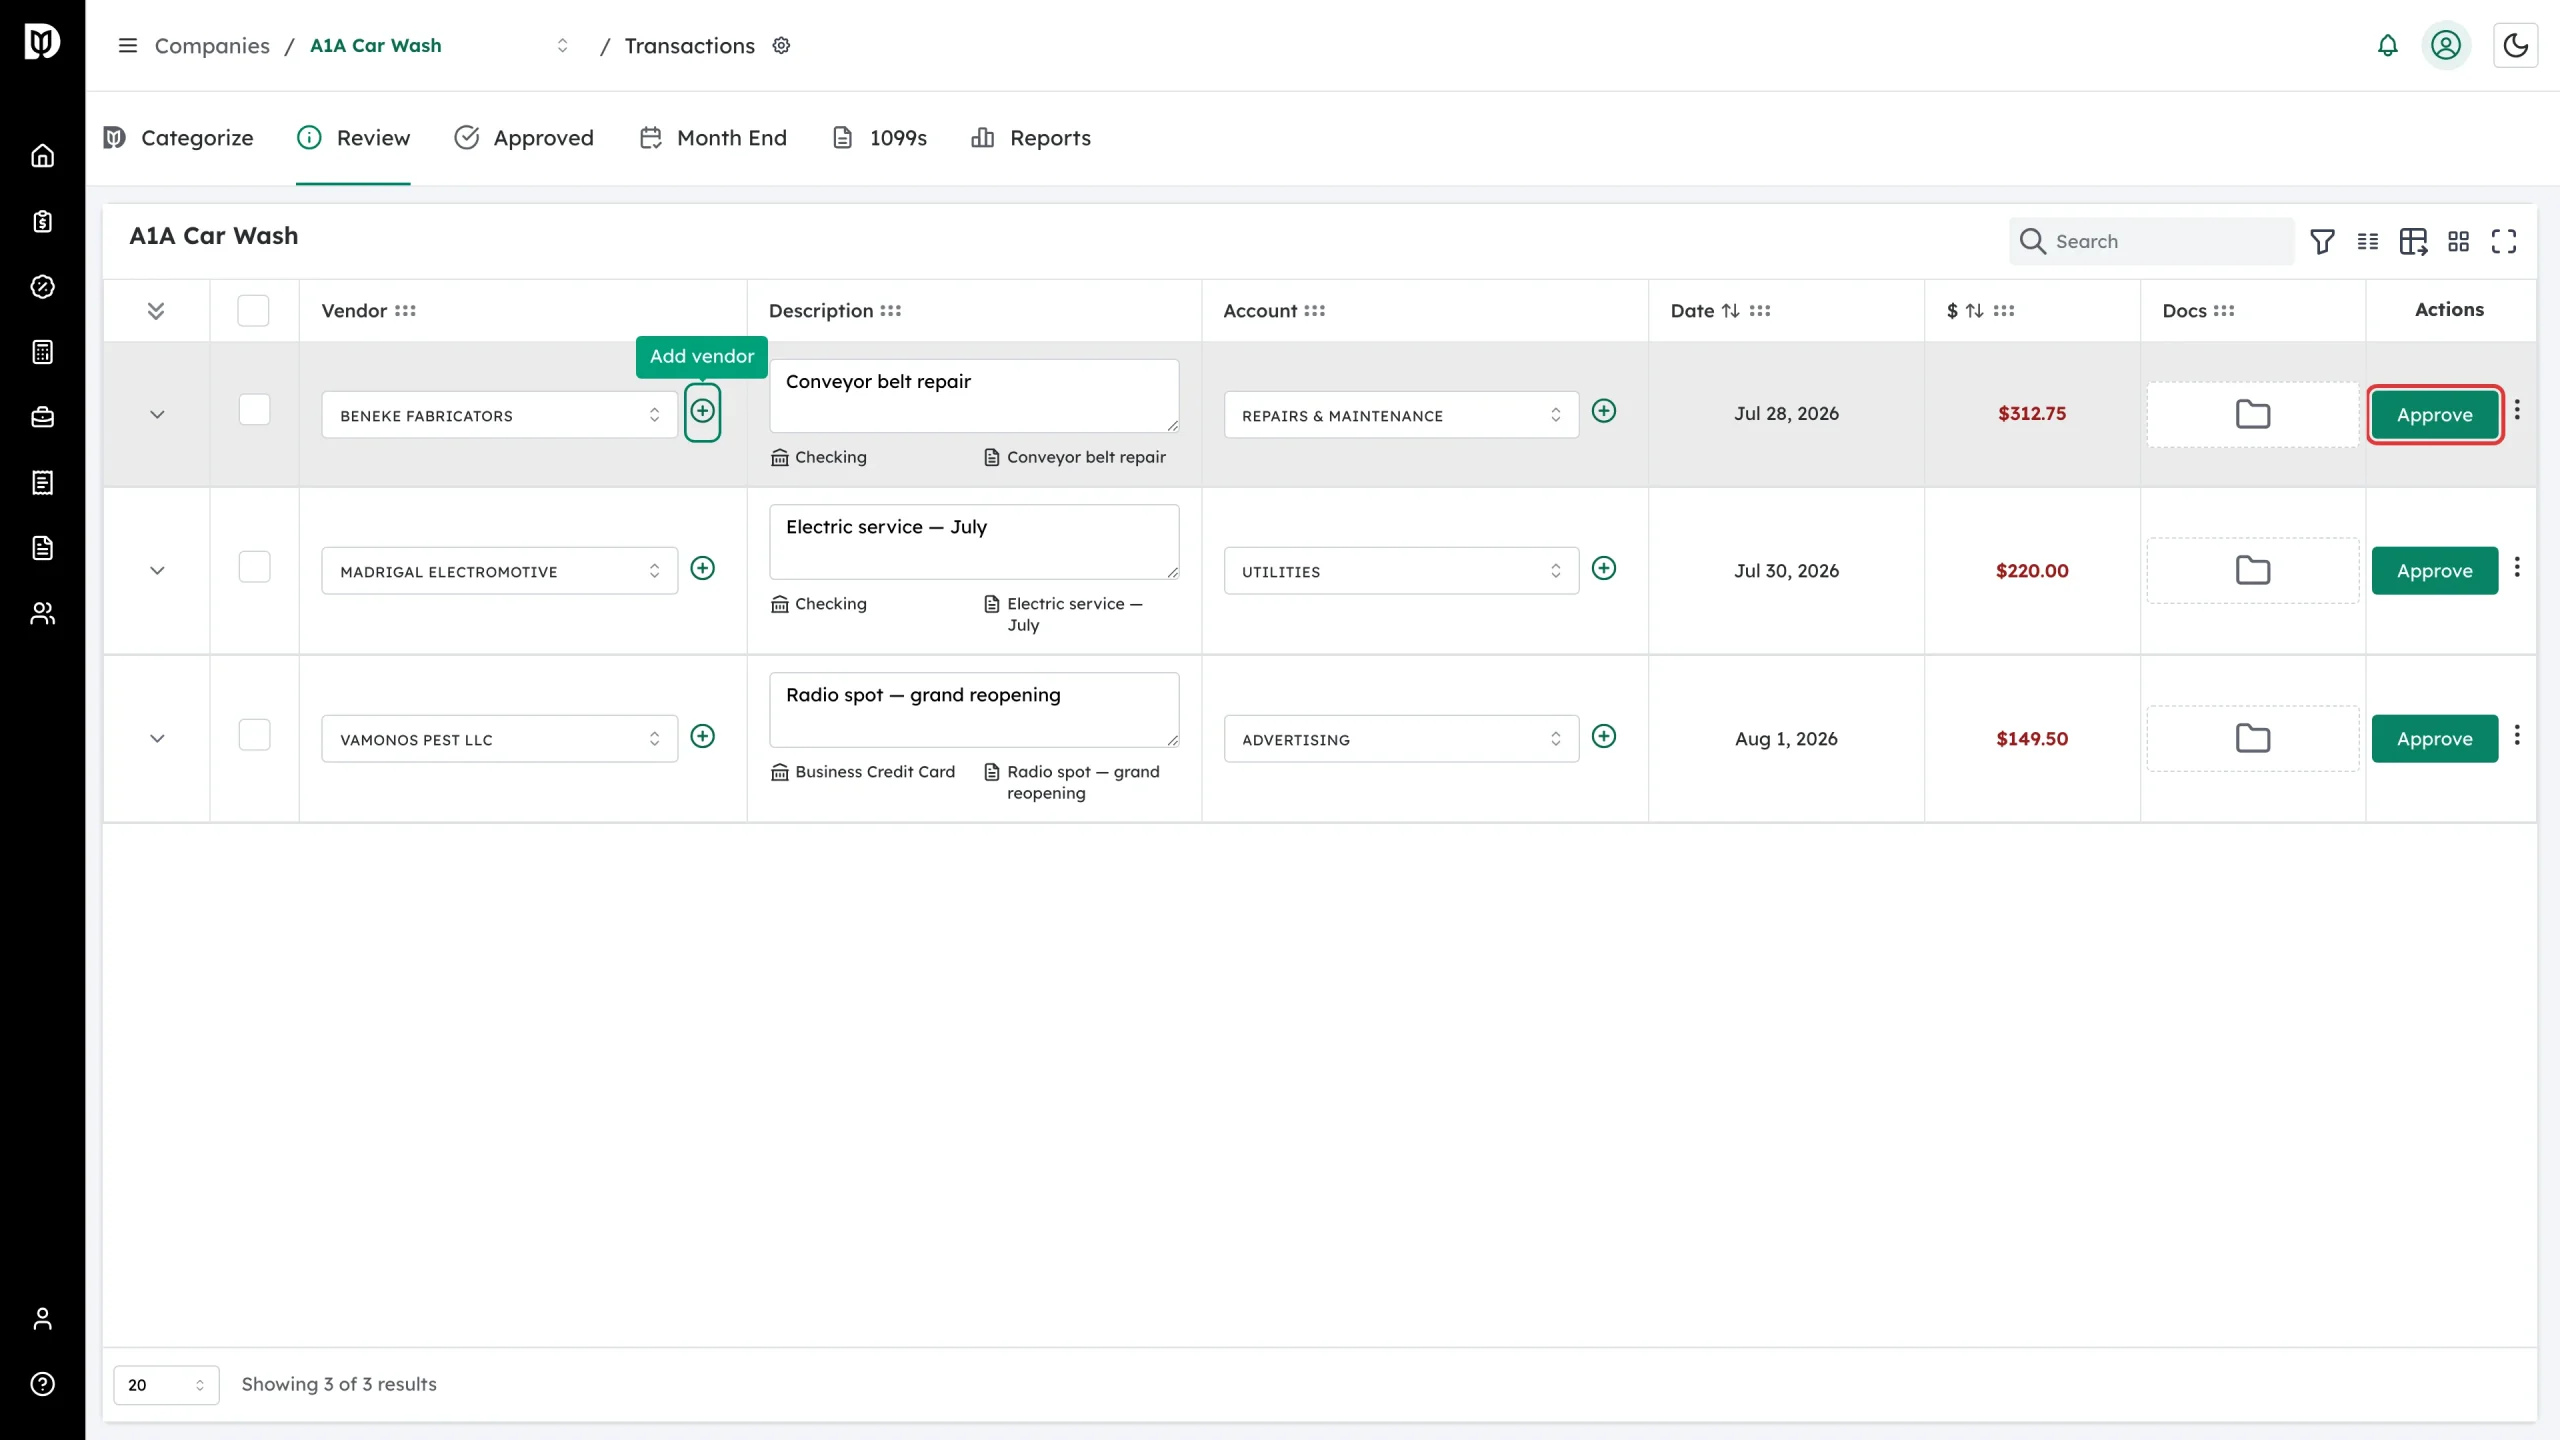
On the Categorize or Review tab, find the transaction and click the green + next to the Vendor picker.
-
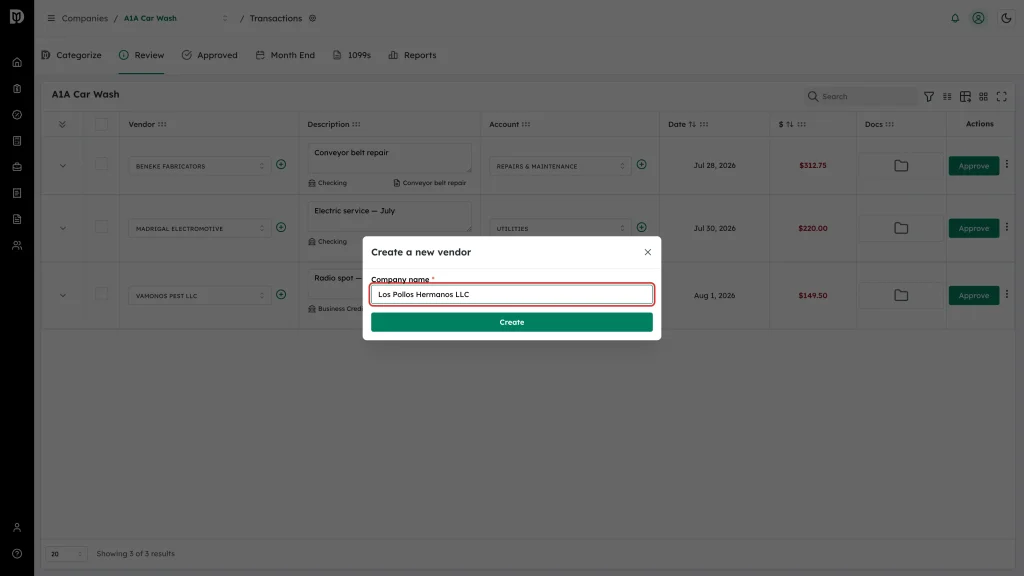
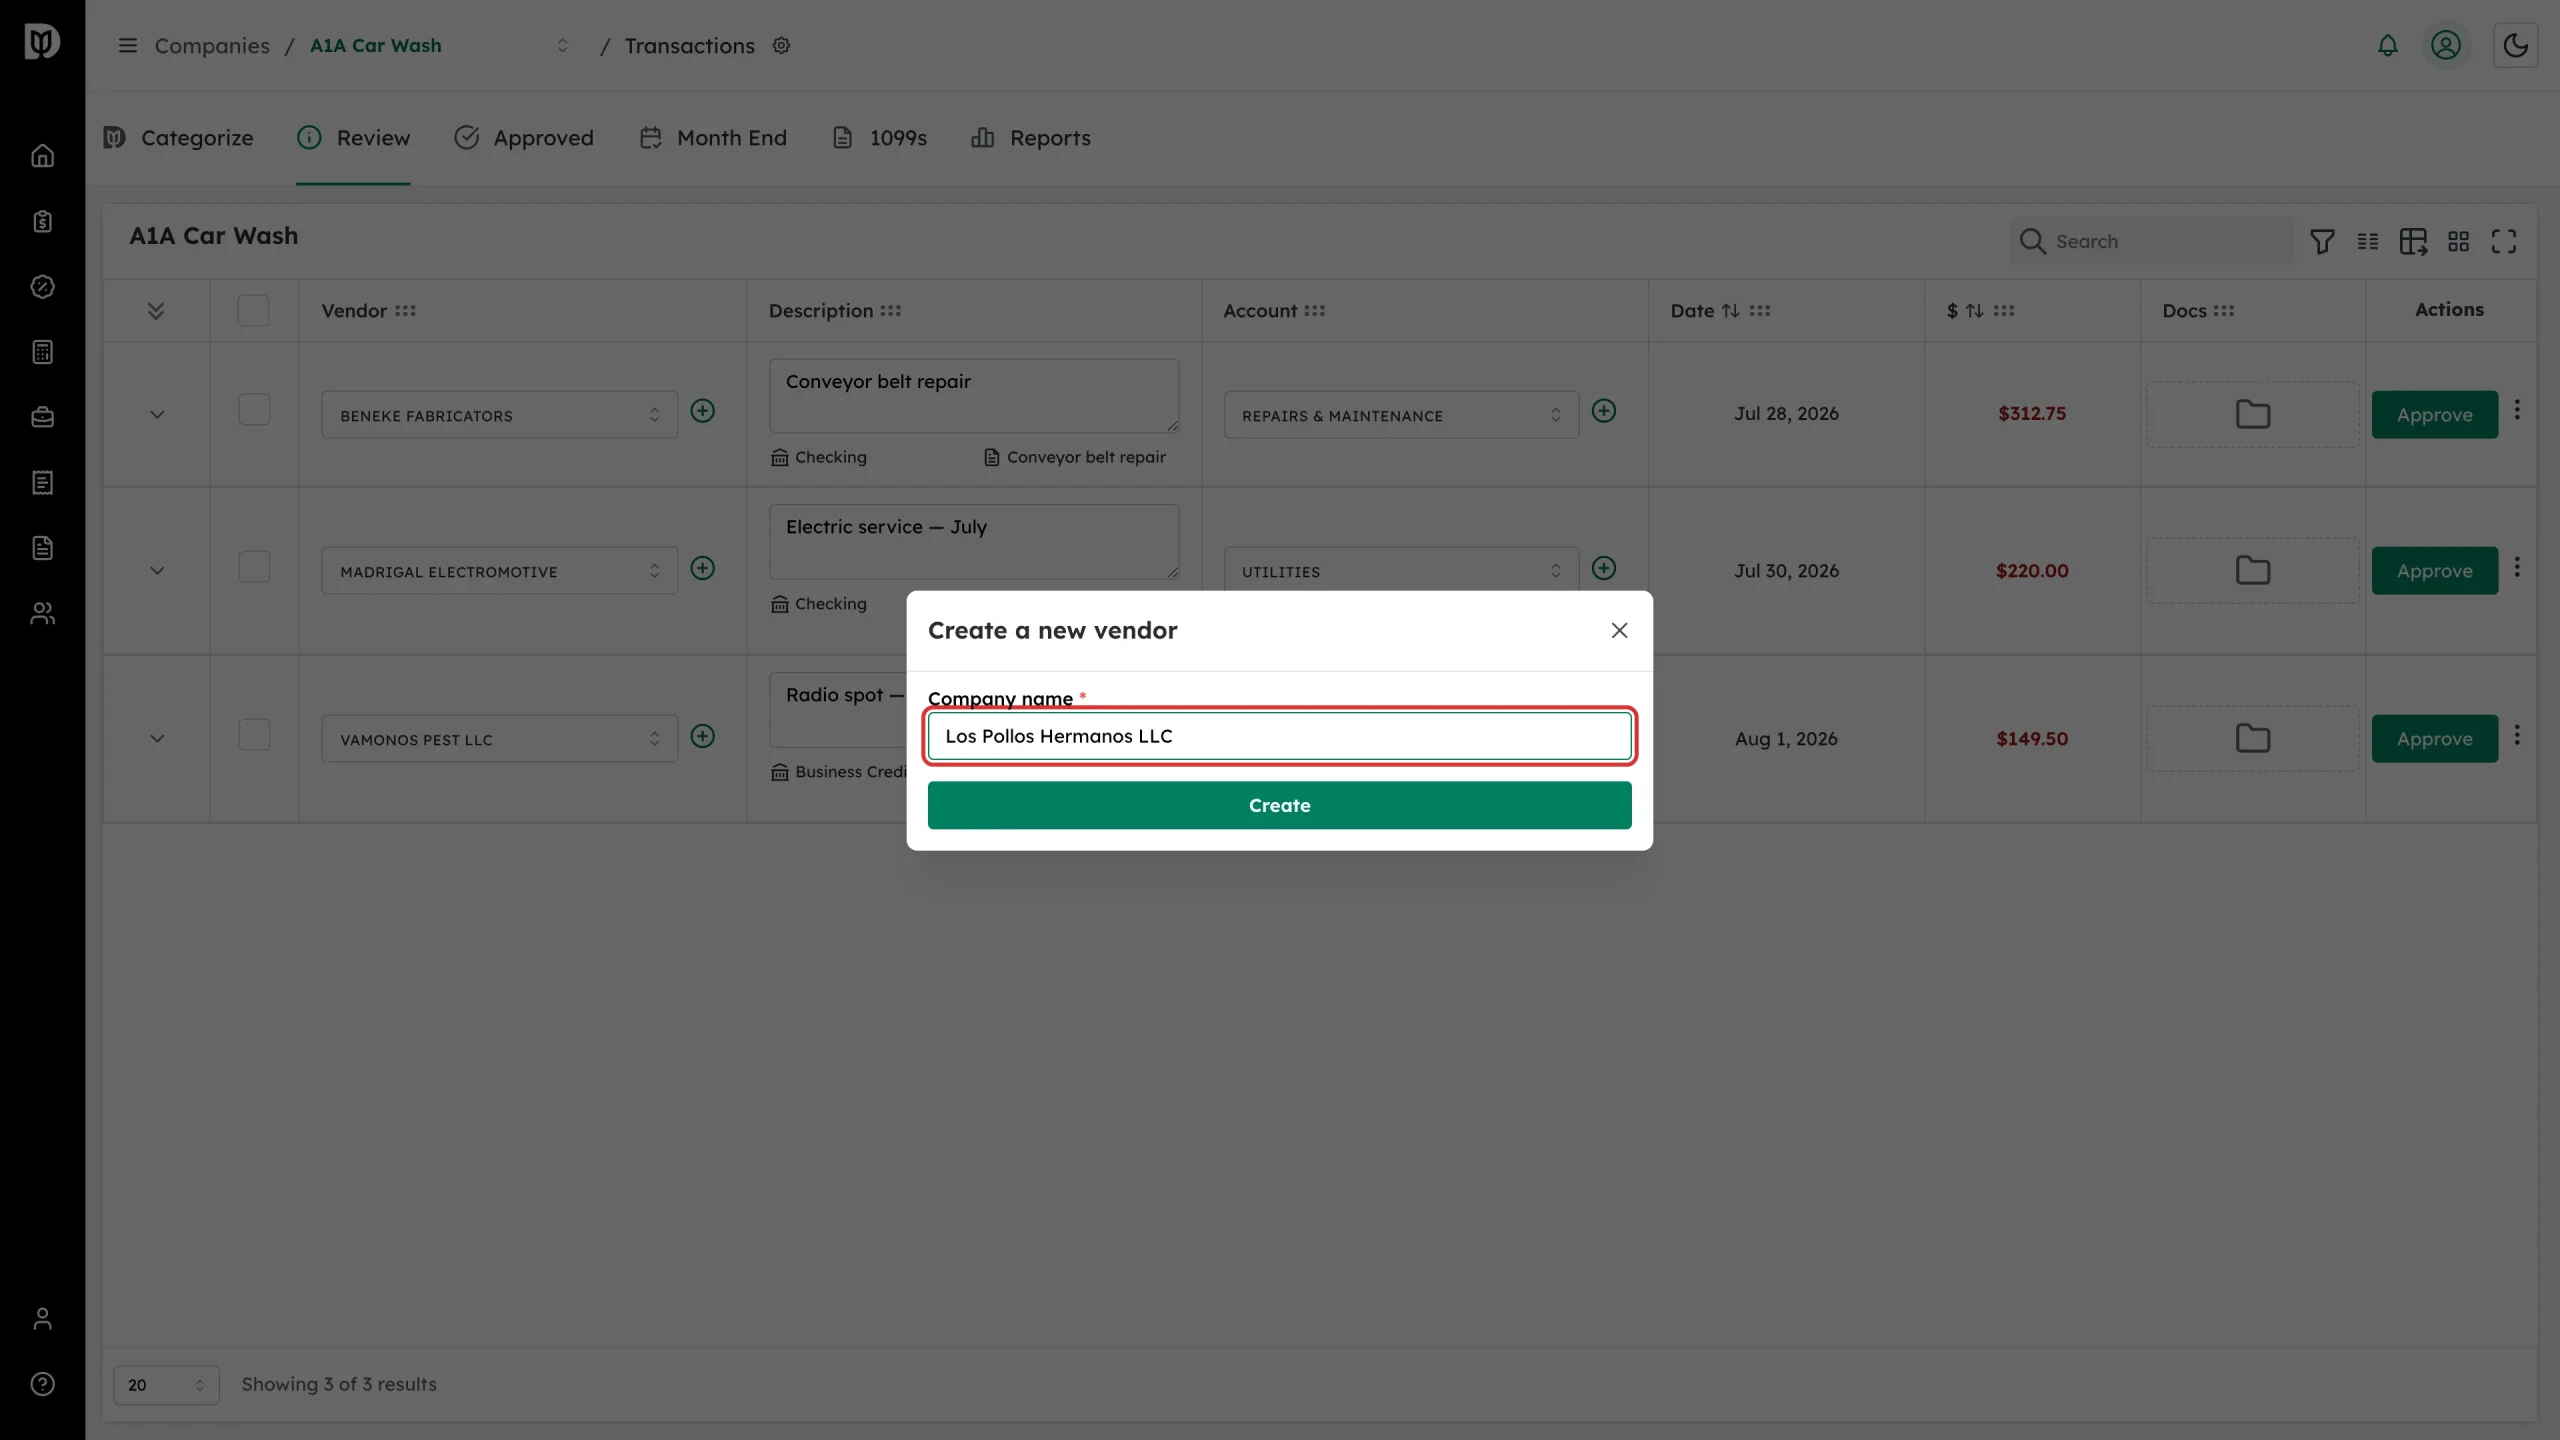
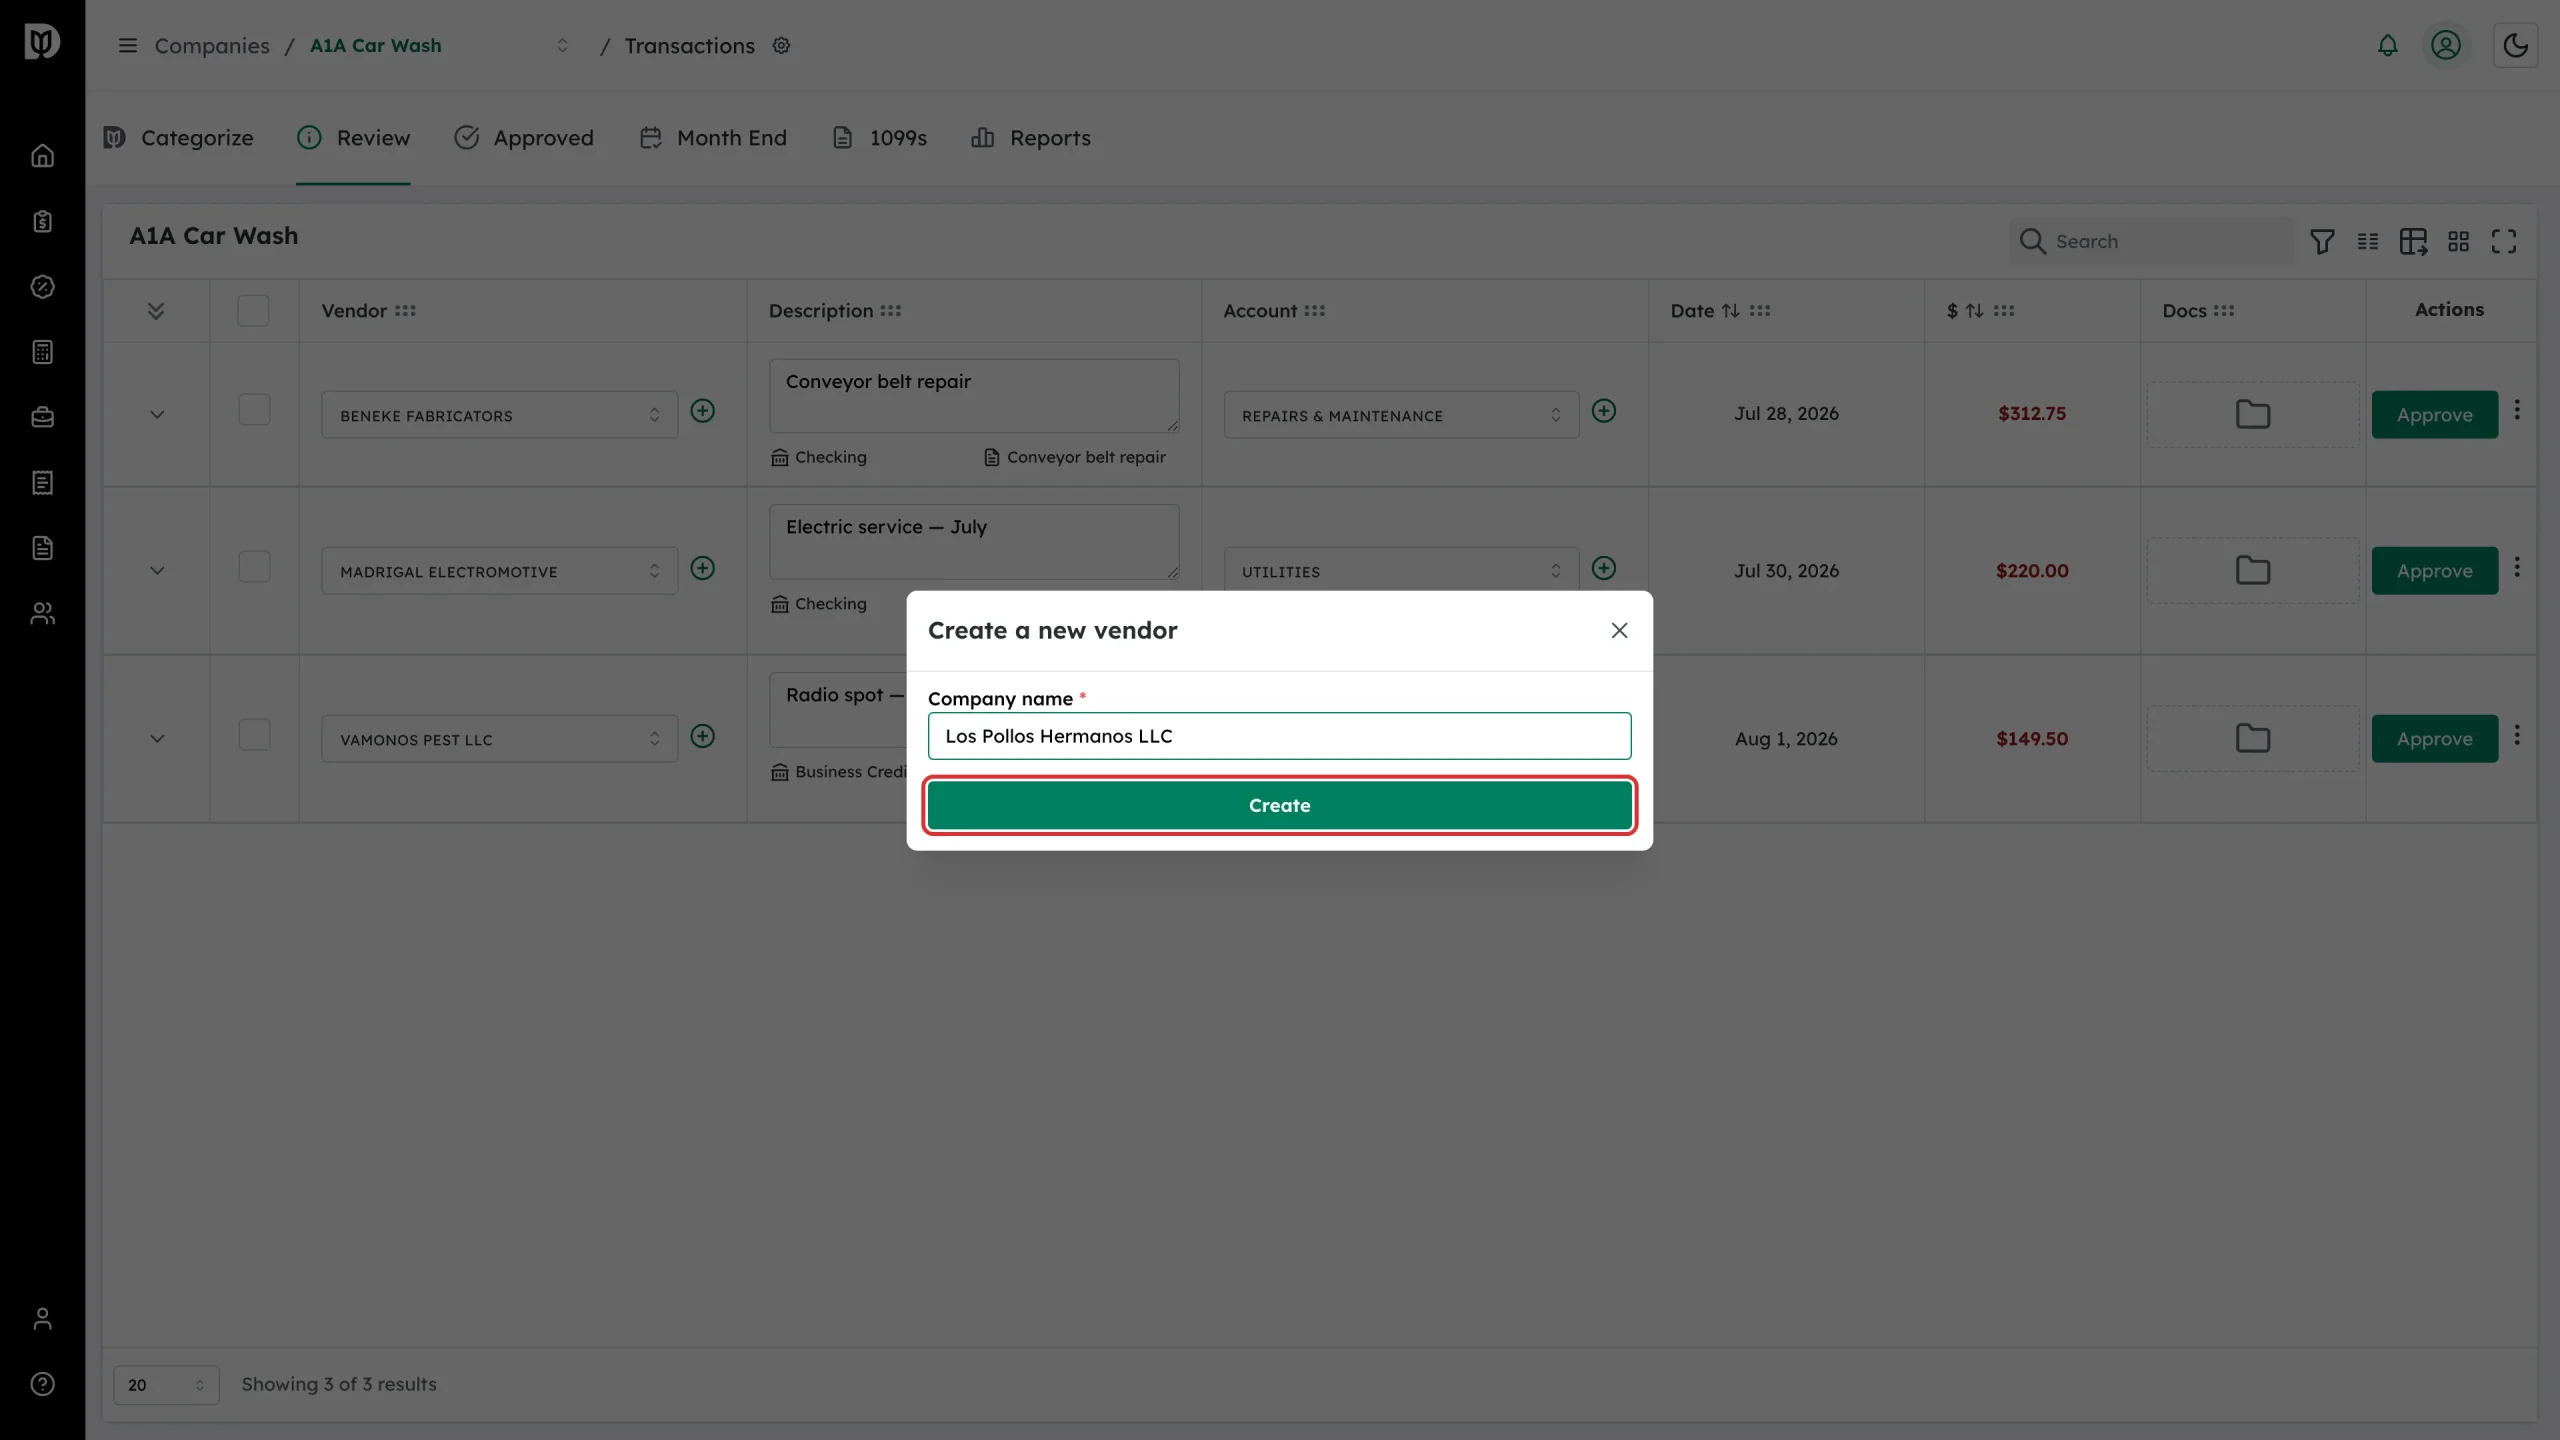
Type the vendor’s name in Company name.
-
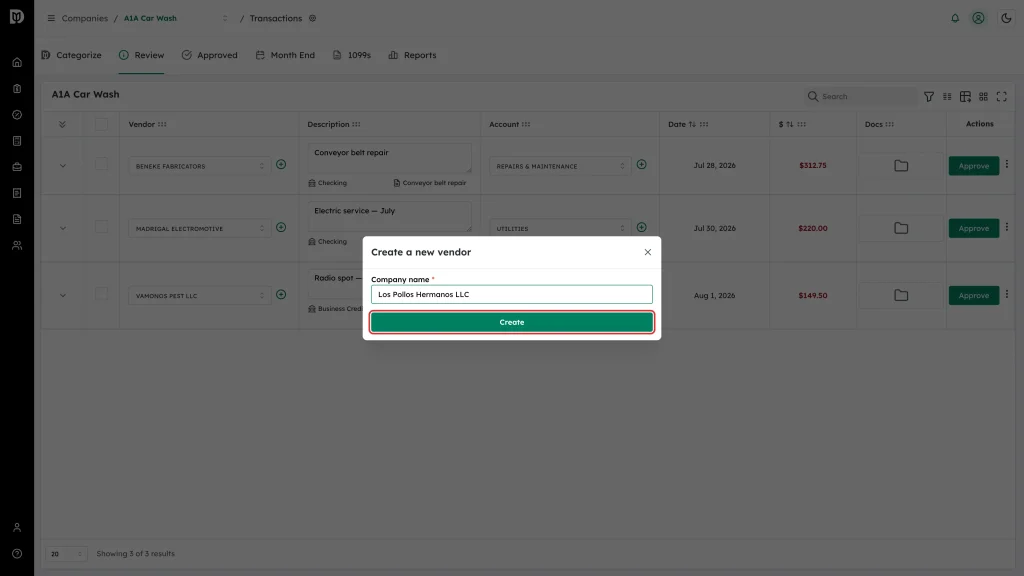
Click Create.
-
The new vendor is selected on the transaction. Click Approve on the Review tab (or Save on the Categorize tab) to send the change to QuickBooks Online.
What happens next
- A New Vendor Created message confirms the vendor was written to QuickBooks Online.
- The vendor is now available in the Vendor picker on every transaction for that company.
- The transaction itself is not updated in QuickBooks until you click Approve or Save.
Troubleshooting
- No plus button. You are on the Approved tab, or you are a client user and the accountant has not turned on Client Settings → Vendor.
- Creation fails. The QuickBooks connection may have expired. Reconnect the company and try again.
- You added the vendor in QuickBooks instead. Close and reopen the Vendor picker after a few seconds — Debits re-reads the vendor list when the picker opens.