Flag a transaction as taxable so QuickBooks Online applies sales tax to it.
Before you start
- Tax applies to expenses, sales receipts, bills and vendor credits. Deposits and journal entries cannot be taxed.
- The icons are read-only on the Approved tab.
Steps
-
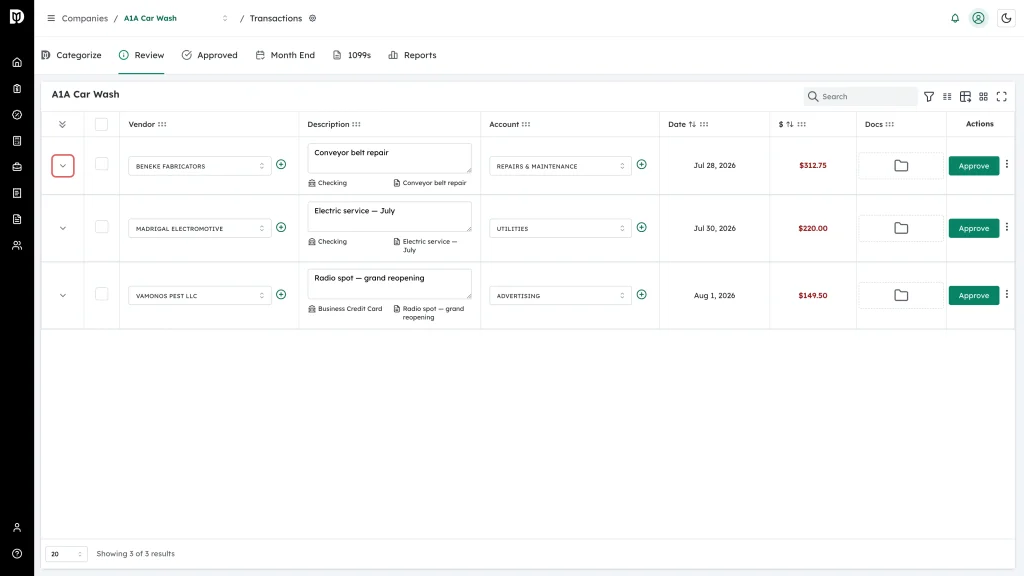
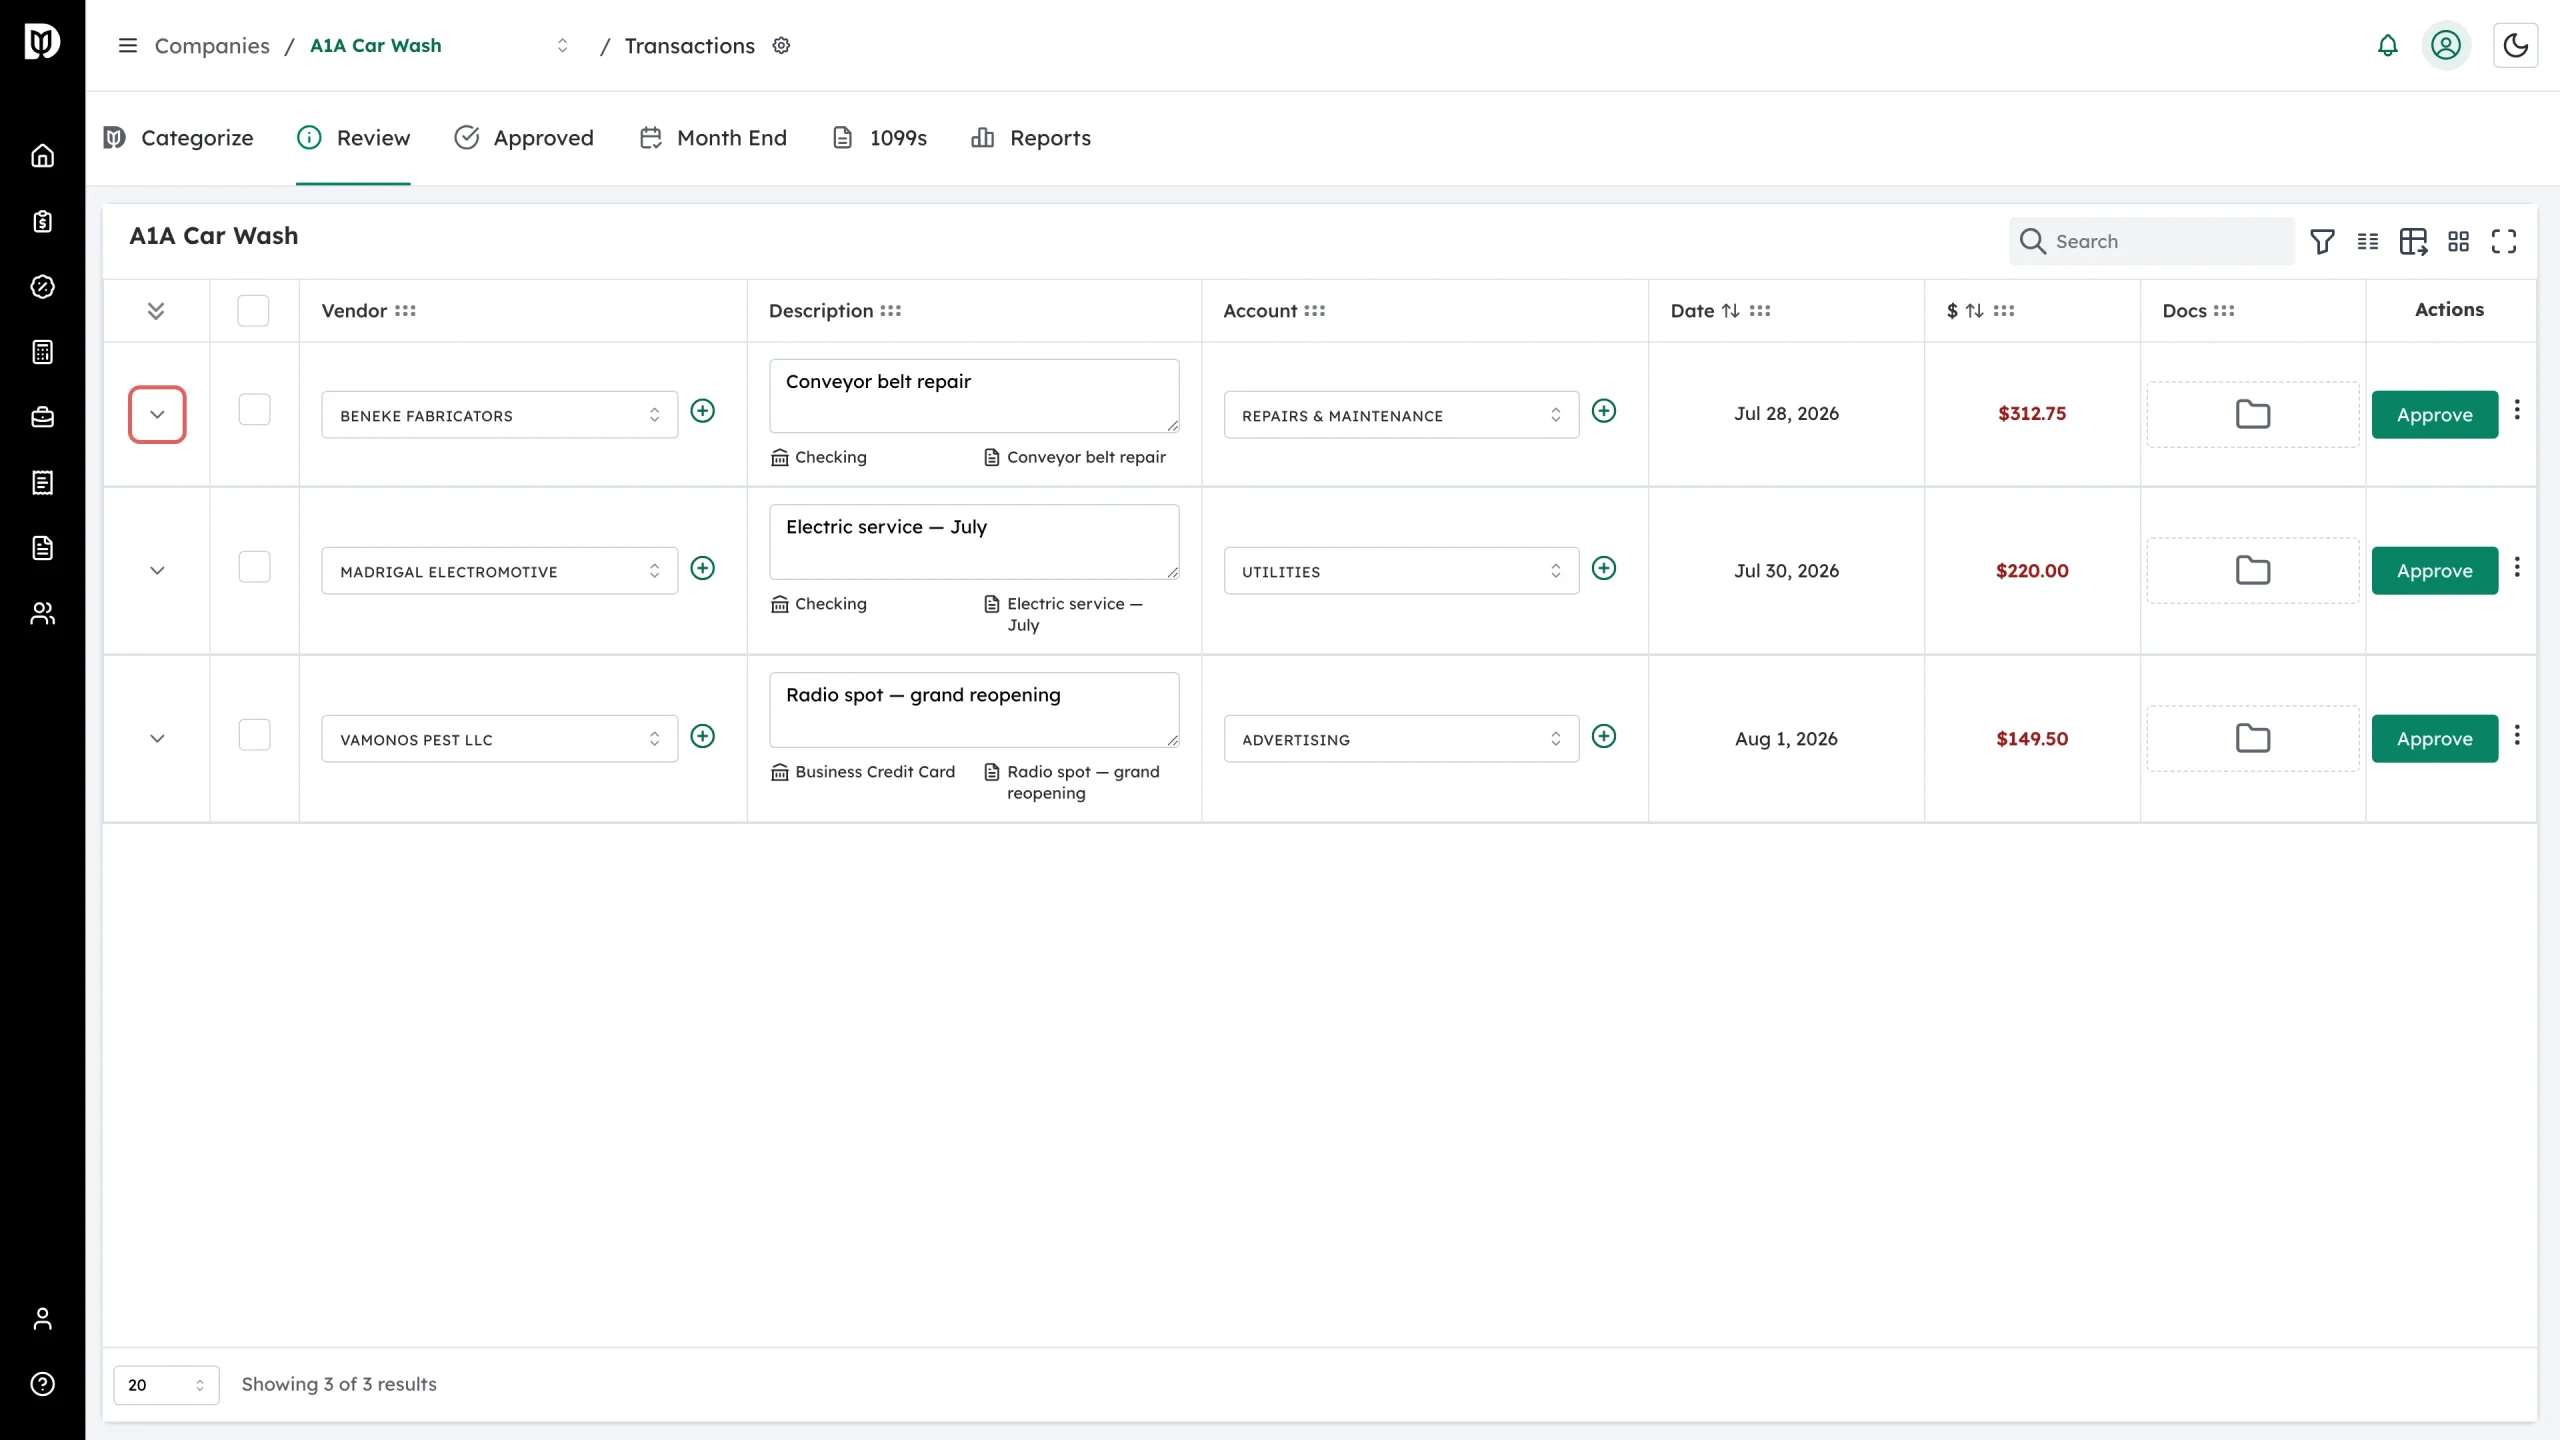
Open the company’s transactions, find the transaction, and click the chevron at the far left of the row to expand it.
-
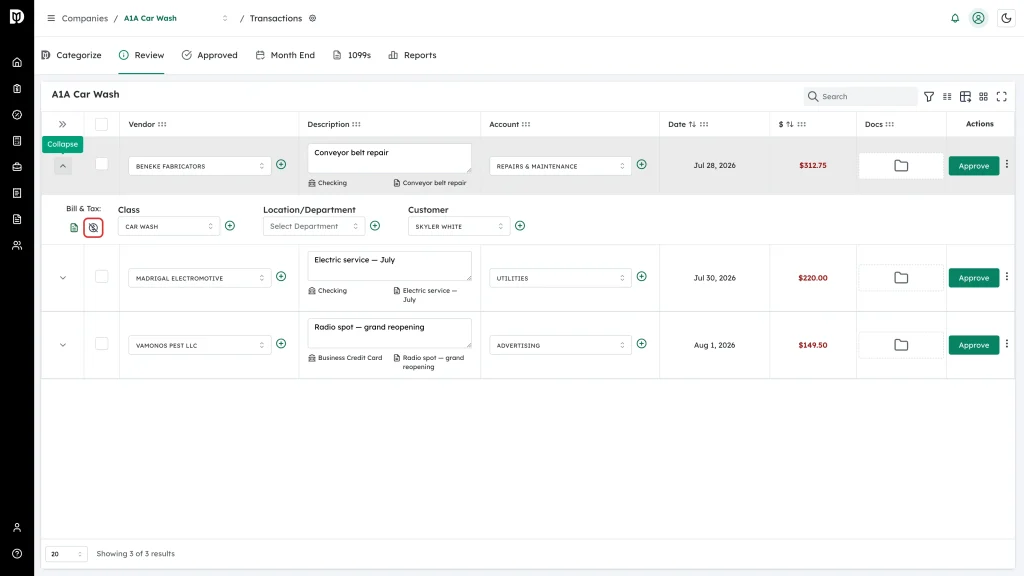
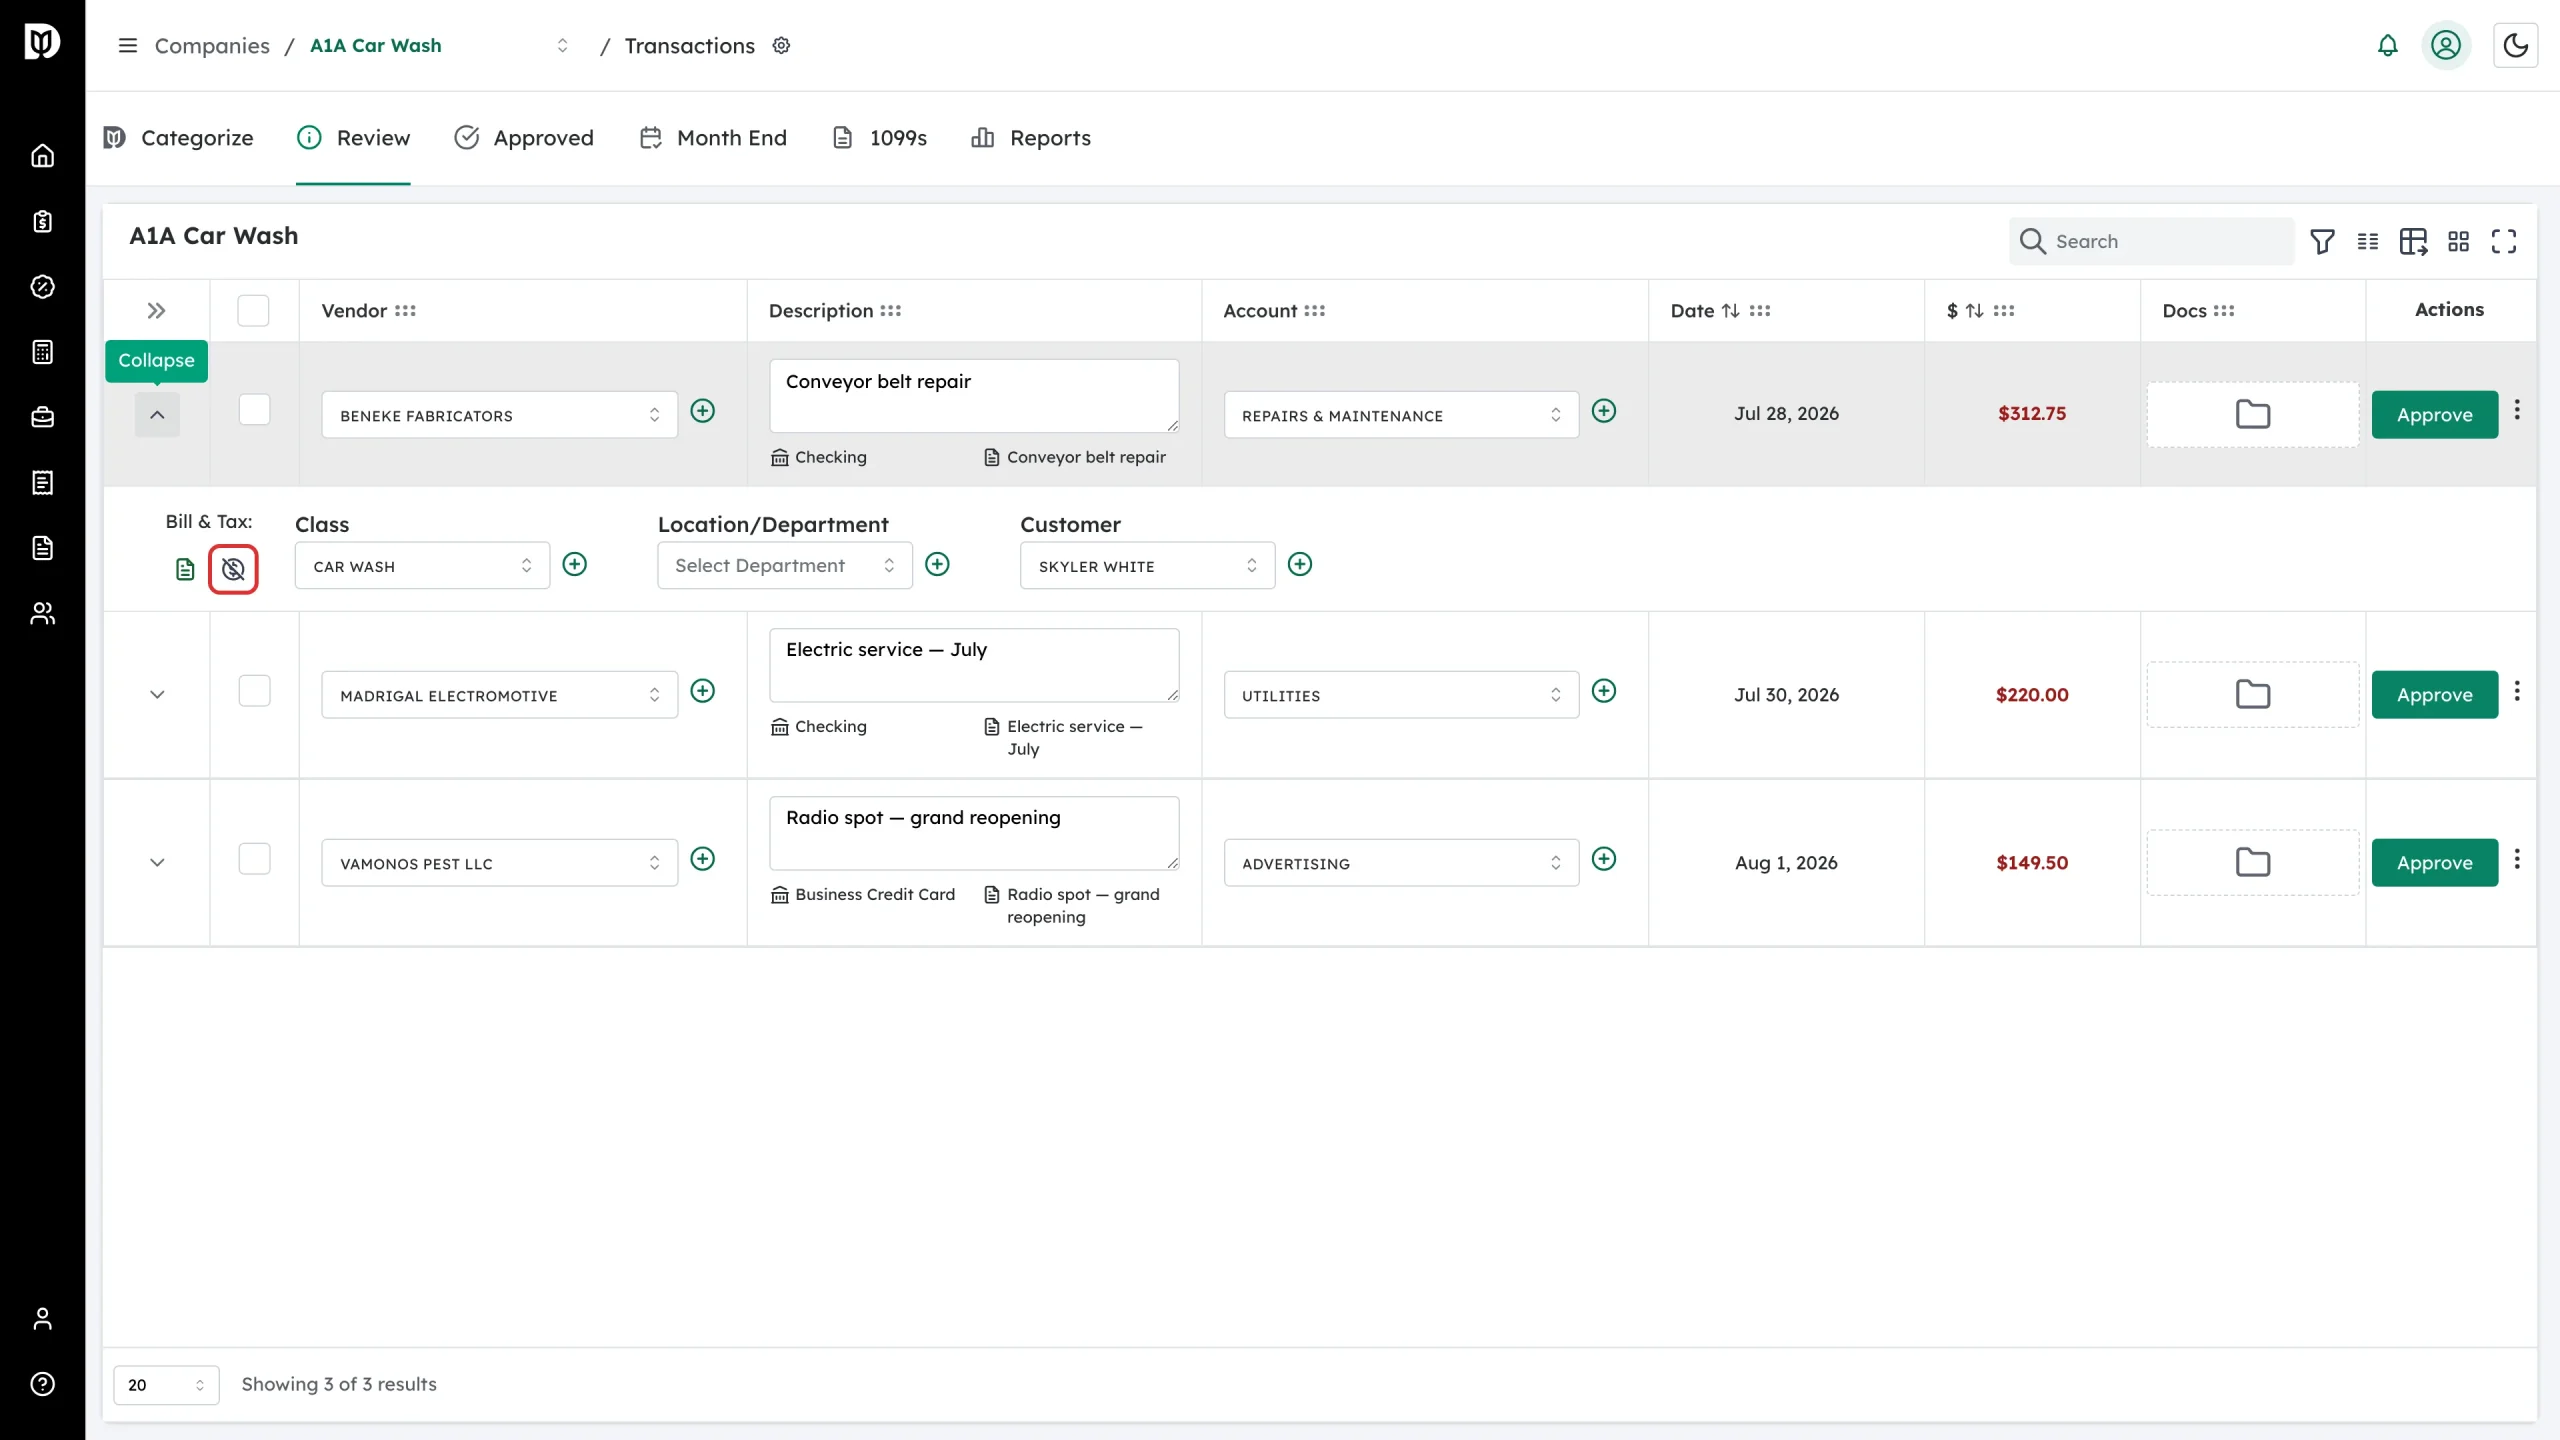
Under Bill & Tax, click the second icon. While the transaction is not taxable the dollar sign is grey with a line through it. Its tooltip reads Tax.
-
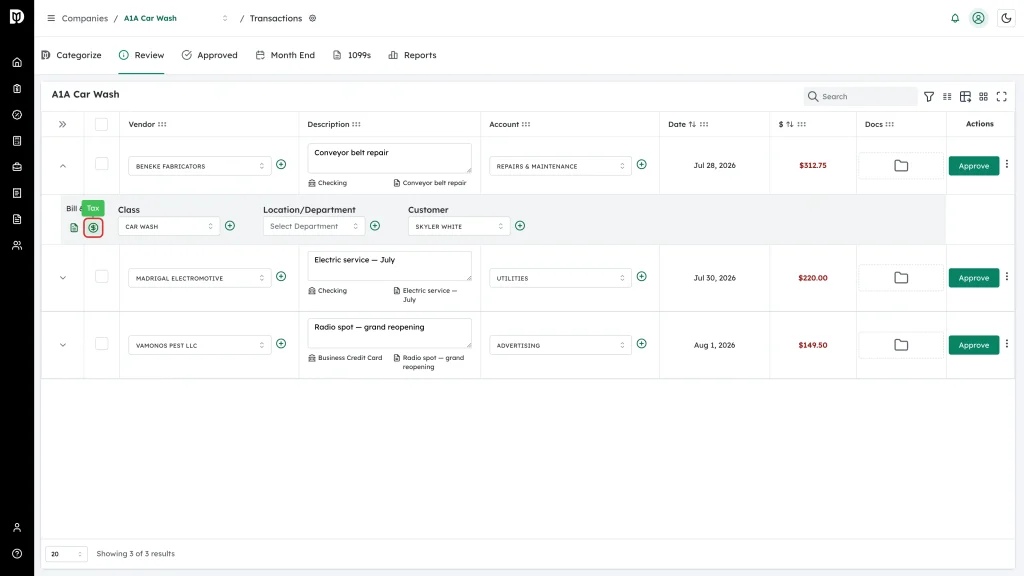
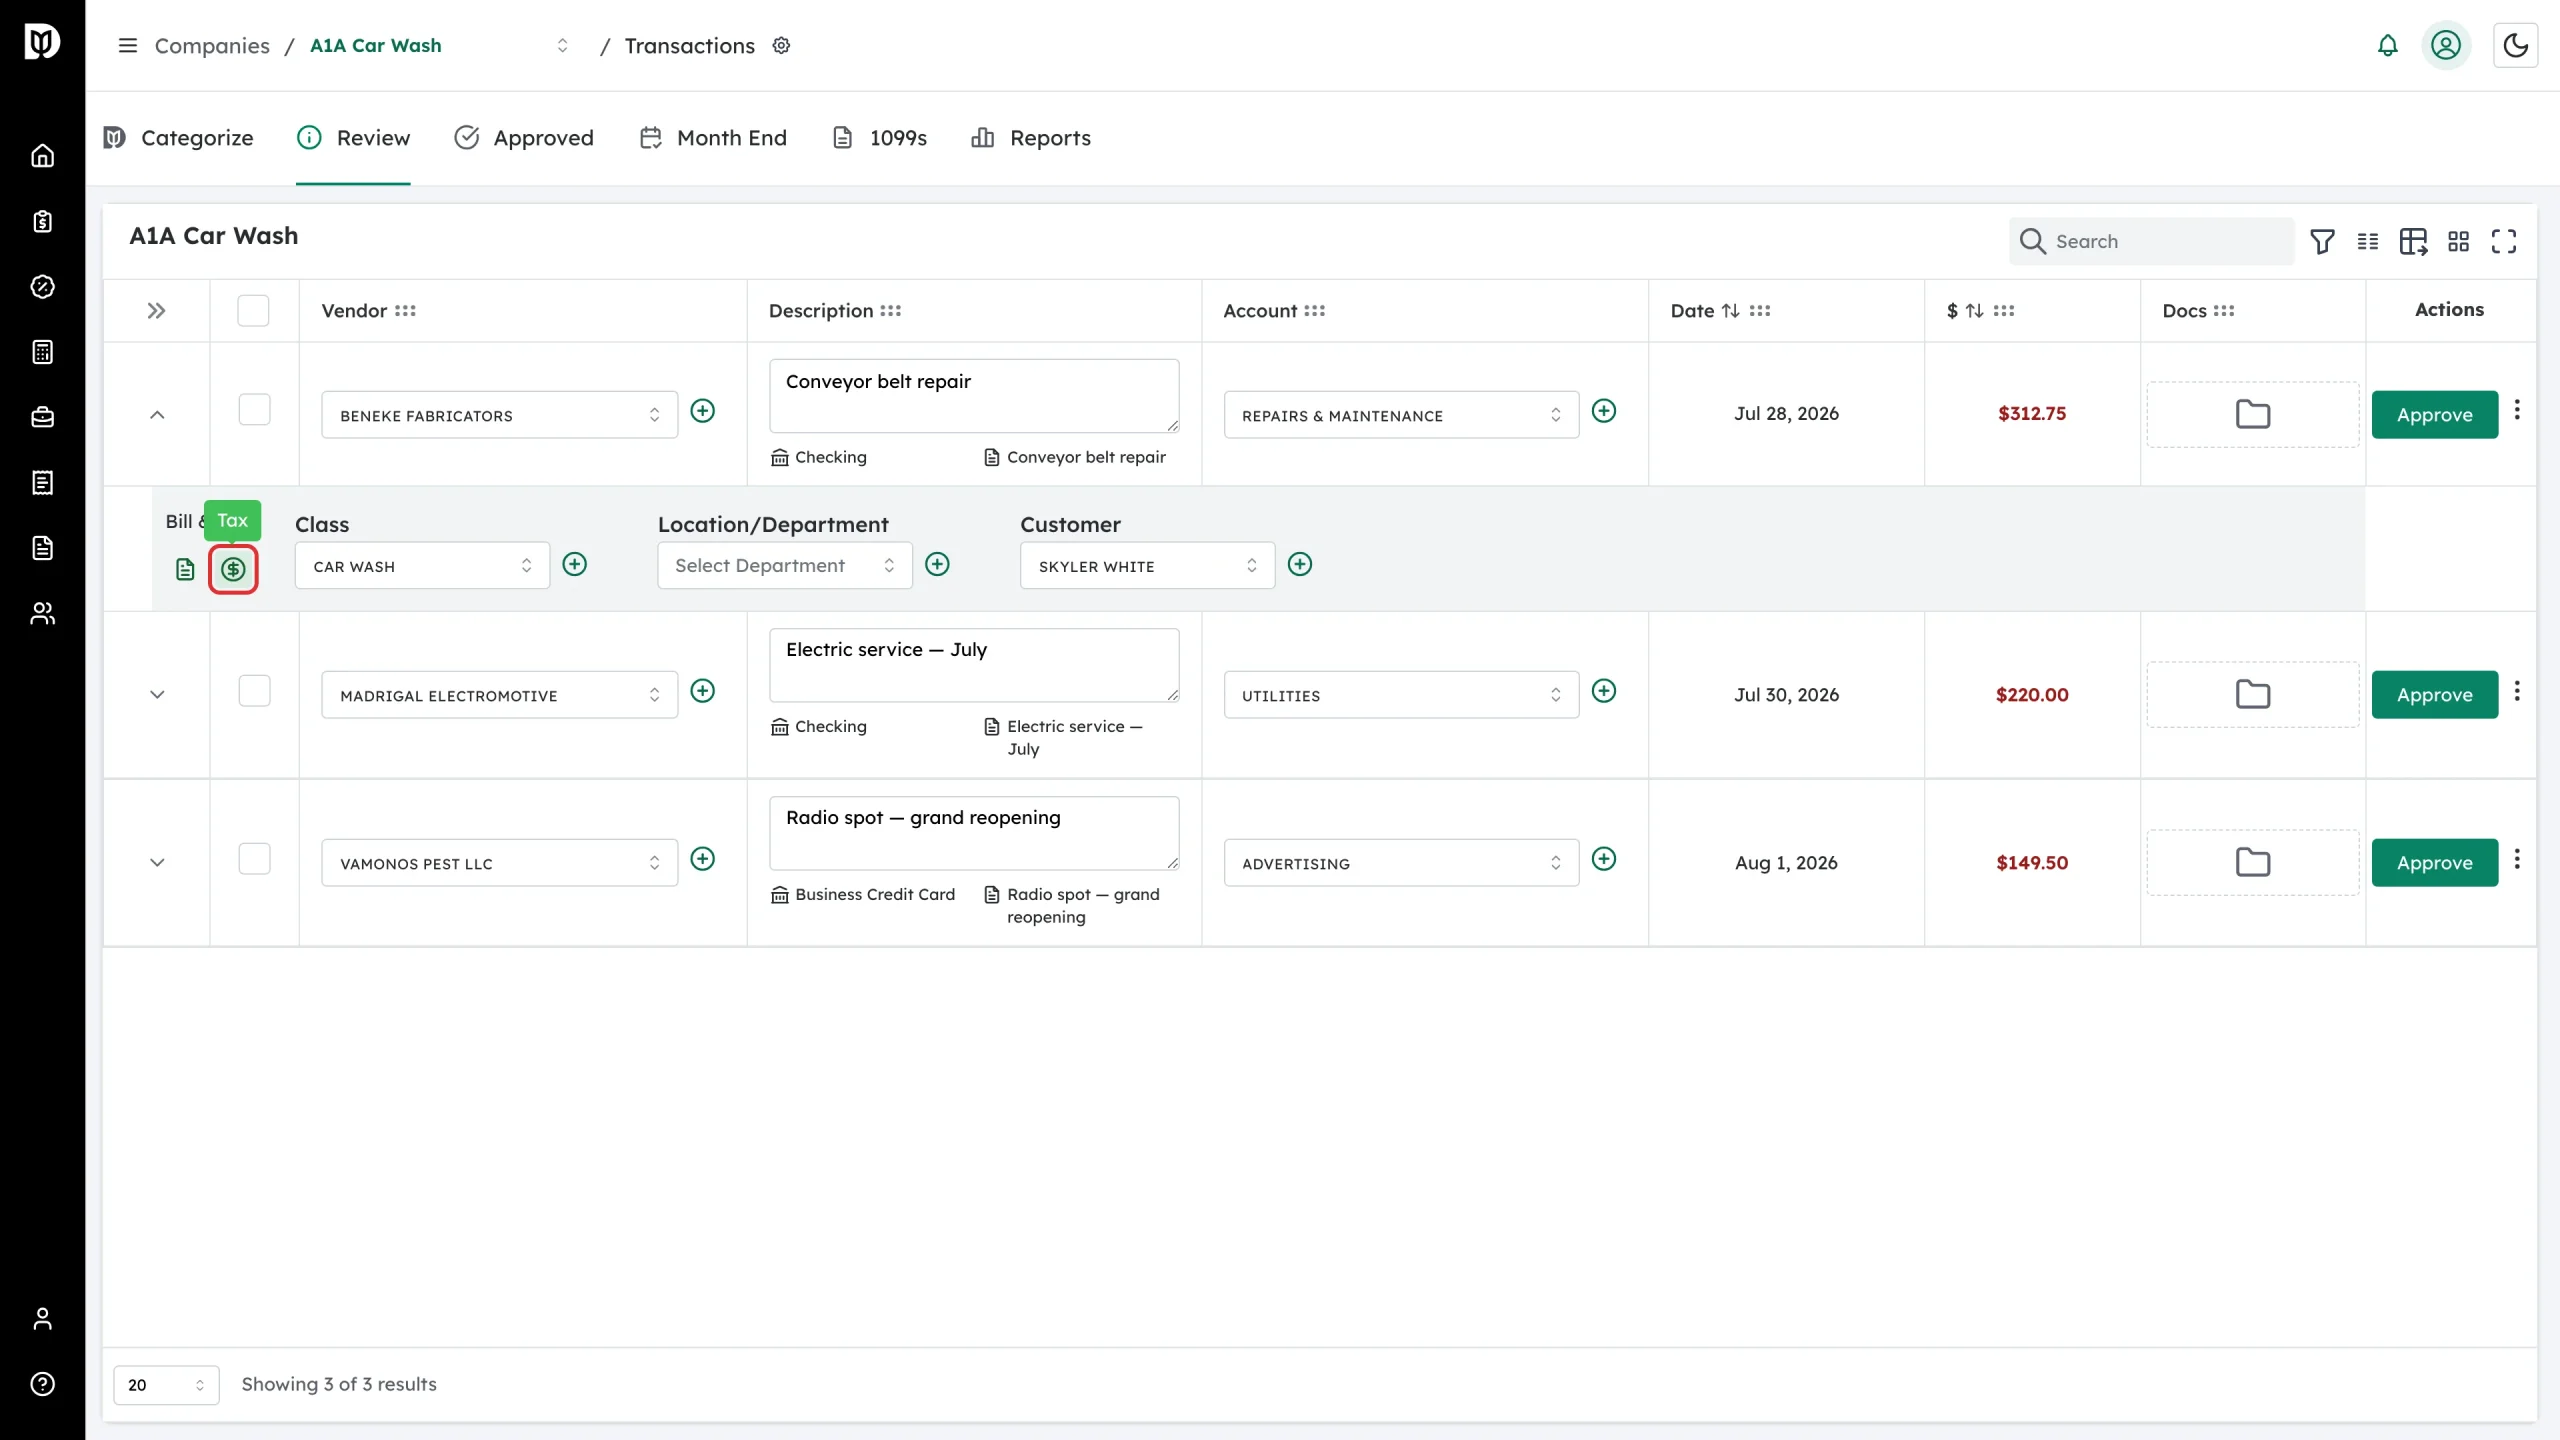
The icon turns green to show the transaction is now taxable.
-
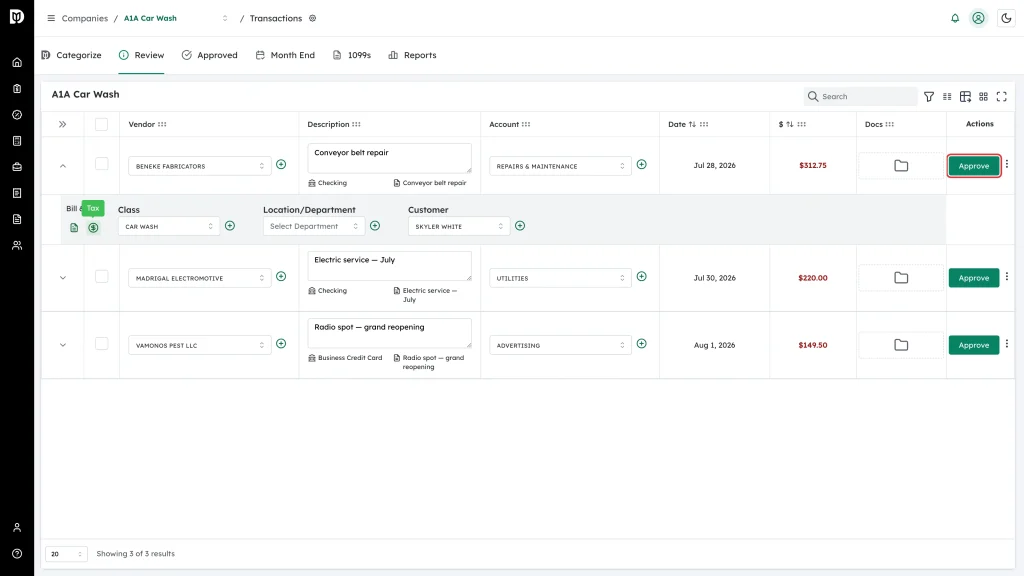
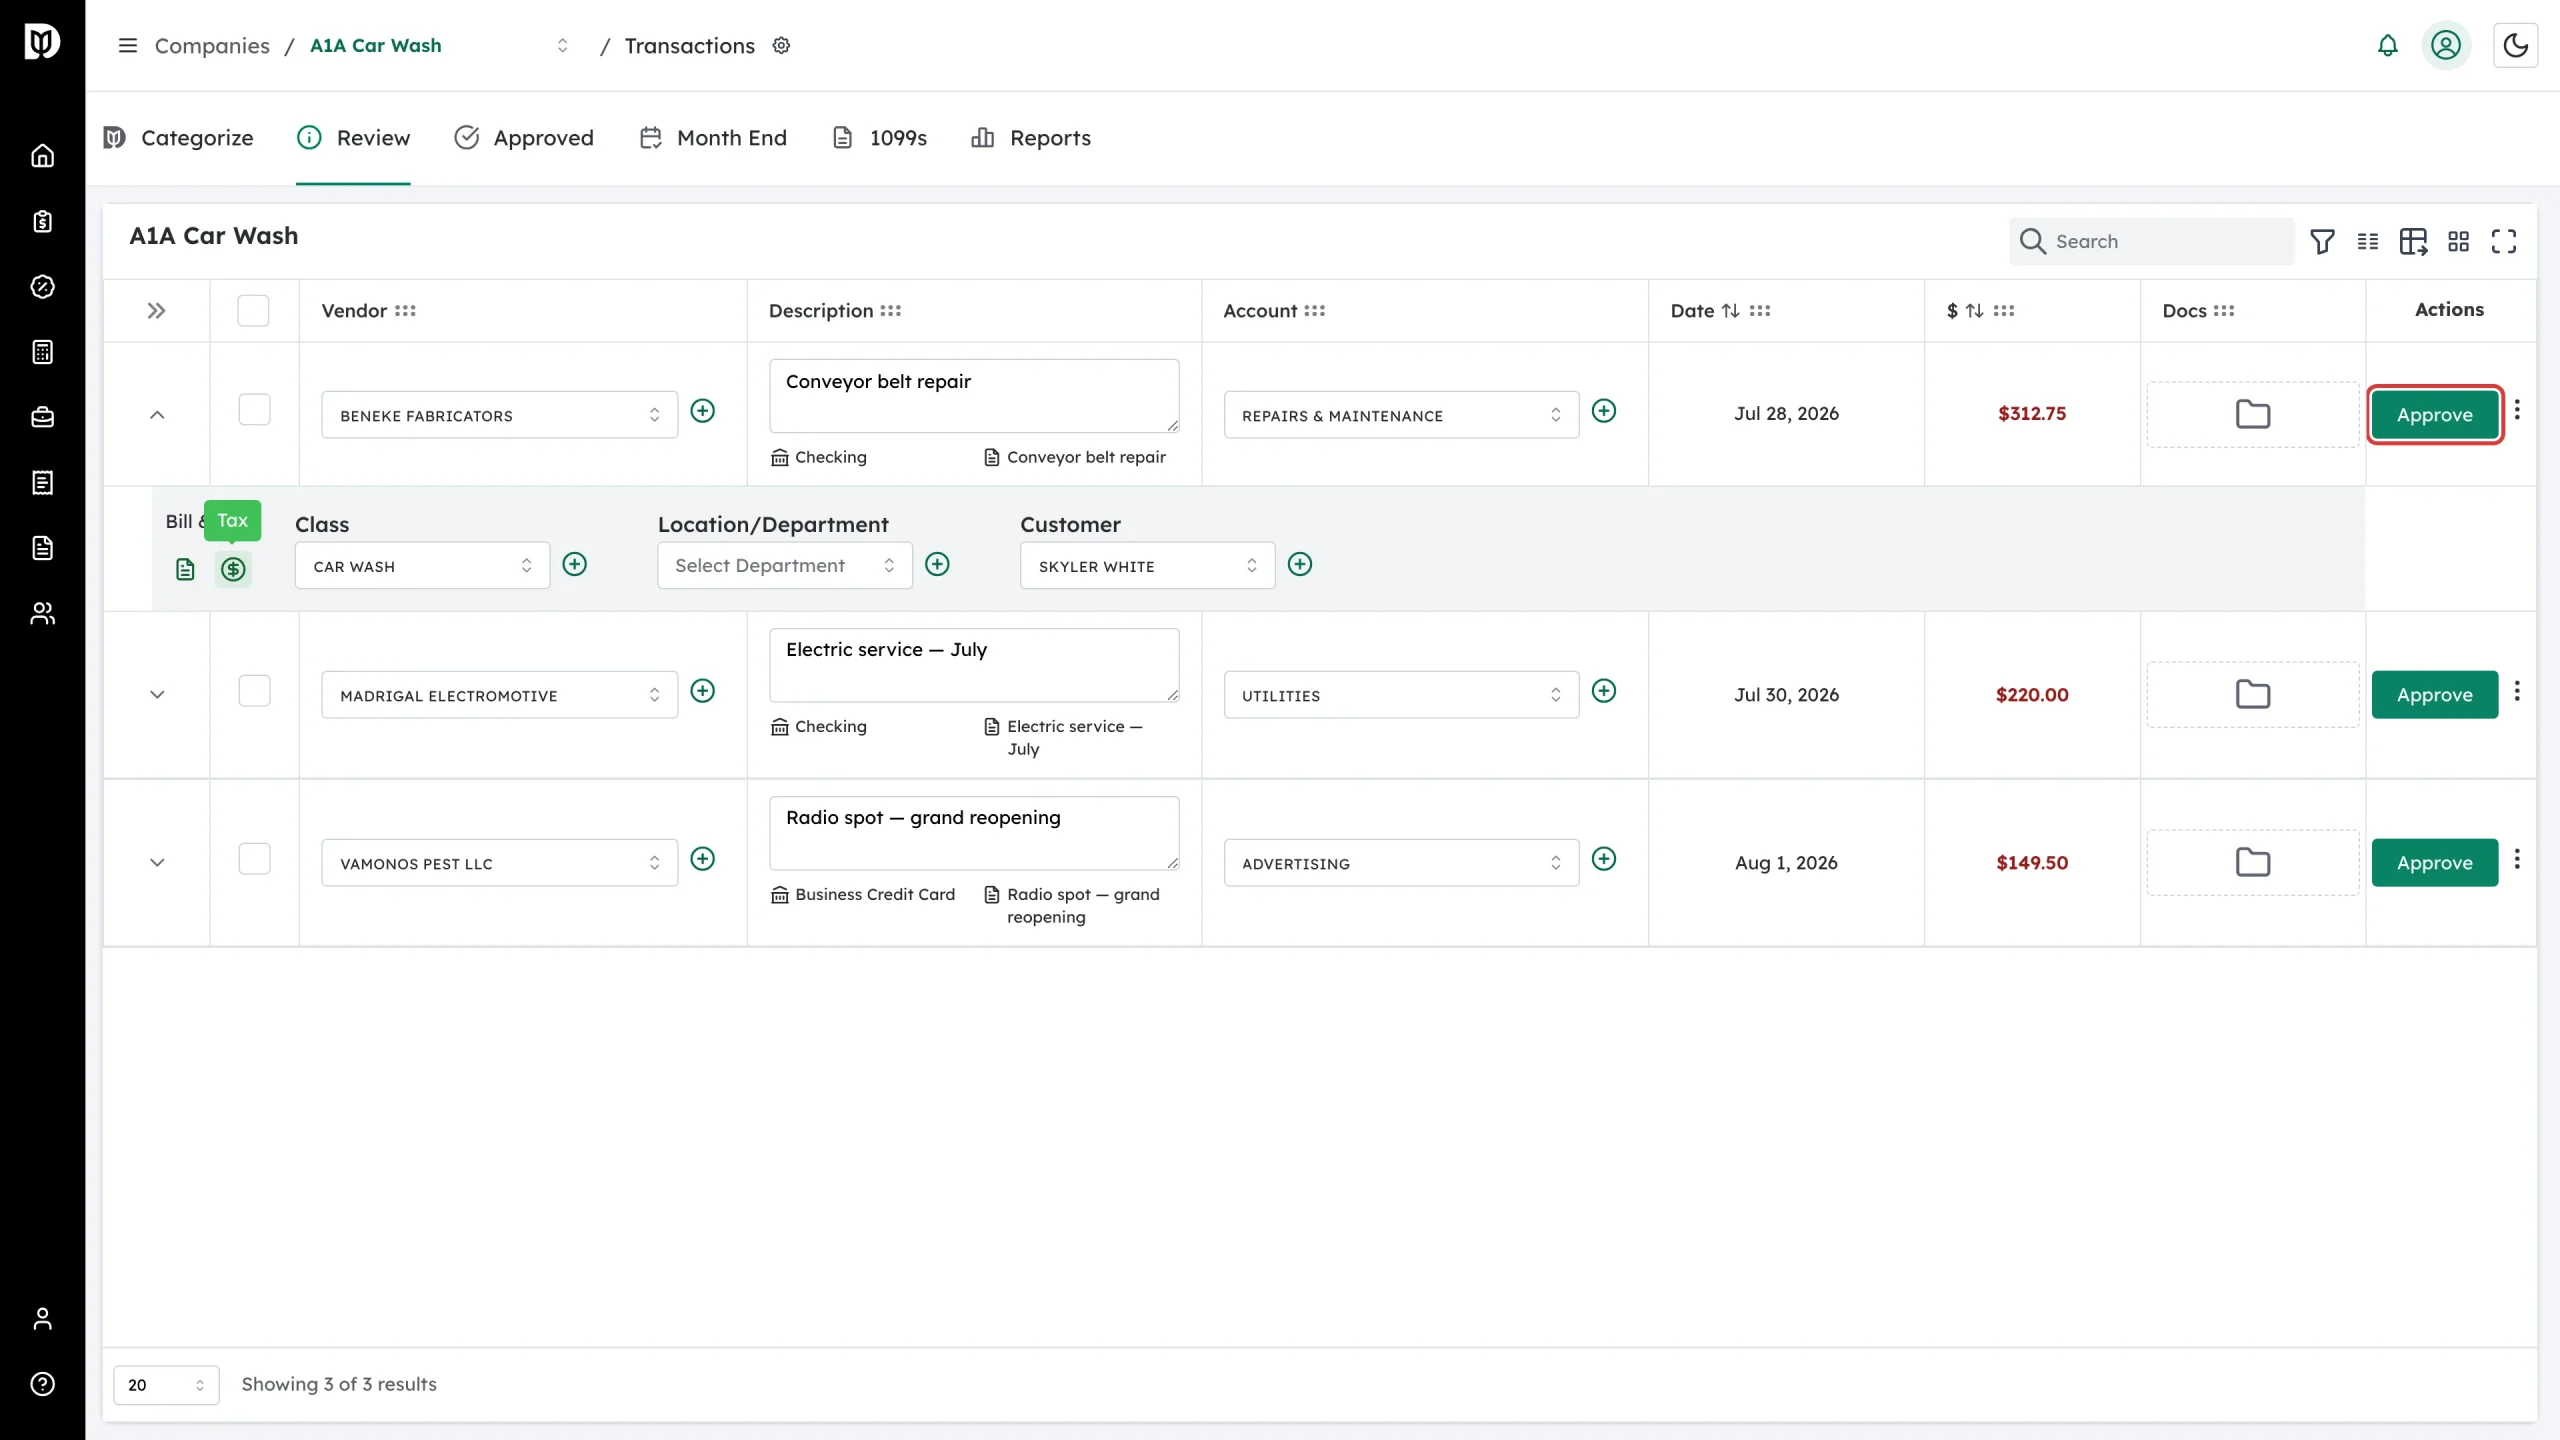
Click Approve on the Review tab, or Save on the Categorize tab, to send the change to QuickBooks Online.
What happens next
- For a company based in the United States, the icon switches the transaction between TAX and NON. There is nothing else to choose.
- For a company outside the United States, clicking the icon opens a window where you pick the tax code to apply, and the icon turns green once a code is set.
- Click the green icon again to make the transaction non-taxable.
Troubleshooting
- “Tax is not supported for Deposit transactions.” (or Journal Entry) Deposits and journal entries cannot be taxed. Expenses, sales receipts, bills and vendor credits can.
- Clicking the icon does nothing. You are on the Approved tab. Use Return to review first if you need to change it.