Who this is for: Bookkeepers and reviewers who want to stop expected transactions from being flagged every month.
What you’ll learn: How to view, add, and remove the exclusion rules that filter transactions out of future scans.
Before you begin
- Open the client’s Month End tab, select the Review tab, then switch to Review Items.
- Rules belong to the client, not to one month, and they apply the next time you run a scan.
- Removing a rule needs an owner or admin role.
Step-by-step instructions
-
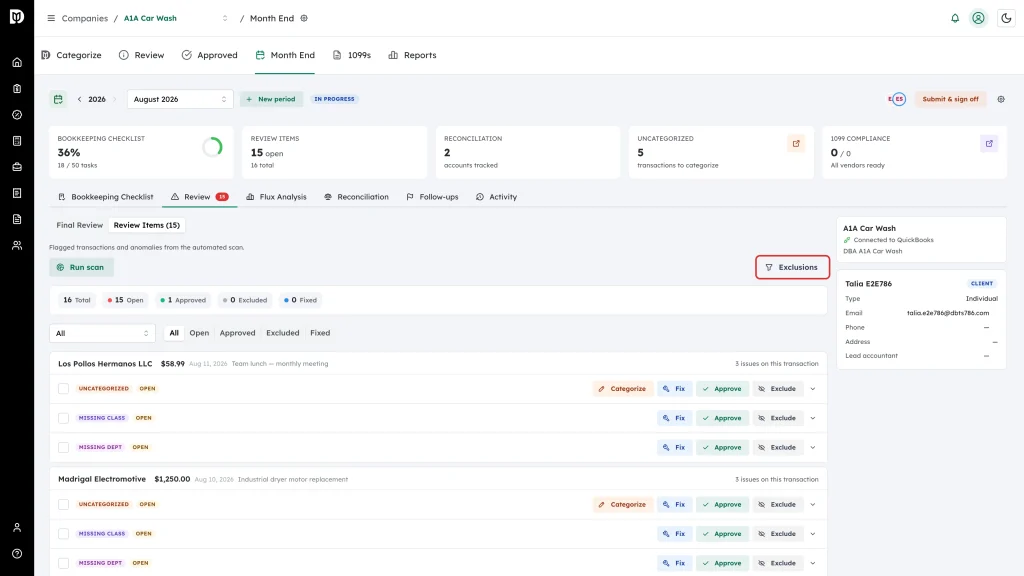
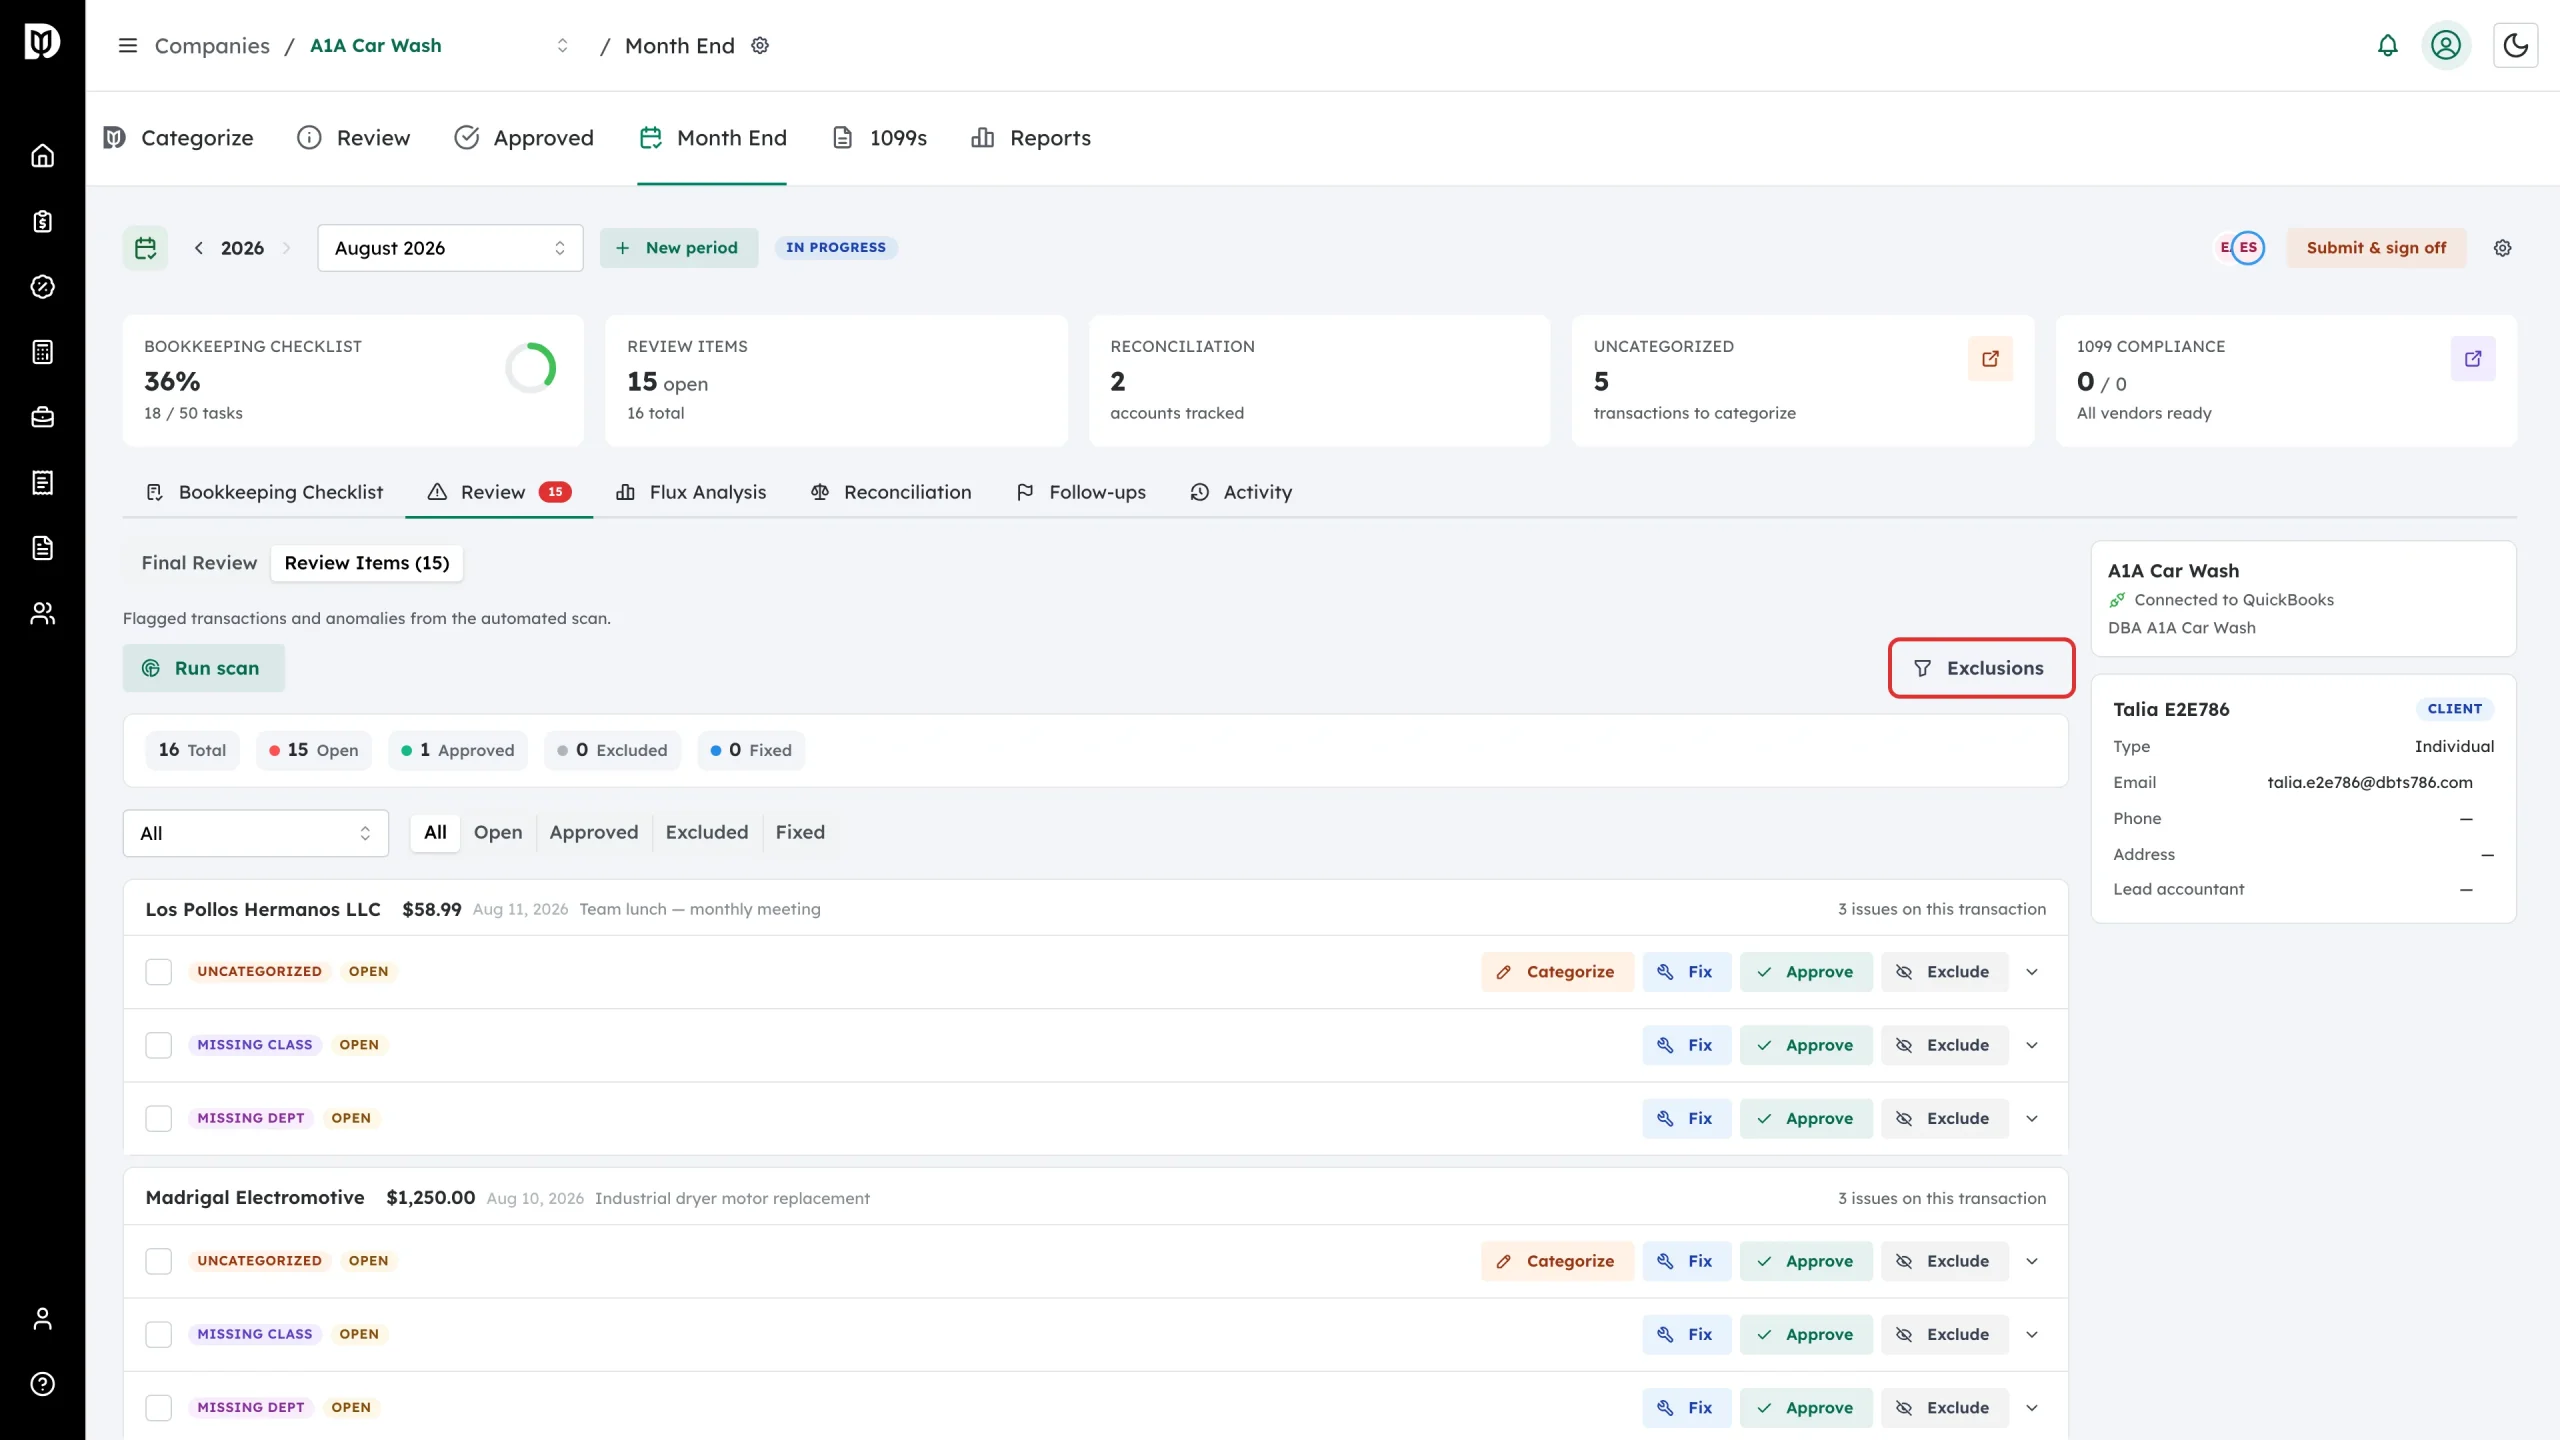
Select Exclusions above the review items list.
-
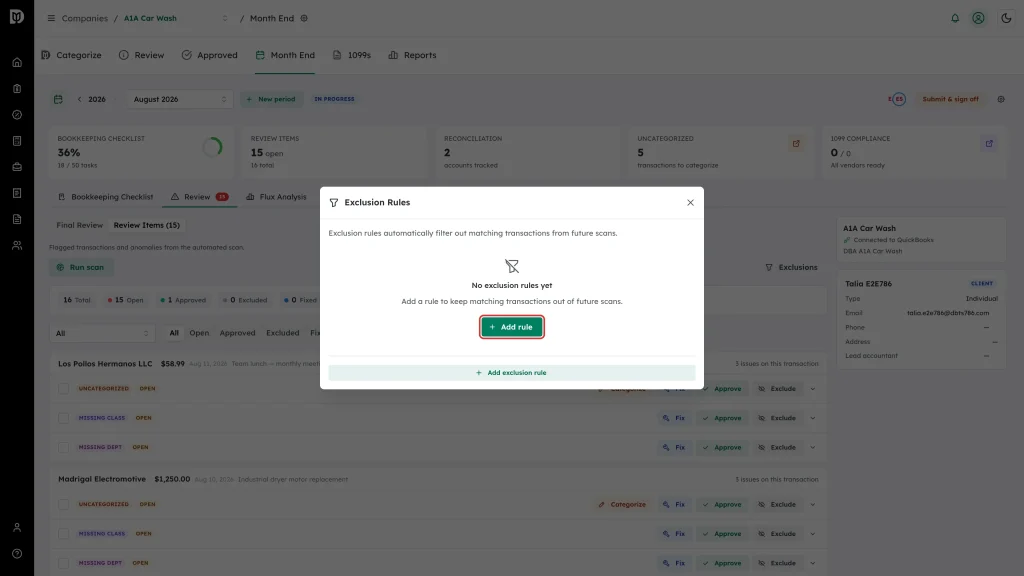
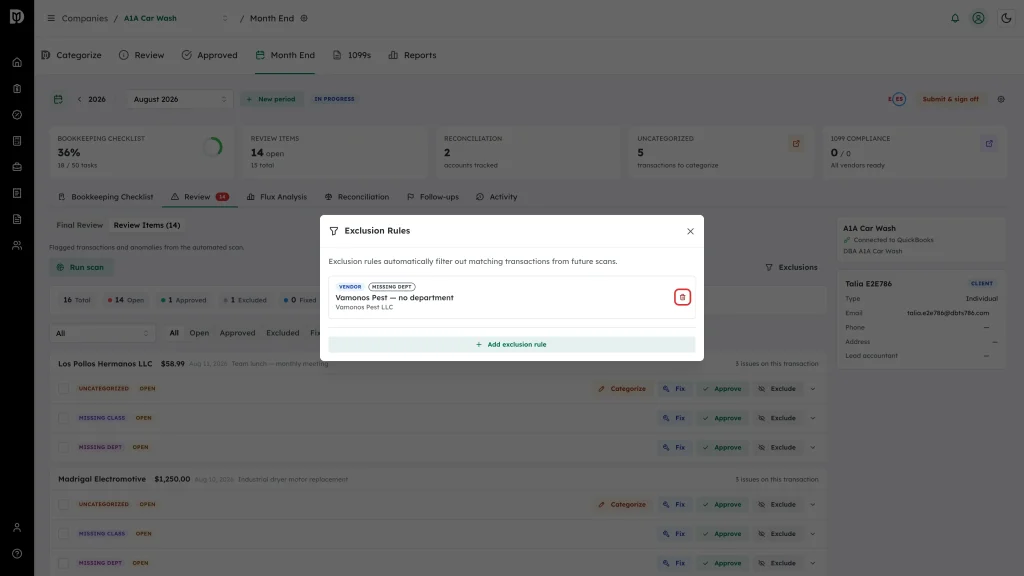
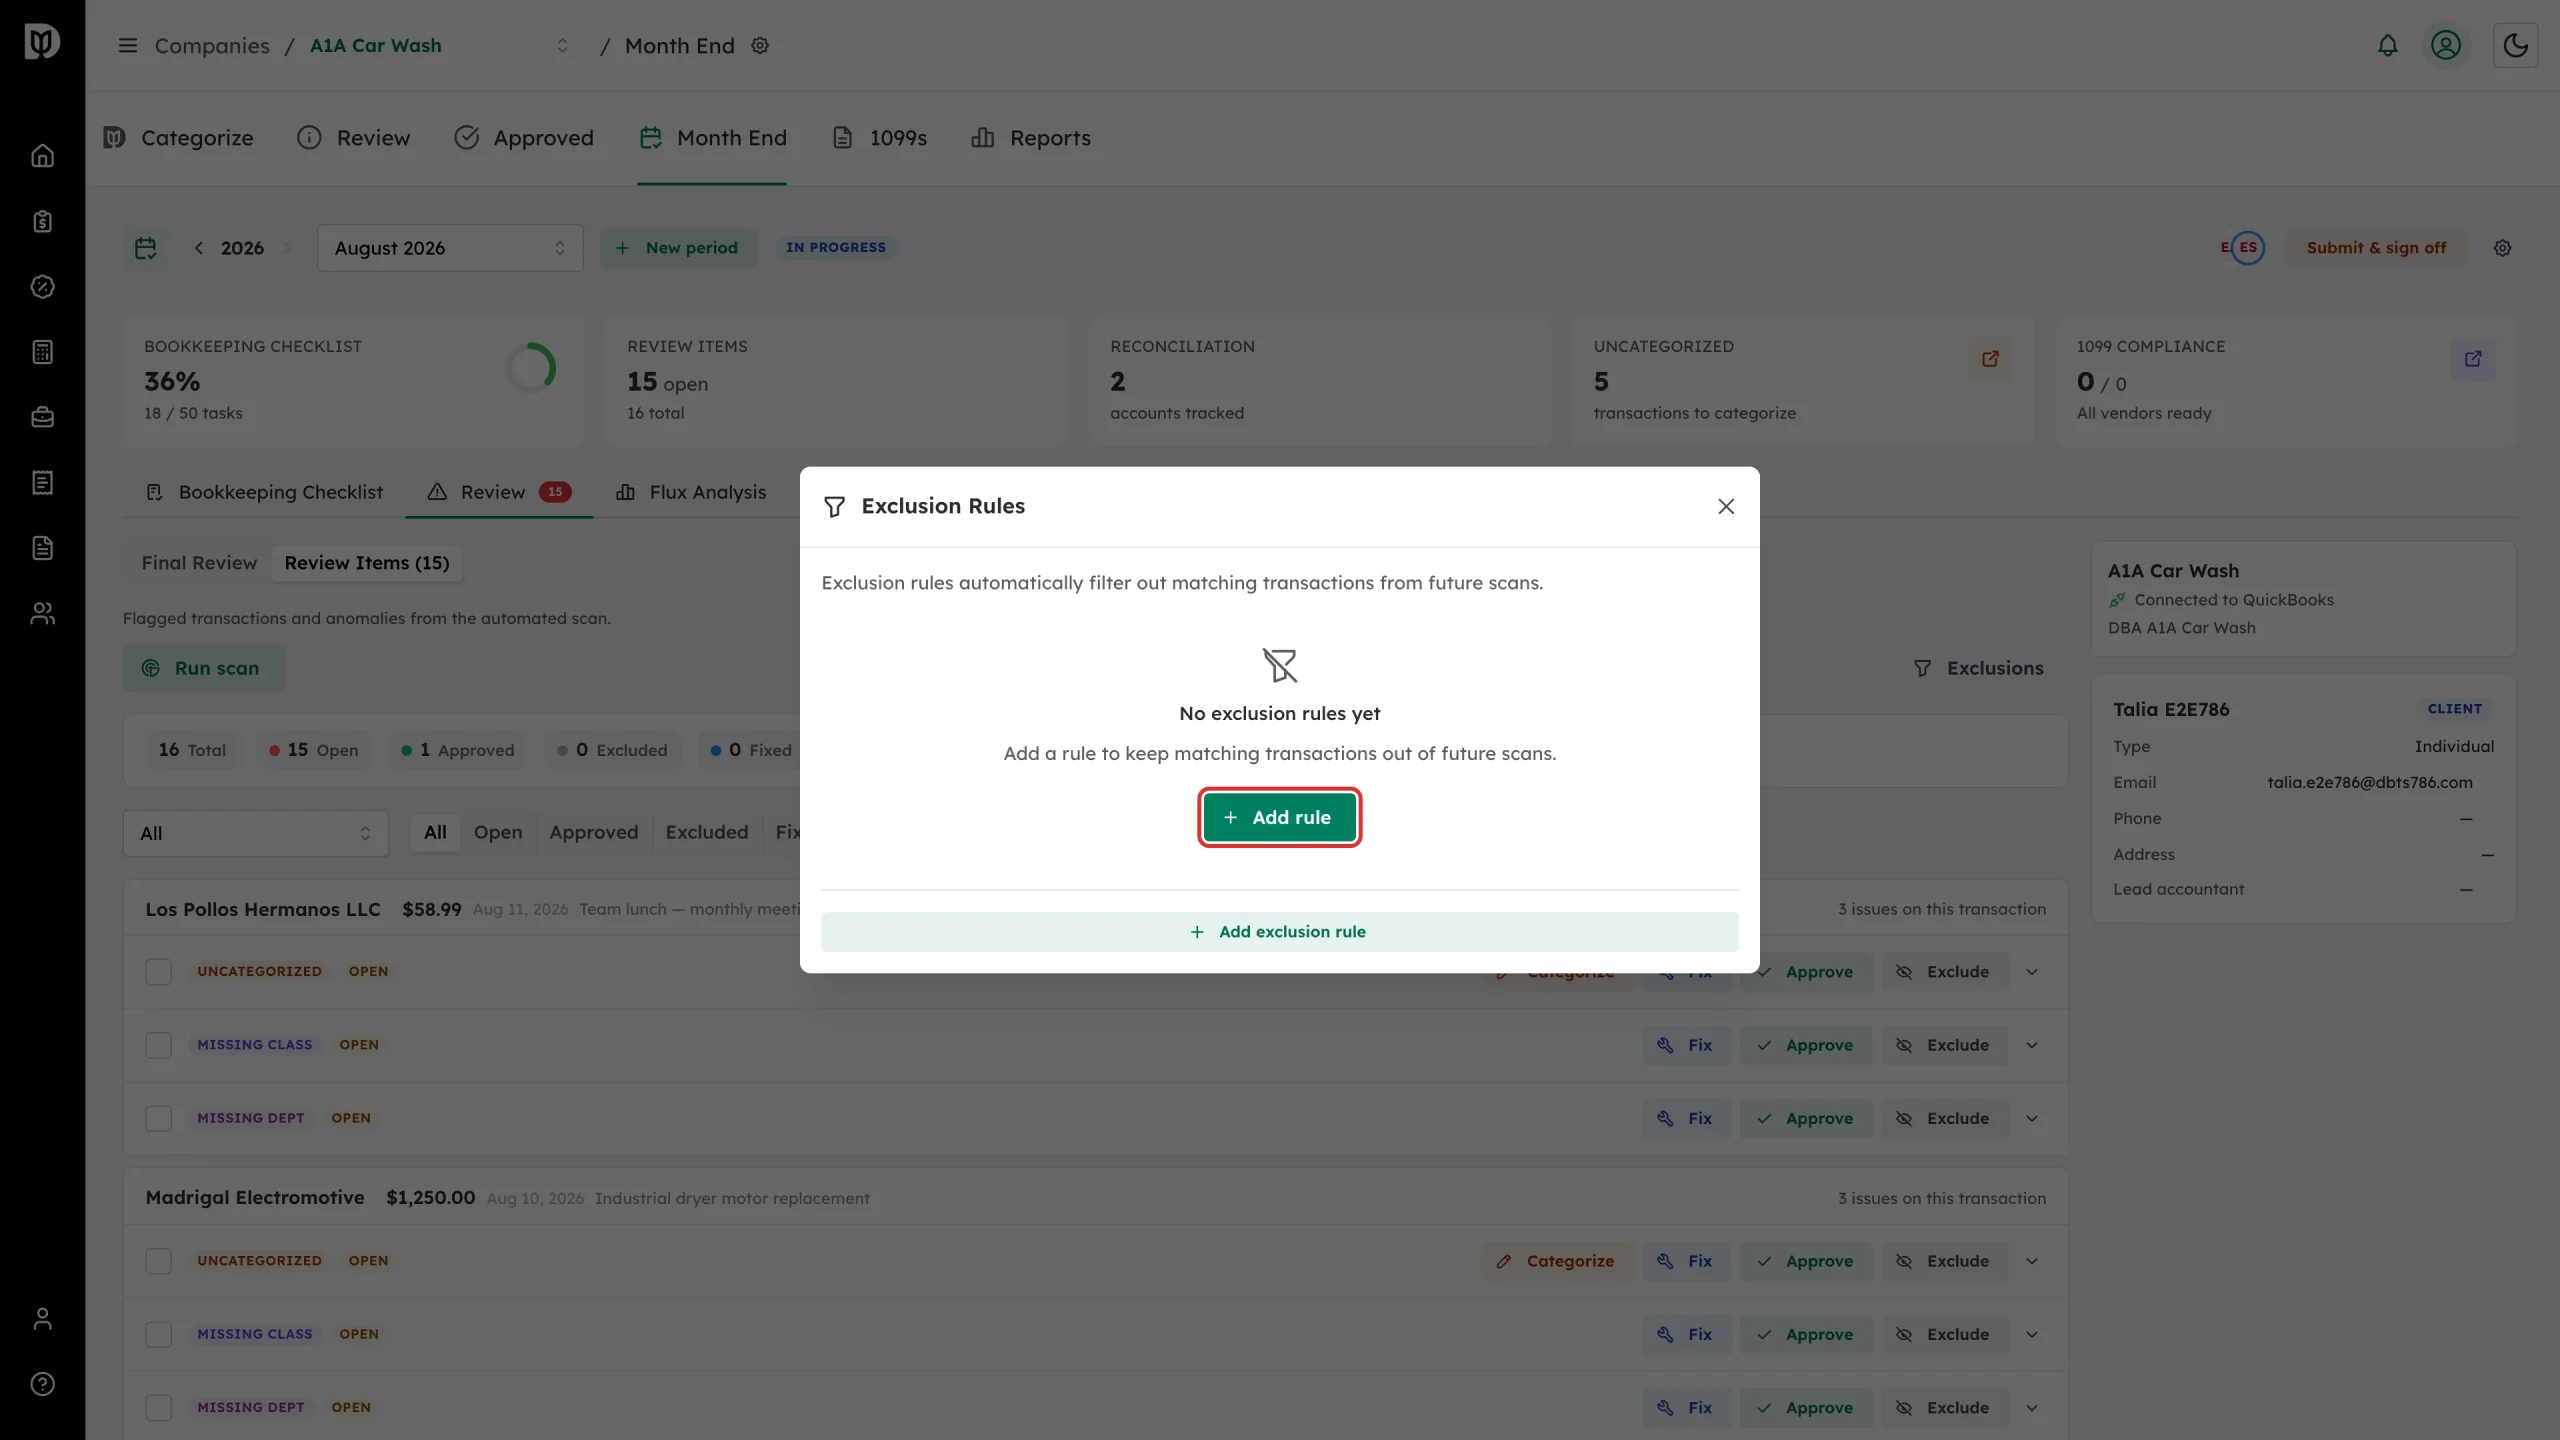
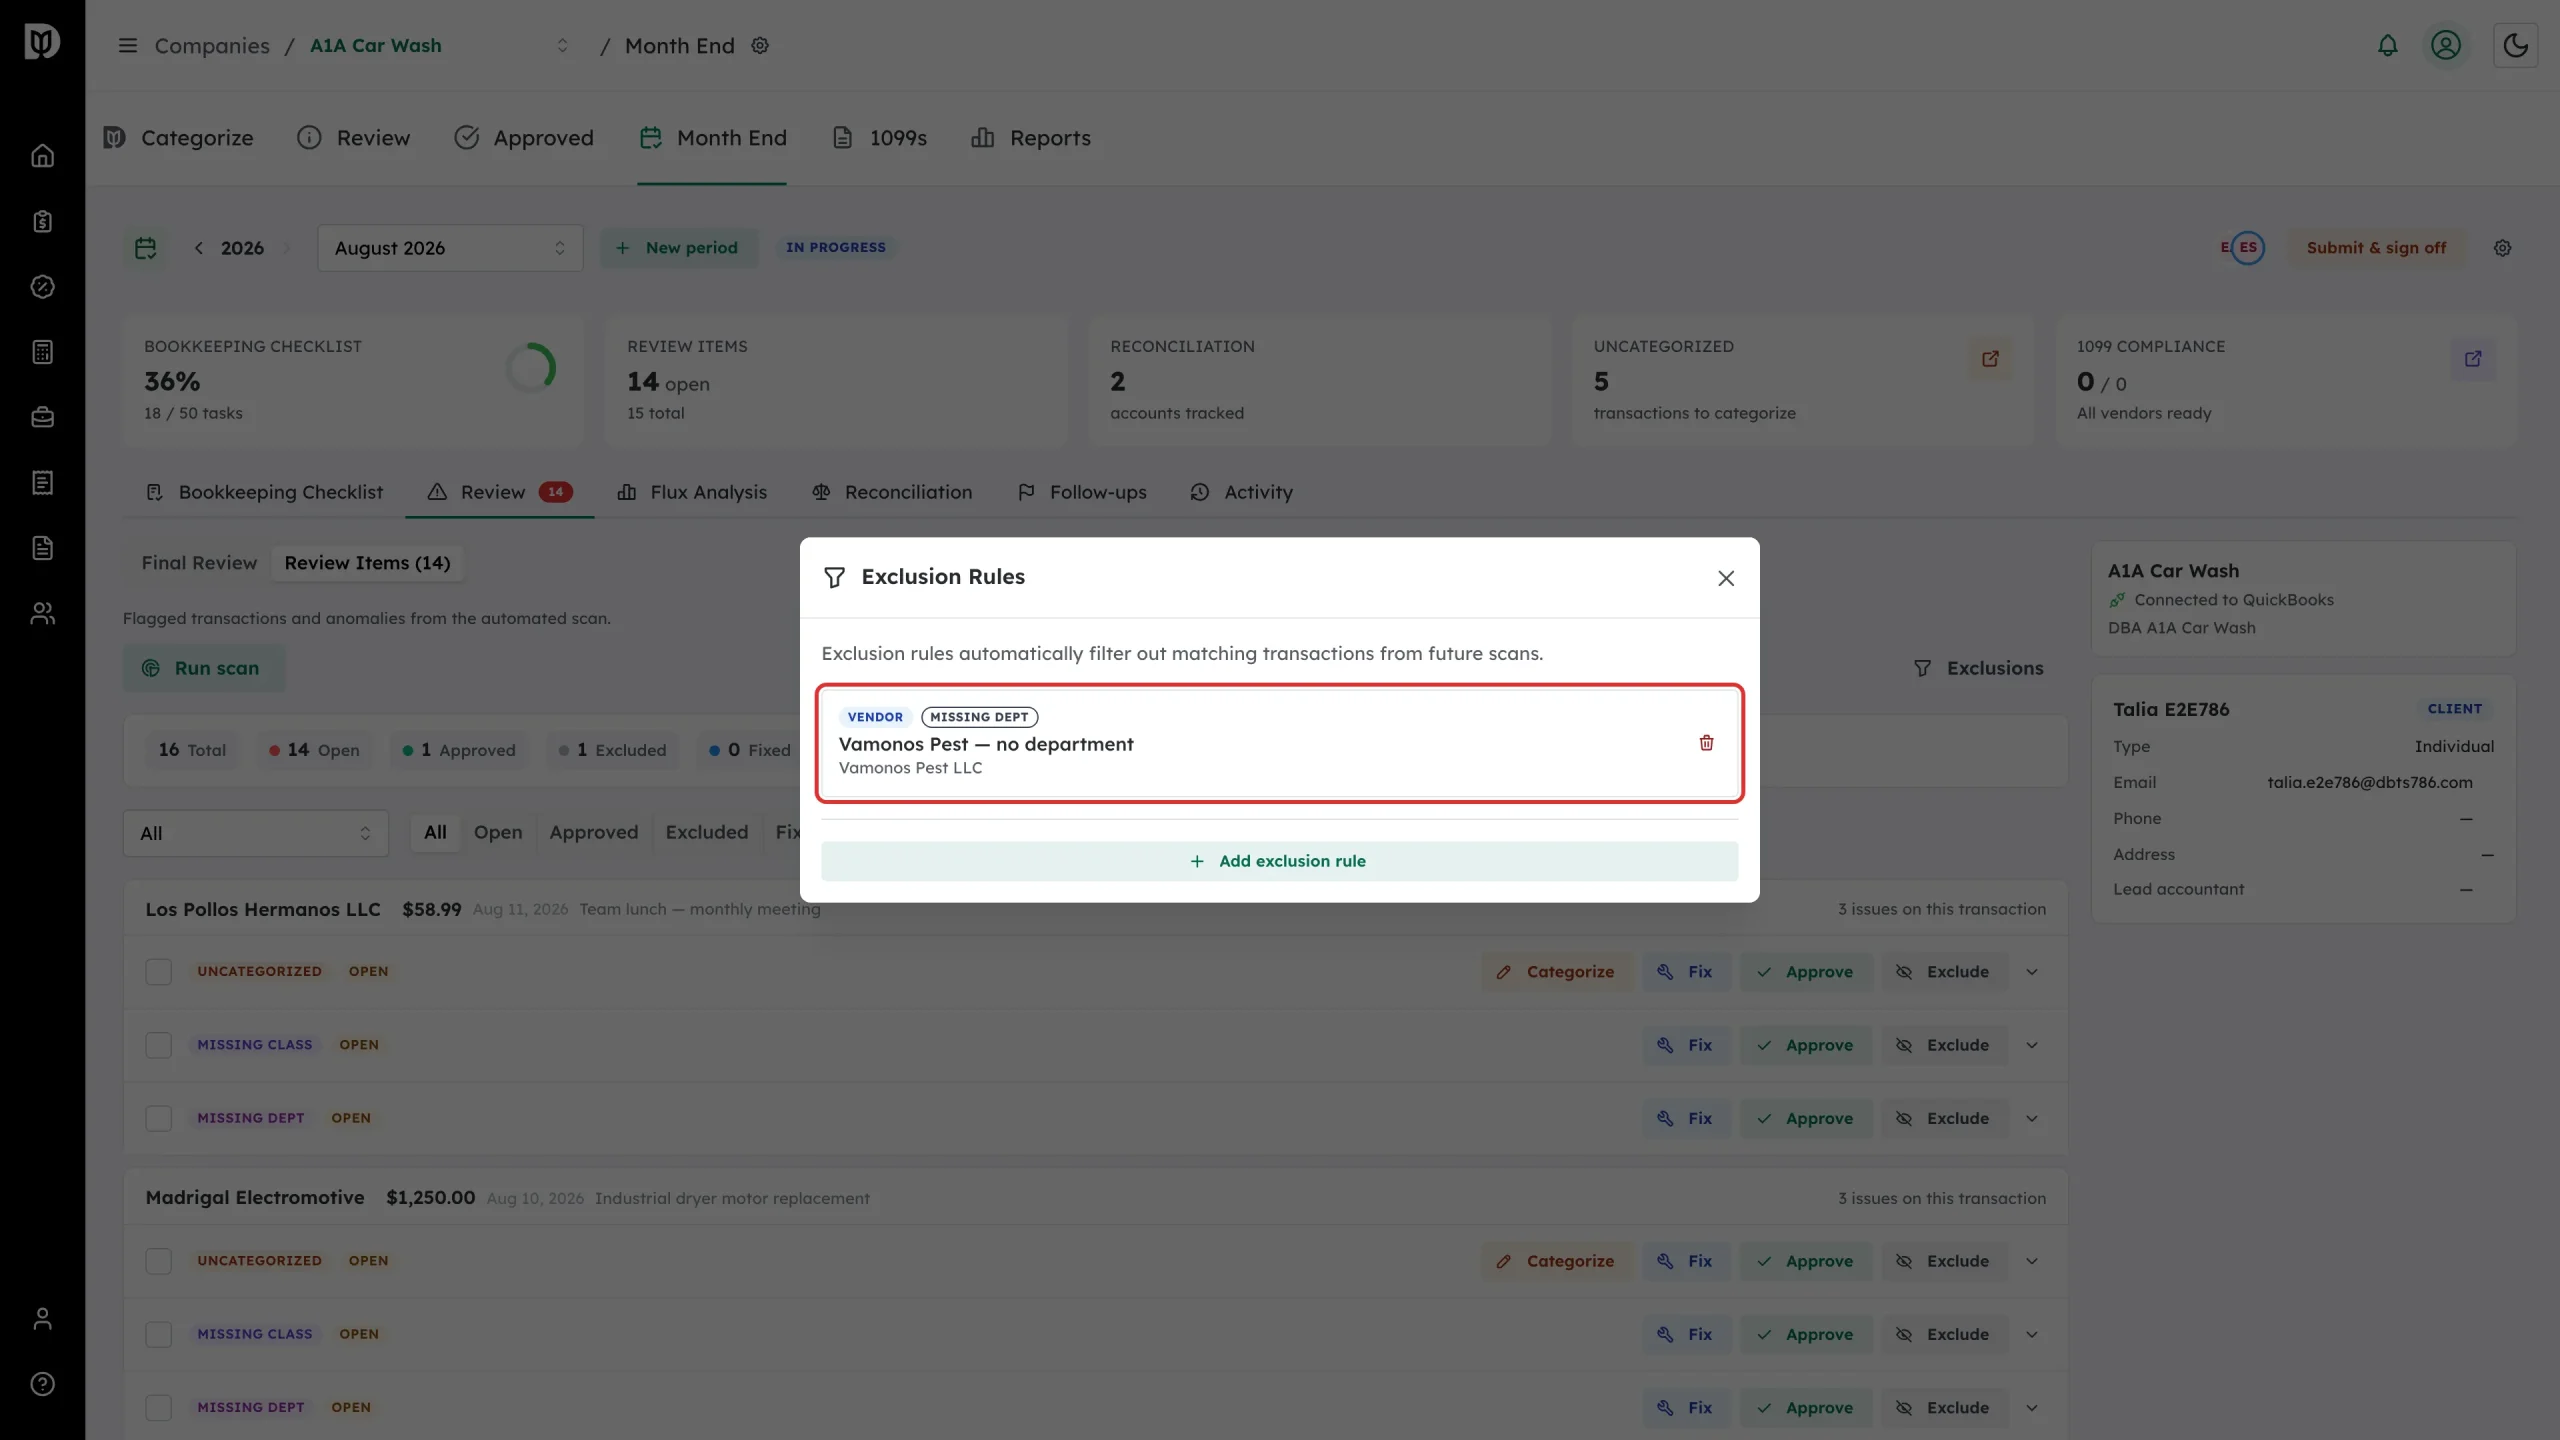
The Exclusion Rules window lists every rule for this client. Select Add rule (or Add exclusion rule when rules already exist).
-
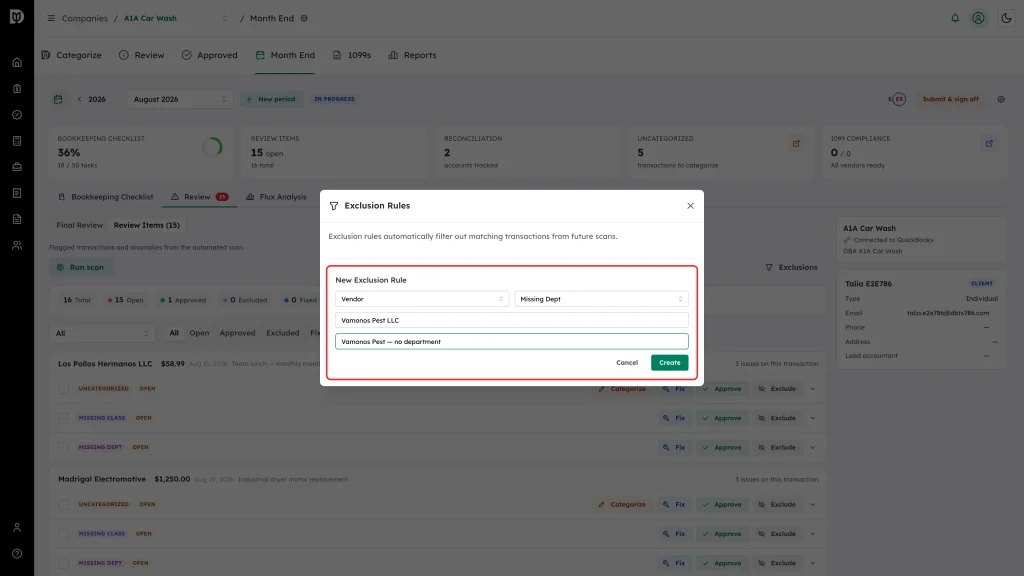
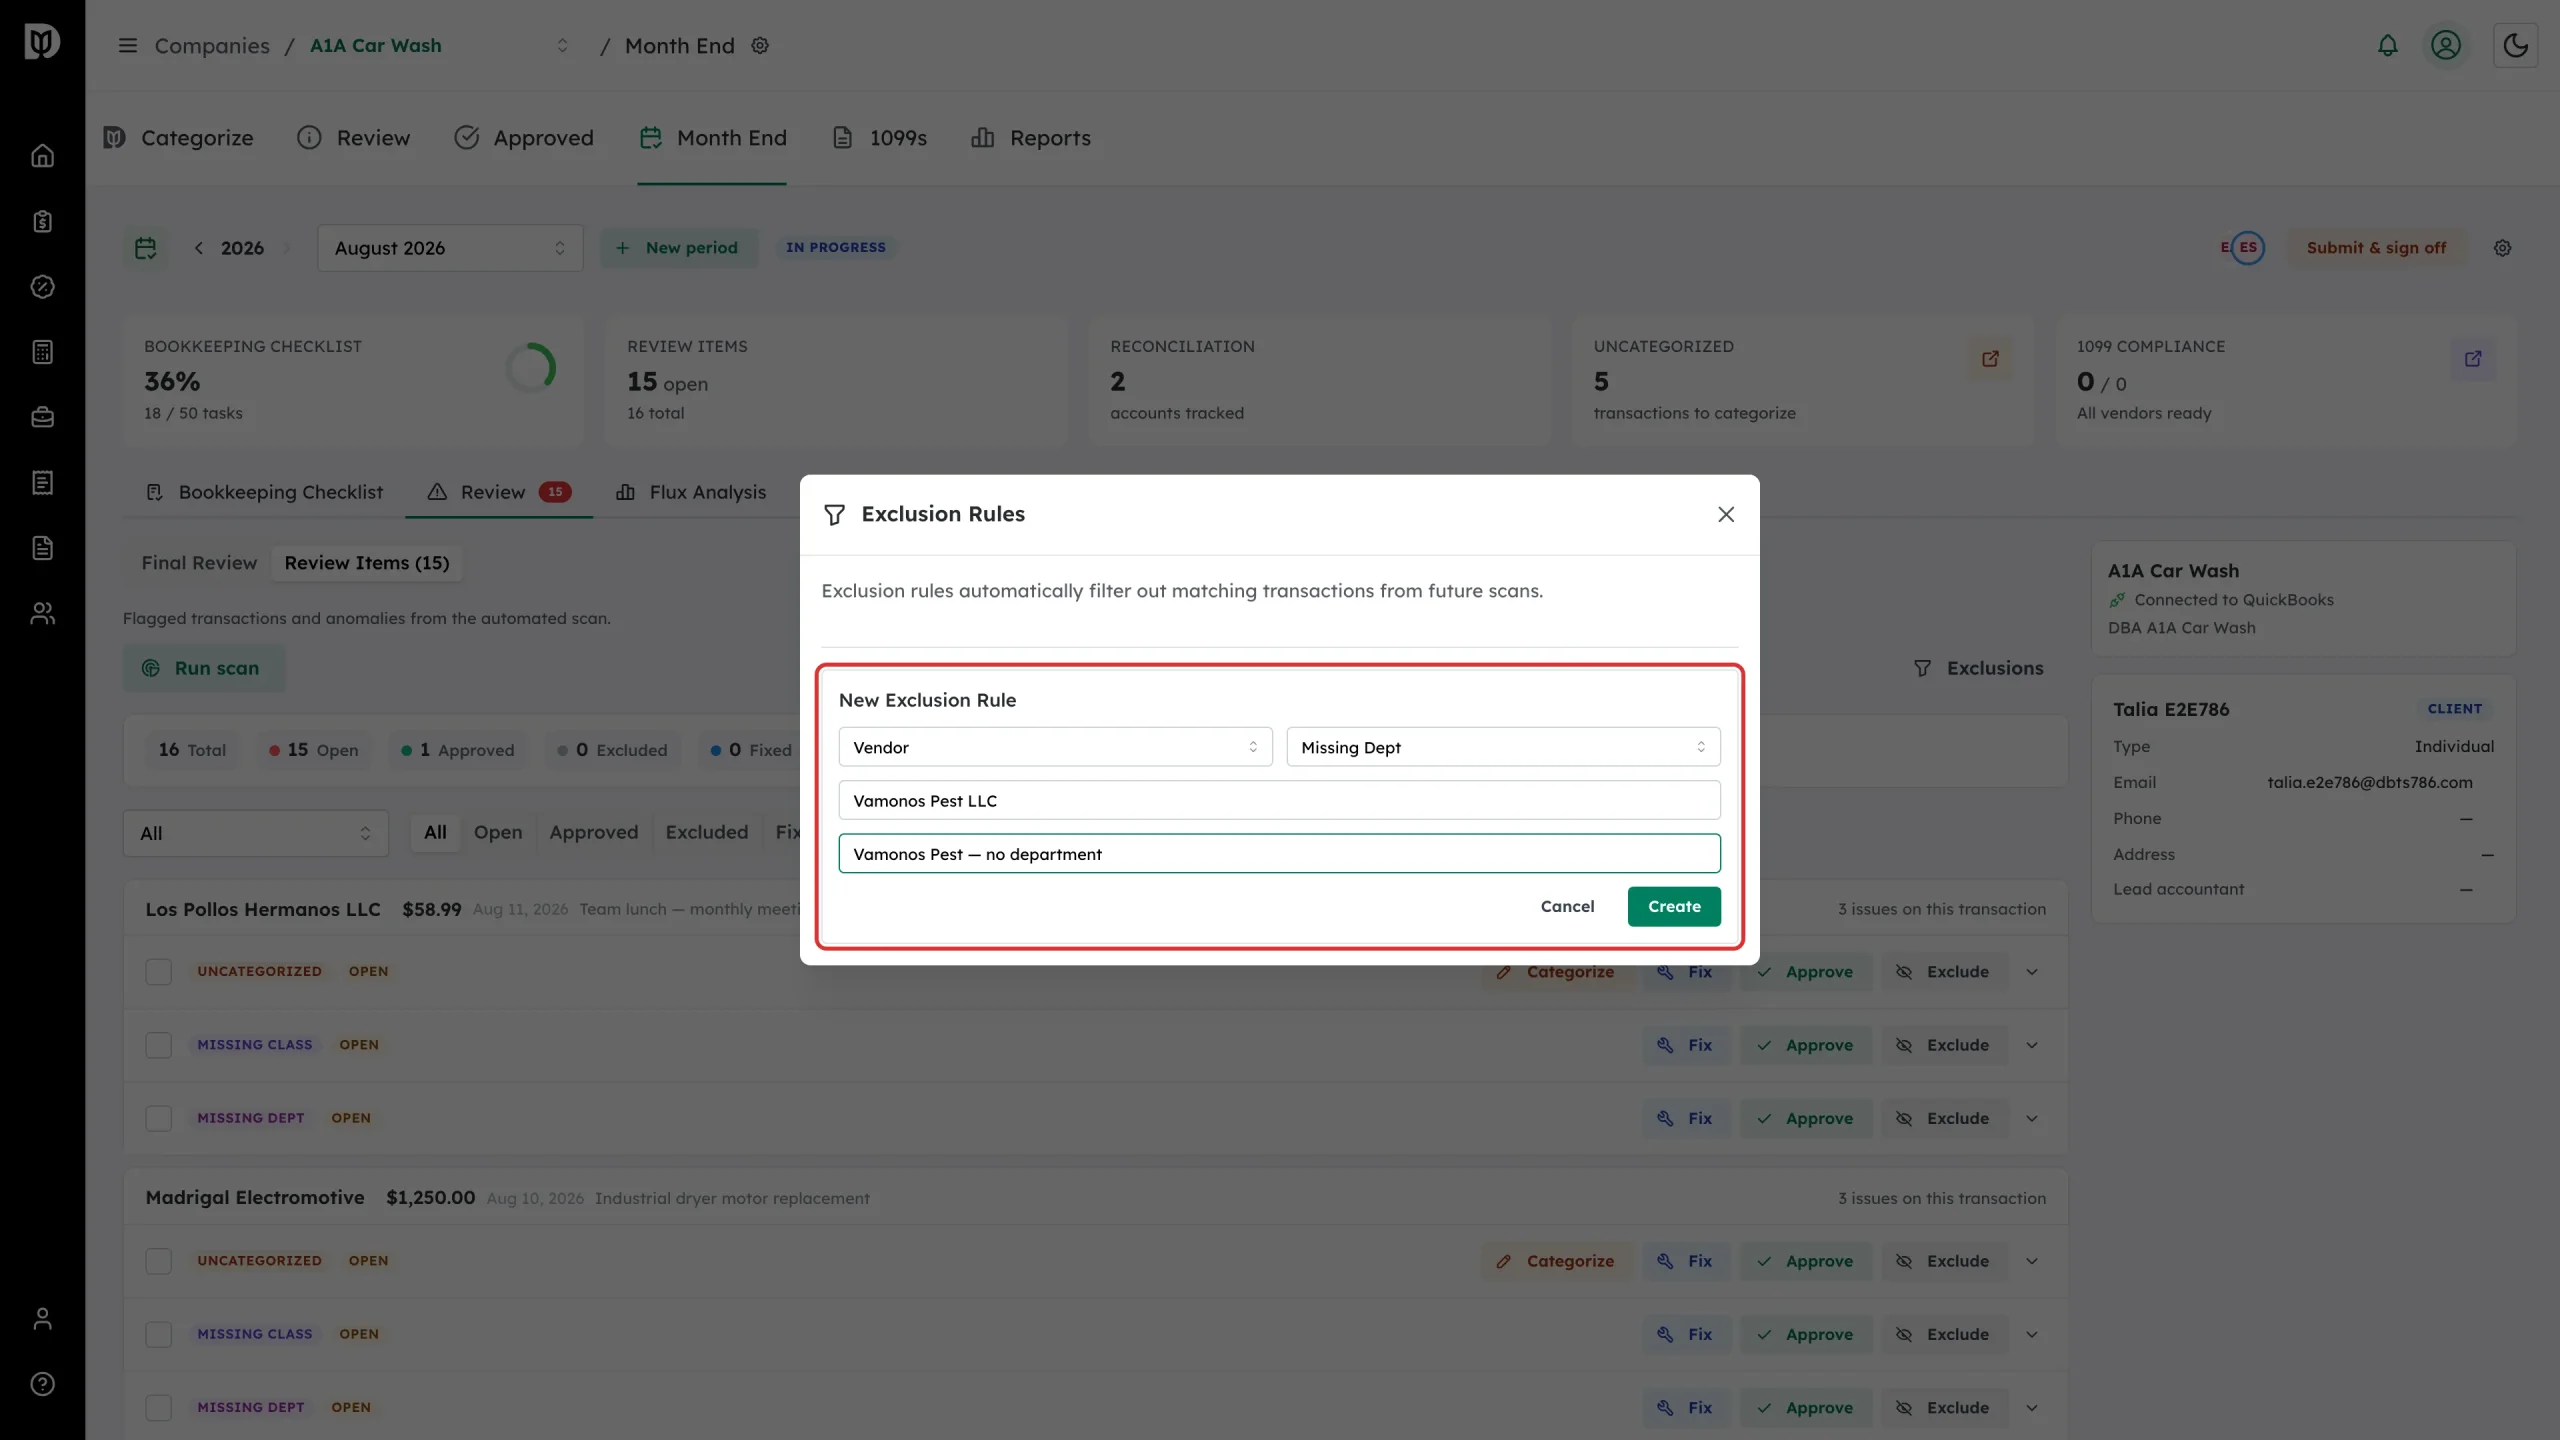
Choose what to match on — Vendor, Account, Description, or Transaction Type — then choose the Scope: All reports, or a single check such as Missing Dept. Enter the Value to match and a Display name so the rule reads clearly later. Select Create.
-
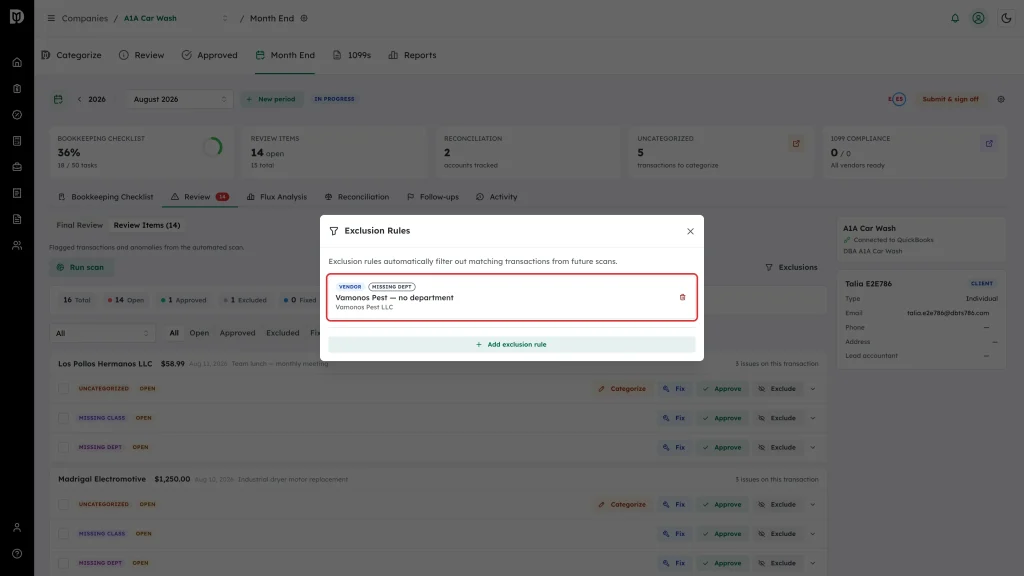
The saved rule shows its type and scope as badges, with the display name and the matched value beneath.
-
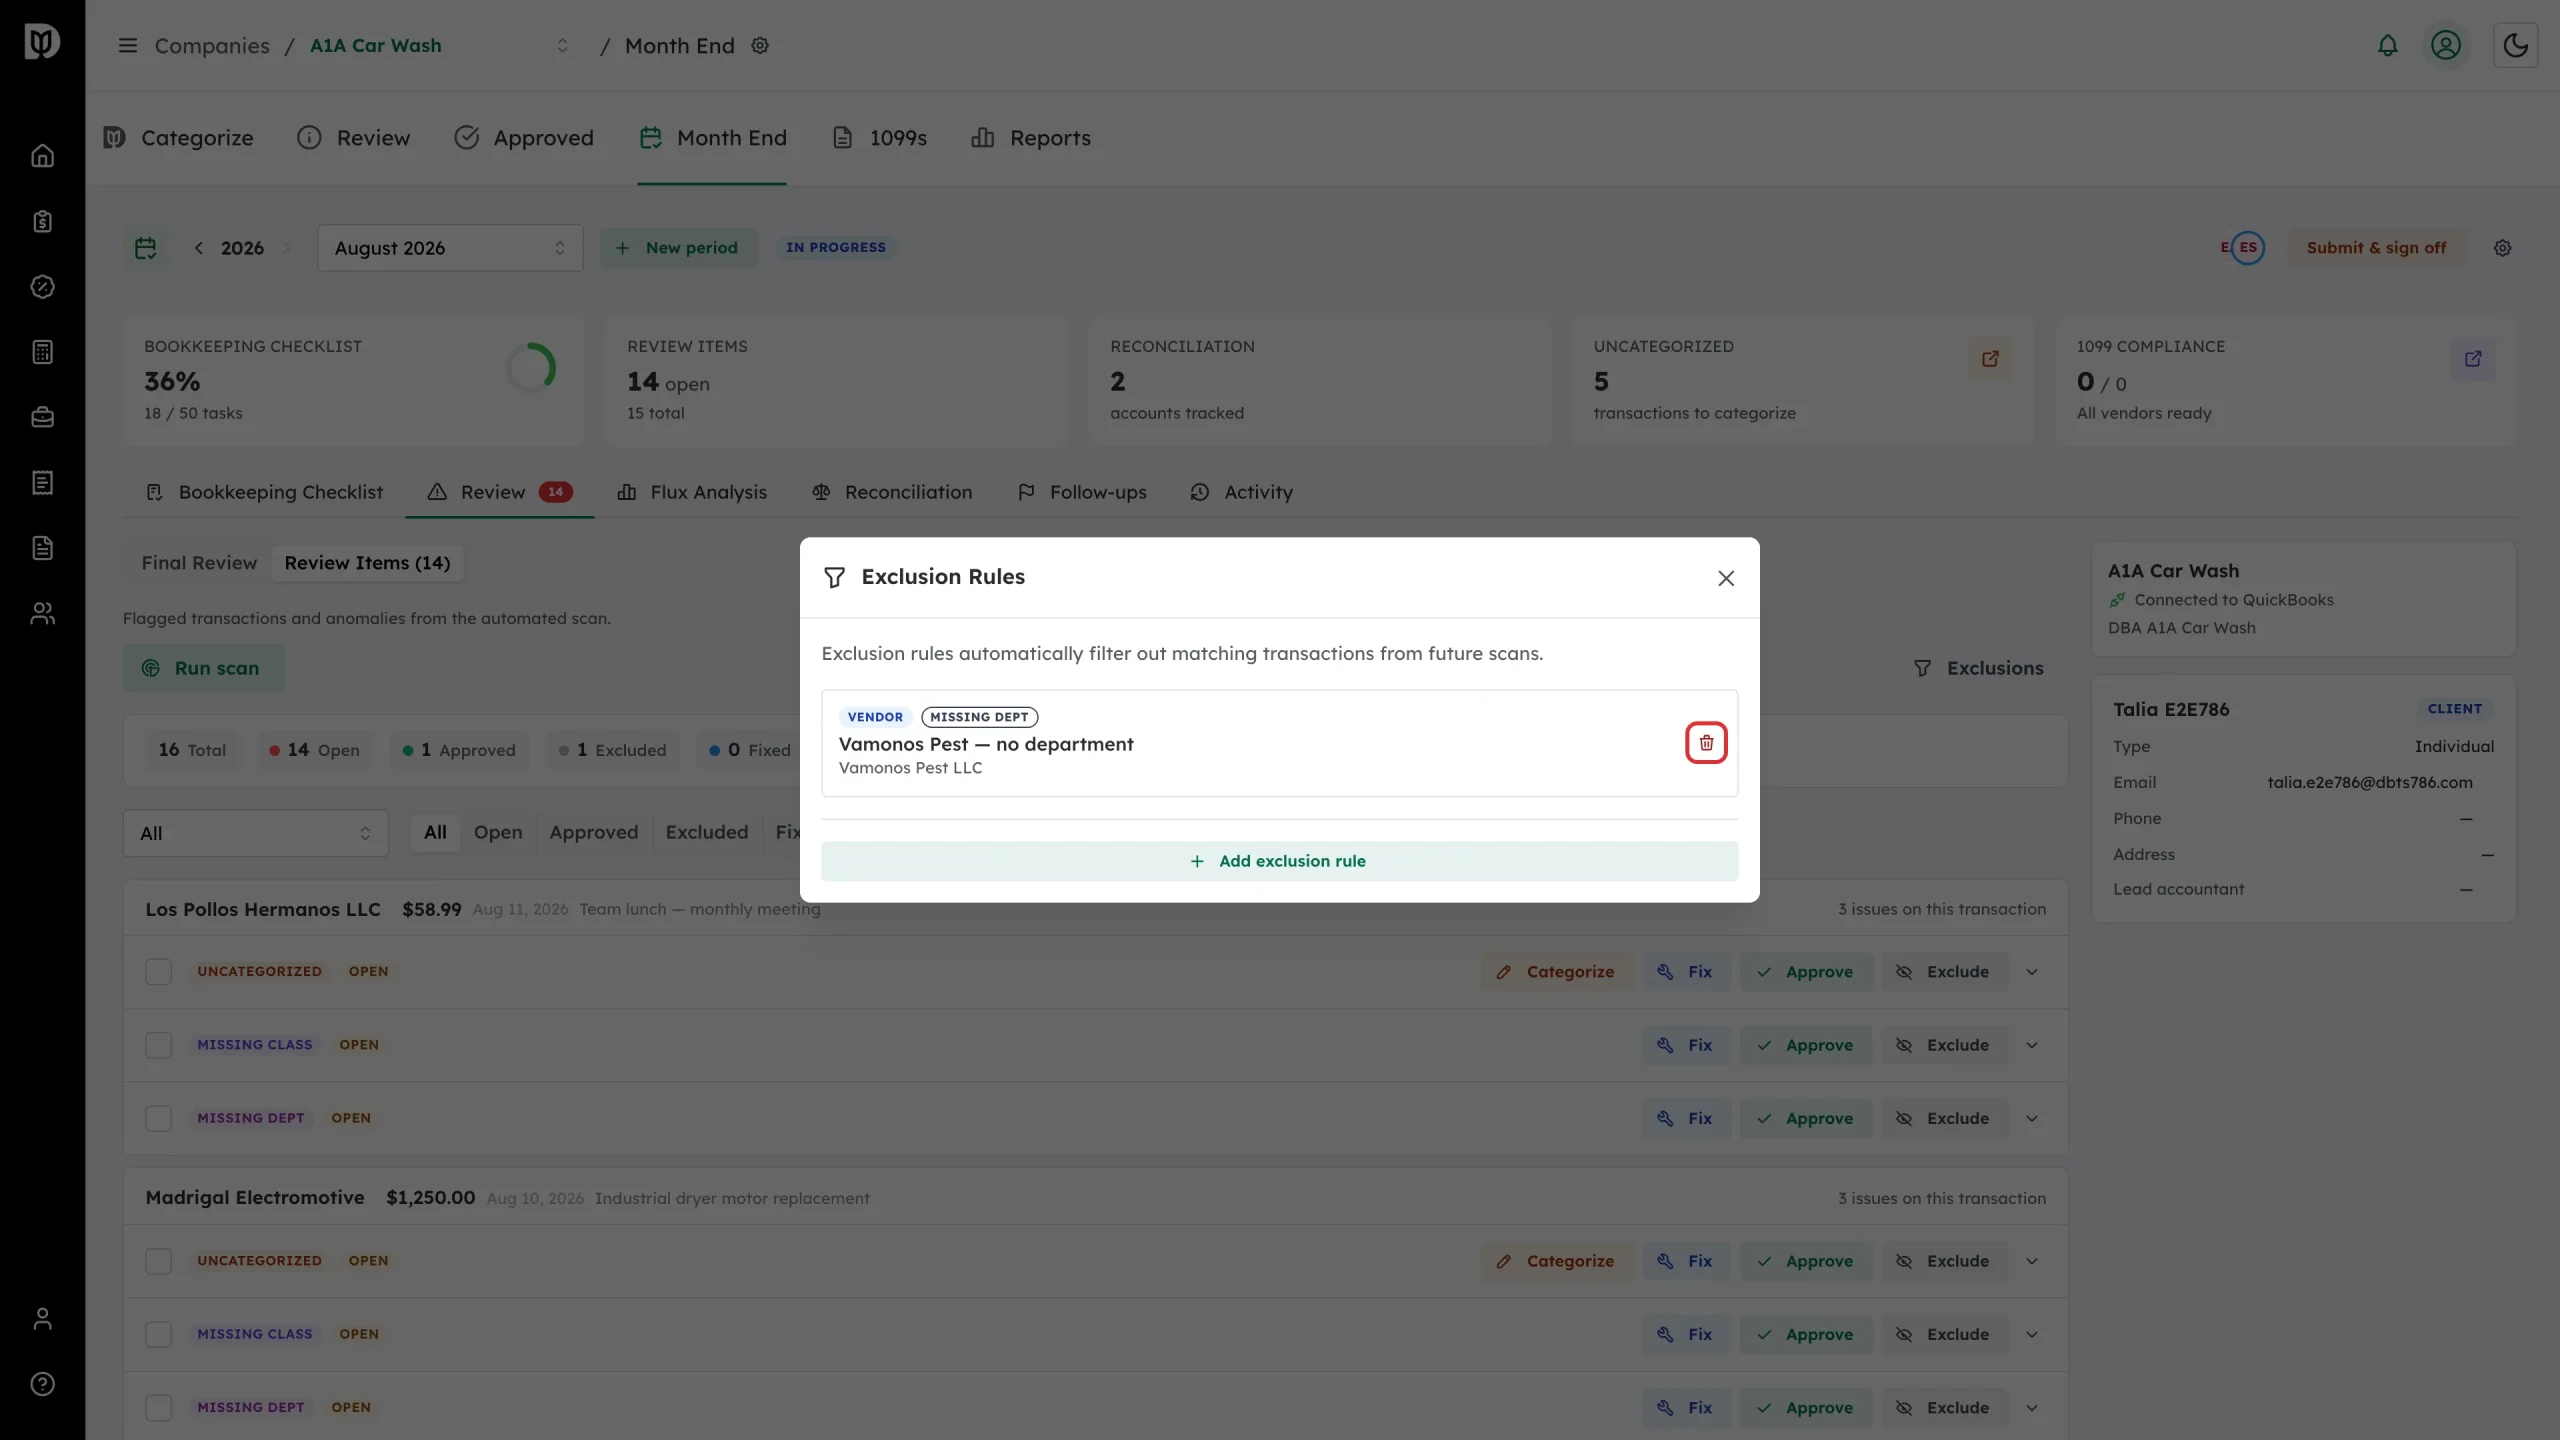
To stop excluding something, select the trash icon on its rule. Matching transactions appear in the next scan again.
What happens next
New rules take effect the next time you run the scan; they do not clear items that are already open. Scope the rule as narrowly as you can — a rule scoped to All reports hides that vendor or account from every check, including large-transaction and duplicate checks.
Troubleshooting
- A transaction you expected is still flagged. Check that the rule’s value matches exactly what is on the transaction (vendor name, account, transaction type), and that its scope covers the check that flagged it. Then re-run the scan.
- You excluded an item and expected a rule to appear. Selecting Exclude on a flagged item that has a vendor also creates a vendor rule for the check that flagged it, so future scans skip that vendor for that check. That rule does not appear in this window, so you cannot see or remove it here. For a one-off that you still want flagged in future, use Approve instead of Exclude. An item with no vendor is excluded on its own, with no rule.
- You cannot delete a rule. Only owners and admins can remove exclusion rules. Ask a firm admin.