Who this is for: Accountants who need to tell Debits where each person signs.
What you’ll learn: How to open the signature field editor, place fields for each signer, and save them.
Before you begin
- At least one PDF must be uploaded to the tax delivery.
- The return must still be a Draft.
- Add all your signers first – you assign fields to them by name.
Step-by-step instructions
Step 1: Open the editor from the document row
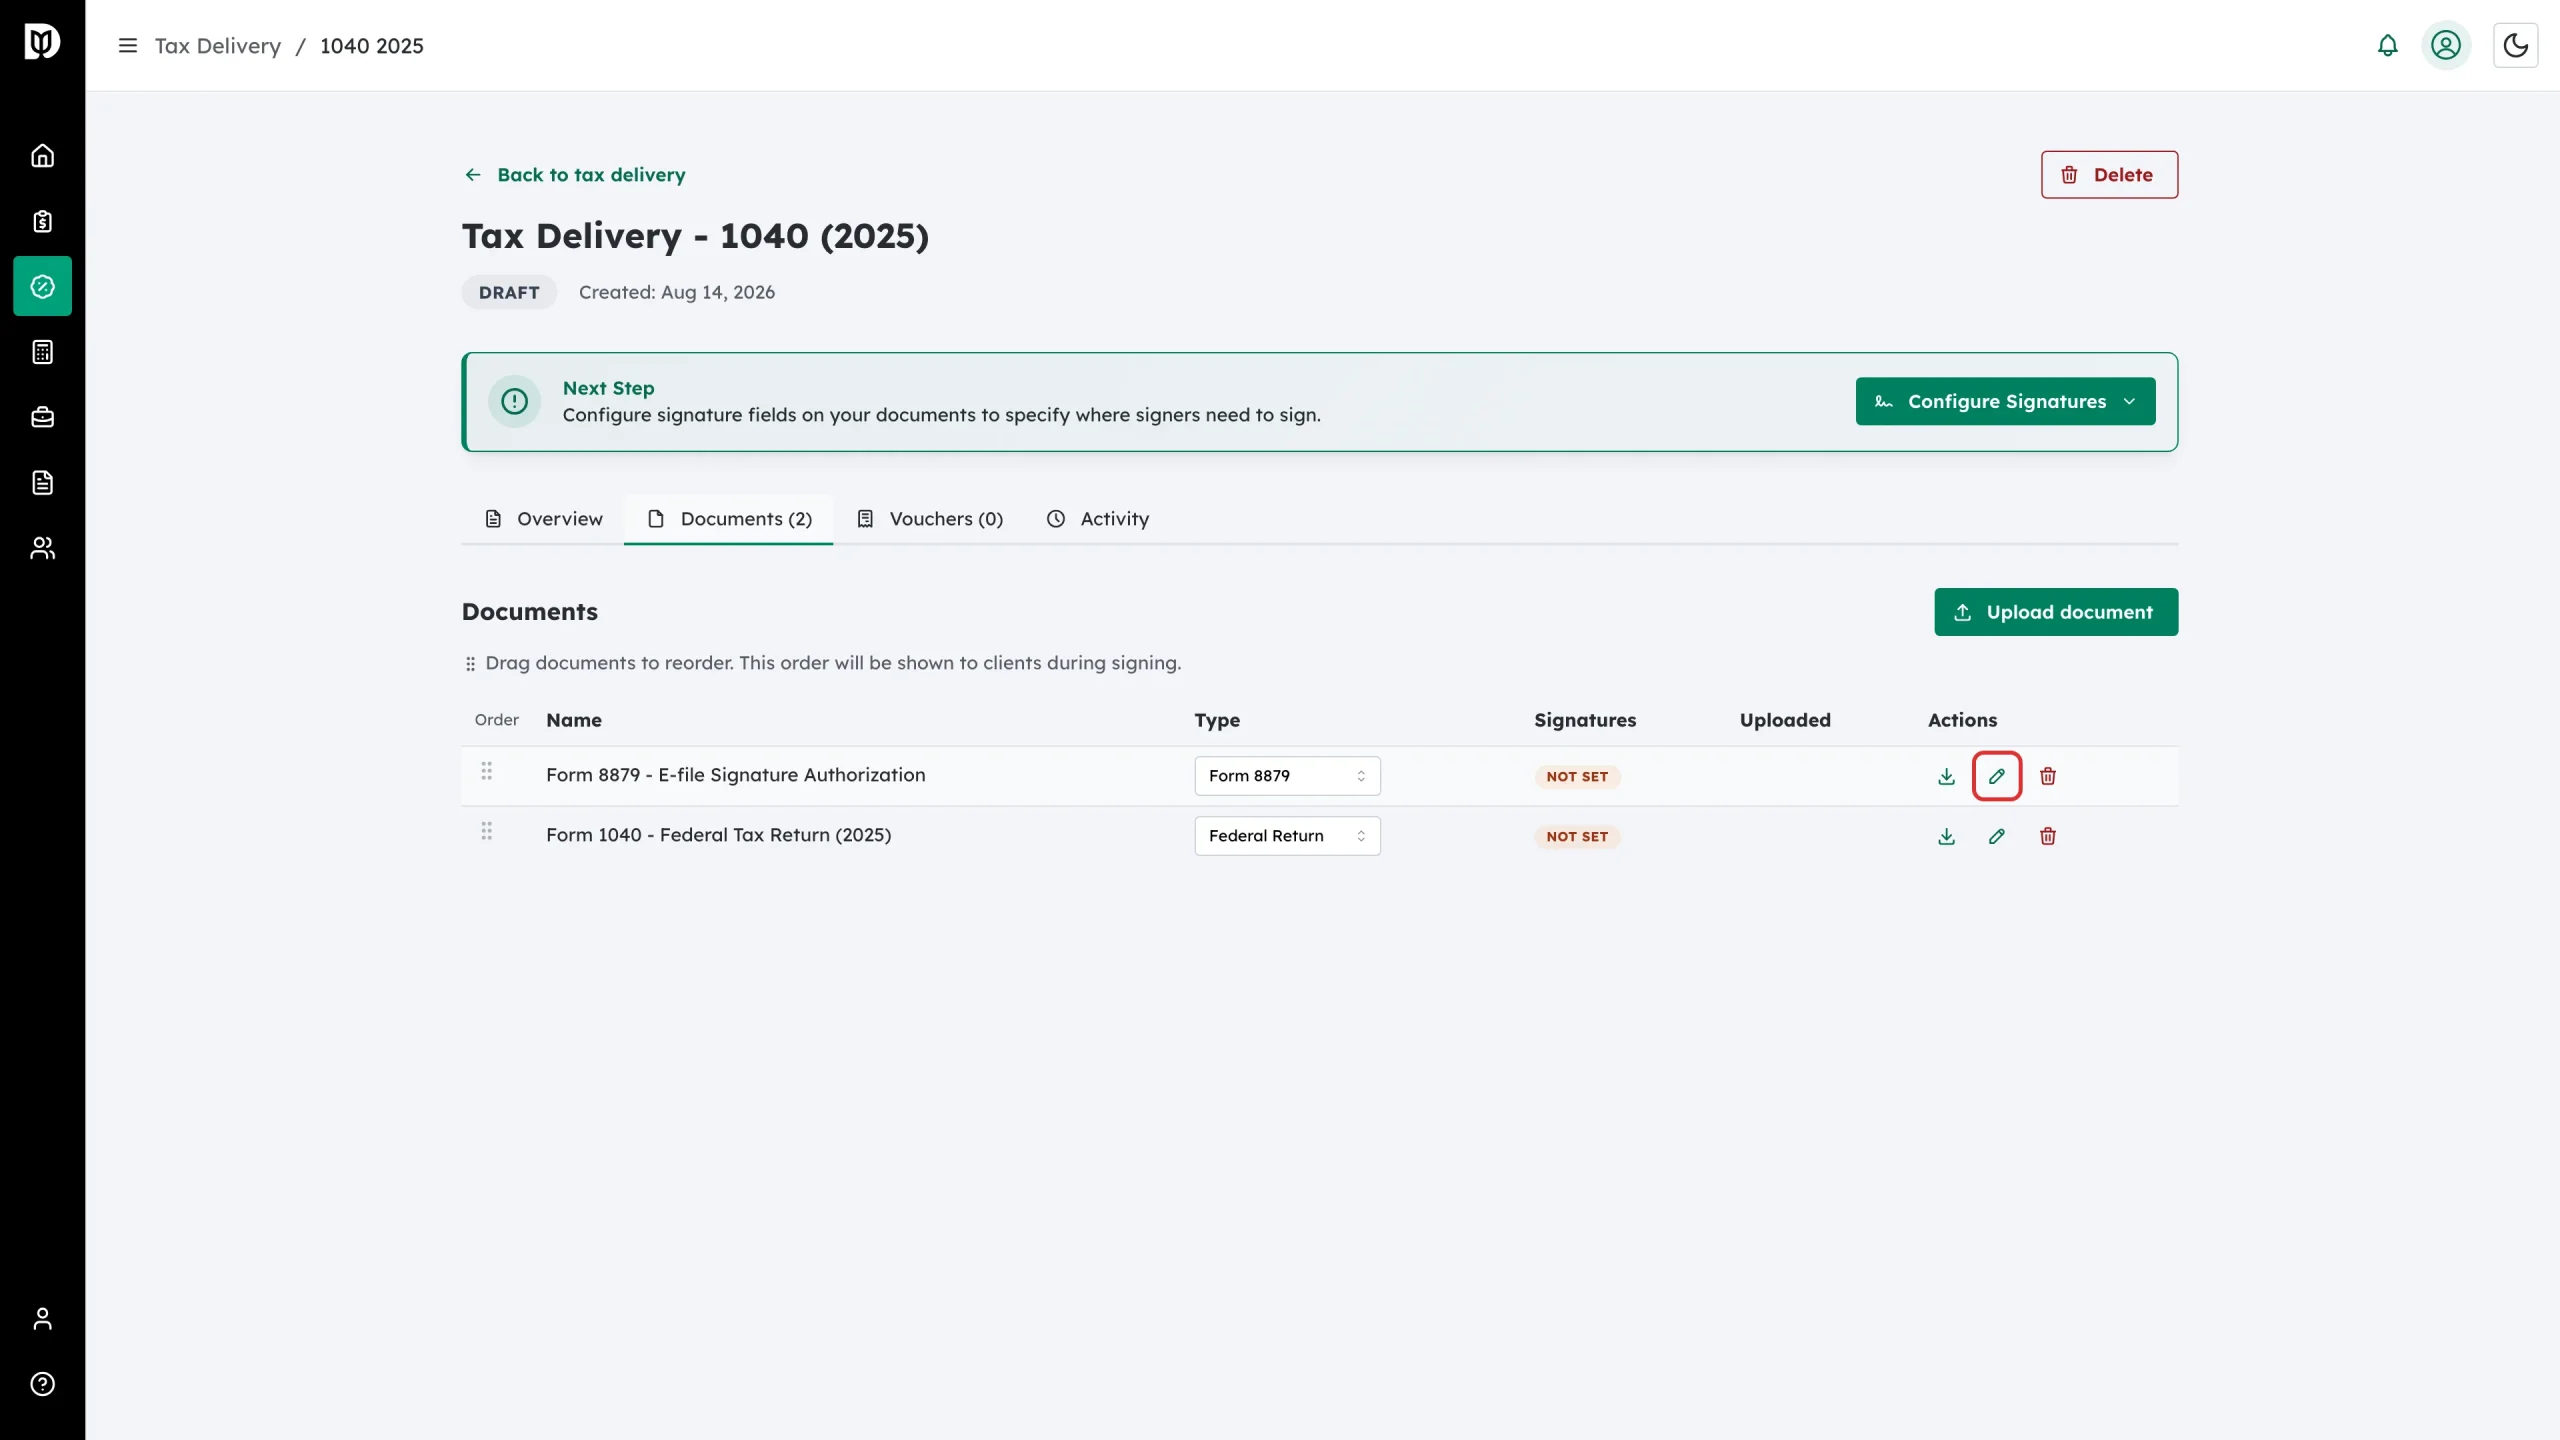
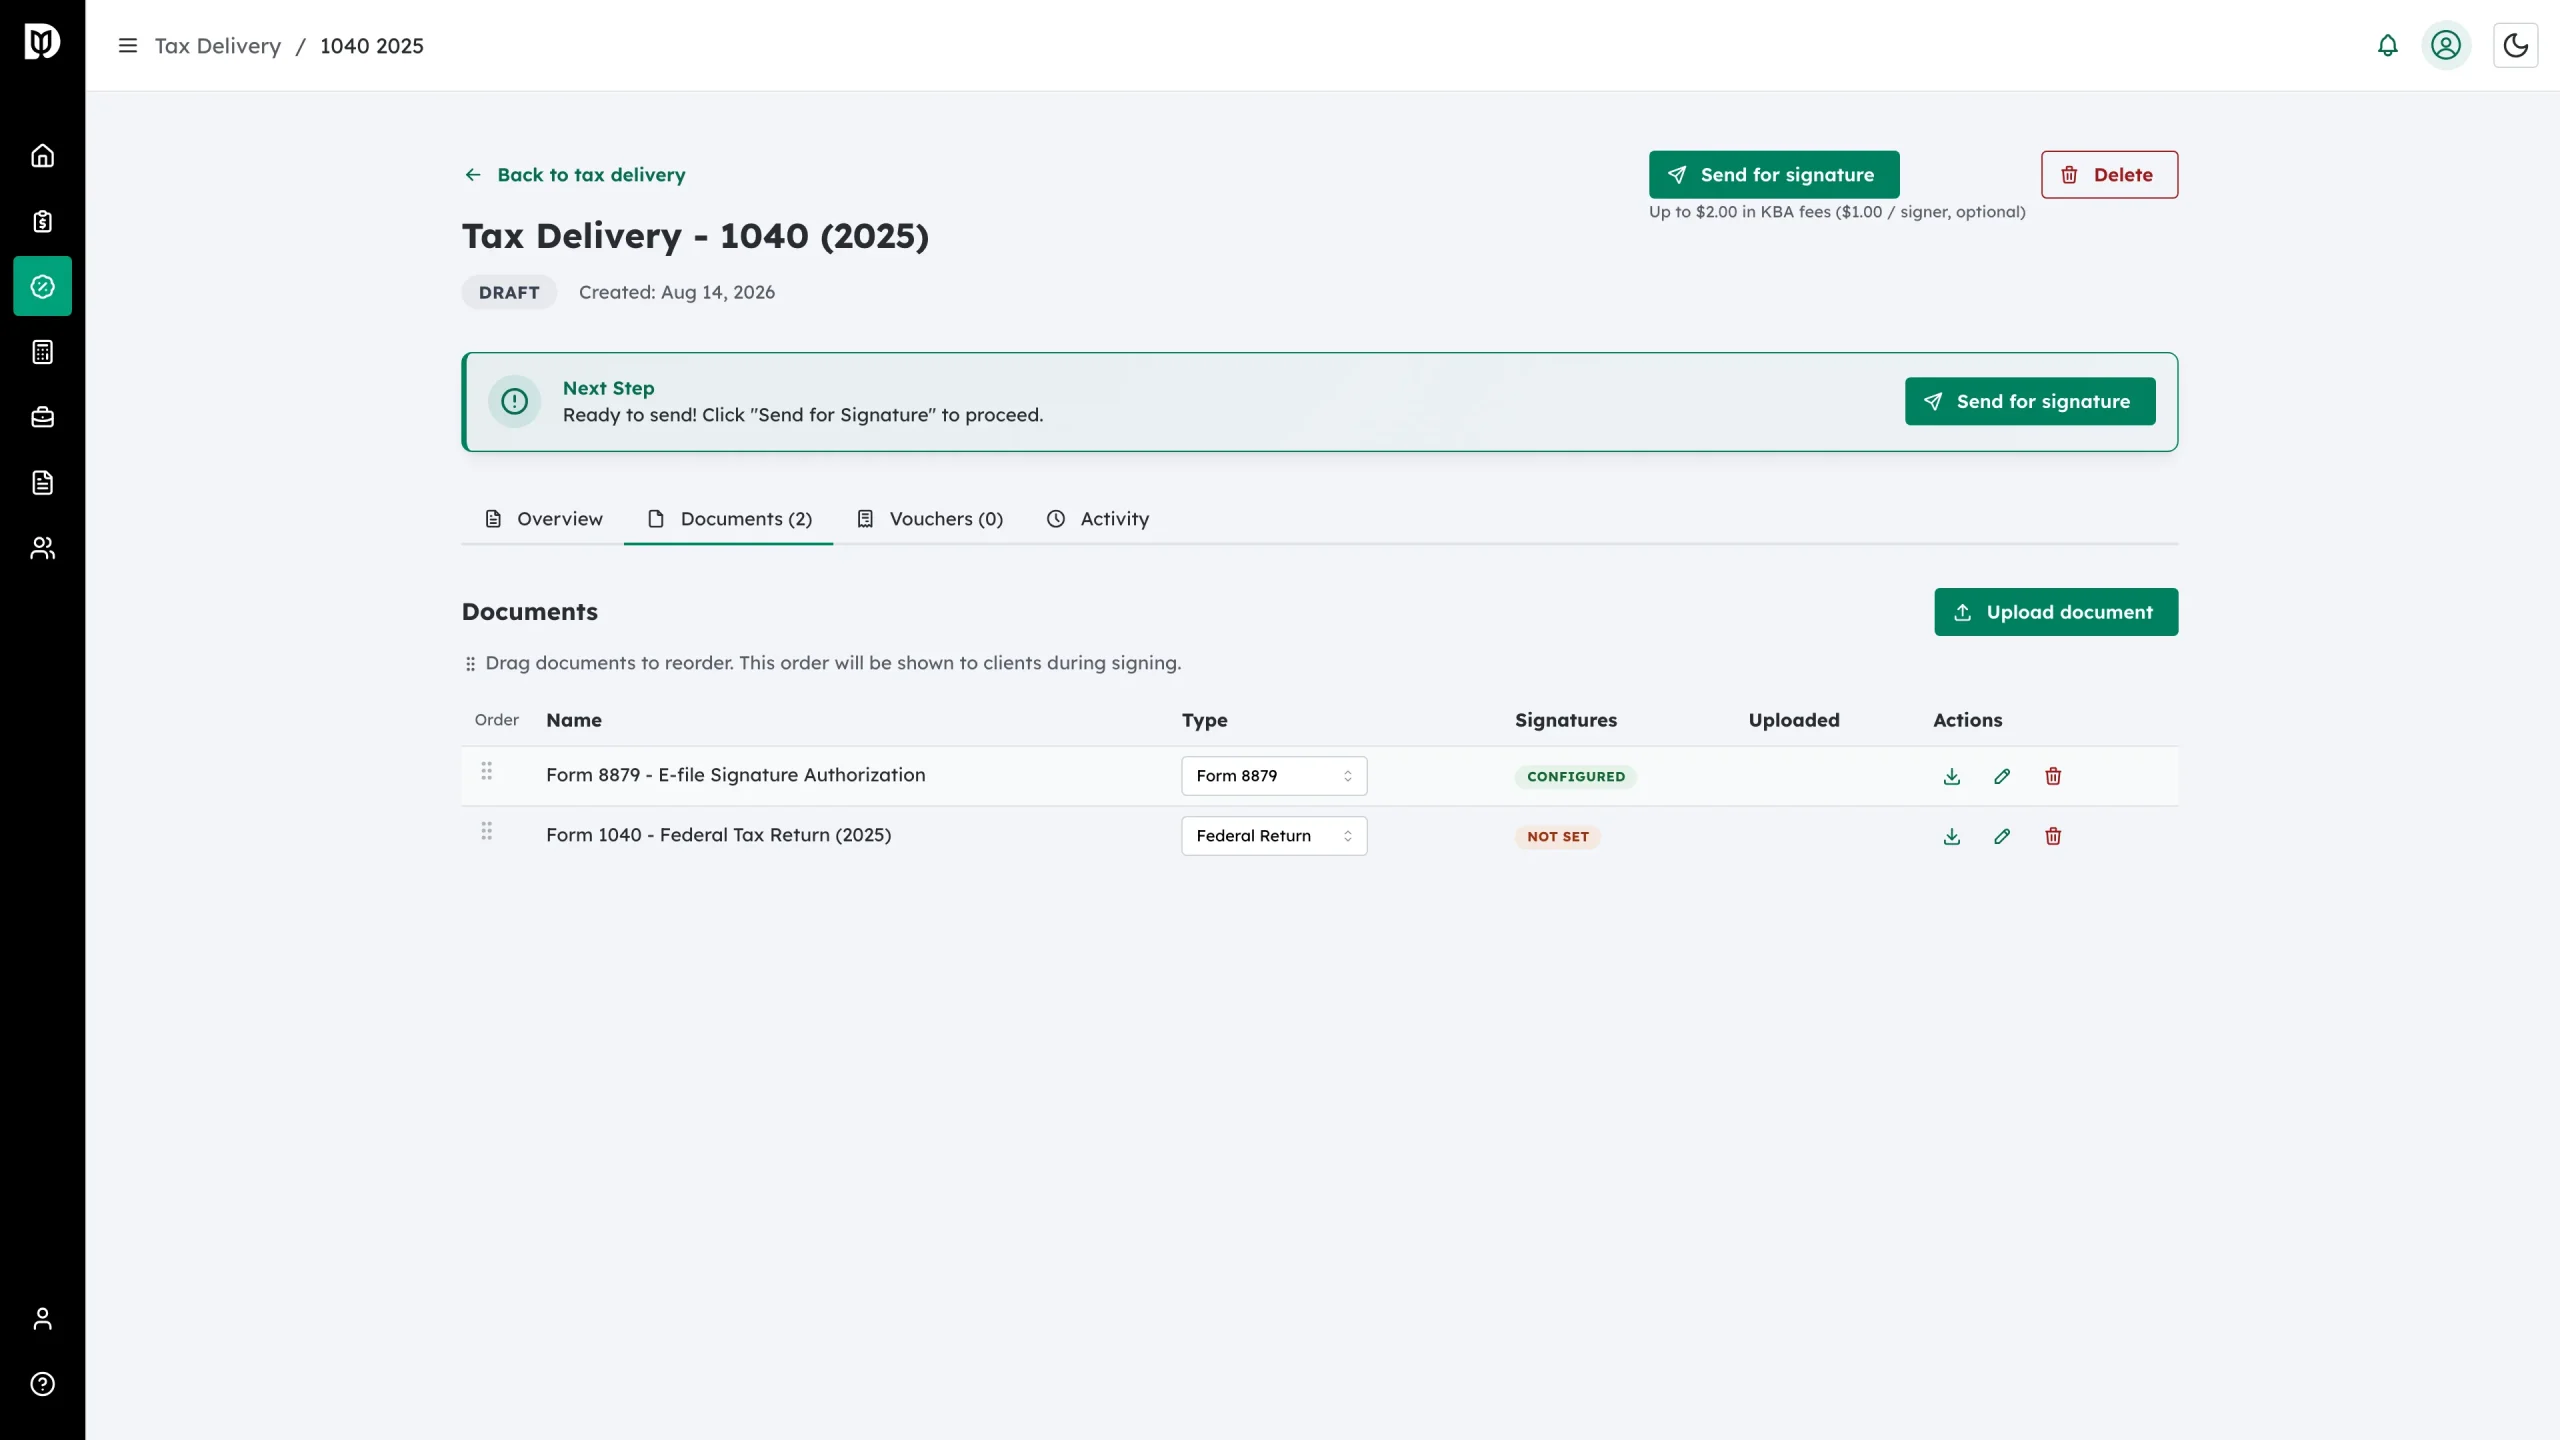
Go to the Documents tab and click the pencil icon in the Actions column of the PDF you want to set up. Its tooltip reads Configure signatures. You can also use the Configure Signatures button in the Next Step card.
Step 2: Get your bearings in the editor
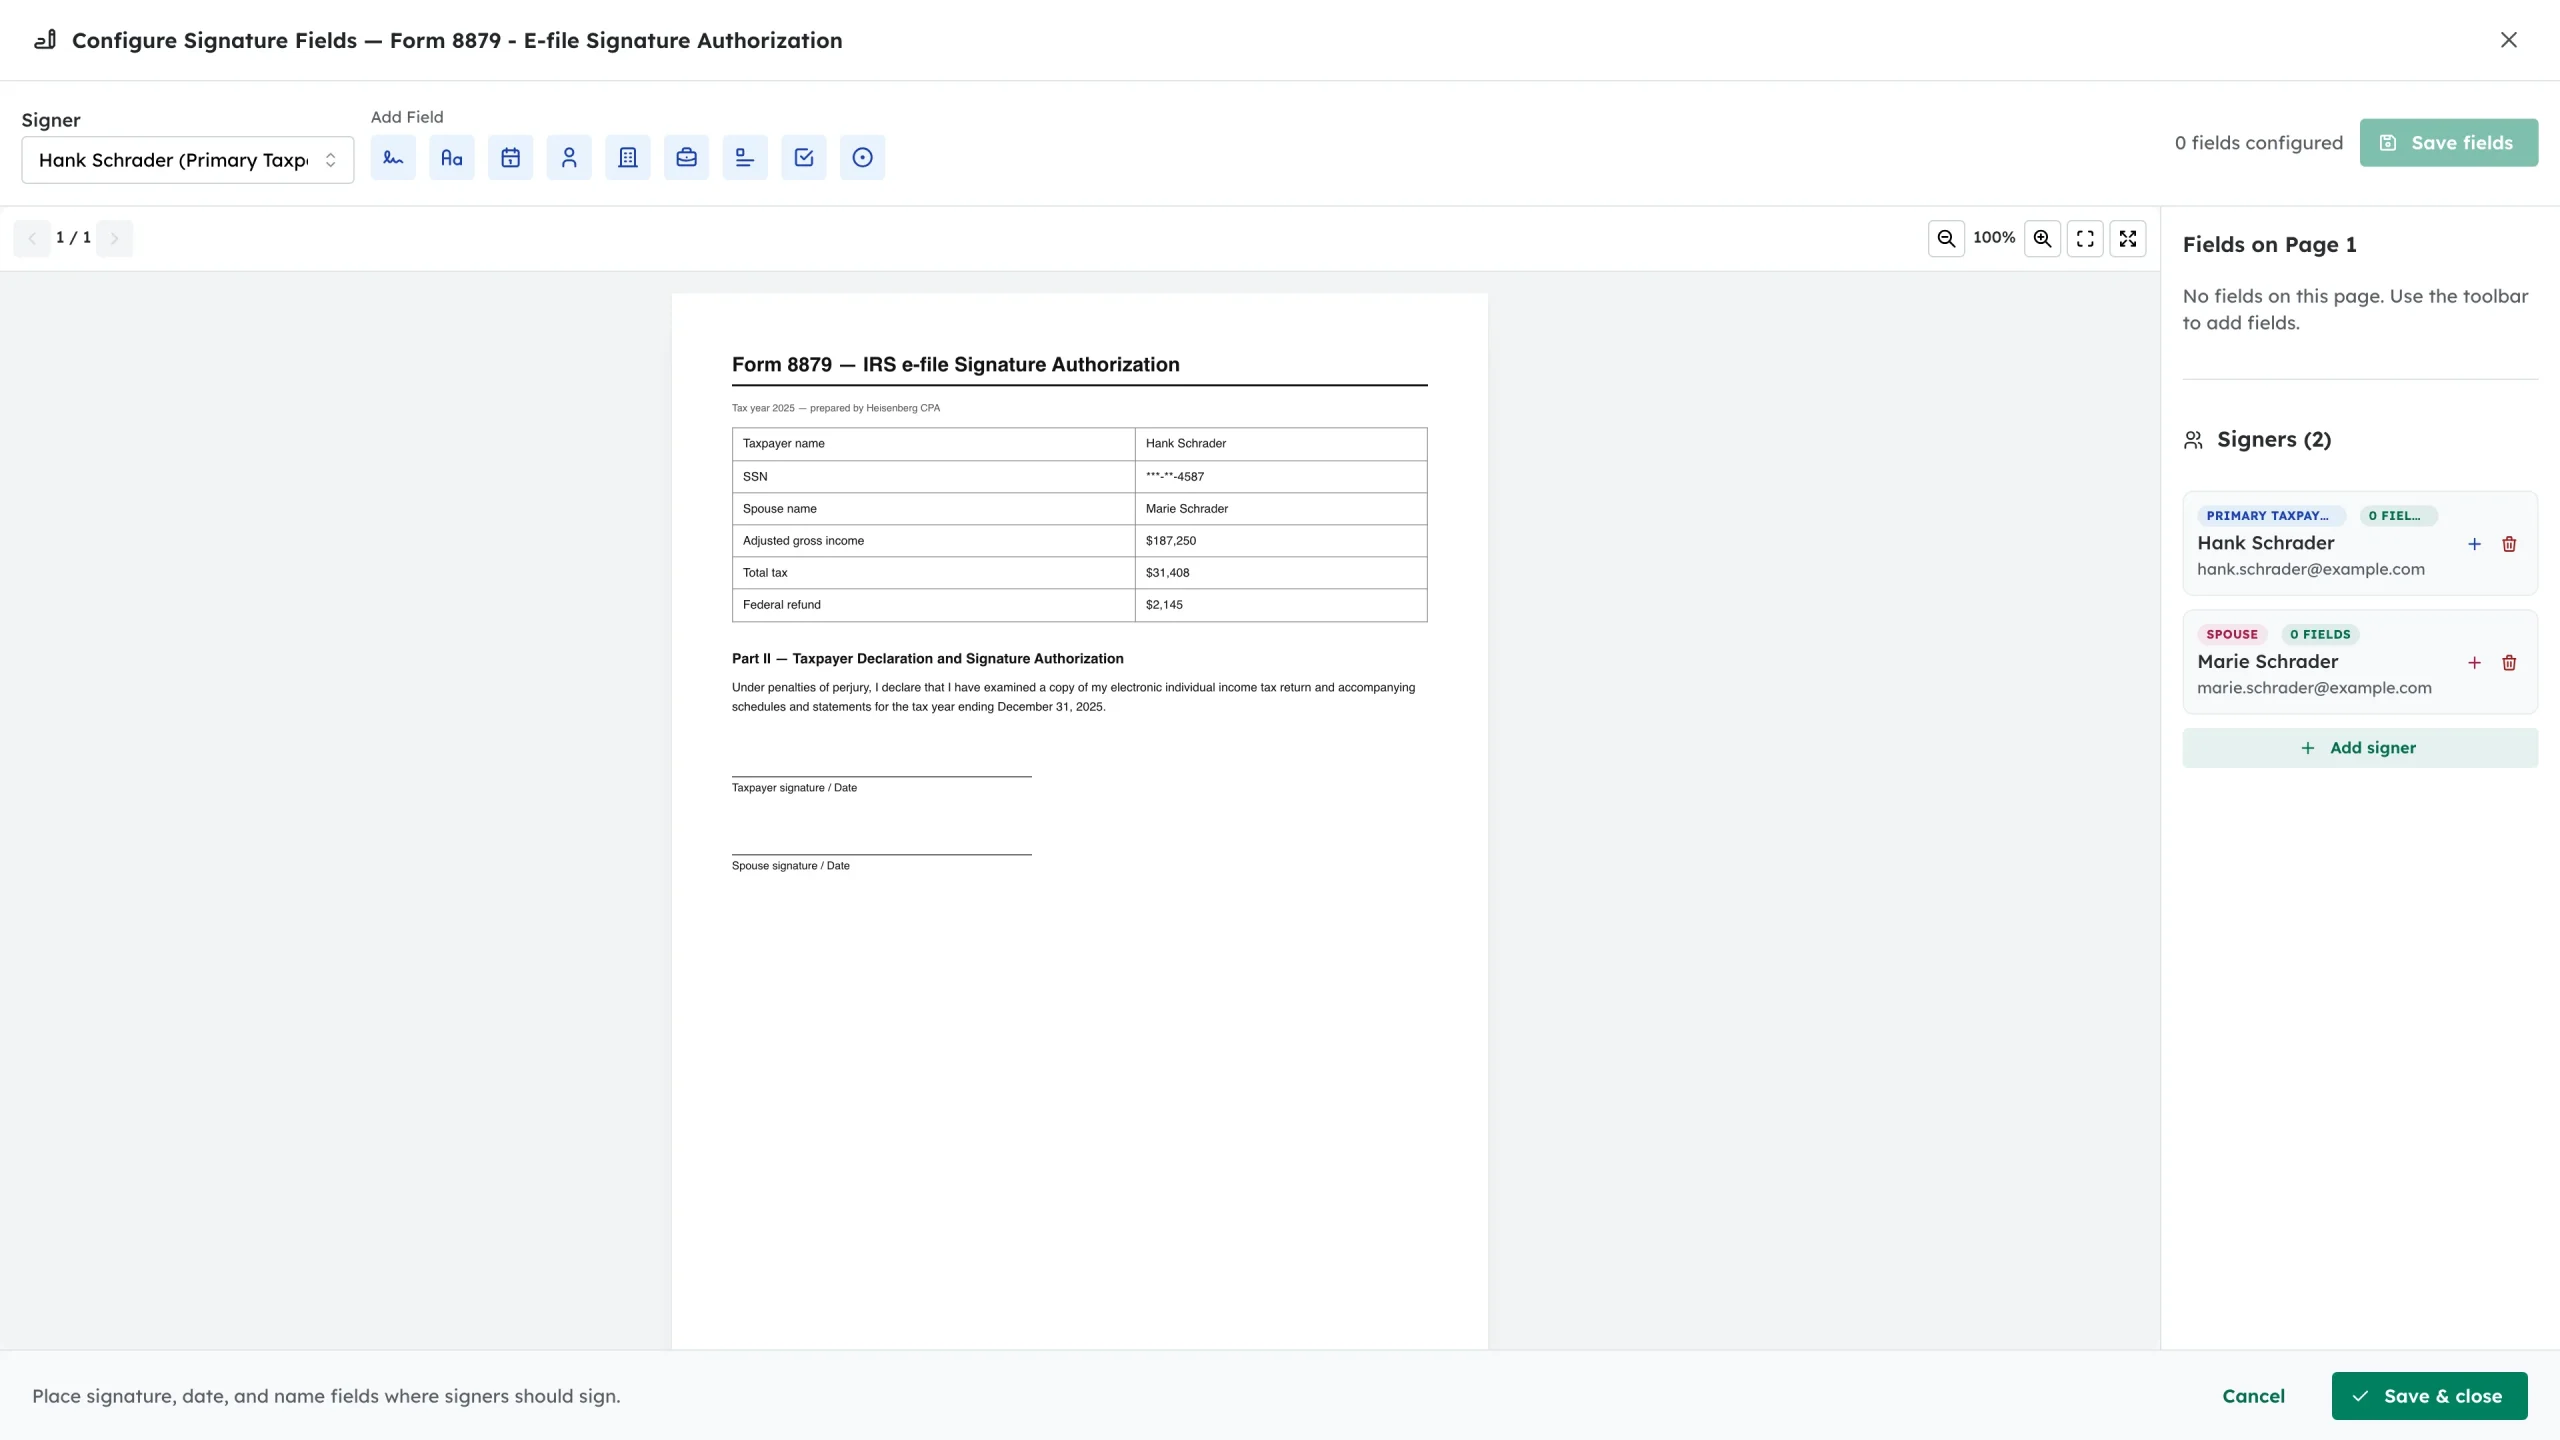
The editor opens full screen with the document in the middle. Along the top are the Signer selector, the Add Field toolbar and a live fields configured count. On the right, Fields on Page 1 lists what you have placed and Signers lists everyone who has to sign.
Step 3: Pick a signer, then drag fields onto the page
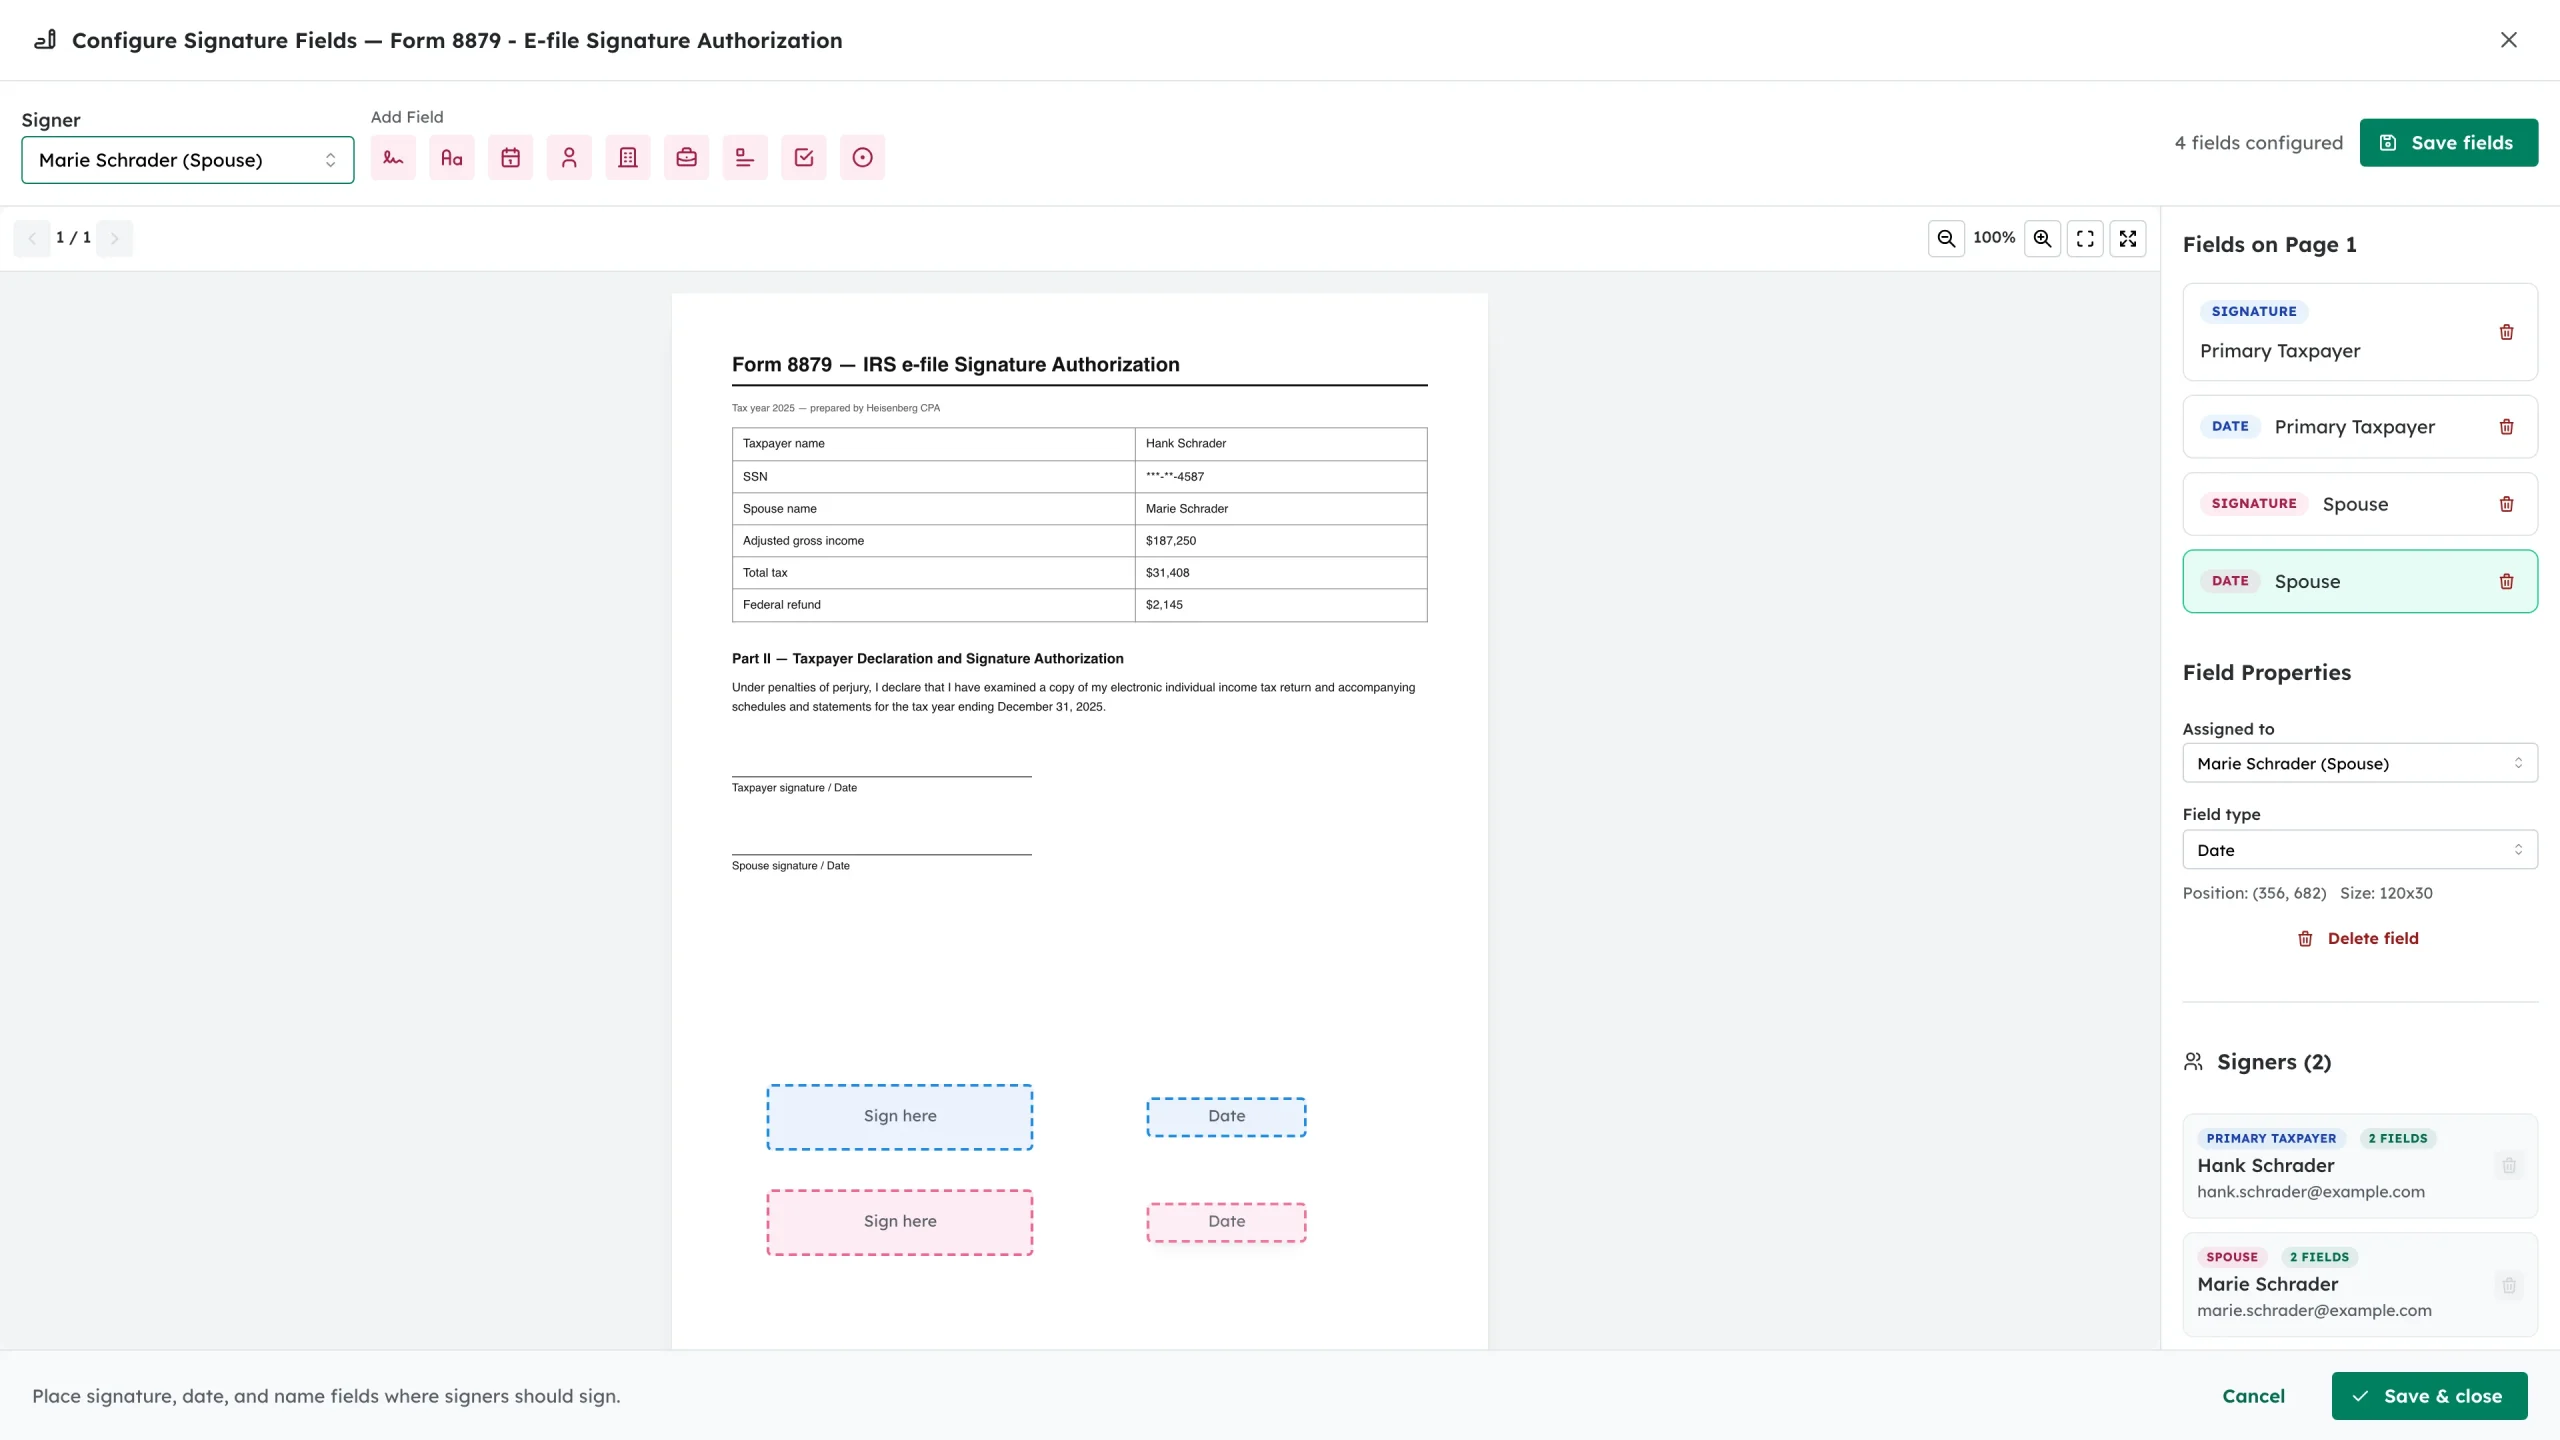
Choose a person in the Signer dropdown, then drag a field from the toolbar onto the document. Fields are colour-coded so you can tell each signer’s fields apart at a glance.
The toolbar offers nine field types: Signature, Initials, Date, Print name, Company, Title, Text, Checkbox and Radio button.
Click any placed field to open Field Properties, where you can change who it is Assigned to, change the Field type, or delete it. Repeat for each signer.
Step 4: Save your layout
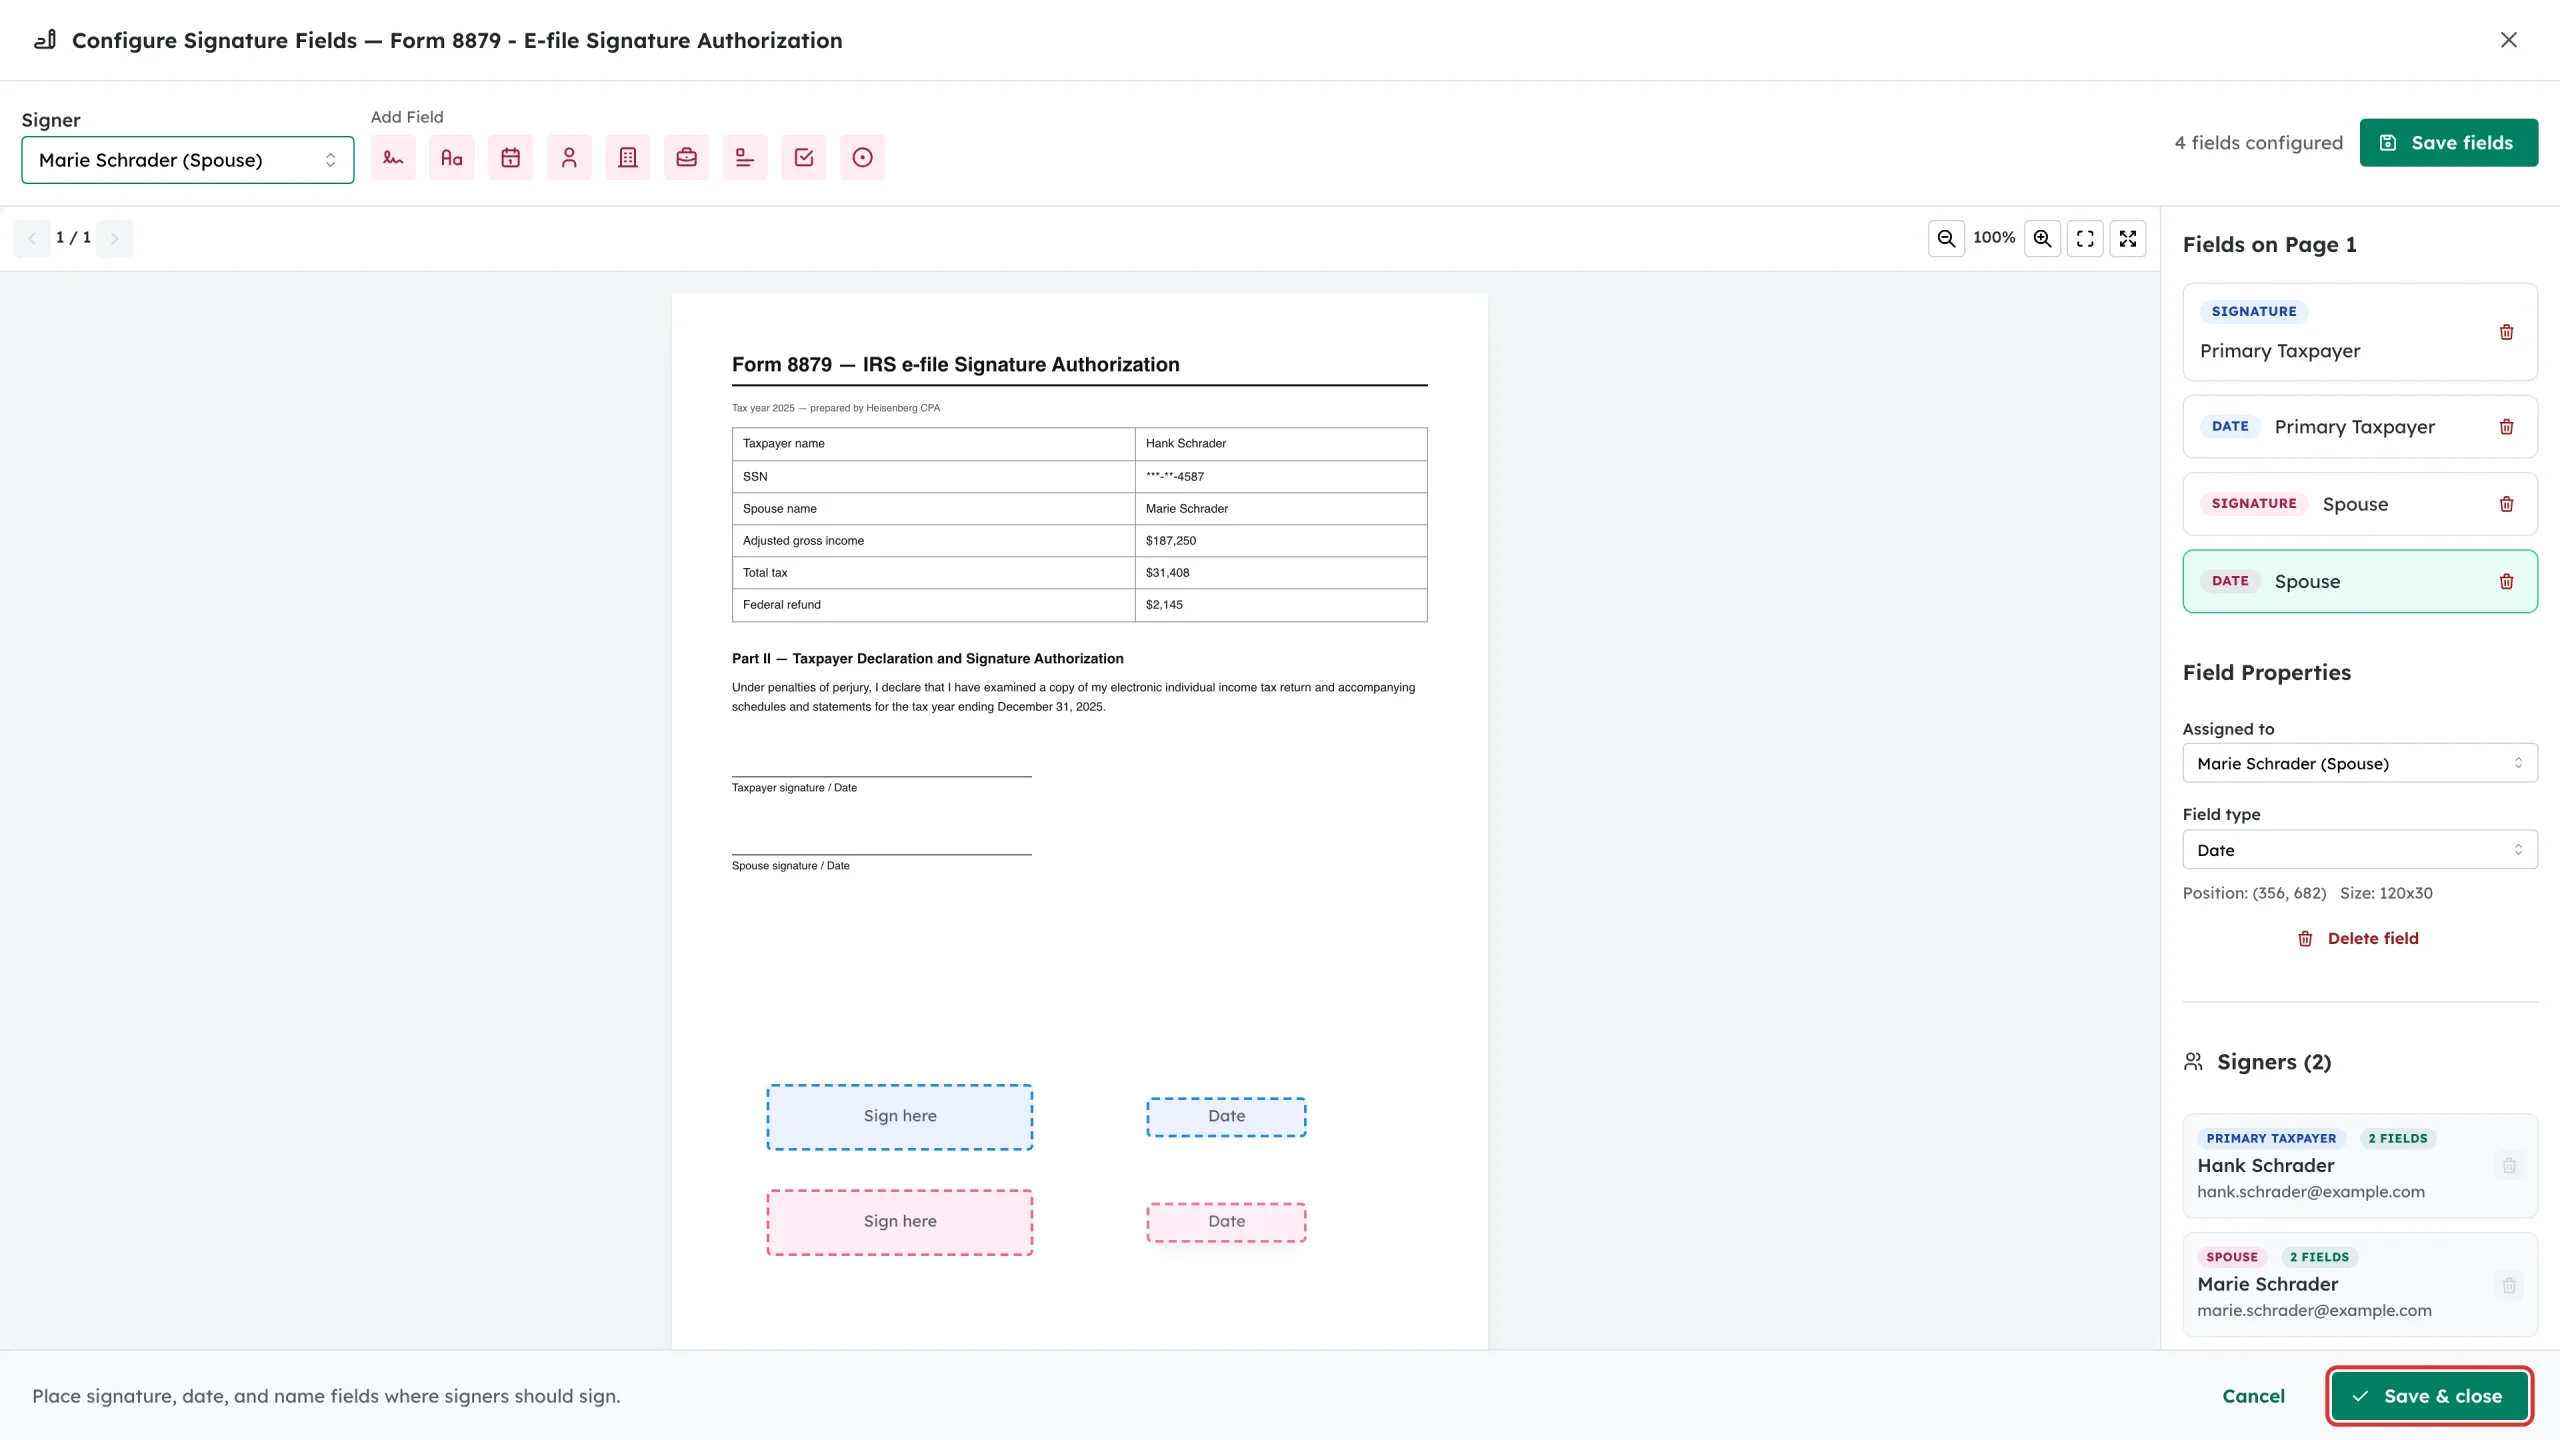
Click Save fields to save without leaving, or Save & close to save and return to the tax delivery.
What happens next
The document’s Signatures column changes from Not set to a green Configured badge, and the Next Step card moves on to “Ready to send!”.
Troubleshooting
- No pencil icon on the row: Only PDFs can take signature fields, and only while the return is a draft.
- The counter still says 0 fields configured: Drag at least one field onto the page. An empty layout will not let the return go out.
- A signer is missing from the dropdown: Add them with Add signer on the Overview tab, or use Add signer in the editor’s Signers panel.