Who this is for: Clients who have been emailed a link to sign their tax return.
What you’ll learn: How to confirm who you are, review your documents, and add your signature.
Before you begin
- You need the email from your accountant with your signing link. The link is personal to you.
- Have your Social Security Number, date of birth and current address ready.
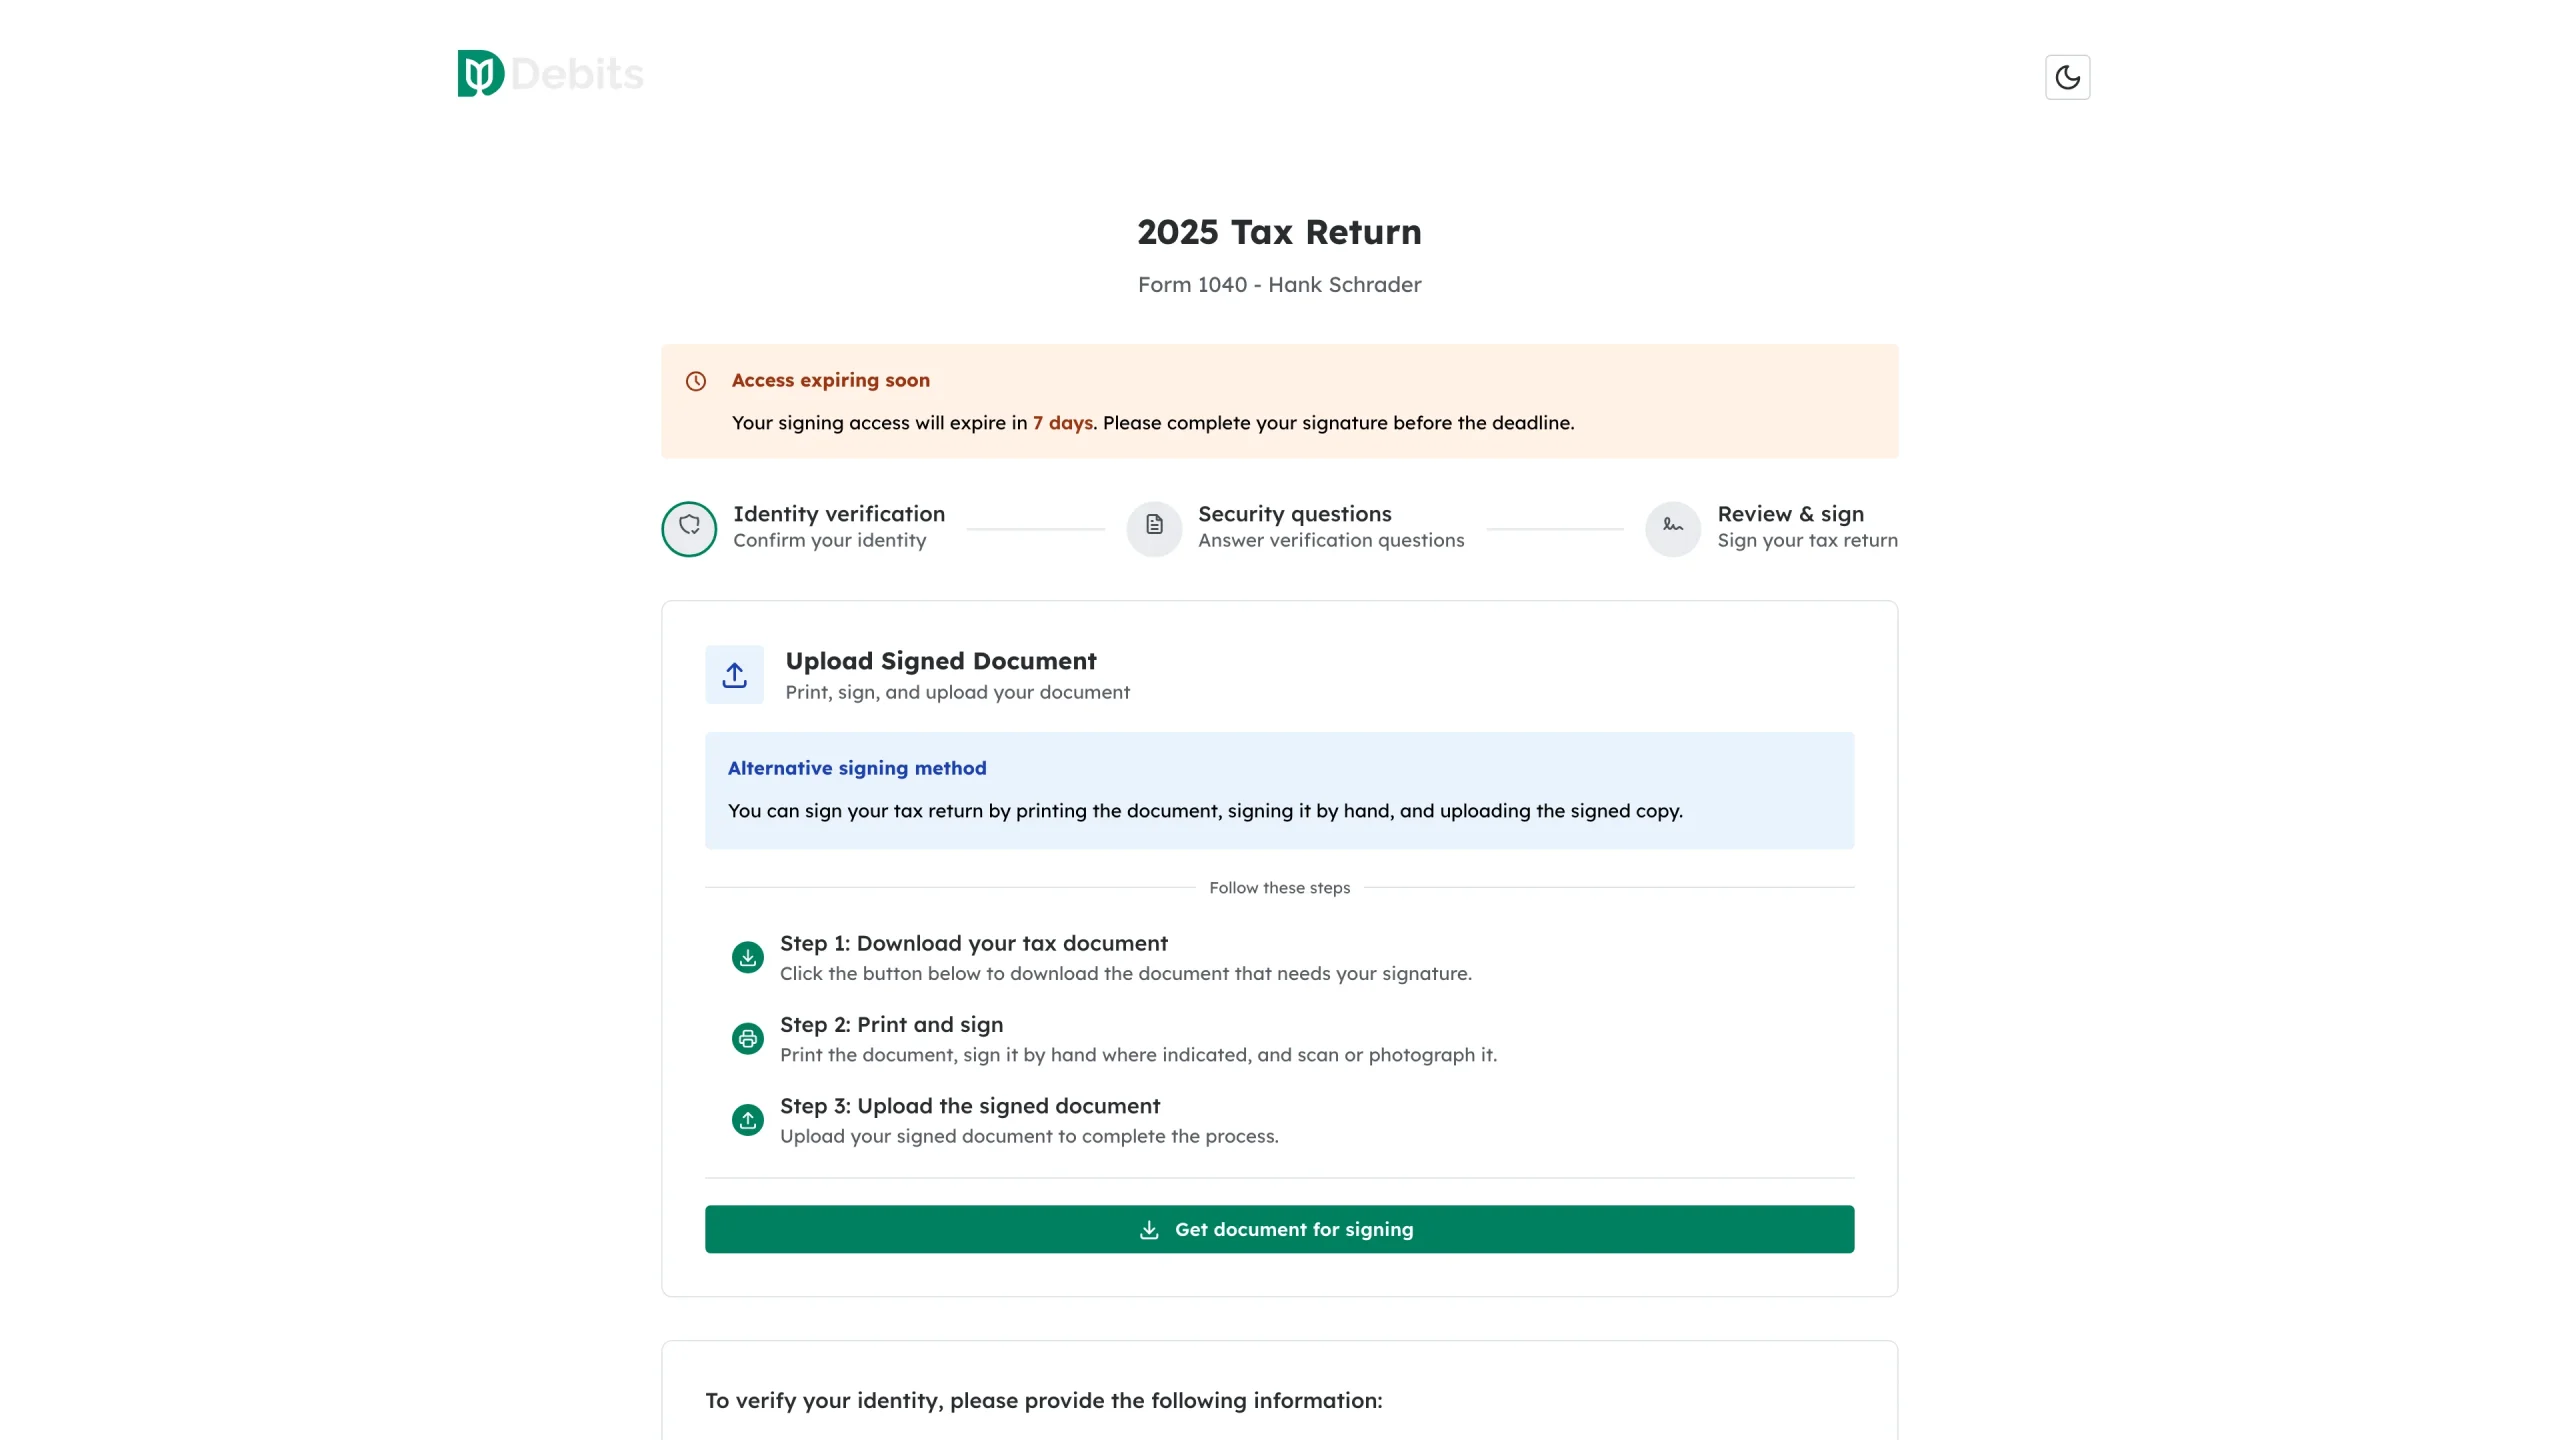
- Links expire. A banner at the top of the page tells you how long you have left.
- If your accountant has asked for payment first, a card at the top of the page shows the invoice and a Pay button. Documents held for payment cannot be signed or downloaded until the invoice is paid; you can still sign anything that is not held.
Step-by-step instructions
Step 1: Open your link
Click the link in the email. The page shows your tax year, your form type and your name, then the three stages ahead: Identity verification, Security questions and Review & sign.
Step 2: Confirm who you are
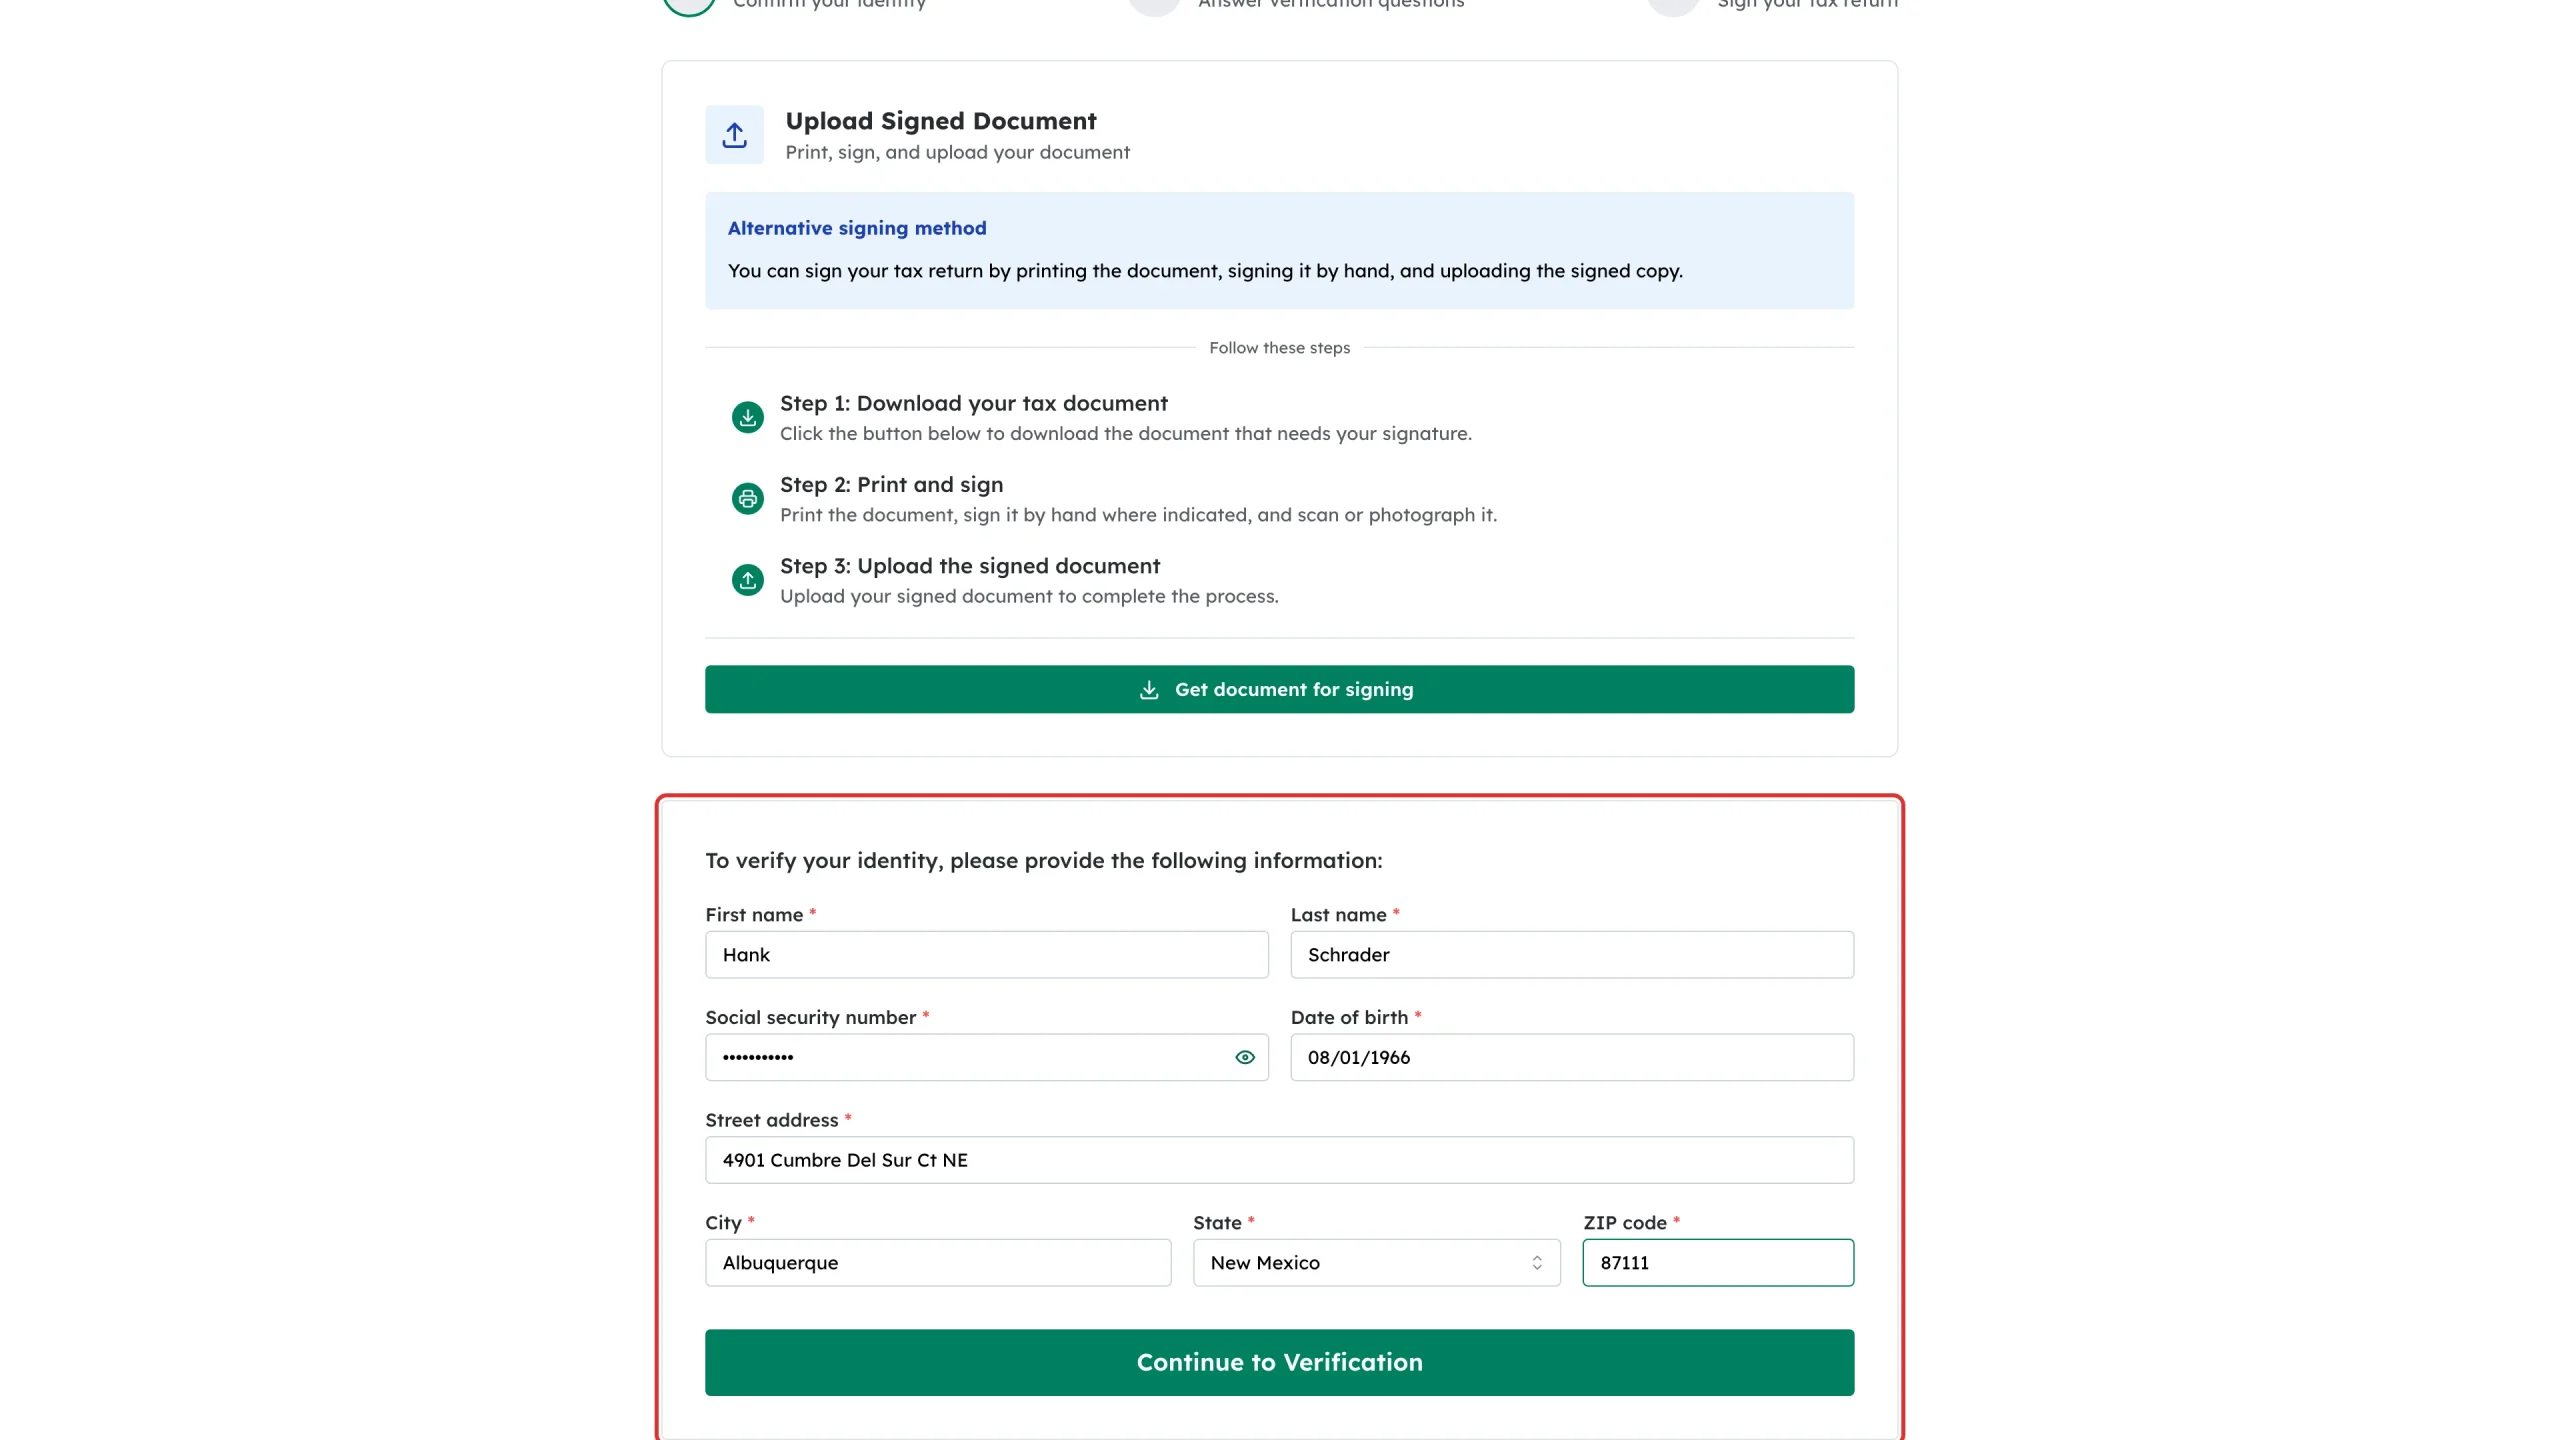
Fill in the identity form: your first and last name, Social Security Number, date of birth, and your street address, city, state and ZIP code.
Use the details that match your public records, not a new address you have just moved to – the questions in the next step are built from those records.
Step 3: Continue to verification
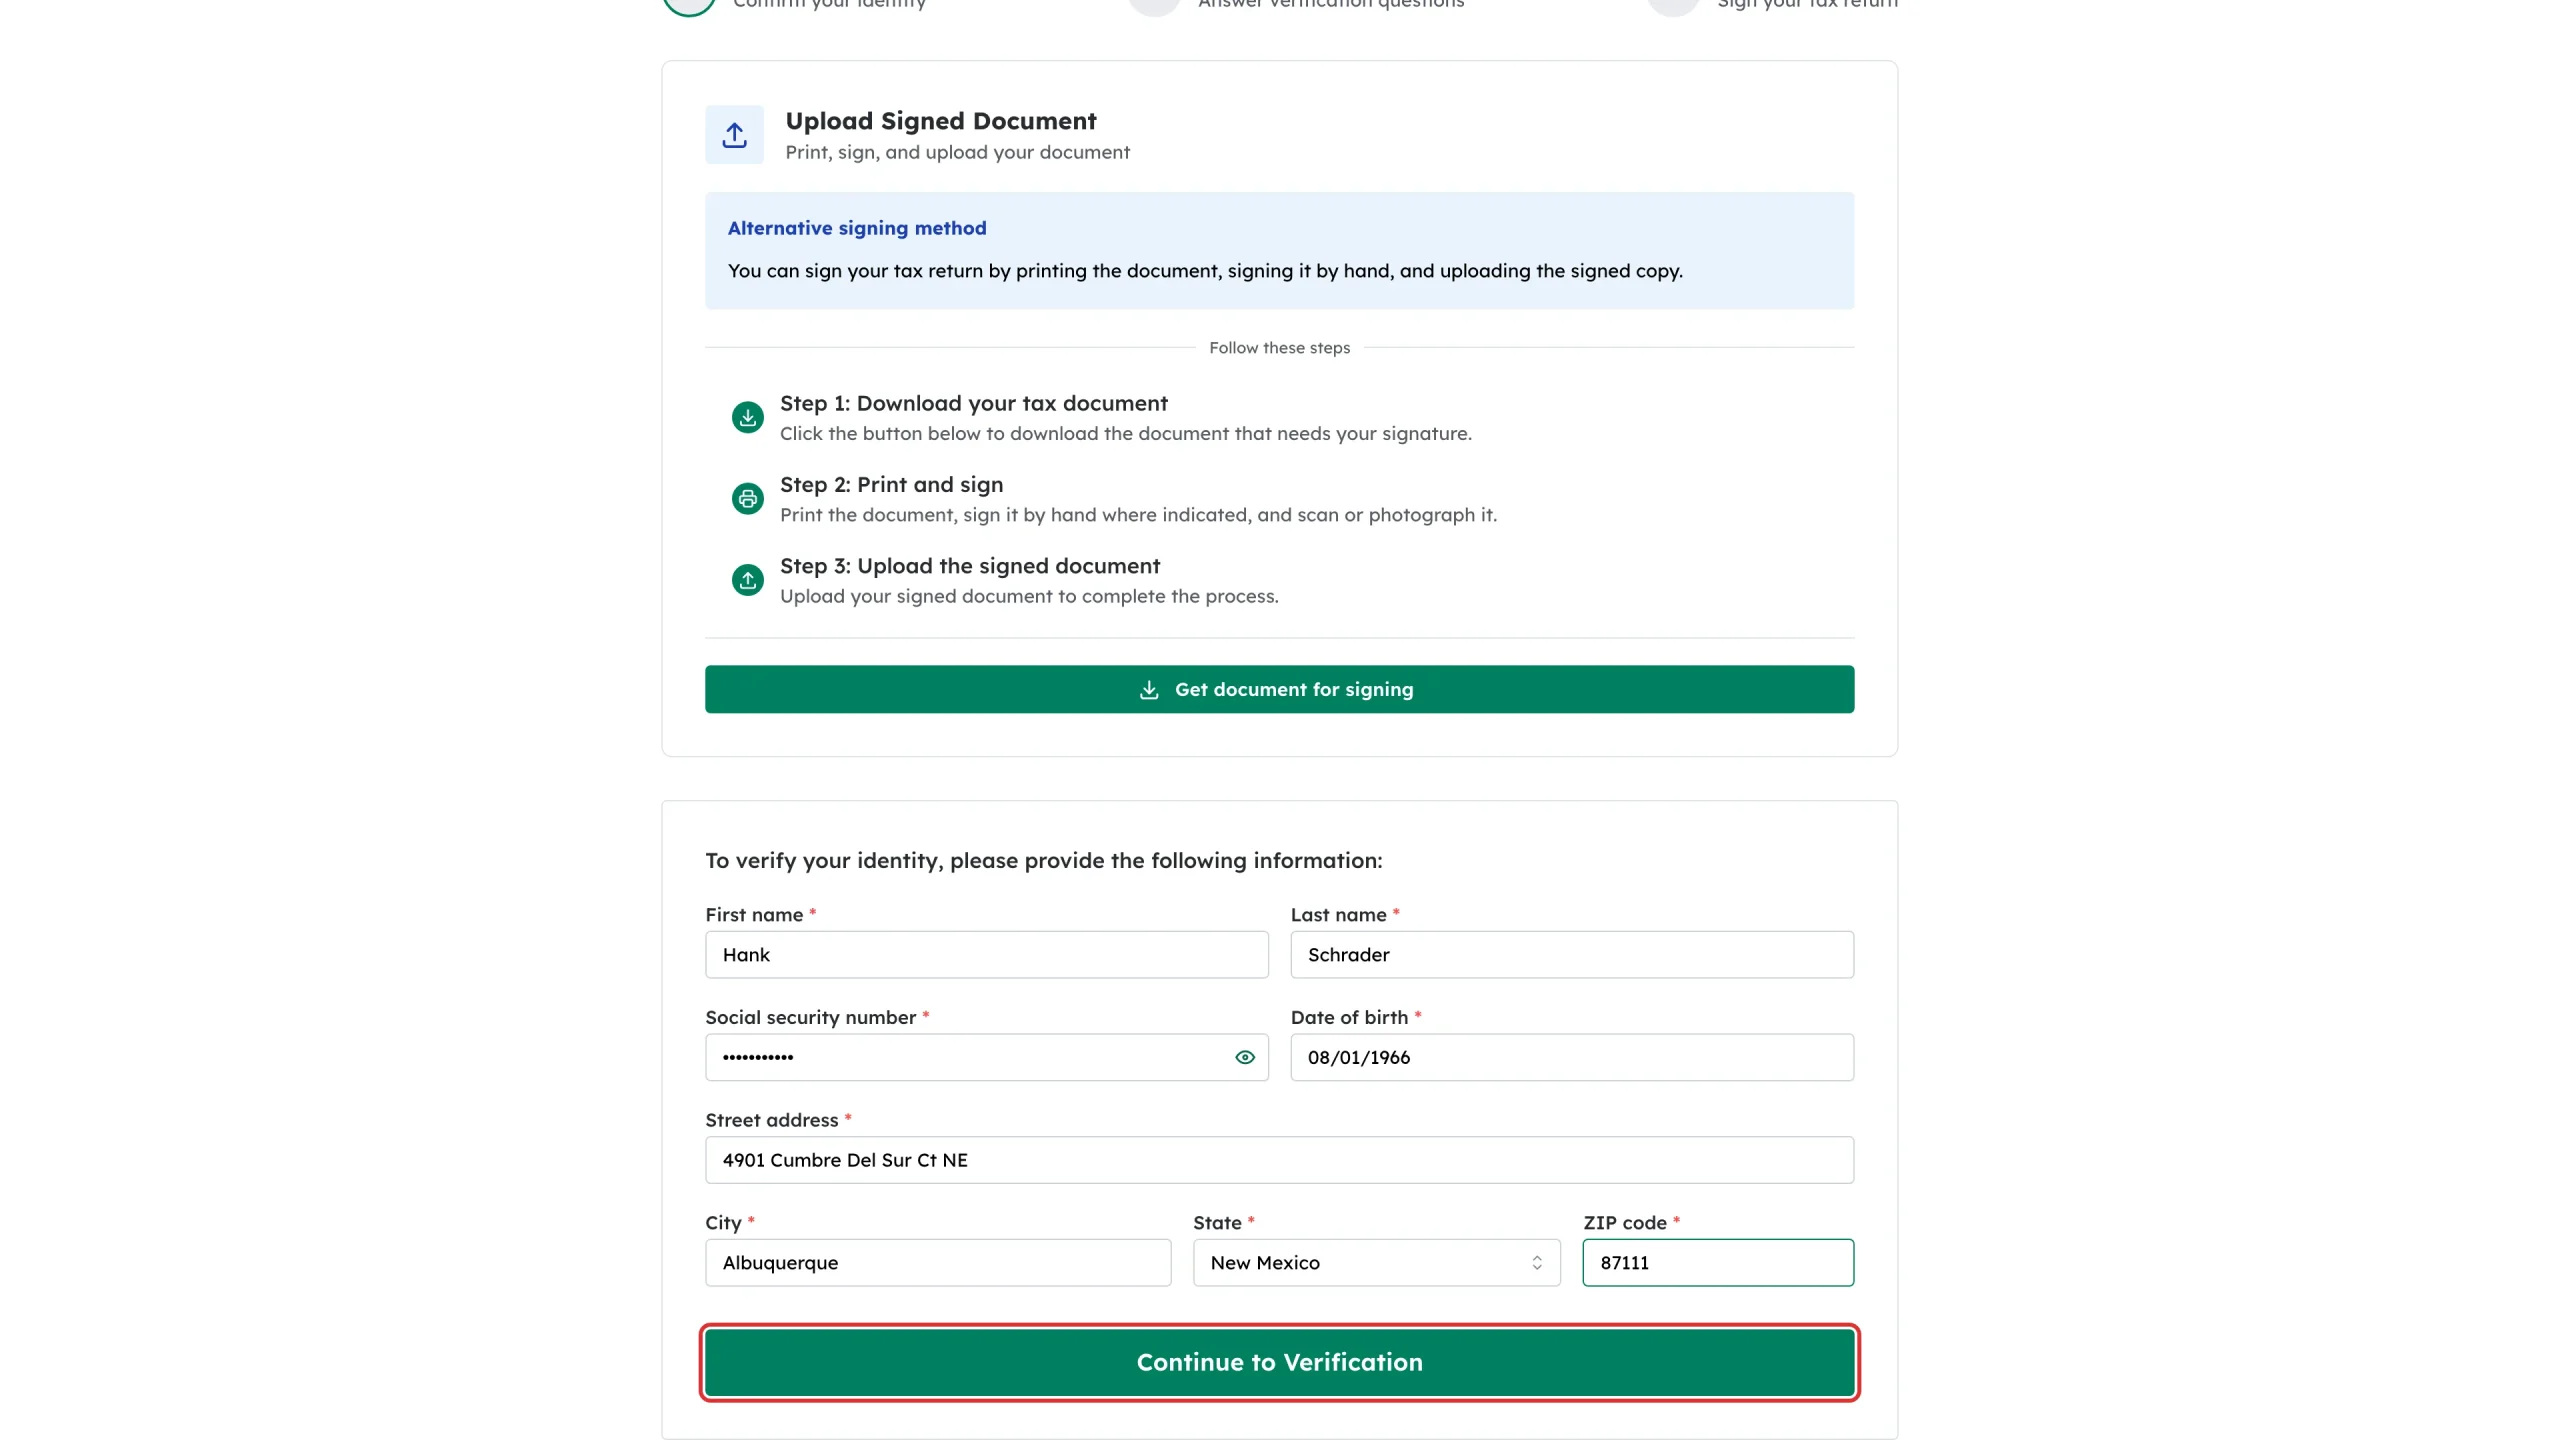
Click Continue to Verification.
Step 4: Answer the security questions
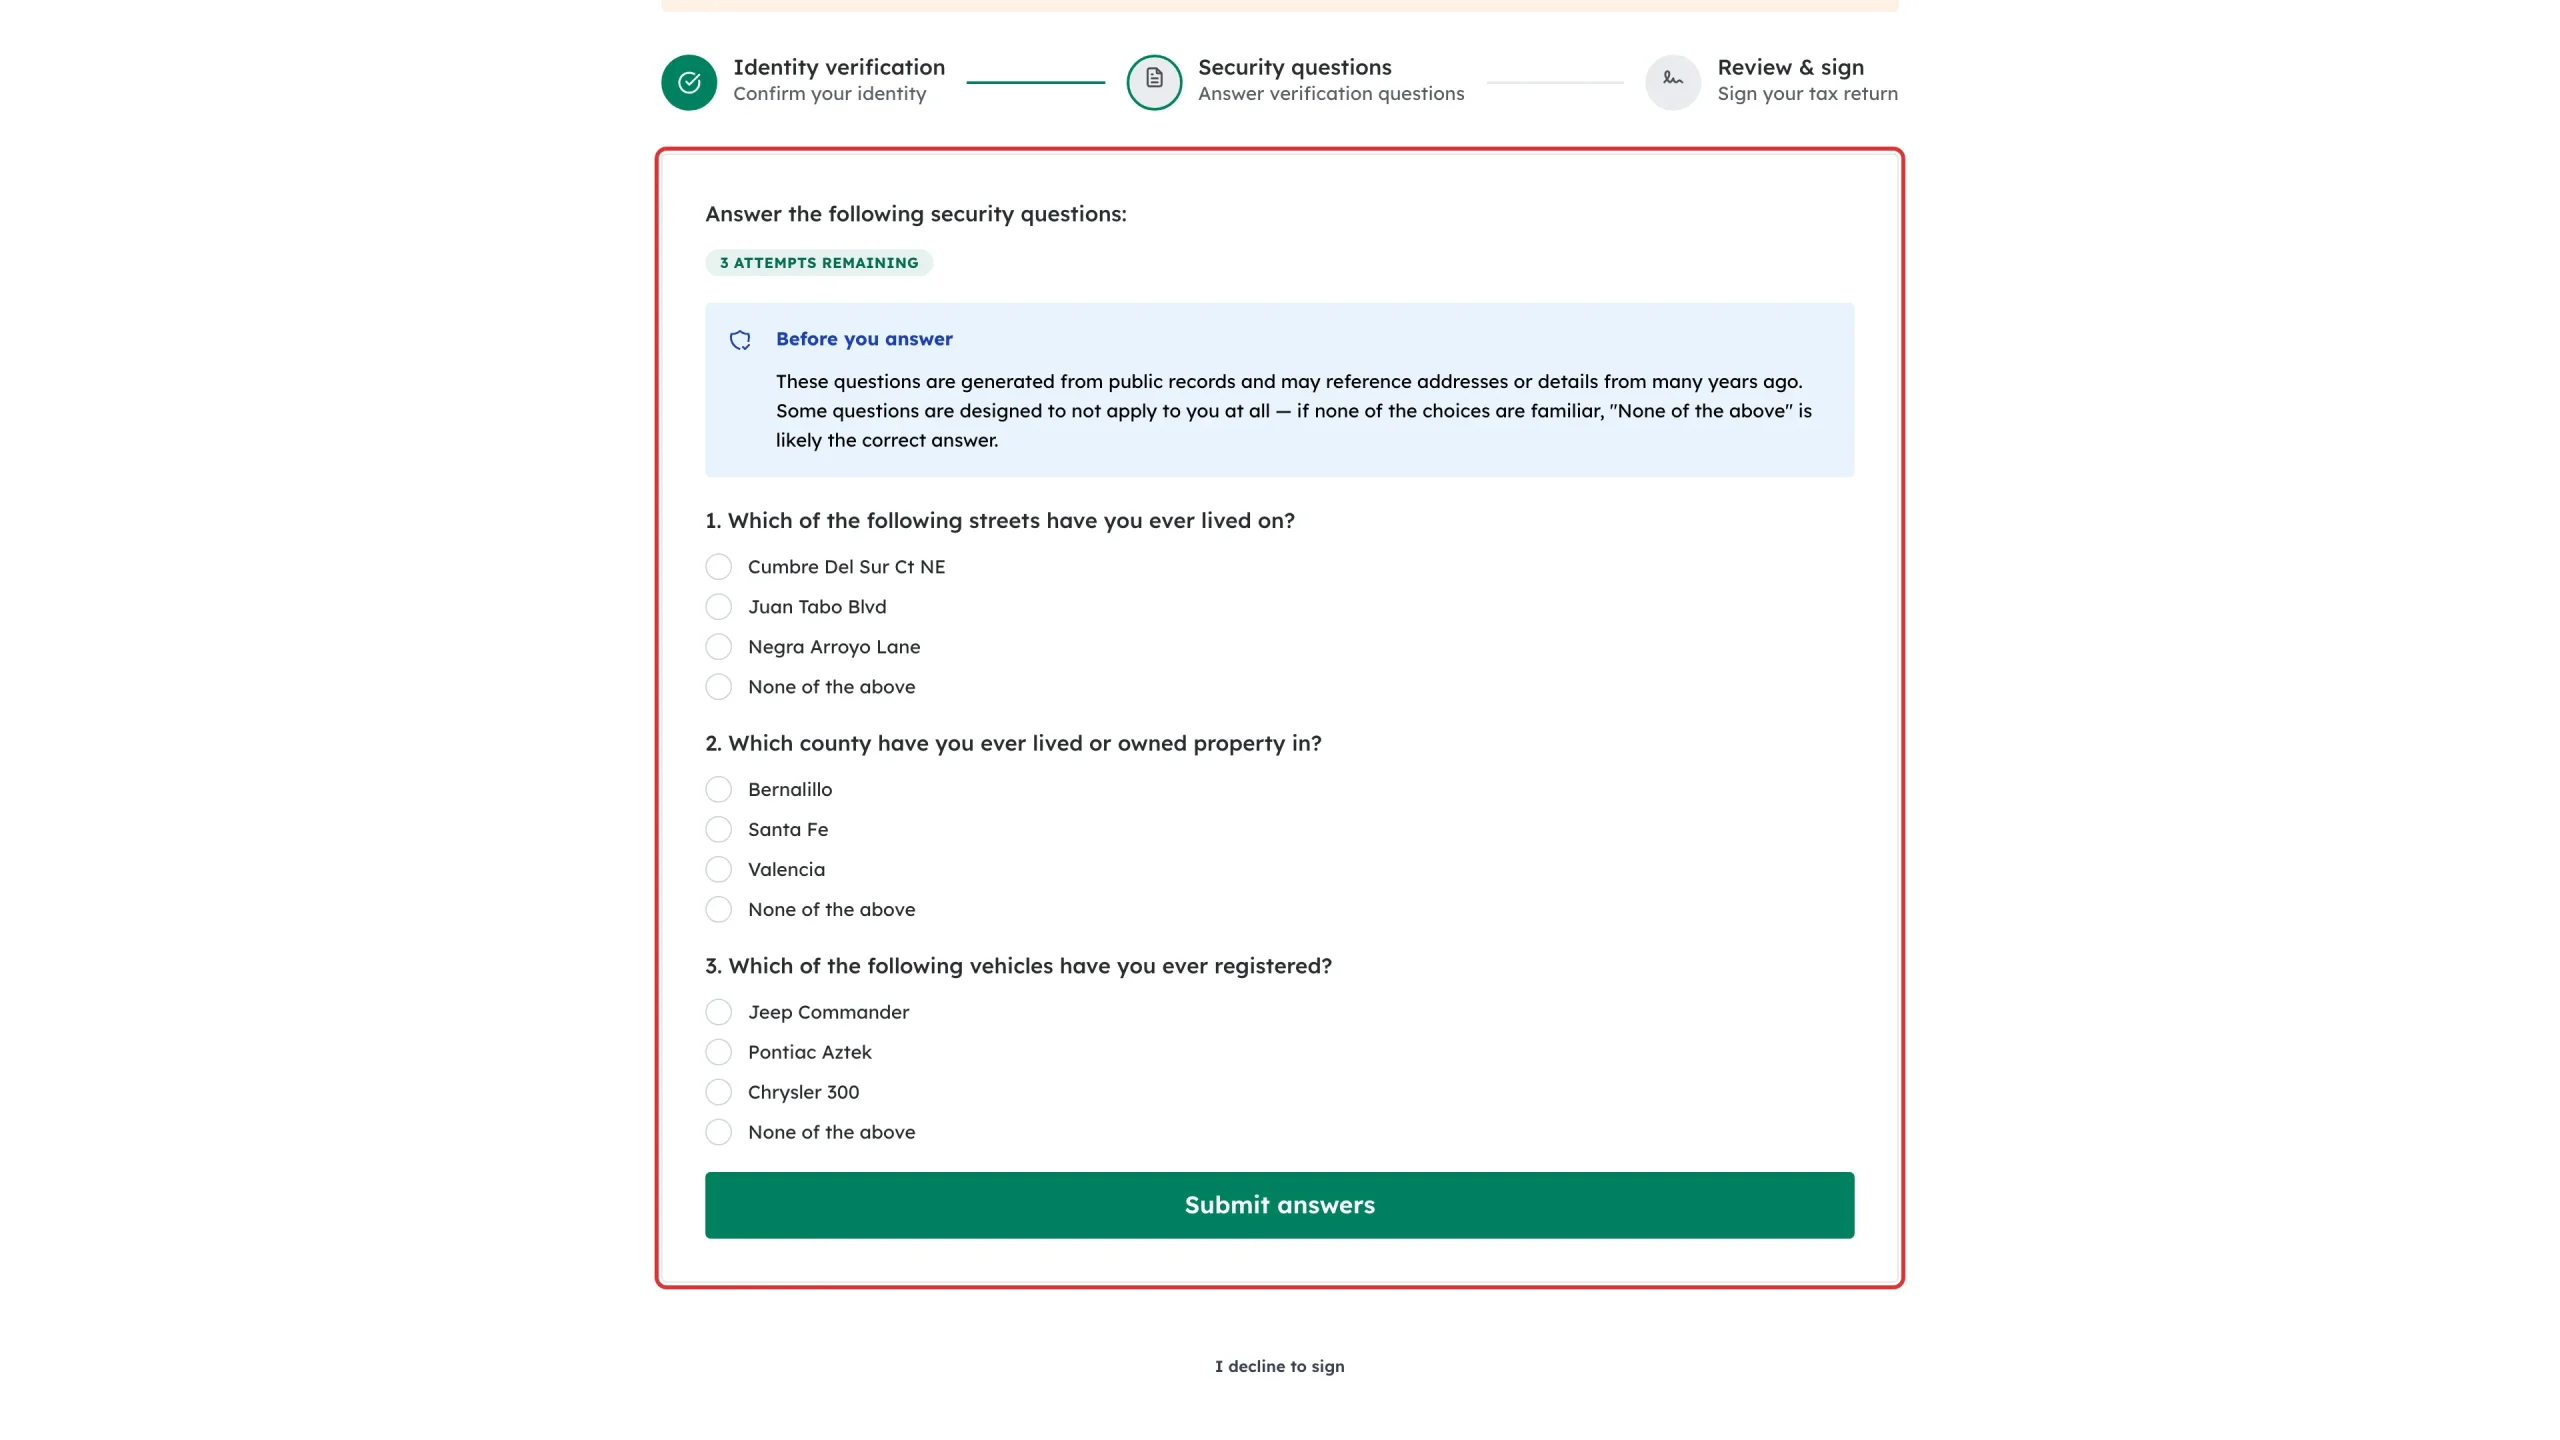
You get a short set of multiple-choice questions drawn from public records. A badge shows how many attempts you have left.
The questions can reach back many years, and some are designed not to apply to you at all – if none of the choices look familiar, None of the above is usually right. Pick an answer for each question, then click Submit answers.
If your accountant chose Regular E-Sign
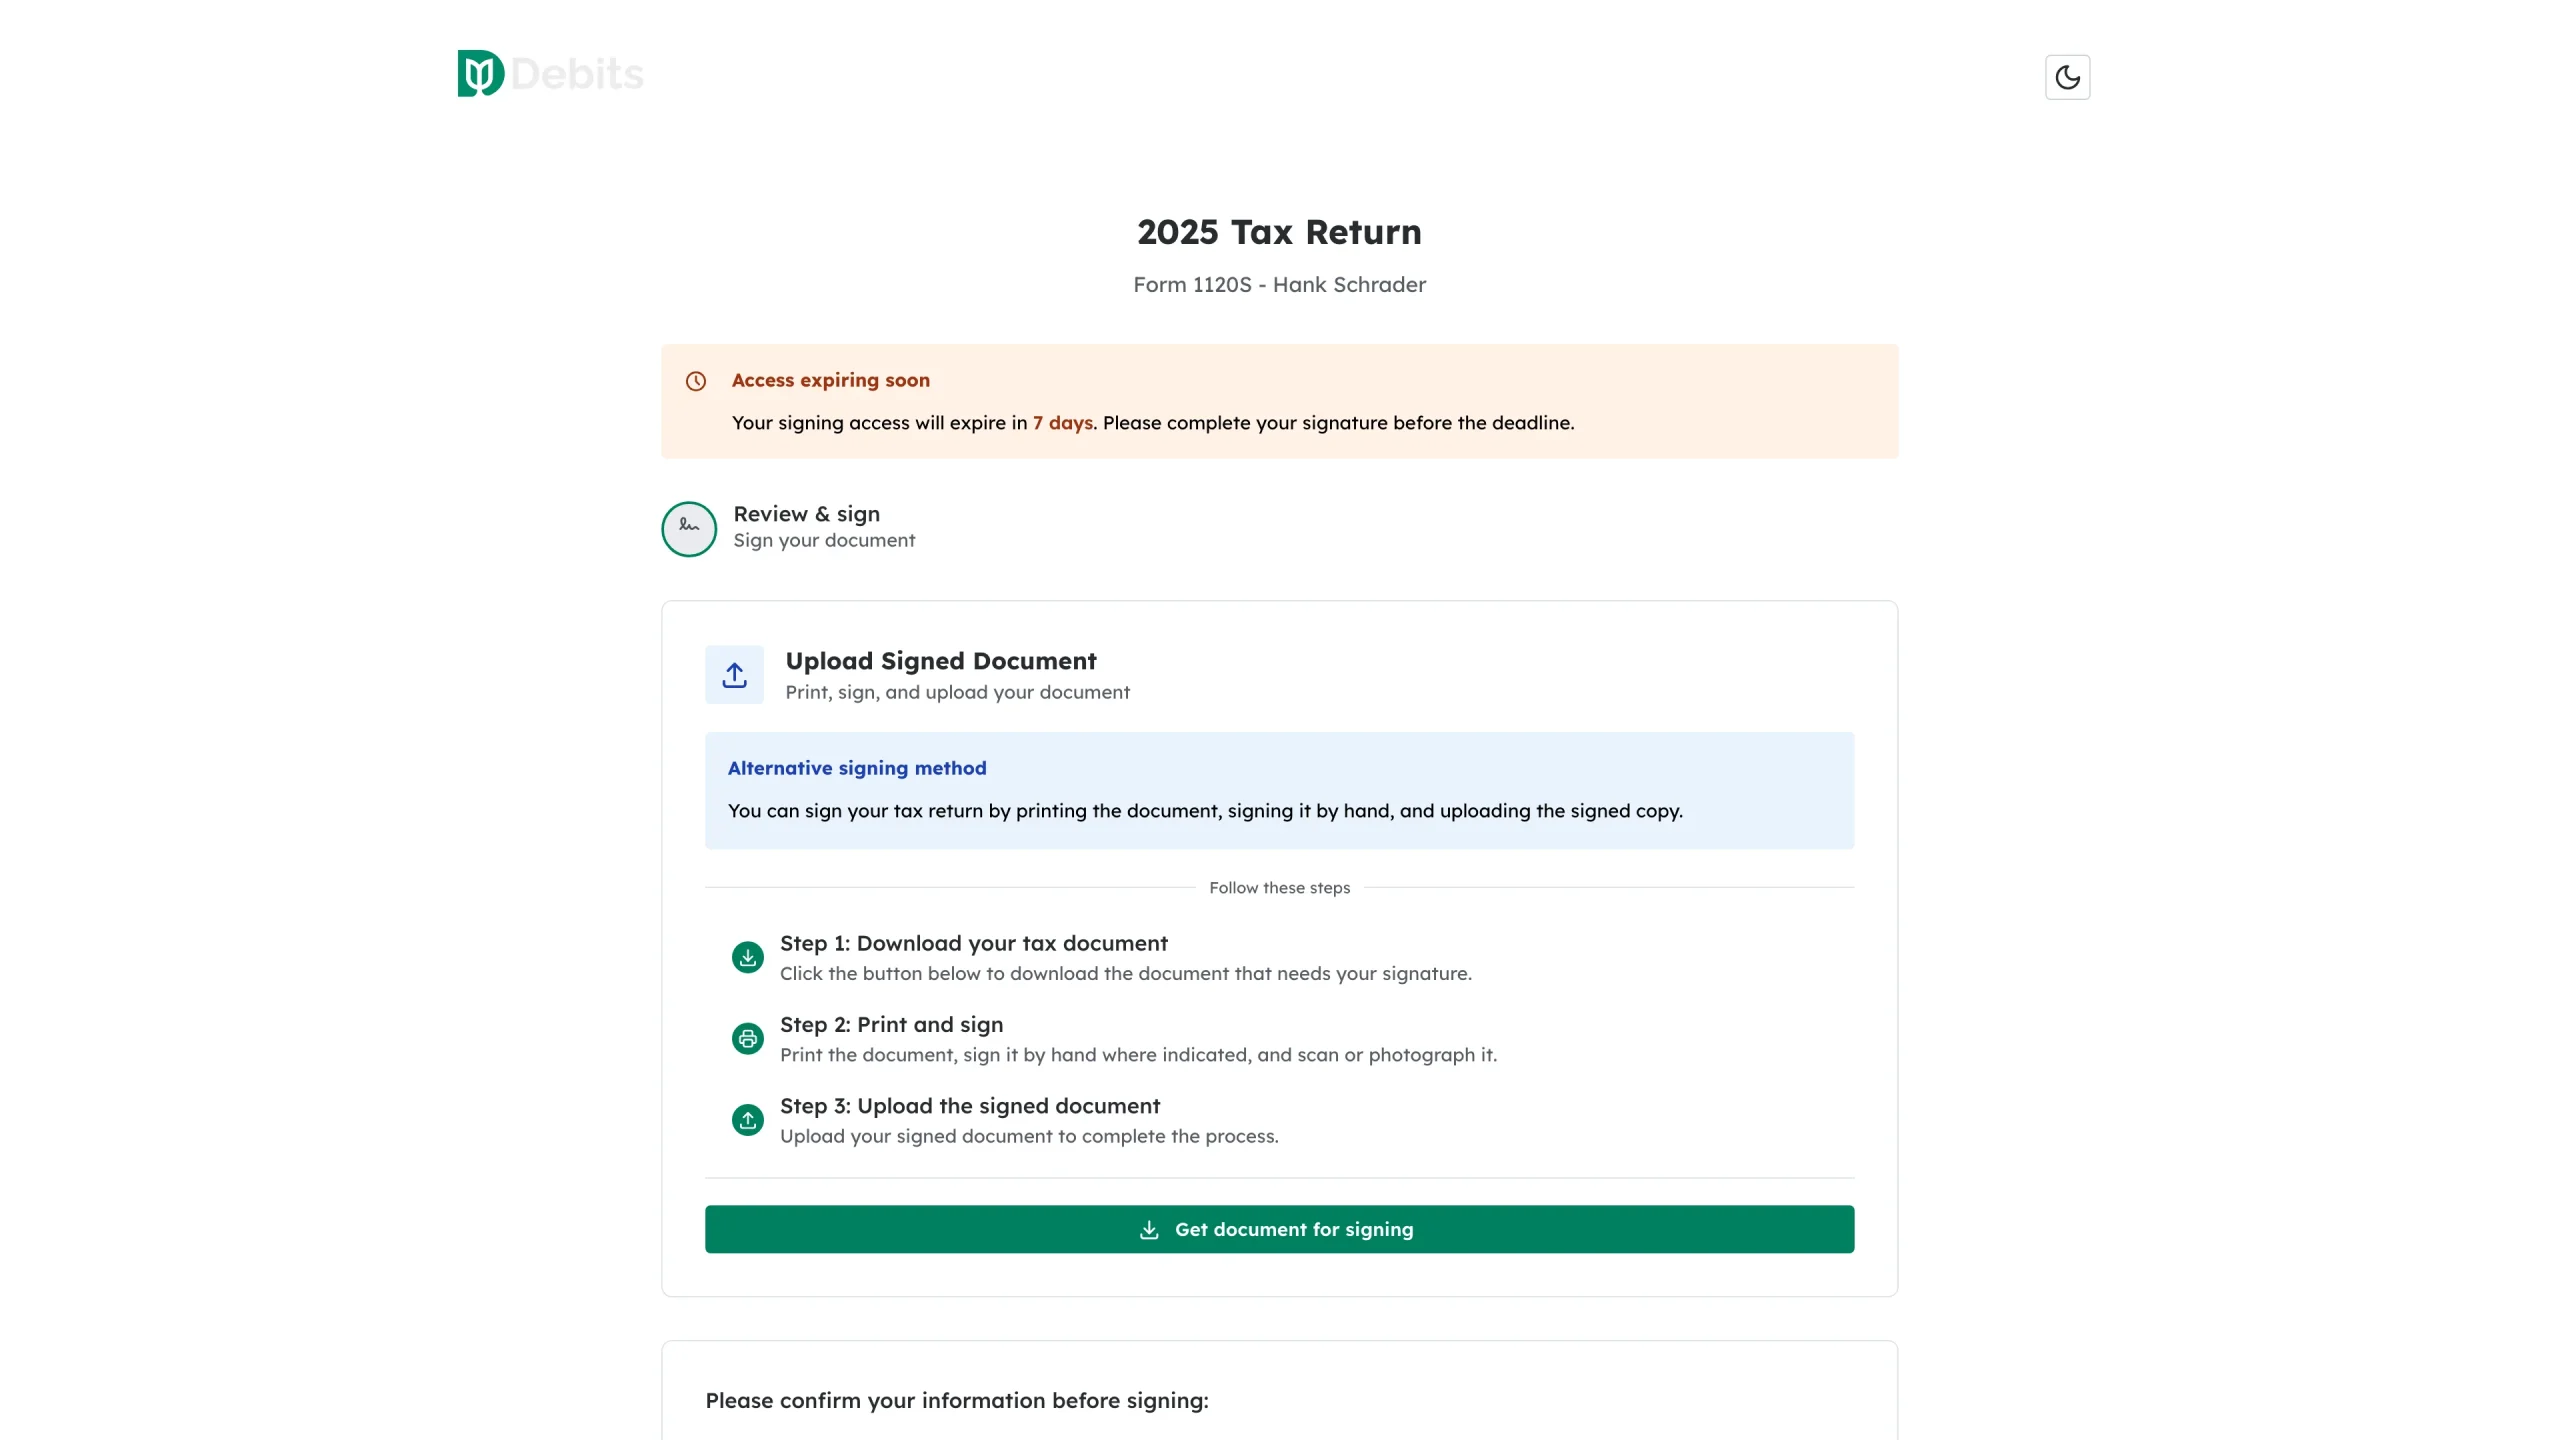
Some documents do not need identity checks. In that case you go straight to Review & sign, confirm your details, and sign. The Upload Signed Document option is available here too if you would rather print and sign by hand.
Step 5: Start signing
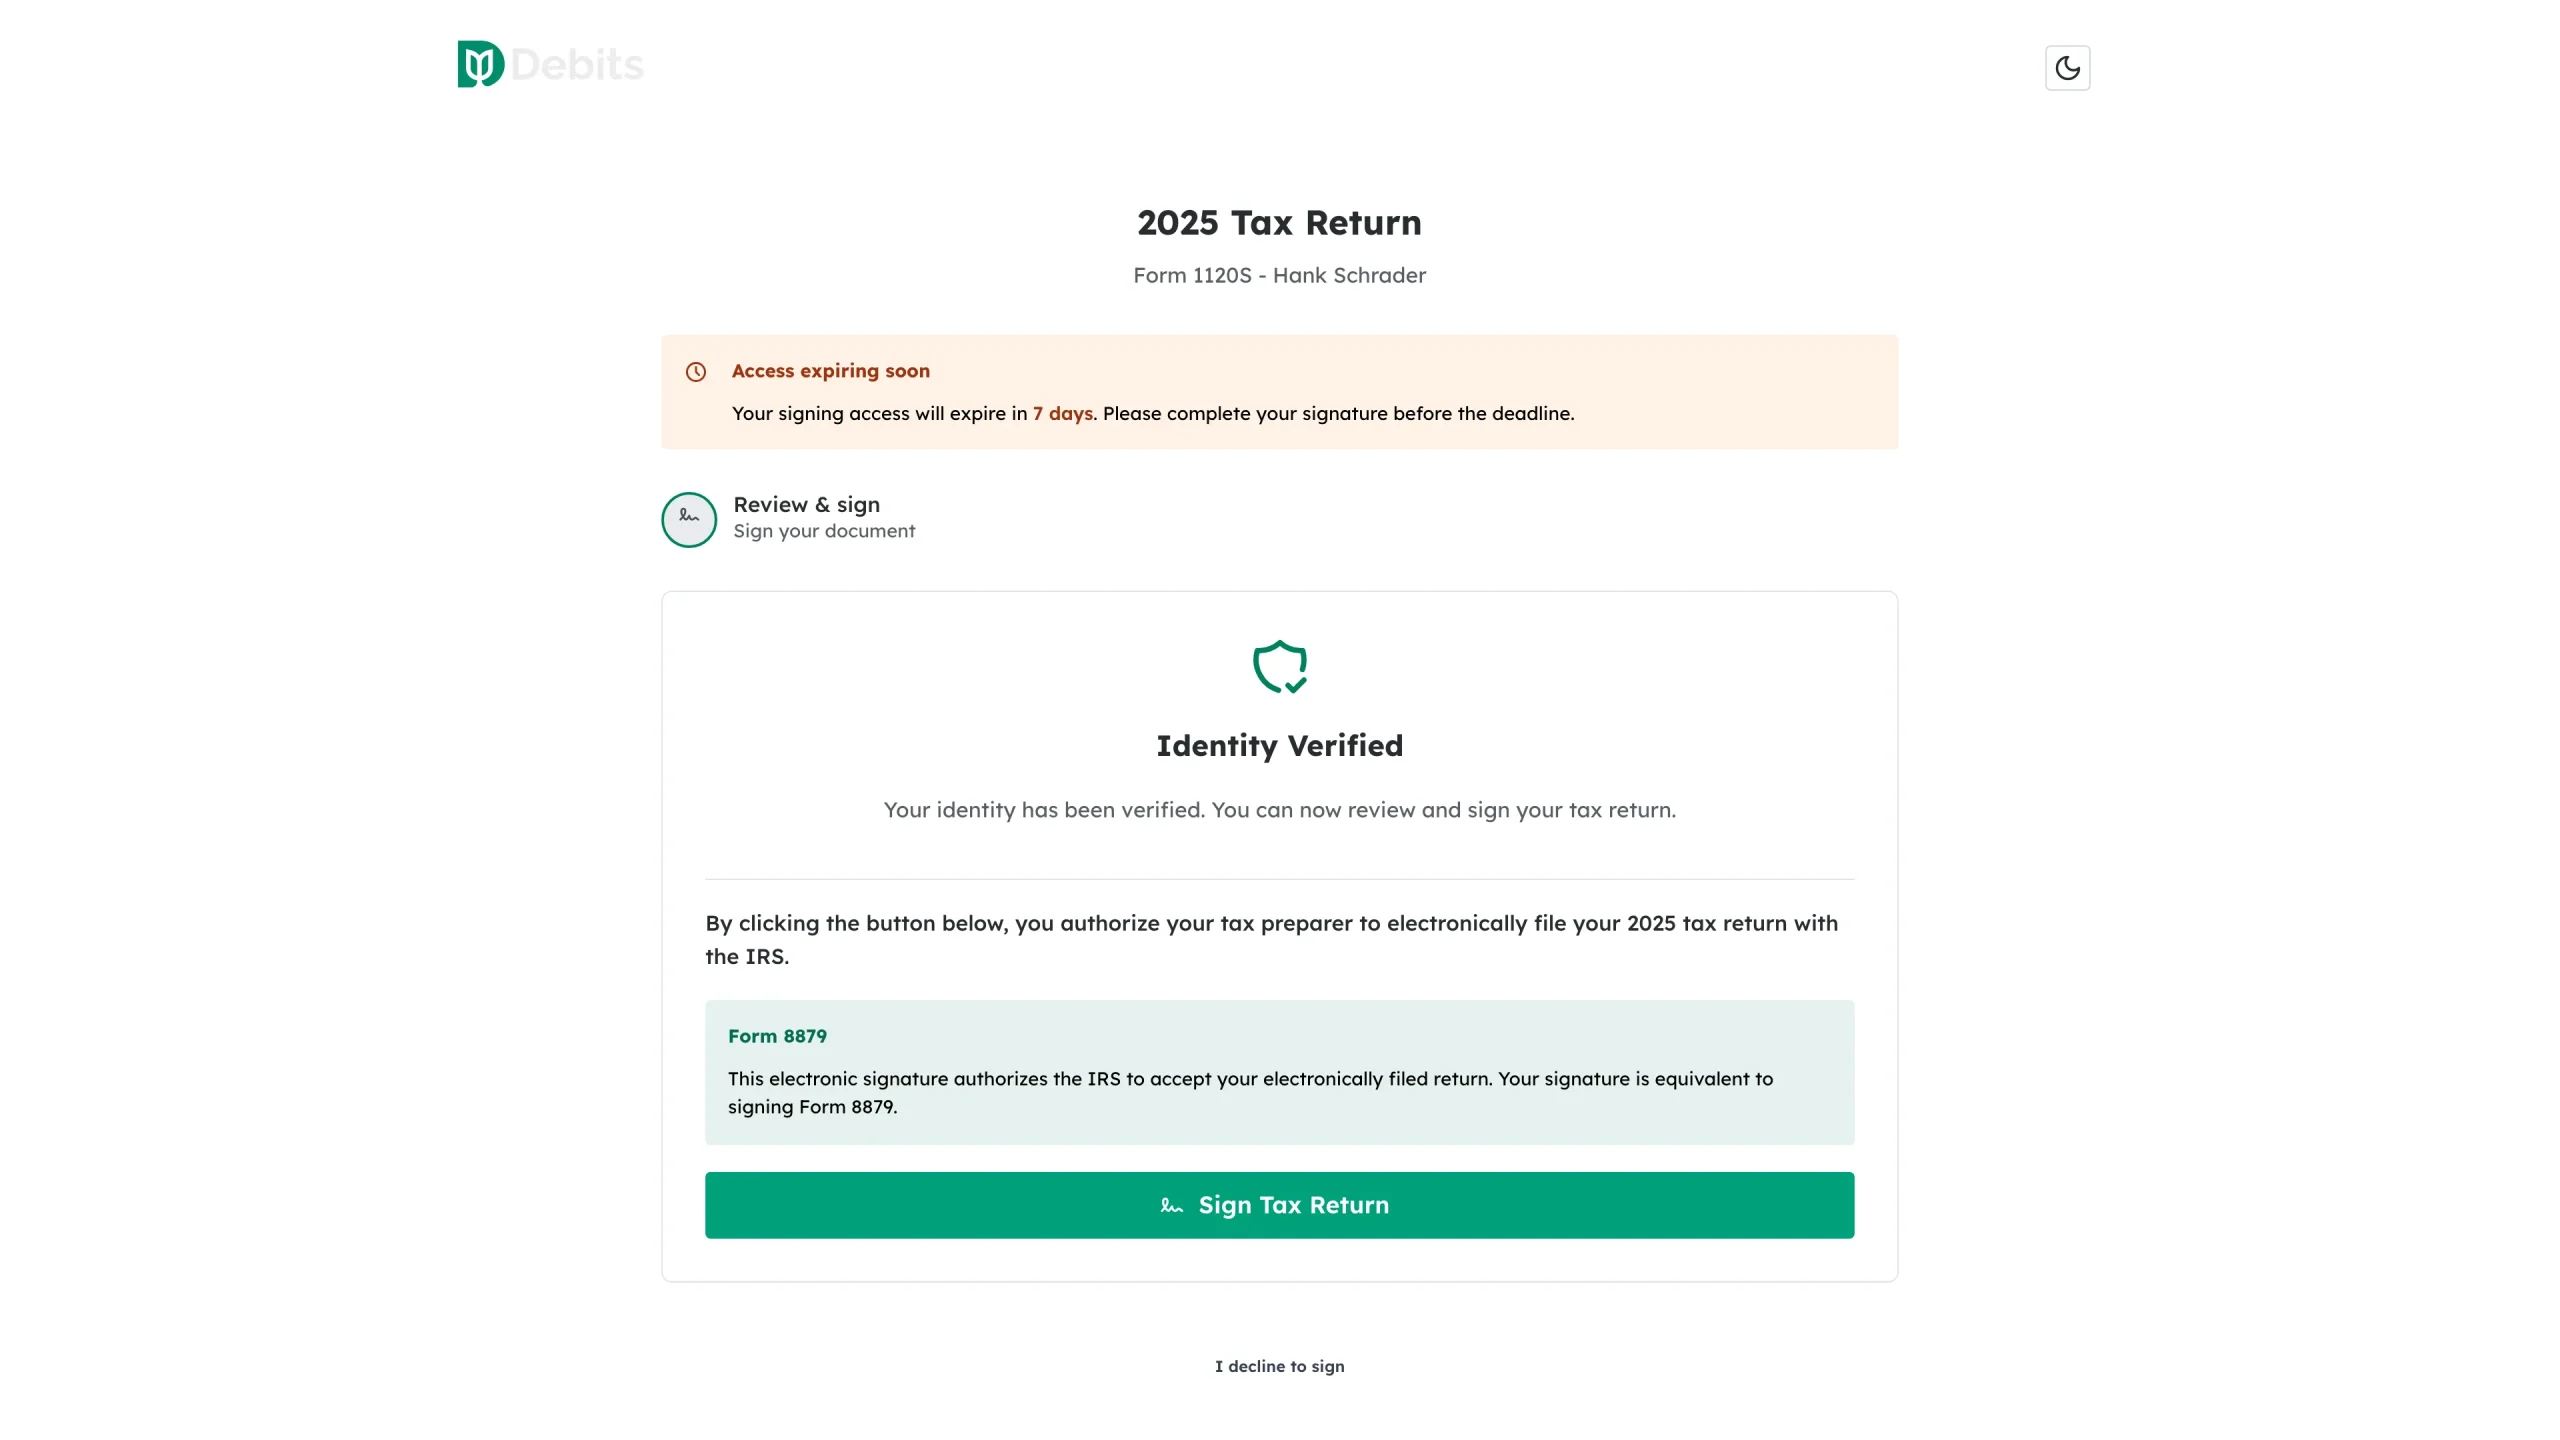
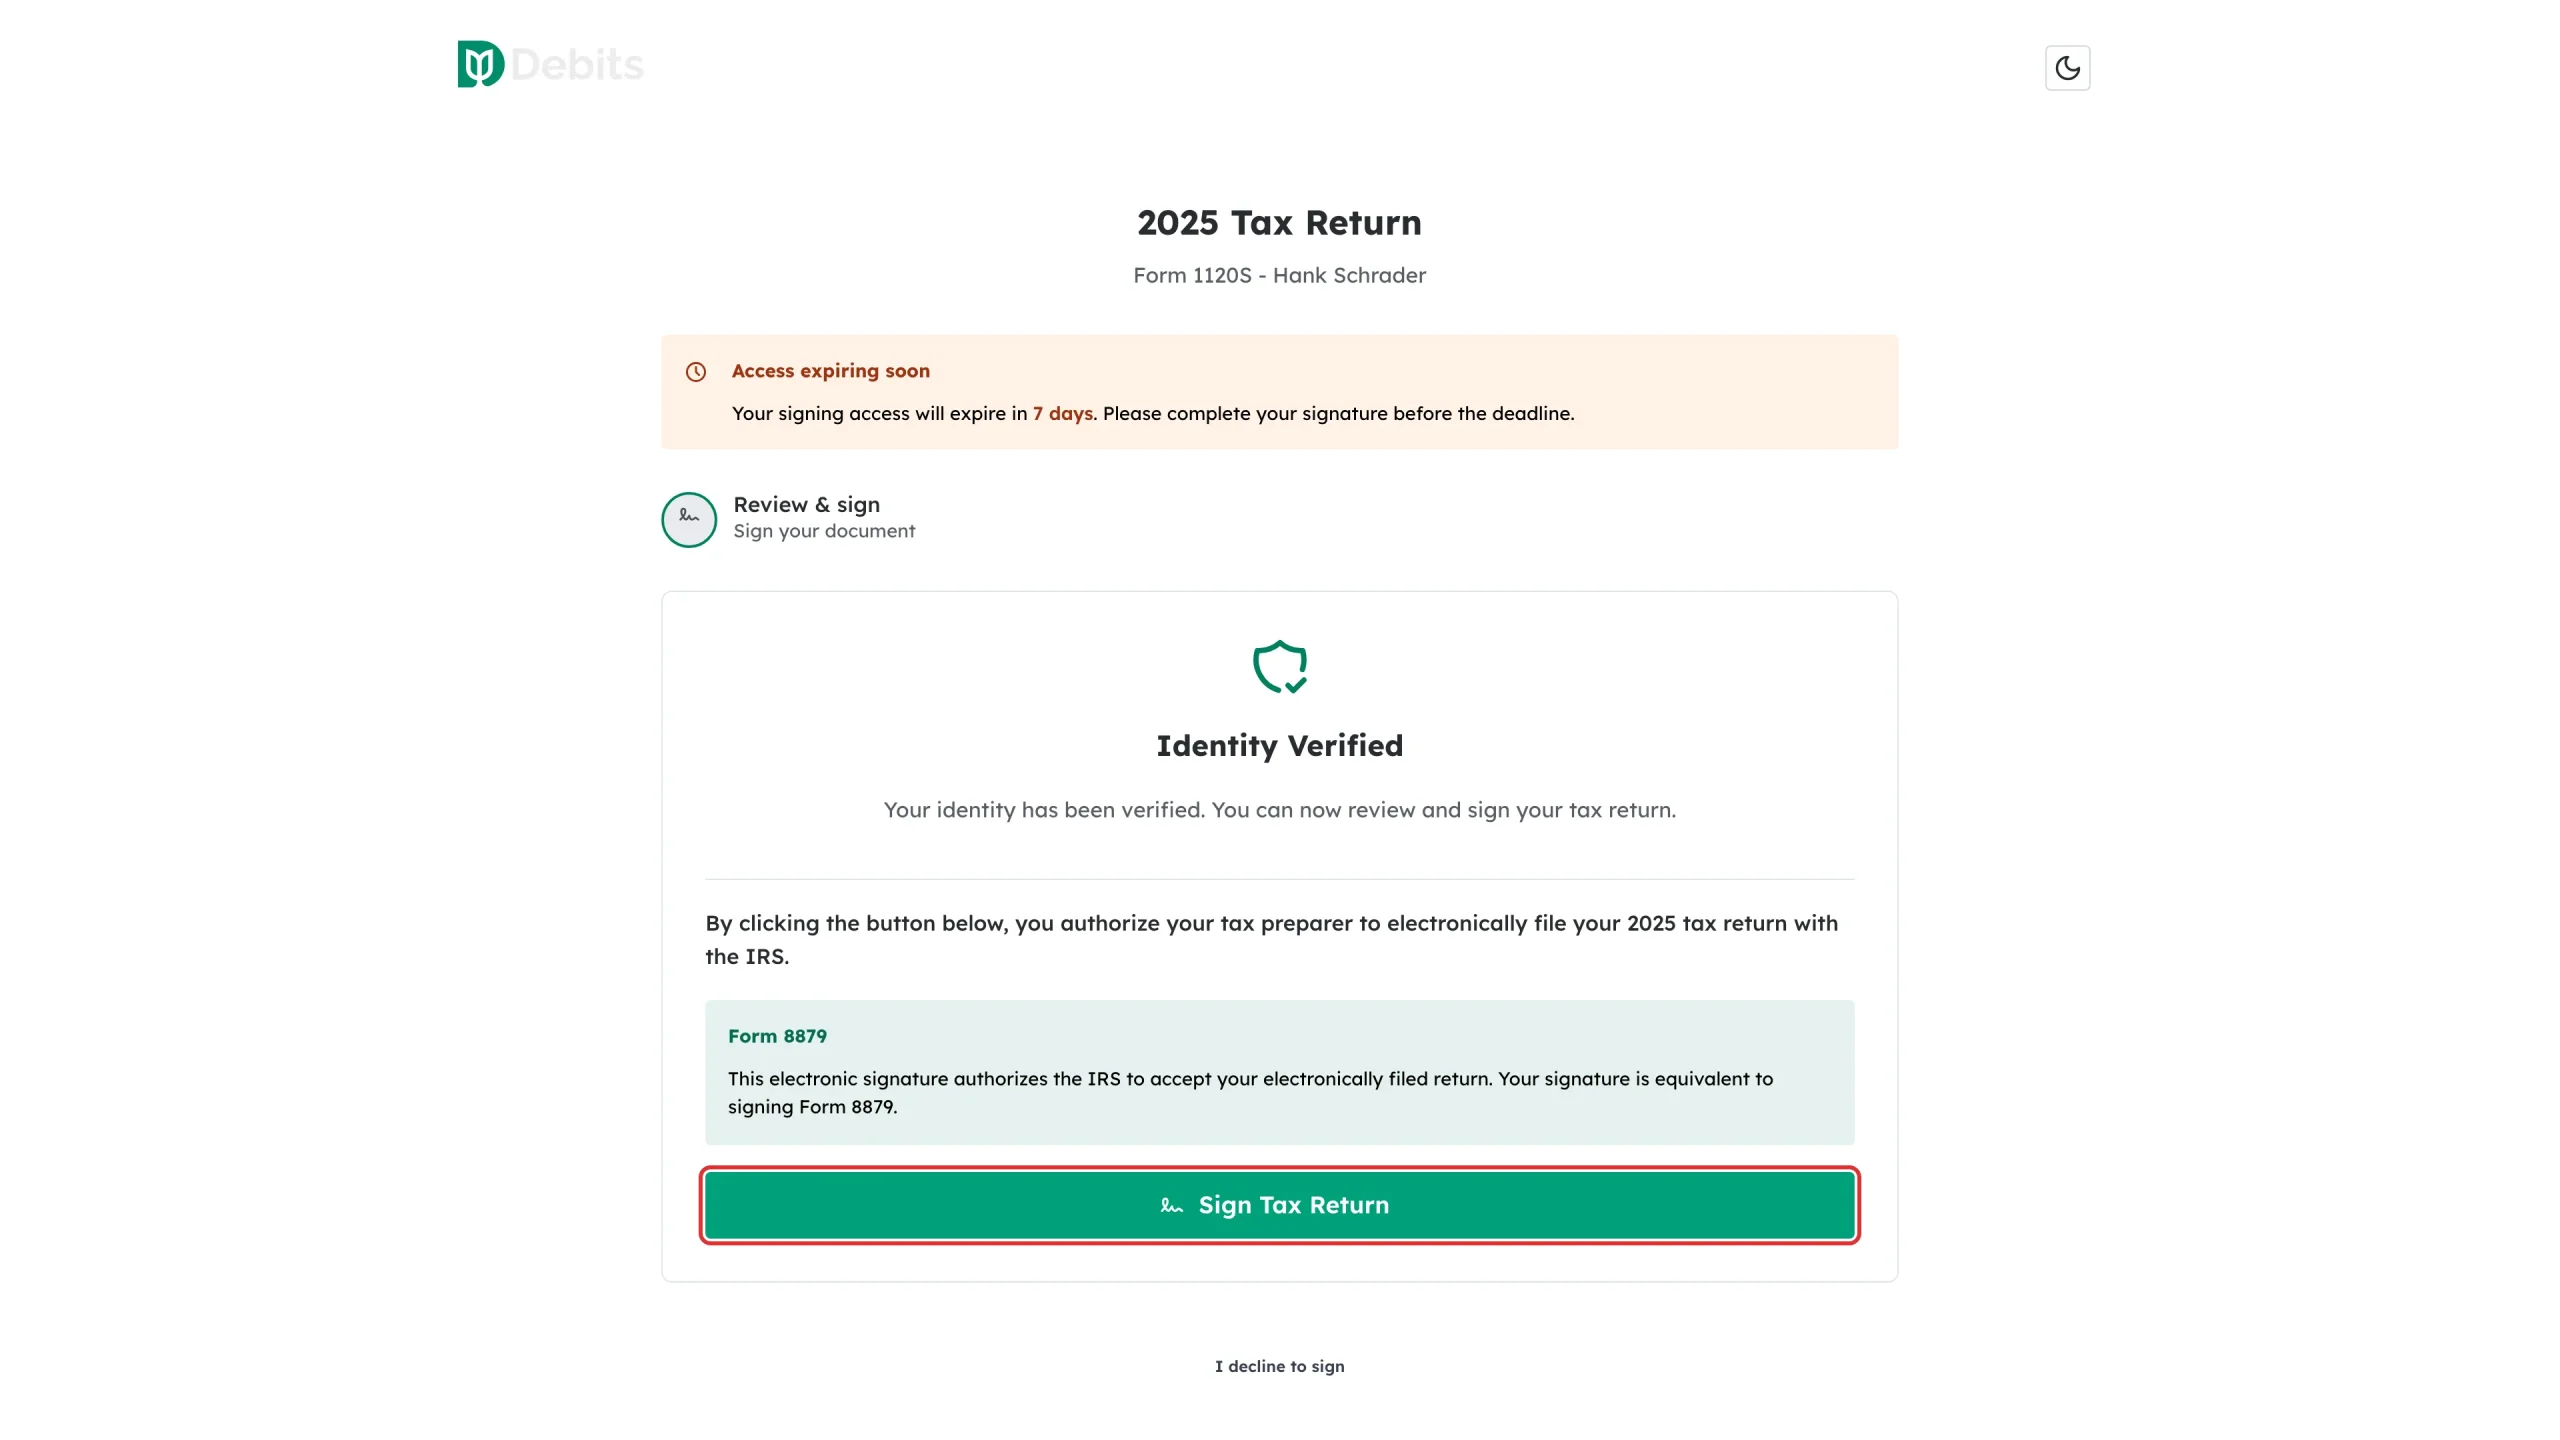
Once you are verified, an Identity Verified card appears. Read the e-file authorization note – your electronic signature has the same effect as signing the form it names: Form 8879 for an individual return, Form 8879-PE for a partnership, or Form 8879-CORP for a corporation – then click Sign Tax Return.
Step 6: Click each Sign here box
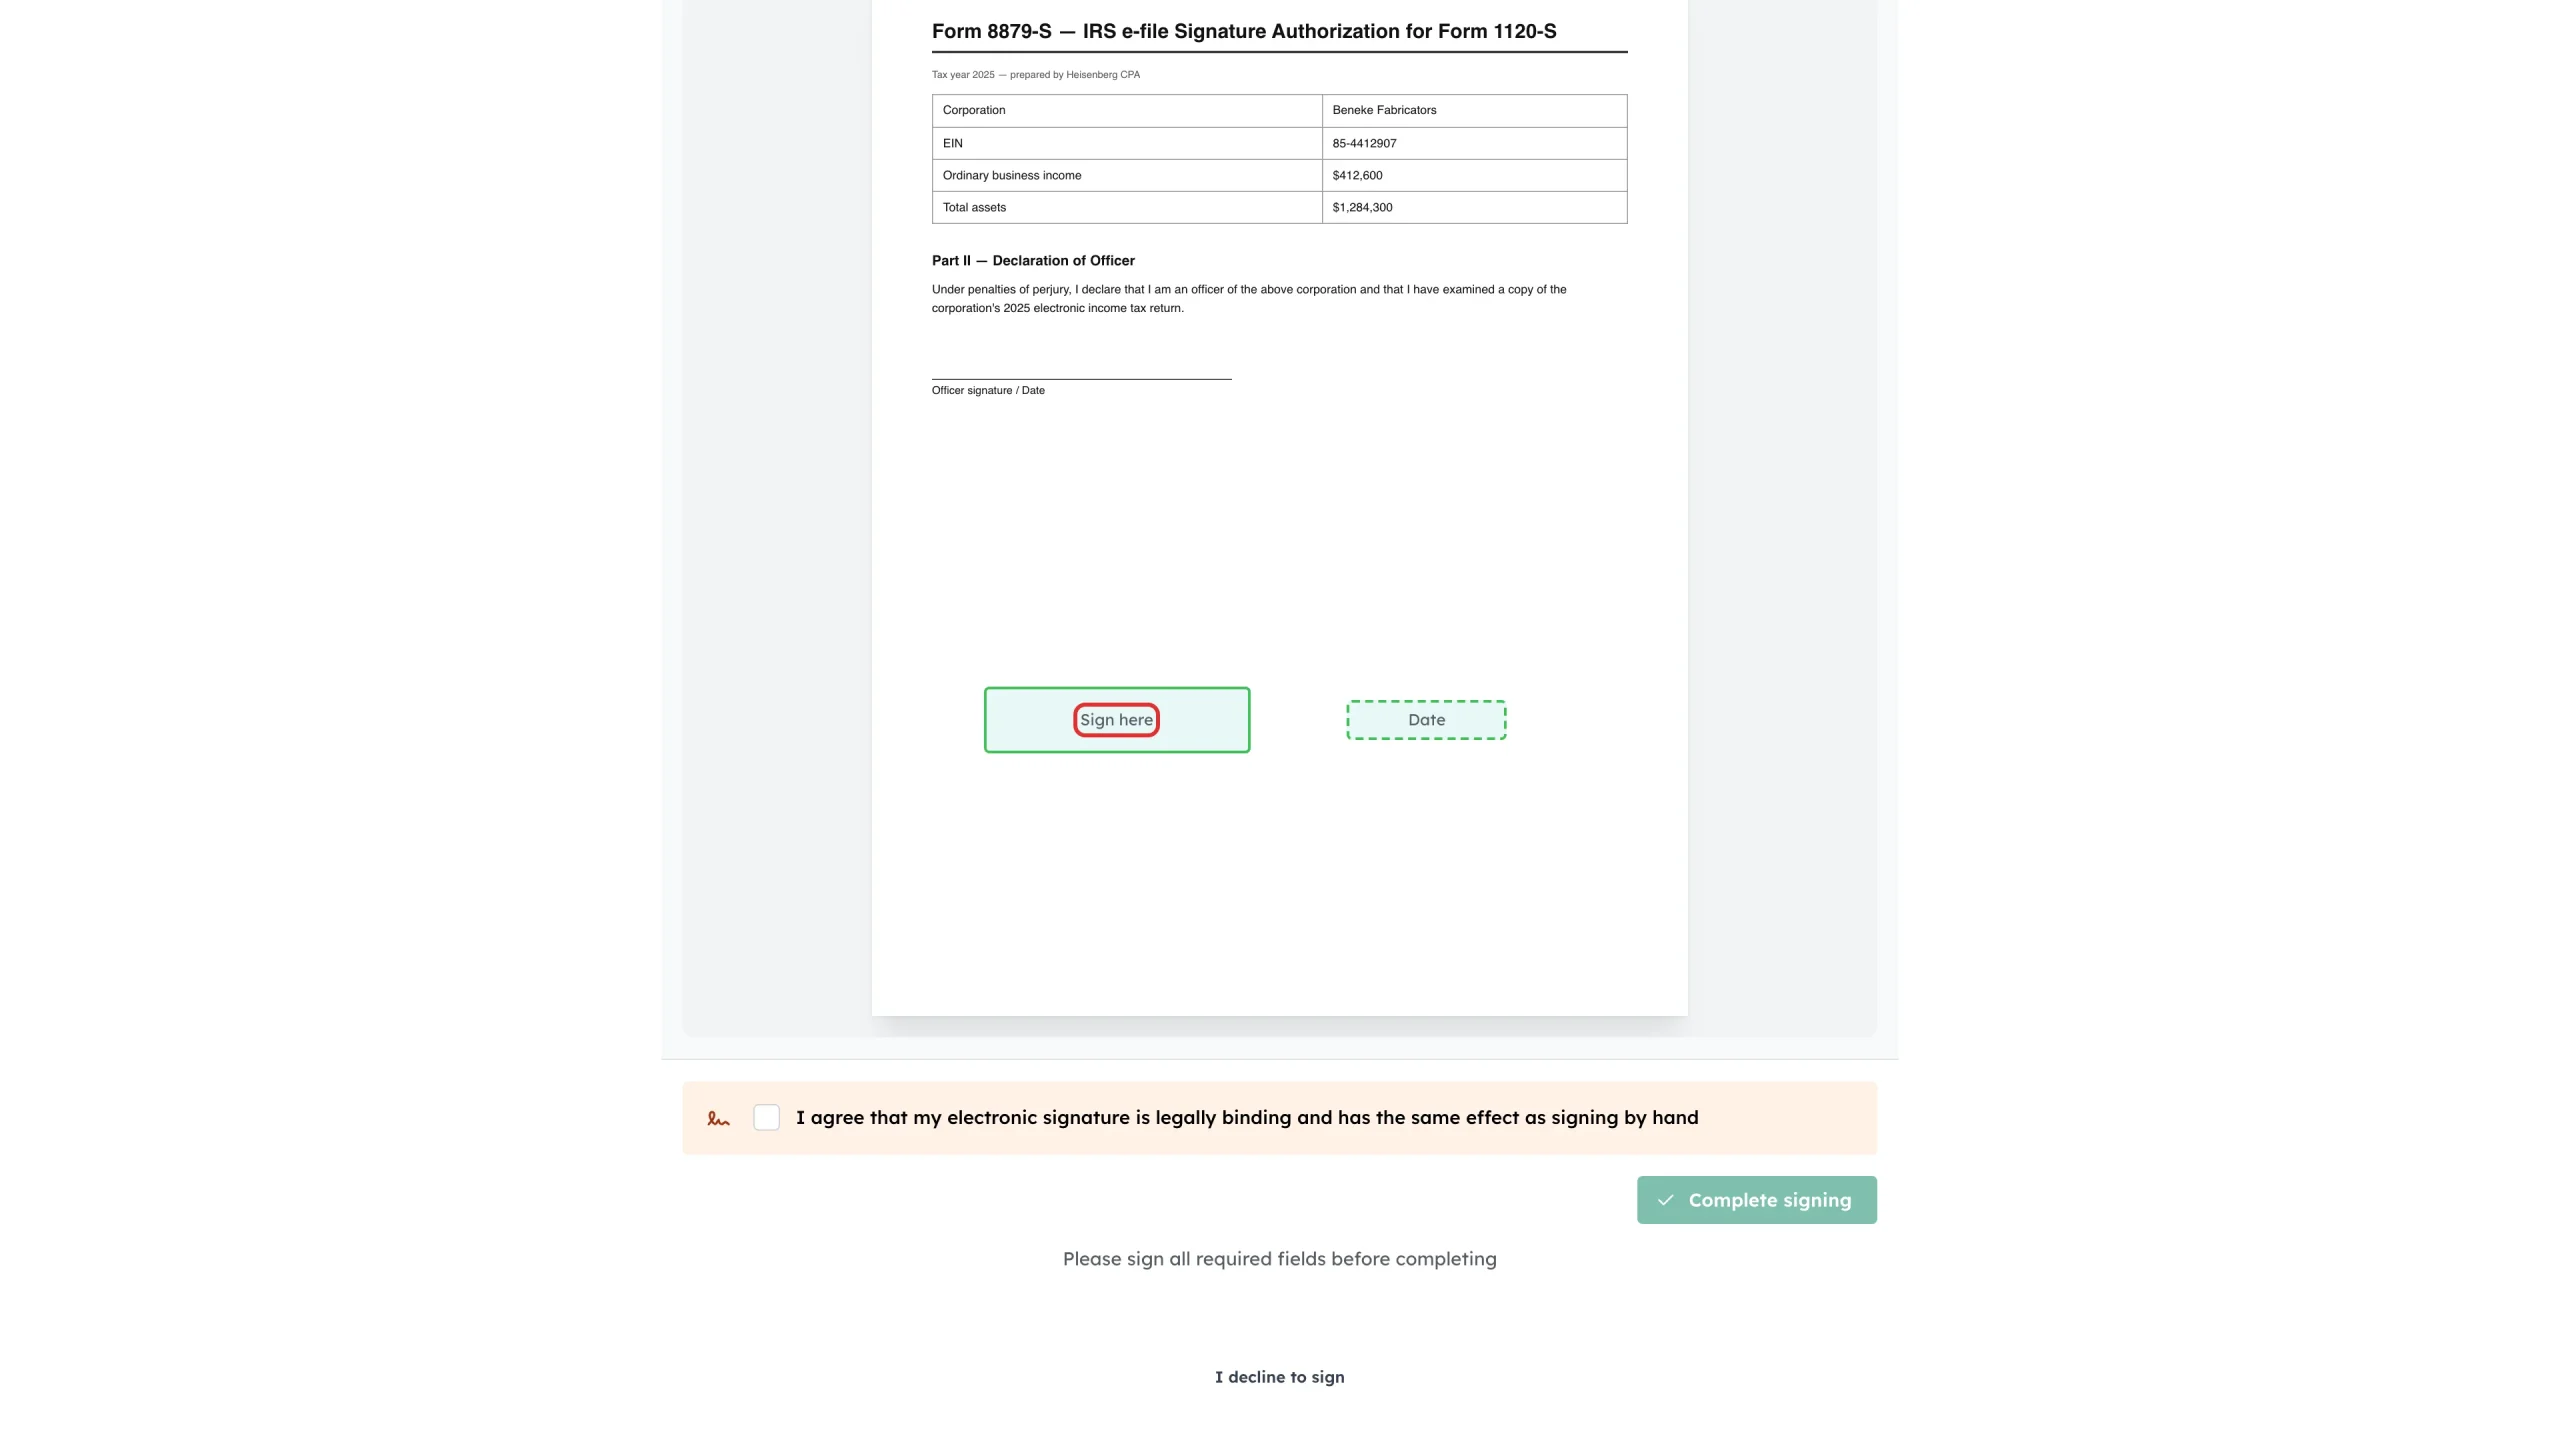
Your document opens with coloured boxes marking every field you have to complete. Click a Sign here box to fill it.
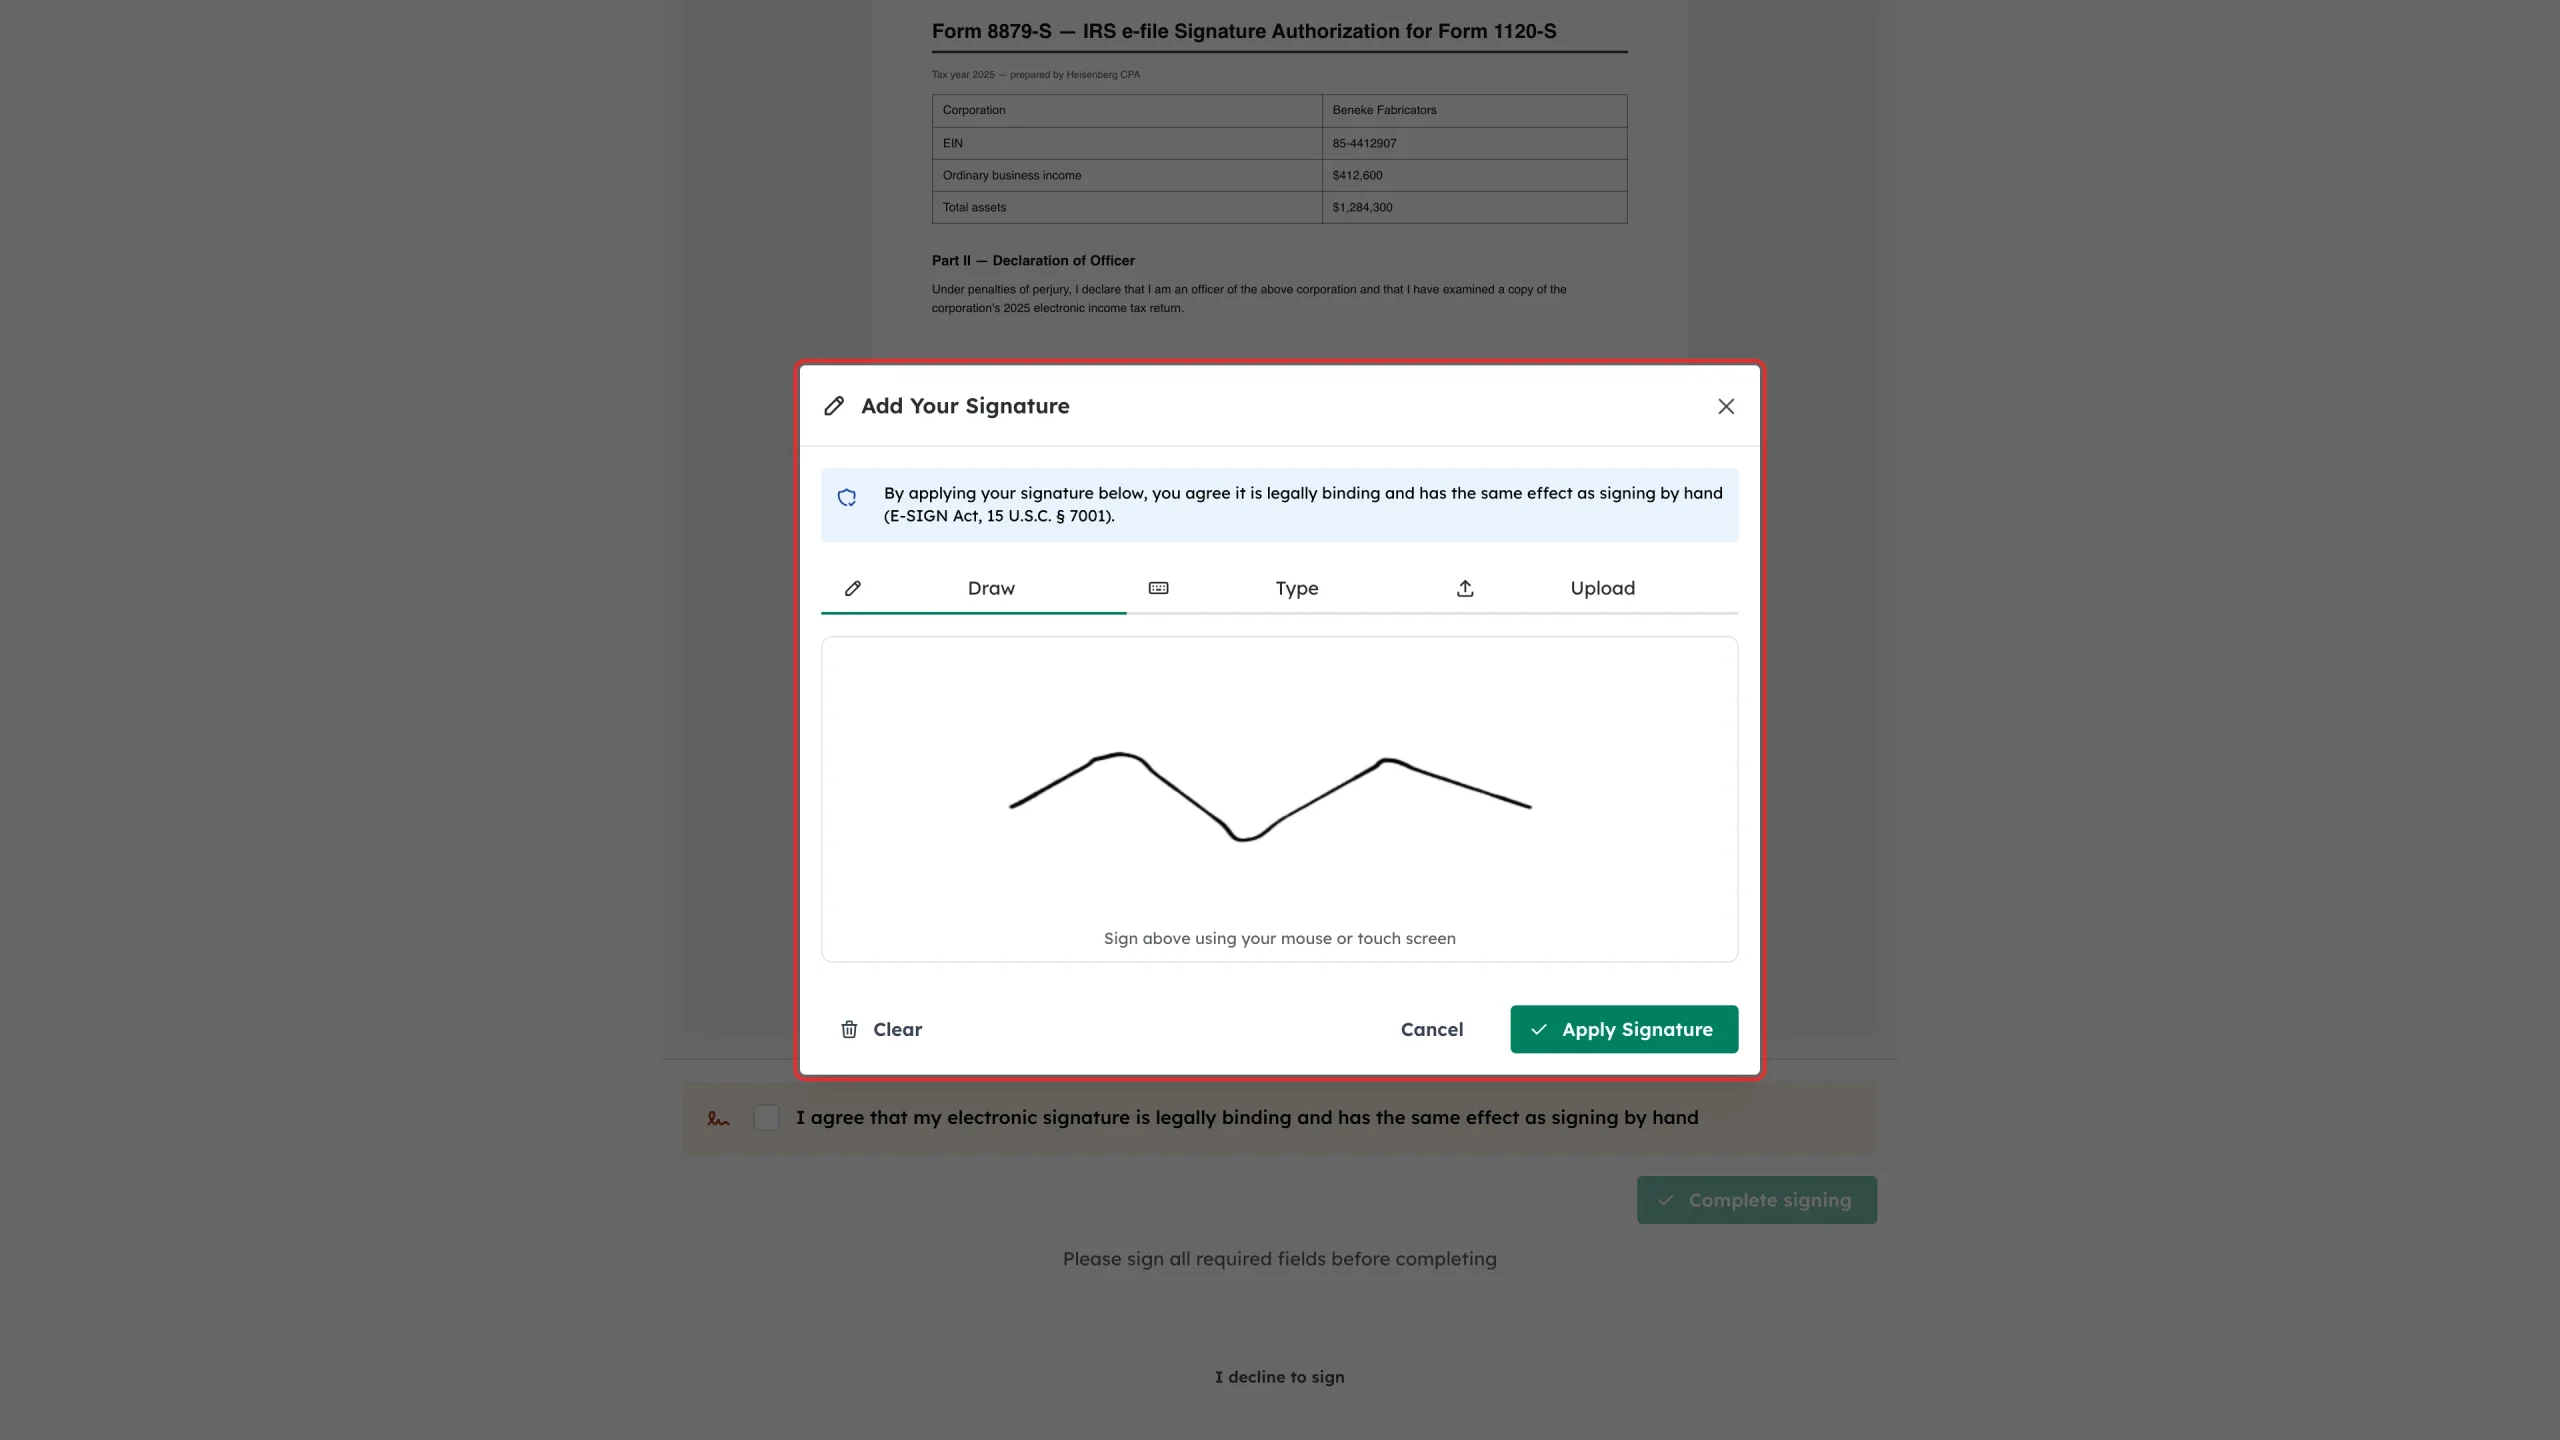
Step 7: Create your signature
The Add Your Signature window opens with three options:
- Draw – sign with your mouse, trackpad or finger
- Type – type your name and pick a style
- Upload – upload an image of your signature
Use Clear to start again, then click Apply Signature.
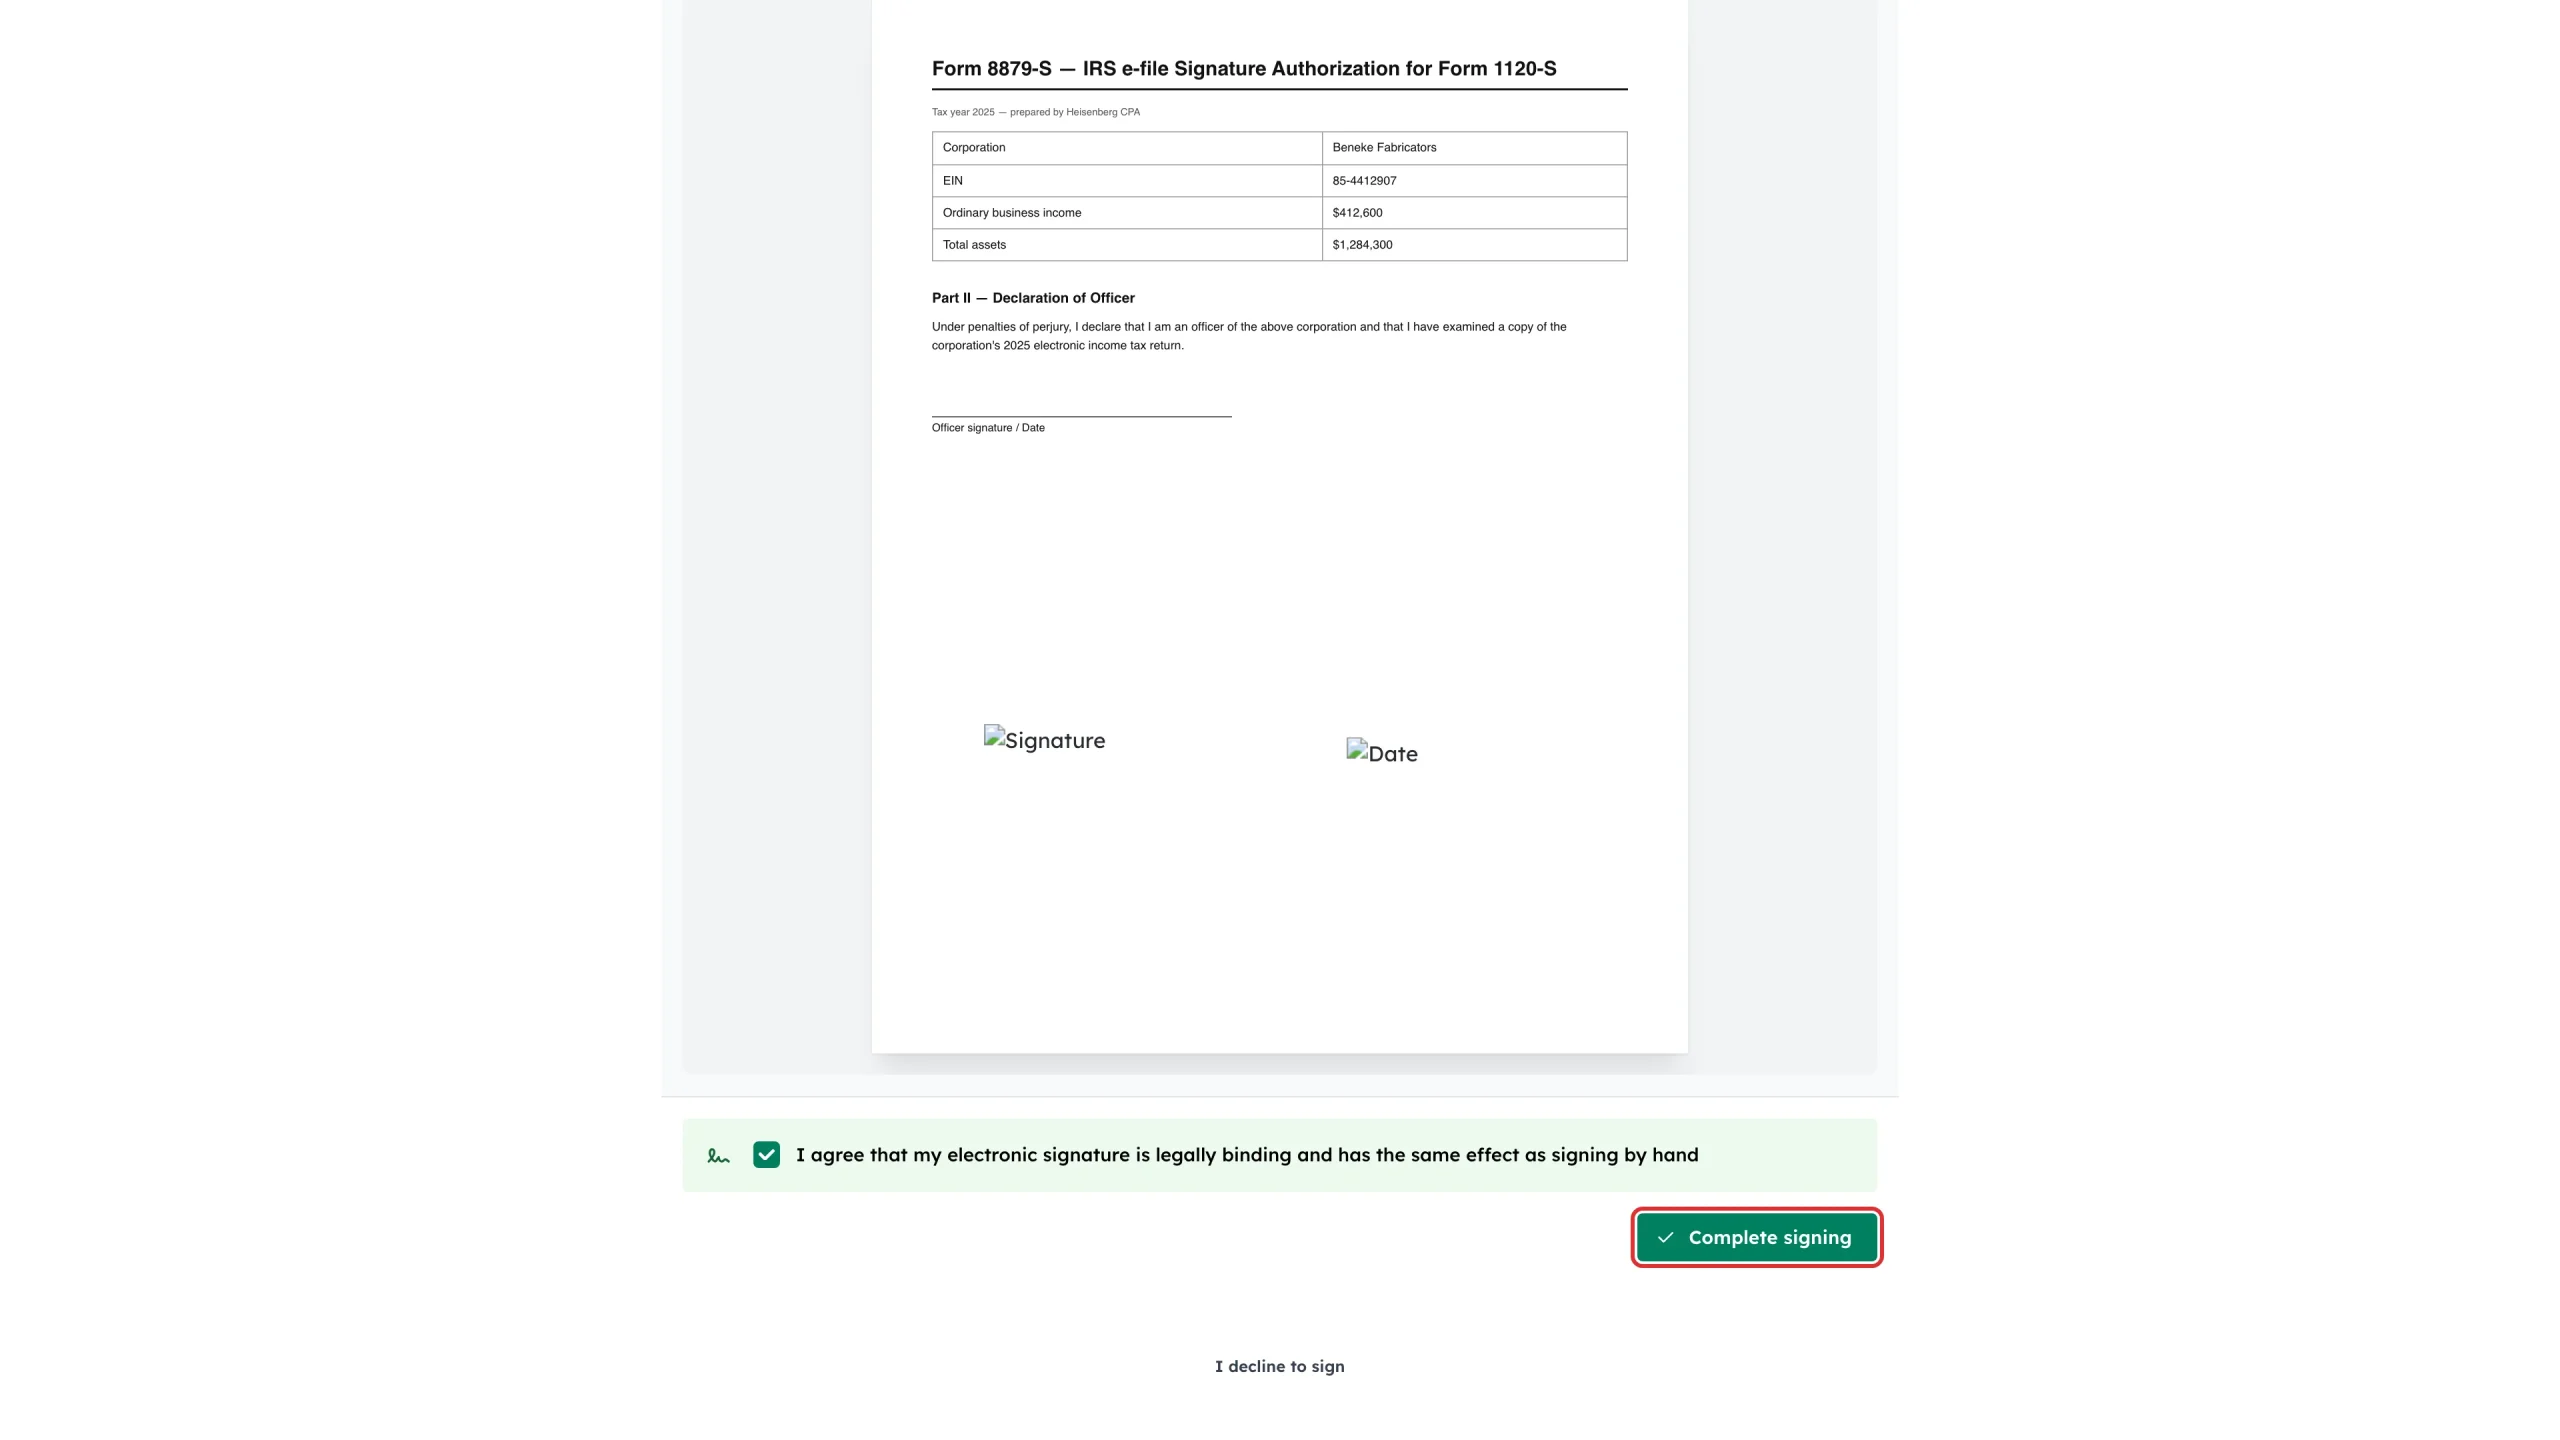
Step 8: Agree and finish
When every required field is filled, tick I agree that my electronic signature is legally binding and has the same effect as signing by hand, then click Complete signing.
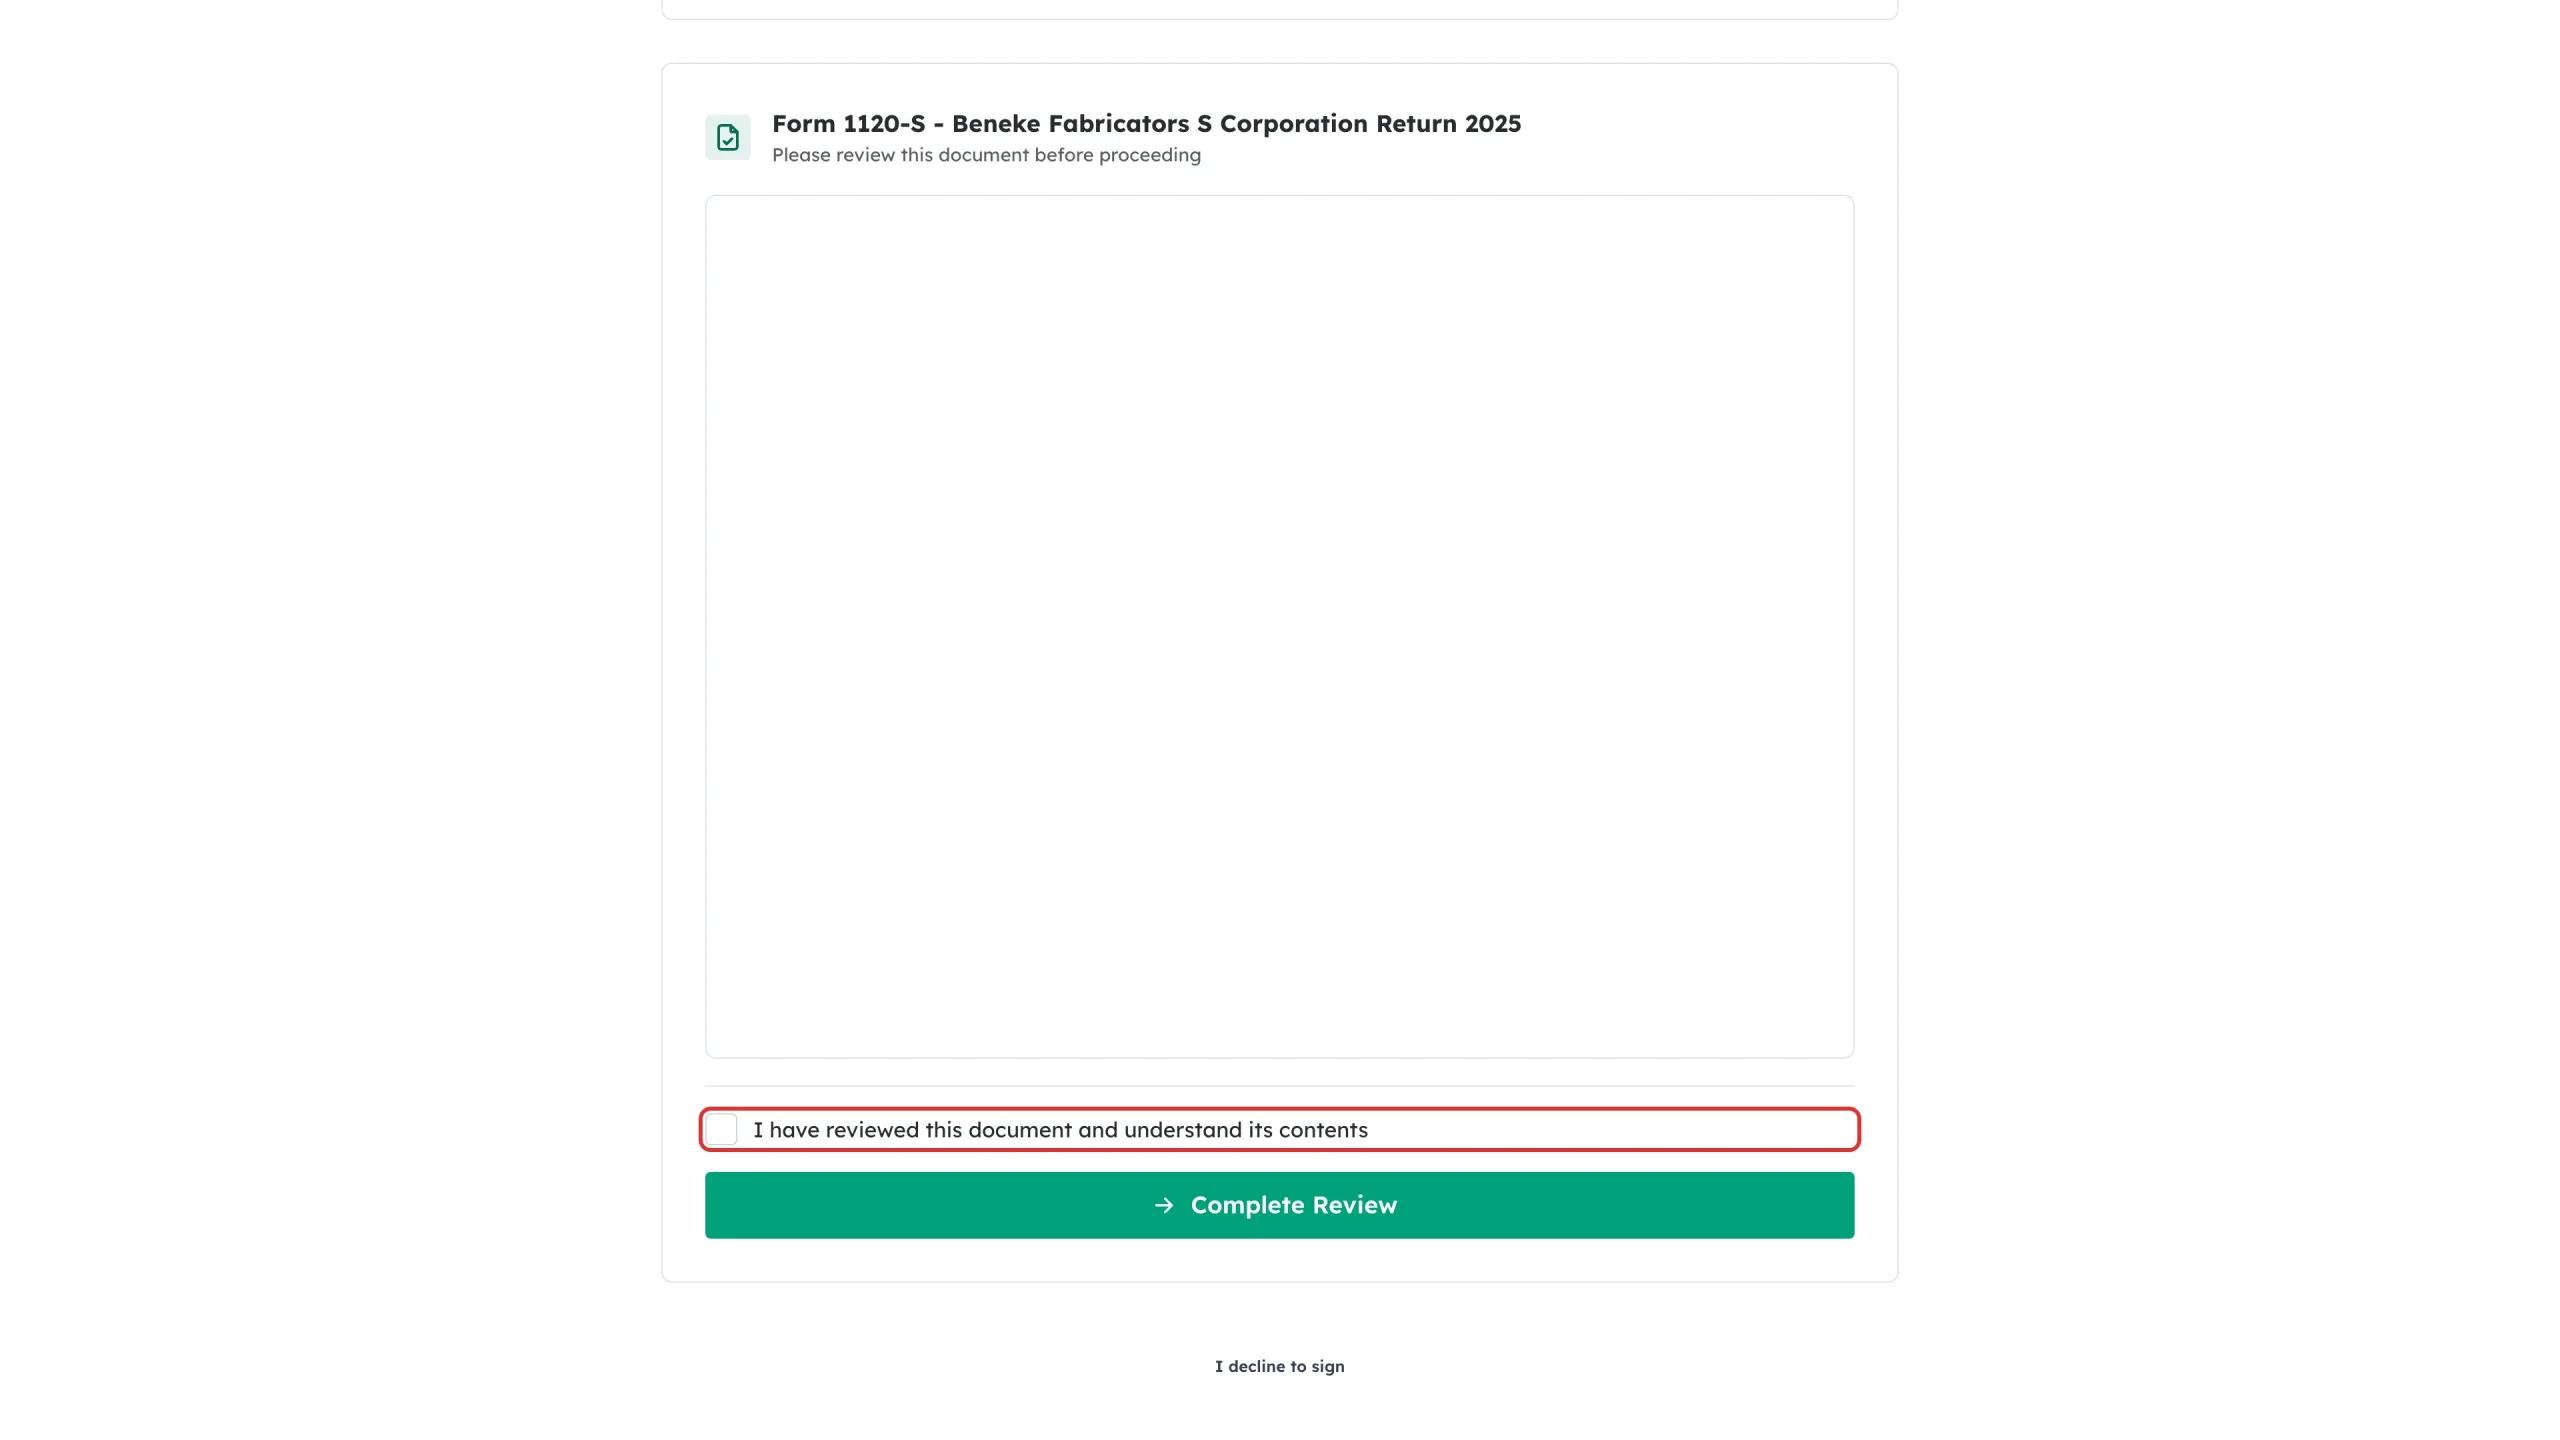
Step 9: Confirm any read-only documents
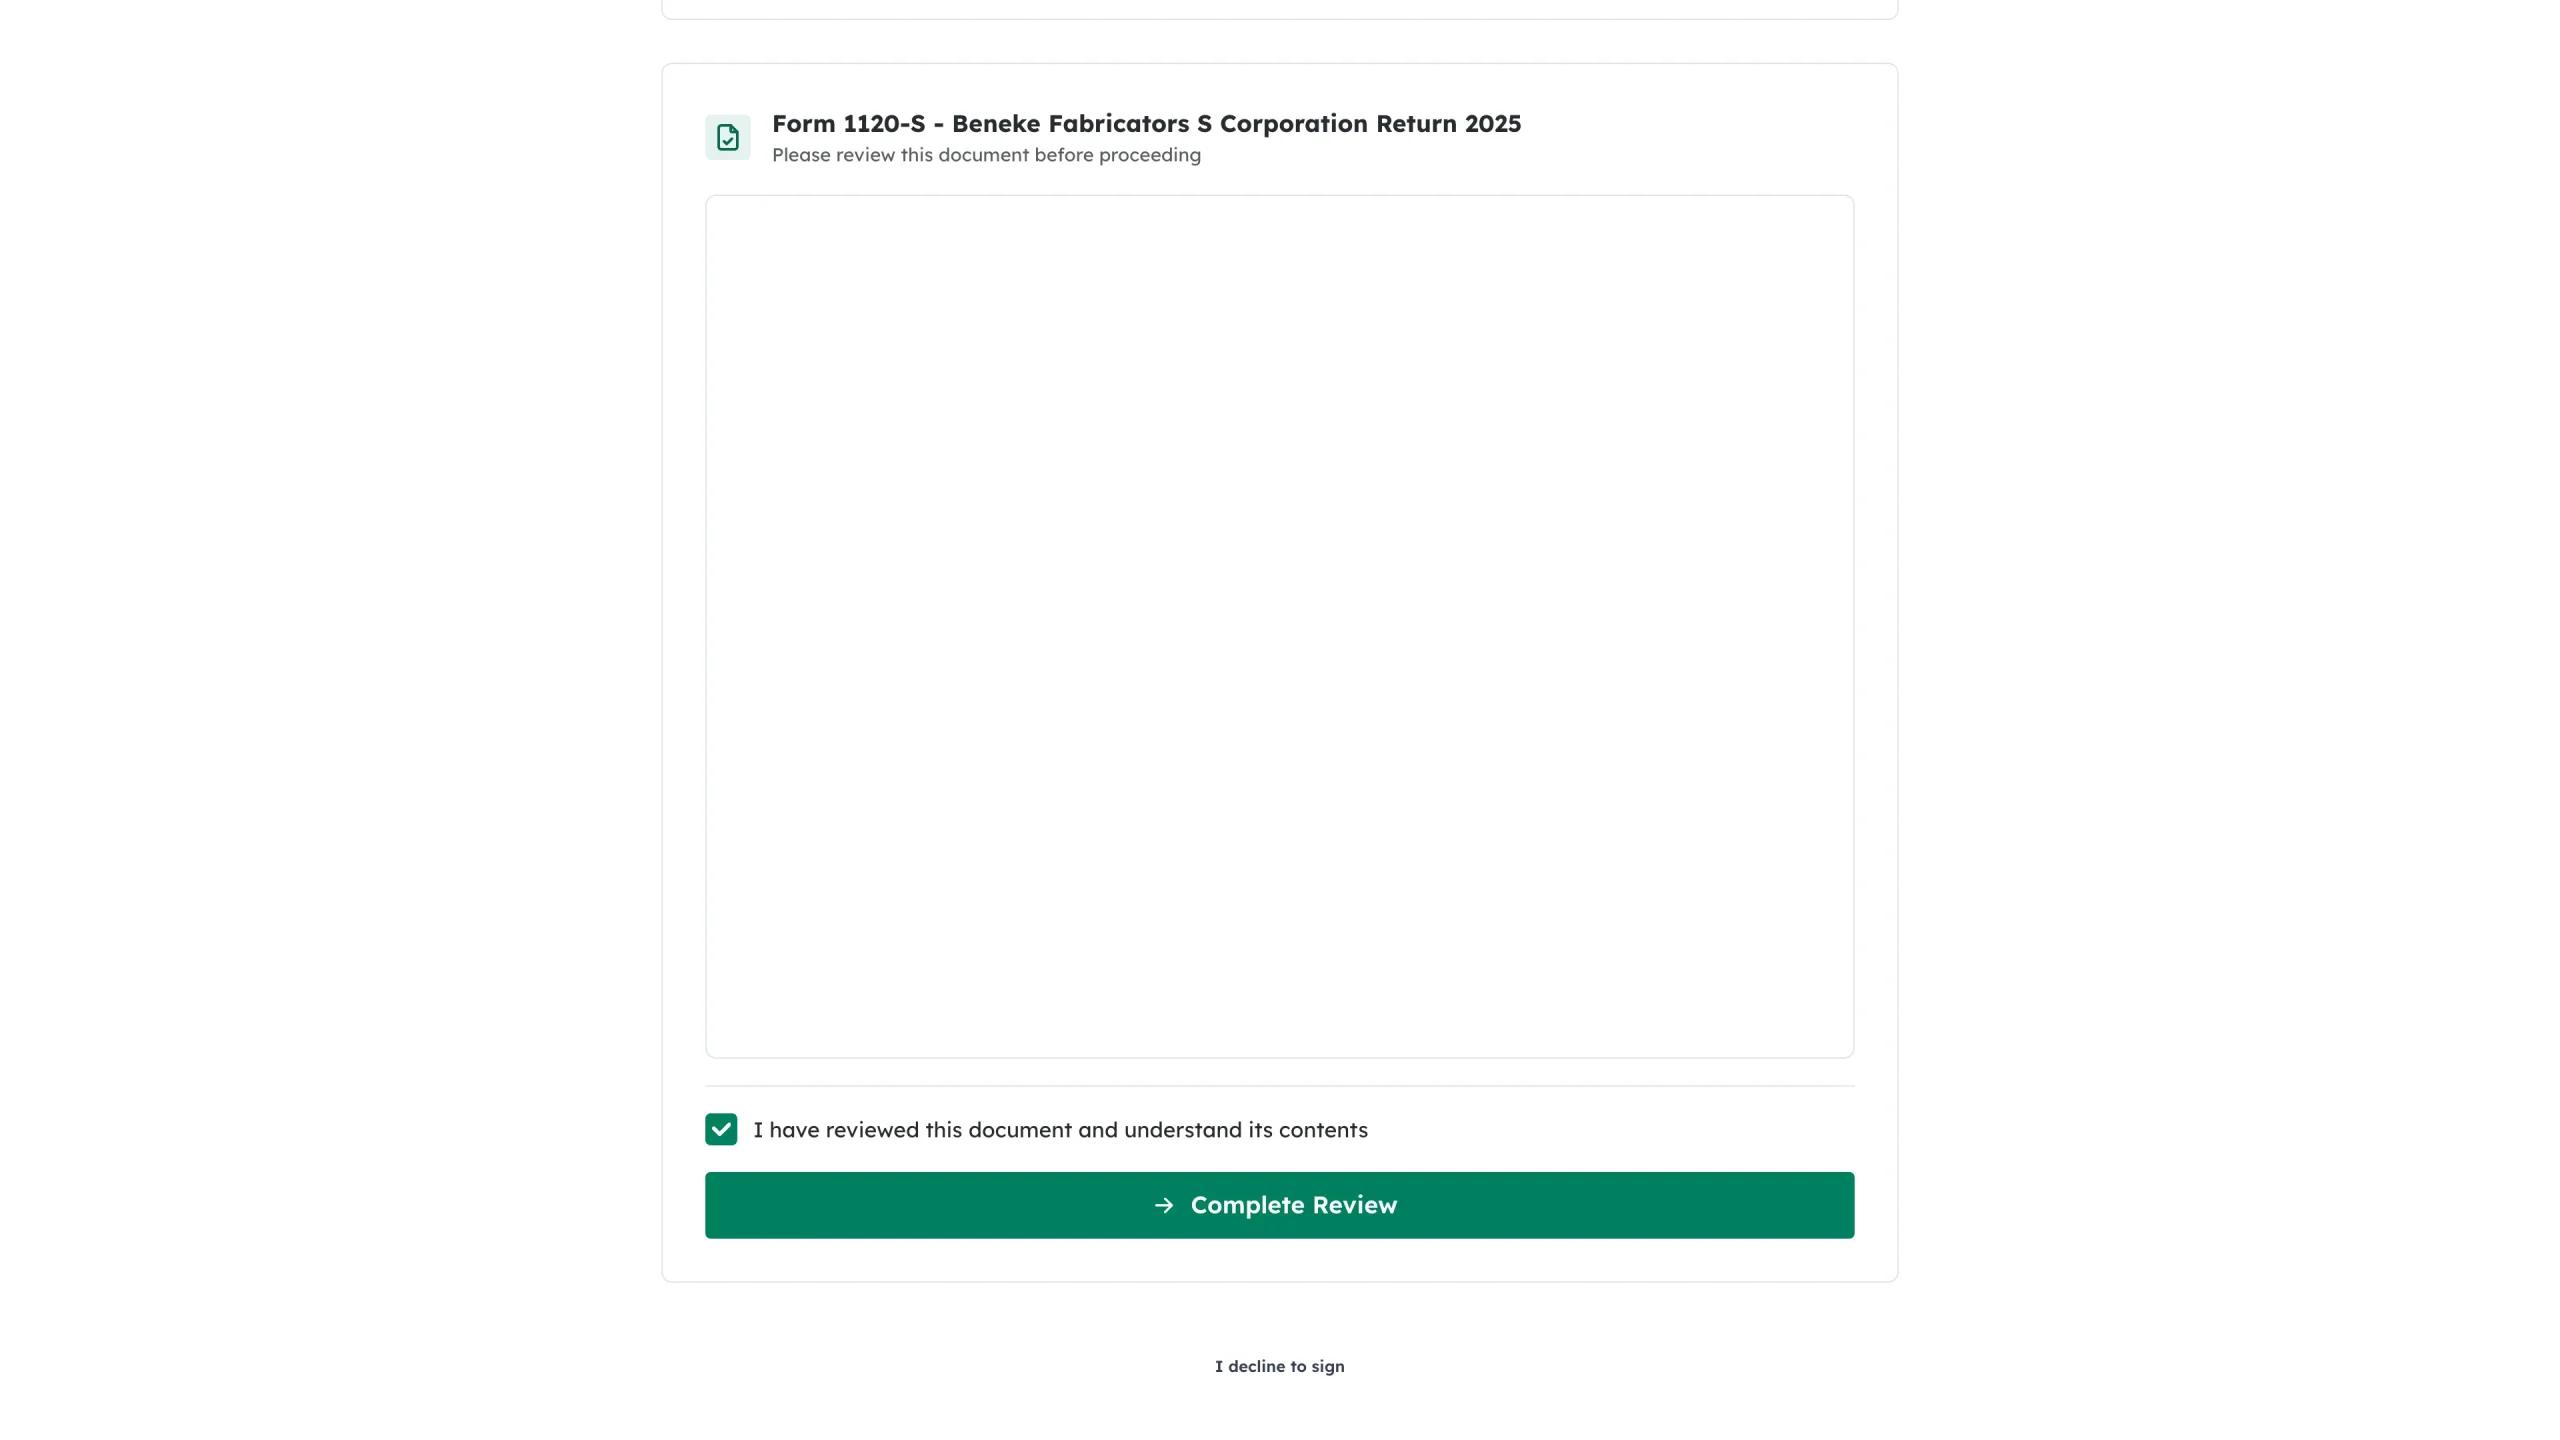
Some documents only need reading, not signing. For those, tick I have reviewed this document and understand its contents.
Then click Complete Review.
What happens next
Your accountant is told straight away that you have signed. If someone else still has to sign – a spouse or a co-owner – the return stays open until they do. Once everyone has signed, you can download the completed copy.
Troubleshooting
- “This link is invalid or has expired”: Ask your accountant to send a new one.
- Verification keeps failing: Check your SSN, date of birth and address against your official records. You have a limited number of attempts.
- You have run out of attempts: Use Upload Signed Document on the same page to print, sign by hand and upload instead. See How to Complete a Wet Signature.
- Complete signing is greyed out: A required field is still empty, or you have not ticked the agreement box.
- “Not signed – payment needed”: one or more documents are held until an invoice is paid. Use the Pay button on the payment card, then sign.
- You do not want to sign: Use the I decline to sign link at the bottom of the page. Your accountant is notified.