Who this is for: Accountants who need to send a finished tax return to a client for signature.
What you’ll learn: How to create a tax delivery, pick the year and return type, and add the people who must sign.
Before you begin
- You need access to the Tax Delivery area of your firm’s account.
- Have each signer’s name and email address ready. If they are already saved as contacts, you can search for them instead.
- For a business return (1065, 1120S or 1120), the business should be saved as a business contact. You can also add it from the wizard.
Step-by-step instructions
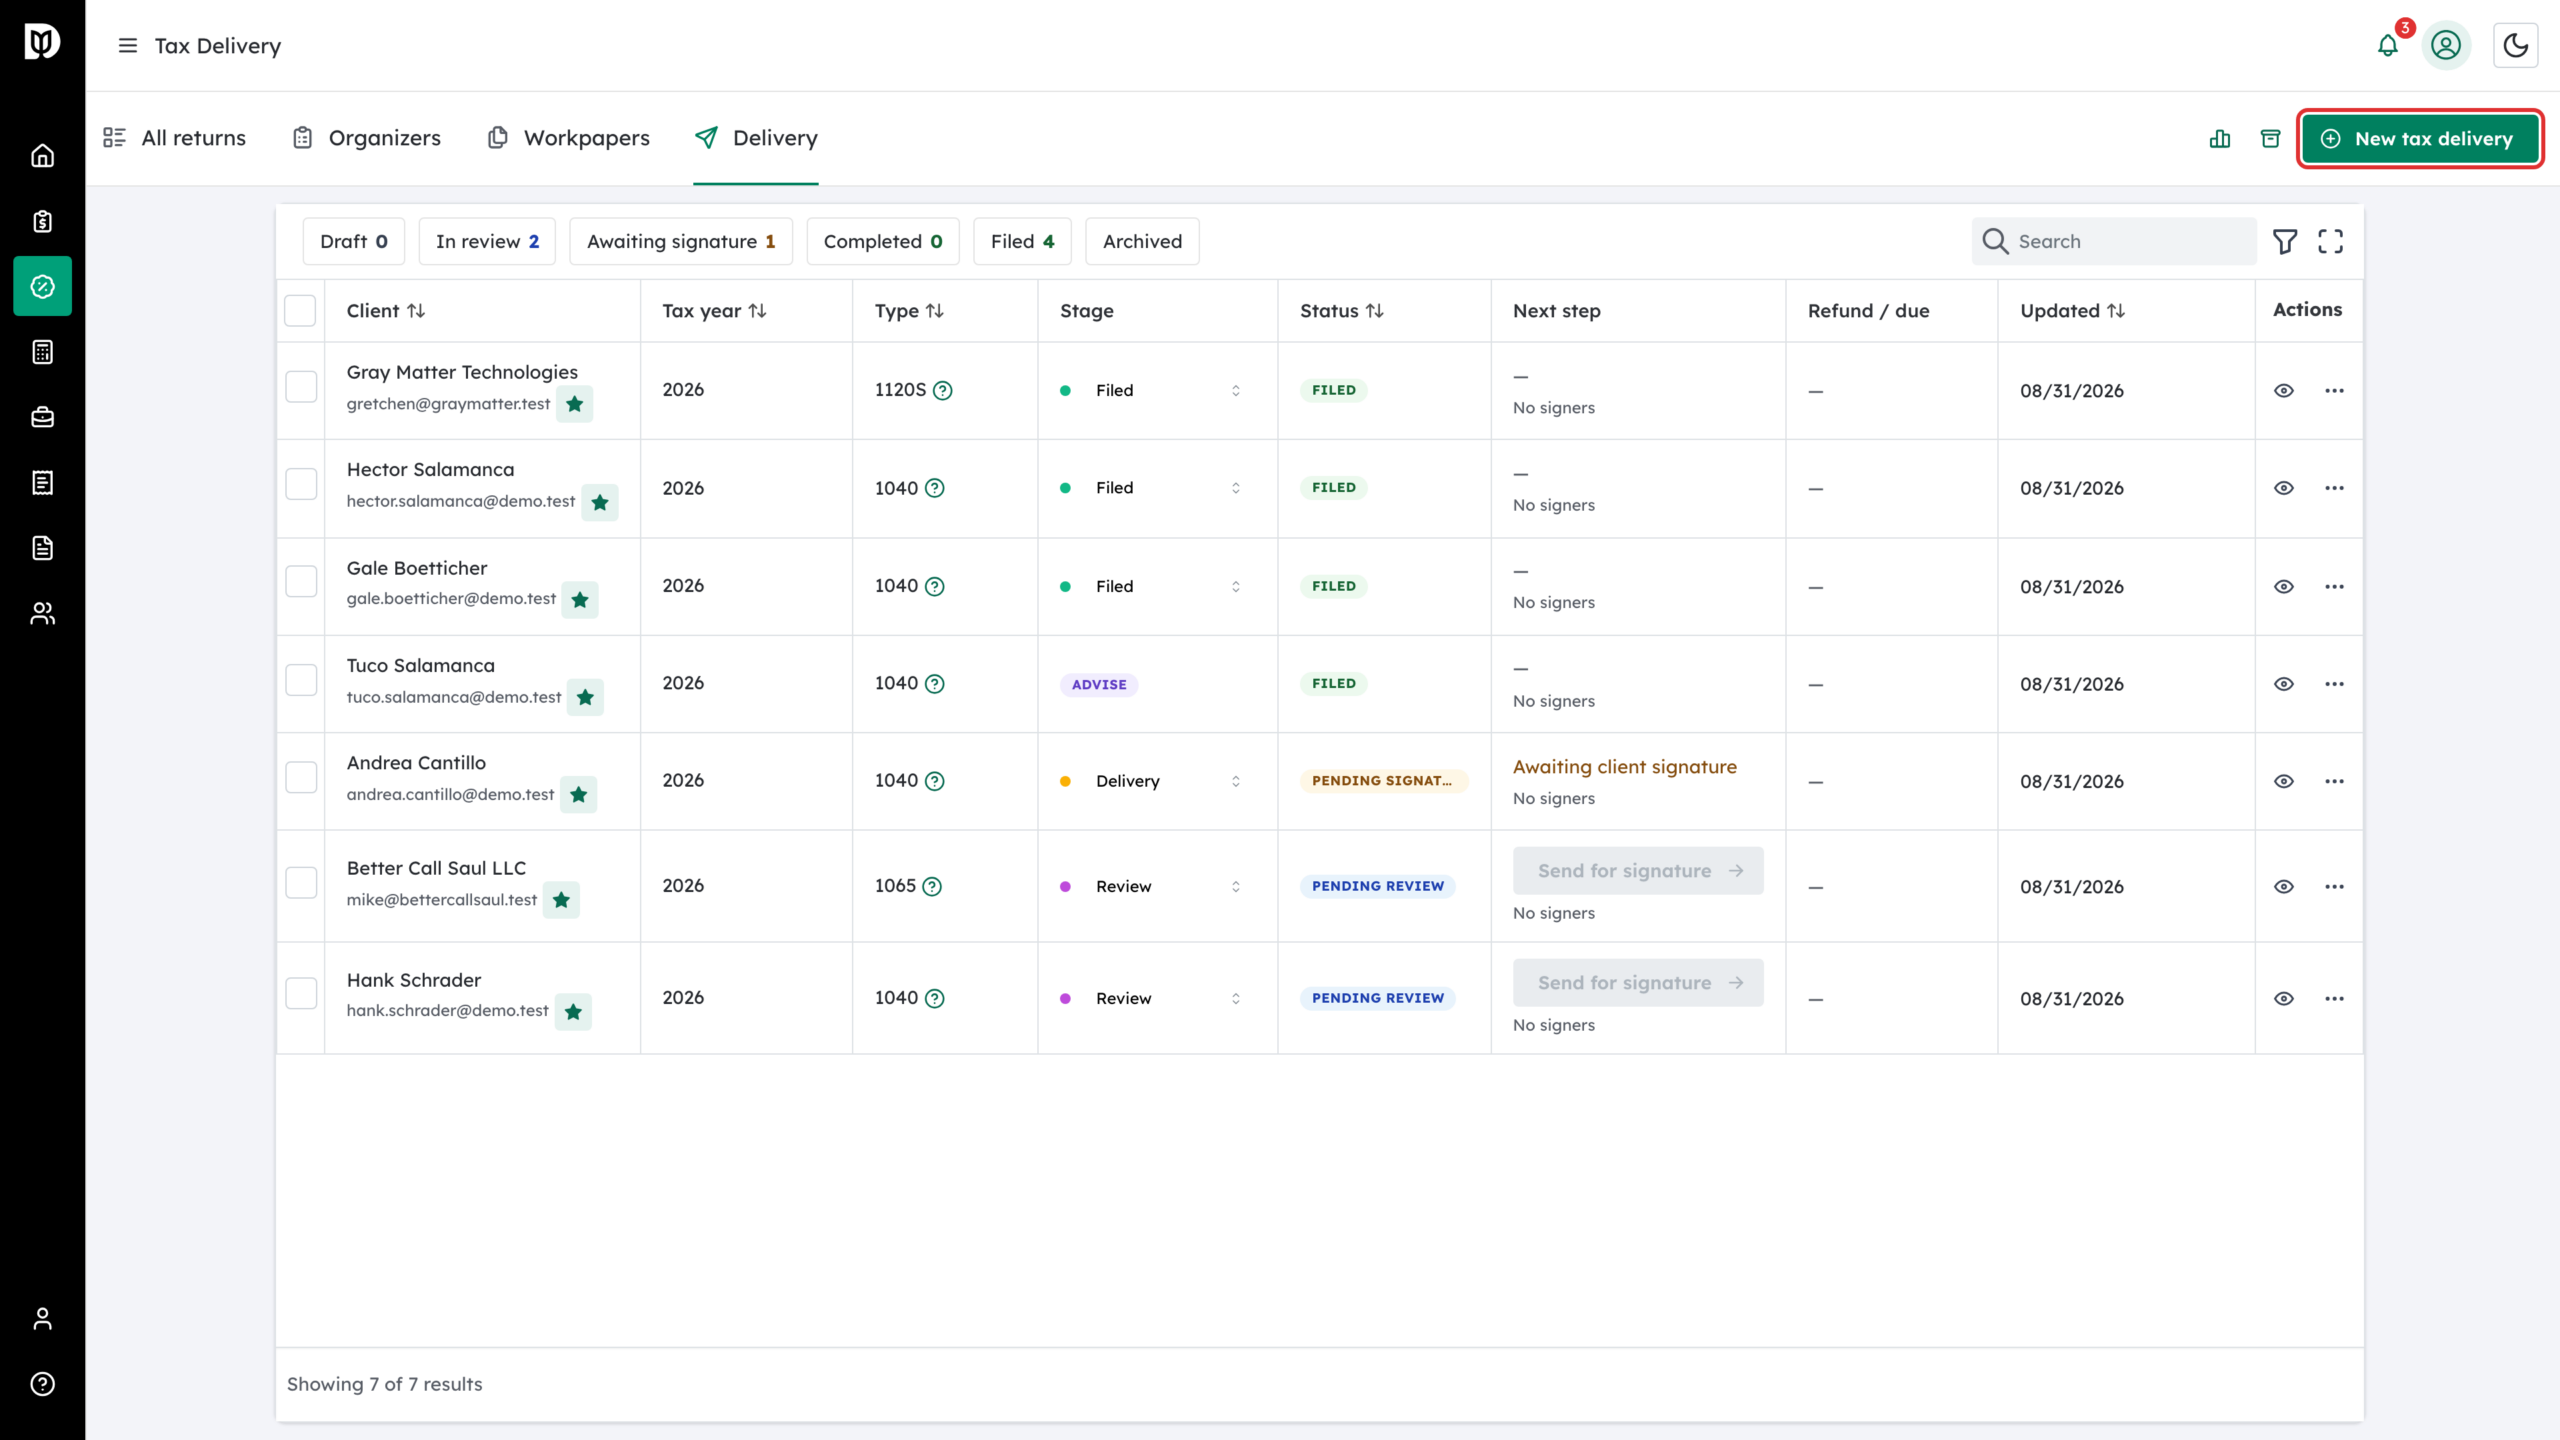
Step 1: Open Tax Delivery and click New tax delivery
Click Tax in the sidebar (it opens on All returns), open the Delivery tab, then click New tax delivery in the top right.
Step 2: Choose the tax year and return type
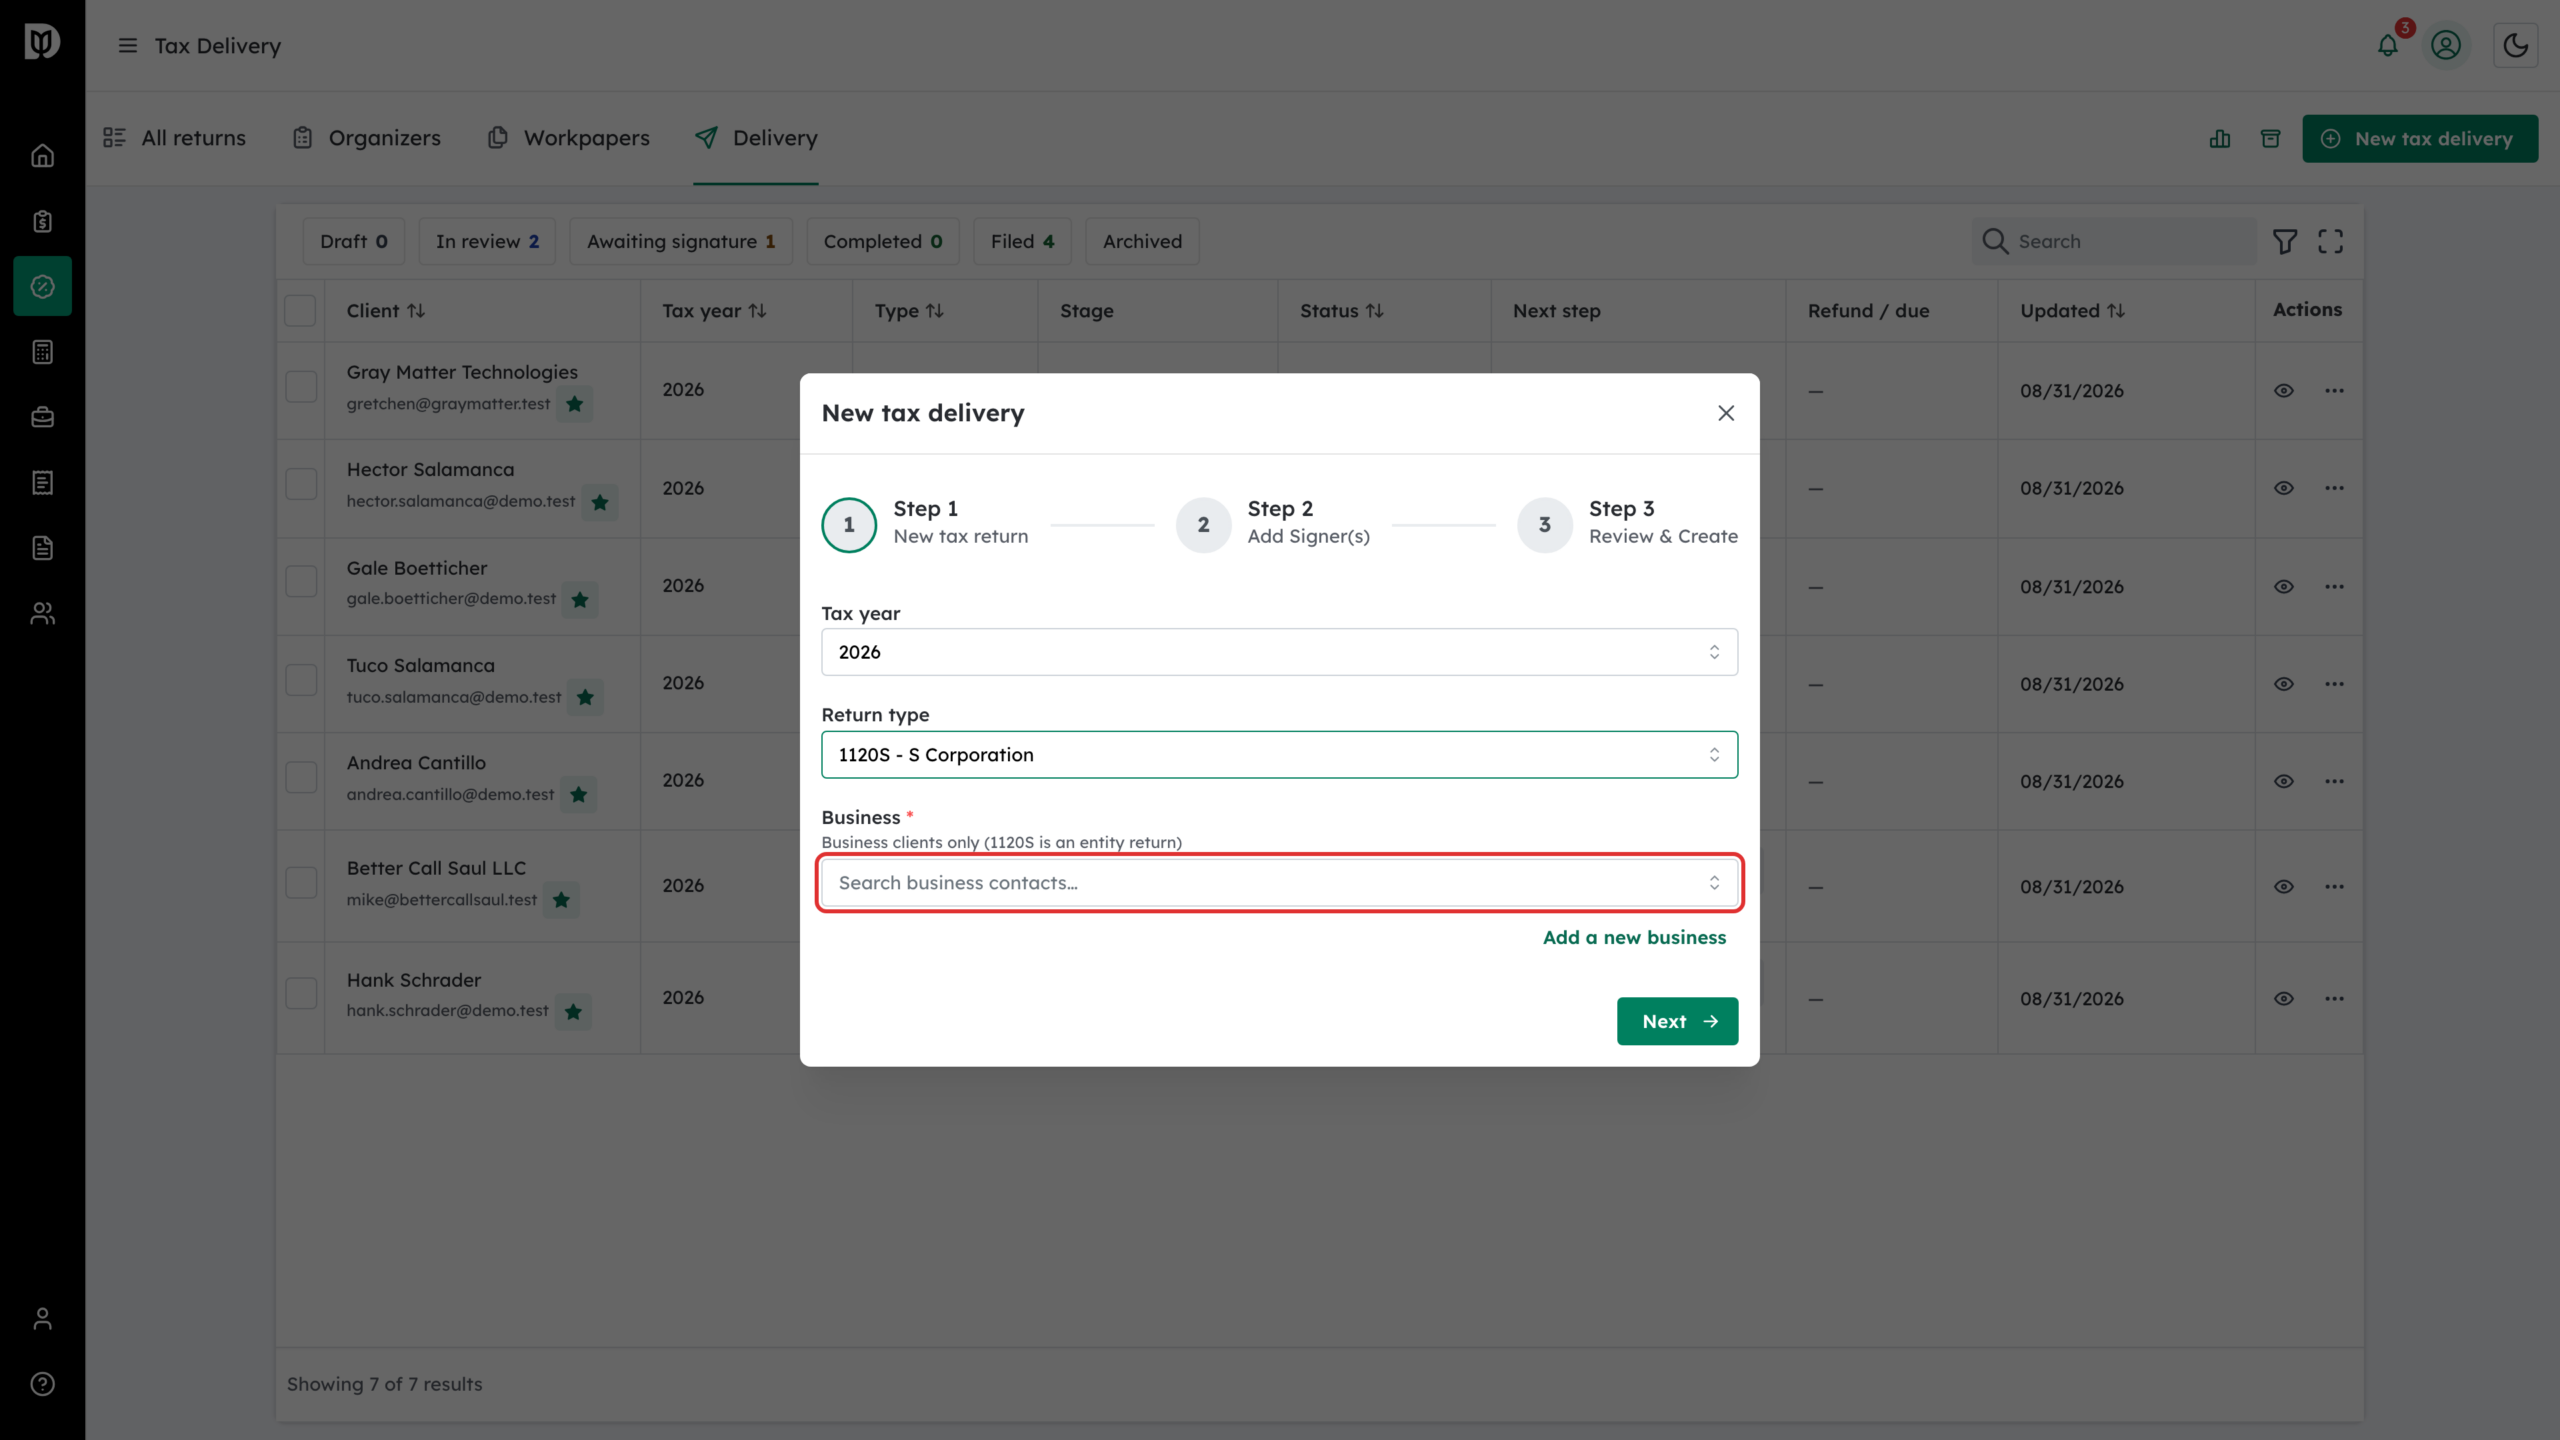
On Step 1 – New tax return, pick the Tax year, then open Return type and choose one:
- 1040 – Individual
- 1065 – Partnership
- 1120S – S Corporation
- 1120 – C Corporation

Step 3: For a business return, pick the business
If you pick 1065, 1120S or 1120, a Business field appears. Type in Search business contacts… to pick a business you already have, or click Add a new business to create one. Click Next.
Step 4: Add the signers
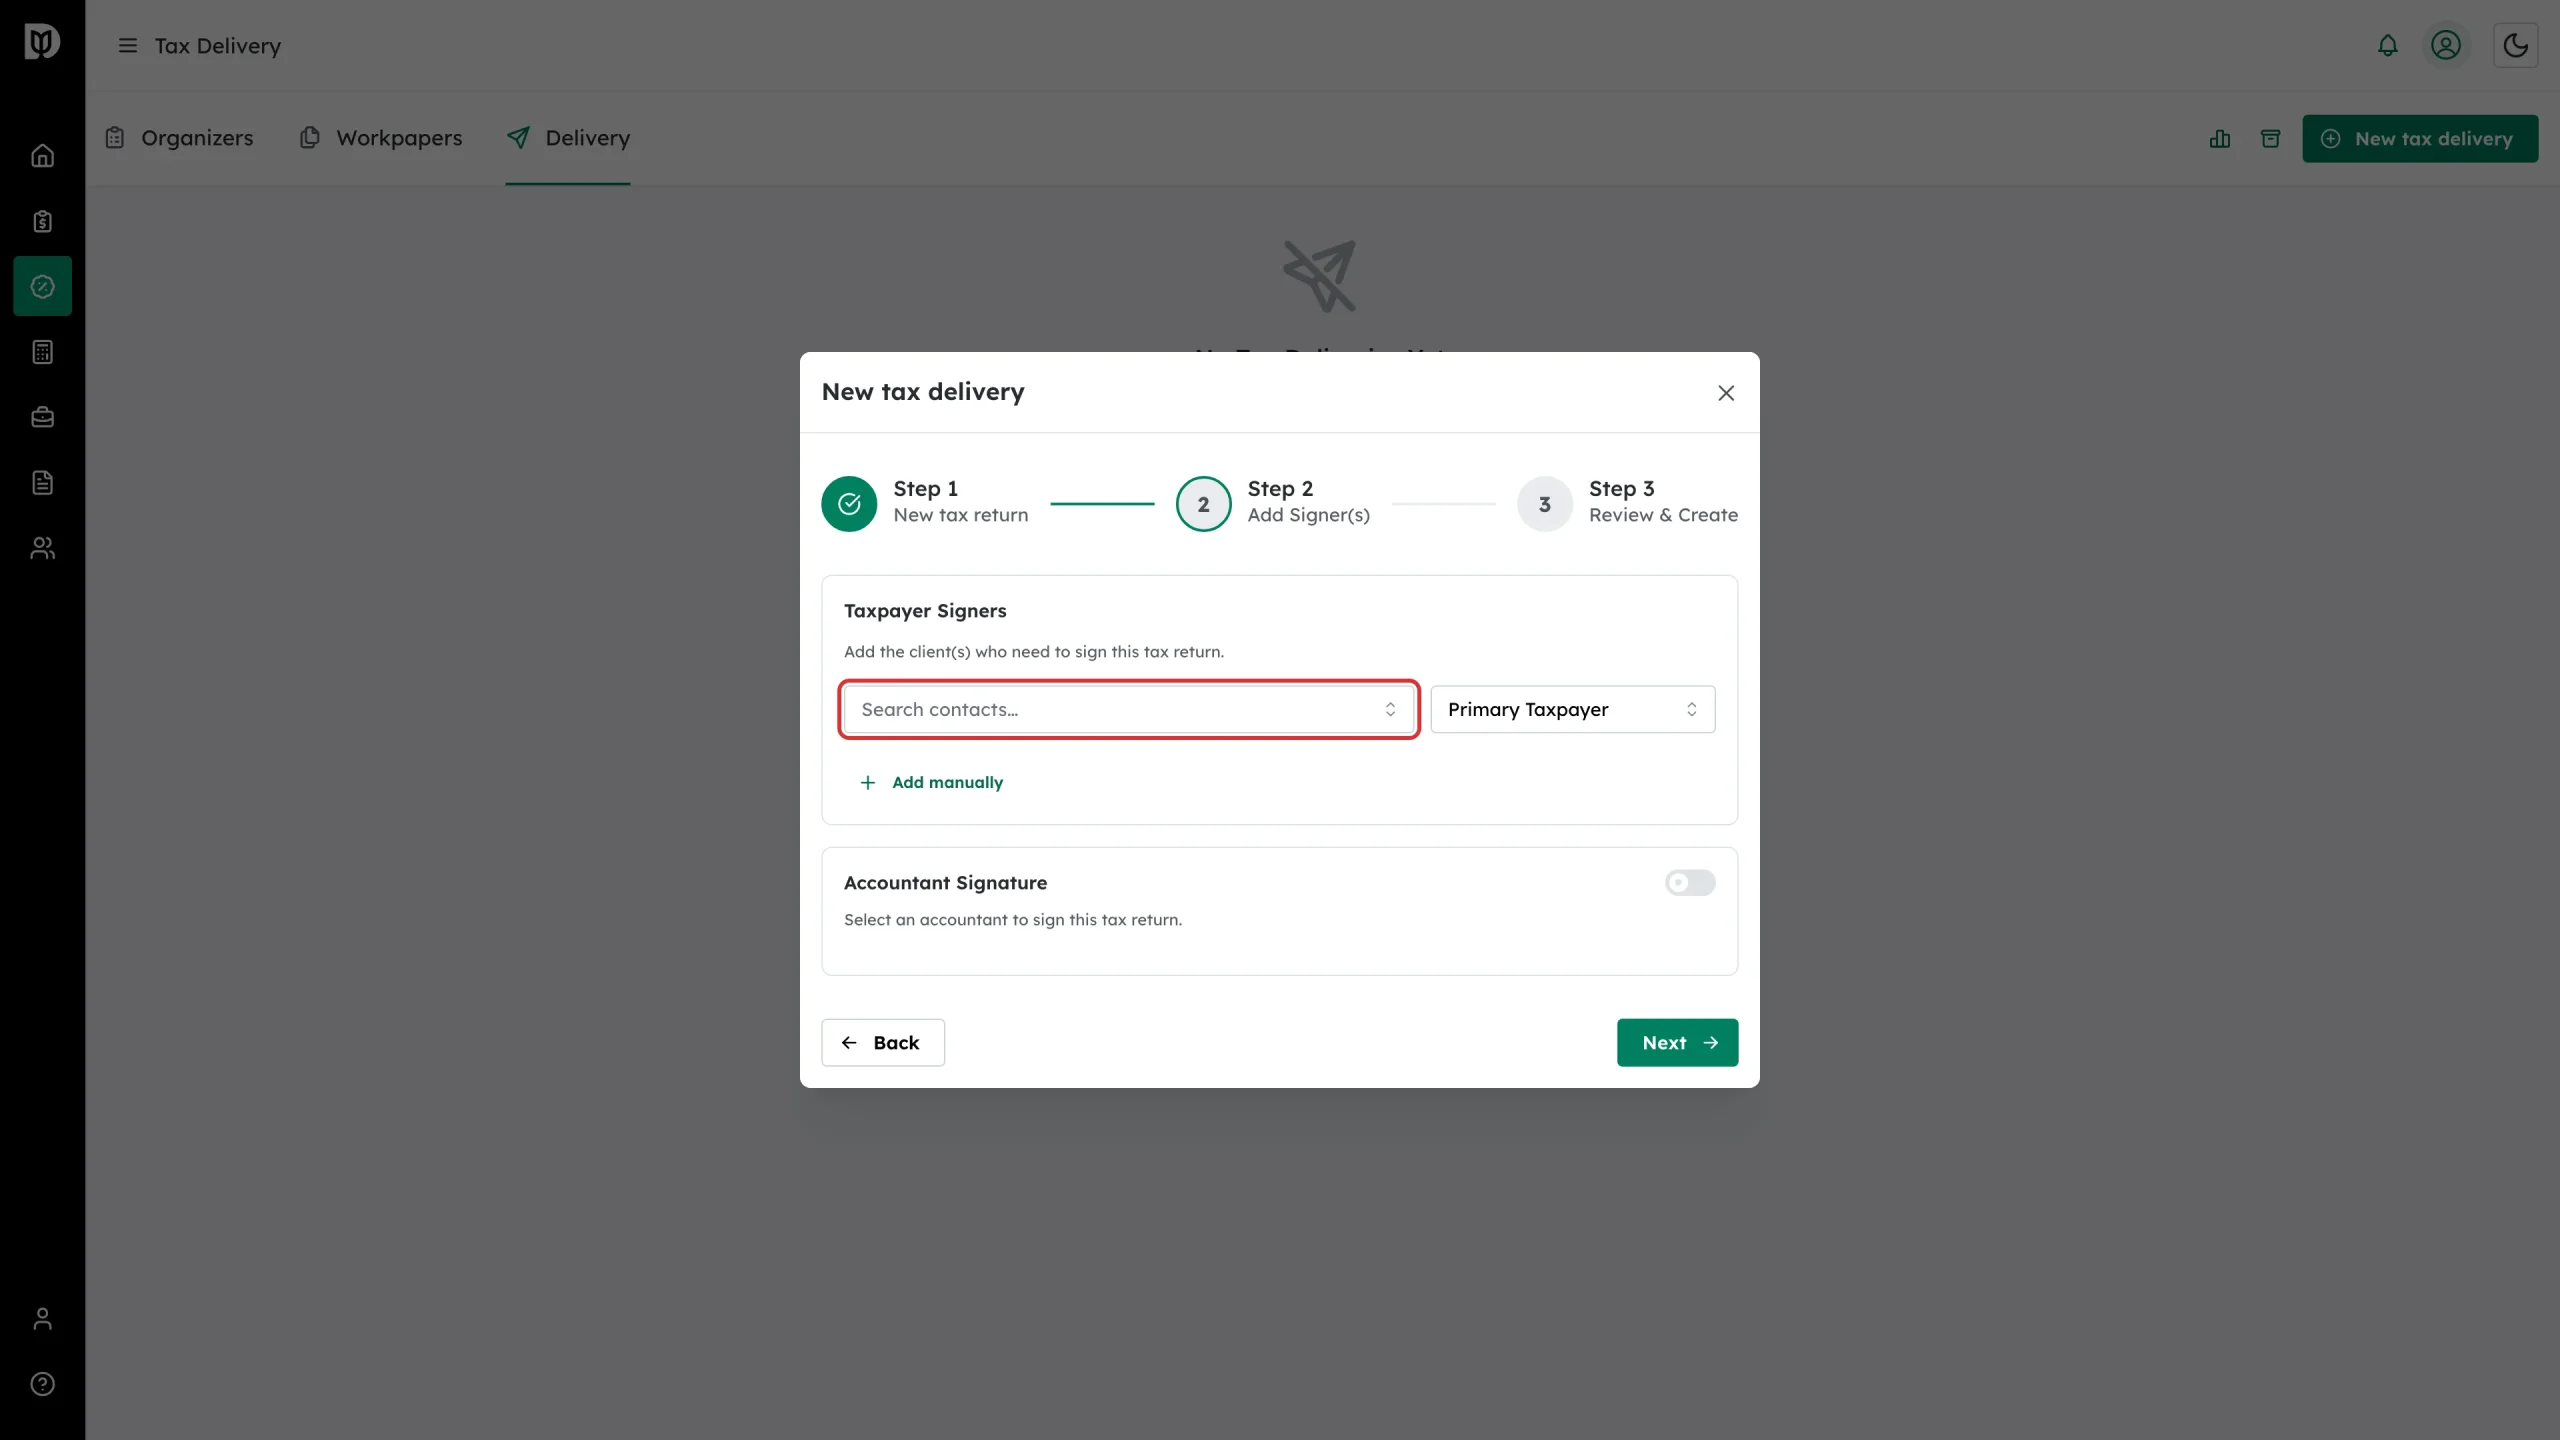
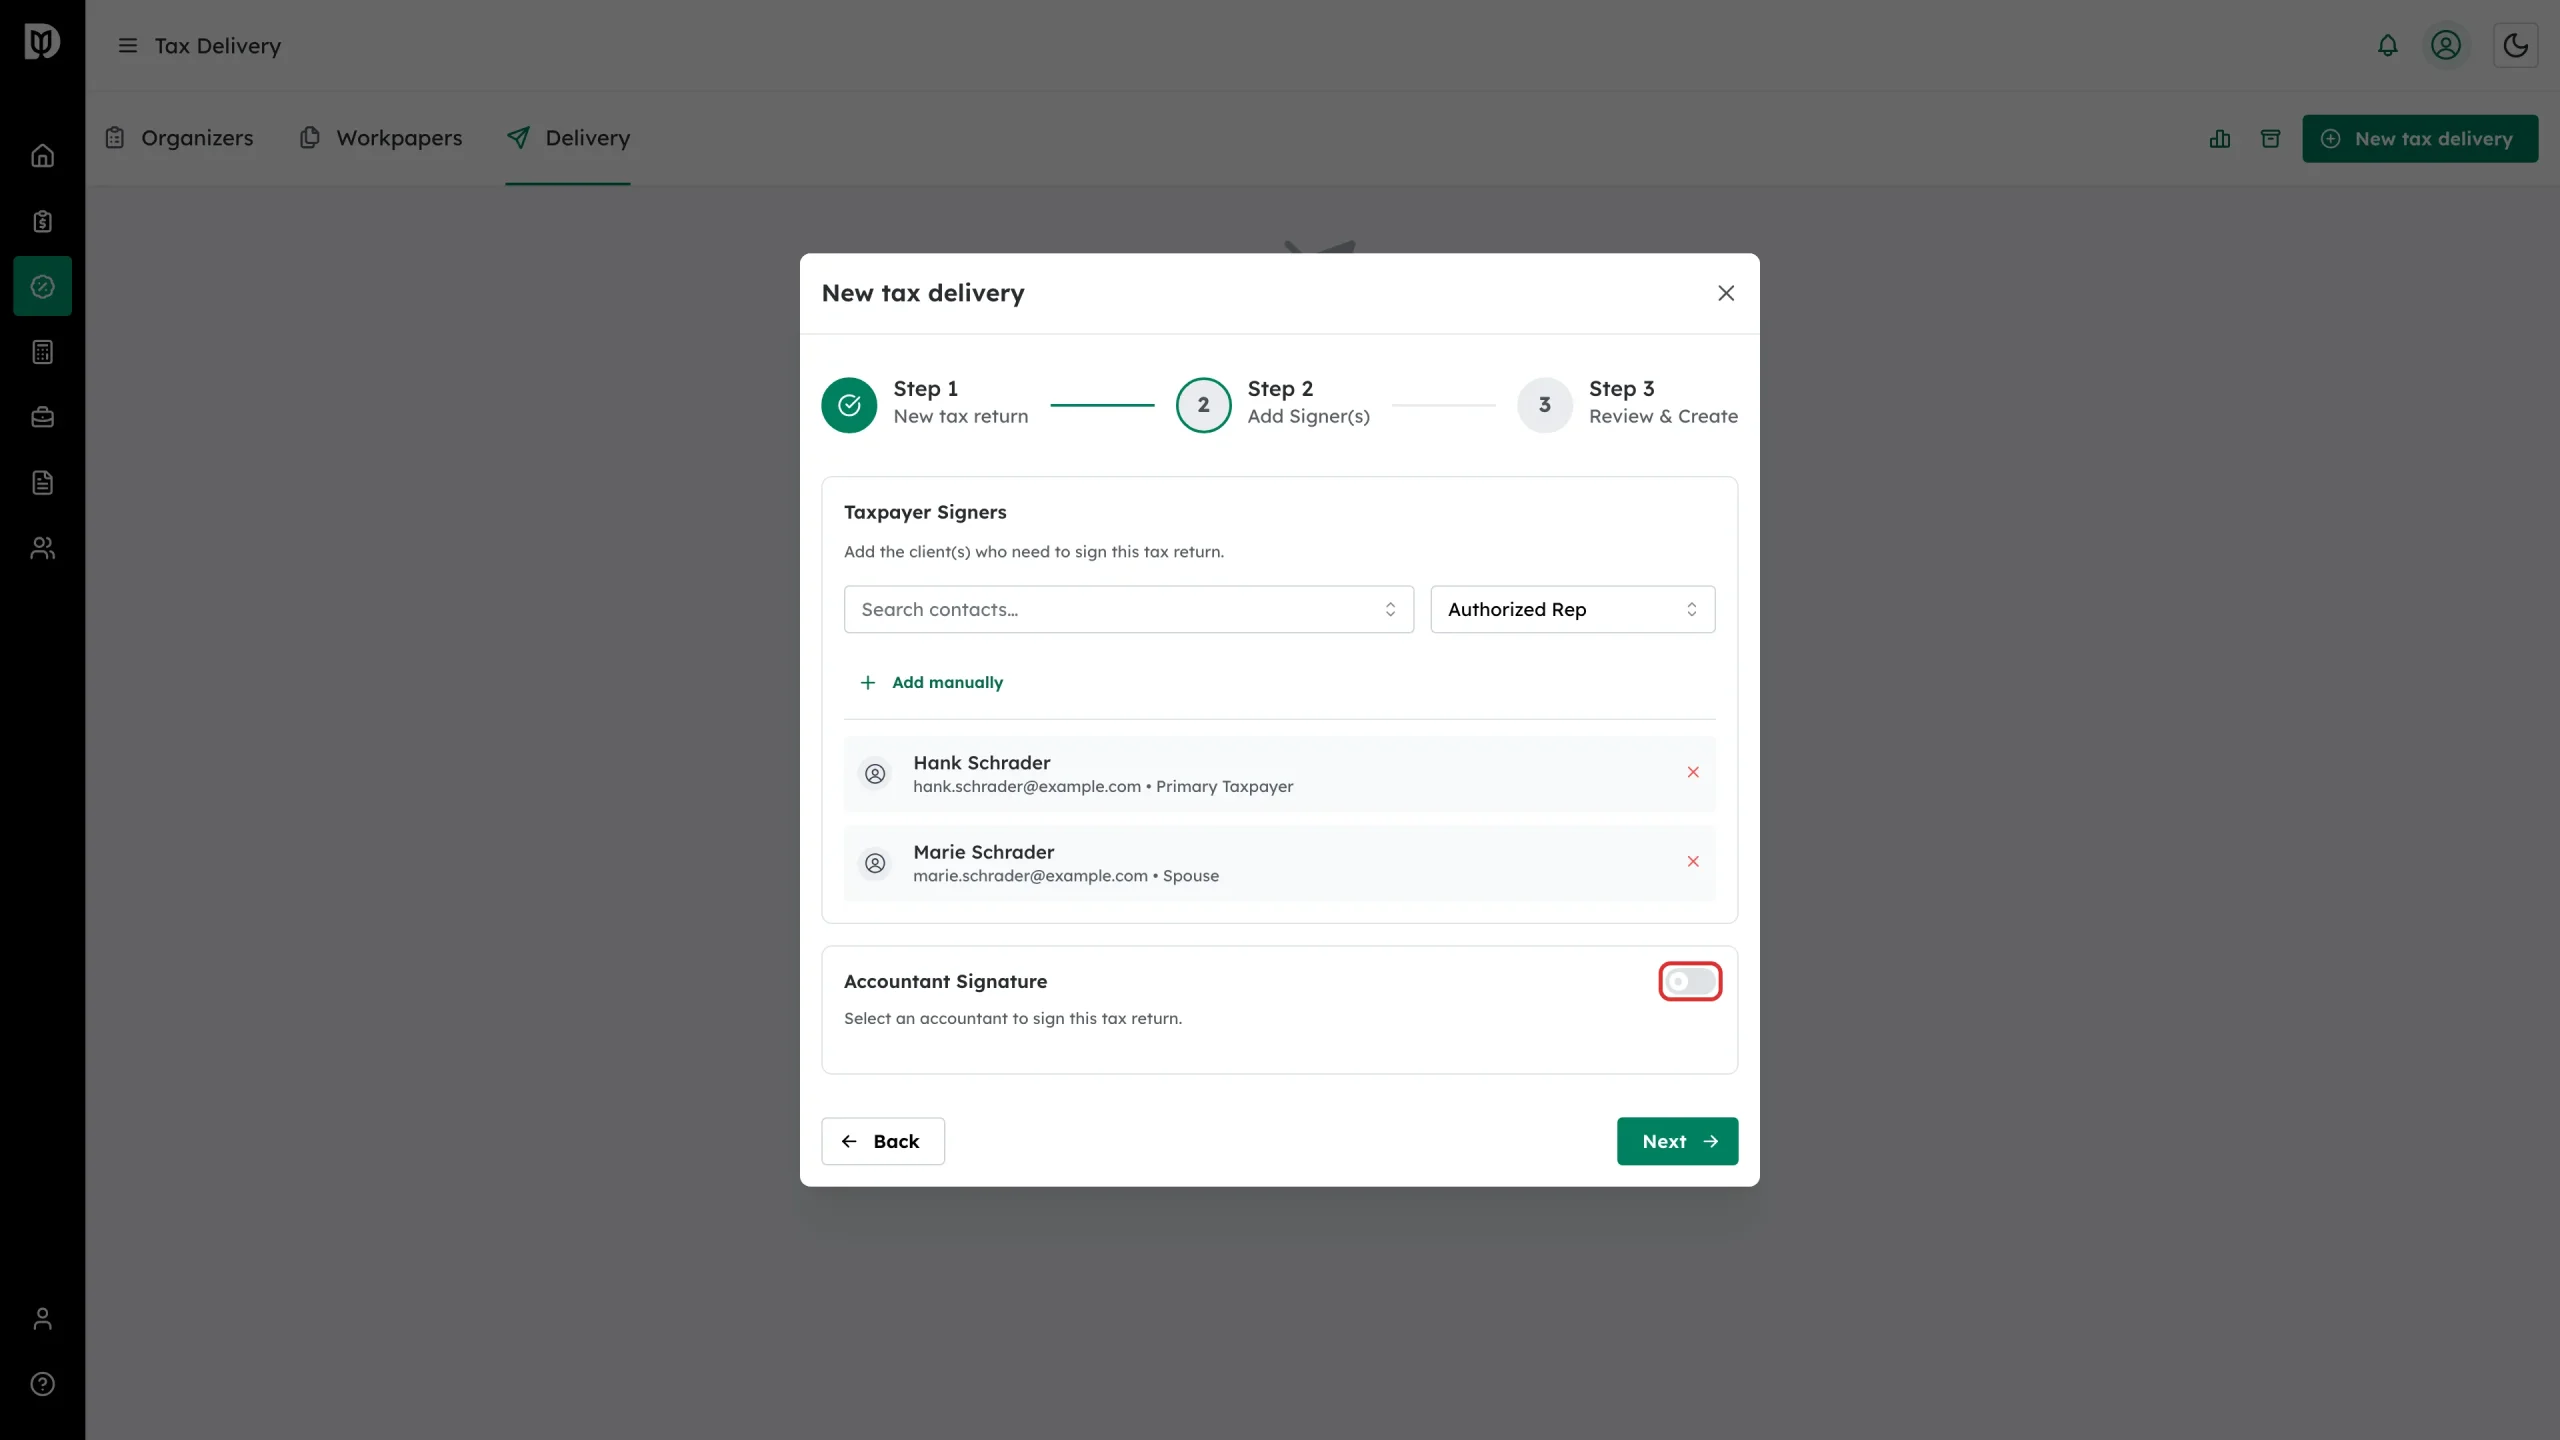
On Step 2 – Add Signer(s), use Search contacts… to find someone already in your contact list, choose their role in the dropdown beside the search box, and add them.
Step 5: Or enter a signer by hand
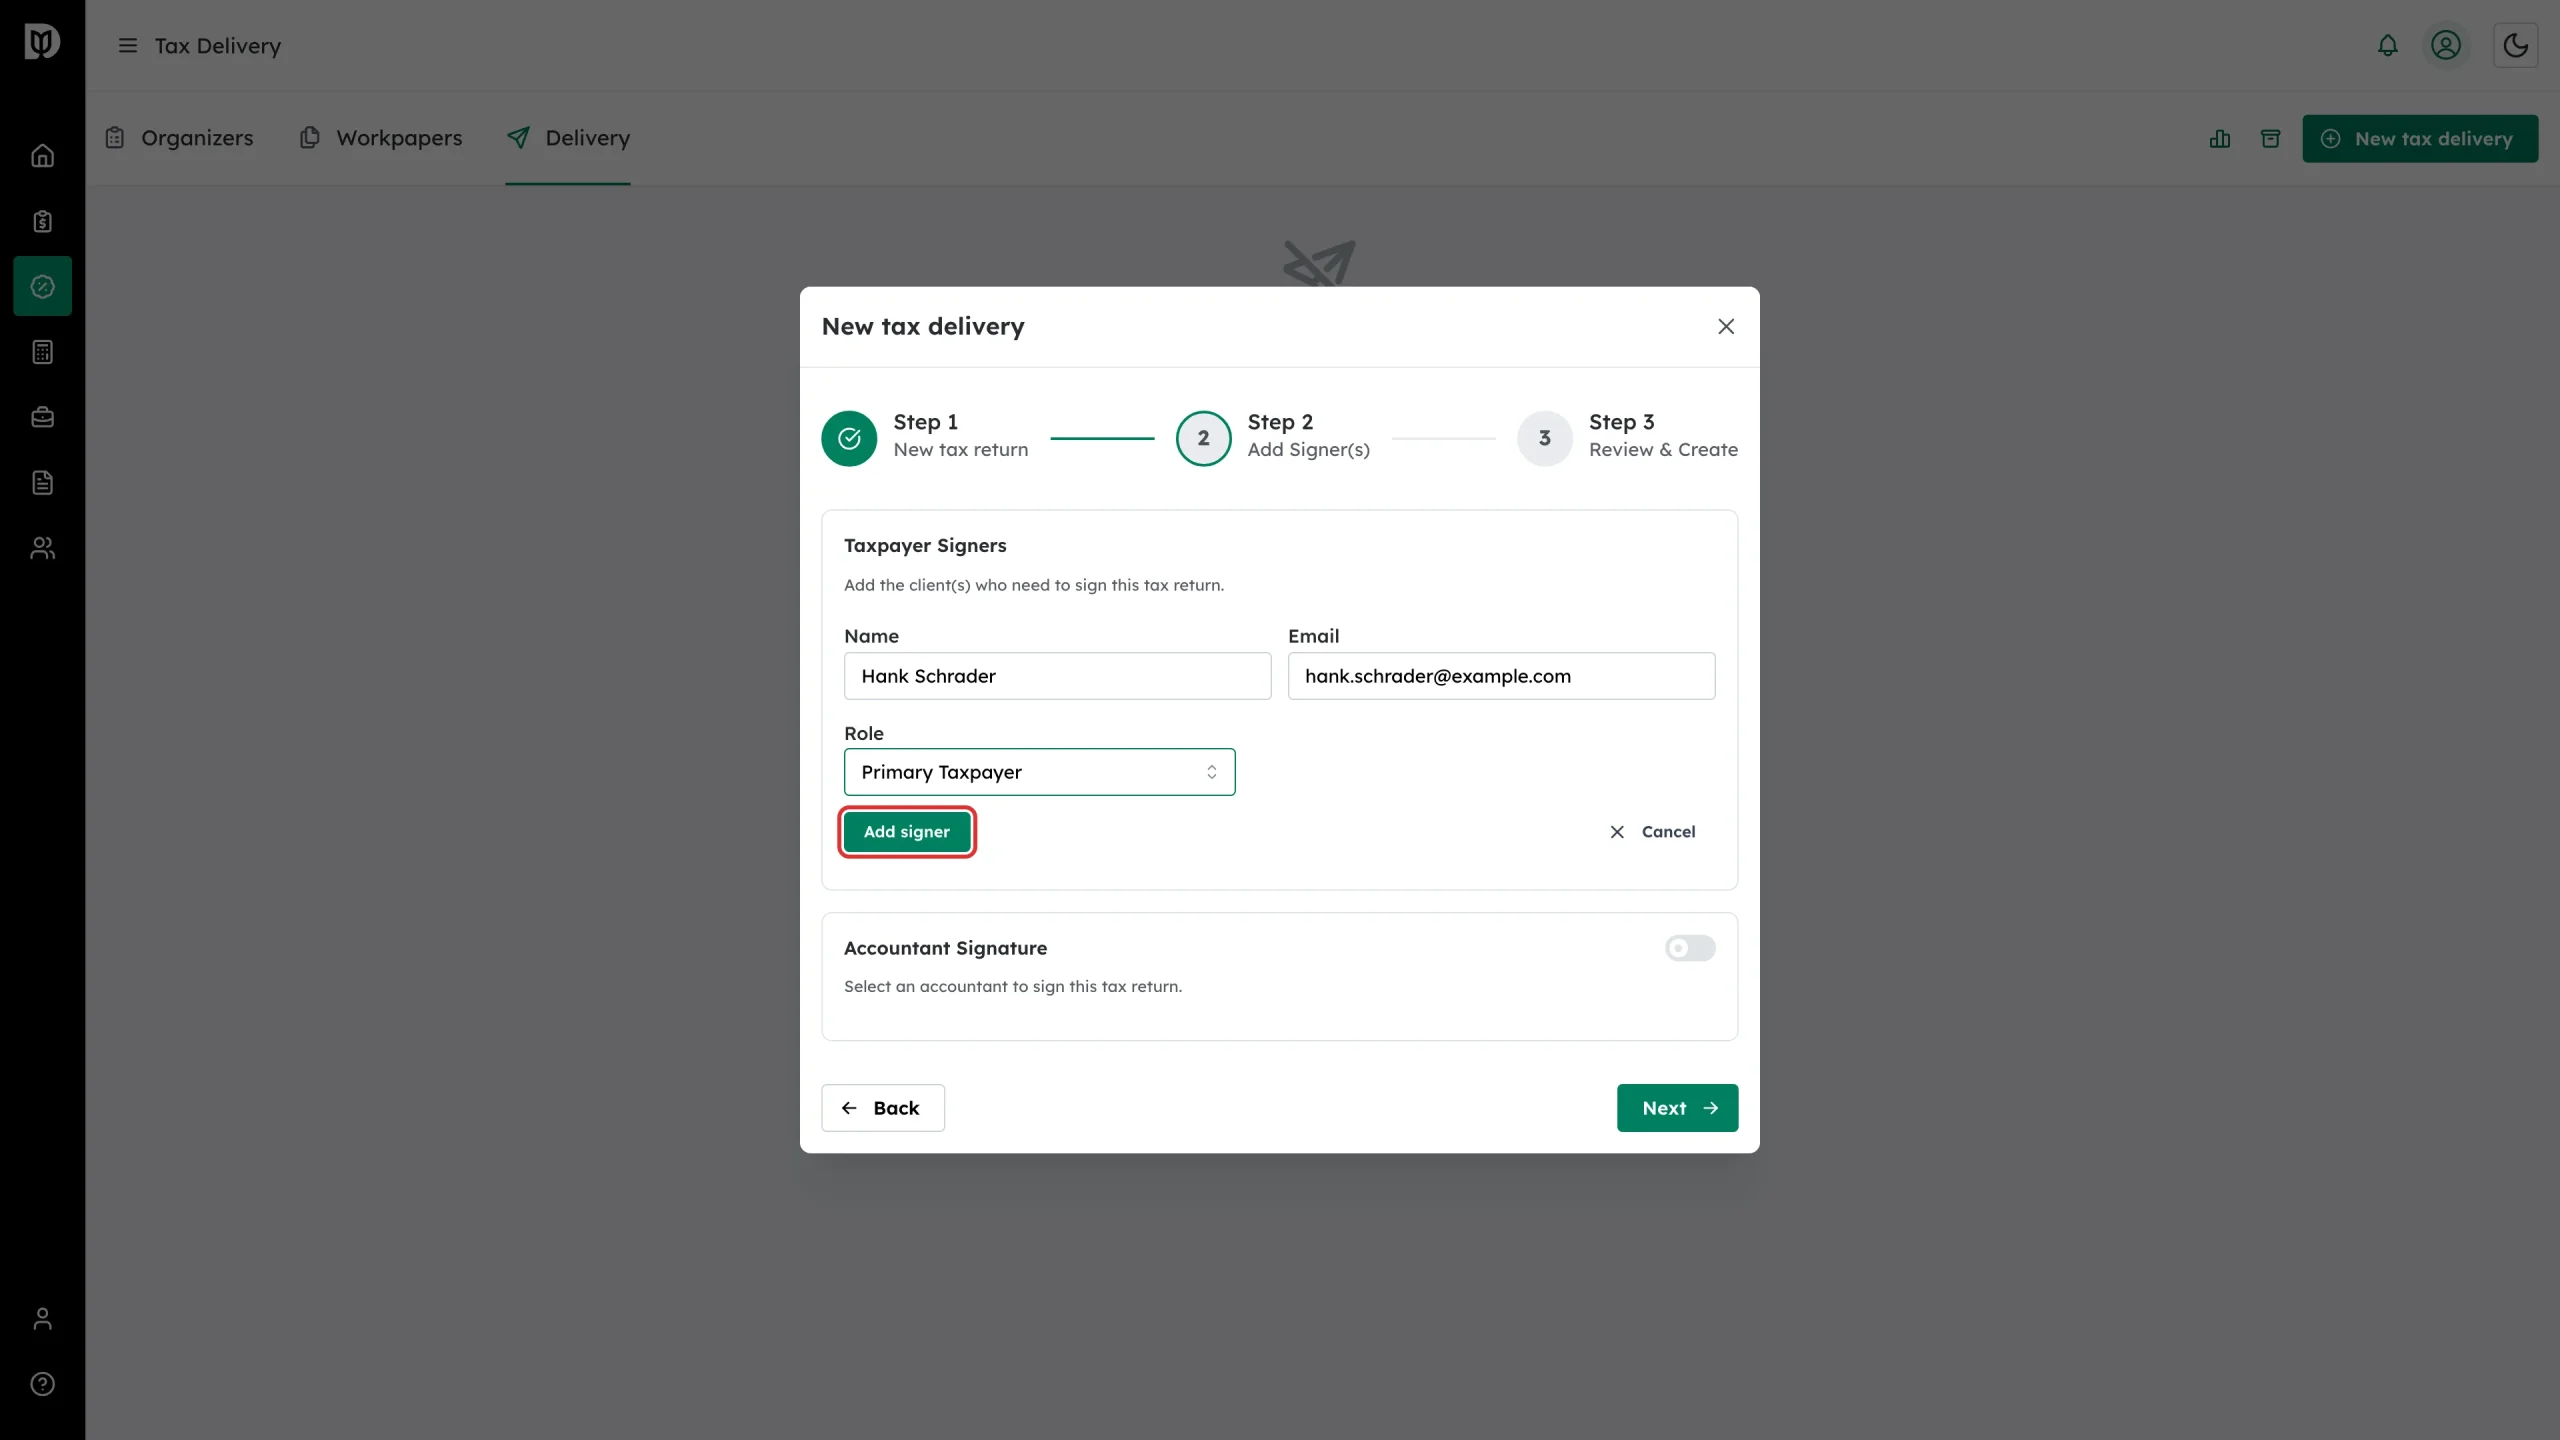
If the person is not a contact yet, click + Add manually, fill in Name, Email and Role, then click Add signer.
The roles you can choose depend on the return type:
- 1040: Primary Taxpayer, Spouse, Authorized Rep, Accountant
- 1065 and 1120S: Officer, Partner, Authorized Rep, Accountant
- 1120: Officer, Authorized Rep, Accountant
Step 6: Decide whether an accountant signs too
Turn on Accountant Signature if someone from your firm also has to sign, then choose the accountant. Leave it off if only the client signs. Click Next.
Step 7: Review and create
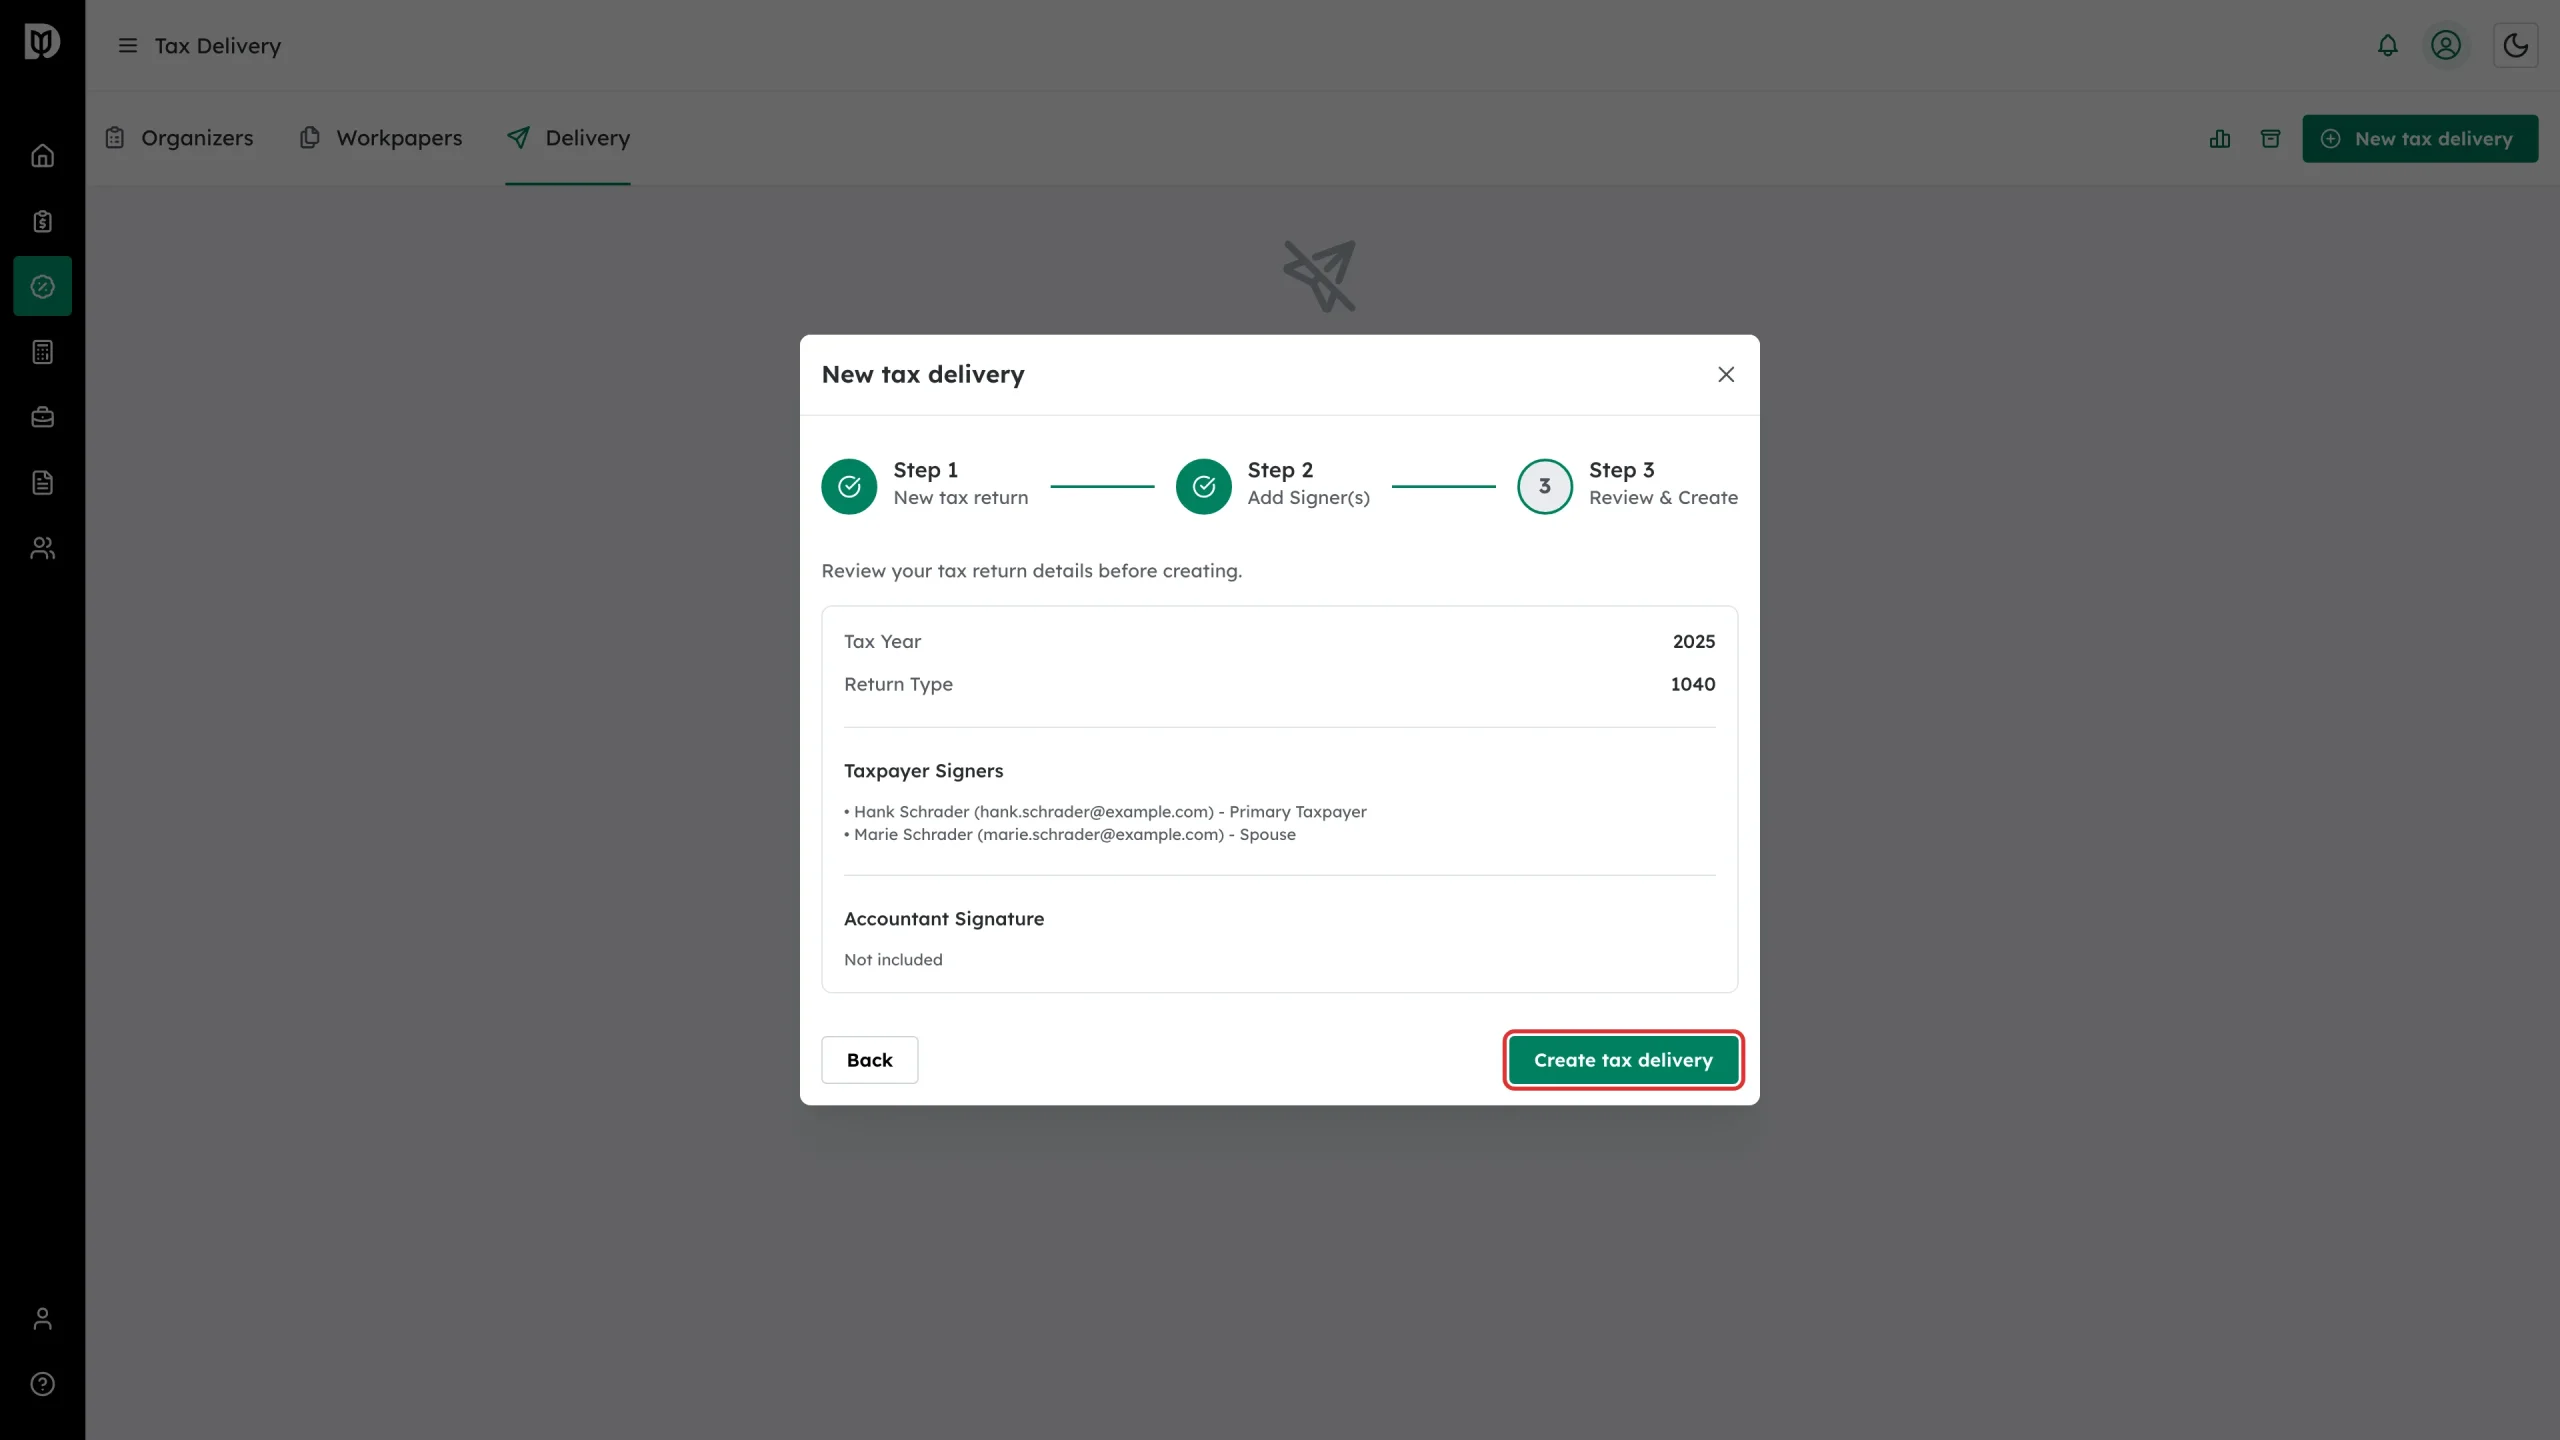
Step 3 – Review & Create lists the tax year, return type, every signer with their role, and whether an accountant signature is included. Click Create tax delivery.
What happens next
The new tax delivery opens with a Draft badge and a Next Step card that says “Upload the tax return documents to proceed.” Nothing is sent to the client yet.
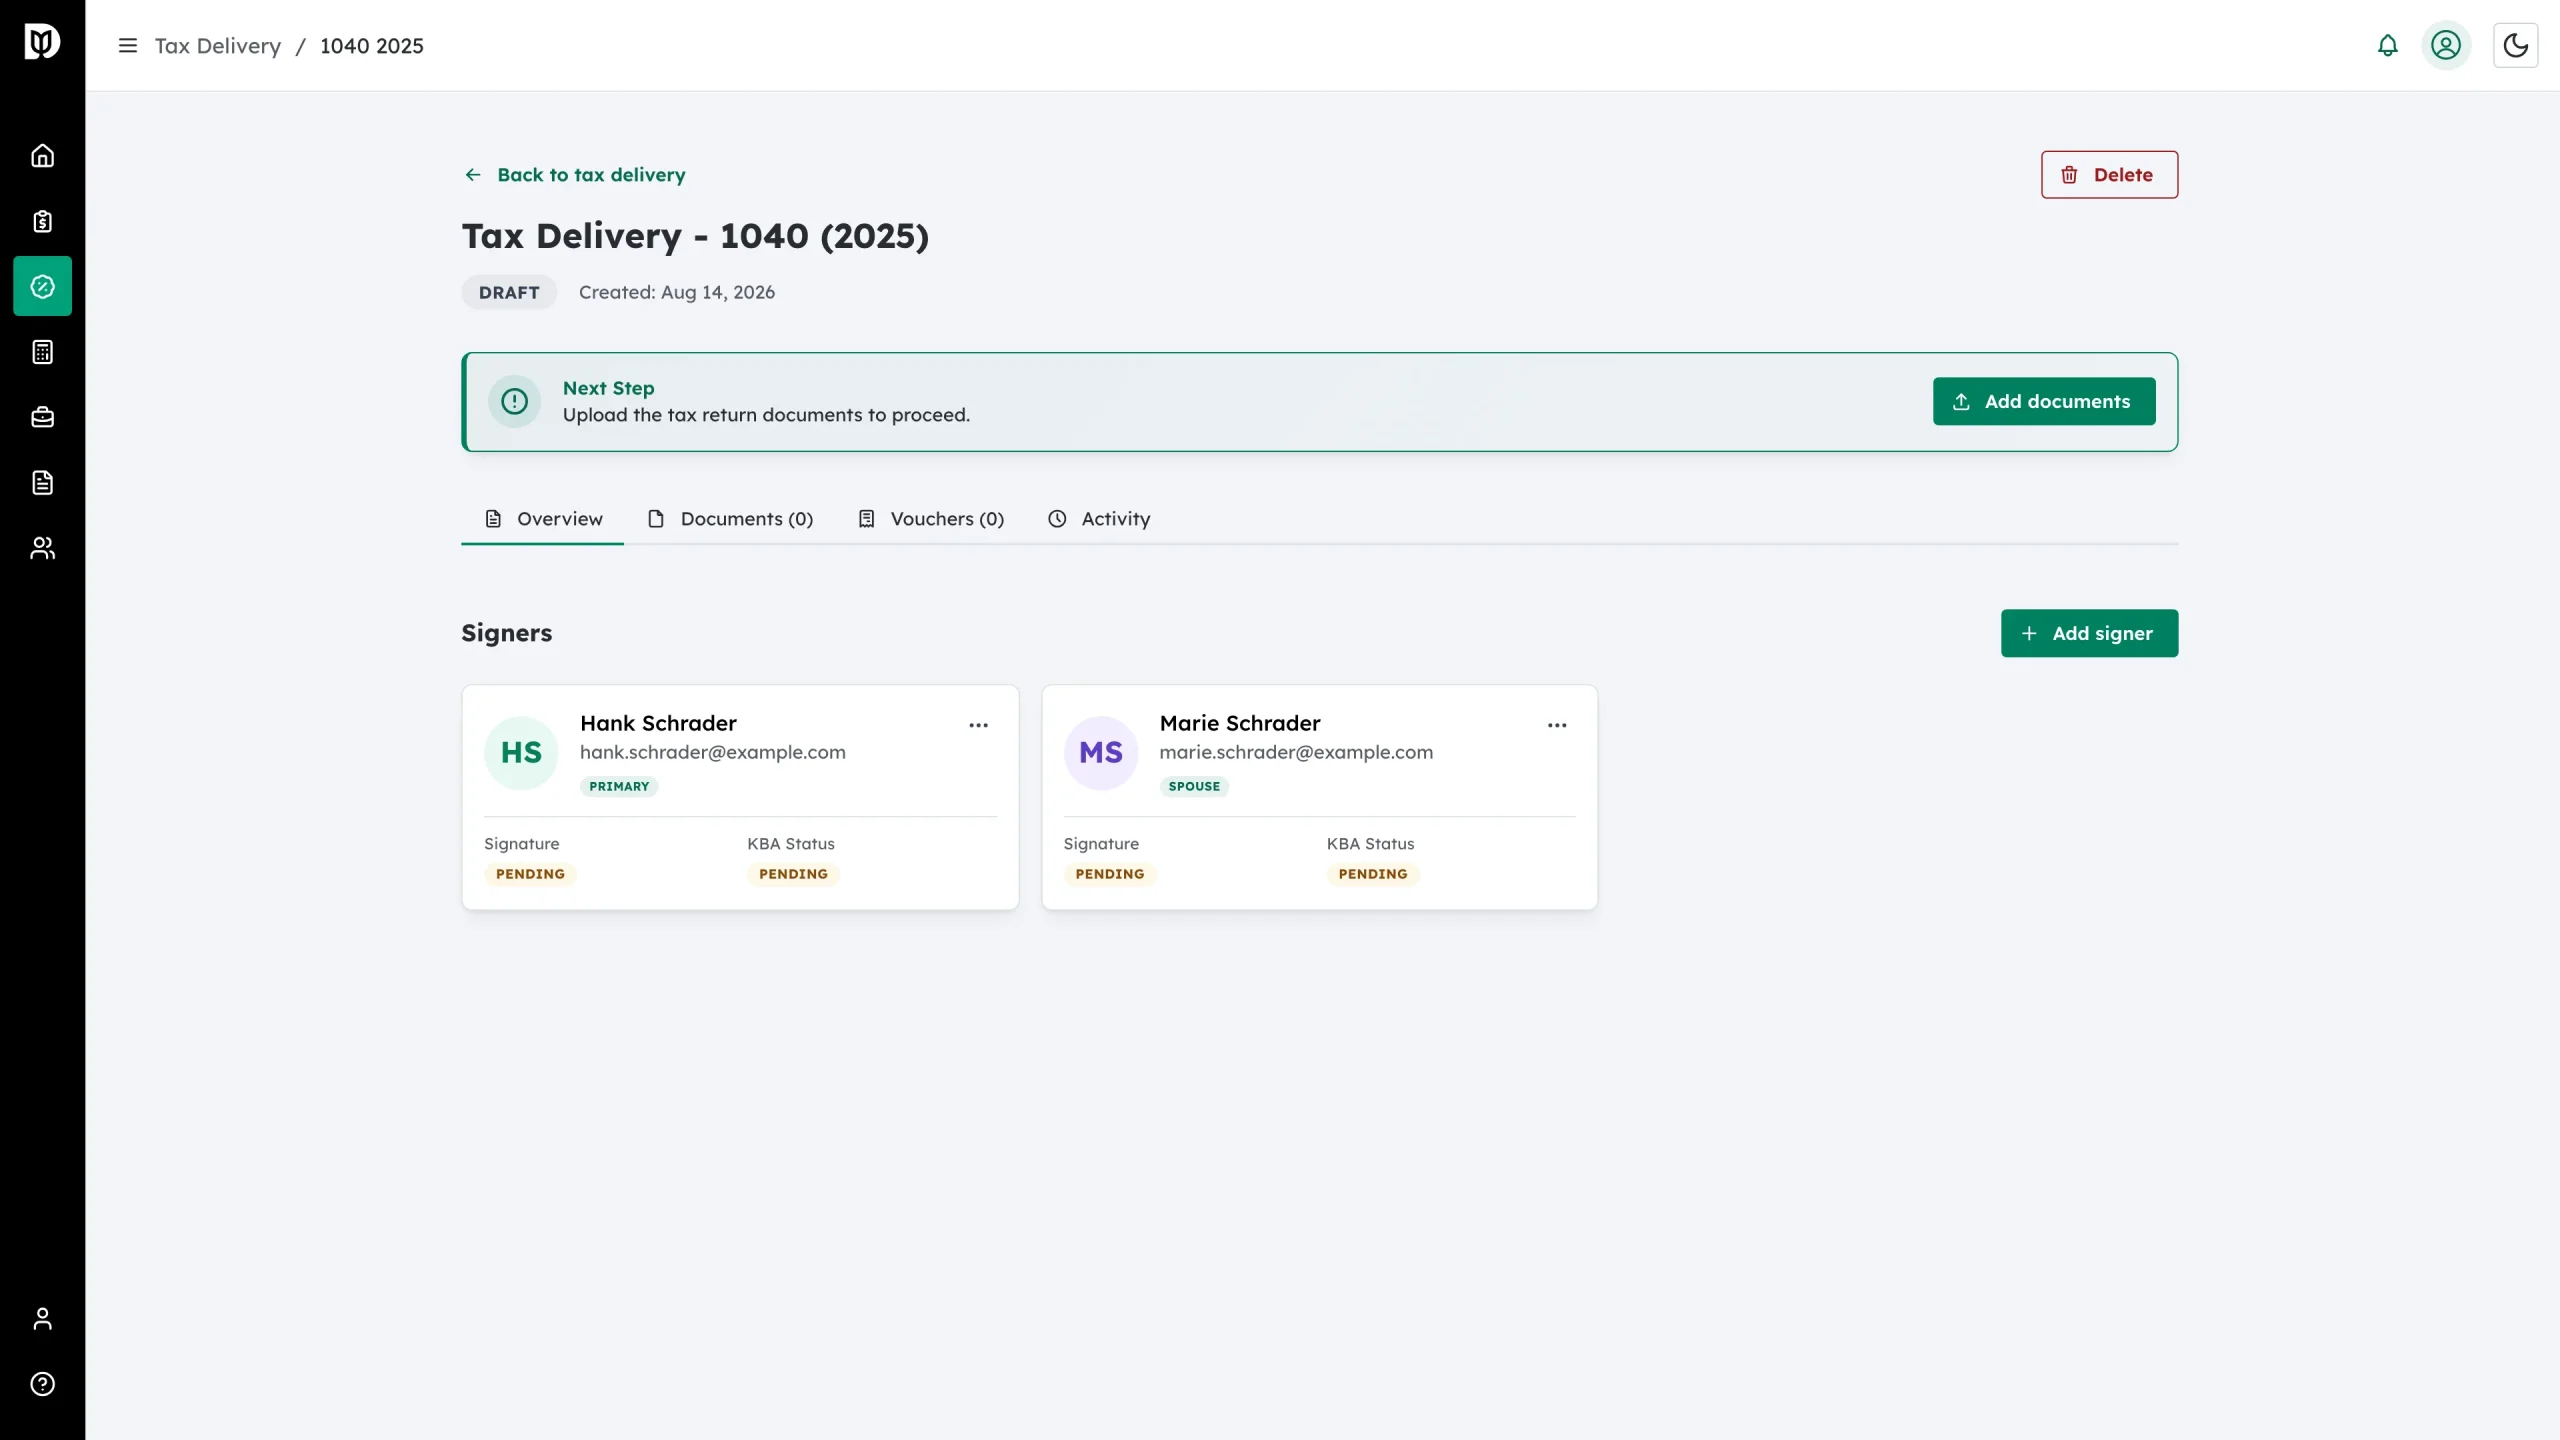
From here, upload the documents, place the signature fields, and then send the return for signature.
Troubleshooting
- A role is greyed out: Only one Primary Taxpayer and one Spouse (or one Officer) are allowed per return. Pick a different role.
- The email is rejected as a duplicate: Every signer on a return needs a different email address.
- Next is disabled on Step 1: Business returns need a business picked before you can continue.