Who this is for: Accountants keeping track of a client’s estimated tax payments.
What you’ll learn: How to edit vouchers, mark them paid, send reminders and update several at once.
Before you begin
- The tax delivery must already have vouchers on it.
Step-by-step instructions
Step 1: Open the Vouchers tab
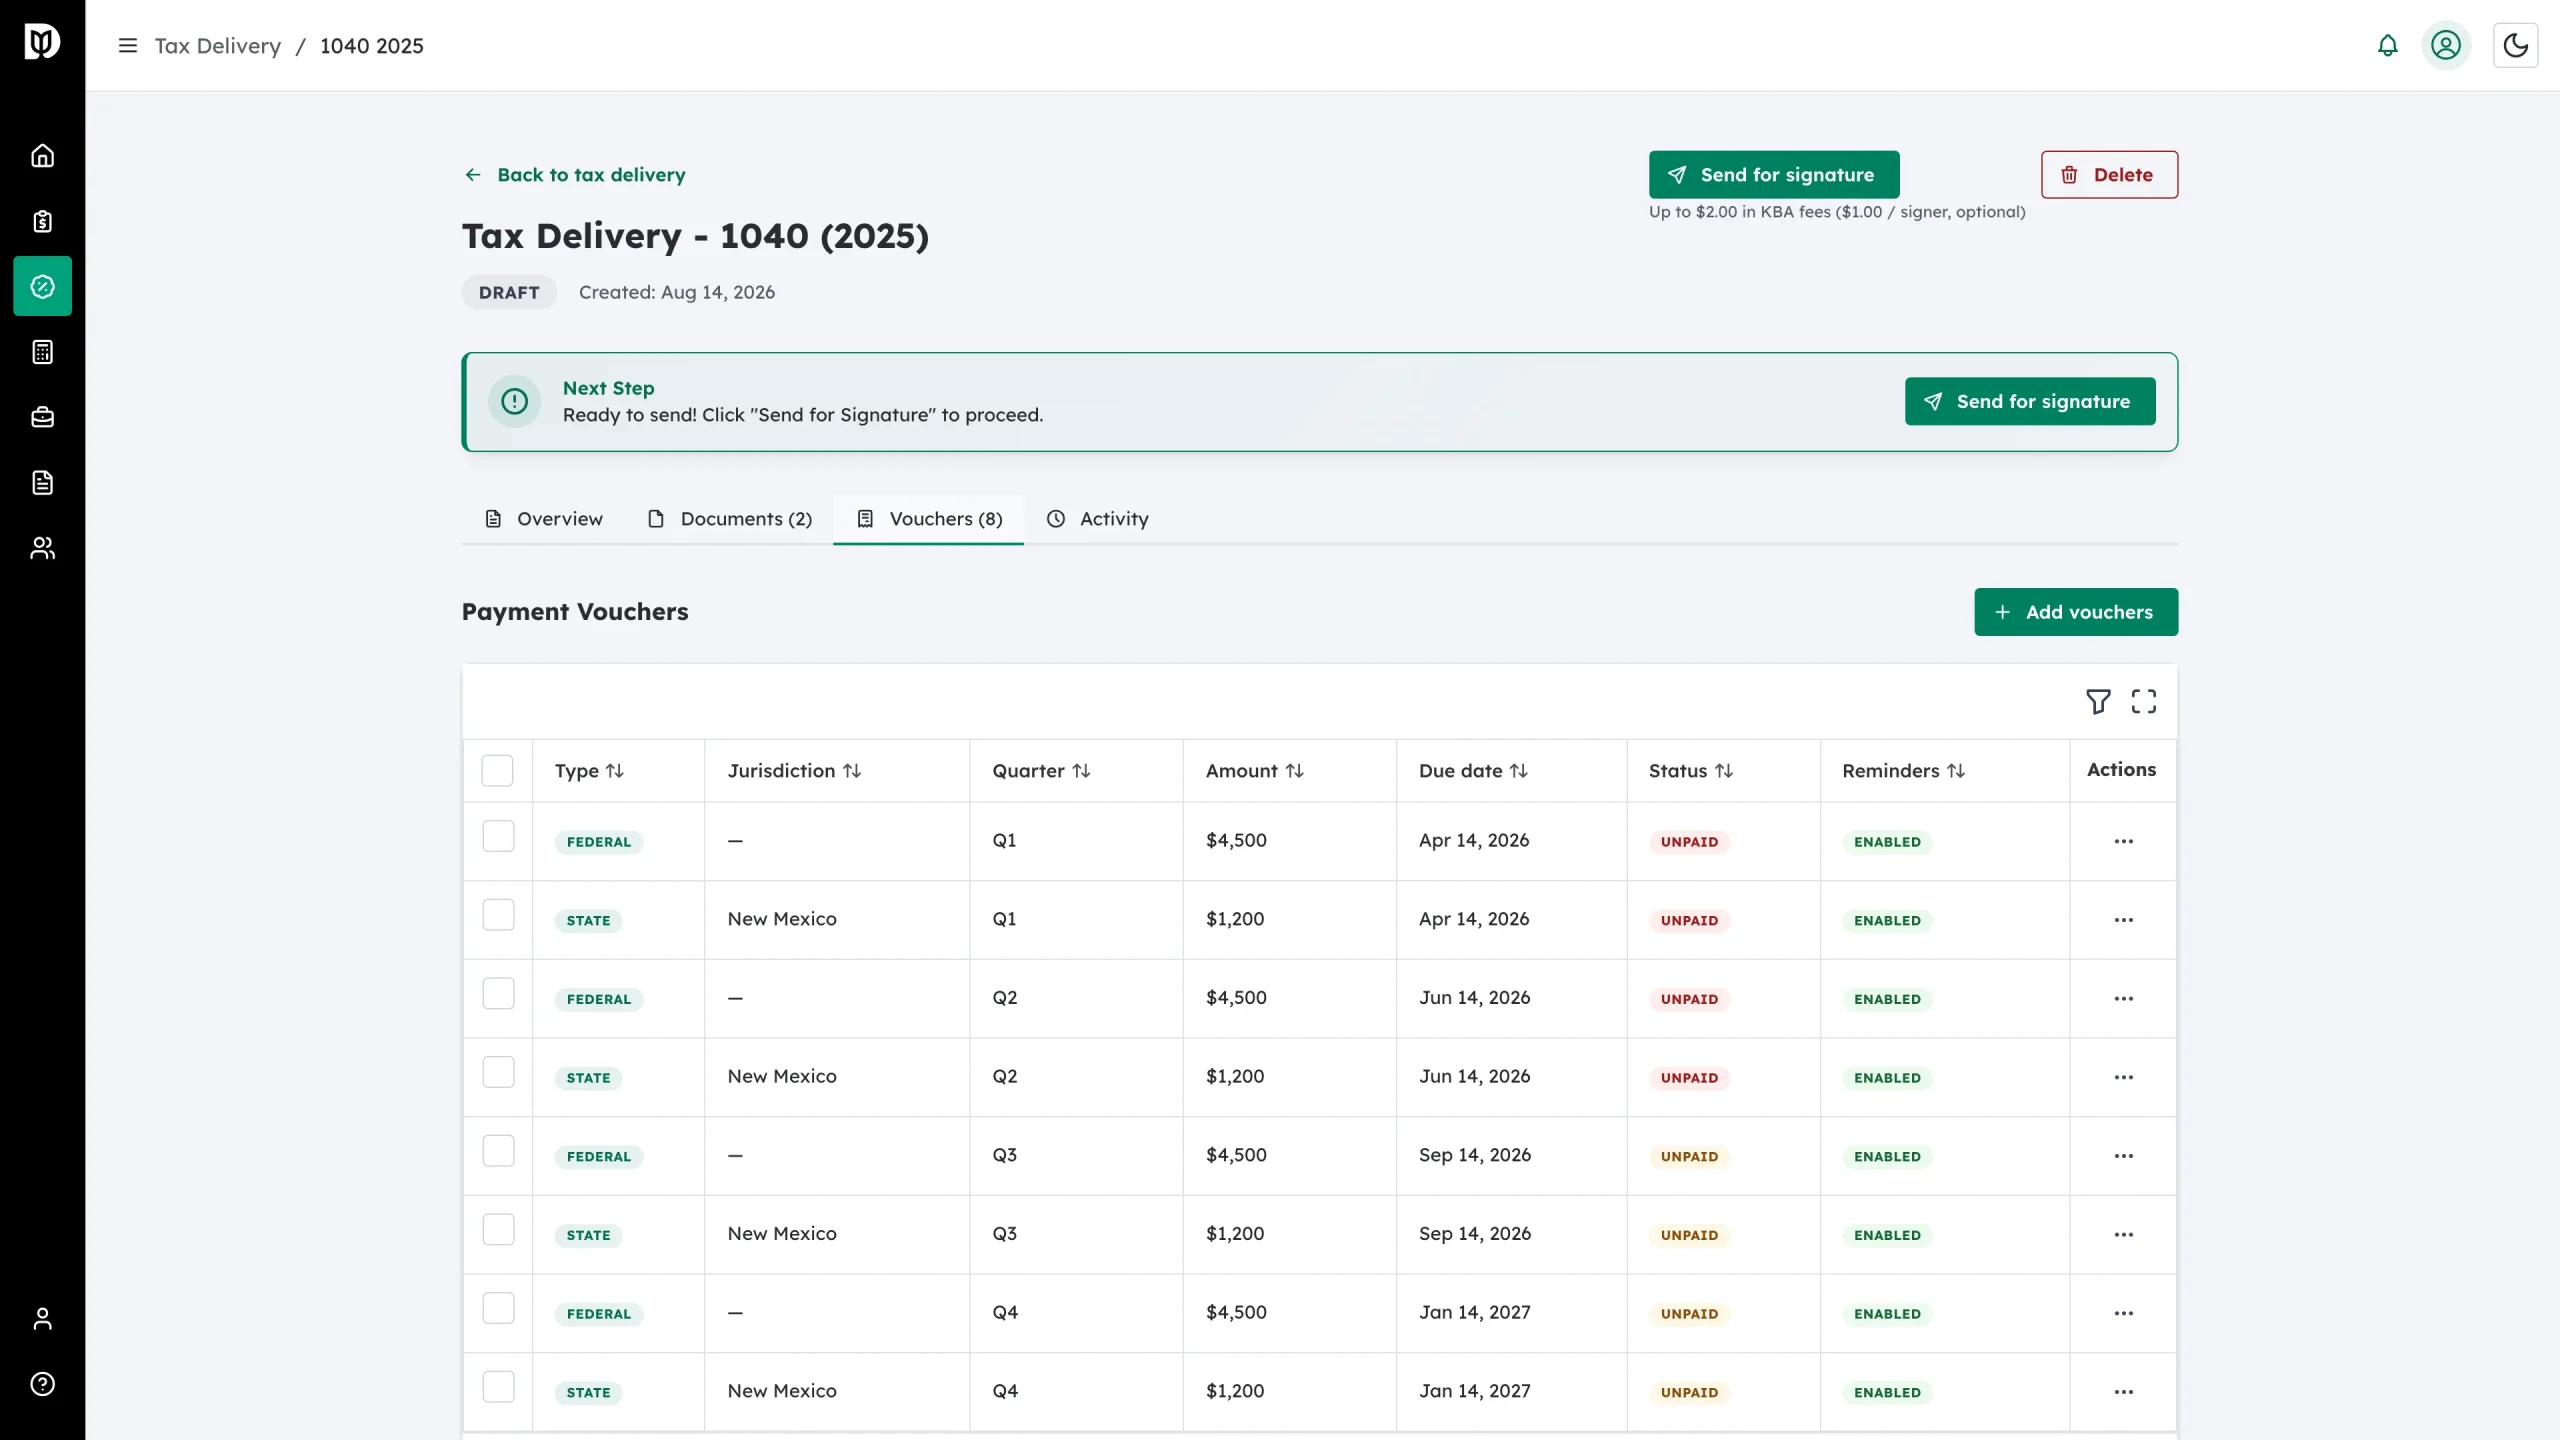
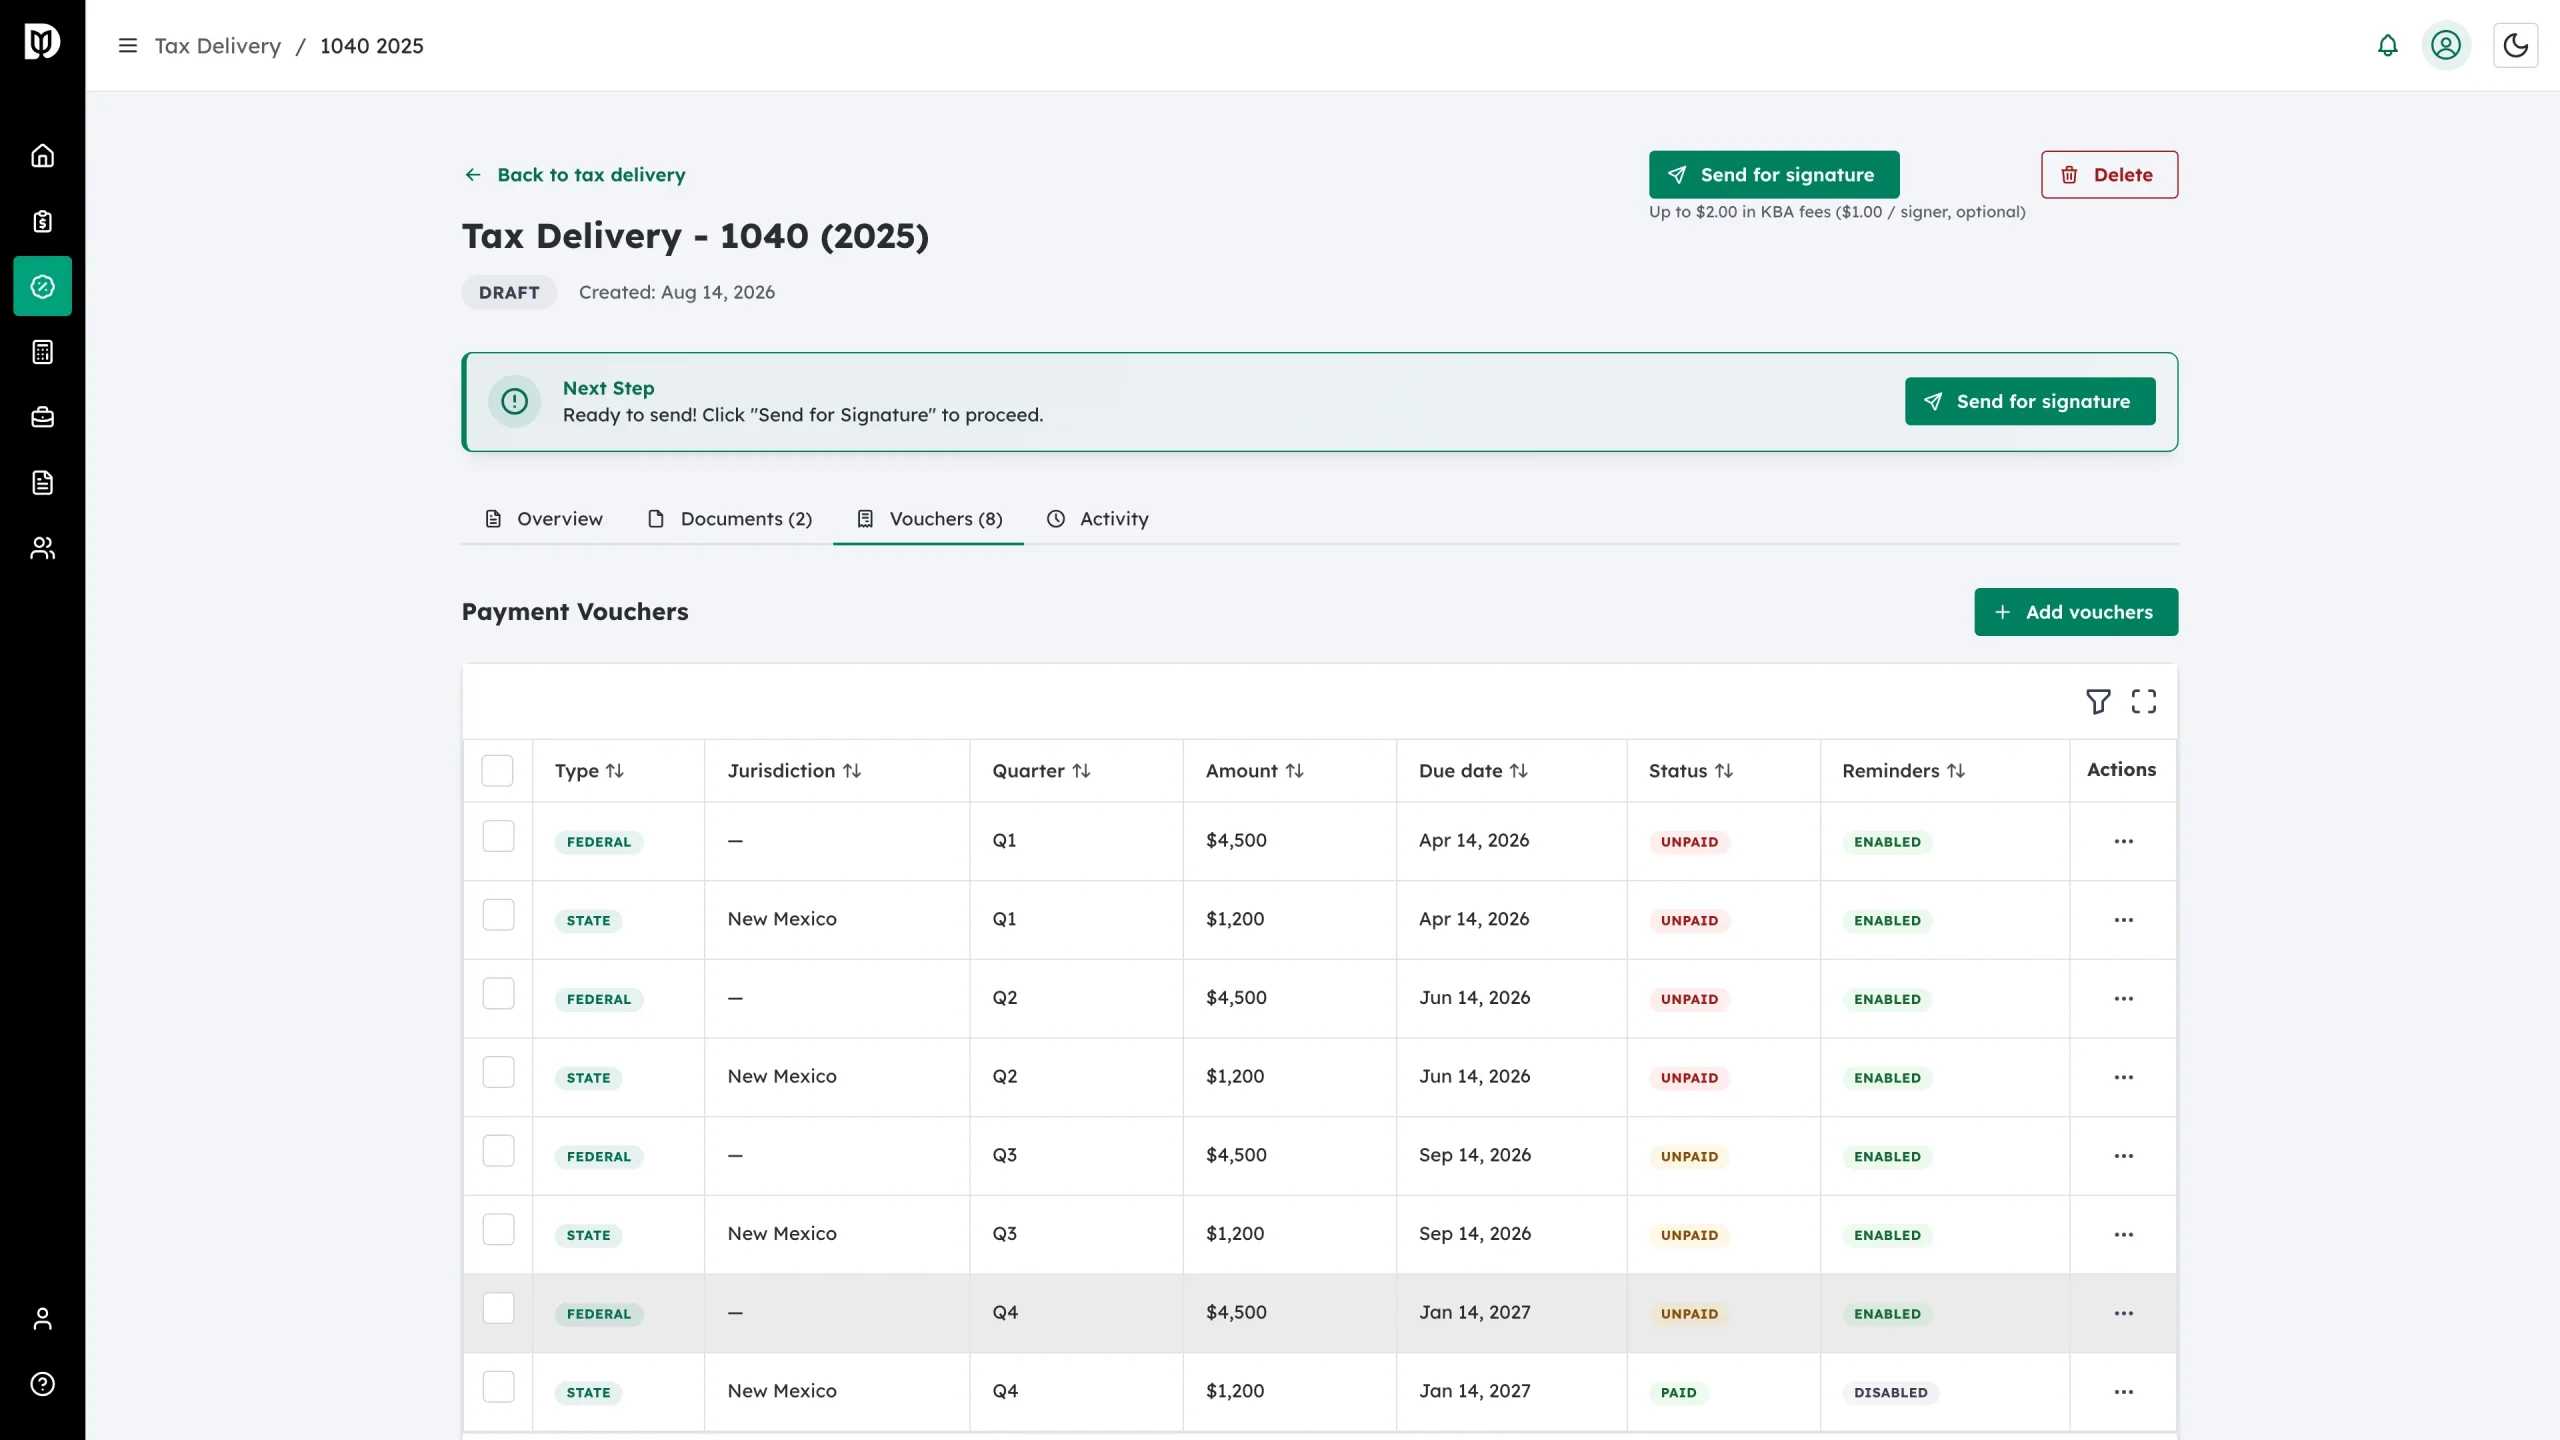
On the tax delivery detail page, click Vouchers. The table lists every voucher with its type, jurisdiction, quarter, amount, due date, payment status and whether reminders are on.
Use the funnel icon above the table to filter by column, and the expand icon to view the table full screen.
Step 2: Open a voucher’s actions
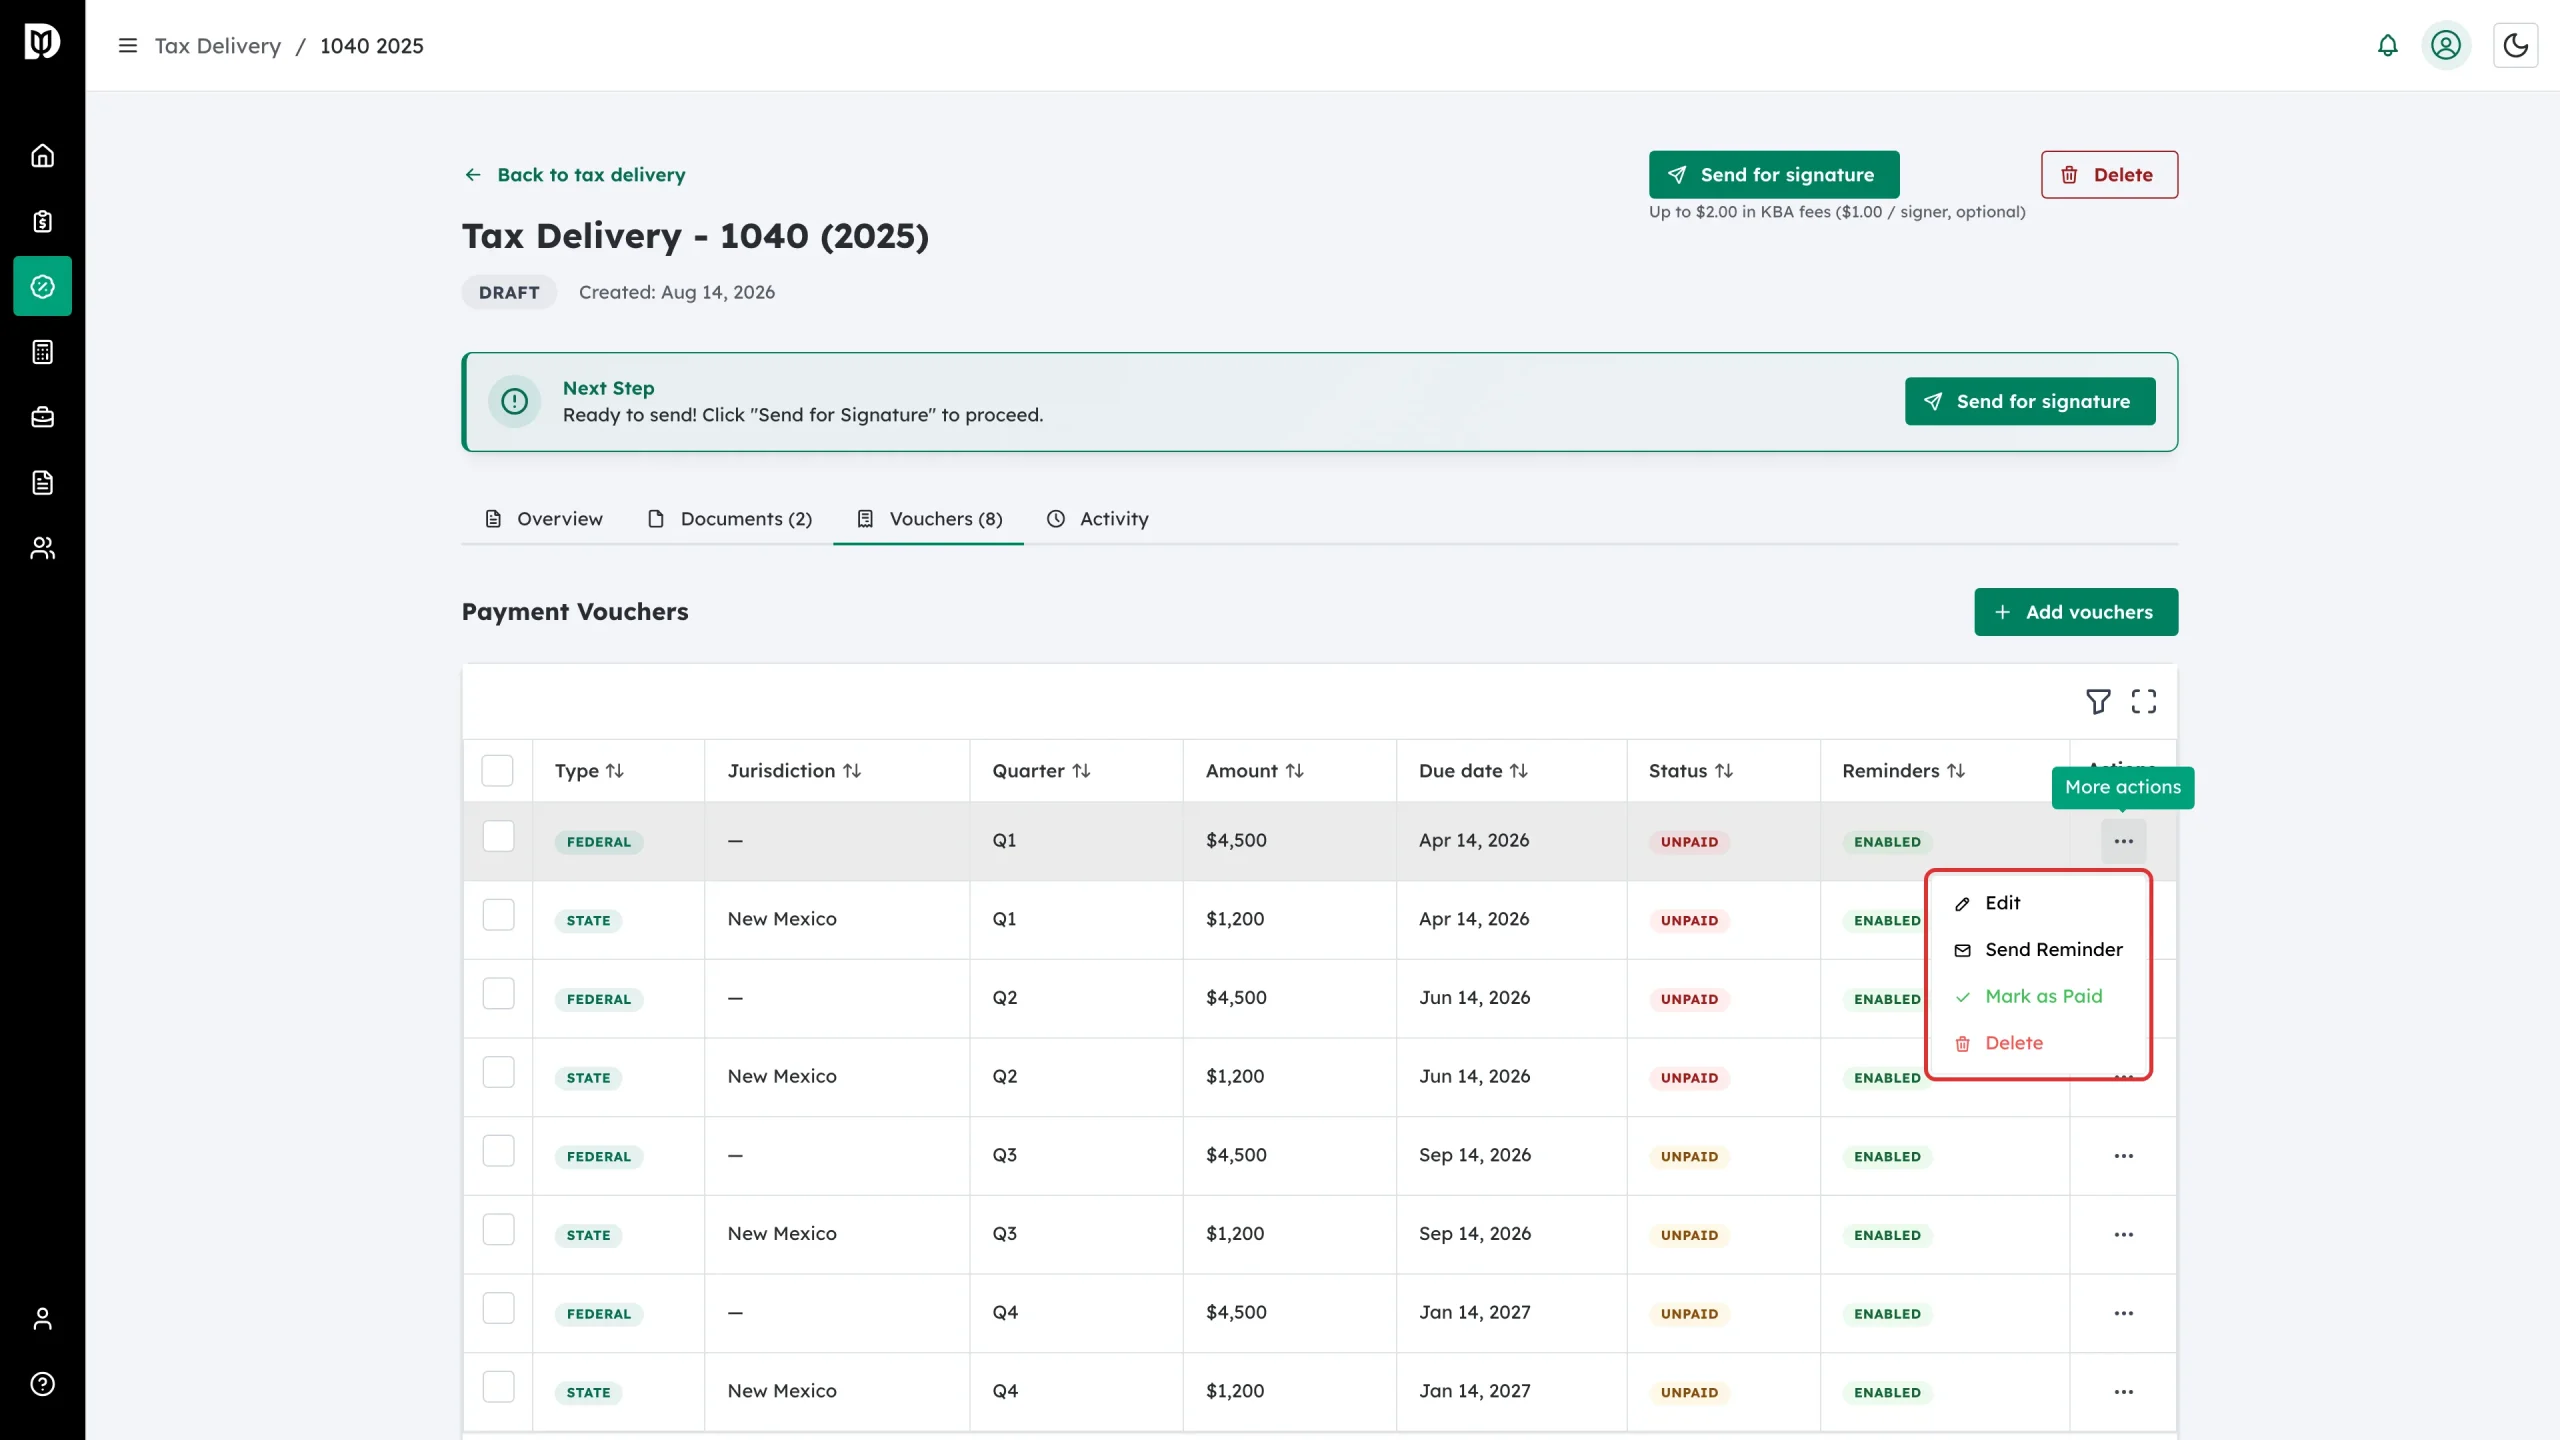
Click the three-dot More actions button on any row. You get:
- Edit – change the amount, due date or reminders
- Send Reminder – email the client about this payment
- Mark as Paid – record that the payment has been made
- Delete – remove the voucher
Download PDF also appears when a voucher PDF is attached.
Step 3: Edit a voucher
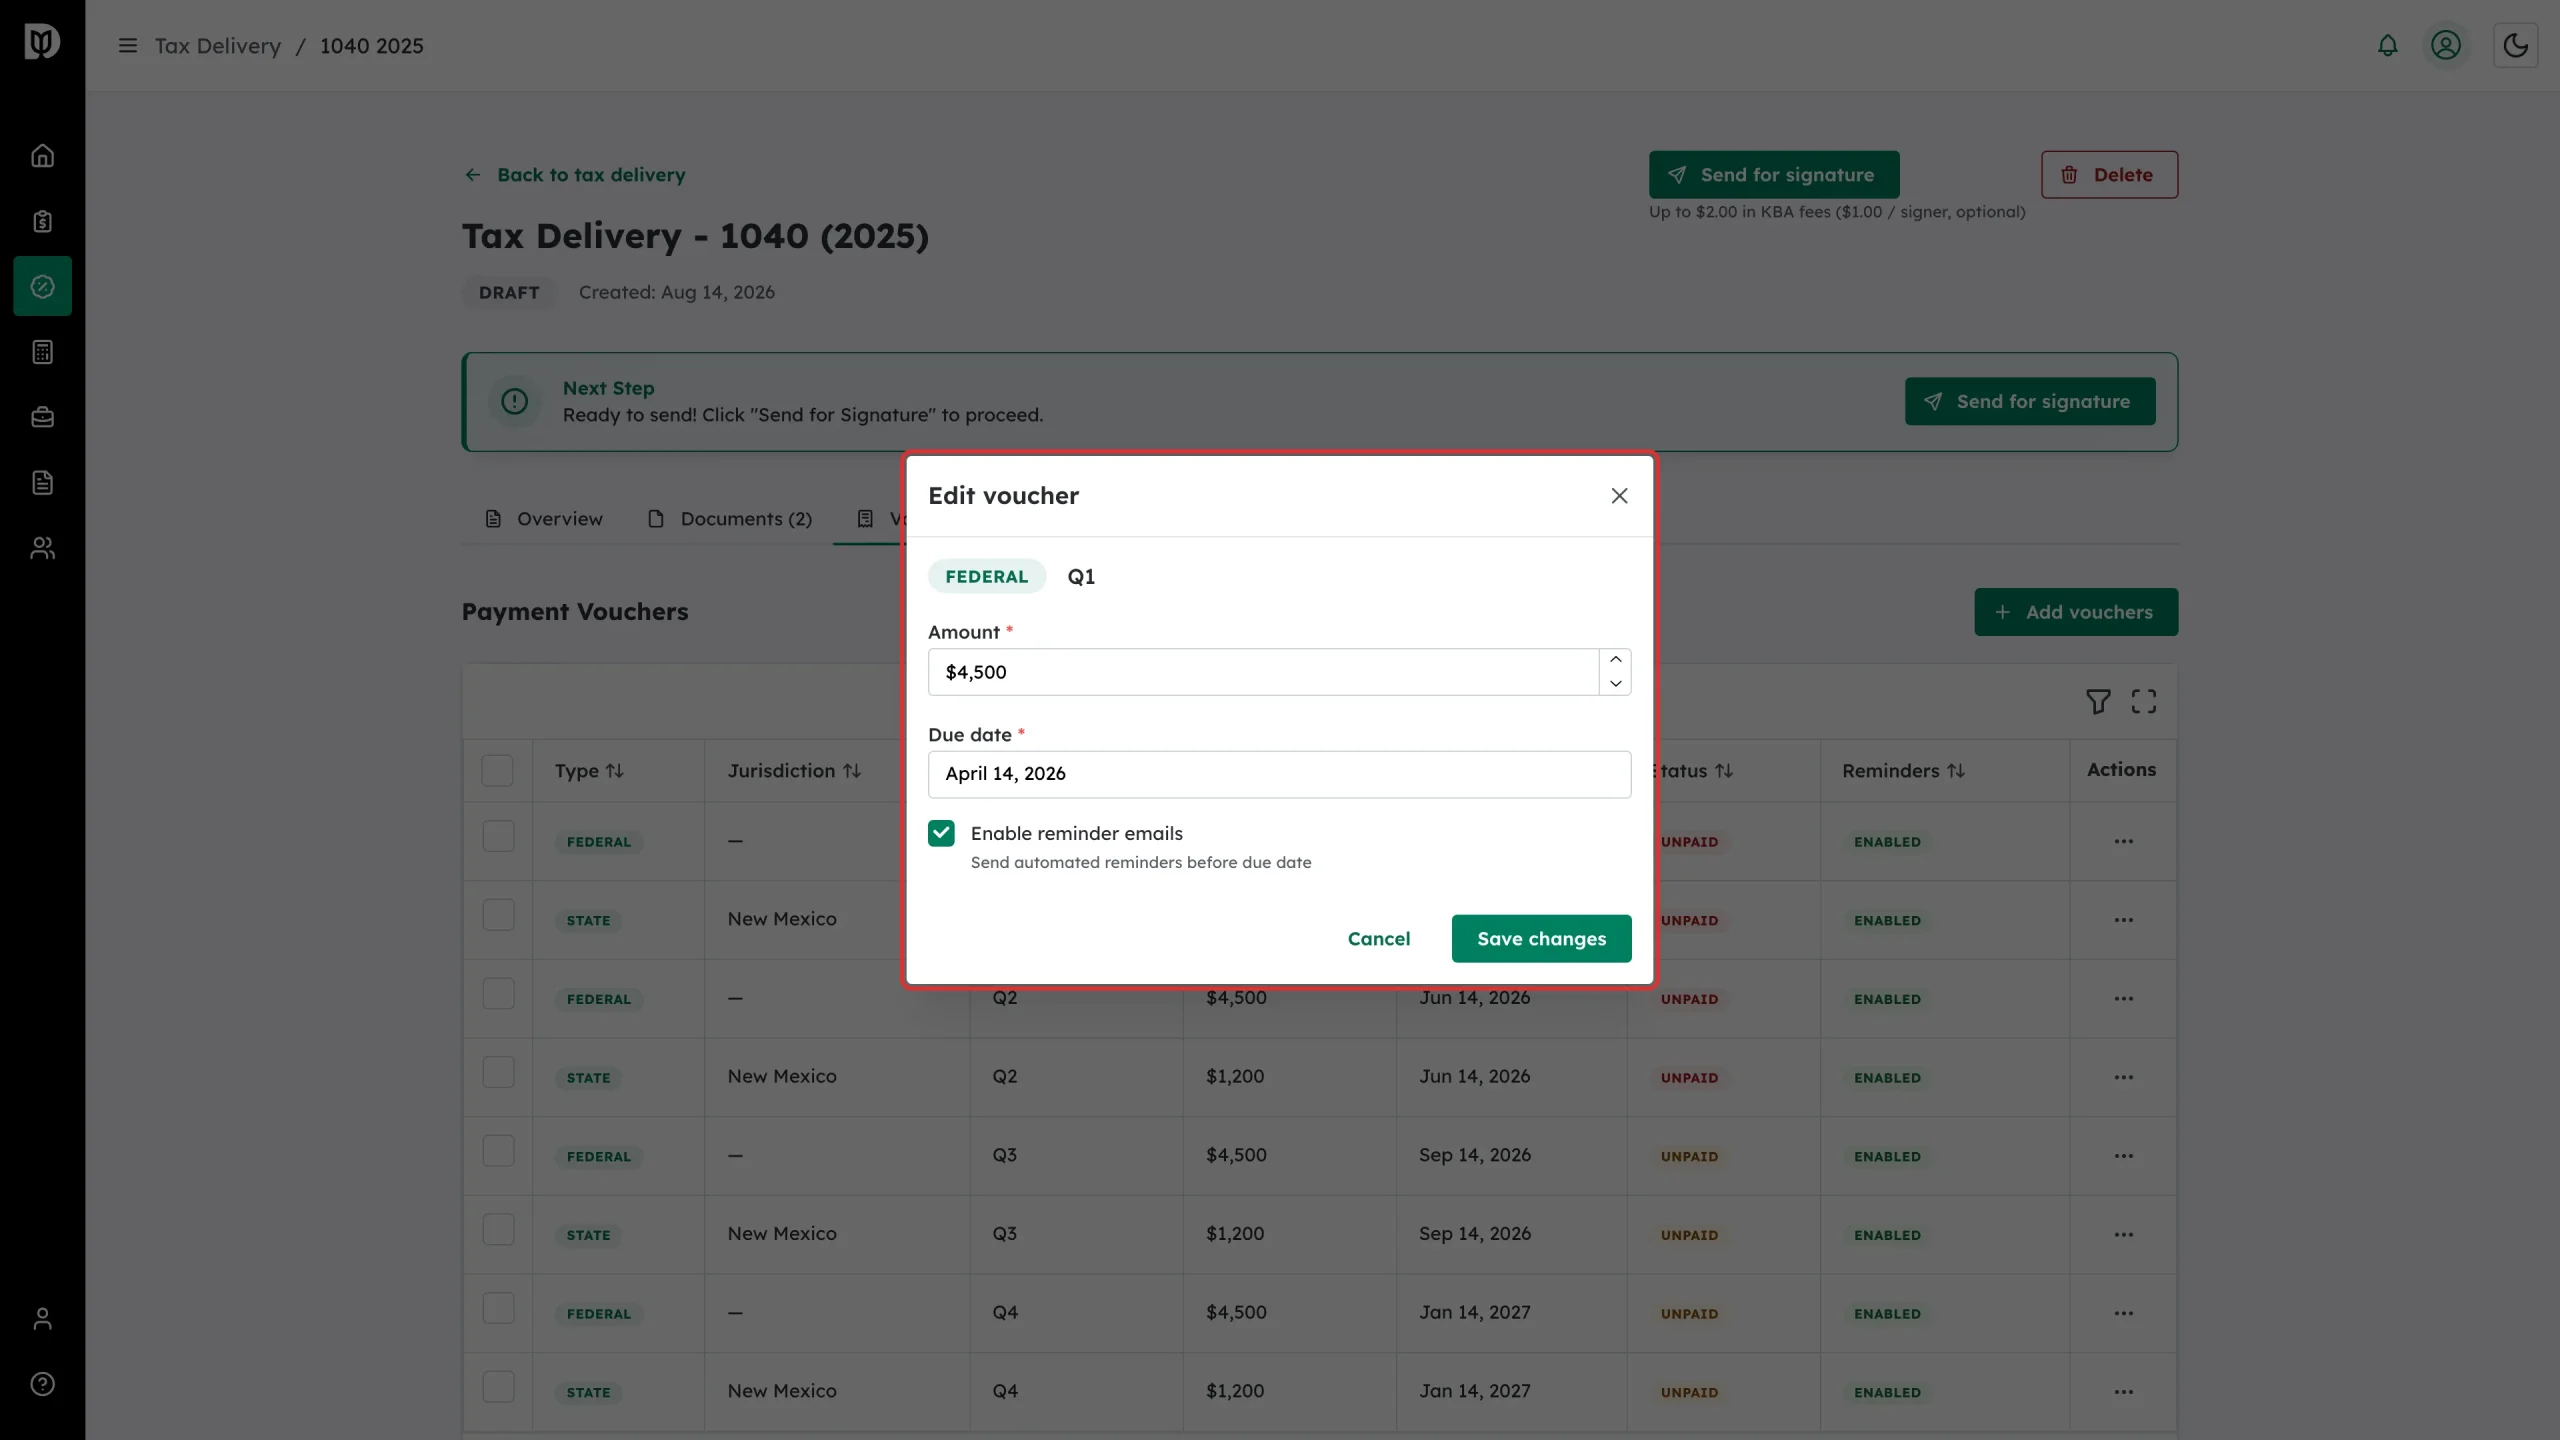
Choose Edit. The jurisdiction and quarter are shown as read-only badges. You can change:
- Amount
- Due date
- Enable reminder emails – automated reminders before the due date
Click Save changes.
Step 4: Send a one-off reminder
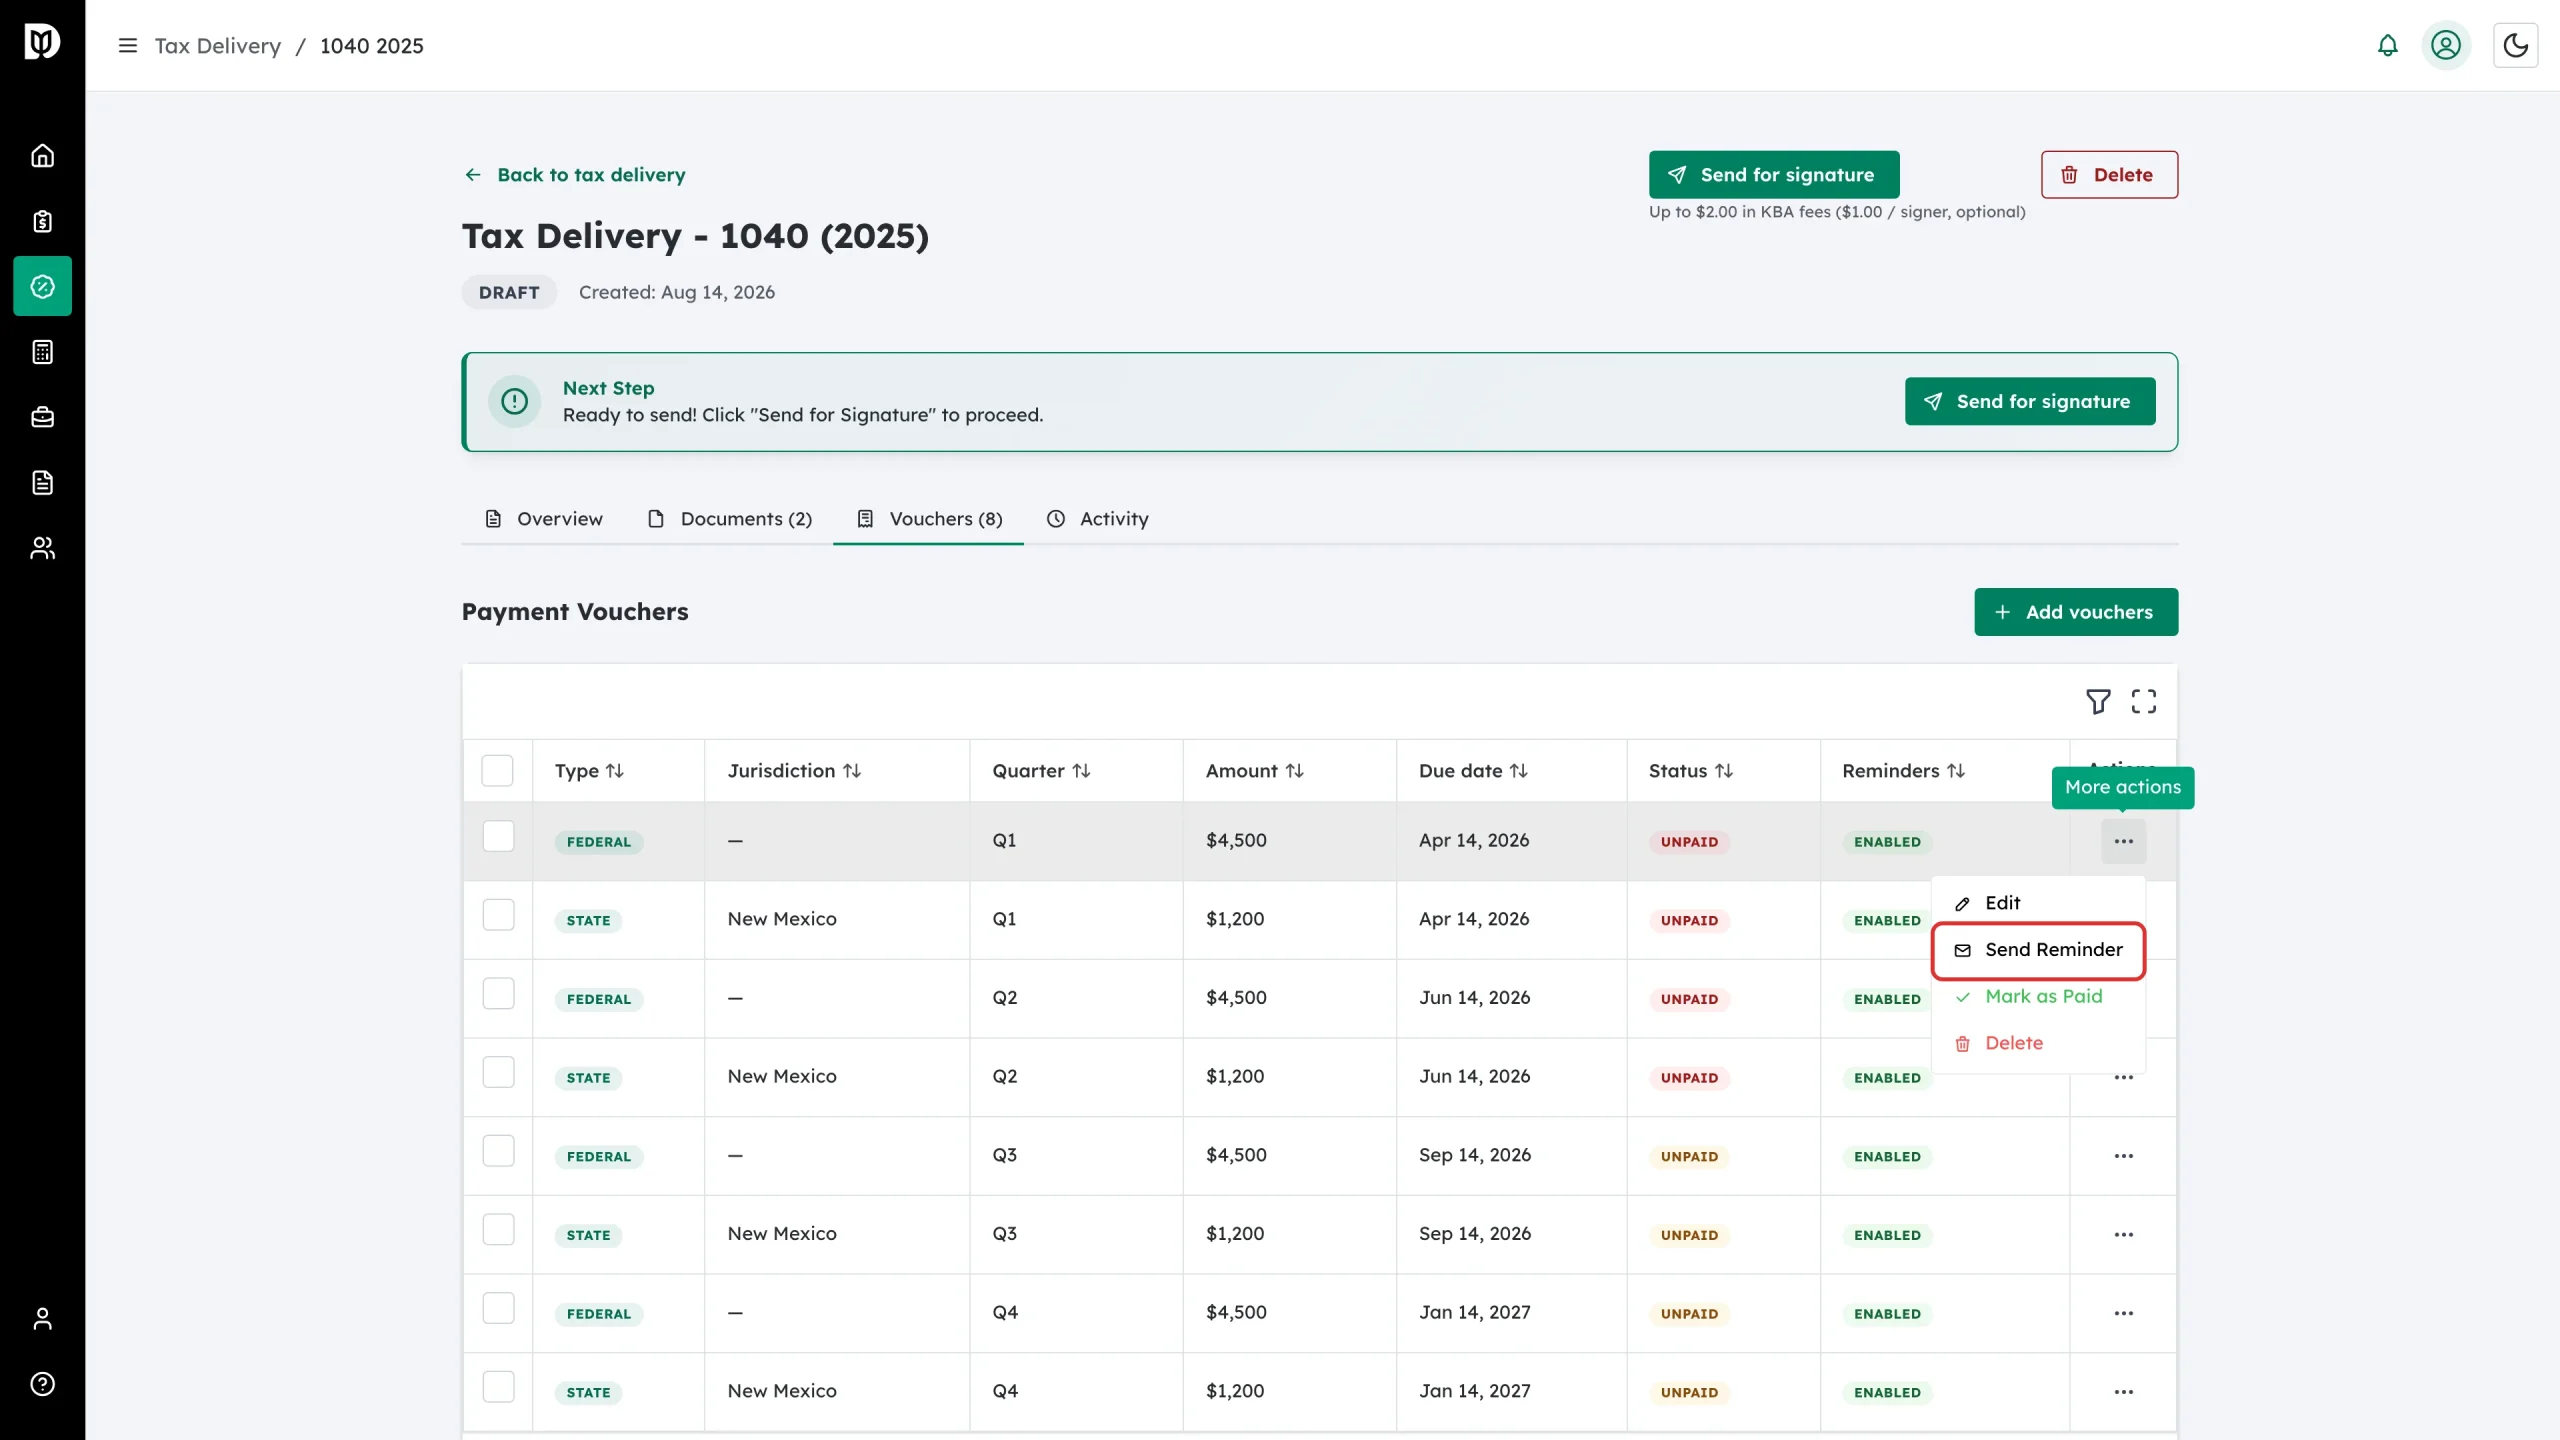
To nudge a client about a specific payment outside the automated schedule, choose Send Reminder from the row menu.
Step 5: Update several vouchers at once
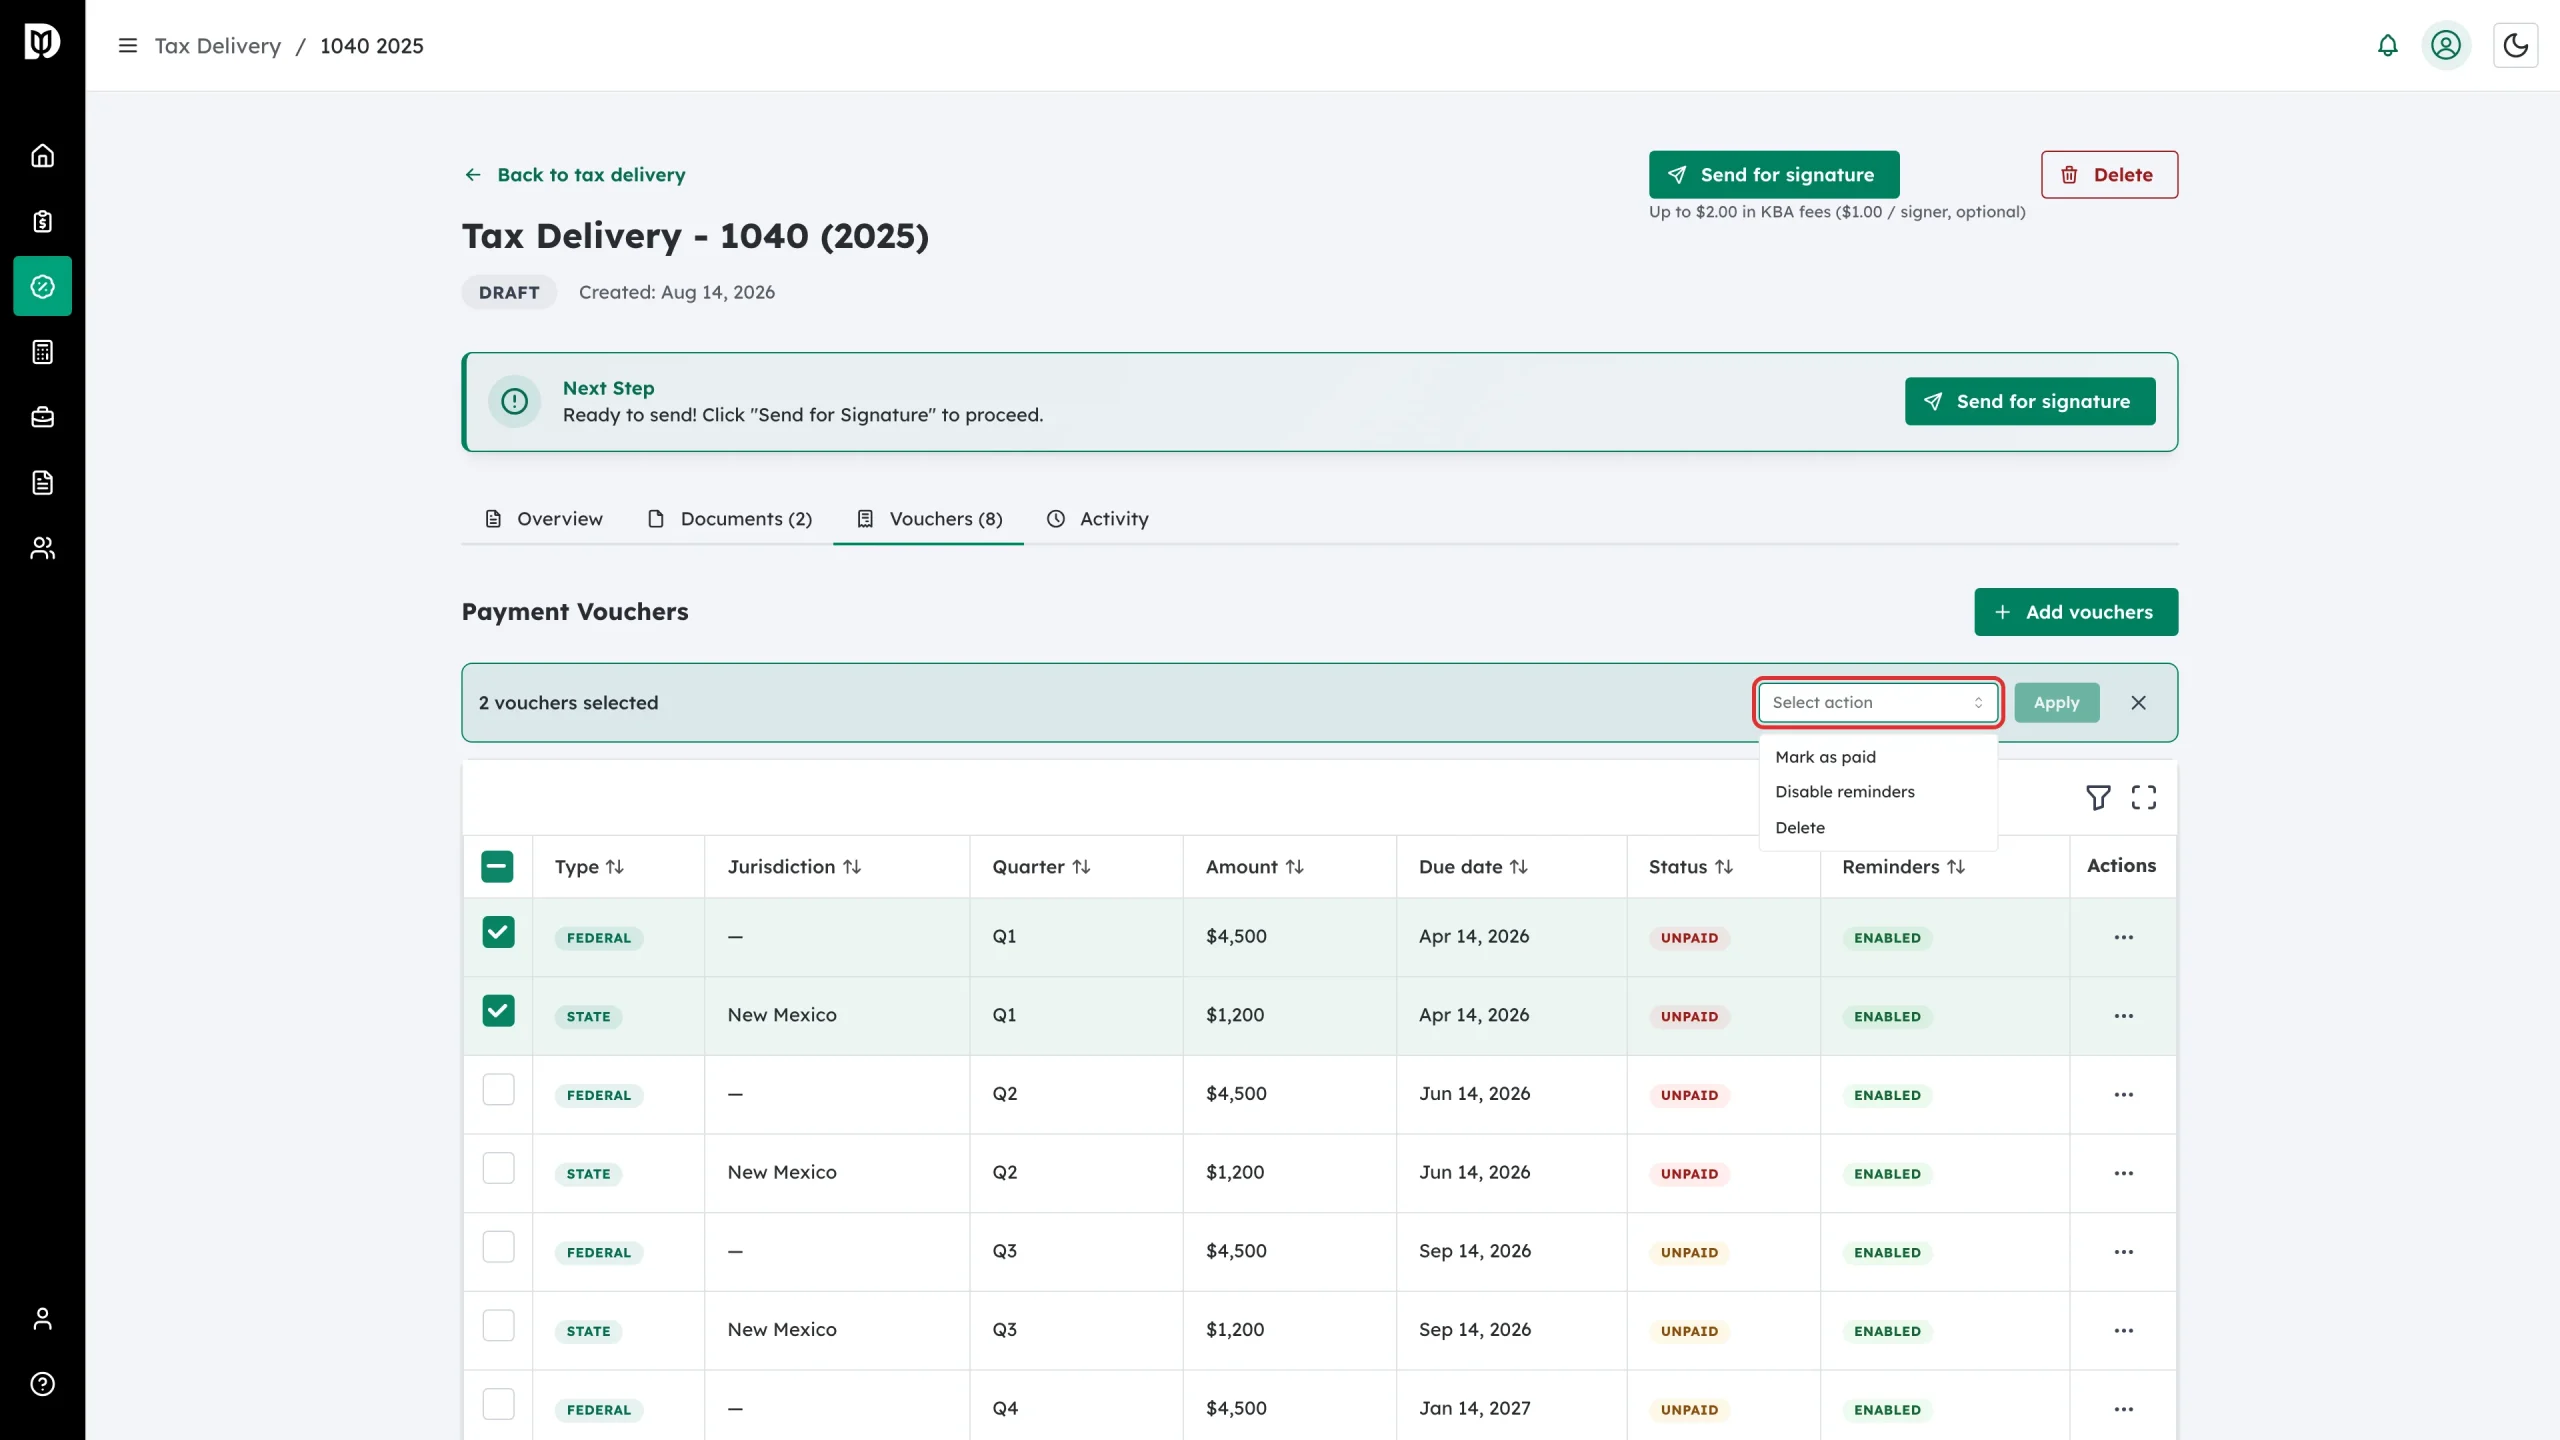
Tick the checkbox on each voucher you want to change. In the bar that appears, open Select action and choose Mark as paid, Disable reminders or Delete, then click Apply.
What happens next
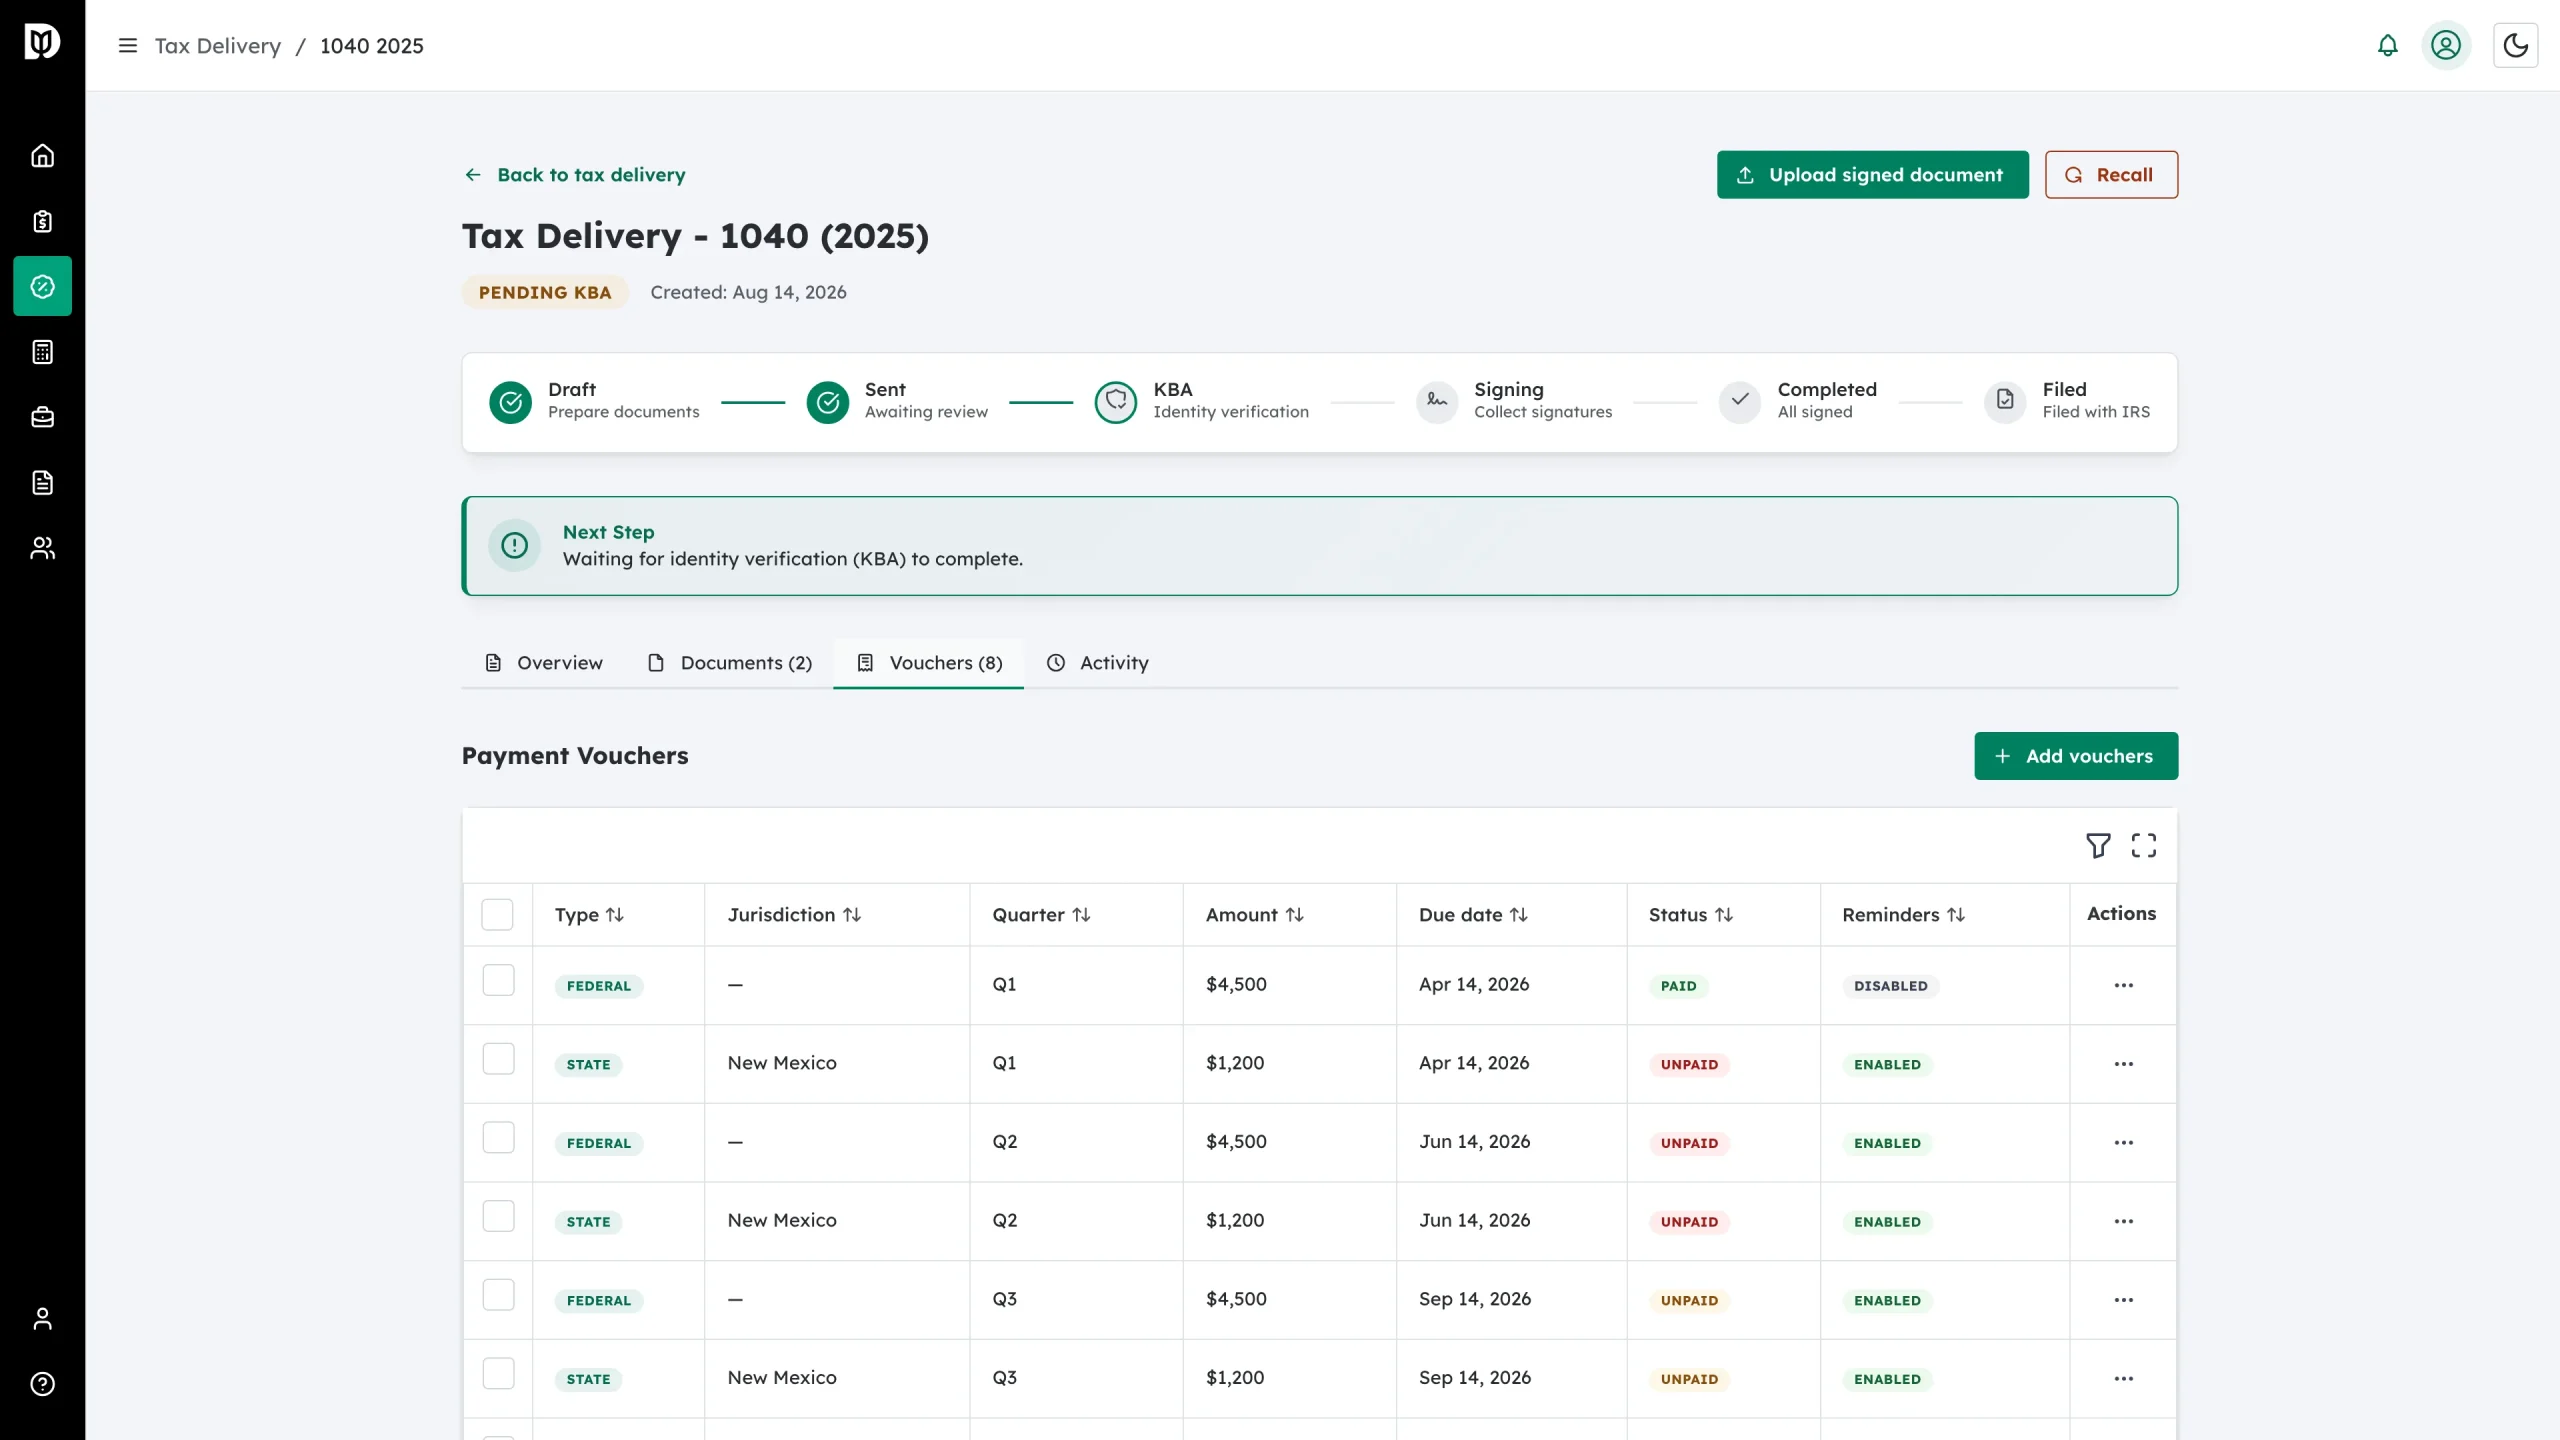
A voucher you mark as paid shows a green Paid badge and its reminders switch to Disabled, so the client is not chased for money they have already sent.
The same thing happens automatically when a client confirms a payment from their reminder email, and the change is written to the Activity tab.
Troubleshooting
- Mark as Paid is missing from the menu: The voucher is already marked as paid.
- A status looks stale: Refresh the page, then check the Activity tab for the matching voucher event.
- The client keeps getting reminders: Open Edit and clear Enable reminder emails, or select the rows and apply Disable reminders.